Self-Registration
Self-registration lets tenants expose a sign-up page where customers can create accounts and immediately access the platform with pre-assigned permissions. The configuration is accessible from Security ⇾ Self-registration.
Prerequisites
Section titled “Prerequisites”Before configuring self-registration, ensure the following:
| Prerequisite | Details |
|---|---|
| ThingsBoard Cloud tenant | An active Cloud tenant account. |
| Domain name | A valid DNS record pointing to your instance (e.g., iot.mycompany.com). See Domains |
| HTTPS | TLS/SSL configured for your domain (e.g., via Let’s Encrypt). See HTTPS (TLS) configuration |
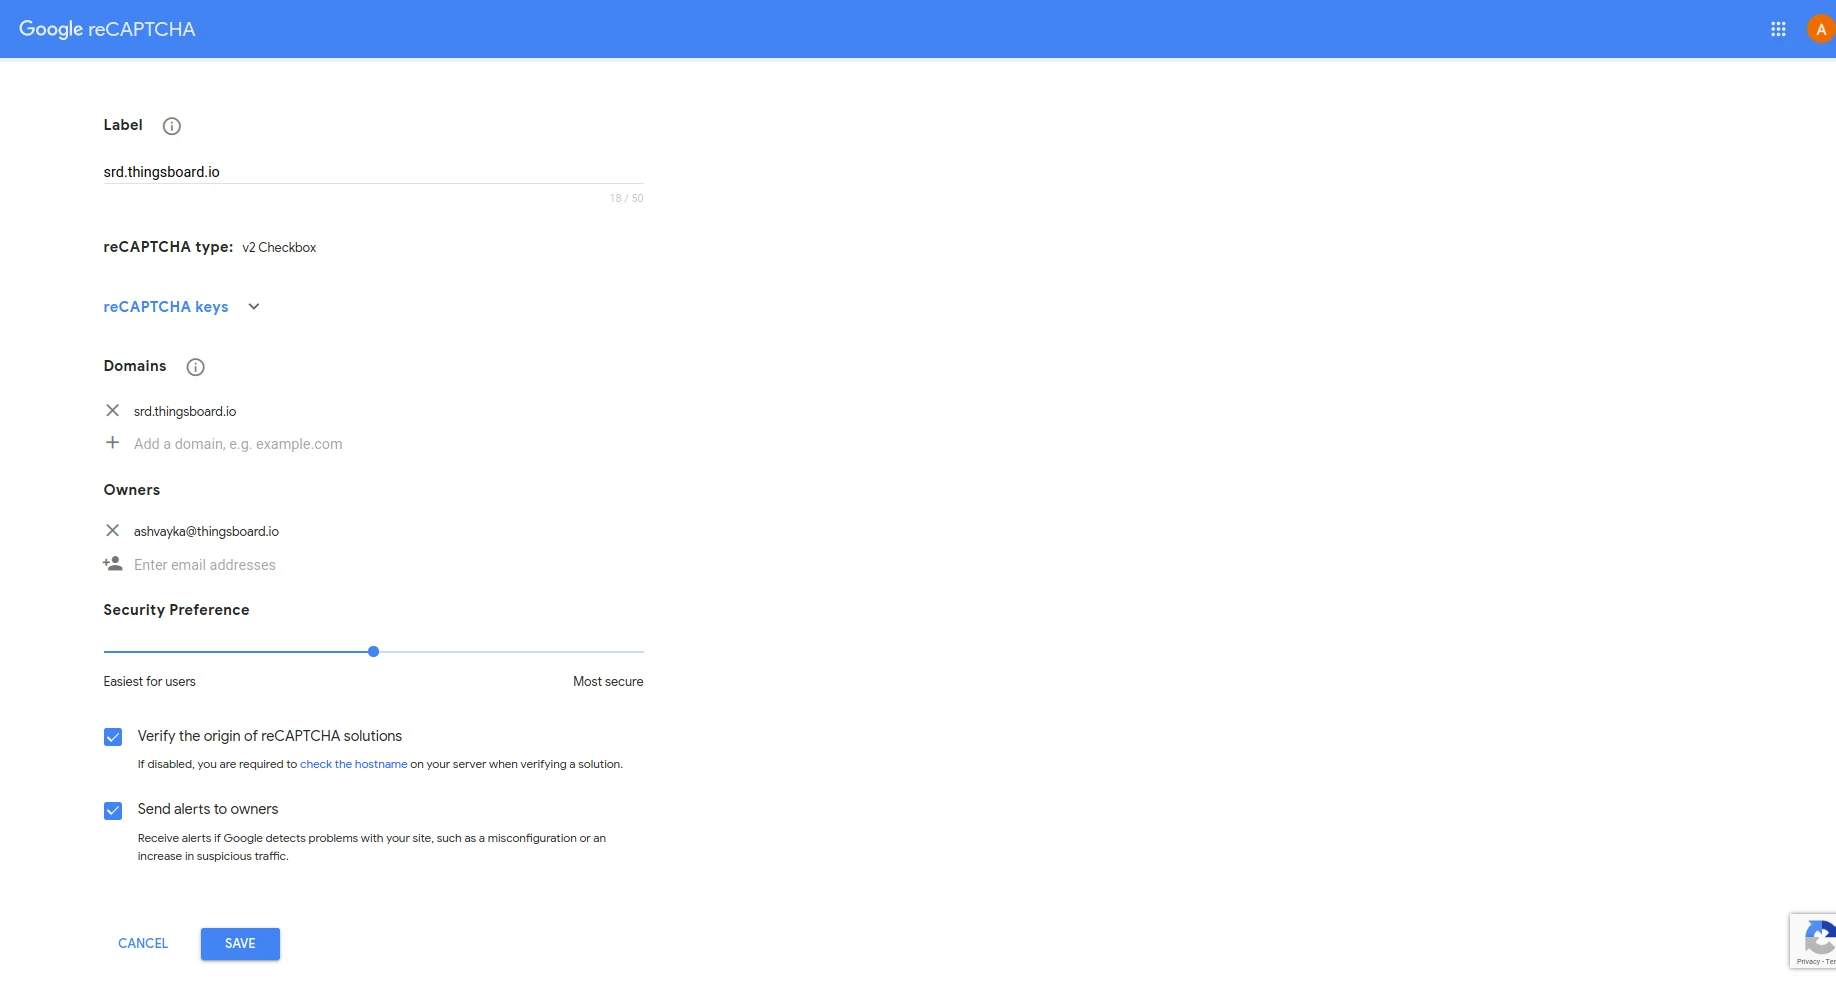
| reCAPTCHA | A site key and secret from the Google reCAPTCHA admin console. Supports v2 Checkbox and v3 |
| Mail server | Outgoing SMTP configured so activation emails can be sent. See mail settings |
Self-Registration Settings
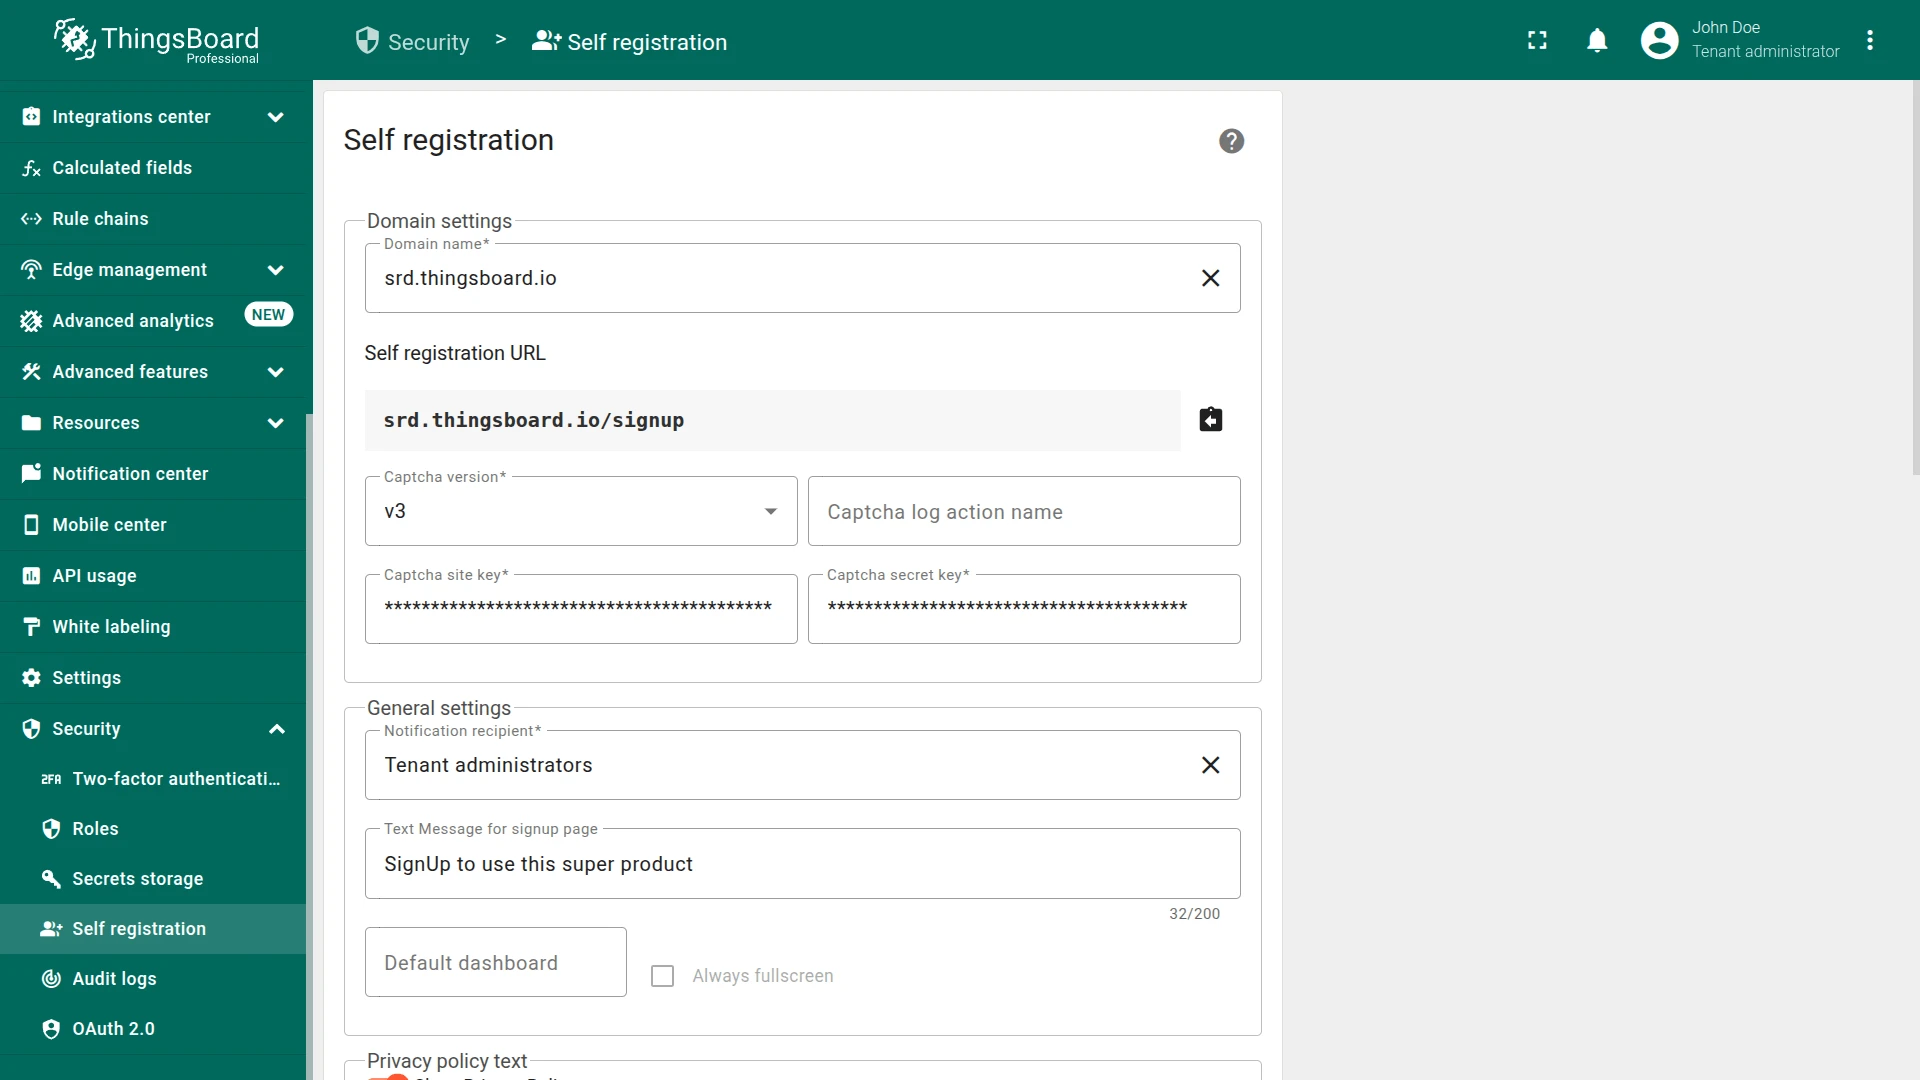
Section titled “Self-Registration Settings”Navigate to Security ⇾ Self-registration. The form is divided into several sections:
Domain Settings
Section titled “Domain Settings”| Setting | Description |
|---|---|
| Domain name | The domain users will use to access the sign-up page. Click Create new to register a new domain |
| Self-registration URL | Auto-generated URL for the sign-up page based on the selected domain |
CAPTCHA Settings
Section titled “CAPTCHA Settings”| Setting | Description |
|---|---|
| Captcha version | Choose between v2 Checkbox (user clicks “I’m not a robot”) or v3 (score-based, invisible) |
| Captcha site key | Public site key from the Google reCAPTCHA admin console |
| Captcha secret key | Secret key from the Google reCAPTCHA admin console |
| Captcha log action name | (v3 only) Action name used for reCAPTCHA analytics |
General Settings
Section titled “General Settings”| Setting | Description |
|---|---|
| Notification recipient | Who receives notifications about new registrations. Select an existing recipient or click Create new to define one. See notification system for details on configuring recipients |
| Text message for signup page | Custom welcome text displayed on the sign-up form (up to 200 characters) |
| Default dashboard | The dashboard shown to the user after login |
| Always fullscreen | When enabled, the default dashboard opens in fullscreen mode |
Privacy Policy and Terms of Use
Section titled “Privacy Policy and Terms of Use”| Setting | Description |
|---|---|
| Show Privacy Policy | Toggle to display a privacy policy on the sign-up form. Use the rich text editor to compose the content |
| Show Terms of Use | Toggle to display terms of use on the sign-up form. Use the rich text editor to compose the content |
User Group Roles
Section titled “User Group Roles”The User Group Roles table defines what permissions self-registered users receive. Each entry specifies:
| Column | Description |
|---|---|
| Role name | The role assigned to the user |
| Role type | Generic (entity-level permissions) or Group (access to a specific entity group) |
| Group type | The entity group type the role applies to (for Group roles) |
| Group name | The specific entity group (for Group roles) |
Click + to add a role assignment. For example:
- A Generic “Customer Administrator” role — gives the user full control over entities within their customer scope
- A Group “Read-Only” role scoped to a “Shared Dashboards” group — gives read-only access to specific dashboards
Configure Self-Registration
Section titled “Configure Self-Registration”- Navigate to Security ⇾ Self-registration.
- Select or create a domain name for the sign-up page.
- Configure CAPTCHA — choose the version (v2 Checkbox or v3) and enter your site key and secret key from the Google reCAPTCHA admin console.
- Set the notification recipient for new registration alerts.
- Optionally set a welcome text and default dashboard, and enable Always fullscreen.
- Configure Privacy Policy and/or Terms of Use text if needed.
- Add user group roles to define permissions for self-registered users.
- Click Save.
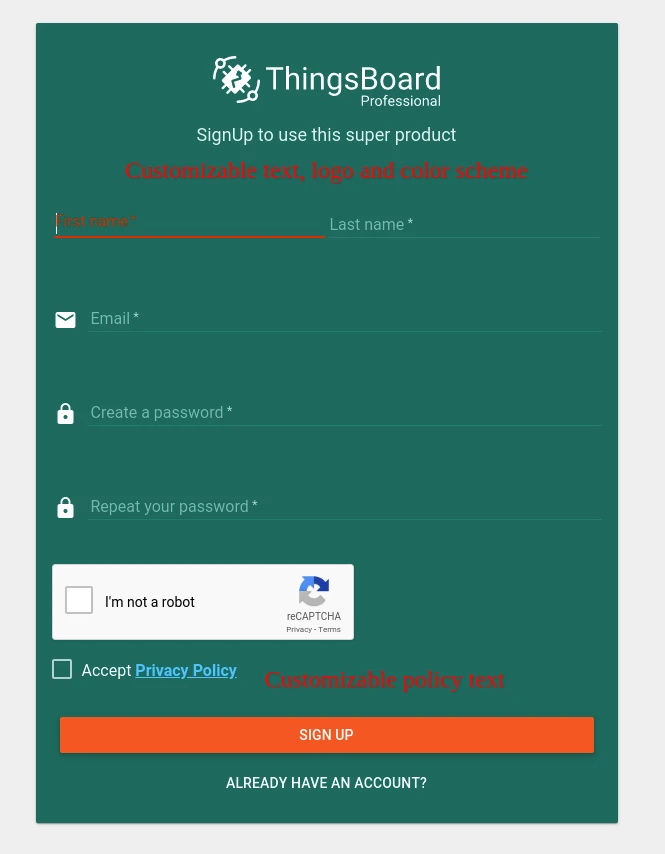
After saving, navigate to the self-registration URL to verify that the sign-up form works correctly. Registered users are isolated within their own customer scope and can manage only their devices and assets.
Example: Self-Registration with a Shared Dashboard
Section titled “Example: Self-Registration with a Shared Dashboard”A common use case: customers self-register and immediately land on a device management dashboard.
- Create user roles. Navigate to Customers & users → Roles and create a
Customer Administratorgeneric role that allows all operations within the customer scope. Optionally create aRead-onlygroup role for shared dashboard access. - Prepare a shared dashboard. Create or import a dashboard (e.g., a device list with add/edit/remove capabilities) and place it in a dashboard group such as “Shared Dashboards”.
- Configure self-registration. Set the domain and CAPTCHA, then add both roles — the “Customer Administrator” generic role and the “Read-Only” group role scoped to the
Shared Dashboardsgroup. Select the shared dashboard as the default and enable Always fullscreen. - Save and test by registering a new account through the sign-up form.
Was this helpful?