Mobile Apps
The Mobile apps page is a hub for building, configuring, and managing mobile apps in ThingsBoard. Whether you are starting from scratch or publishing the ThingsBoard app to Google Play or the App Store, this tool guides you through every step.
The page is divided into tabs:
- Bundle — manage settings for mobile applications included in the bundle: authentication methods, layout, and self-registration.
- Applications — add, edit, or remove mobile applications.
- QR code widget — set up a QR code widget on the Home page for easy mobile app access.
Bundle
Section titled “Bundle”A Bundle groups OAuth 2.0 settings, layout design, and self-registration for one or more mobile apps — letting you manage Android and iOS versions in one place.
The bundle wizard includes the following steps:
- Basic settings — define the bundle name and link your apps. You can also create a new app directly.
- OAuth 2.0 — enable Single Sign-On (SSO) via third-party identity providers that support OAuth 2.0.
- Layout — customize the app’s navigation menu to match your use cases.
- Self registration — set up a registration form for new mobile users.
Adding a New Bundle
Section titled “Adding a New Bundle”- Go to the Mobile apps page.
- On the Bundles tab, click + Add bundle in the upper-right corner.
The bundle configuration wizard opens.
Basic Settings
Section titled “Basic Settings”The first step of the wizard has four fields:
- Title — the bundle name.
- Android Application and iOS Application — pick an existing application for each platform, or click Create new next to the field to create one without leaving the wizard. A bundle can hold one application per platform, and either platform can stay empty.
- Description — optional notes about the bundle.
Creating an Application
Section titled “Creating an Application”- Click Create new in the corresponding section (Android Application or iOS Application).
- Enter the Application package name and, optionally, an Application title.
- An Application Secret is generated automatically — copy and store it, or replace it with your own value.
- Set the Status:
- Draft — for applications still in development. Store information can be added later.
- Published — for applications ready to be launched and used by end users.
- Deprecated — for older applications that are no longer actively supported but still available.
- Suspended — for applications that are temporarily disabled or restricted.
- (Optional) Specify minimum/latest app versions and release notes.
- Add store information:
- Android: Google Play link and SHA256 certificate fingerprints.
- iOS: App Store link and App Site Association ID.
- Click Add to save the application.
Click Next.
OAuth 2.0
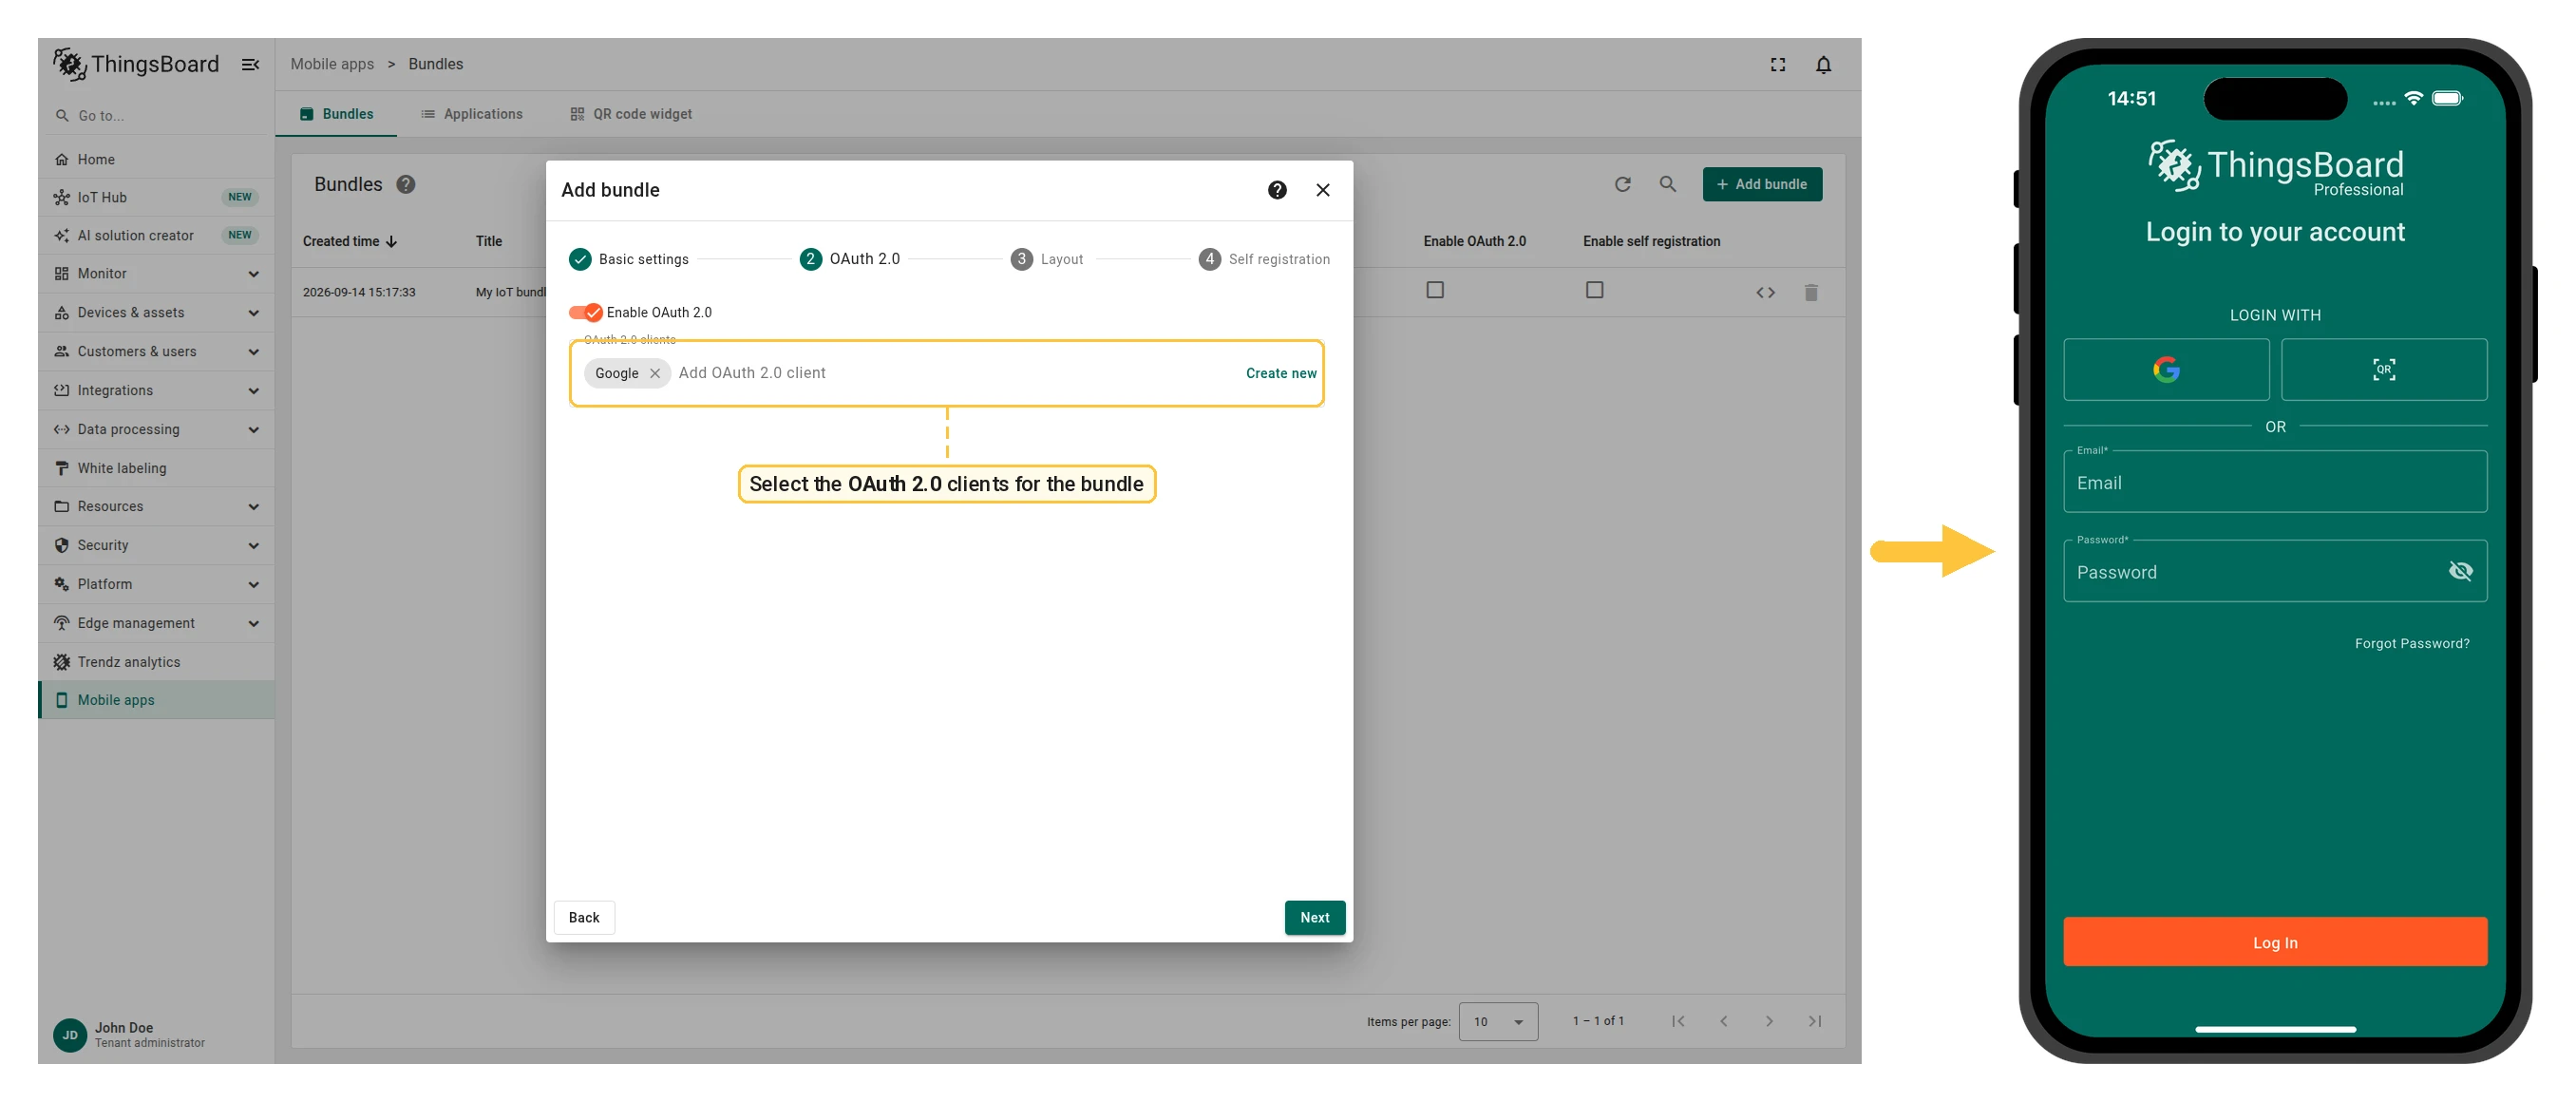
Section titled “OAuth 2.0”Enable authentication through an external provider that supports the OAuth 2.0 protocol. Select an existing OAuth 2.0 client or configure a new one.
You can also disable OAuth 2.0 for mobile devices.
To change this later, go to Mobile apps → Bundles, click the bundle, and open the OAuth 2.0 tab.
When OAuth 2.0 is enabled, the login screen of the app shows a sign-in button for each selected client above the email and password fields.
After completing the OAuth 2.0 configuration, click Next.
Layout
Section titled “Layout”Set up quick access to the dashboards and features you use most. Add menu items, change icons and names, and reorder the navigation menu.
To change the layout later, go to Mobile apps → Bundles, click the bundle, and open the Layout tab.
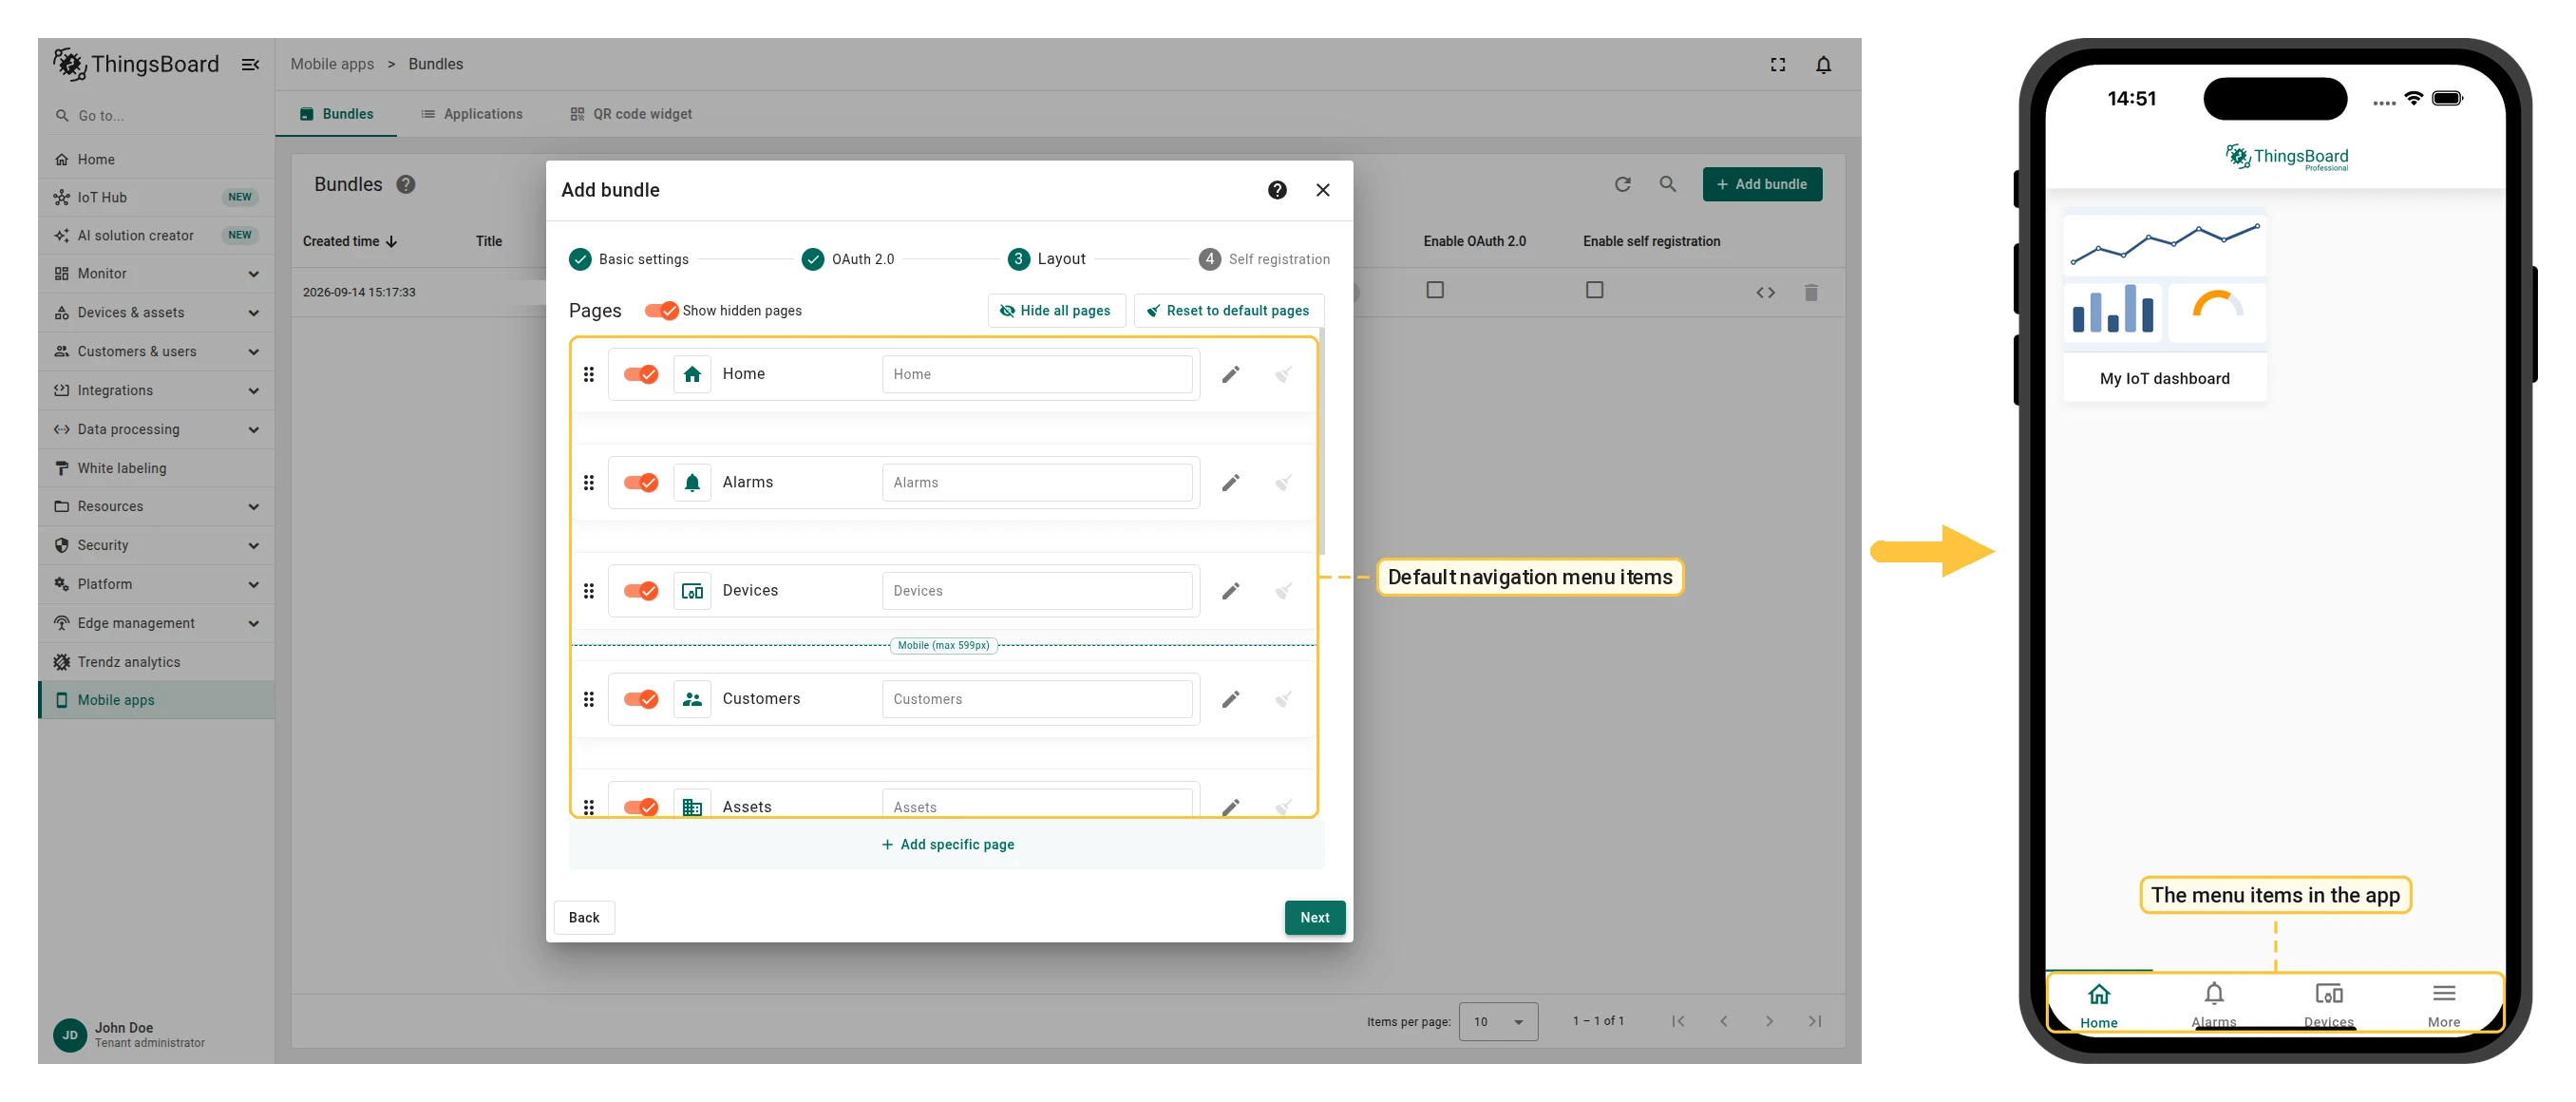
The list opens on the default menu items, with Show hidden pages already switched on. A few items arrive switched off: they belong to the bundle but stay out of the app’s navigation until you turn on the toggle at the left of the row.
Device list, Dashboards, and Live location tracking are switched off by default.
Show hidden pages changes only what this list displays, never what the app shows. Hide all pages switches every item off and turns that toggle off with them, so switch it back on to bring the hidden items into view.
To rename a built-in page such as Home, Devices or Alarms, edit its name in the layout. The app shows that name in the navigation bar and on the More page instead of the default title, starting with ThingsBoard app 1.9.1. Clear the name to go back to the default title, which follows the device language. Users see the change after they log in again.
To add a new menu item:
- Click + Add specific page at the bottom of the page or between existing menu items.
- Enter the Page name.
- Select the Page type:
- Dashboard — link to a ThingsBoard dashboard.
- Web view — link to an external webpage.
- Custom — a built-in app page addressed by its path.
- Depending on the selected page type, select a dashboard, enter the external URL, or enter the Path of the built-in page.
- Click Add.
The following routes are available for the Custom page type:
| Page name | Route | Description |
|---|---|---|
| Home | /home | Displays the Home page |
| Assets | /assets | Displays the Assets page |
| Devices | /devices | Displays the Device profiles page |
| Device list | /deviceList | Displays the list of all devices |
| Alarms | /alarms | Displays the list of alarms |
| Dashboards | /dashboards | Displays the list of dashboards |
| Specific dashboard | /dashboard/:id | Displays the specified dashboard |
| Audit logs | /auditLogs | Displays the Audit logs page |
| Customers | /customers | Displays the list of customers |
| Specific customer | /customer/:id | Displays the specified customer |
| Notification | /notifications | Displays the list of notifications |
| Live location tracking | /liveTracking | Displays the GPS tracking session page |
| Custom URL link | /url/:link | Displays an external URL |
The “More” Page
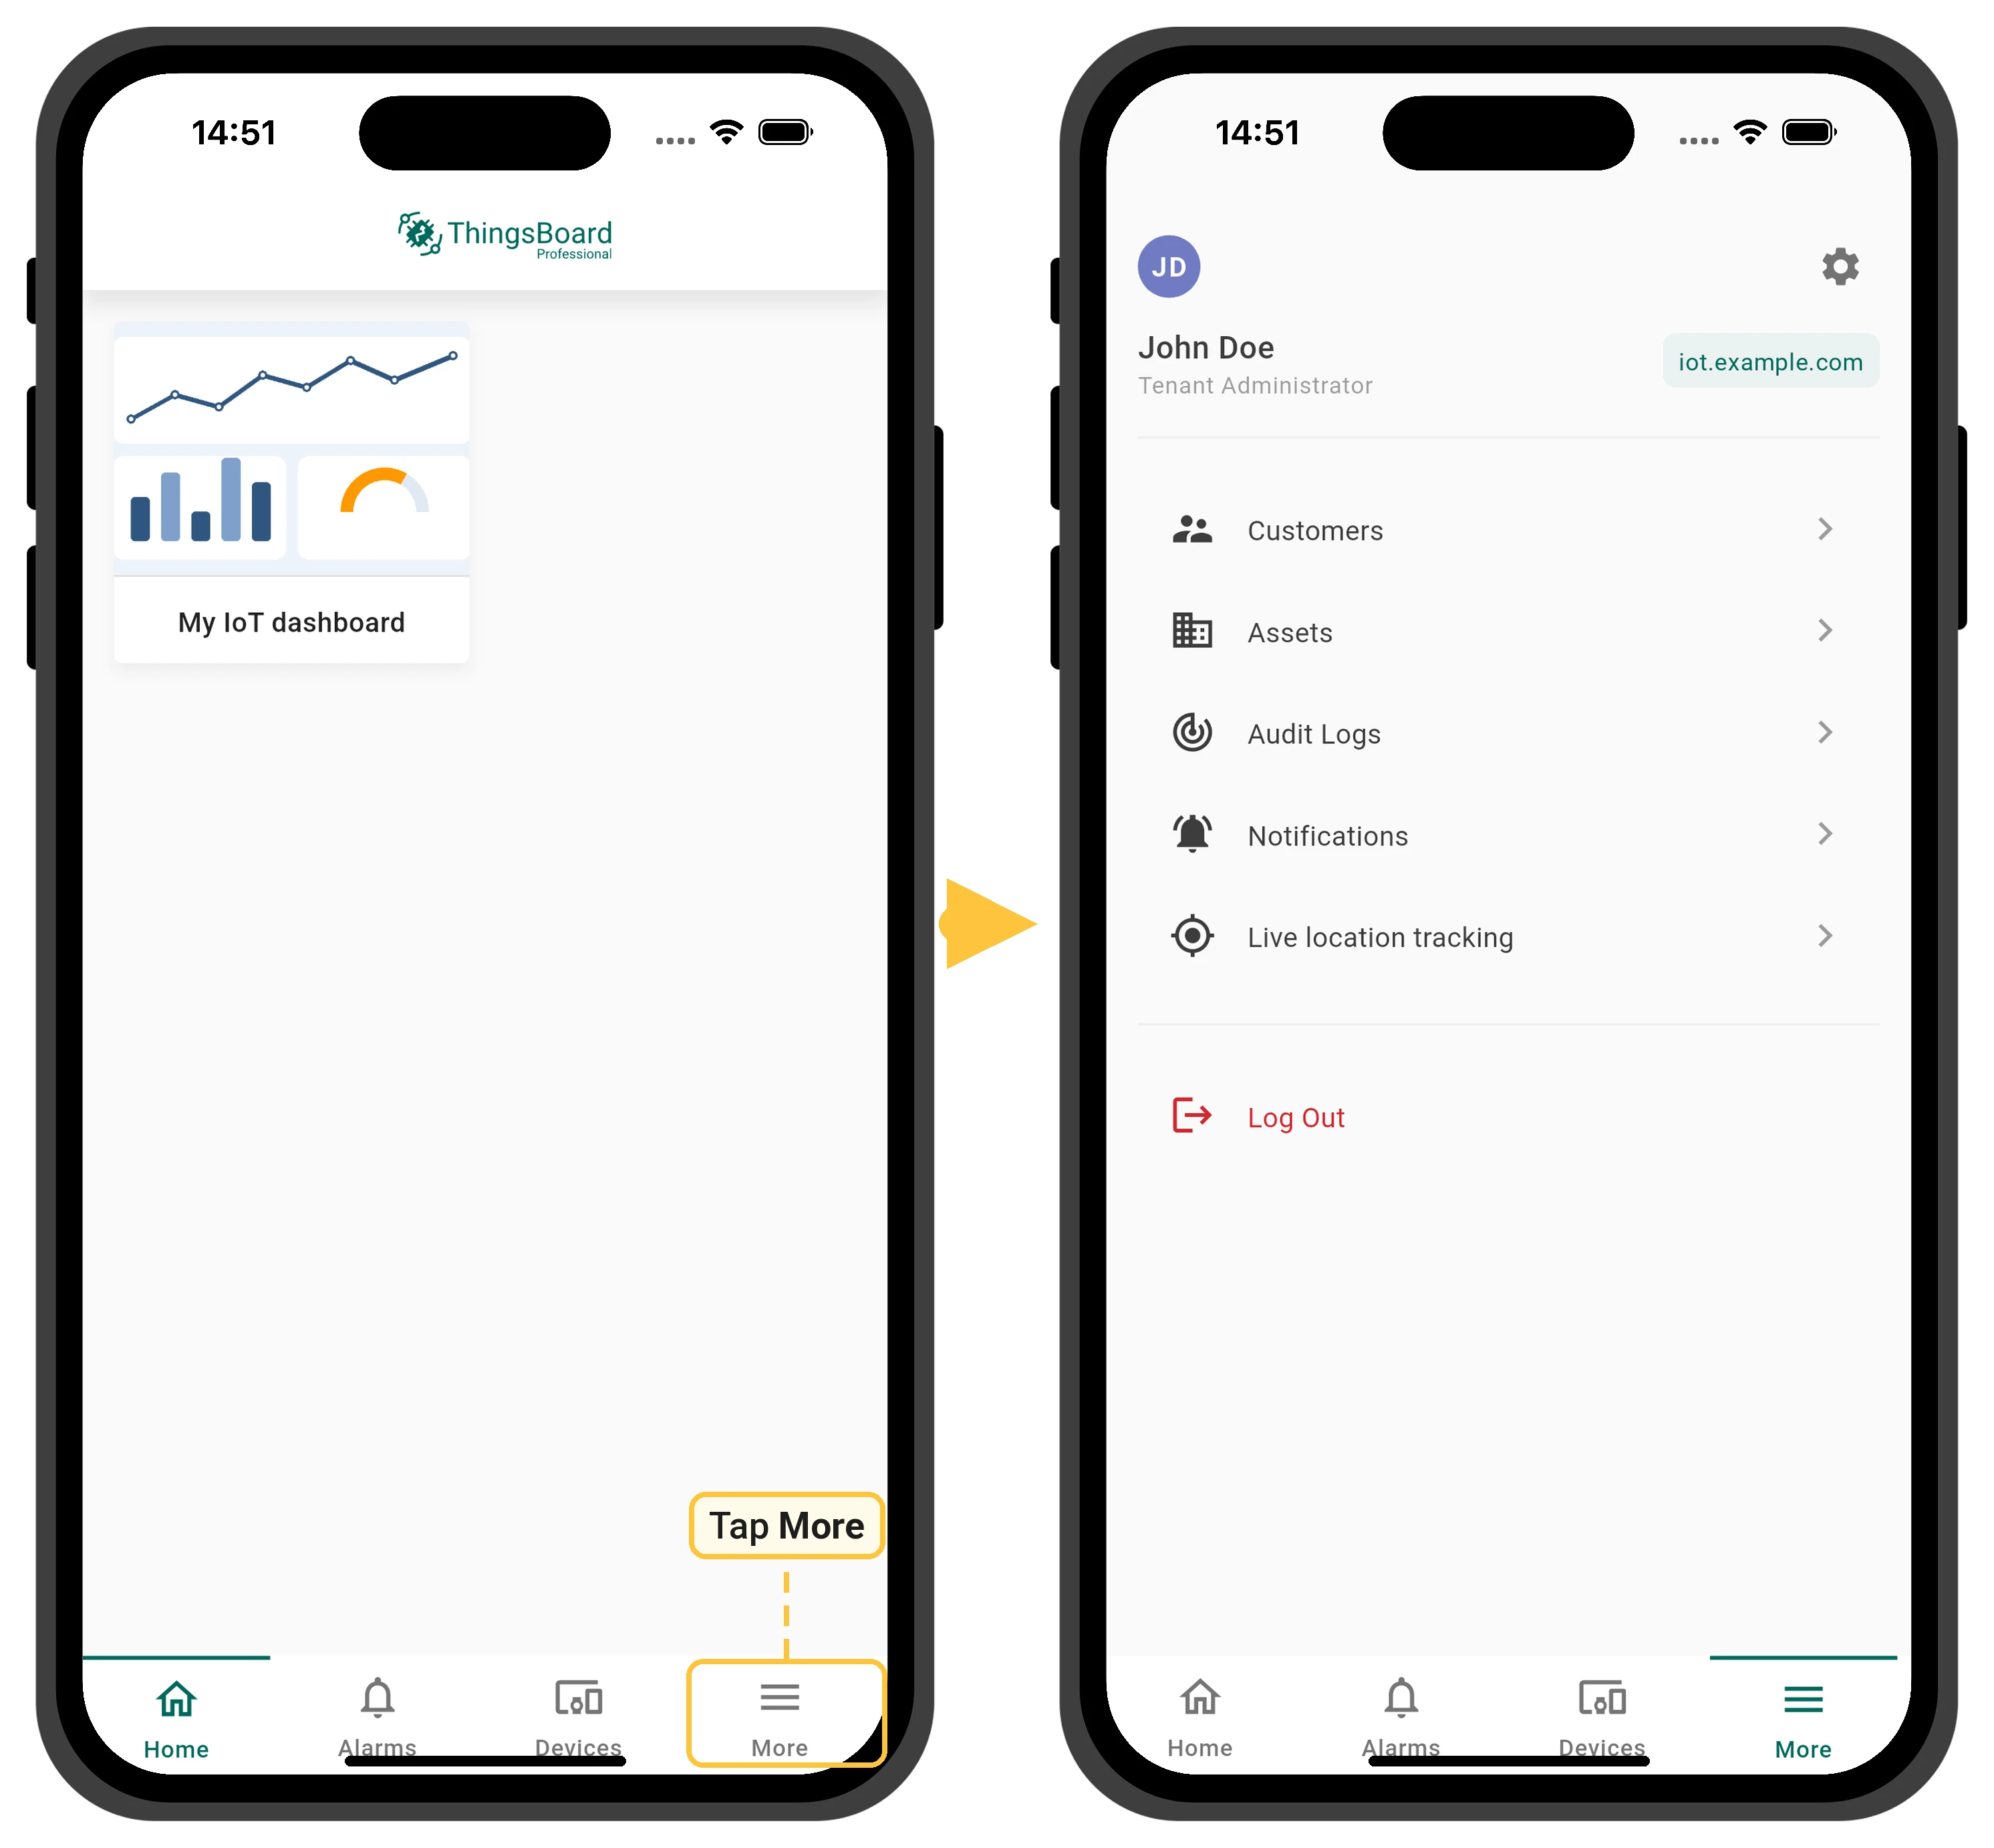
Section titled “The “More” Page”The number of menu items displayed in the bottom navigation menu depends on the screen size of the mobile device. Items that do not fit are grouped under the More page.
Self registration
Section titled “Self registration”The self-registration feature lets tenants set up a public sign-up page where clients can register and access ThingsBoard with predefined roles and permissions.
To configure it later, go to Mobile apps → Bundles, click the bundle, and open the Self registration tab.
Configure the self-registration form:
Basic settings:- Page title — the header displayed at the top of the registration page.
- Notification recipient — recipients who receive notifications about new user registrations. Learn more about notifications.
- Redirect settings:
- Application URL scheme — the custom URL scheme for redirecting users after registration (e.g.,
tbscheme). - Application URL hostname — the hostname used in redirection (e.g.,
app.pe.thingsboard.org).
- Application URL scheme — the custom URL scheme for redirecting users after registration (e.g.,
The mandatory fields are email, password, and repeat password. Additional fields can be added as needed.
Captcha properties:Captcha prevents automated creation of fake accounts.
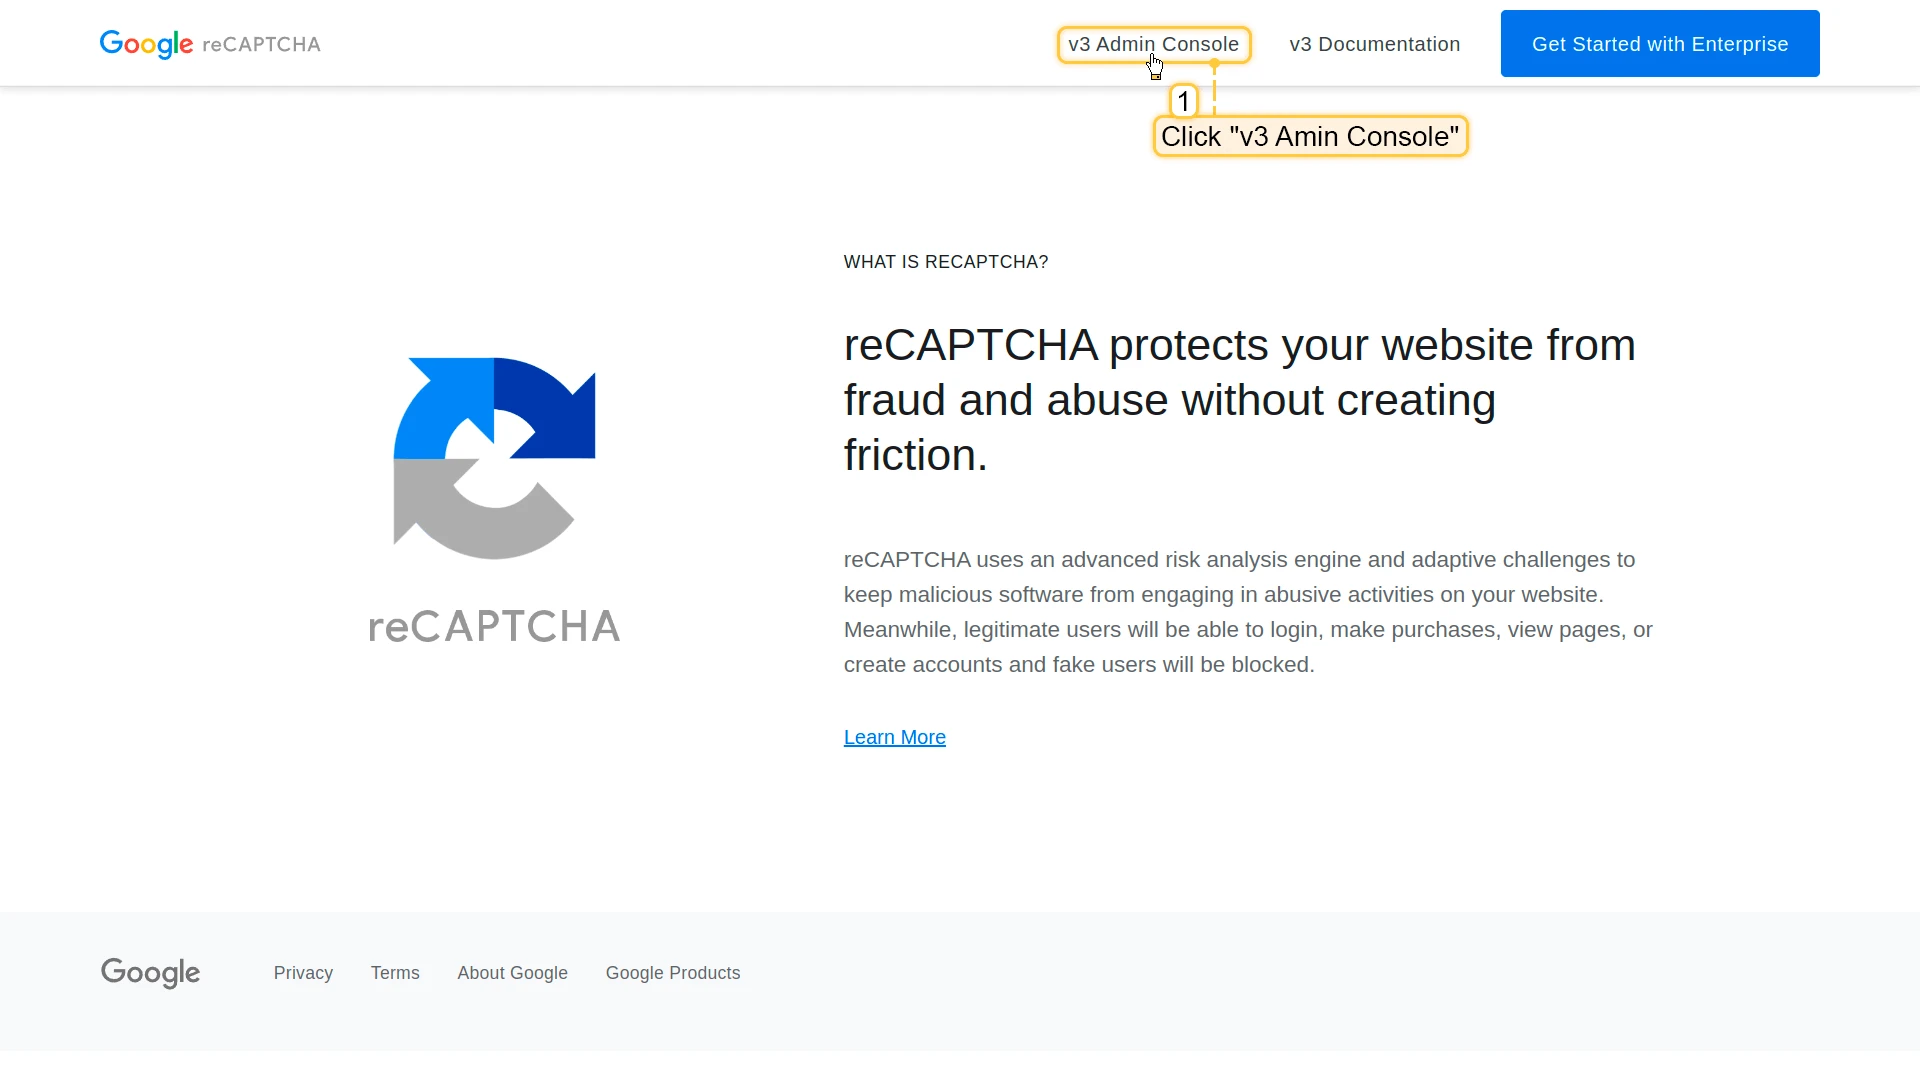
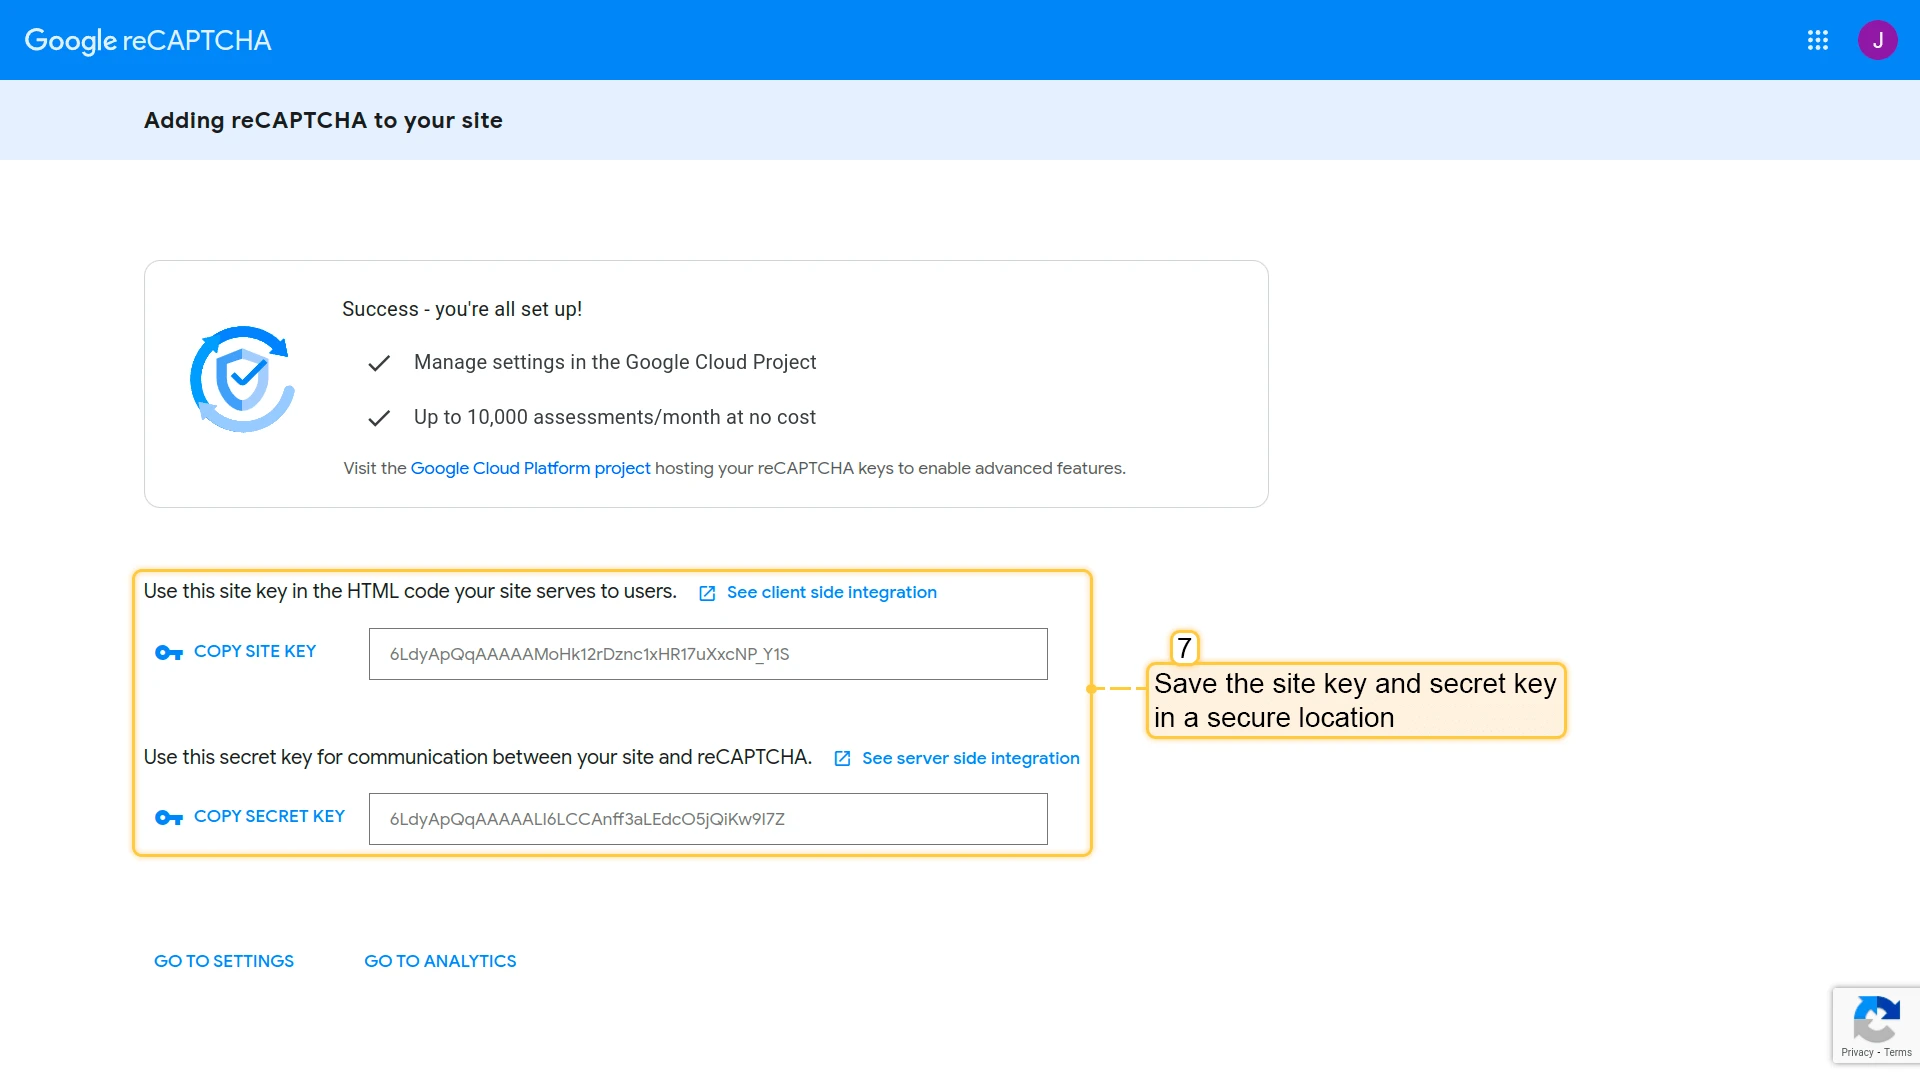
To generate Captcha keys, navigate to the Google reCAPTCHA admin console:
- Select the reCAPTCHA version (v2, v3, or Enterprise).
- Specify the domain name of your ThingsBoard instance.
- Copy and securely store the site key and secret key.

In ThingsBoard:
| Parameter | Description |
|---|---|
| Captcha version | The reCAPTCHA version to use. |
| Captcha site key | The public key used to render the captcha on the site. |
| Captcha secret key | The private key used to verify captcha responses on the server. |
| Project ID, reCAPTCHA Enterprise account credentials JSON file, Android key, iOS key | Shown for the Enterprise version only: the Google Cloud project, its service account credentials, and the per-platform site keys. |
| Captcha log action name | The action name associated with the captcha, used for logging. |
- Show Privacy Policy — enable or disable the Privacy Policy link on the registration page.
- Show Terms of Use — enable or disable the Terms of Use link on the registration page.
- User group roles — roles assigned to the user upon successful registration, determining their permissions and access level.
| Parameter | Description |
|---|---|
| Customer group | The customer group to which the new user will be added. |
| Customer title prefix | A prefix added to the customer’s title for identification. |
| Custom menu | A custom navigation menu applied for the new user. |
| Default dashboard | The dashboard displayed when the user logs in for the first time. |
The main dashboard displayed when the user navigates to the Home menu item. Turn on Hide home dashboard toolbar to open it without the dashboard toolbar.
Configuration Dialog
Section titled “Configuration Dialog”After the bundle is created, the Configuration dialog opens with the steps to get the ThingsBoard app running against this bundle. Follow them to set up your app, or click Close if you already have one configured.
The dialog has four sections:
- Prepare development environment — a Documentation link to the Flutter SDK setup.
- Get app source code — the
git clonecommand for the app repository. - Configure app settings — a Download file button for the bundle’s
configs.json, which goes into the root directory of the cloned project. - Run the app — the
flutter runcommand that builds the app with that file.
The Getting Started button at the bottom links to a Flutter getting-started guide. For the ThingsBoard walkthrough, see the Getting started guide. Turn on Do not show again to stop the dialog from opening after each new bundle.
To open the dialog again, go to Mobile apps → Bundles and click the Configuration app button in the row of the bundle.
The bundle is created. Applications included in the bundle now use the configured settings.
Was this helpful?