Single Switch
The Single switch widget places a toggle switch on any dashboard for controlling binary device states — turning a relay, light, or motor ON/OFF by sending RPC commands or updating device attributes. Use it when operators need a one-click control element that always reflects the current device state and responds to external state changes in real time.
How it works
Section titled “How it works”The widget follows four functional principles:
- Initial state — on dashboard load, the widget reads the current device state from a configured source (RPC, attribute, or telemetry) and reflects it in the switch position.
- Toggle action — when the user flips the switch, the widget executes the configured action: sends an RPC command, updates an attribute, or writes a telemetry record.
- Visual feedback — the switch track and knob change color based on state (ON → active color, OFF → neutral color), giving instant recognition of the device’s status.
- Synchronization — if the device state changes externally (via automation or rule chains), the widget receives the update and moves the switch to match the actual state.
Key capabilities
Section titled “Key capabilities”- Three behavior sections — Initial state, Turn On, Turn Off — each independently configurable.
- Supports RPC commands, shared/server attributes, and telemetry as state source and action target.
- Disabled state: locks the switch when a device is offline, in maintenance, or under an alarm condition.
- Configurable switch and knob colors per state, custom ON/OFF labels, and layout options.
Adding the widget
Section titled “Adding the widget”- Open the dashboard in edit mode. Click Add widget in the top toolbar, or click the Add new widget icon in the center of an empty dashboard.
- In the widget bundle selection dialog, find and click Control widgets.
- Select the Single switch widget.
- Configure the datasource, behavior, and appearance, then click Add.
Configuration
Section titled “Configuration”All settings in this section use Basic mode — a quick-start configuration covering the essentials. For finer widget controls like title font, card style, and tooltip, switch to the Advanced tab.
Datasource
Section titled “Datasource”Select the source of state data:
- Device — a specific device; the widget reads and writes state for this device.
- Entity alias — a set of entities matched by an entity alias; use this when the target device is selected dynamically at runtime.
Behavior
Section titled “Behavior”Initial state
Section titled “Initial state”Defines how the widget determines its ON/OFF position when the dashboard loads.
| Action type | Description | Configuration | Action result converter |
|---|---|---|---|
| Do nothing | State is set manually — no data is queried. | Value: On / Off | — |
| Execute RPC | Calls a device RPC method to get the current state. | Method: e.g. getState; optional Timeout and Persistence | None: specify the result value that means On. Function: custom JS f(result) returning Boolean. |
| Get Attribute | Reads an attribute value from the entity. | Attribute scope: Any / Client / Server / Shared; Attribute key: e.g. powerState | None: specify the value meaning On. Function: custom converter. |
| Get Time Series | Retrieves the latest value of a telemetry key. | Time series key: e.g. state | None: specify the value meaning On. Function: convert telemetry to Boolean. |
| Get Alarm Status | Derives state from active alarms. | Alarm severity: Critical / Major / Minor / Warning / Indeterminate; Alarm types: Any or selected | None: specify when active alarm means On. Function: map alarm data to Boolean. |
| Get Dashboard State ID | Reads the current dashboard state ID. | Result type: String / Integer / Double / Boolean / JSON | None: specify when ID means On. Function: convert ID to Boolean. |
| Get Dashboard State Object | Reads the full dashboard state as JSON. | Result type: String / Integer / Double / Boolean / JSON | None or Function. |
Turn On
Section titled “Turn On”Defines the action executed when the user flips the switch to ON.
| Action type | Description | Configuration |
|---|---|---|
| Execute RPC | Sends an RPC command to turn the device ON. | Method: e.g. setState; Parameters: Constant (e.g. true), Function, or None. Advanced: RPC timeout (ms), Persistent request. |
| Set Attribute | Updates a device attribute to the ON value. | Attribute scope: Server or Shared; Attribute key: e.g. powerState; Value: Constant (e.g. true) or Function. |
| Add Time Series | Writes a new telemetry record representing ON. | Time series key: e.g. state; Value: Constant or Function. |
Turn Off
Section titled “Turn Off”Mirrors the Turn On configuration but uses values representing the OFF state.
| Action type | Description | Configuration |
|---|---|---|
| Execute RPC | Sends an RPC command to turn the device OFF. | Method: e.g. setState; Parameters: Constant (e.g. false), Function, or None. Advanced: RPC timeout (ms), Persistent request. |
| Set Attribute | Updates a device attribute to the OFF value. | Attribute scope: Server or Shared; Attribute key: e.g. powerState; Value: Constant (e.g. false) or Function. |
| Add Time Series | Writes a new telemetry record representing OFF. | Time series key: e.g. state; Value: Constant or Function. |
Disabled state
Section titled “Disabled state”Defines when the switch becomes non-clickable. In the disabled state the switch turns gray and ignores user input — use this when a device is offline, under maintenance, or should not be controlled during an active alarm.
| Action type | Description | Configuration |
|---|---|---|
| Do nothing | Manually sets a static disabled appearance. | Value: On / Off |
| Execute RPC | Disables the switch based on an RPC response. | Method: e.g. getAvailability; converter: None or Function. |
| Get Attribute | Reads an attribute to decide if the switch should be locked. | Scope: Any / Client / Server / Shared; Key: e.g. enabled; converter: None or Function. |
| Get Time Series | Uses the latest telemetry to determine disabled state. | Key: e.g. availability; converter: None or Function. |
| Get Alarm Status | Disables when an alarm of selected type or severity is active. | Alarm severity and Alarm types; converter: None or Function. |
| Get Dashboard State ID / Object | Disables based on the current dashboard state. | Result type: String / Integer / Double / Boolean / JSON; converter: None or Function. |
Appearance
Section titled “Appearance”Controls the switch layout, colors, labels, and icon.
| Setting | Description |
|---|---|
| Layout | Position of the switch within the widget: Right, Left, or Center. |
| Auto scale | Automatically adjusts font size and element scaling when the widget is resized. |
| Label | Descriptive text displayed beside the switch, like Ventilation or Power. |
| Icon | Optional icon shown to the left of the label to identify the controlled device or function. |
| Switch color | Color of the switch track (background line) in each state: On / Off / Disabled. |
| Tumbler color | Color of the switch knob in each state: On / Off / Disabled. |
| On label / Off label | Custom text and color shown next to the switch to communicate the current state. |
Card appearance
Section titled “Card appearance”| Setting | Description |
|---|---|
| Background | Solid color or image background for the card. |
| Show card buttons | Enable the Fullscreen toolbar button. |
| Card border radius | Corner rounding in pixels. |
| Card padding | Spacing between card content and its border. |
Actions
Section titled “Actions”The Single switch supports the Widget header button action — a button placed in the widget header that triggers a configured action when clicked.
Example
Section titled “Example”Ventilation relay control
Section titled “Ventilation relay control”Scenario: A Ventilation Relay device subscribes to updates of the powerState shared attribute from ThingsBoard. When the attribute value changes, the device adjusts its physical relay state accordingly.
Goal: Add a Single switch widget that reads the current powerState value and lets the user flip the relay ON or OFF by updating the attribute.
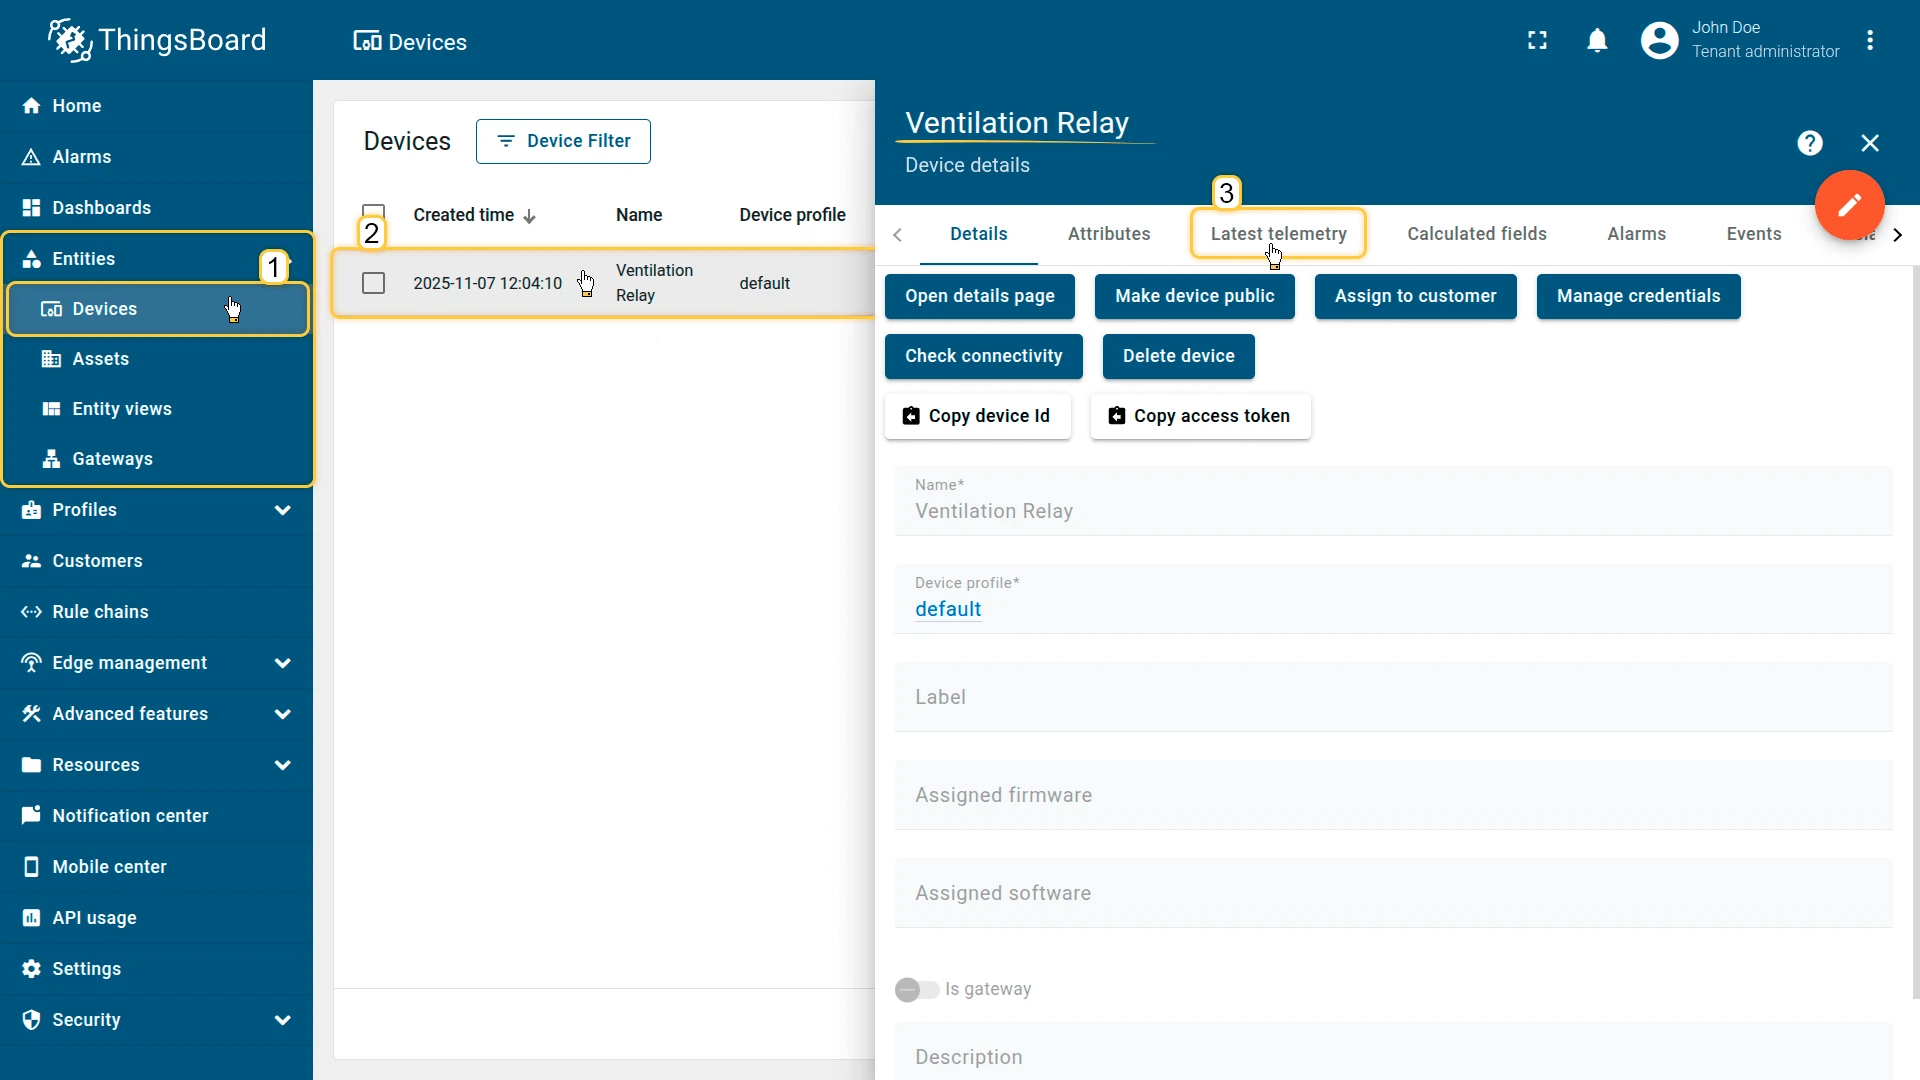
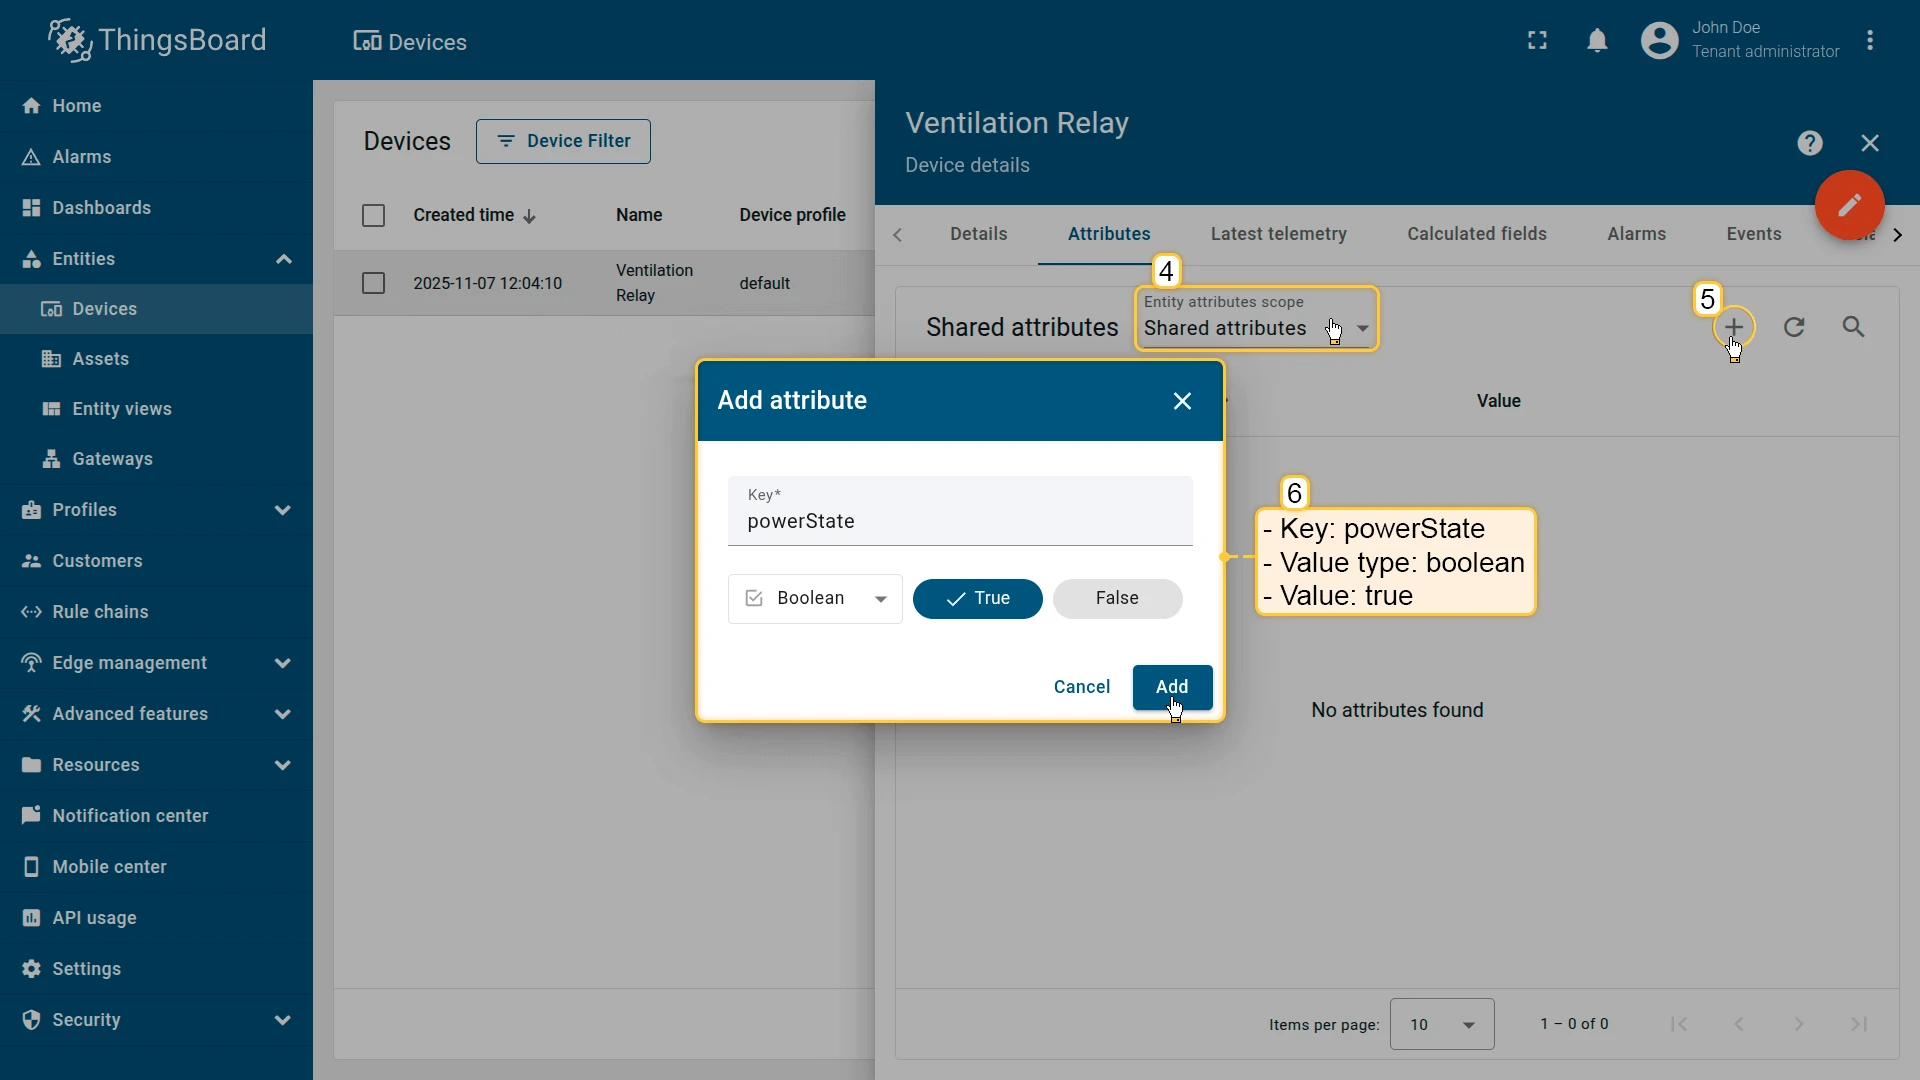
Prerequisites: Create a device named Ventilation Relay and add a shared attribute:
- Key name:
powerState - Data type: Boolean
- Value:
true
Step 1. Add the widget. Open the dashboard in edit mode, click Add widget, select Control widgets, then choose Single switch.
Step 2. Configure the datasource. Set Datasource type to Device, then select Ventilation Relay.
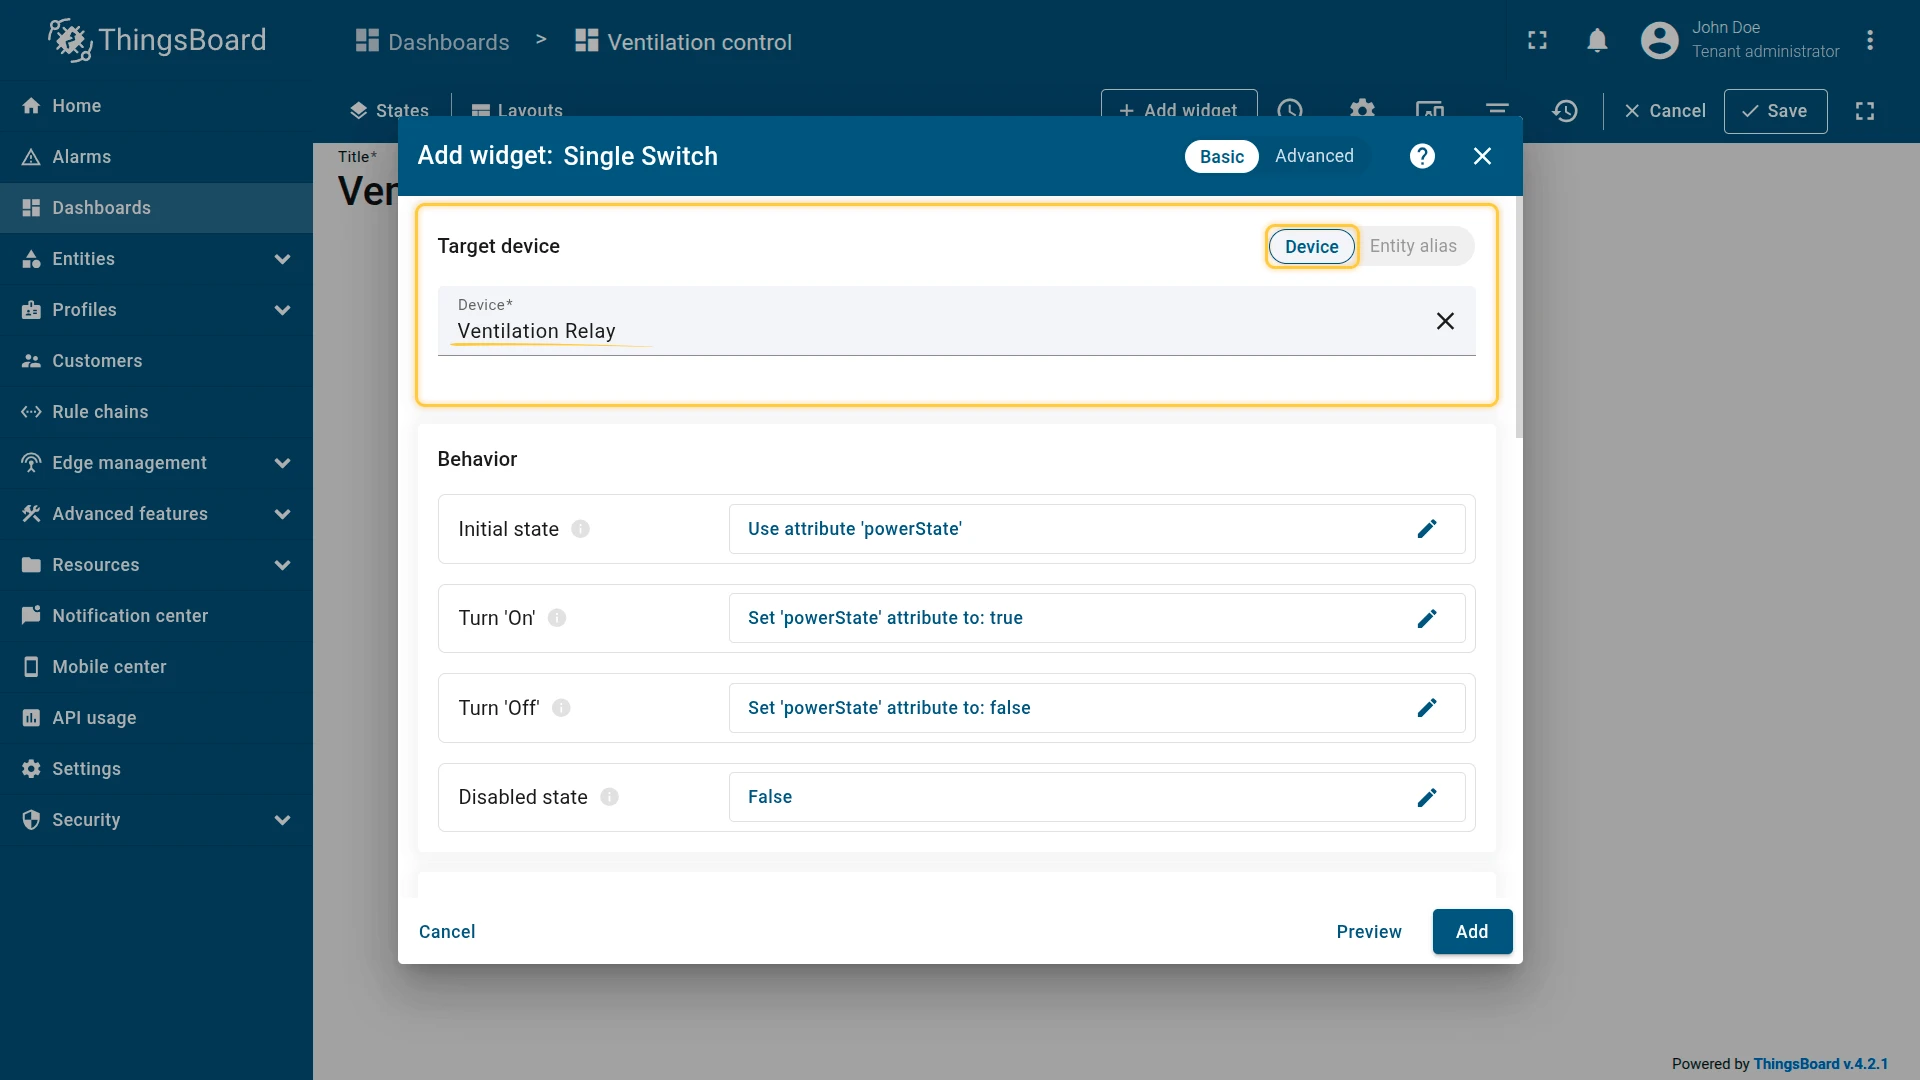
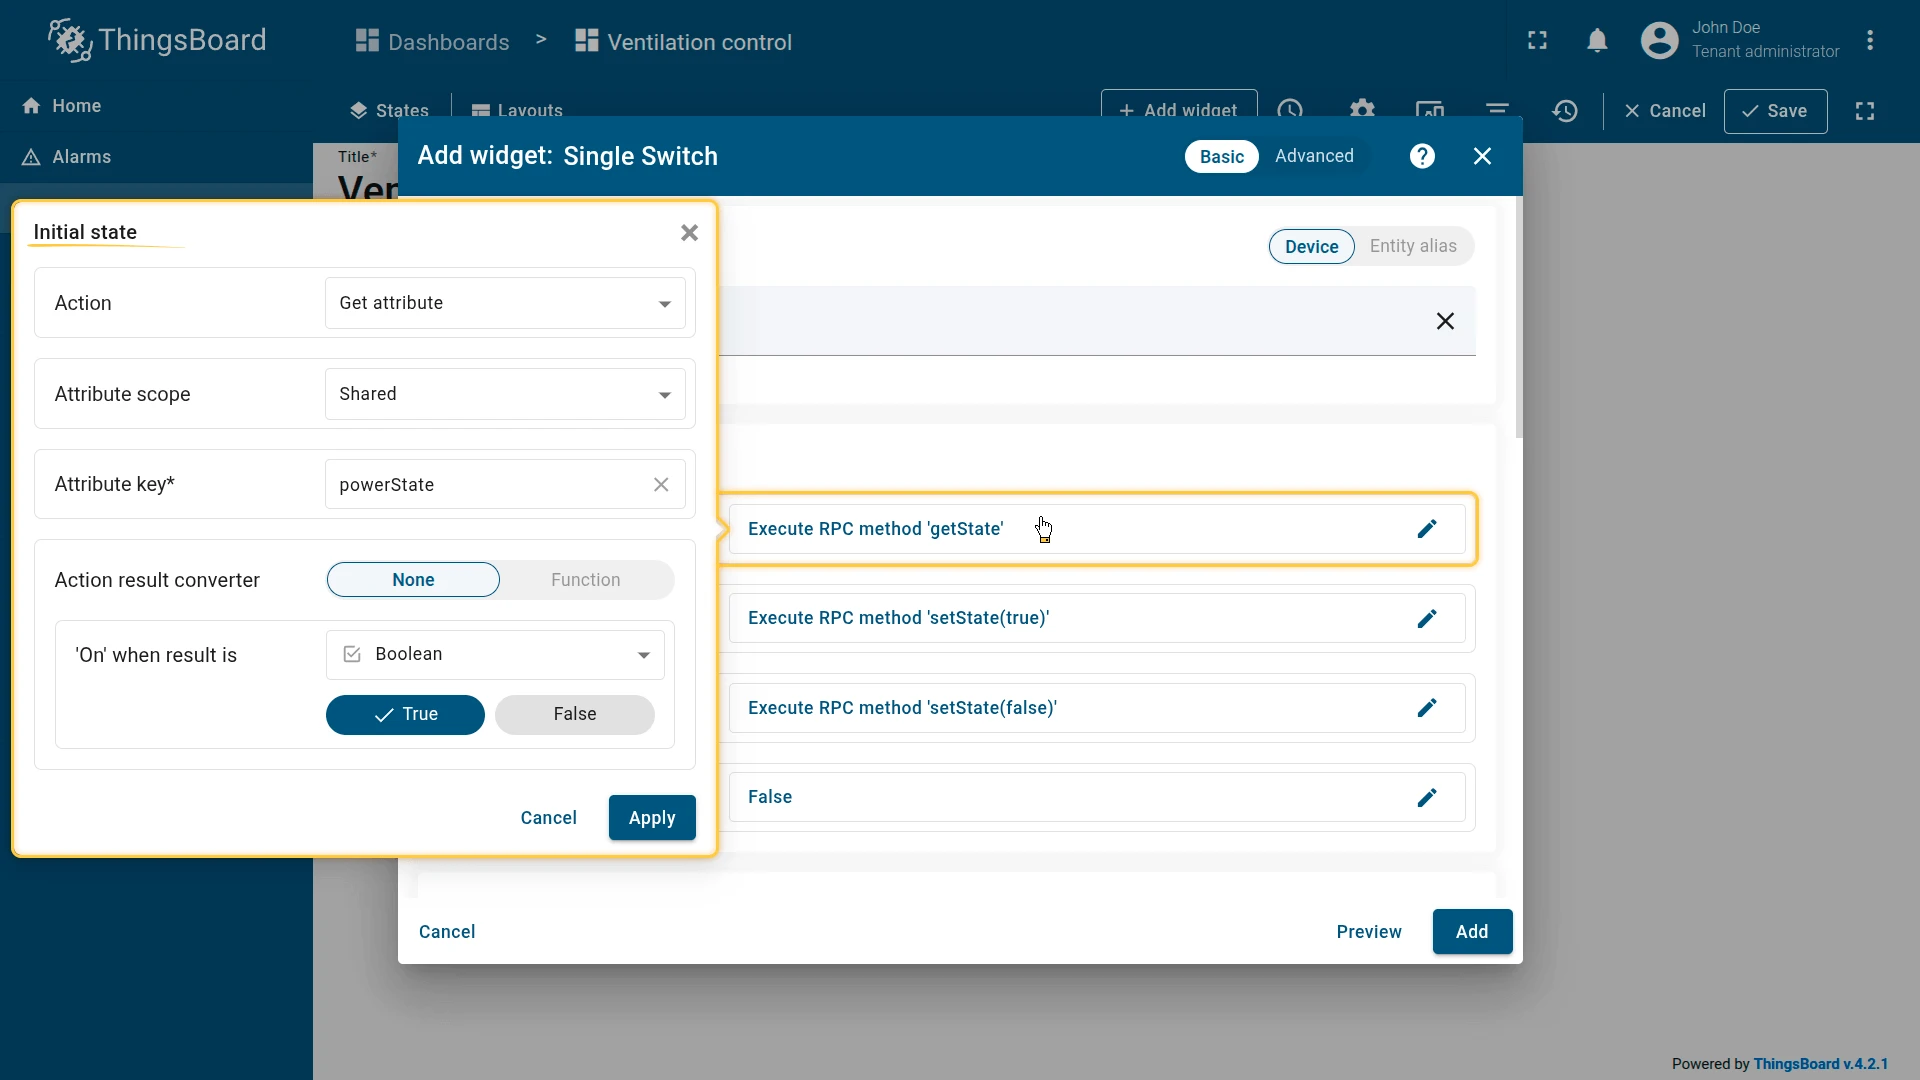
Step 3. Configure Initial state. Set the behavior so the switch reads the current relay state on load:
- Action: Get Attribute
- Attribute scope: Shared
- Attribute key:
powerState - Action result converter: On when result is
true(Boolean)
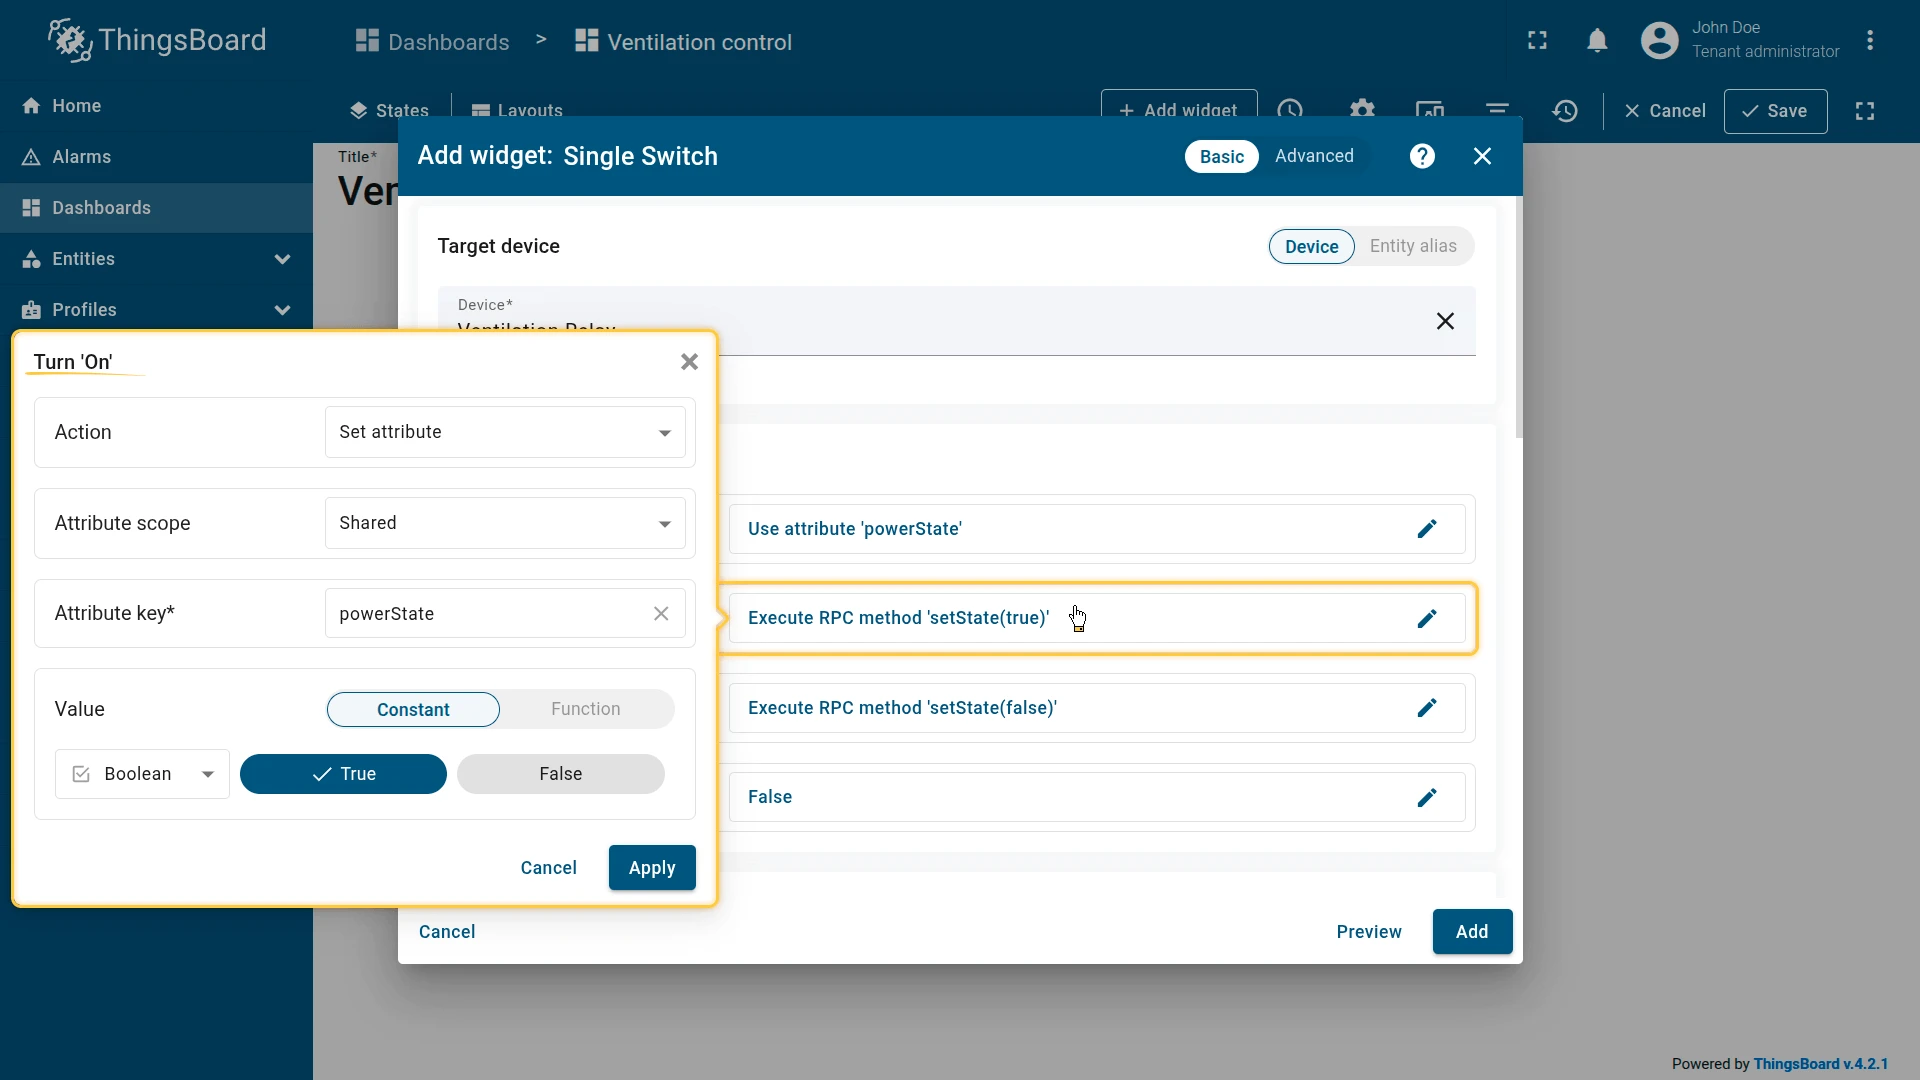
Step 4. Configure Turn On. Set the action triggered when the user flips the switch to ON:
- Action: Set Attribute
- Attribute scope: Shared
- Attribute key:
powerState - Value: Constant →
true(Boolean)
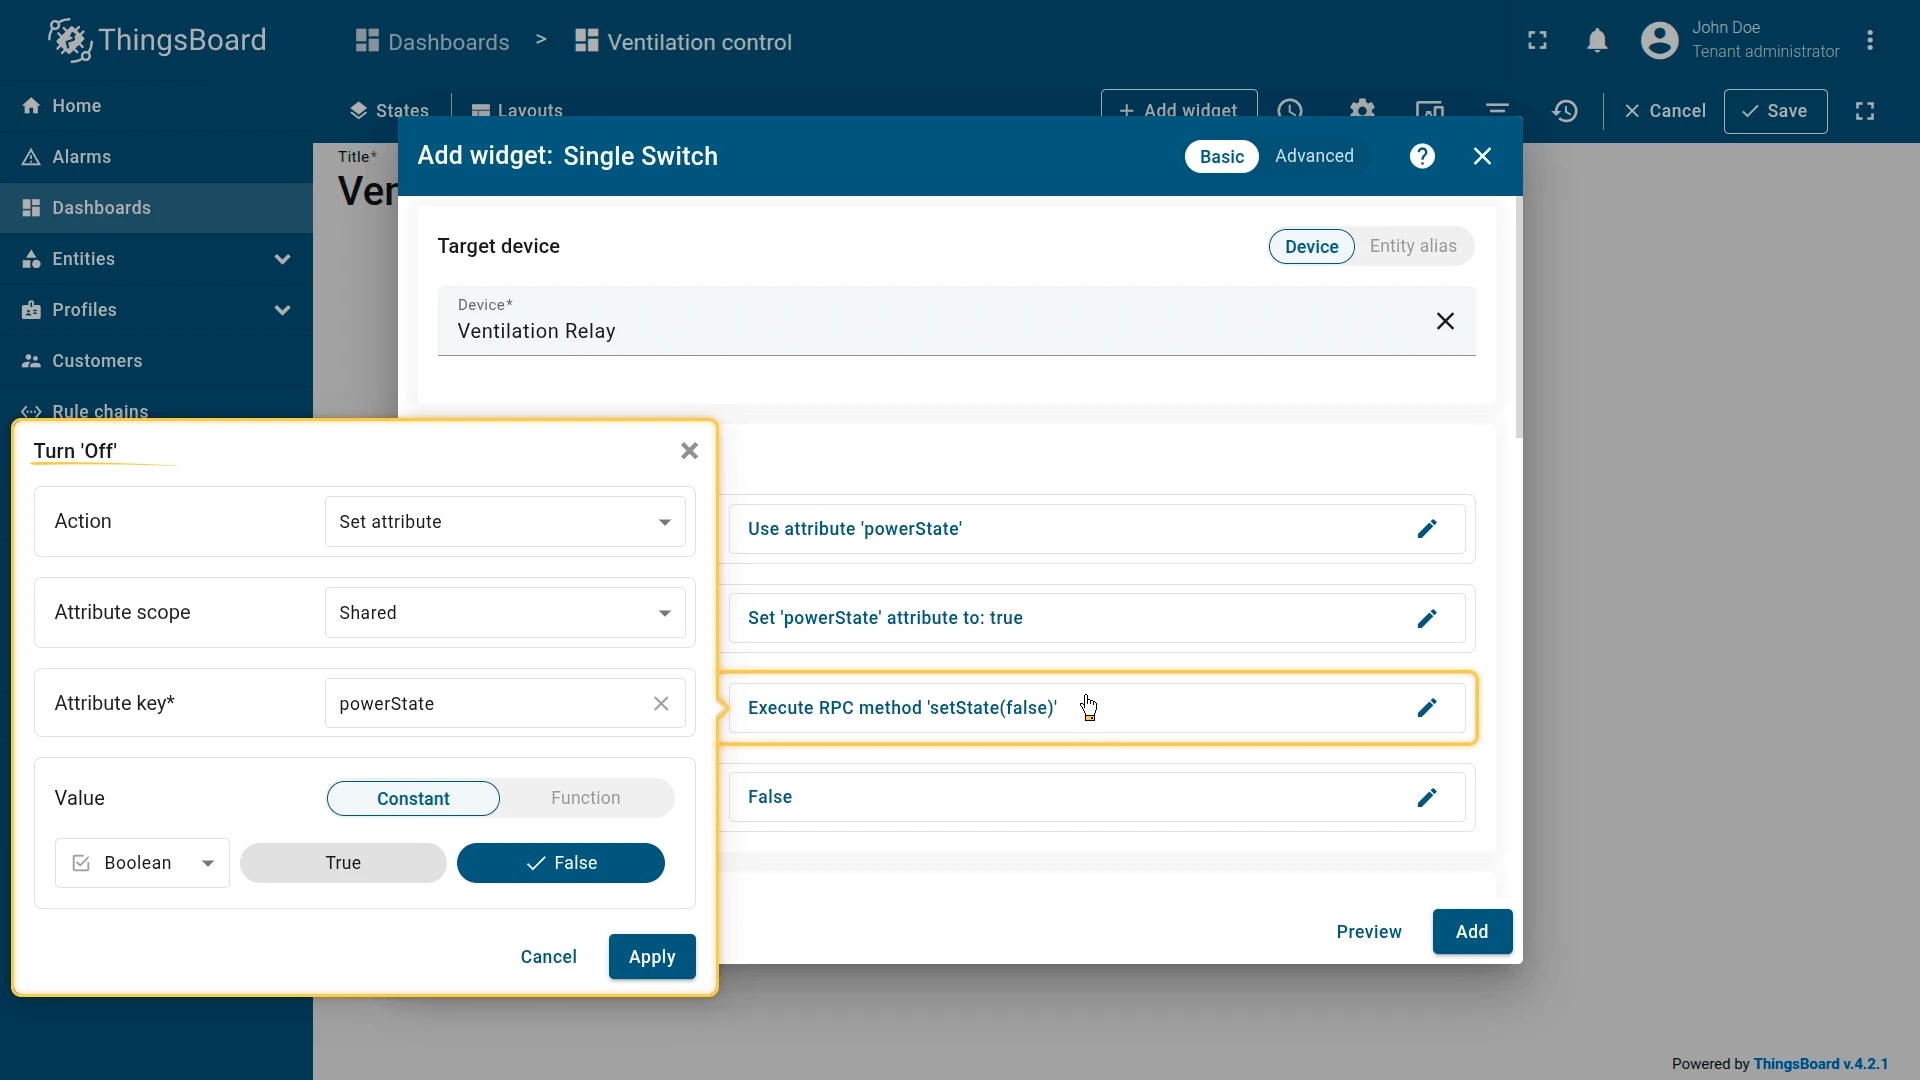
Step 5. Configure Turn Off. Set the action triggered when the user flips the switch to OFF:
- Action: Set Attribute
- Attribute scope: Shared
- Attribute key:
powerState - Value: Constant →
false(Boolean)
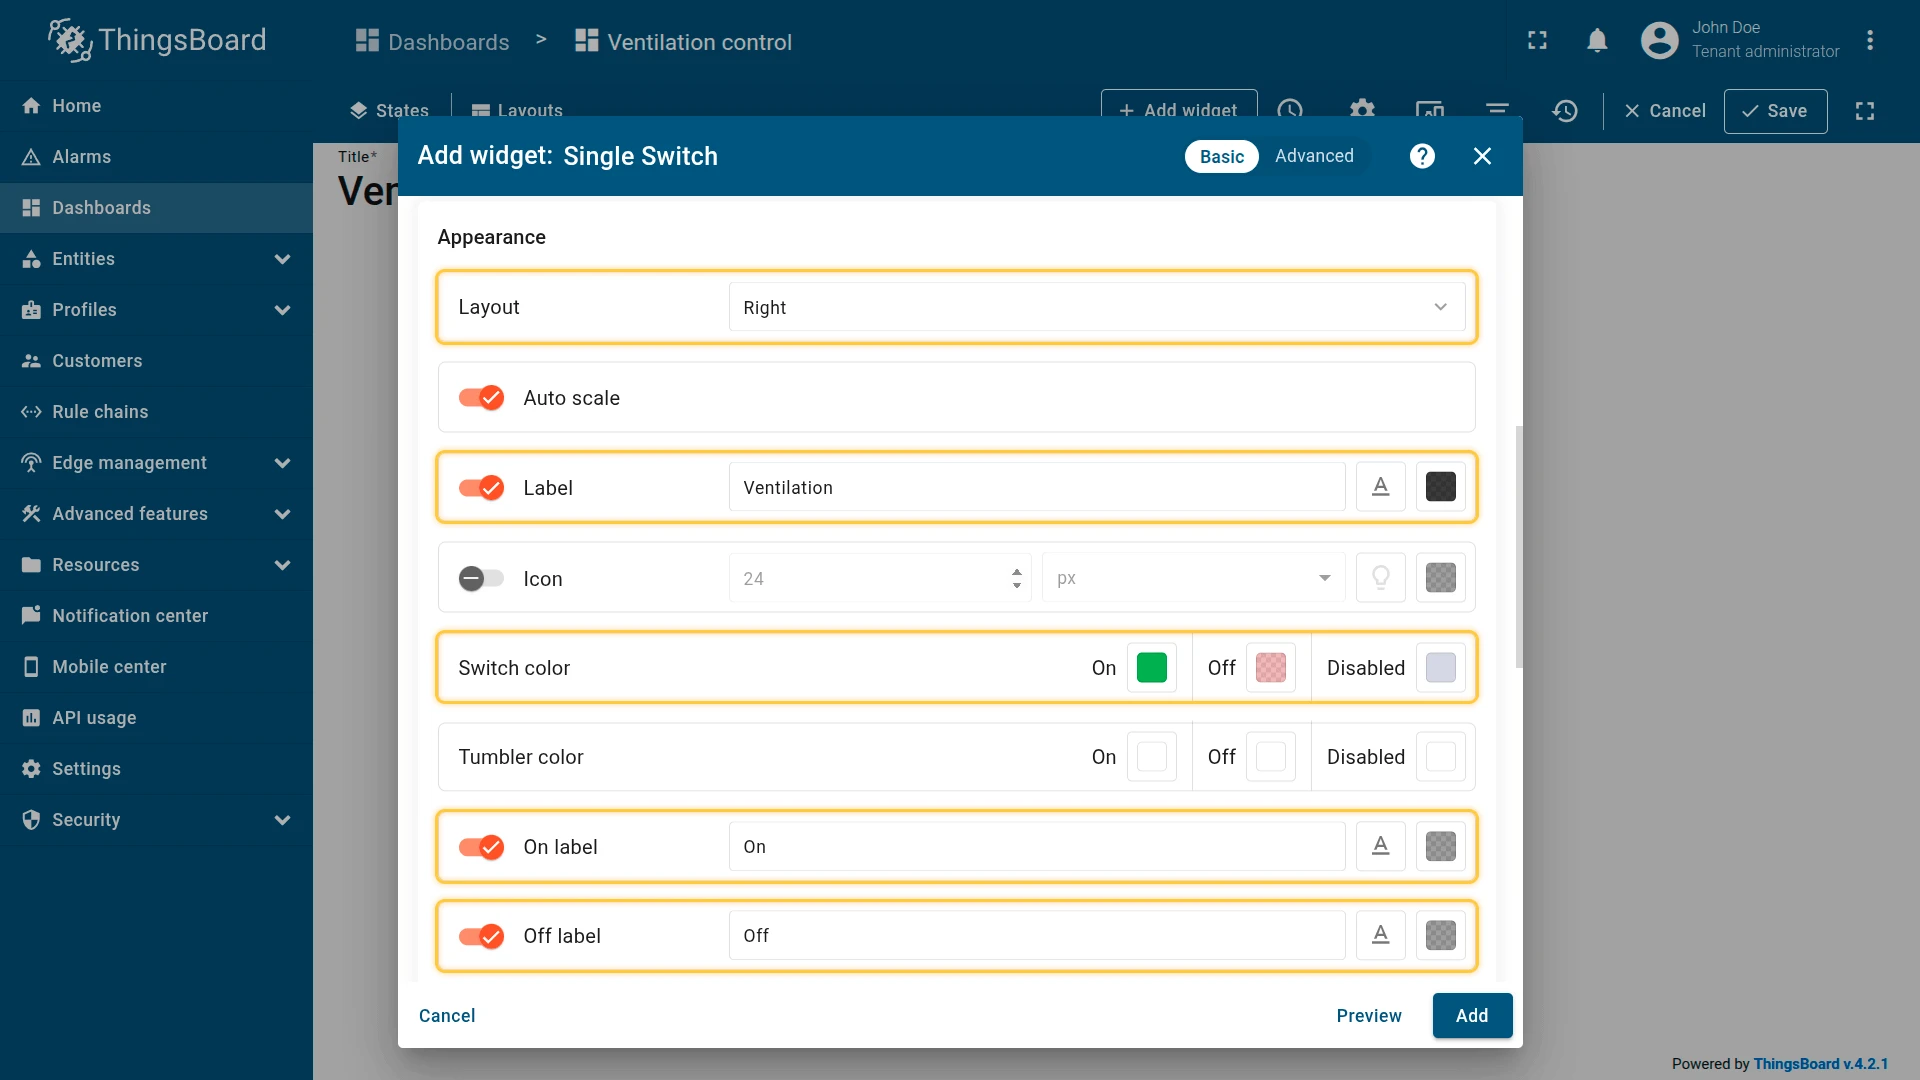
Step 6. Configure appearance. Set the following:
- Layout: Right
- Label:
Ventilation - Switch color: On →
#4CAF50, Off →#AF4C4E66 - On label:
On/ Off label:Off
Step 7. Save. Click Add, resize and reposition as needed, then click Save on the dashboard toolbar.
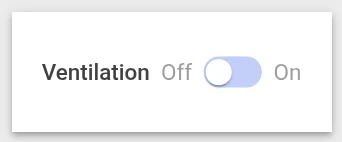
Result: The widget reads powerState from the Ventilation Relay device. If powerState = true, the switch is green and in the ON position. If powerState = false, the switch is red and in the OFF position.
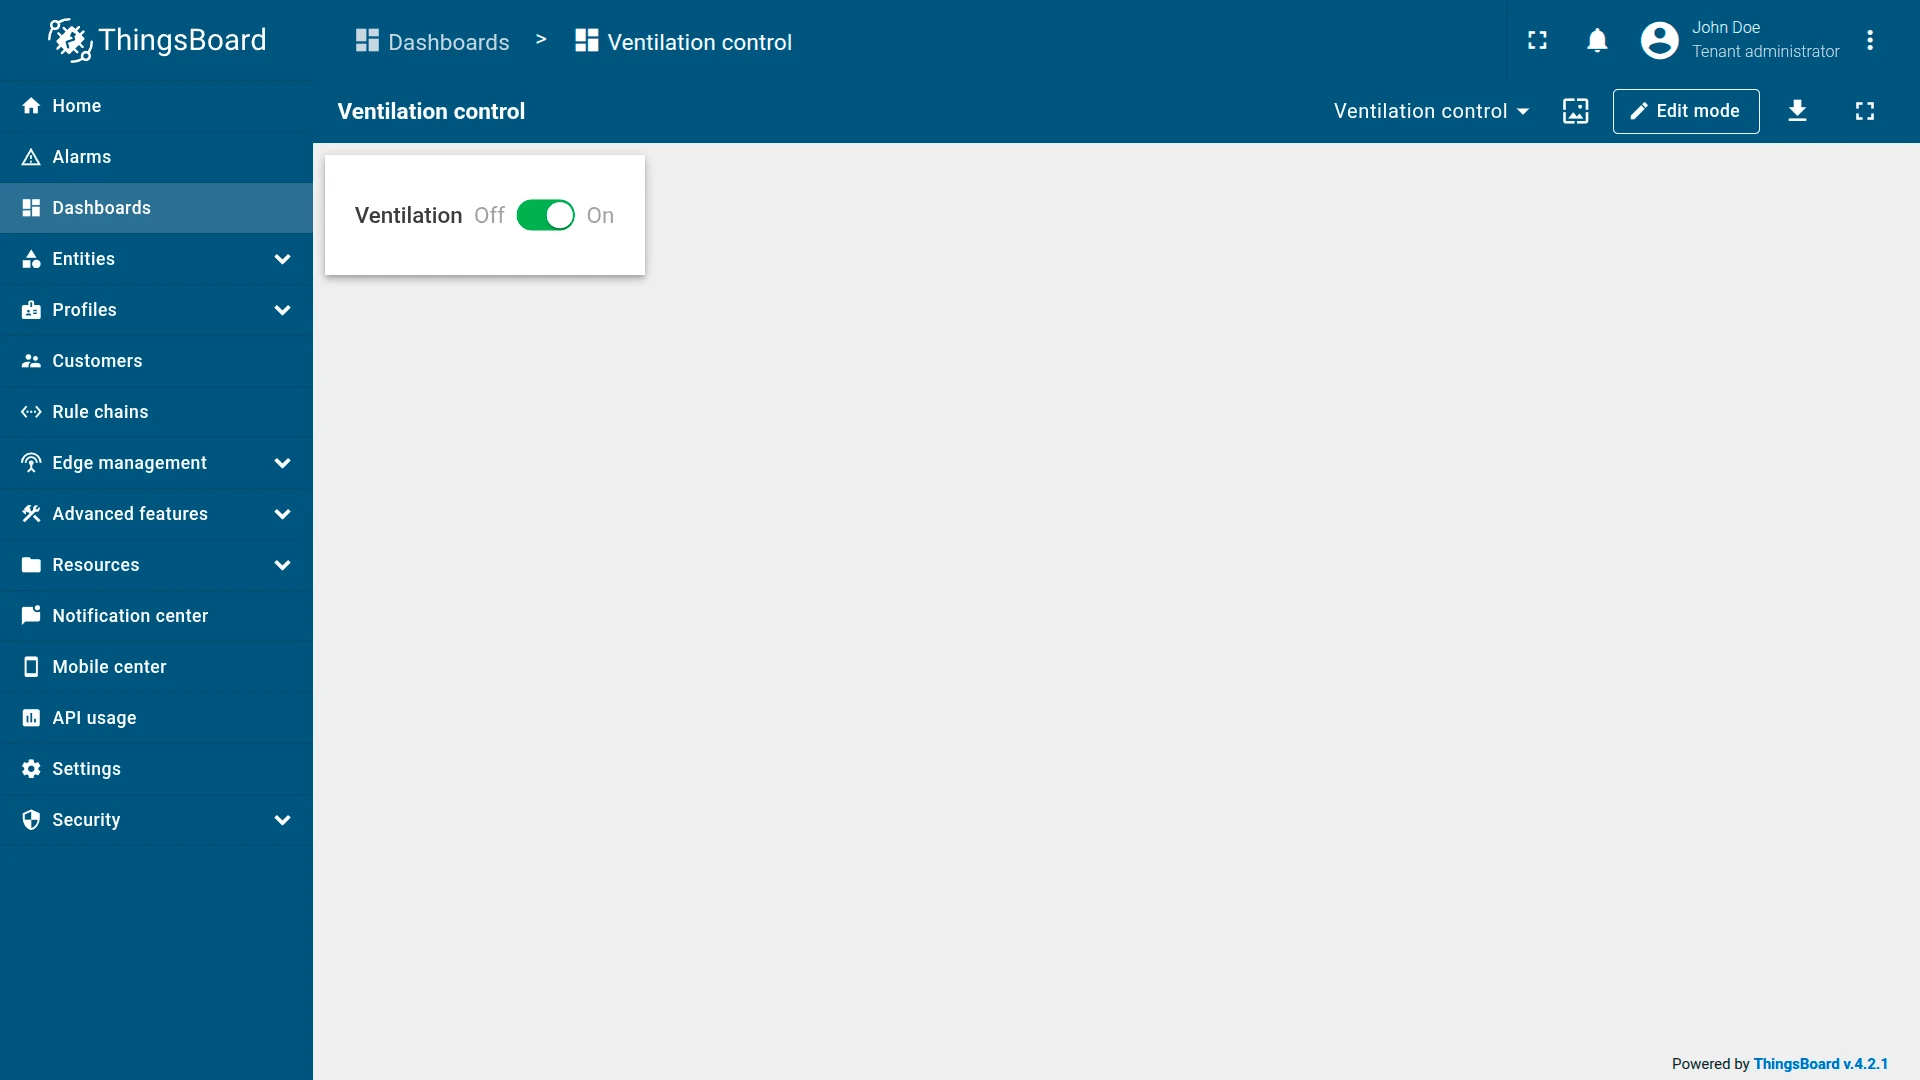
Flipping the switch updates the powerState attribute on ThingsBoard. The Ventilation Relay device, subscribed to this attribute, receives the updated value and adjusts its physical relay state automatically.


Troubleshooting
Section titled “Troubleshooting”Switch does not reflect the correct initial state
| Cause | Solution |
|---|---|
| Wrong attribute key or scope | Verify the Attribute key and Scope in the Initial state section match the actual attribute on the device. |
| Attribute not set on device | Open Devices → Attributes and confirm the attribute exists and has a value. |
| Action result converter mismatch | Check that the converter correctly maps the attribute value to Boolean — for example, On when result is true. |
Flipping the switch has no effect on the device
| Cause | Solution |
|---|---|
| Wrong action type | Confirm Turn On and Turn Off use the correct action type (RPC, Set Attribute, or Add Time Series) for your device. |
| Wrong attribute key or RPC method | Verify the key name or method name matches what the device expects. Names are case-sensitive. |
| Device not subscribed to attribute updates | Confirm the device firmware subscribes to the relevant shared attribute before expecting automatic responses. |
Switch is stuck in Disabled state
| Cause | Solution |
|---|---|
| Disabled state condition is always true | Review the Disabled state configuration and verify the source value (attribute, telemetry, or alarm) only activates disabled when intended. |
| Active alarm blocking control | Check if an alarm of the configured type and severity is active. Resolve the alarm or adjust the Disabled state filter. |
Was this helpful?