Configure the Video Streaming widget
This page assumes you already have a public, browser-reachable HTTPS stream URL. If your camera only speaks RTSP on your LAN, build a public stream URL first, then come back here.
The steps below apply to both protocols. Whether you brought your own URL or built one for your camera, only the URL string changes.
Import the widget bundle
Section titled “Import the widget bundle”-
Download the bundle file: video_streaming.json.
-
In ThingsBoard, open the Widgets Library.
-
Switch to the Widgets bundles tab, then click the + icon → Import widgets bundle.
-
Upload the
video_streaming.jsonfile you downloaded, then click Import.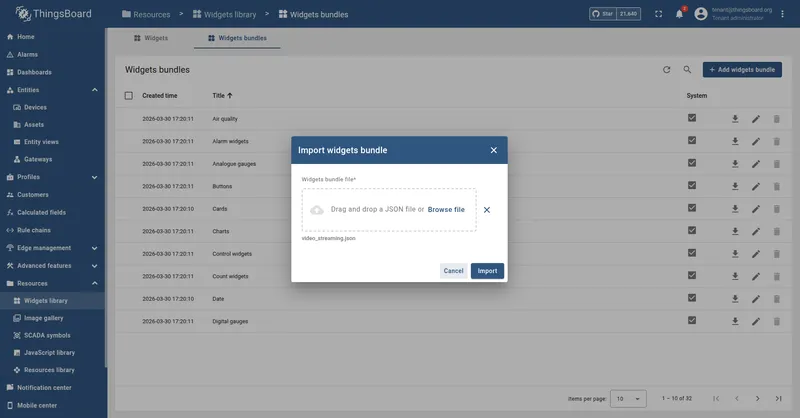
-
The Video Streaming bundle appears in the bundles list. It contains two widgets: HLS Video Stream and WebRTC Video Stream.

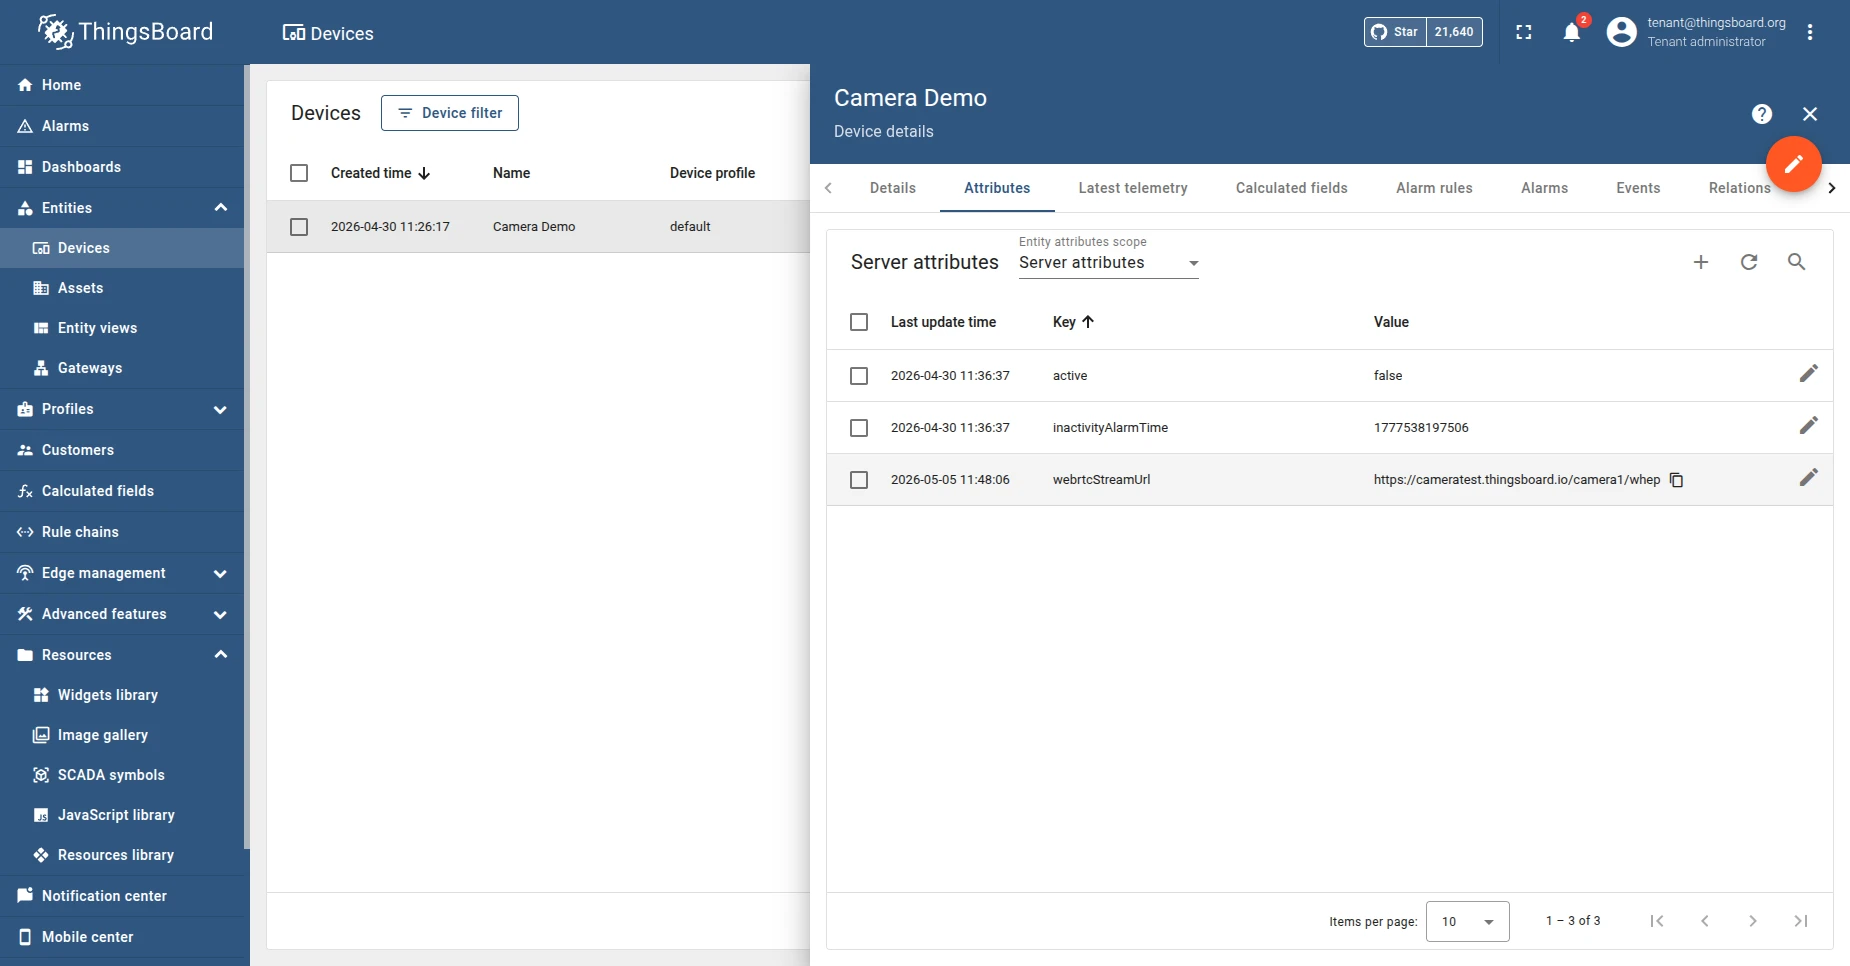
Create a camera device and the stream URL attribute
Section titled “Create a camera device and the stream URL attribute”Each camera is represented by a device entity. The widget reads the stream URL from a server attribute on that device. The attribute name is up to you — the only requirement is that the widget’s data key matches it. The examples below use hlsStreamUrl and webrtcStreamUrl because those are the widget defaults, but any name works (mainCameraUrl, entrance_cam, …).
-
Create a device for your camera under Devices. The device profile and label are not significant to this widget — any profile works.
-
Open the device’s Attributes tab → Server attributes → + Add attribute.
-
Set:
- Key: any name you want (defaults
hlsStreamUrl/webrtcStreamUrl). - Value type:
String. - Value: the public URL — for example,
https://cameras.yourdomain.com/camera1/index.m3u8orhttps://cameras.yourdomain.com/camera1/whep.
- Key: any name you want (defaults

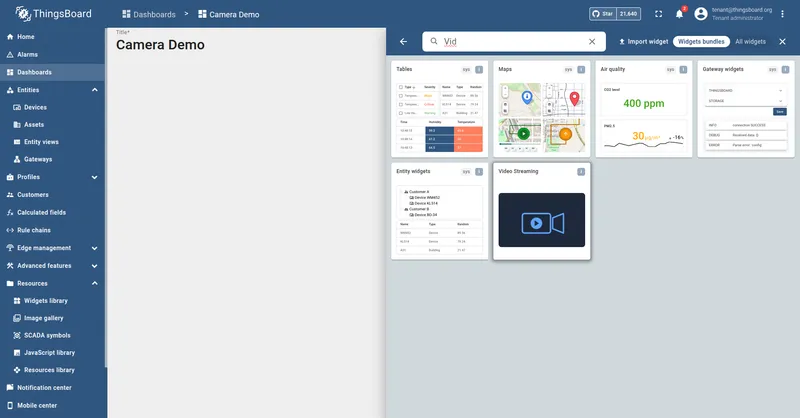
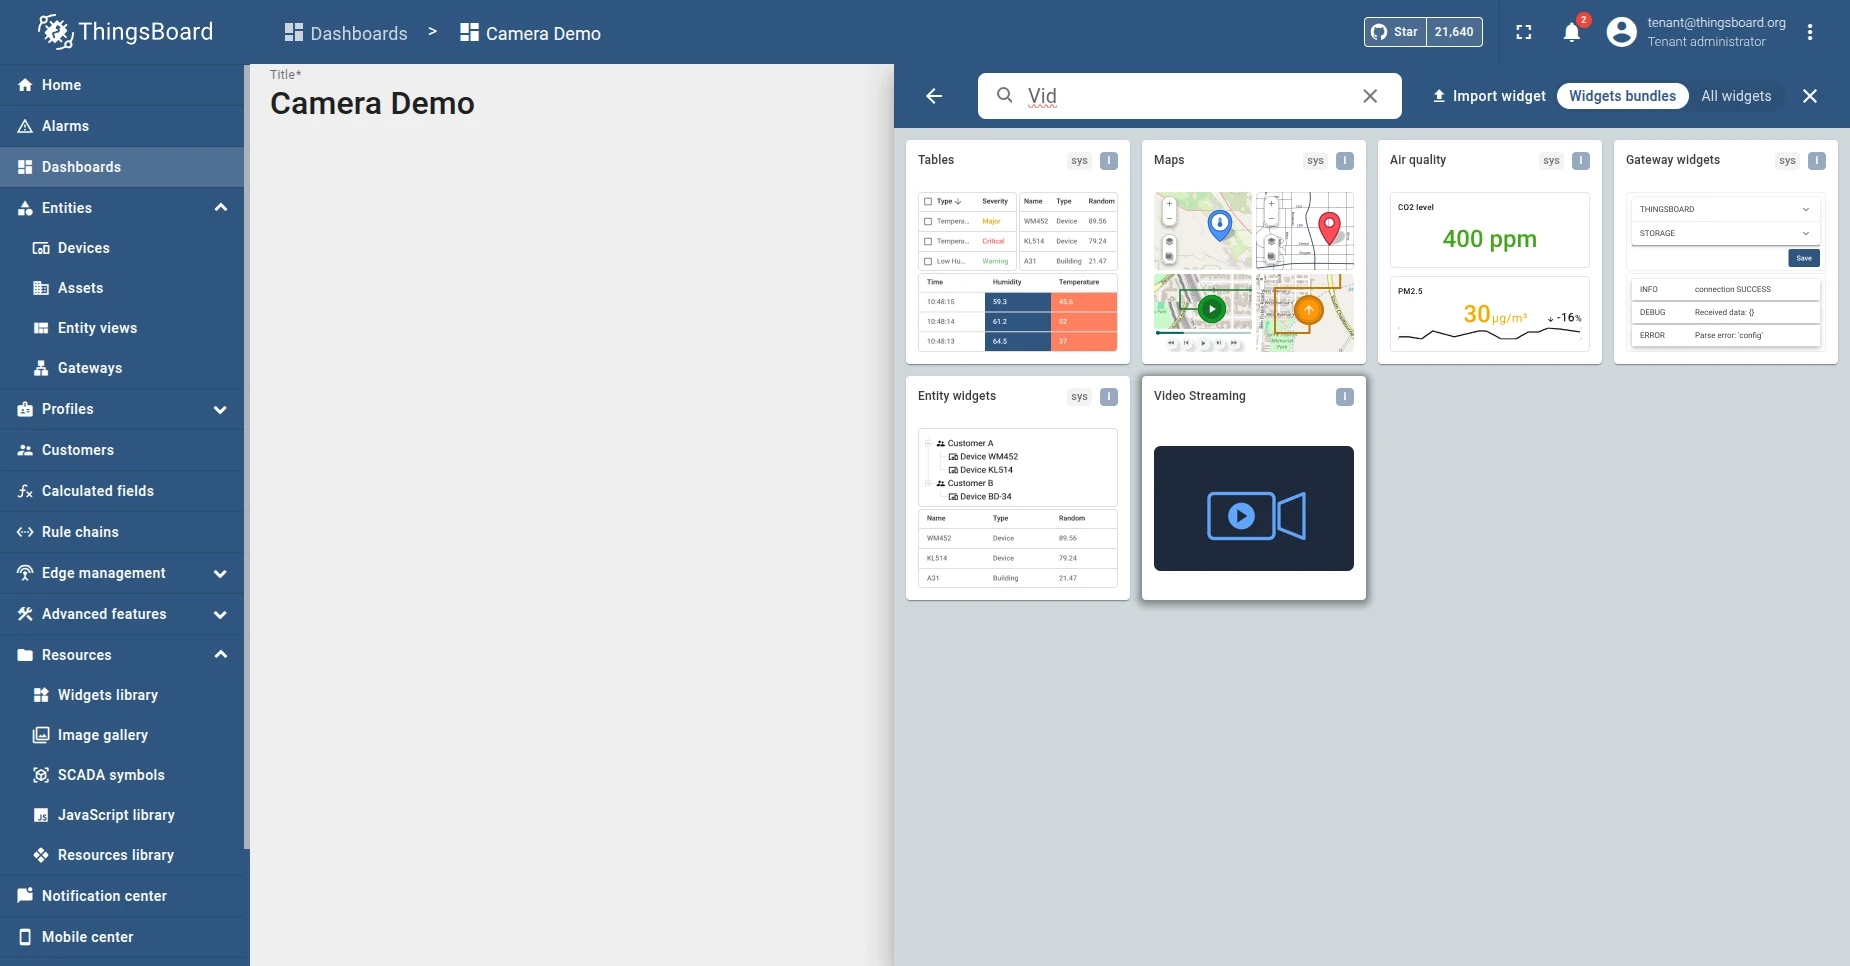
Add a widget to a dashboard
Section titled “Add a widget to a dashboard”-
Open or create a dashboard and enter edit mode.
-
Click + Add widget.
-
Select the Video Streaming bundle.
-
Choose HLS Video Stream or WebRTC Video Stream.
-
Configure the data source:
- Type: Entity.
- Entity: create or pick an entity alias that resolves to the camera device — for a single camera, use a Single entity filter pointing at the device you created earlier.
- Data key: add a key of type Attribute whose name exactly matches the attribute you created on the device. The widget defaults are
hlsStreamUrlandwebrtcStreamUrl, but use whatever name you picked.

-
Click Add. The widget is placed on the dashboard.
-
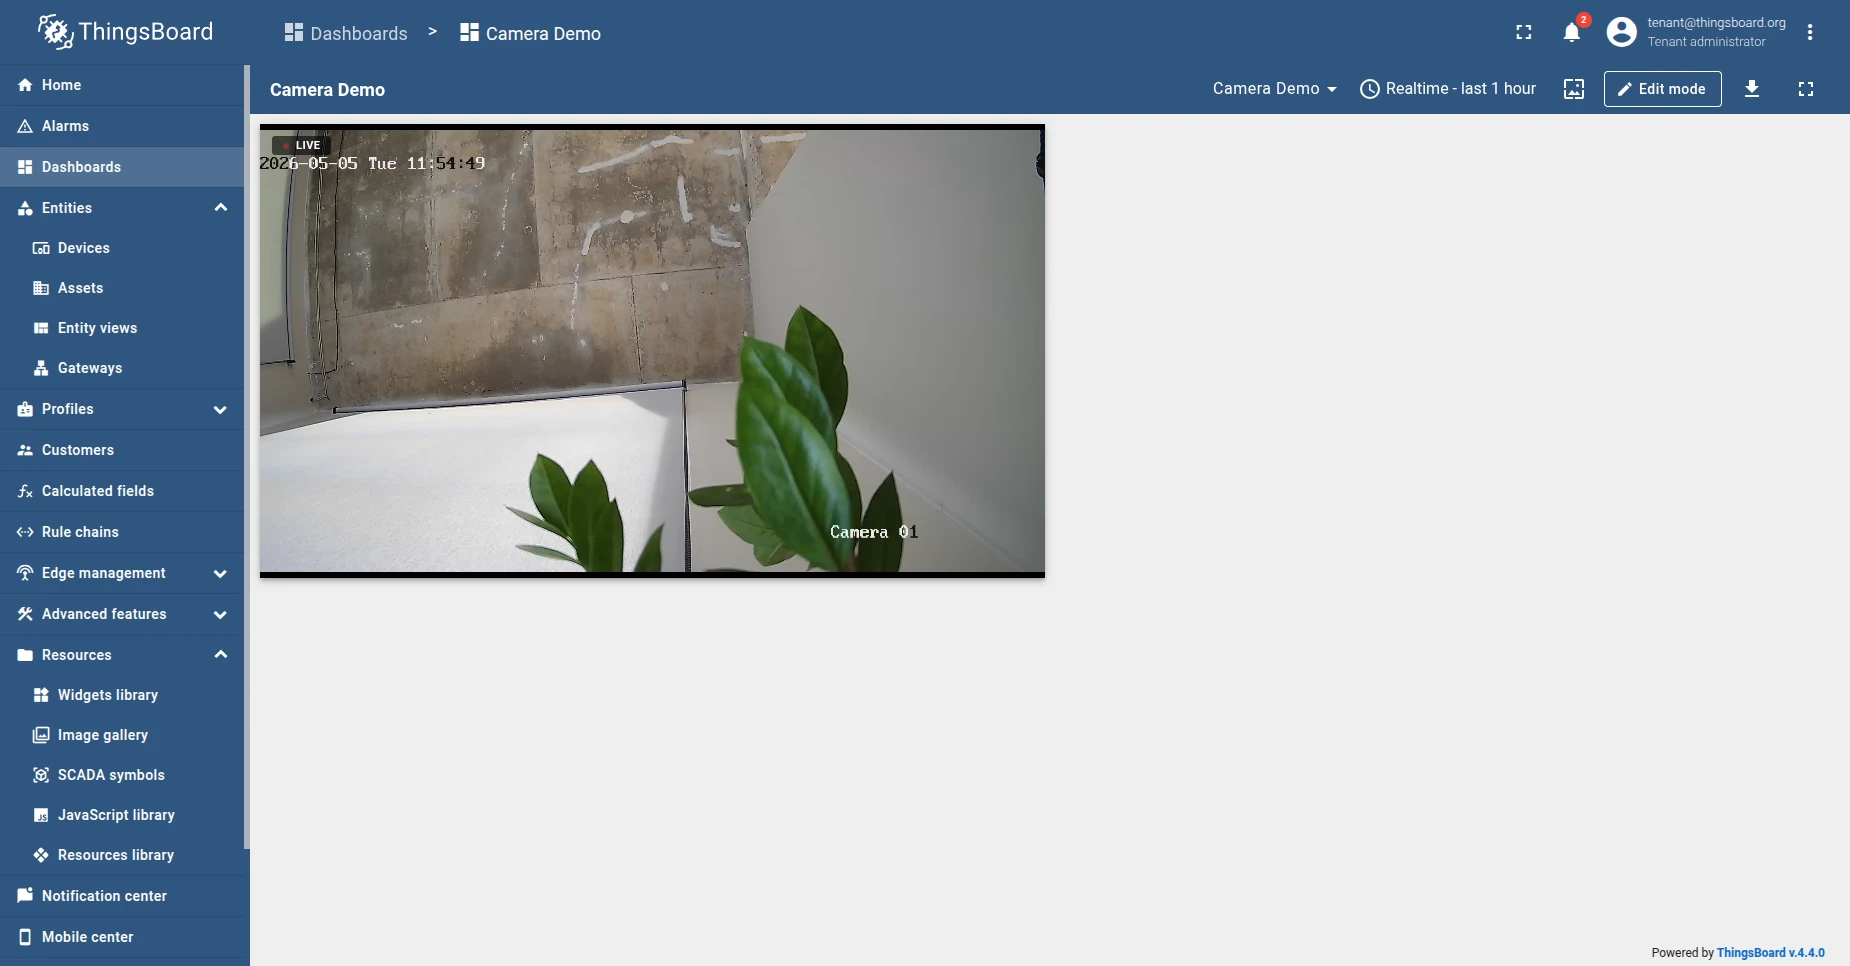
Save the dashboard. Live video should start within a few seconds.


HLS Video Stream — settings reference
Section titled “HLS Video Stream — settings reference”Open the widget settings and use the table below as a reference for each field.
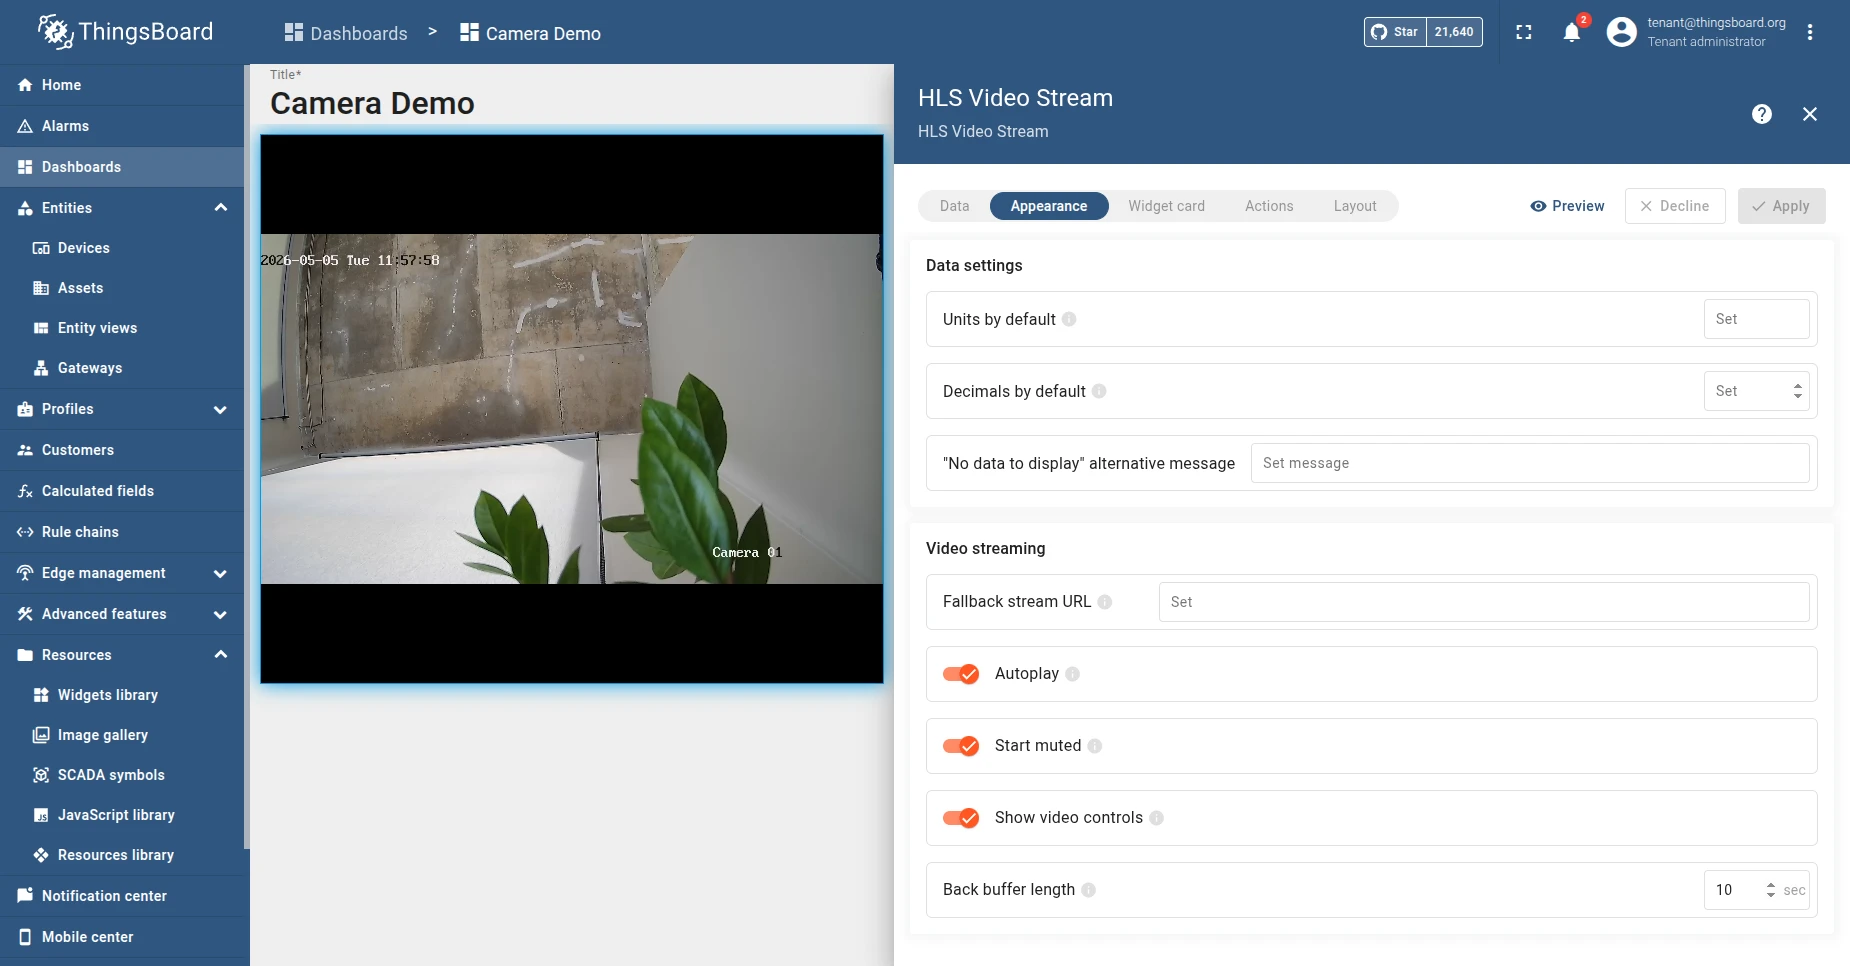
| Setting | Default | Description |
|---|---|---|
| Fallback stream URL | (empty) | Optional fallback URL. Used when the data key is empty or missing. Useful when you want a “default camera” to display before the user selects a device. |
| Autoplay | On | Start playback automatically when the stream loads. If the browser blocks autoplay with sound, the widget falls back to muted autoplay. |
| Start muted | On | Start playback muted. Users can unmute via the video controls. Required for reliable autoplay in most browsers. |
| Show video controls | On | Show the standard HTML5 video controls (play / pause, volume, fullscreen, picture-in-picture). |
| Back buffer length | 10 sec | Seconds of already-played live video kept in memory for seeking back. Valid range: 0–60. Set to 0 to disable seek-back. |
The widget supports one entity, one data key. The default data key label is hlsStreamUrl, but you can rename it to match any attribute name you’ve created on the device. By default, it ships with a function datasource pointing at a public Mux test stream (https://test-streams.mux.dev/x36xhzz/x36xhzz.m3u8) so it previews correctly; configure an Entity datasource bound to your device attribute.
WebRTC Video Stream — settings reference
Section titled “WebRTC Video Stream — settings reference”
| Setting | Default | Description |
|---|---|---|
| Fallback stream URL | (empty) | Optional fallback WHEP URL. Used when the data key is empty or missing. Example: https://cameras.yourdomain.com/camera1/whep. |
| Autoplay | On | Start playback automatically once the WebRTC session connects. Falls back to muted autoplay if the browser blocks autoplay with sound. |
| Start muted | On | Start playback muted. Users can unmute via the video controls. |
| Show video controls | On | Show the standard HTML5 video controls (play / pause, volume, fullscreen, picture-in-picture). |
| Show LIVE indicator | On | Show a pulsing red LIVE badge in the top-left corner while the stream is playing. |
| STUN server URL | (empty) | Optional STUN server URL (e.g., stun:stun.l.google.com:19302). Leave empty when the browser can reach the stream server directly. Set it when viewers sit behind NAT and the ICE handshake needs help discovering a working candidate pair. |
The widget supports one entity, one data key. The default data key label is webrtcStreamUrl, but you can rename it to match any attribute name you’ve created on the device.
Troubleshooting
Section titled “Troubleshooting”Widget displays “Can’t reach the stream. Check the URL and try again.” The widget’s loading watchdog fired after 10 seconds without a successful start. Open browser DevTools → Network tab, reload the dashboard, and look at the request the widget made:
- A failed CORS preflight or
Access-Control-Allow-Originmismatch means the stream server isn’t allowing your dashboard’s origin. If you control the stream server, configure it to sendAccess-Control-Allow-Origin: *(or the specific dashboard origin) on stream responses. If you set this up yourself, see the matching item under Build a public stream URL → Troubleshooting. - A
404onindex.m3u8orwhepmeans the URL’s path doesn’t exist on the stream server. Double-check the path with whoever manages the stream. If you followed Build a public stream URL, the path segment must match anMTX_PATHS_*entry in yourdocker-compose.yml.
Mixed-content blocking. If the dashboard is served over HTTPS but the stream URL is http://, the browser blocks the request silently. The widget then shows the “no stream” placeholder. Use an HTTPS URL.
Was this helpful?