Fetch Weather Data via REST API
Use the REST API Call rule node to call the OpenWeatherMap API on a schedule and store outdoor temperature, humidity, and weather conditions as time series telemetry on the Building A asset.
Use case
Section titled “Use case”Building A has a known geographic location.
ThingsBoard:
- reads the
appidAPI key from the assigned customer’s server attributes - reads
latitude,longitude, andunitsfrom the asset’s server attributes - calls the OpenWeatherMap current weather endpoint on a fixed interval
- extracts temperature and humidity from the response
- saves them as telemetry keys on the asset
Step 1. Get an OpenWeatherMap API key
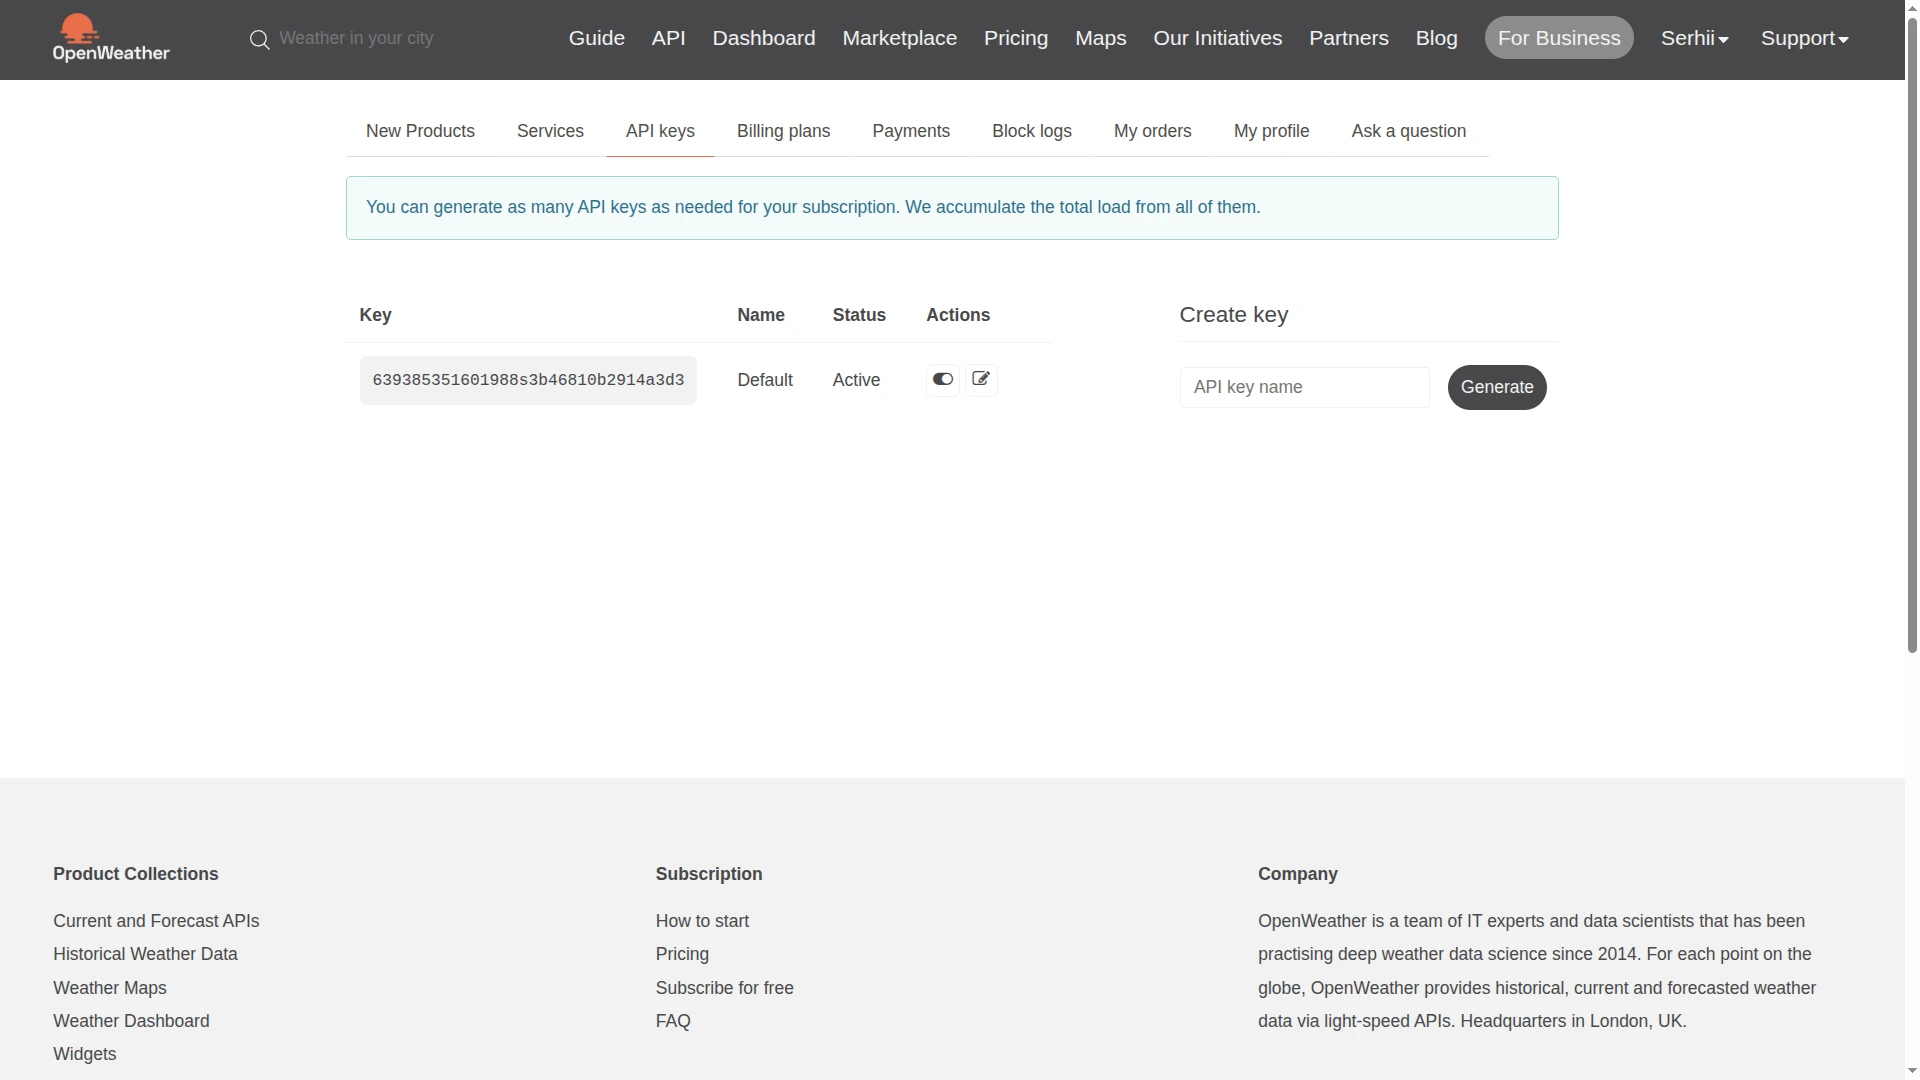
Section titled “Step 1. Get an OpenWeatherMap API key”In order to get weather data you should register on a website which will provide it. In this case OpenWeatherMap will be used.
After signing up there go to the API keys page to get your API key.
Step 2. Add API key to Customer A
Section titled “Step 2. Add API key to Customer A”Open Customer A ⇾ Attributes tab and add a server attribute:
- Key:
appid - Type:
String - Value: your OpenWeatherMap API key
Step 3. Create Asset under Customer A
Section titled “Step 3. Create Asset under Customer A”Go to Assets and create an asset:
- Name:
Building A - Asset profile:
building
Open Building A ⇾ Attributes tab and add the following Server attributes:
| Key | Type | Example |
|---|---|---|
latitude | Double | 59.338970597112066 |
longitude | Double | 18.057188573215196 |
units | String | metric (Celsius + m/s), imperial (Fahrenheit + mph), or empty for Kelvin |
Then, go to Customers ⇾ Customer A ⇾ Manage customer assets and click + Assign new asset. Select the Building A asset to assign to the customer, and click Assign.
Step 4. Create rule chain
Section titled “Step 4. Create rule chain”You can import a ready-made rule chain or build it manually.
Option 1. Import rule chain
-
Download the Outside Temperature/Humidity rule chain as a JSON file and import it into your instance.
Option 2. Create manually
- Create a new rule chain named
Outside Temperature/Humidity, open it, and add the following nodes:
Step 4.1. Generator node
Section titled “Step 4.1. Generator node”Add a Generator node connected to the Input node.
This node triggers a weather fetch on a fixed interval with the asset as the originator.
- Name:
Trigger Weather Fetch - Generation parameters:
- Generated messages limit:
100 - Generation frequency in seconds:
60seconds
- Generated messages limit:
- Originator:
- Originator type:
Asset - Asset:
Building A
- Originator type:
- Generate function:
return { msg: {}, metadata: {}, msgType: 'POST_TELEMETRY_REQUEST' };Step 4.2. Customer Attributes node
Section titled “Step 4.2. Customer Attributes node”Add the Customer Attributes node and connect it to a Generator node with a relation type Success.
This node will put customer attribute APPID into the metadata of message.
- Name:
Get Customer API Key - Mapping of customer’s:
Attributes - Attributes mapping:
- Source attribute key:
appid - Target key:
appid
- Source attribute key:
Step 4.3. Originator Attributes node
Section titled “Step 4.3. Originator Attributes node”Add an Originator Attributes node and connect it to the Customer Attributes node with relation type Success.
This node loads the building’s location attributes into message metadata.
- Name:
Get Asset Attributes - Server attributes:
latitude,longitude,units
The values become available as ${ss_latitude}, ${ss_longitude}, ${ss_units} in the next node’s URL pattern.
Step 4.4. REST API Call node
Section titled “Step 4.4. REST API Call node”Add a REST API Call node and connect it to the Originator Attributes node with relation type Success.
- Name:
Fetch Weather Data - Endpoint URL pattern:
https://api.openweathermap.org/data/2.5/weather?lat=${ss_latitude}&lon=${ss_longitude}&units=${ss_units}&appid=${appid}- Request method:
GET - Credential type:
Anonymous
On success (HTTP 2xx), the JSON response becomes the message body for the next node.
Step 4.5. Script Transformation node
Section titled “Step 4.5. Script Transformation node”Add a Transformation Script node and connect it to the REST API Call node with relation type Success.
This node extracts the relevant weather fields from the API response.
- Name:
Extract Weather Fields
var newMsg = {  "outsideTemp": msg.main.temp,  "outsideMaxTemp": msg.main.temp_max,  "outsideMinTemp": msg.main.temp_min,  "outsideHumidity": msg.main.humidity,};
return {msg: newMsg, metadata: metadata, msgType: msgType};
var newMsg = { "outsideTemp": msg.main.temp, "outsideMaxTemp": msg.main.temp_max, "outsideMinTemp": msg.main.temp_min, "outsideHumidity": msg.main.humidity,};
return {msg: newMsg, metadata: metadata, msgType: msgType};Step 4.6. Save Time Series node
Section titled “Step 4.6. Save Time Series node”Add a Save Time Series node and connect it to the Transformation Script node with relation type Success.
- Name:
Save Weather Telemetry
Step 4.7. Check node connections
Section titled “Step 4.7. Check node connections”- Trigger Weather Fetch ⇾
Success⇾ Get Customer API Key - Get Customer API Key ⇾
Success⇾ Get Asset Attributes - Get Asset Attributes ⇾
Success⇾ Fetch Weather Data - Fetch Weather Data ⇾
Success⇾ Extract Weather Fields - Extract Weather Fields ⇾
Success⇾ Save Weather Telemetry
Save the rule chain.
Step 5. Verify the result
Section titled “Step 5. Verify the result”Open Building A ⇾ Latest telemetry tab.
Within 60 seconds, the following keys should appear:
| Key | Description |
|---|---|
outsideTemp | Current temperature |
outsideHumidity | Relative humidity (%) |
outsideMaxTemp | Maximum temperature |
outsideMinTemp | Minimal temperature |
Download the pre-built dashboard as a JSON file and import it.
The Weather Dashboard displays Building A on the map, a table with humidity and temperature metrics, and real-time temperature and humidity graphs.
See also
Section titled “See also”- REST API Call node — full node reference
- Originator Attributes node — how to load entity attributes into message metadata
- Rule Engine — ThingsBoard Rule Engine overview
Was this helpful?