Custom Integration
Custom integrations always execute remotely from the main ThingsBoard instance and can use any transport protocol to communicate with devices. This guide demonstrates how to build a TCP-based custom integration that receives comma-separated sensor readings, converts them using an uplink data converter, and pushes the result to ThingsBoard.
Prerequisites
Section titled “Prerequisites”- A ThingsBoard PE instance (v2.4.1 or later) with Tenant Administrator access.
- Java 11+ and Maven installed locally to build the sample application.
ThingsBoard integration setup
Section titled “ThingsBoard integration setup”Create an uplink converter
Section titled “Create an uplink converter”Custom integrations use a generic uplink converter. The uplink converter parses incoming device messages and maps them to ThingsBoard telemetry. In this example, a device transmits three readings as a comma-separated string ("25,40,94" — temperature, humidity, and battery level). The decoder splits the string and converts each value to a number.
The decoder function used in this tutorial:
/** Decoder **/
// decode payload to stringvar decodedString = decodeToString(payload);// remove unnecessary ["] and split by [,] to get an arrayvar payloadArray = decodedString.replace(/"/g, "").split(',');var result = {    deviceName: "Device A",    deviceType: "type",    telemetry: {        // get each reading from the array and convert the string value to a number        temperature: toInt(payloadArray[0]),        humidity: toInt(payloadArray[1]),        batteryLevel: toInt(payloadArray[2])    },    attributes: {}};
/** Helper functions 'decodeToString' and 'decodeToJson' are already built-in **/
return result;
/** Decoder **/
// decode payload to stringvar decodedString = decodeToString(payload);// remove unnecessary ["] and split by [,] to get an arrayvar payloadArray = decodedString.replace(/"/g, "").split(',');var result = { deviceName: "Device A", deviceType: "type", telemetry: { // get each reading from the array and convert the string value to a number temperature: Number(payloadArray[0]), humidity: Number(payloadArray[1]), batteryLevel: Number(payloadArray[2]) }, attributes: {}};
/** Helper functions **/
function decodeToString(payload) { return String.fromCharCode.apply(String, payload);}
function decodeToJson(payload) { // convert payload to string. var str = decodeToString(payload); // parse string to JSON var data = JSON.parse(str); return data;}
return result;Create a downlink converter
Section titled “Create a downlink converter”The downlink converter encodes a Rule Engine message — such as an RPC command or shared attribute update — into the payload format expected by your custom integration. It is optional: skip it if the integration only ingests data into ThingsBoard.
The encoder function receives four parameters and must return a result object:
| Parameter | Description |
|---|---|
msg | JSON payload of the Rule Engine message |
msgType | Message type, e.g. ATTRIBUTES_UPDATED, POST_TELEMETRY_REQUEST |
metadata | Key-value pairs with additional data about the message |
integrationMetadata | Key-value pairs defined in the integration configuration |
The returned object must contain:
contentType—JSON,TEXT, orBINARY(Base64-encoded string)data— the encoded payload stringmetadata— optional key-value pairs forwarded to the integration
Encoder function example:
function encoder(msg, metadata, msgType, integrationMetadata) {  // Encode downlink data from incoming Rule Engine message
  /** Encoder **/
  // Process data from incoming message and metadata  var data = {};  data.tmpFreq = msg.temperatureUploadFrequency;  data.humFreq = msg.humidityUploadFrequency;  data.deviceSerialNumber = metadata['ss_serialNumber'];
  // Result object with encoded downlink payload  var result = {    // downlink data content type: JSON, TEXT or BINARY (base64 format)    contentType: 'JSON',
    // downlink data    data: JSON.stringify(data),
    // Optional metadata object presented in key/value format    metadata: {      topic: metadata['deviceType'] + '/' + metadata['deviceName'] + '/upload'    }  };
  return result;}
For the full downlink converter reference — including the Library catalog, test function, and rule chain setup — see Downlink data converter.
Create the integration
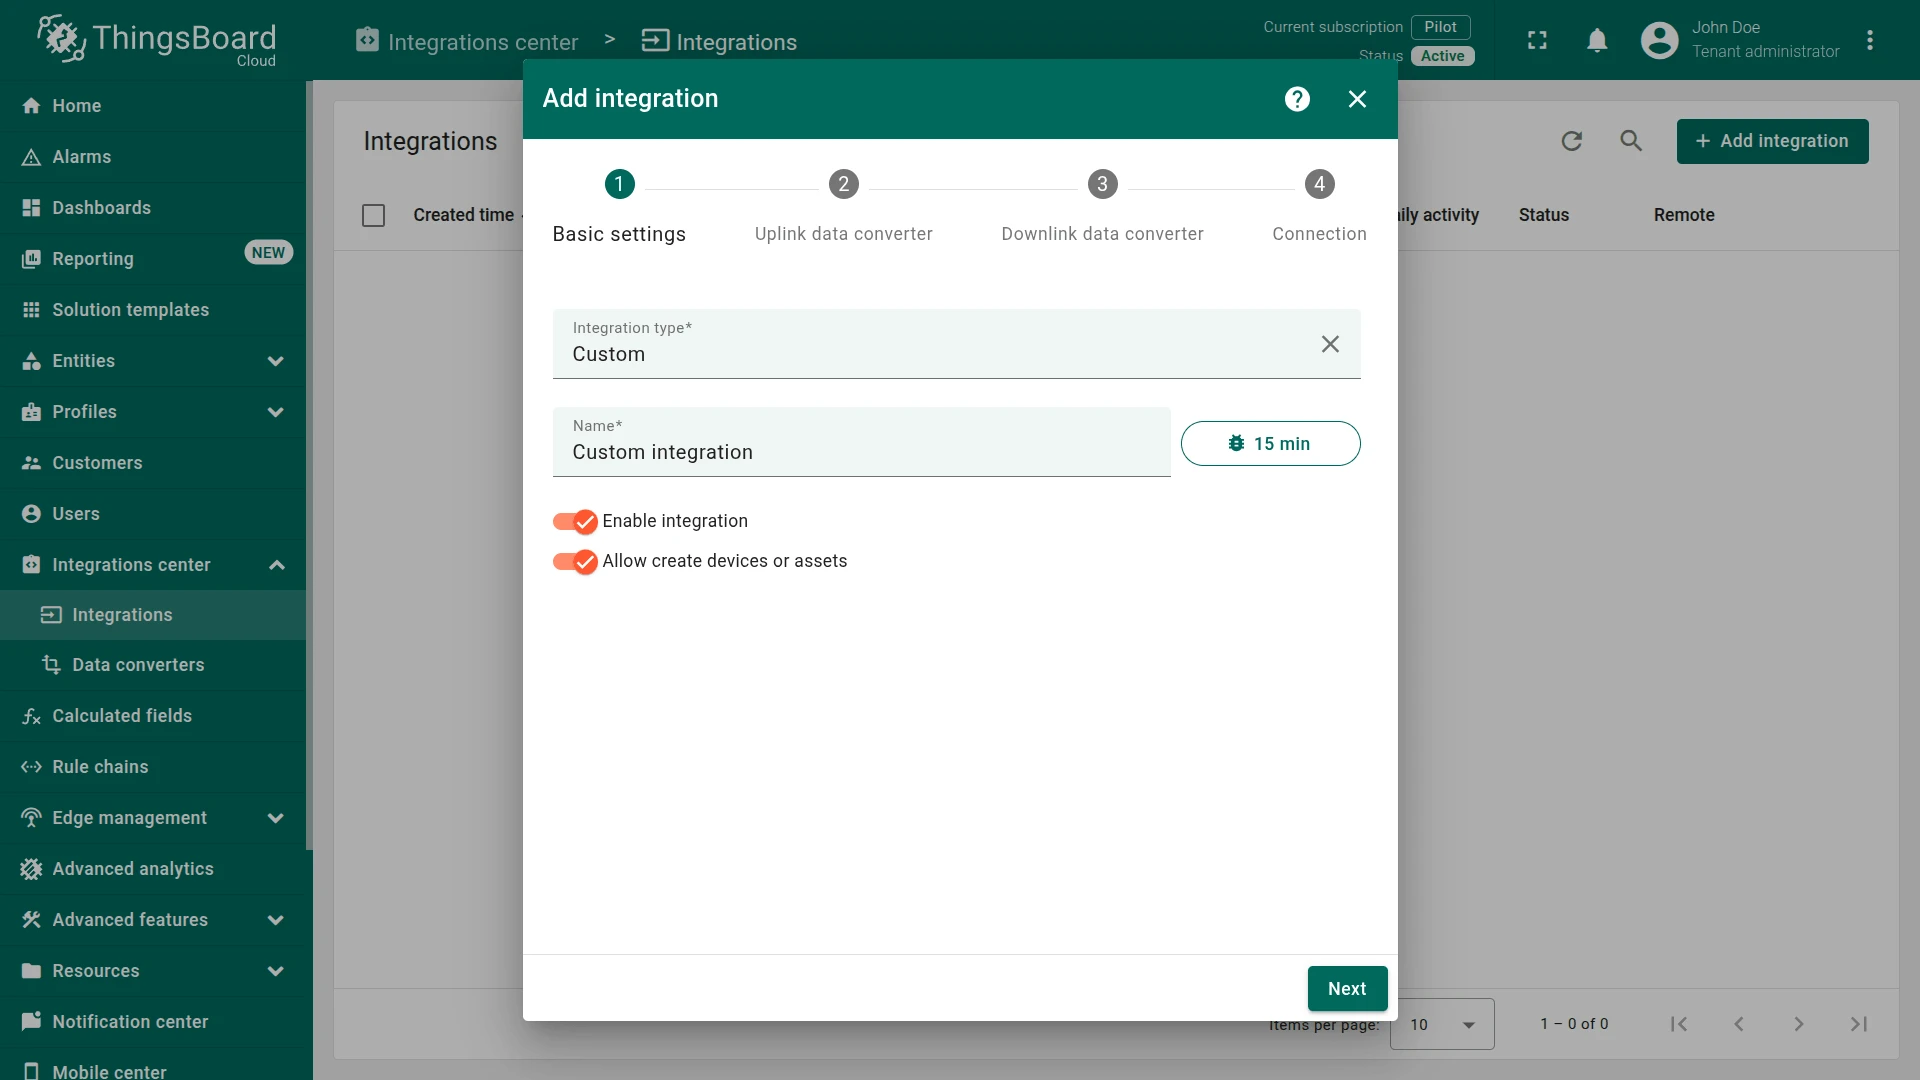
Section titled “Create the integration”- Go to Integrations center ⇾ Integrations and click + Add integration. Set type to Custom, enter a name, and click Next.
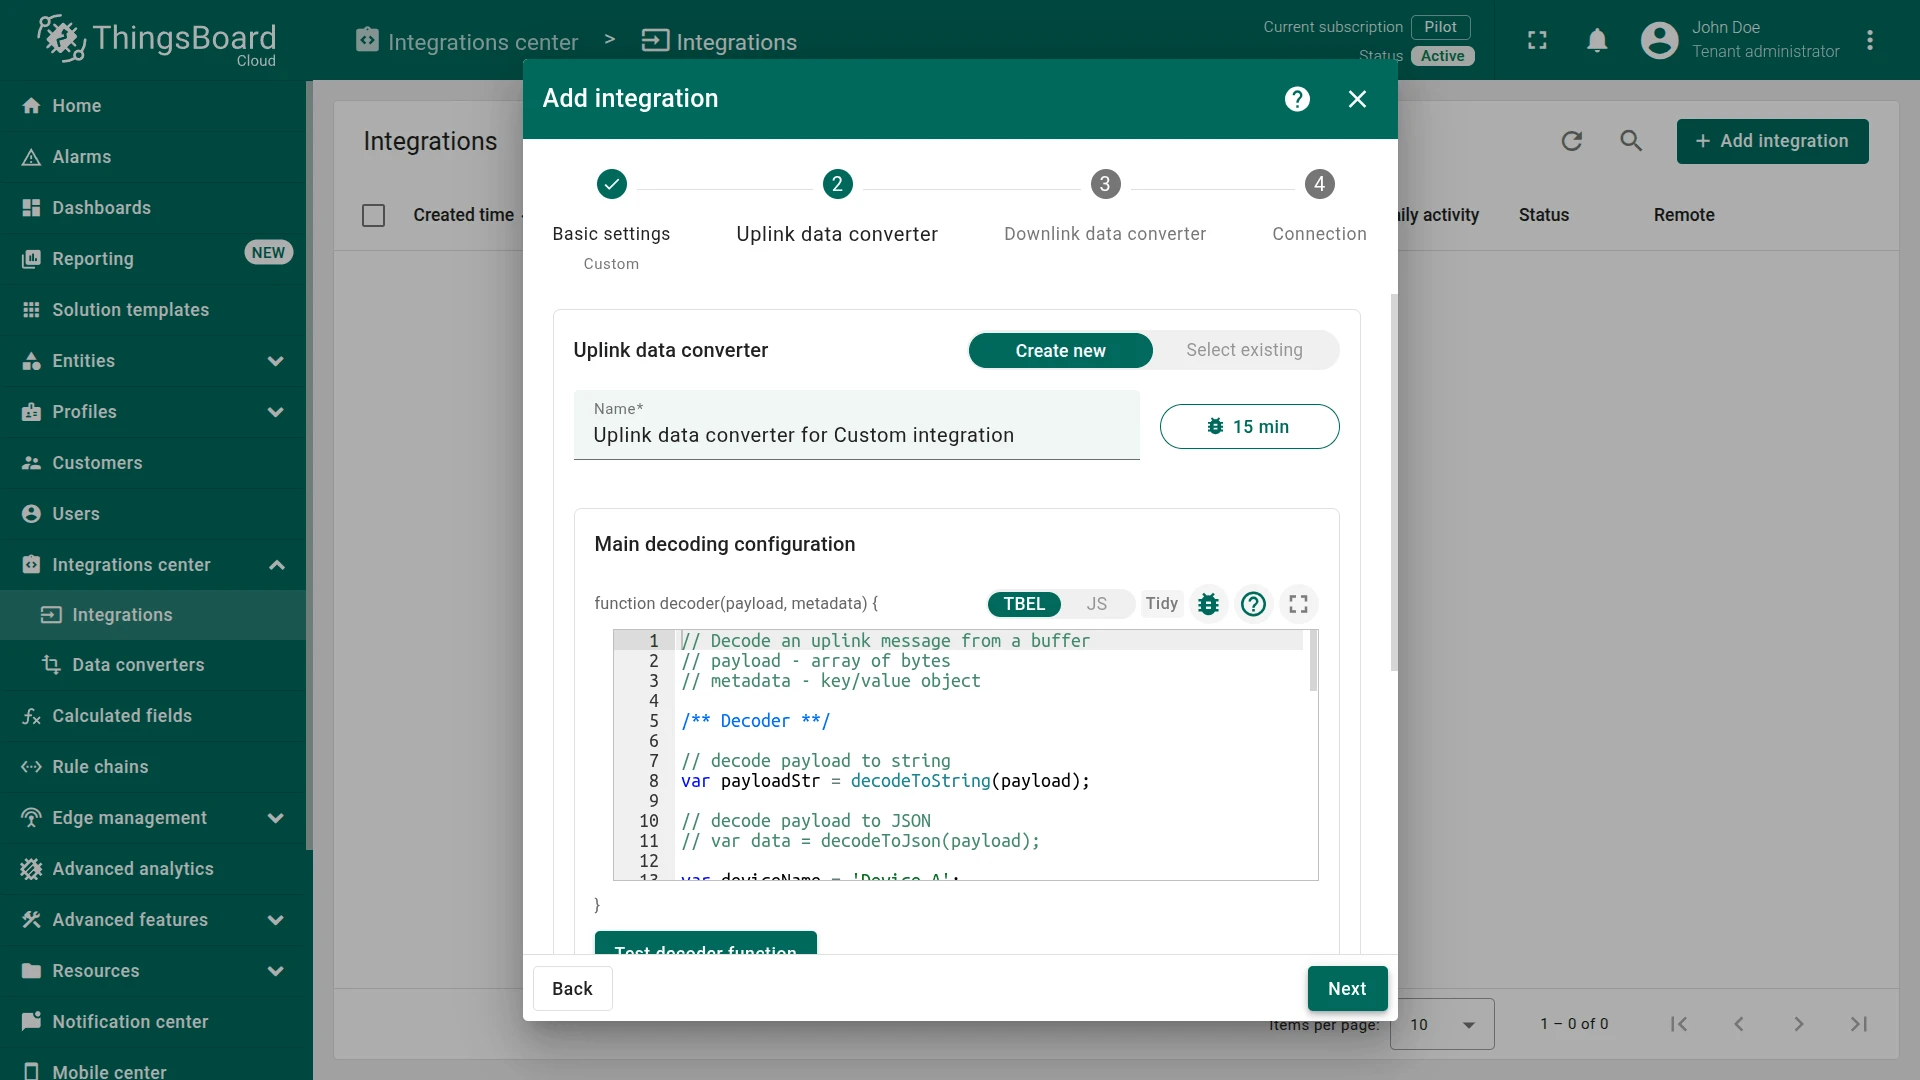
- Uplink data converter: click Create new, enter a converter name, paste the decoder function from the section above, and click Next. Use the Test decoder function button to validate the decoder output before proceeding.
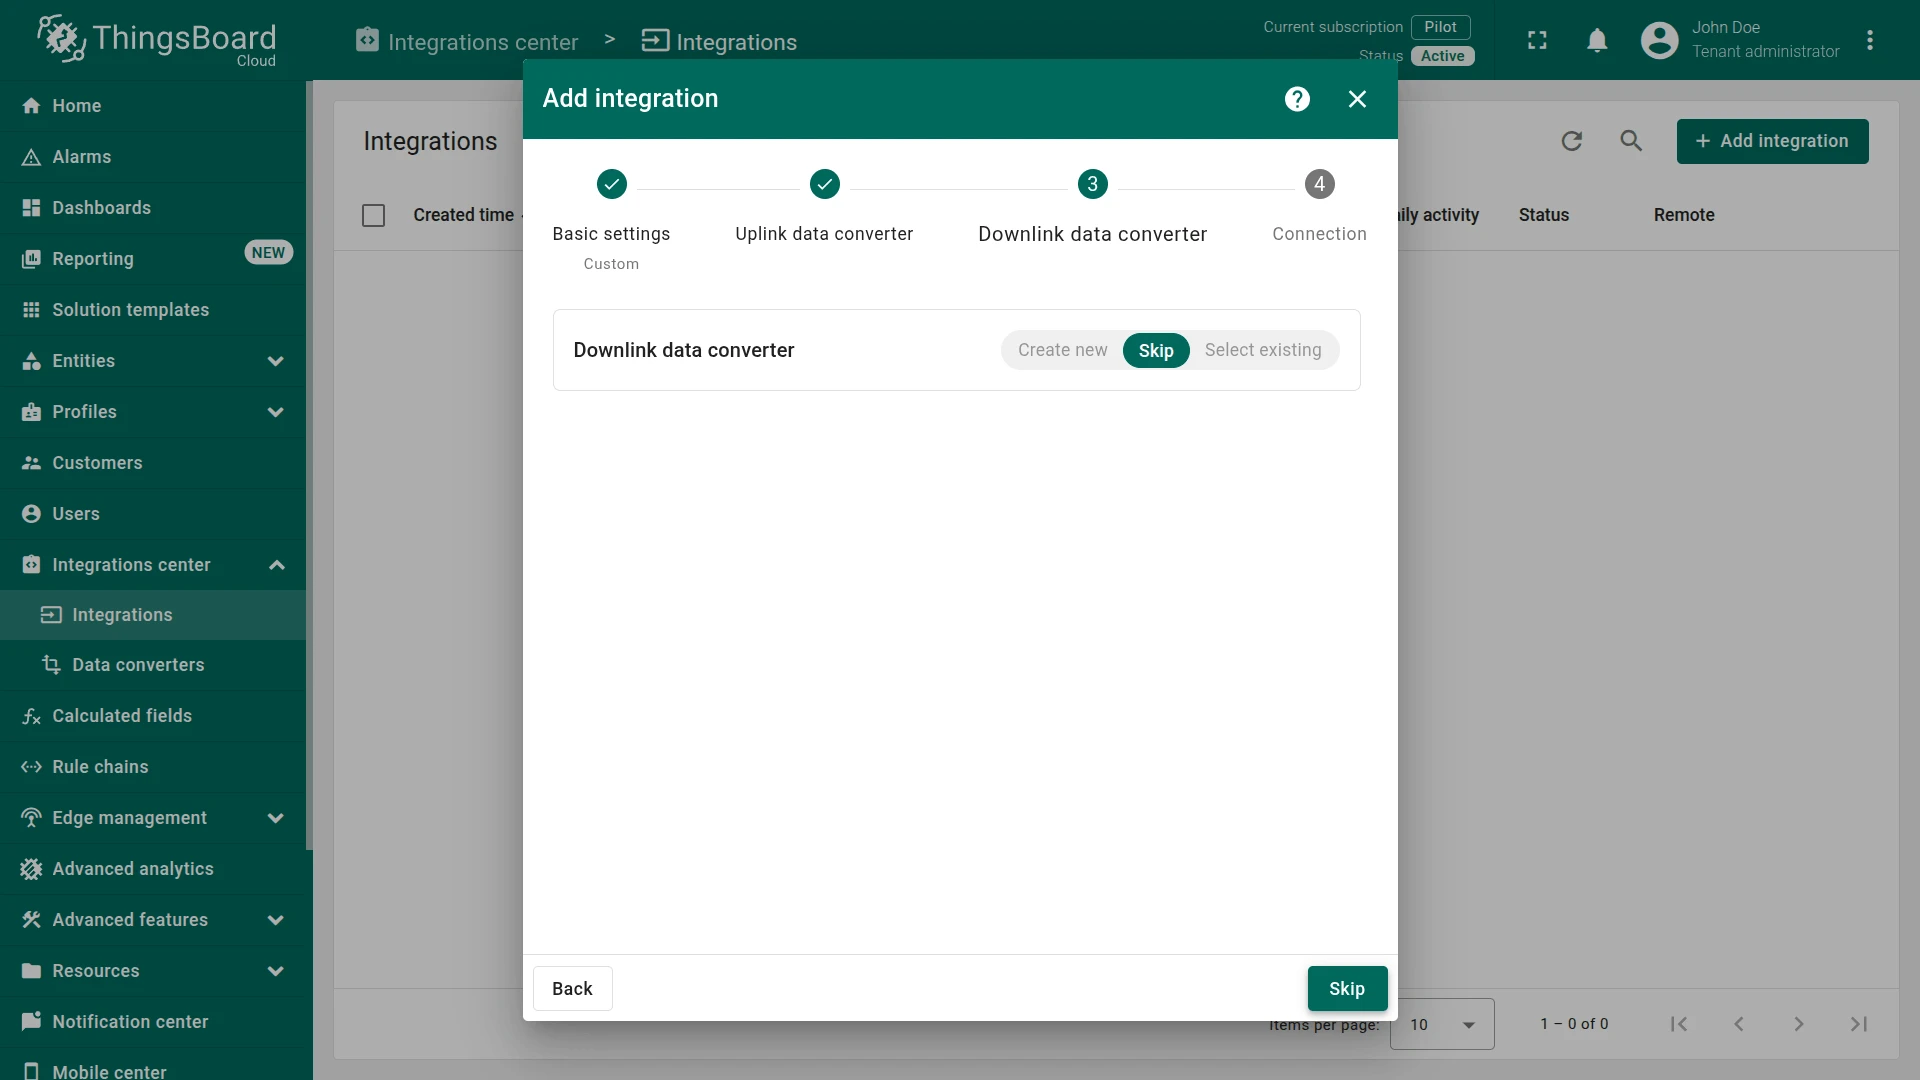
- Downlink data converter: click Skip if you do not need to send commands to devices. To enable downlinks, click Create new instead, enter a name, and implement the encoder function (see template above).
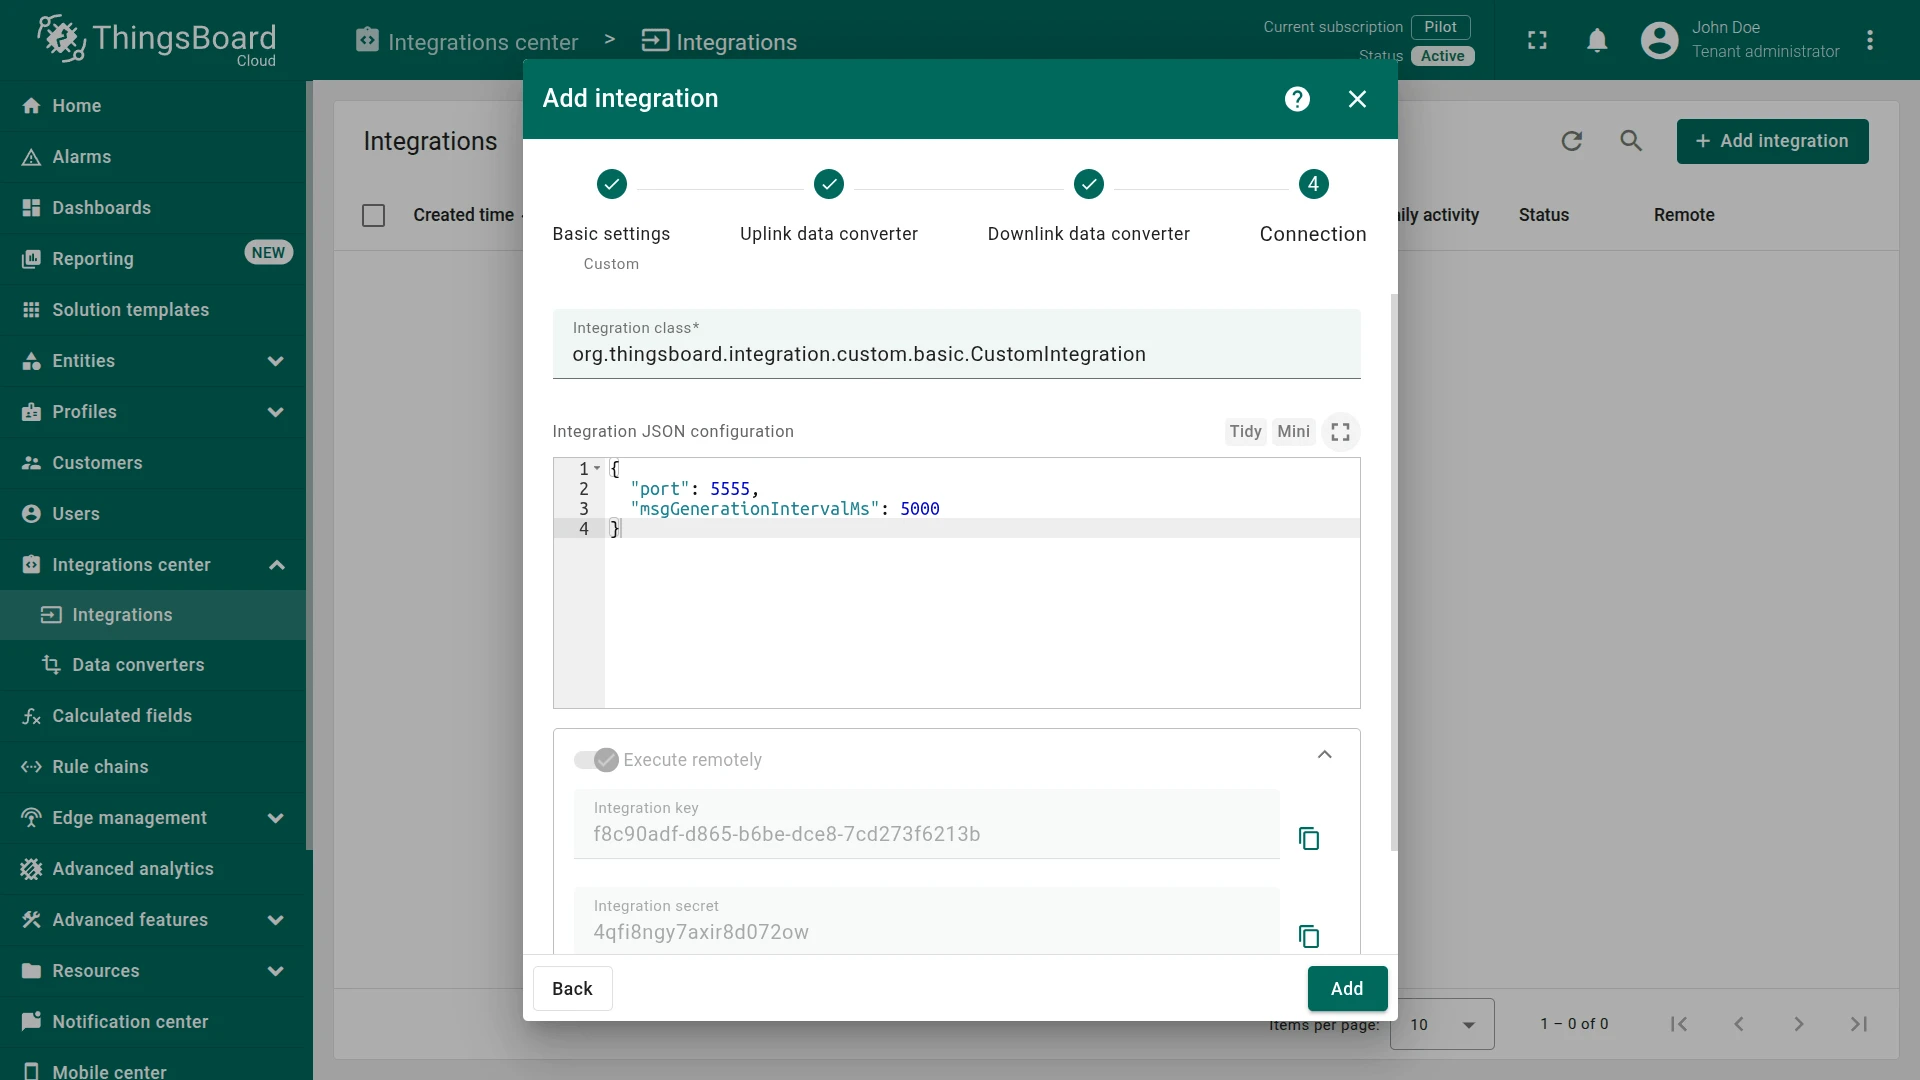
- Connection: enter the Integration class and Integration JSON configuration (see values below), then click Add. Once saved, copy the Integration Key and Integration Secret — you will need them to configure the remote integration application.
Use the following values in the Connection step:
Integration class:
org.thingsboard.integration.custom.basic.CustomIntegrationIntegration JSON configuration:
{ "port": 5555, "msgGenerationIntervalMs": 5000}port— TCP port the integration will bind to.msgGenerationIntervalMs— interval (in milliseconds) at which the built-in client emulator sends test messages.
Build and run the integration application
Section titled “Build and run the integration application”The sample application is available on GitHub at github.com/thingsboard/remote-integration-example. It uses Netty for TCP communication and gRPC to connect to ThingsBoard.
Maven dependencies:
<!-- API ThingsBoard provides to create custom integration --><dependency> <groupId>org.thingsboard.common.integration</groupId> <artifactId>remote-integration-api</artifactId> <version>${thingsboard.version}</version></dependency><!-- Netty for TCP client-server implementation --><dependency> <groupId>io.netty</groupId> <artifactId>netty-all</artifactId> <version>${netty.version}</version></dependency><!-- gRPC transport between remote integration and ThingsBoard --><dependency> <groupId>io.grpc</groupId> <artifactId>grpc-netty</artifactId> <version>${grpc.version}</version></dependency>Clone the repository, then build:
mvn clean installBefore starting the application, set the Integration Key and Integration Secret (copied from the Connection step) in tb-remote-integration.yml:
integration:  routingKey: "${TB_INTEGRATION_ROUTING_KEY:YOUR_ROUTING_KEY}"  secret: "${TB_INTEGRATION_SECRET:YOUR_SECRET}"
thingsboard:  host: "${THINGSBOARD_GW_HOST:localhost}"  port: "${THINGSBOARD_GW_PORT:9090}"
How the integration works:
- The integration starts a TCP server on the configured port.
- A built-in client emulator connects and sends
Hello to ThingsBoard!with the device name. - The server responds with
Hello from ThingsBoard!and marks the session as initialized. - The emulator starts sending auto-generated comma-separated readings every
msgGenerationIntervalMsmilliseconds. - Each message is passed to the uplink converter, and the resulting telemetry is pushed to ThingsBoard.
See also
Section titled “See also”Was this helpful?