Google Cloud Pub/Sub Integration
Google Cloud Pub/Sub is a fully managed publish/subscribe messaging service. The ThingsBoard Pub/Sub integration connects to a GCP pull subscription as a subscriber: it reads messages published to a topic, decodes them with an uplink converter, and stores the resulting telemetry and attributes in ThingsBoard.
Architecture
Section titled “Architecture”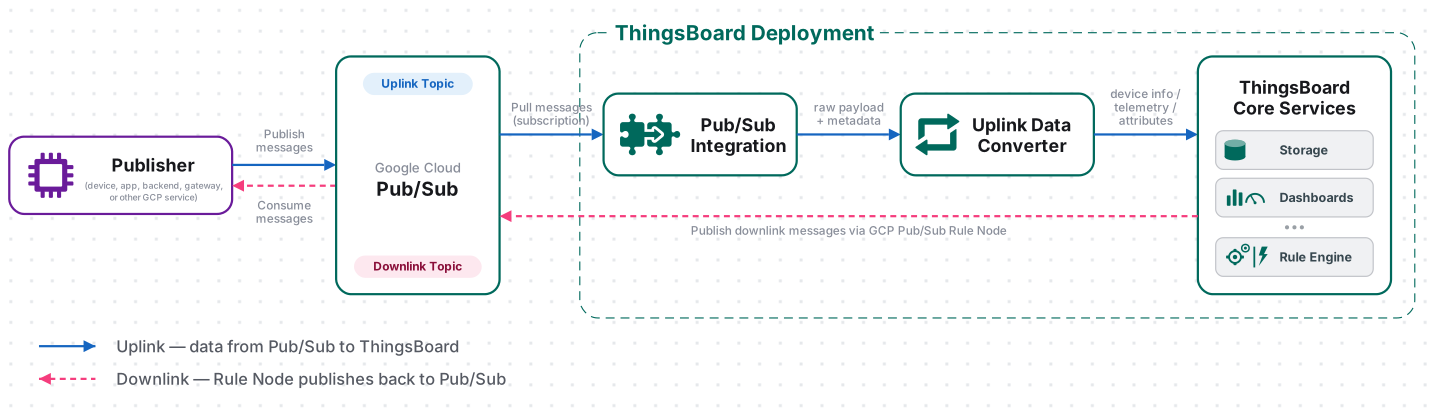
A device or cloud service publishes a message to a Pub/Sub topic, and the message is delivered to the pull subscription that ThingsBoard consumes. The integration reads the message and forwards it to the uplink converter, which decodes the payload into telemetry and attributes, and the ThingsBoard Core Service stores the data, provisioning the device automatically on the first message.
Prerequisites
Section titled “Prerequisites”Before creating the integration, ensure:
- You have access to ThingsBoard or ThingsBoard Cloud with integration functionality enabled for your tenant.
- You have permissions to create integrations and data converters.
- You have a Google Cloud project with the Cloud Pub/Sub API enabled.
- You can create Pub/Sub topics, subscriptions, and service accounts in that project (or someone can provide them to you).
Set Up Google Cloud Pub/Sub
Section titled “Set Up Google Cloud Pub/Sub”Prepare the topic, subscription, and service account in the Google Cloud Console before creating the integration in ThingsBoard.
Enable the Cloud Pub/Sub API
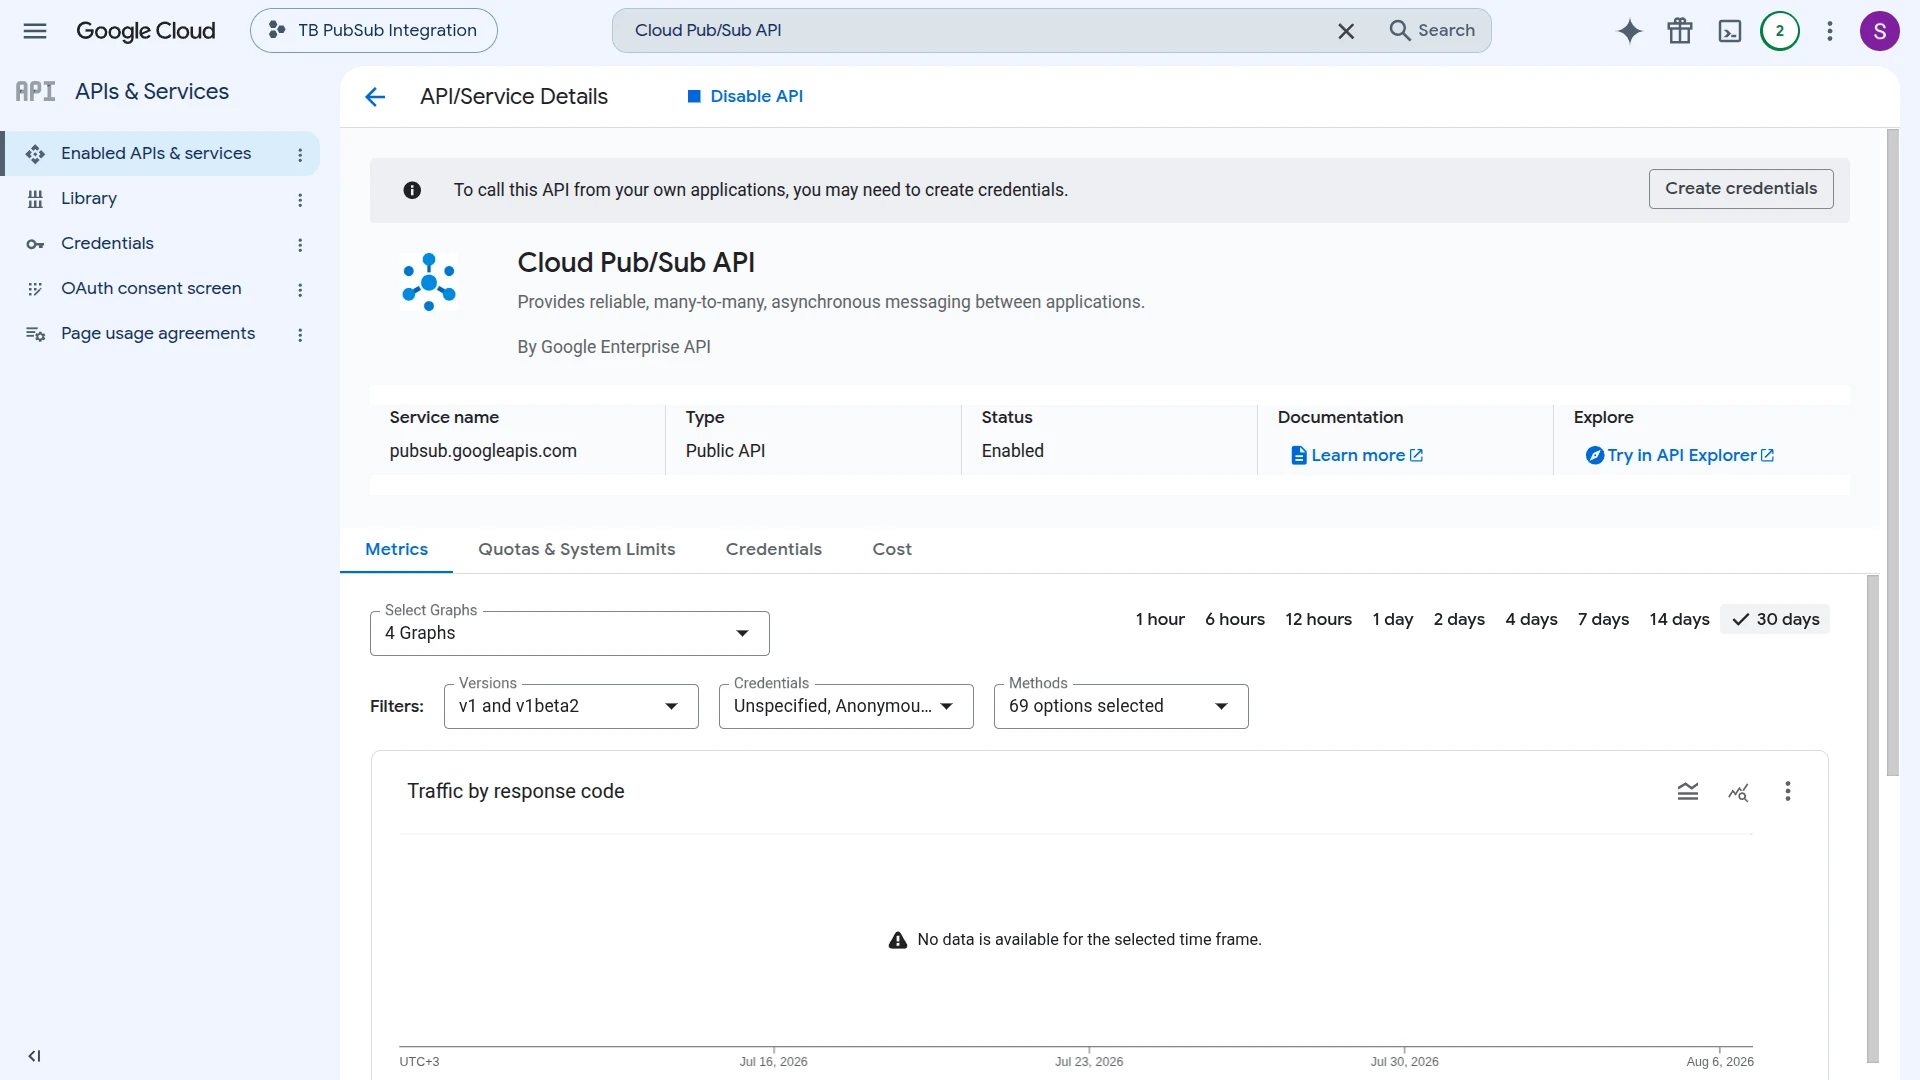
Section titled “Enable the Cloud Pub/Sub API”- Open your GCP project and click Search in the top toolbar, then search for Cloud Pub/Sub API.
- Select Cloud Pub/Sub API from the search results.
- On the Cloud Pub/Sub API page, click Enable if not already enabled.
- Once enabled, the API details page shows Status: Enabled.
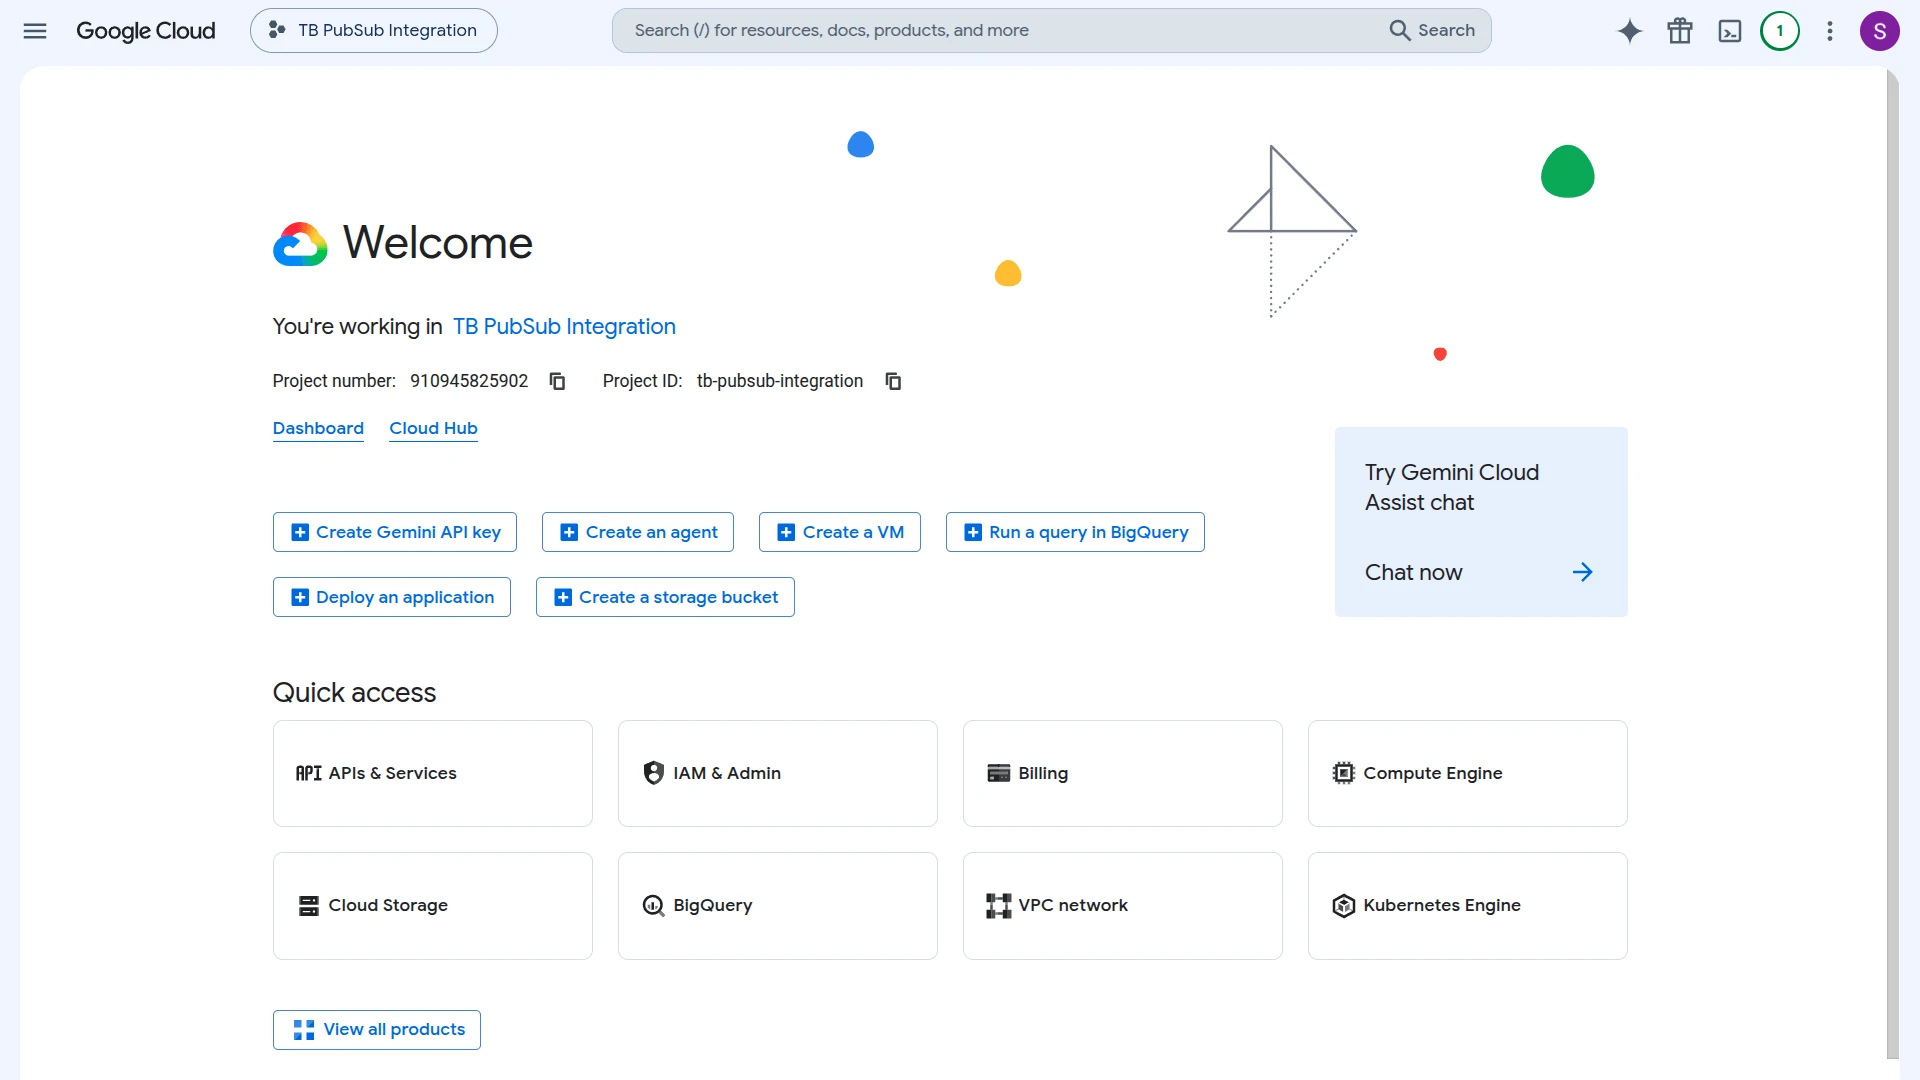
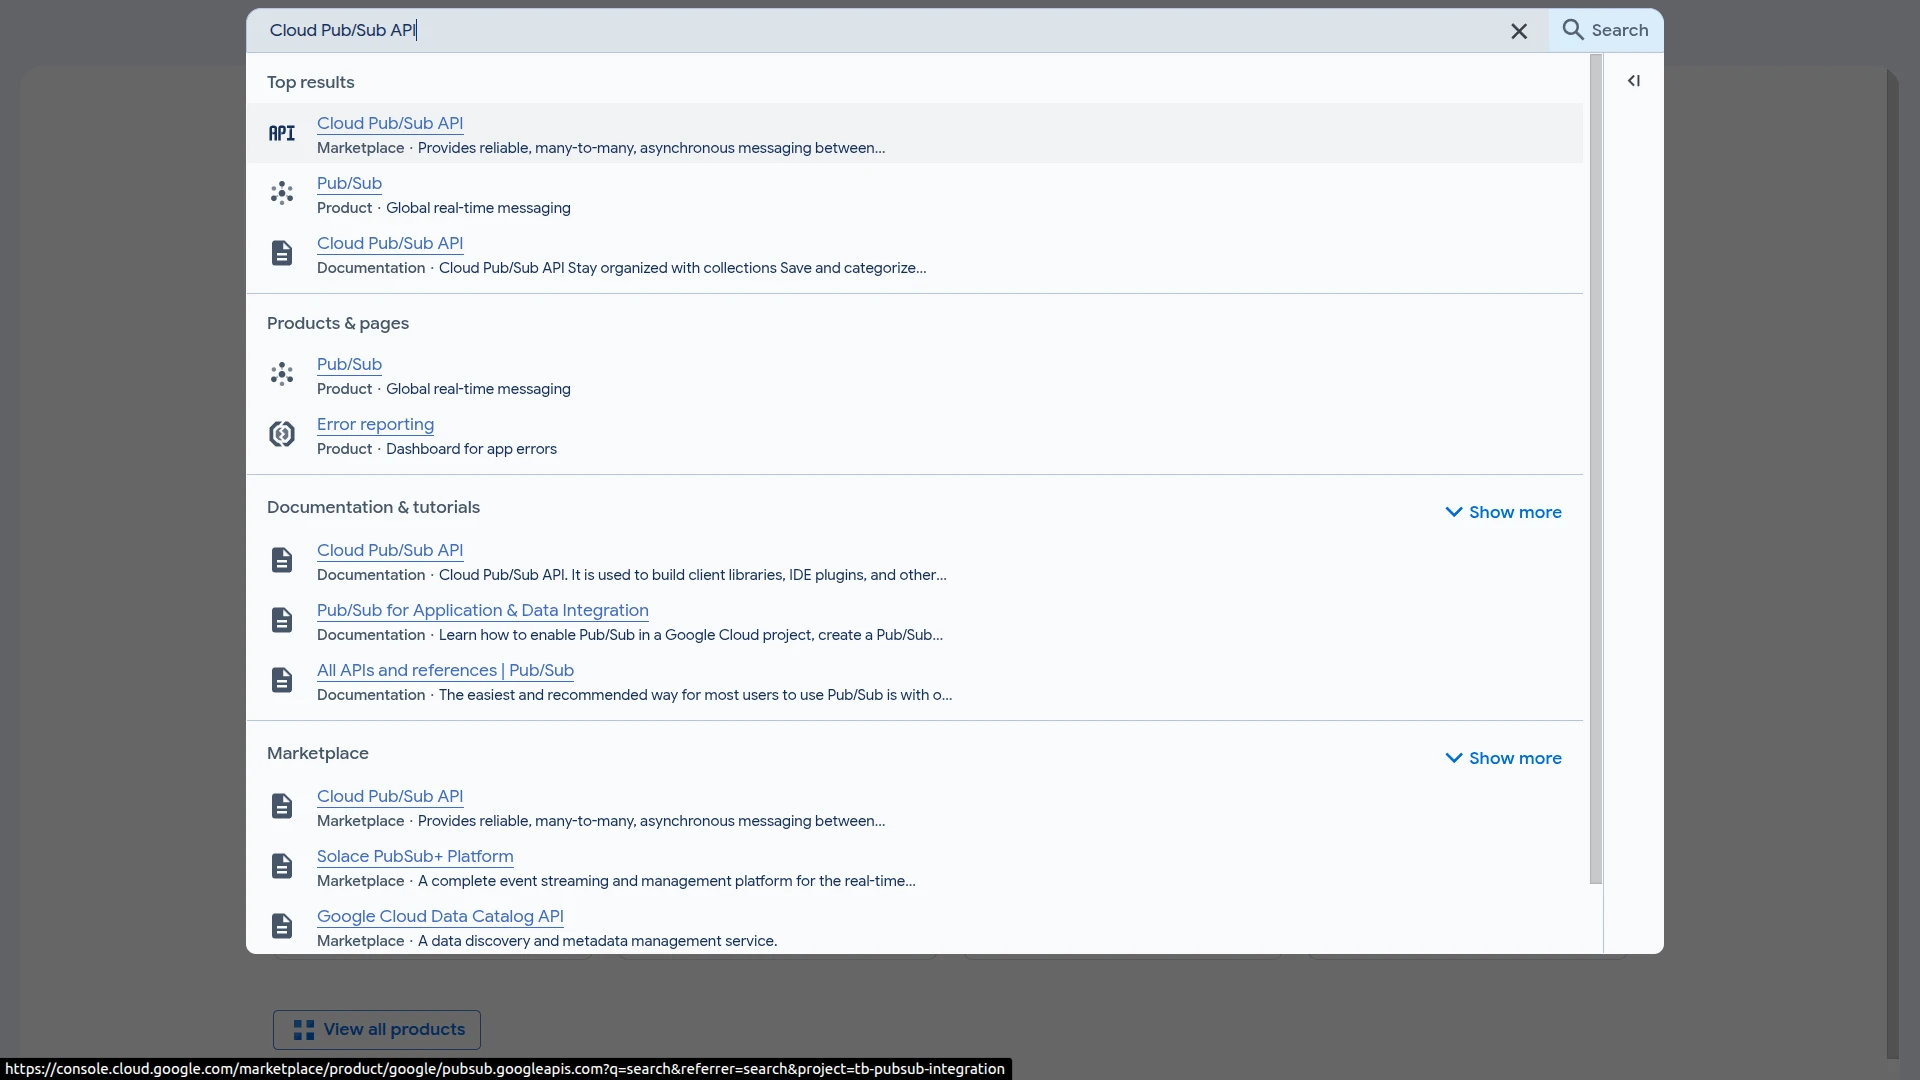
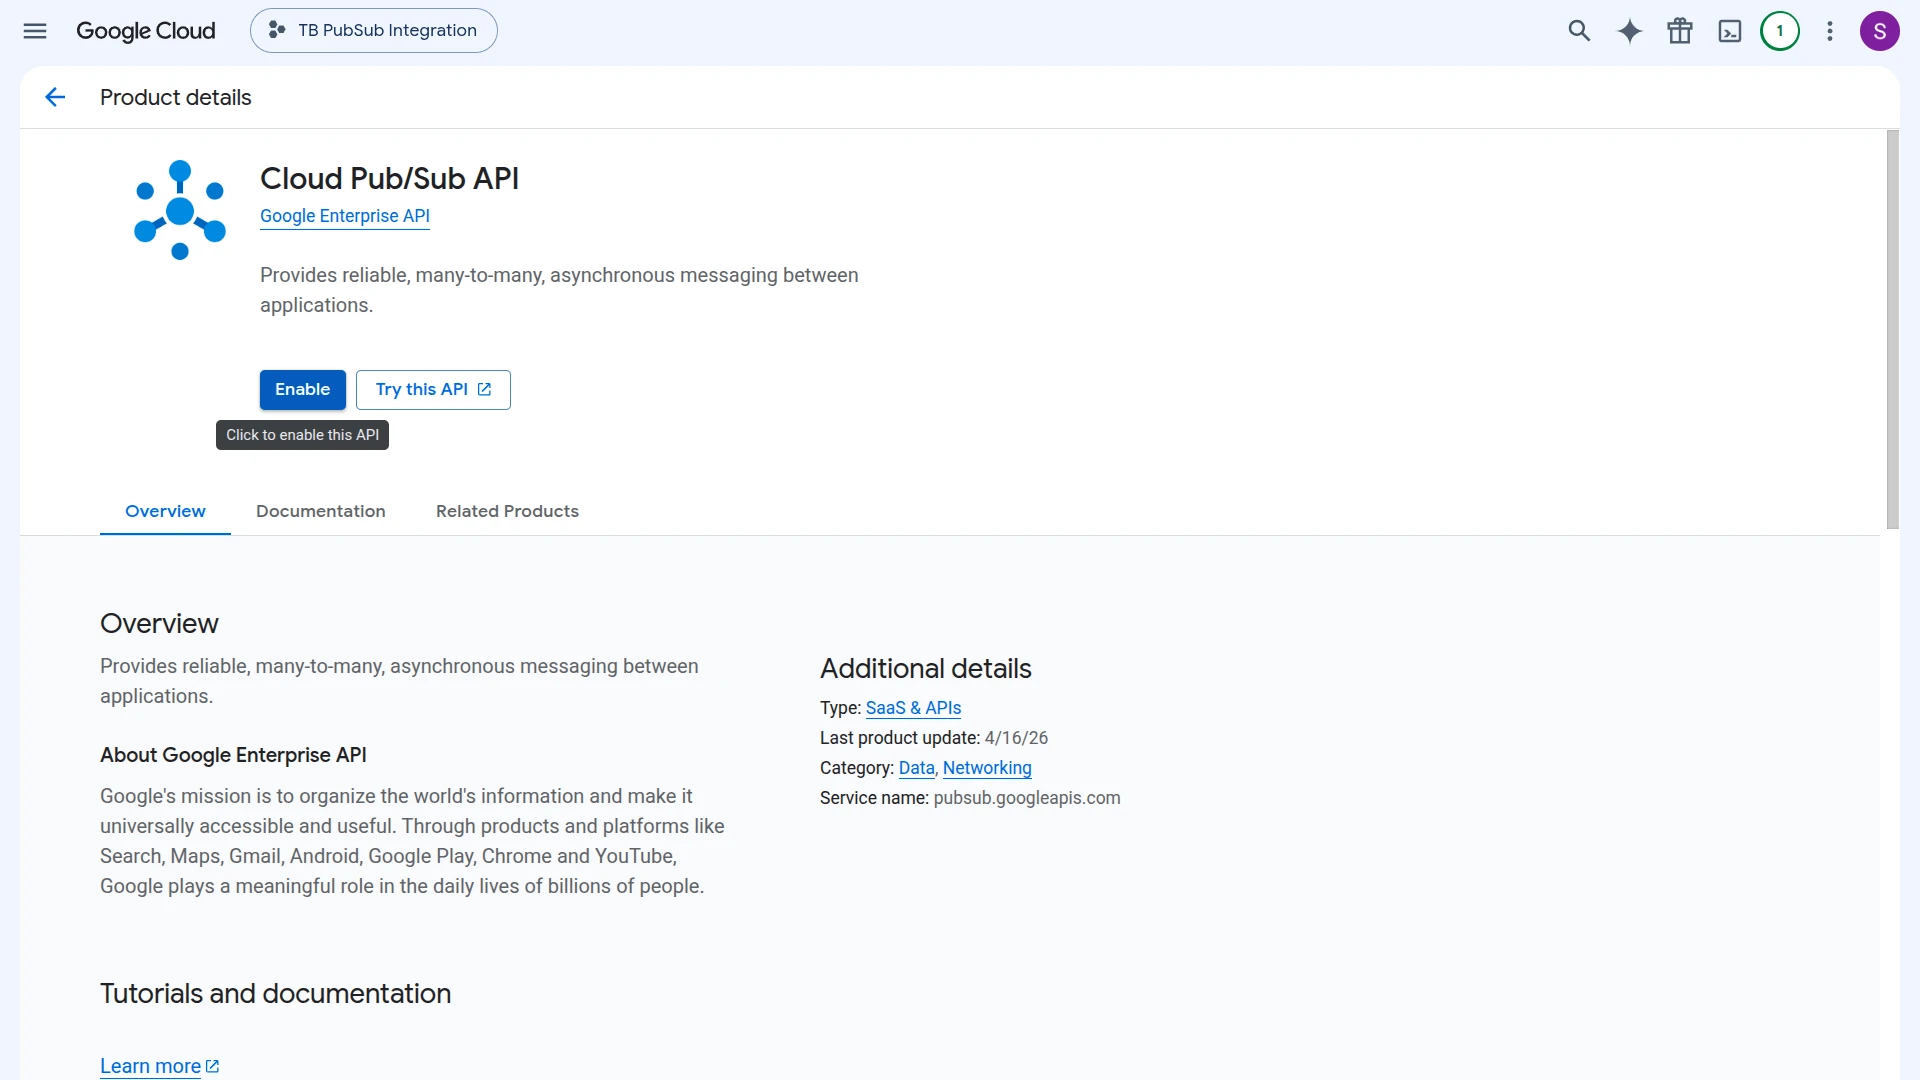
Create the Uplink Topic and Subscription
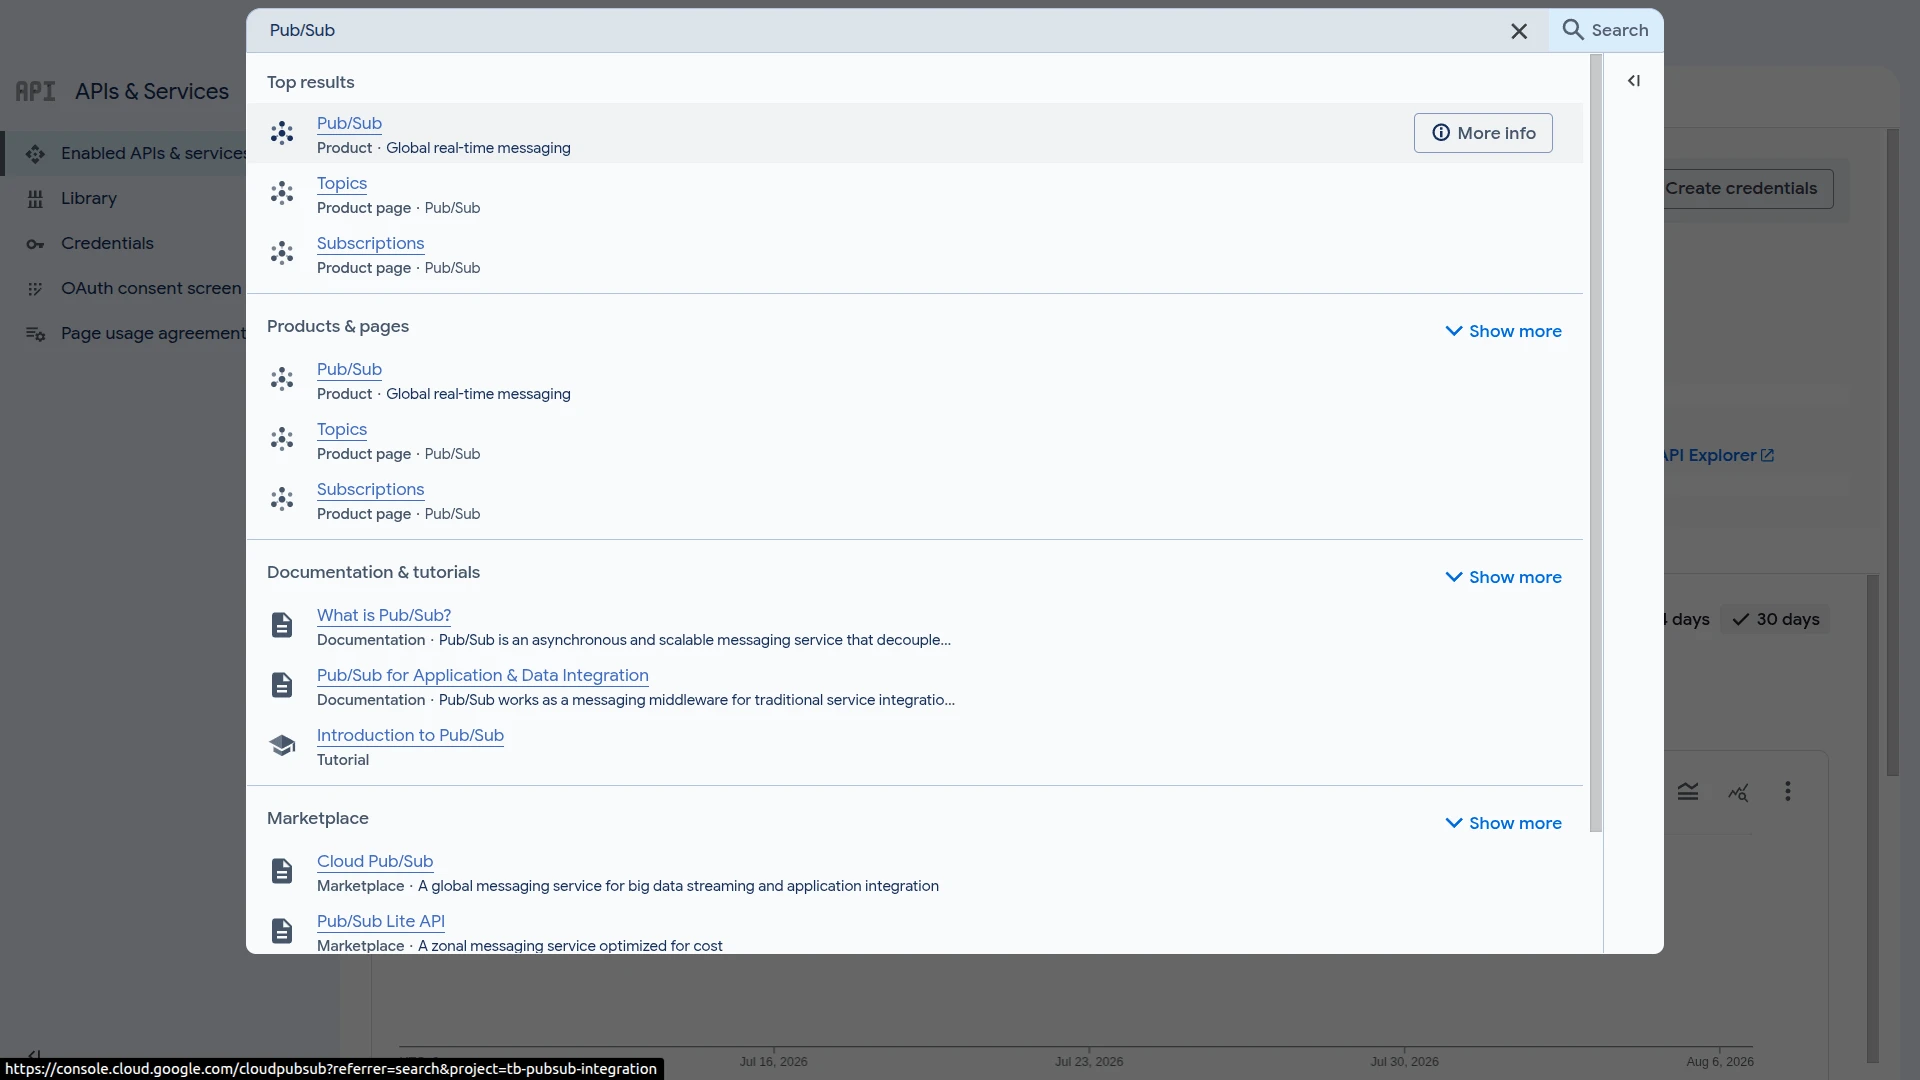
Section titled “Create the Uplink Topic and Subscription”- Click Search in the top toolbar, search for Pub/Sub, and select Pub/Sub from the results.
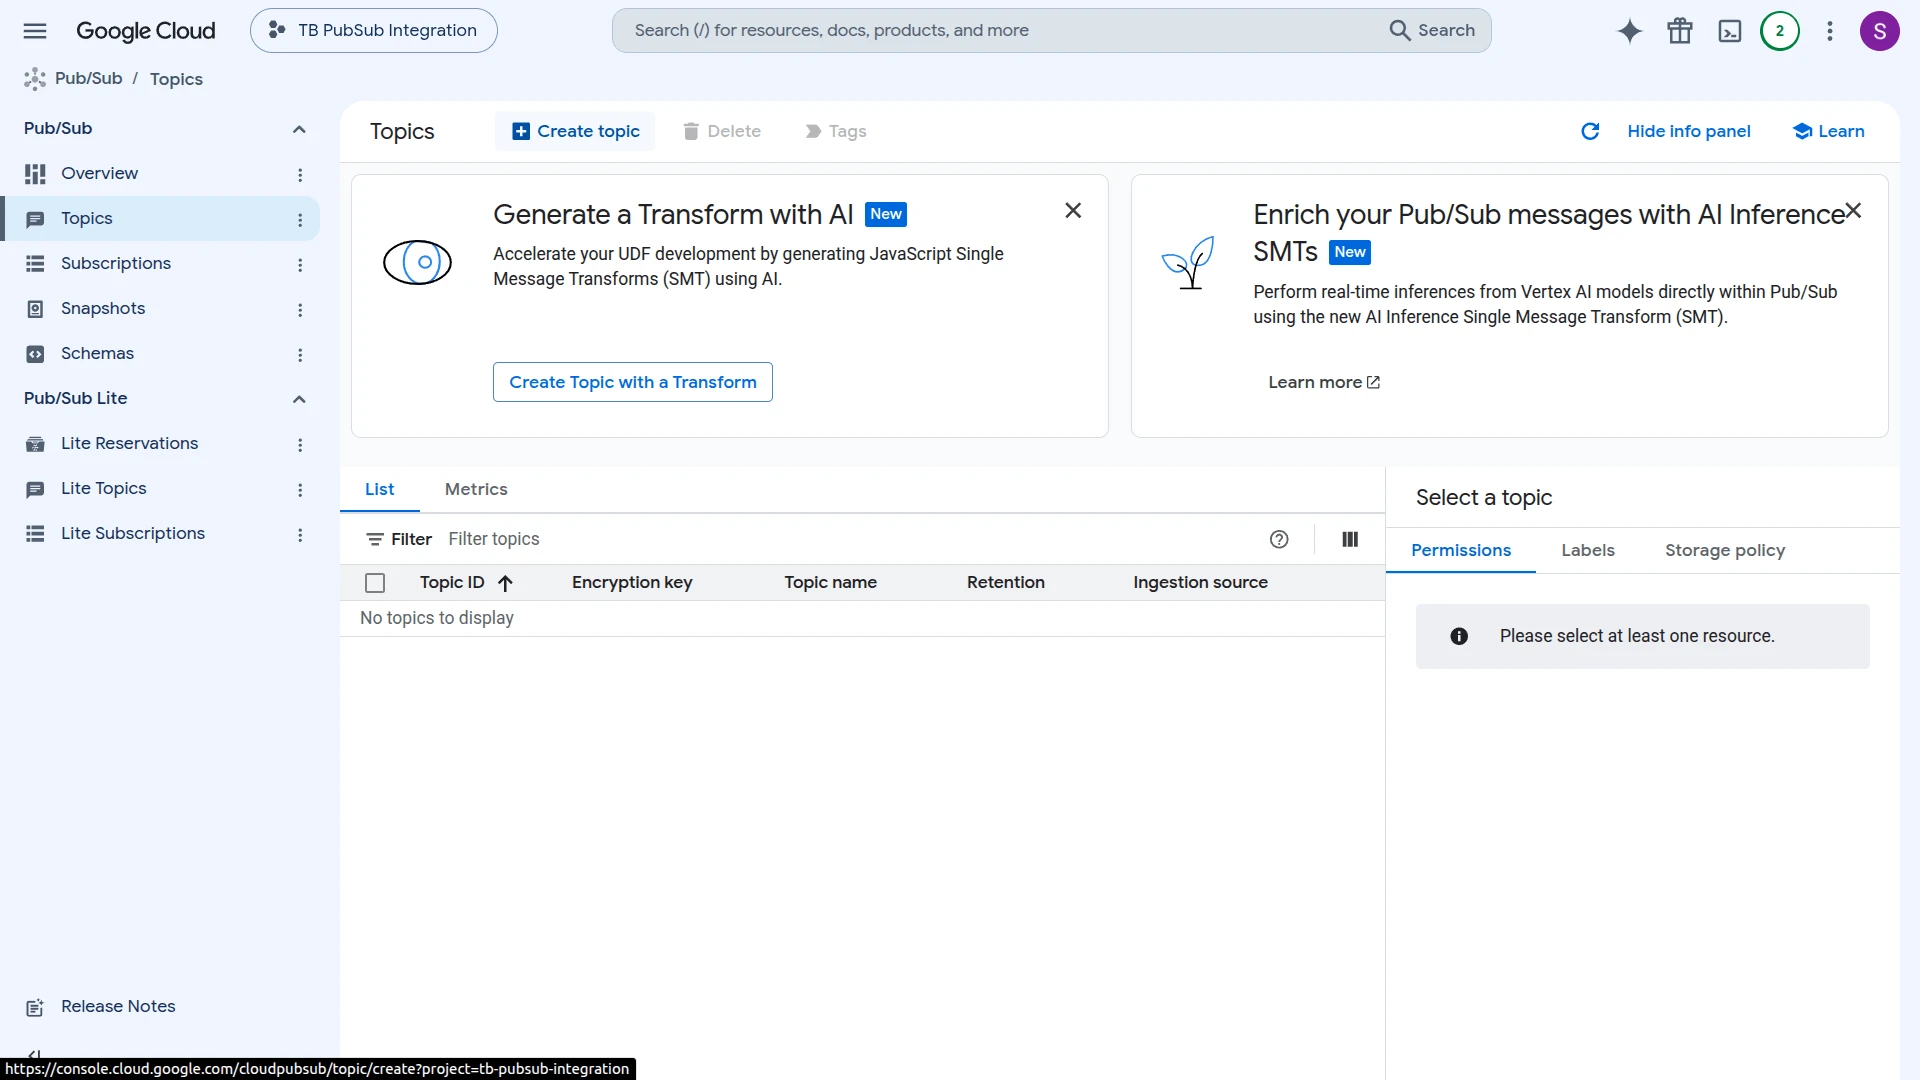
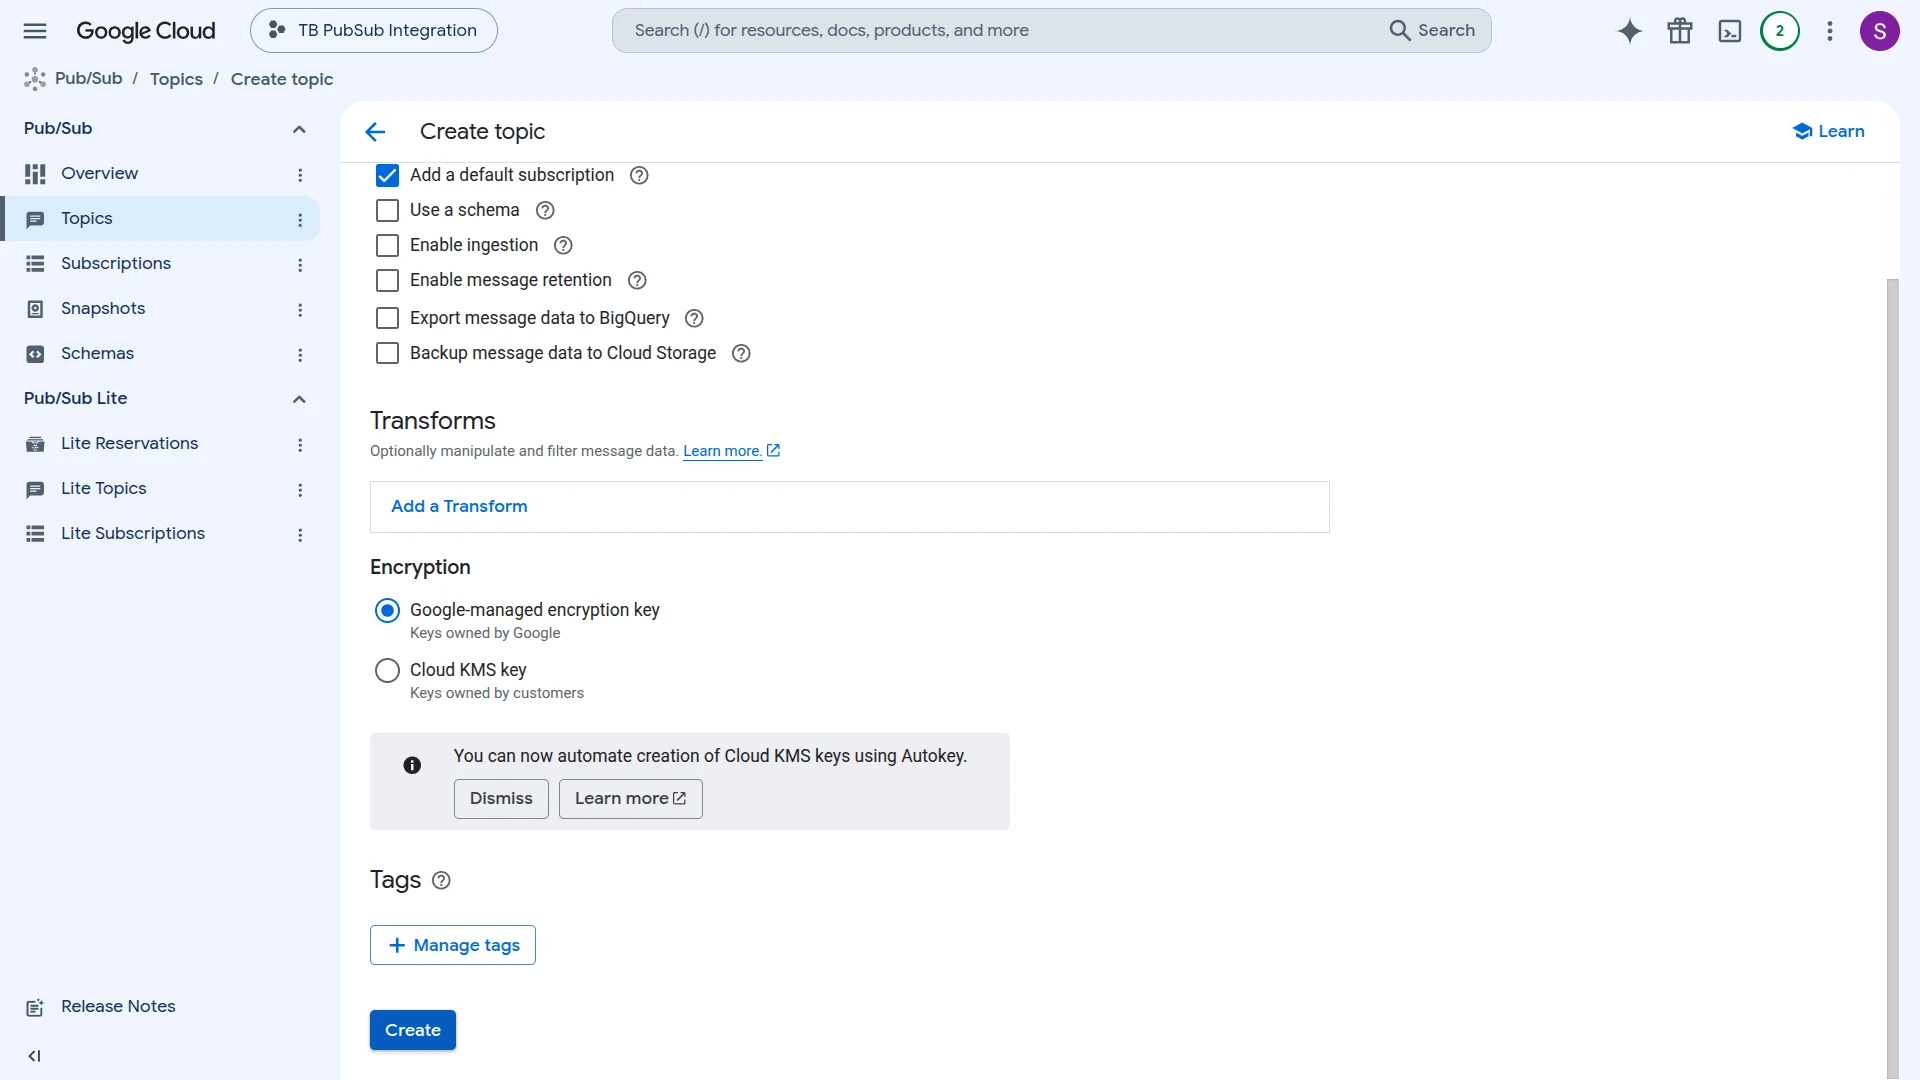
- Go to the Topics page and click Create topic.
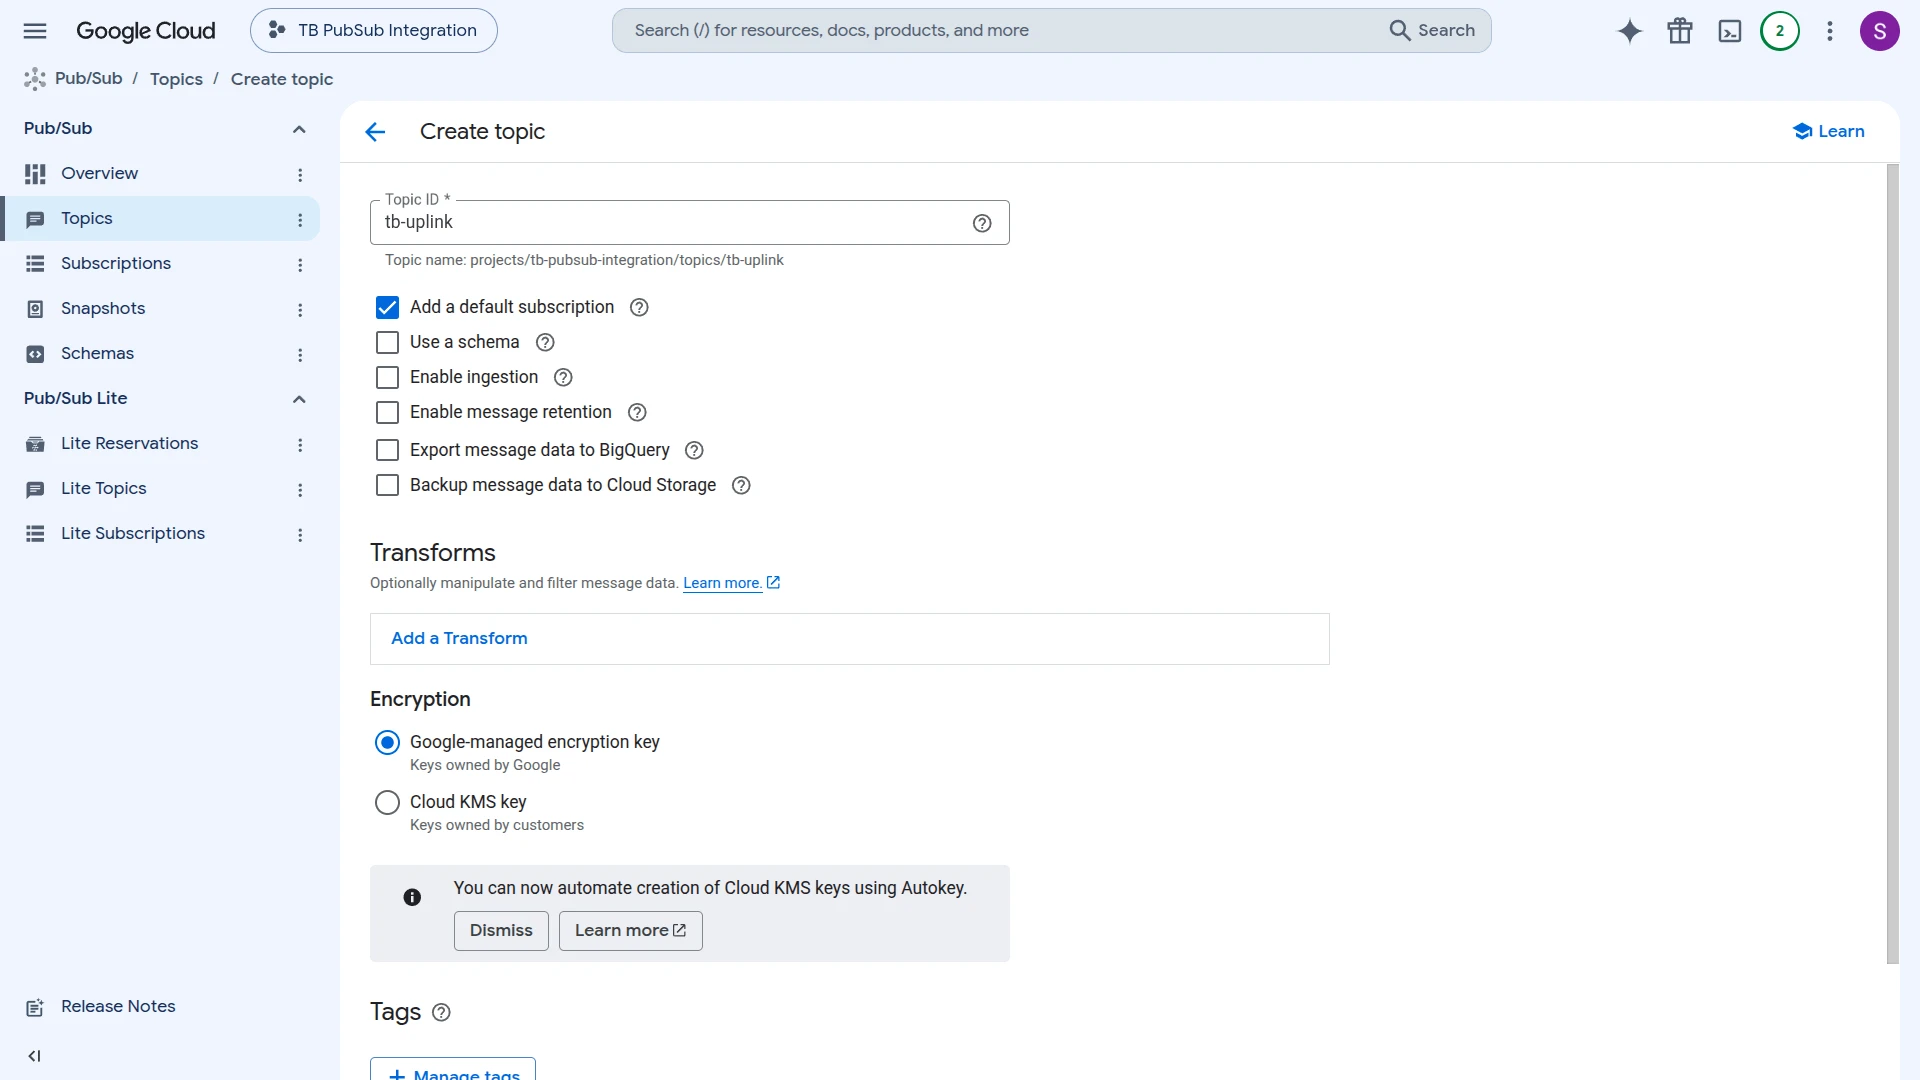
- Enter a Topic ID (e.g.
tb-uplink) and keep Add a default subscription checked — this creates a pull subscription together with the topic. - Scroll down and click Create.
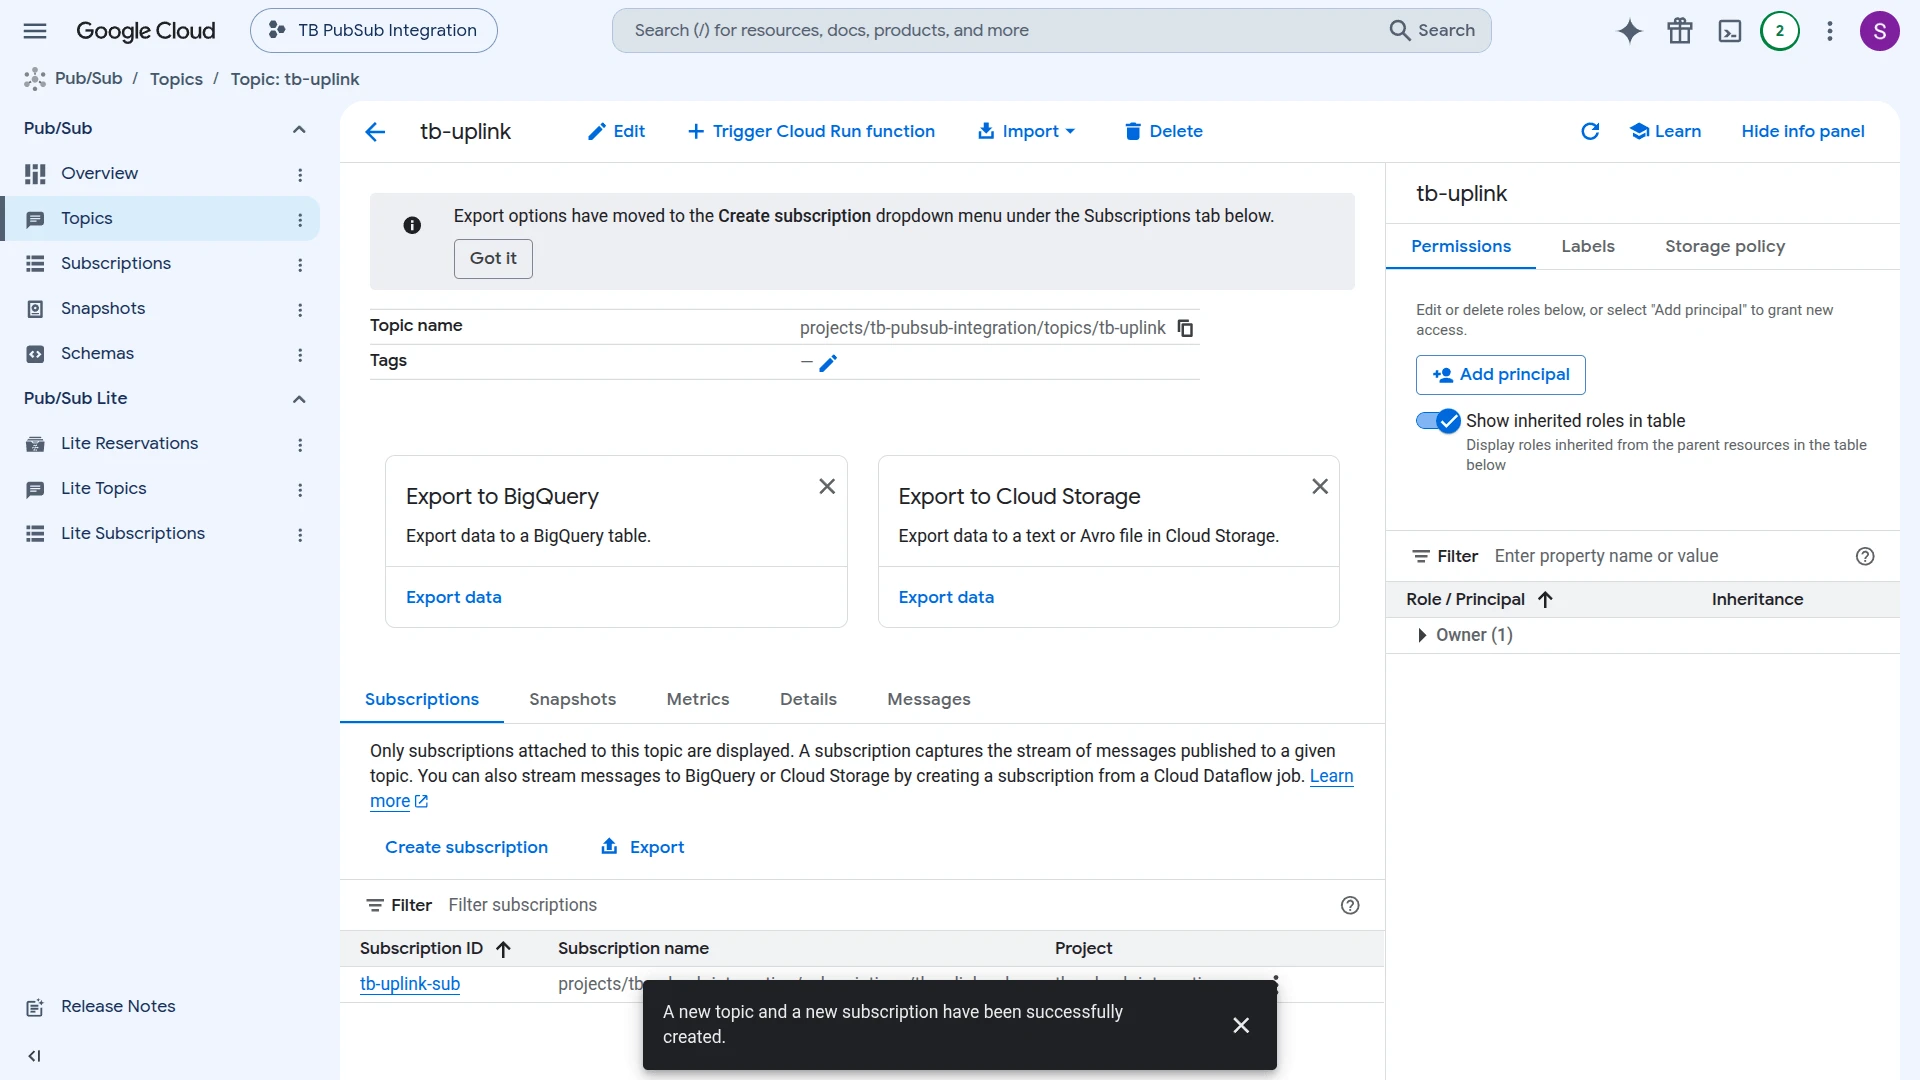
- GCP creates the topic and its subscription (e.g.
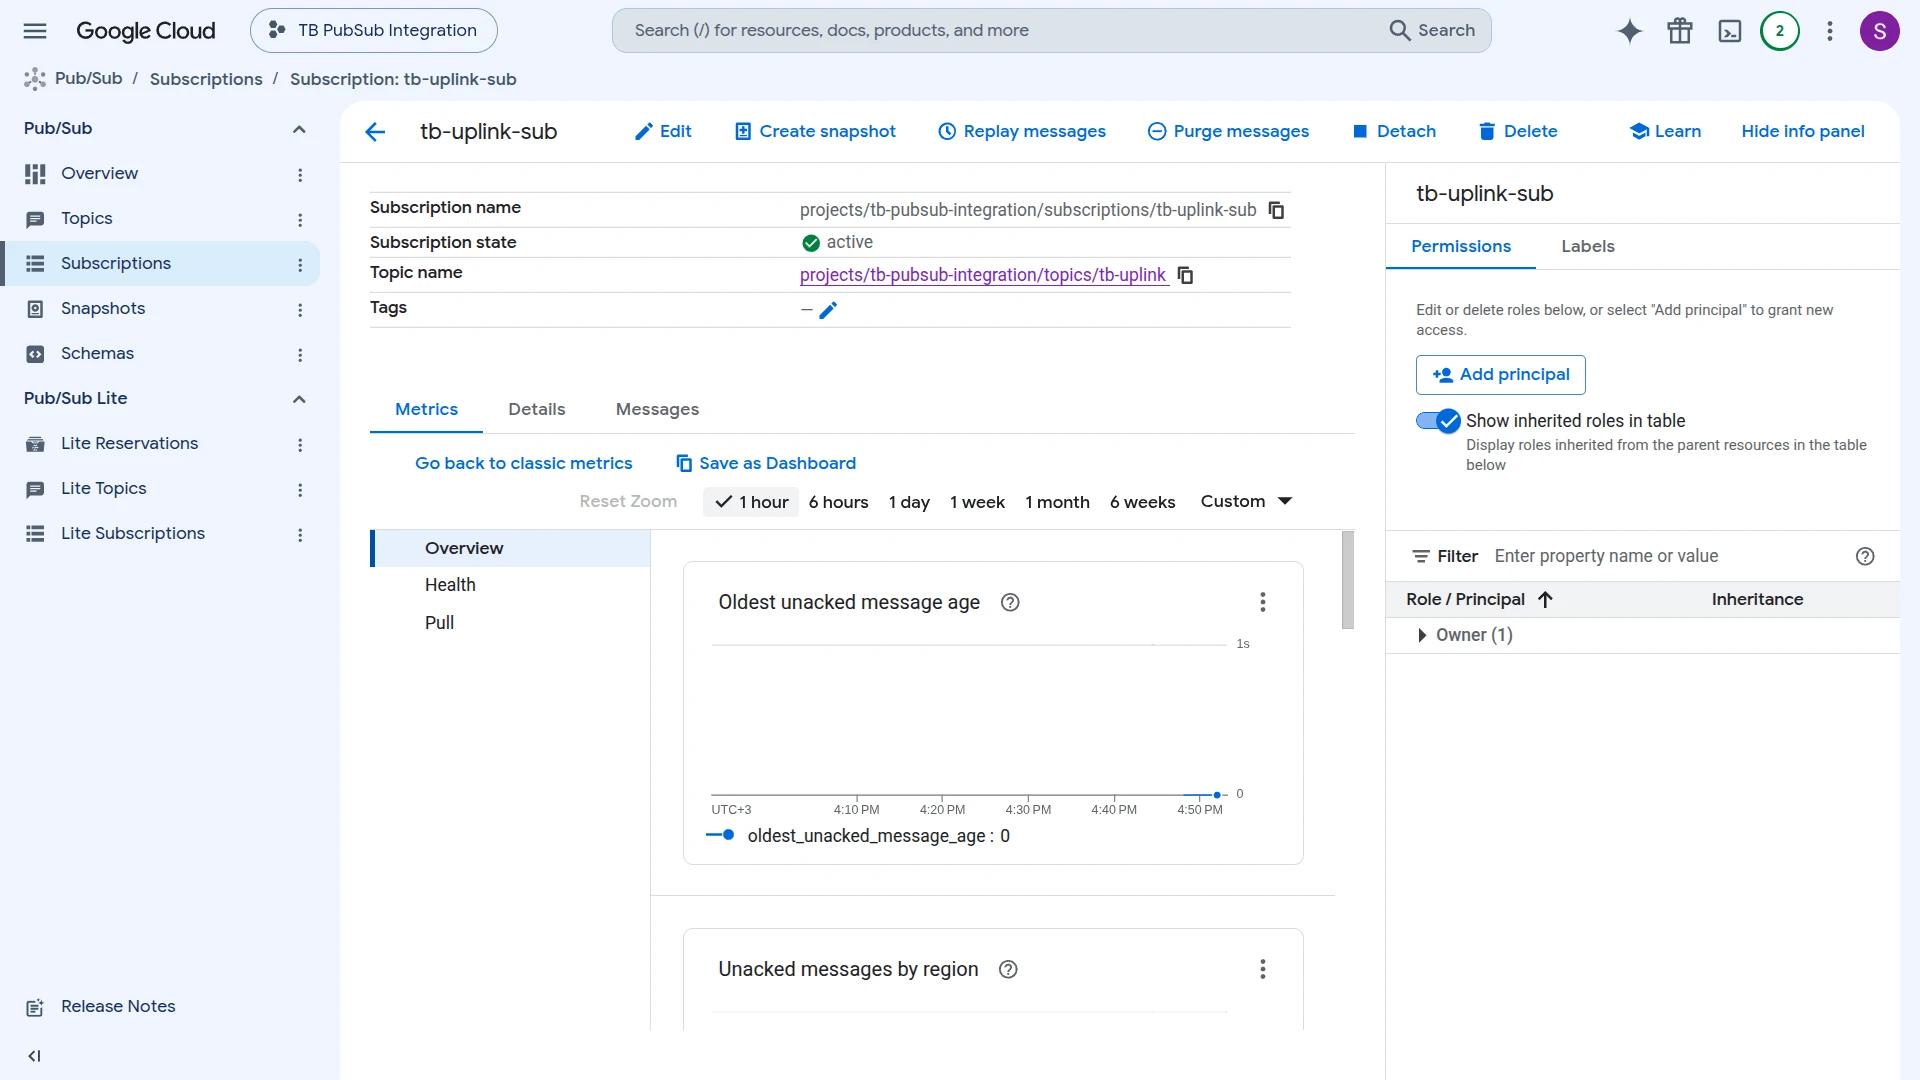
tb-uplink-sub) together, listed in the topic’s Subscriptions tab. - Open the subscription to confirm its Subscription state is active and it uses Pull delivery.
Create a Service Account and Download the Key
Section titled “Create a Service Account and Download the Key”ThingsBoard authenticates to GCP using a service account key. The account needs at least the Pub/Sub Subscriber role to receive uplink messages.
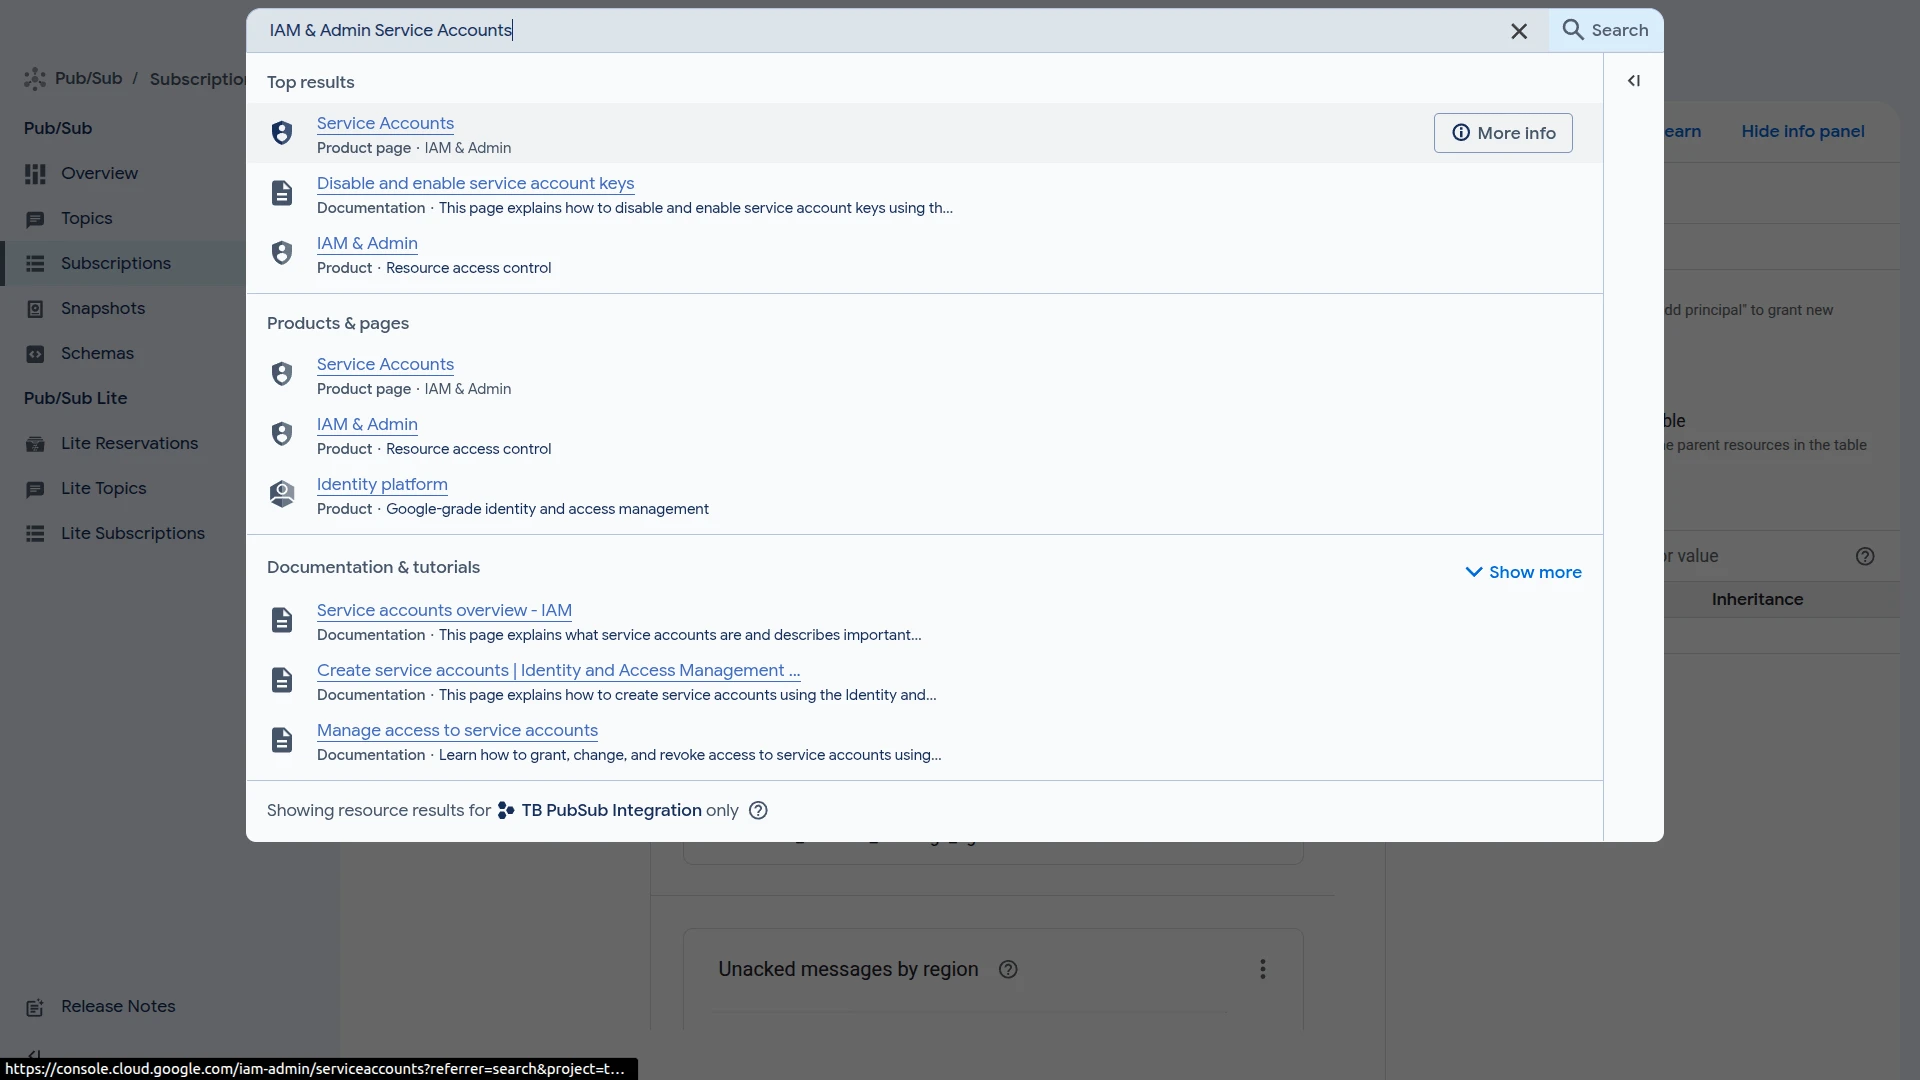
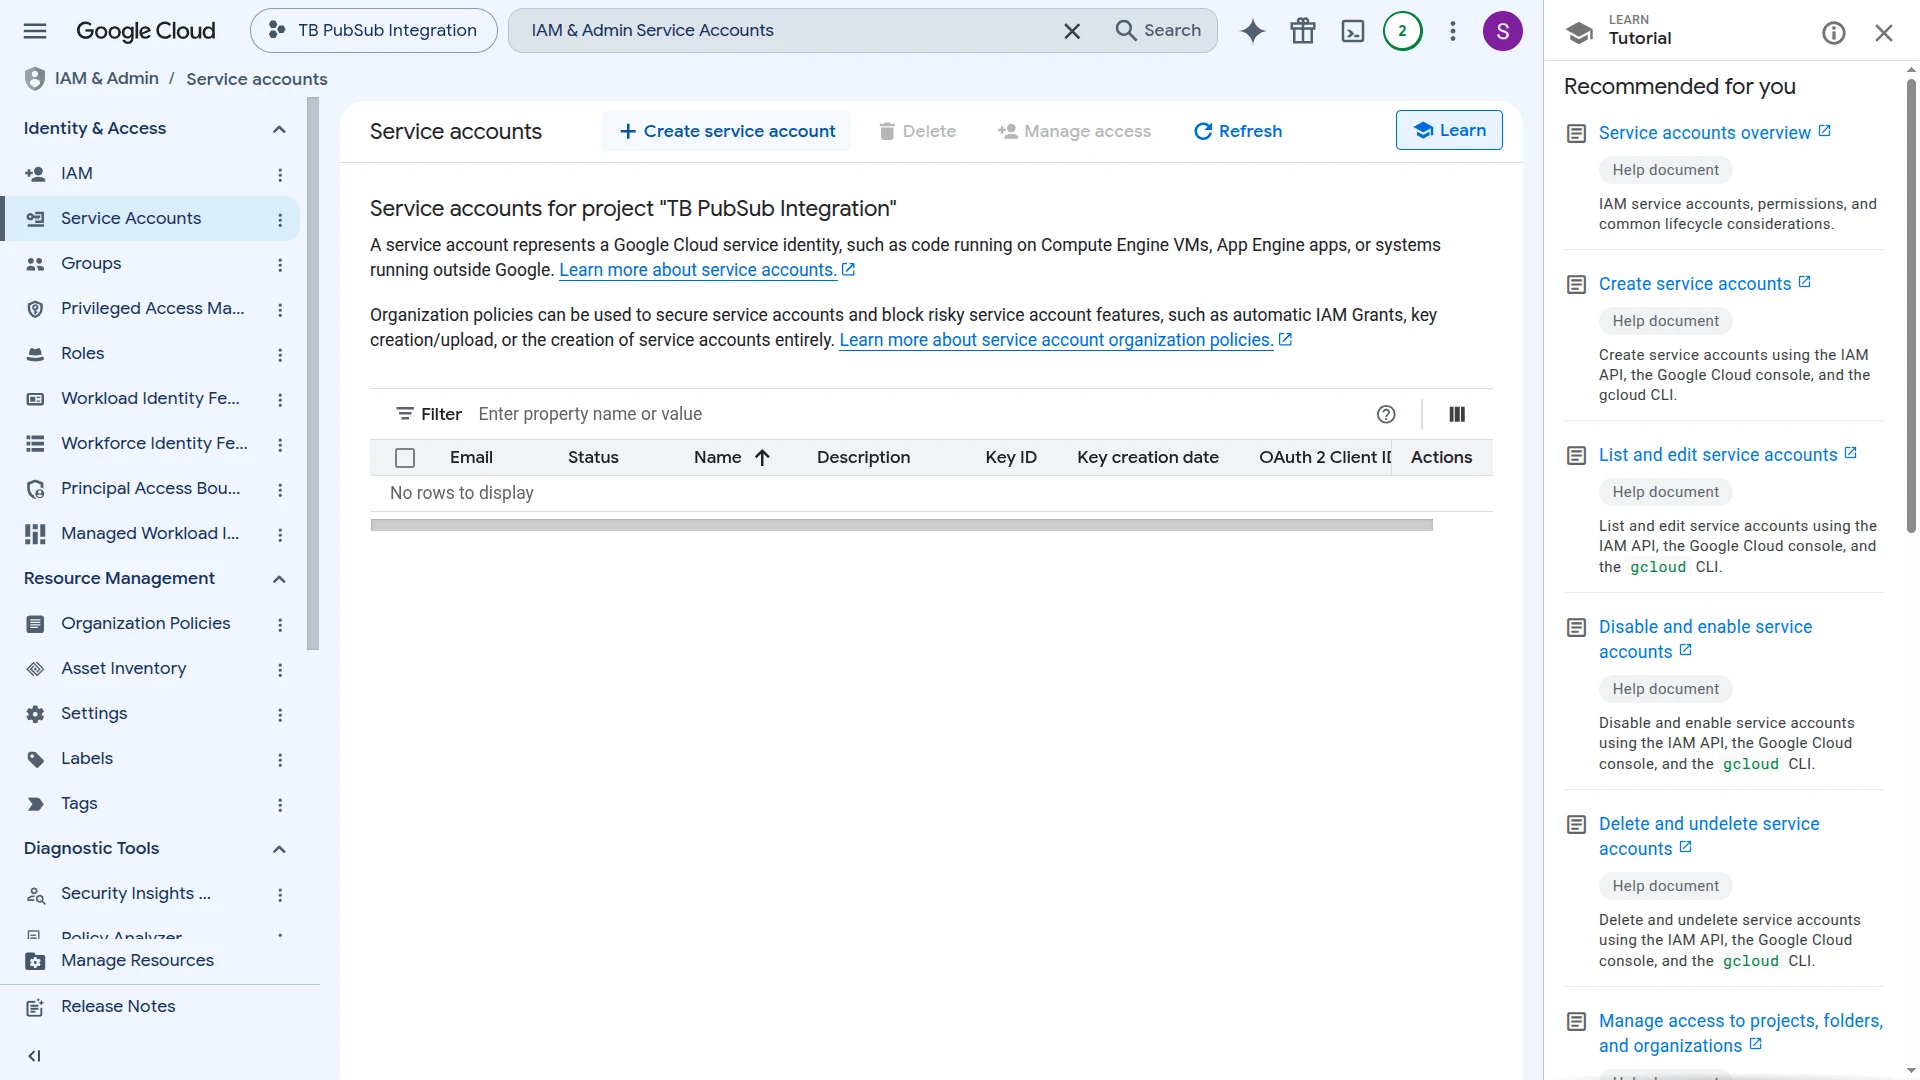
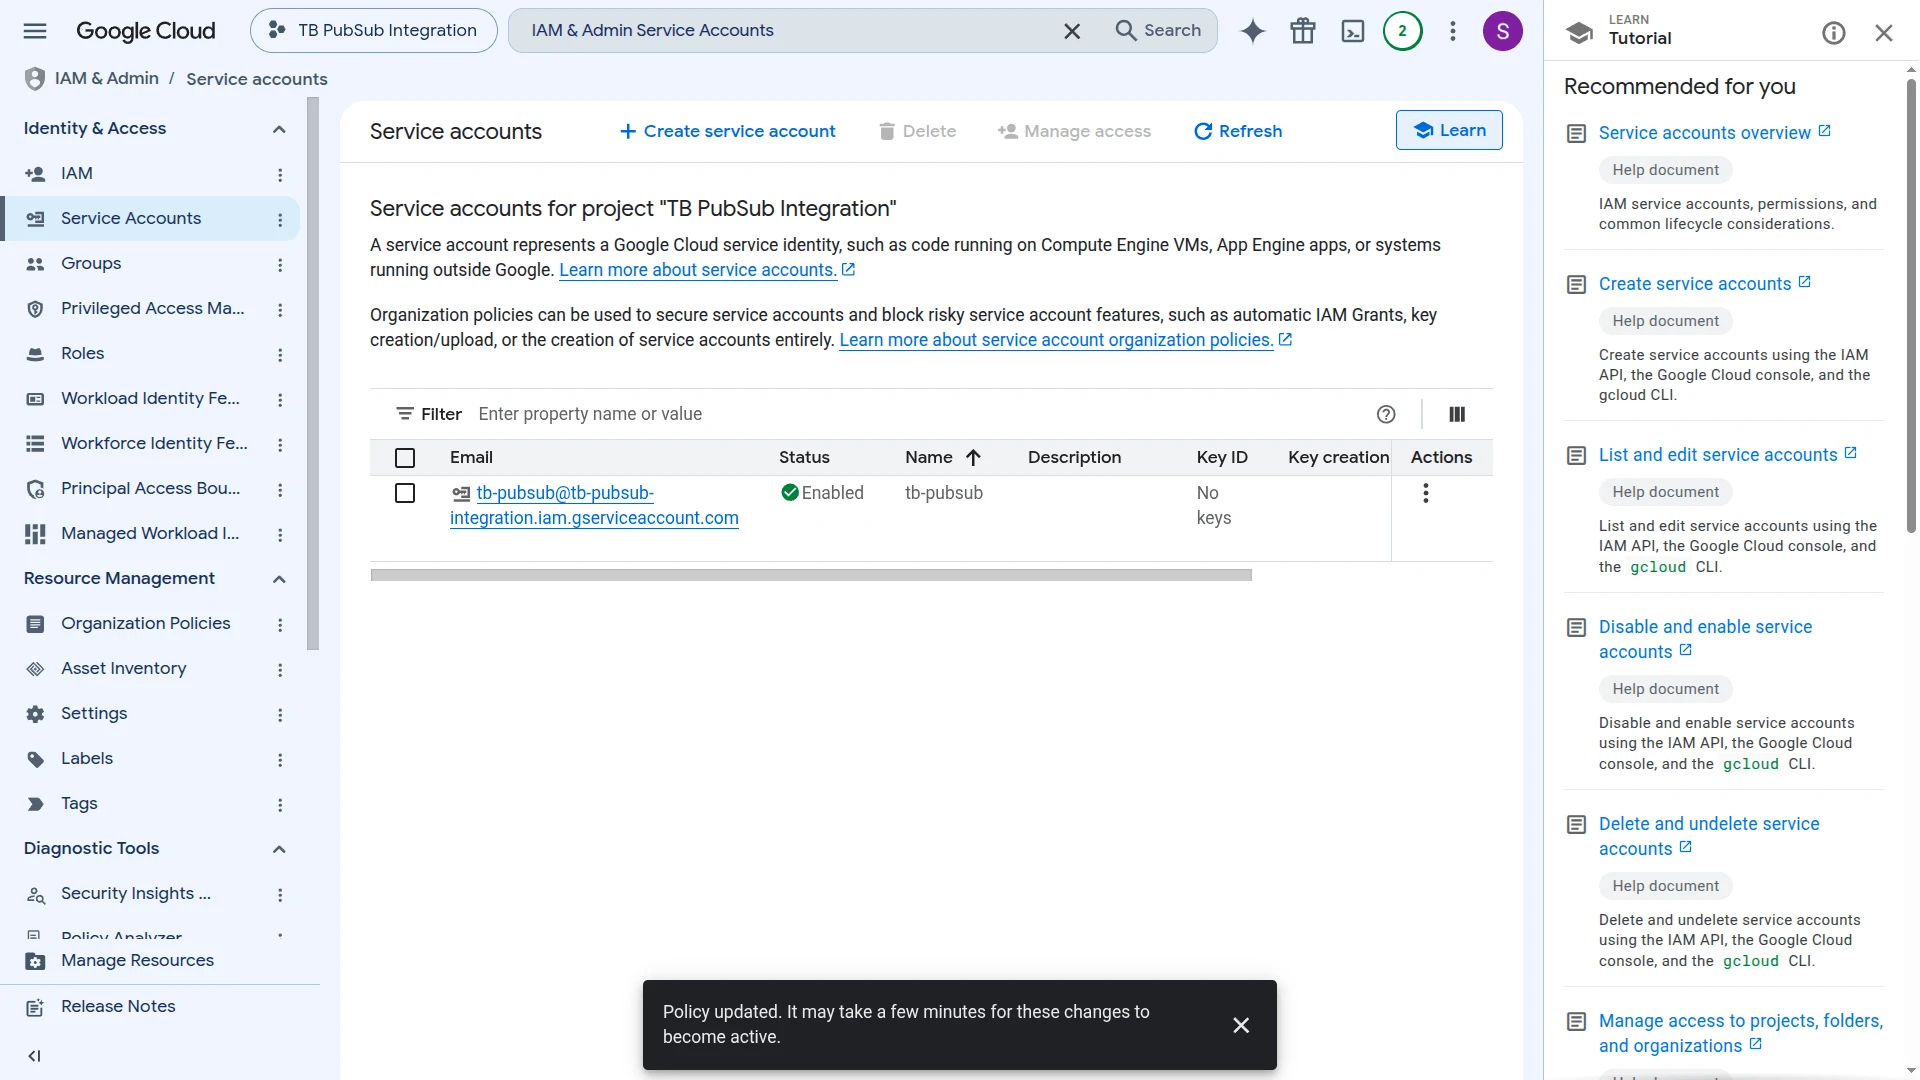
- Click Search in the top toolbar, search for Service Accounts, and select it from the results.
- On the Service accounts page, click Create service account.
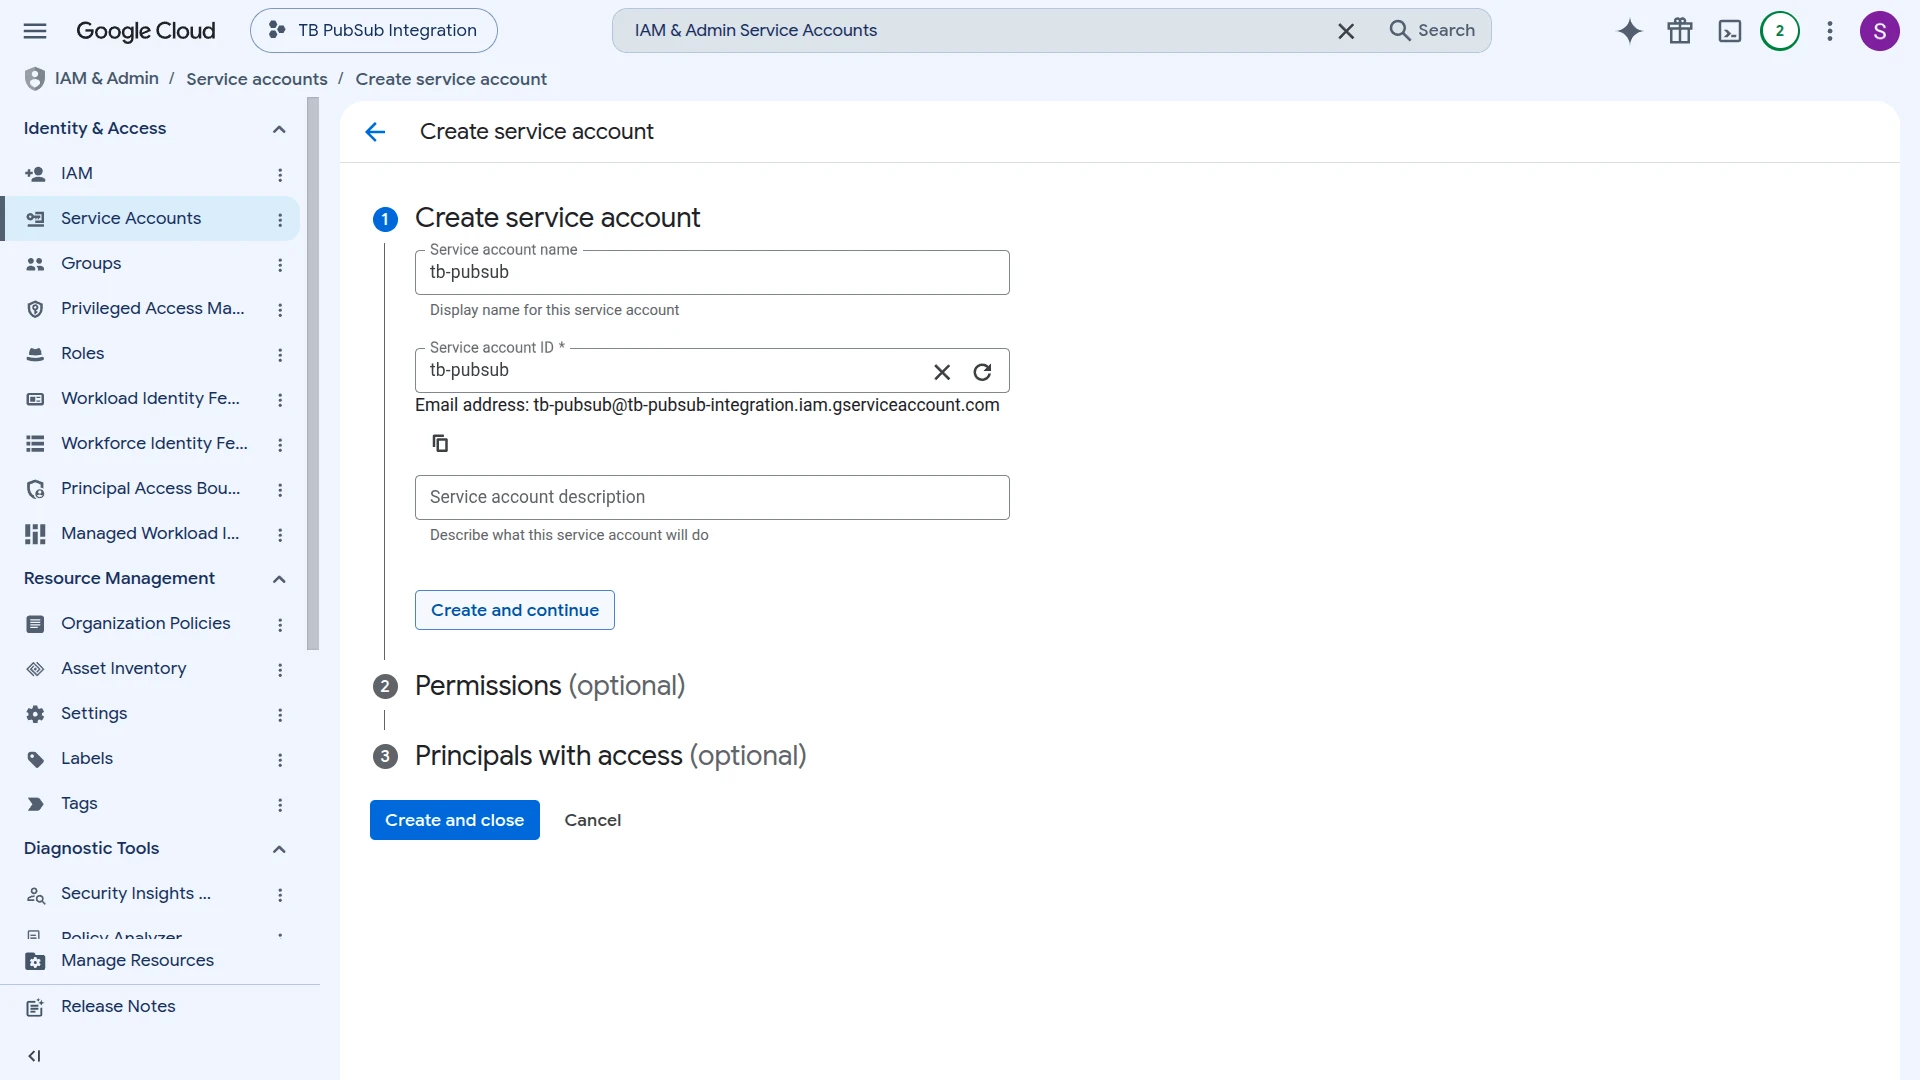
- Enter a name (e.g.
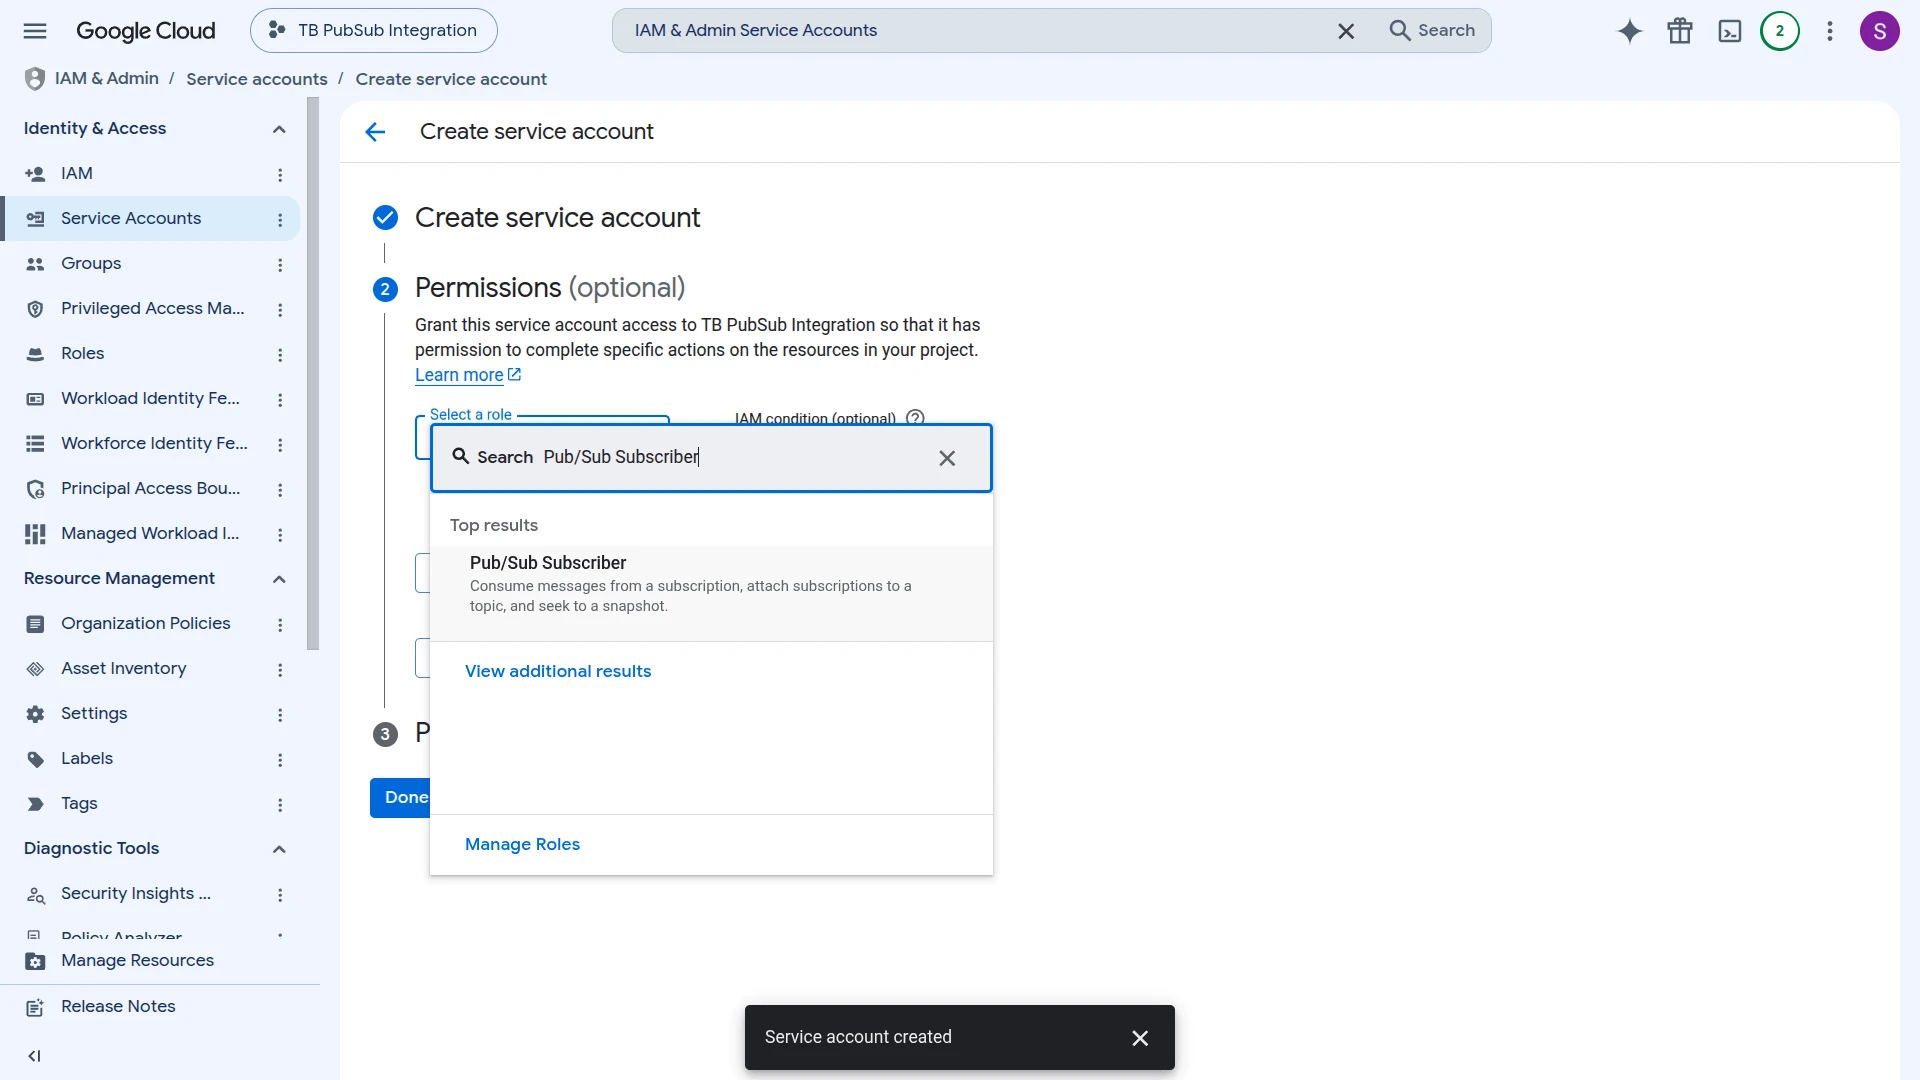
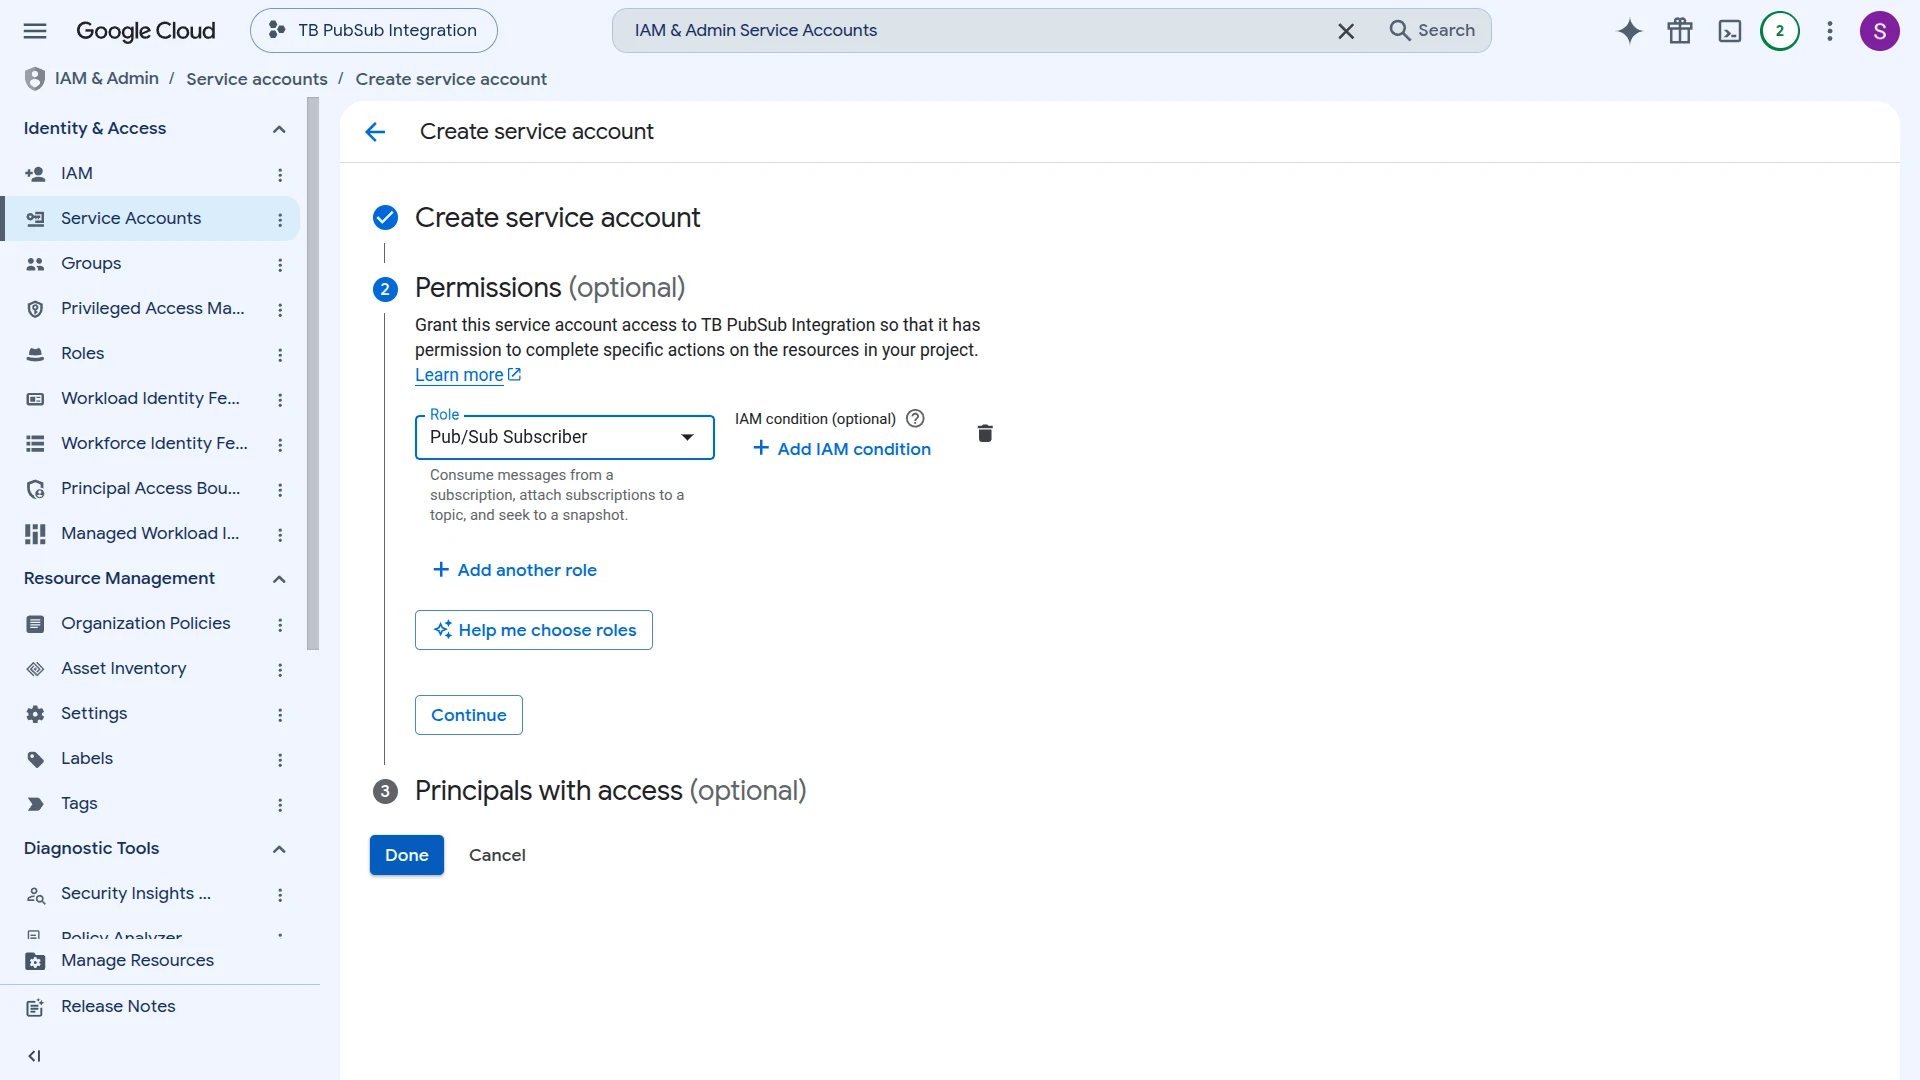
tb-pubsub) and click Create and continue. - In the Permissions step, search for the Pub/Sub Subscriber role and select it.
- With the role assigned, click Continue, then Done.
- The service account appears in the list with status Enabled. Click its email to open it.
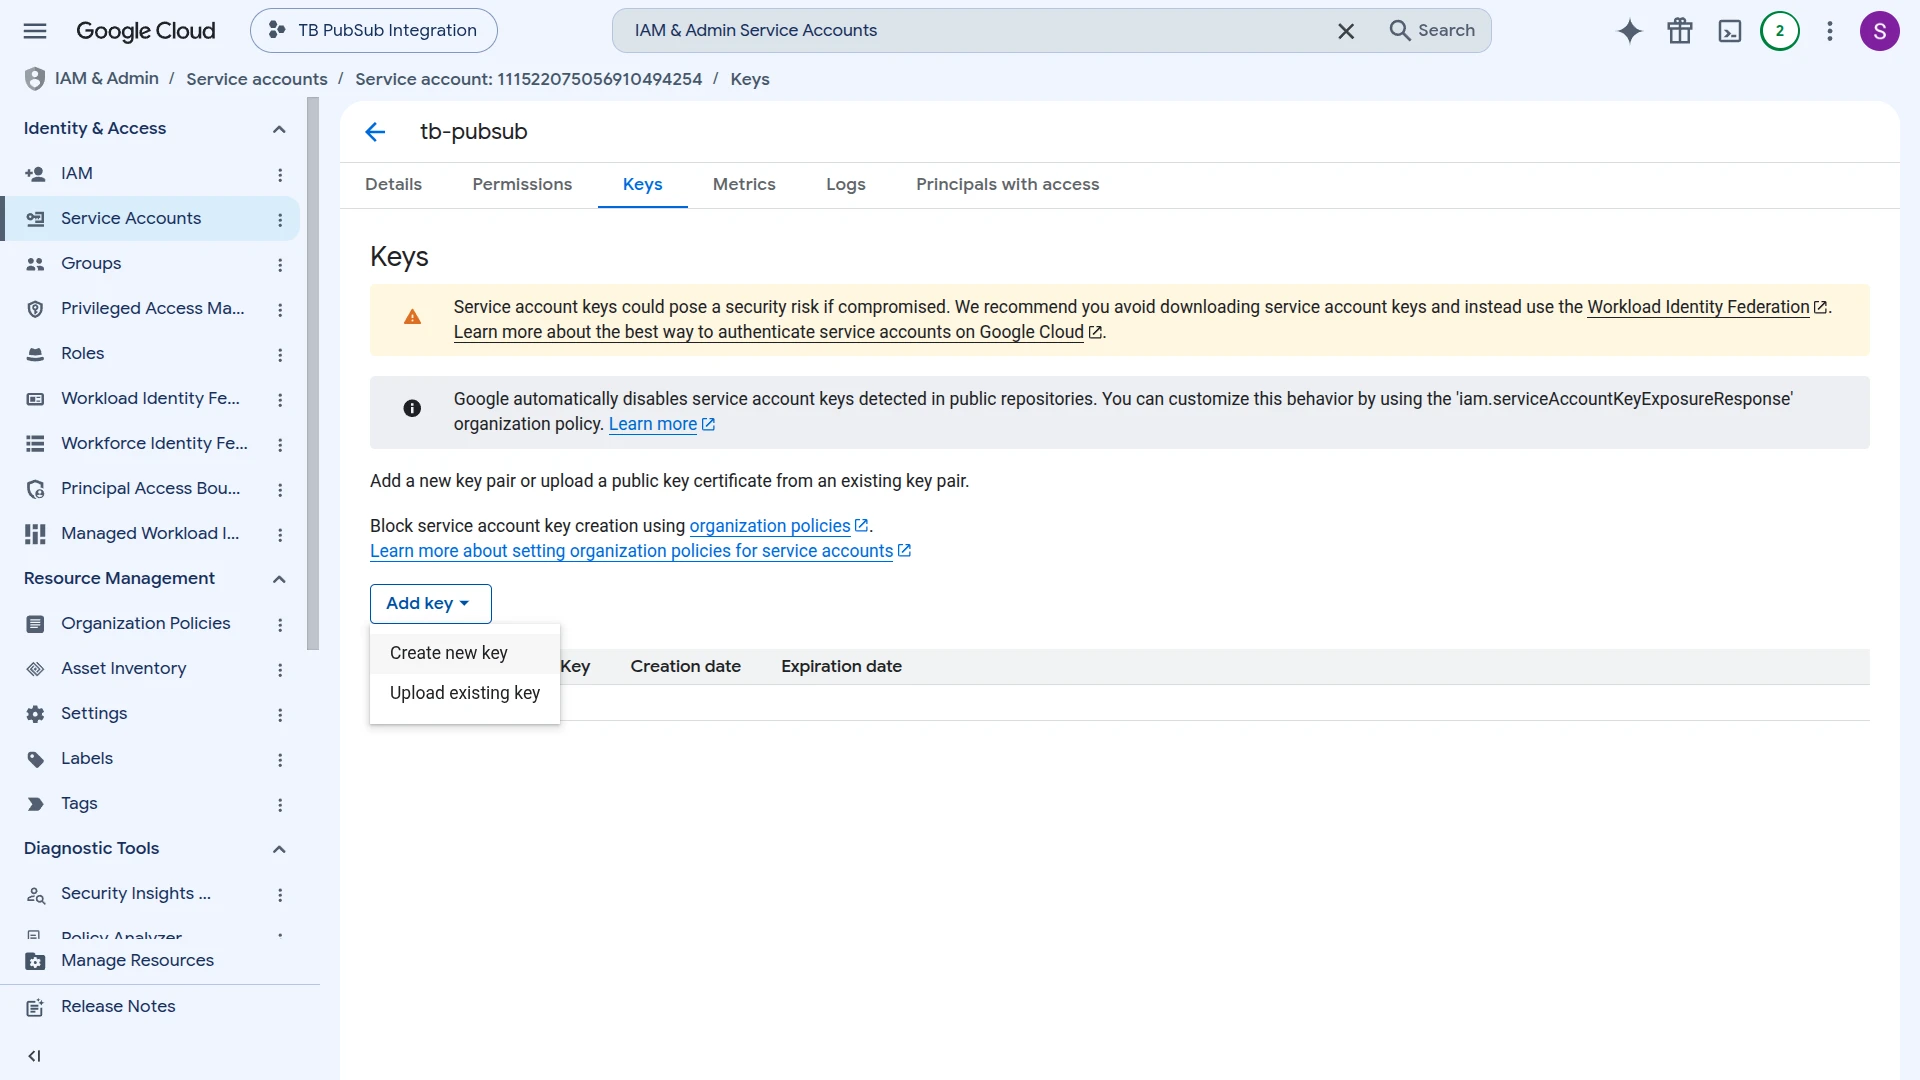
- Go to the Keys tab and click Add key ⇾ Create new key.
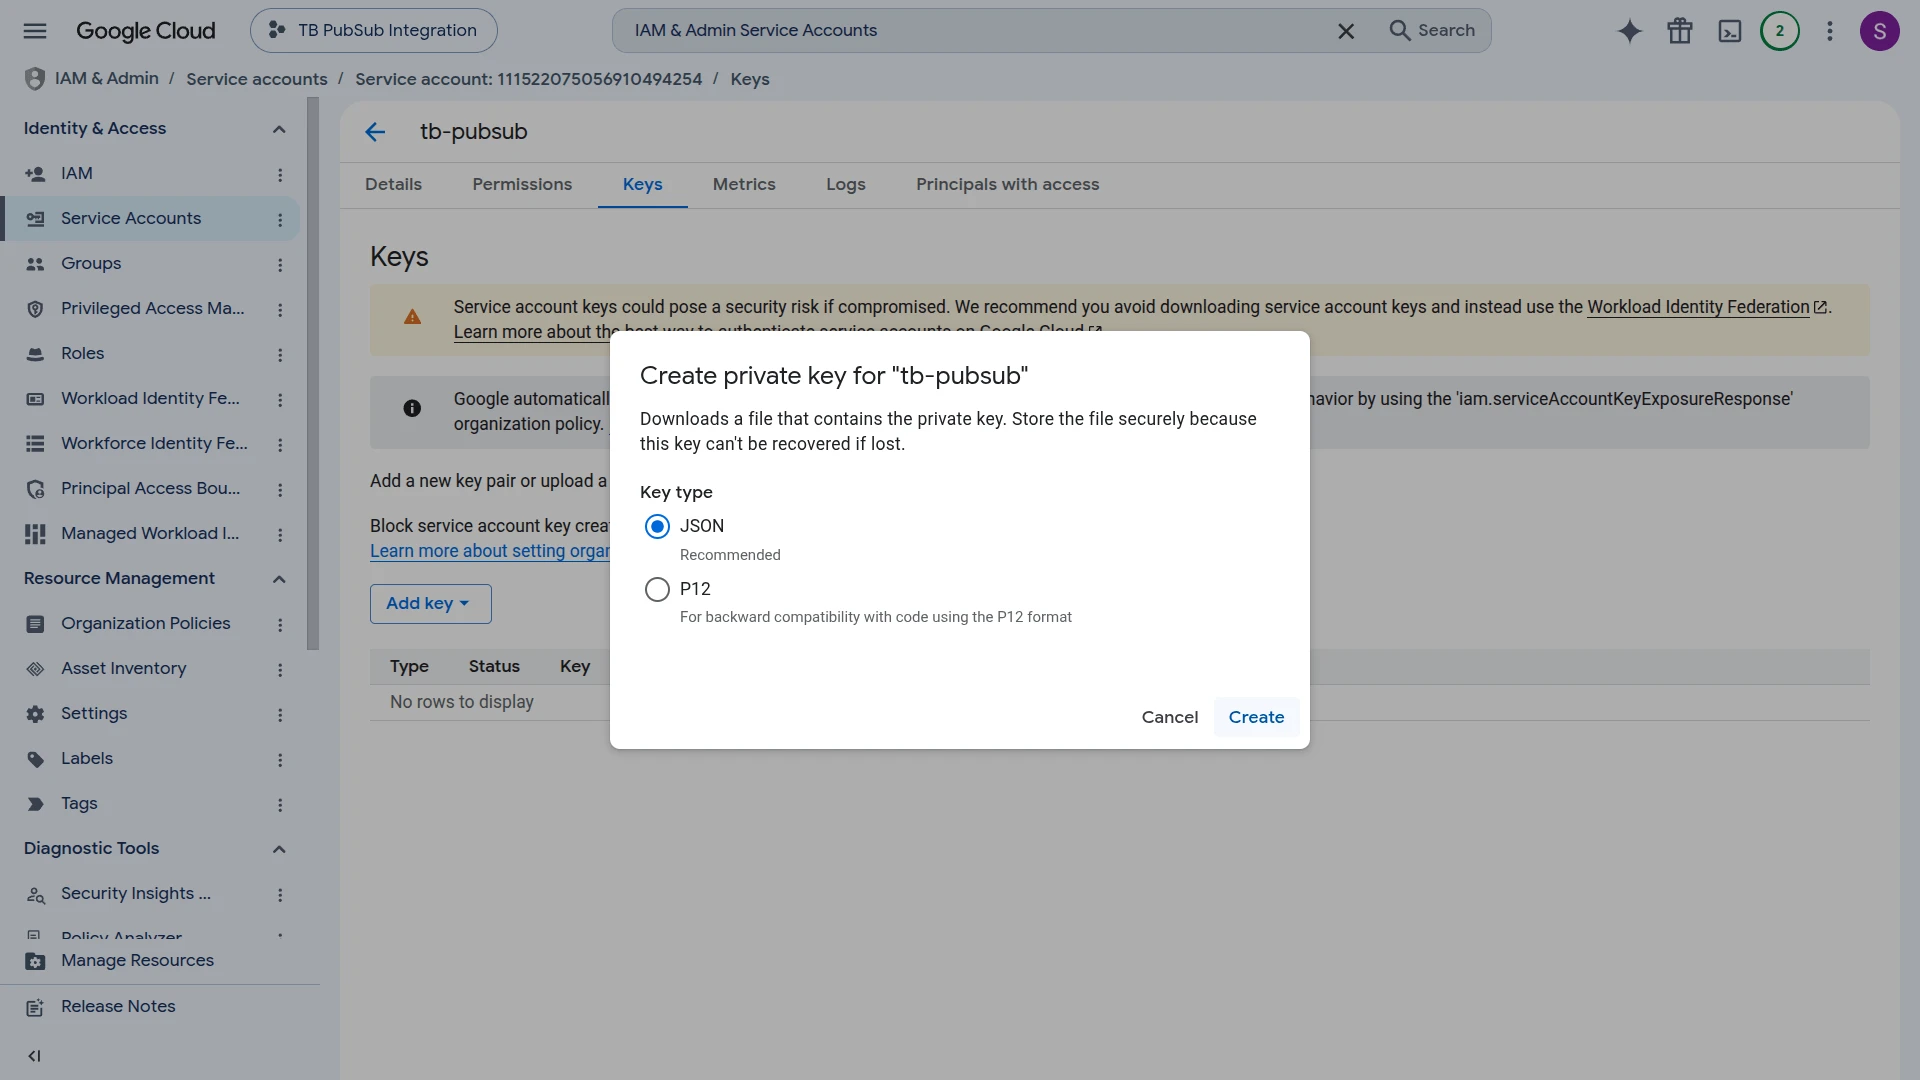
- Select JSON as the key type and click Create.
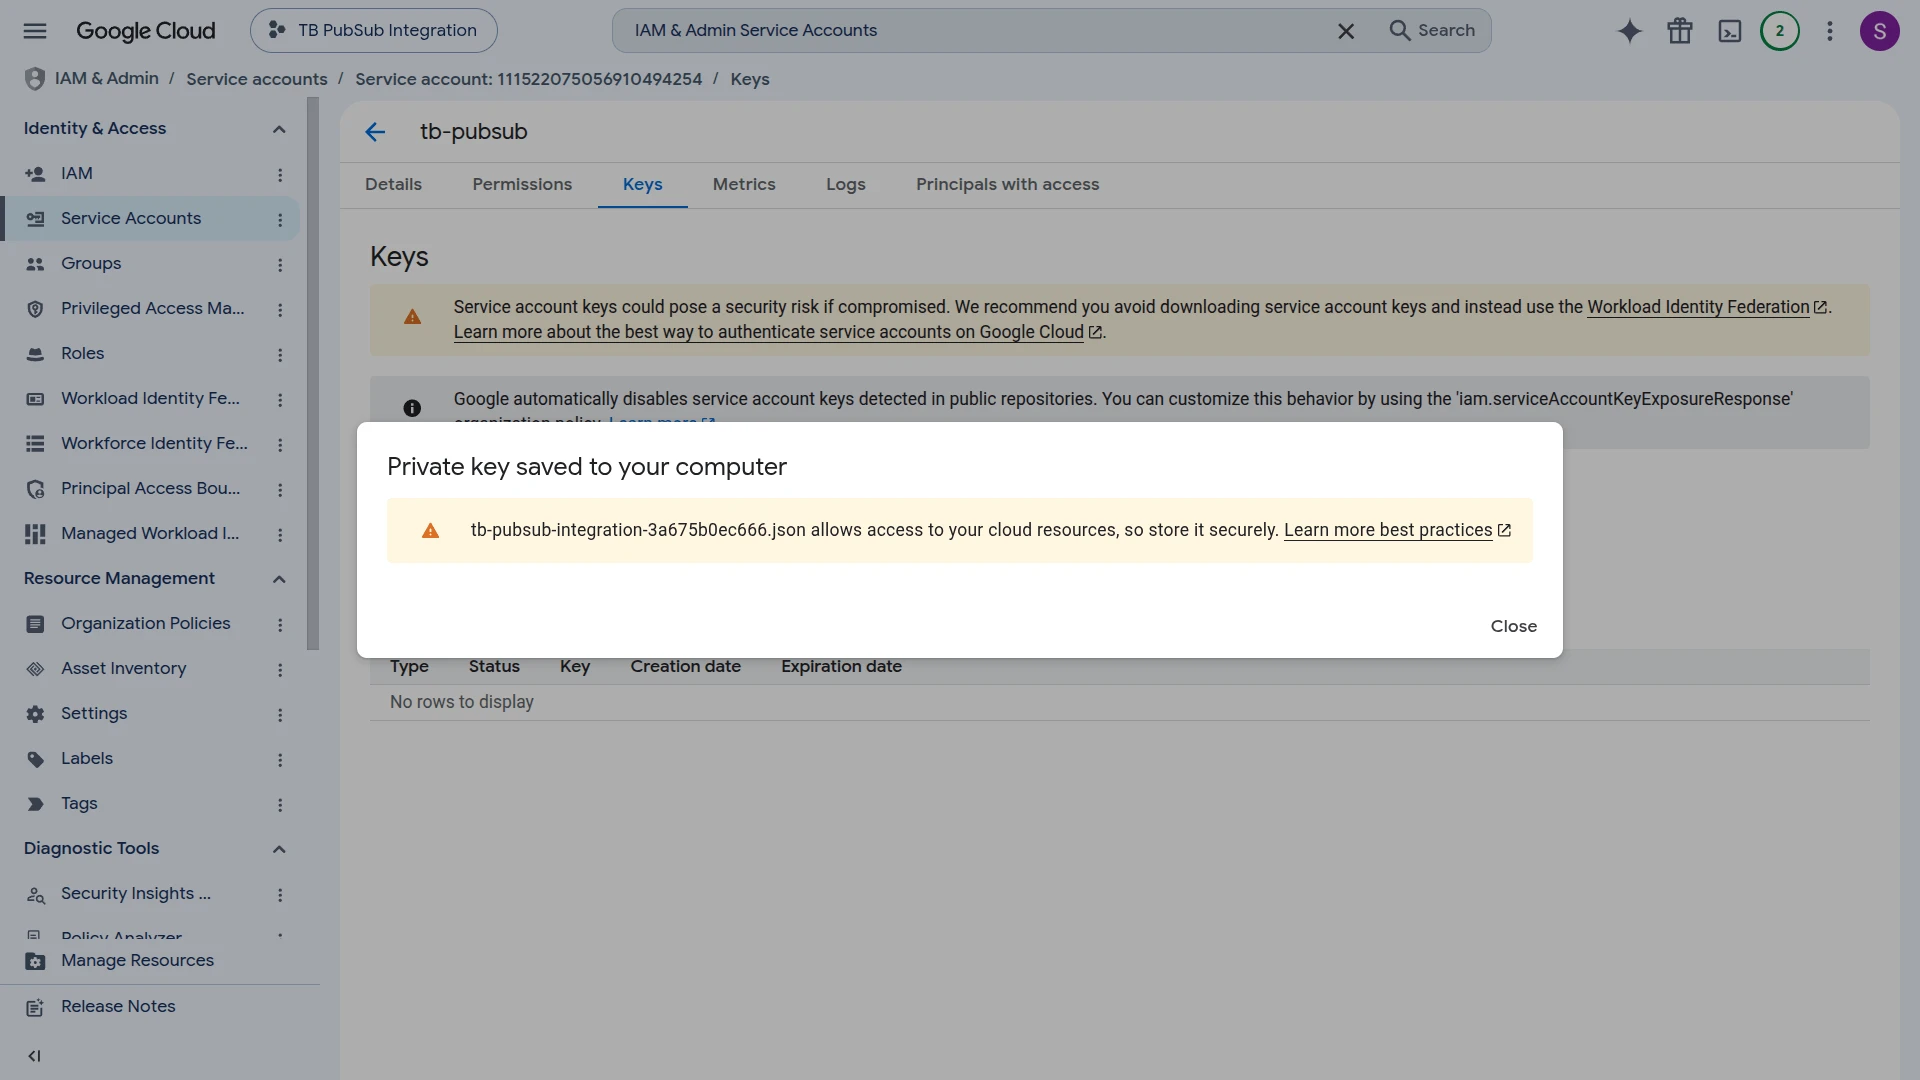
- The private key file downloads automatically — store it securely; you will upload it to ThingsBoard when creating the integration.
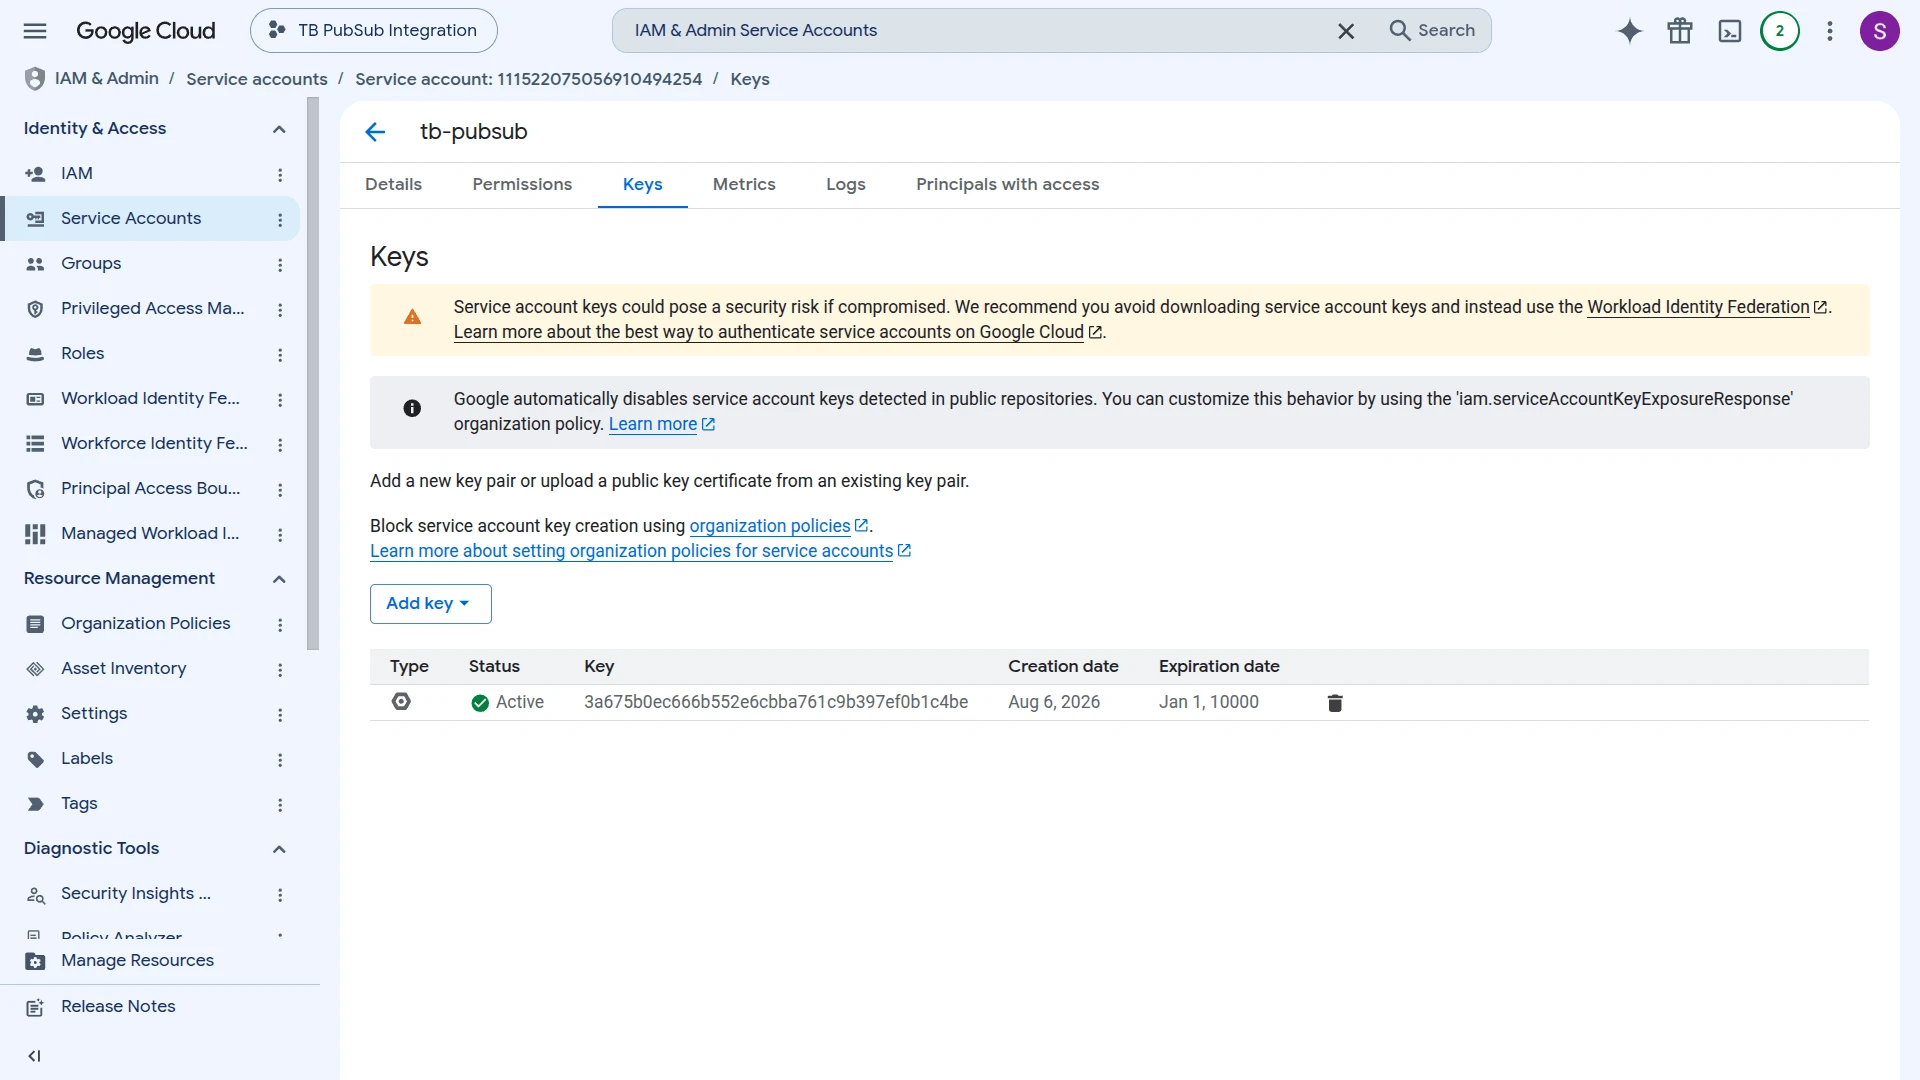
- The key now appears as Active in the Keys tab.
Set Up the Pub/Sub Integration
Section titled “Set Up the Pub/Sub Integration”To set up the Pub/Sub integration, first create an uplink data converter to process incoming messages, then create and configure the integration.
Create the Uplink Data Converter
Section titled “Create the Uplink Data Converter”The uplink converter decodes incoming Pub/Sub messages and maps them to the ThingsBoard data model. Pub/Sub uses a generic uplink converter.
The decoder function receives:
payload— the raw Pub/Sub message data as a UTF-8 byte arraymetadata—integrationNameand any key-value pairs configured in the integration’s Metadata settings
Sample payload:
{ "deviceName": "Sensor A1", "deviceType": "thermostat", "temperature": 23.5, "humidity": 60}- Go to Integrations ⇾ Data converters.
- Click + Add data converter ⇾ Create new converter.
In the Add data converter dialog:
- Converter type — leave Uplink (selected by default).
- Integration type — in the search field, enter
Pub/Suband select Pub/Sub from the list. - Name — enter a converter name, for example
Pub/Sub Uplink Converter. - Main decoding configuration — a code editor with the function signature
function decoder(payload, metadata) {. Paste the decoder function shown below. By default the editor opens in TBEL; use the TBEL / JS toggle (upper right) to switch languages. - Click Add.
The decoder function used in this tutorial:
// Decode an uplink message from a buffer// payload - array of bytes// metadata - key/value object
/** Decoder **/
// decode payload to JSONvar data = decodeToJson(payload);
// --- Device name and type ---var deviceName = data.deviceName != null ? data.deviceName : 'Unknown Device';var deviceType = data.deviceType != null ? data.deviceType : 'default';// var customerName = 'Customer C';// var groupName = 'thermostat devices';
// use assetName and assetType instead of deviceName and deviceType// to automatically create assets instead of devices.// var assetName = 'Asset A';// var assetType = 'building';
// --- Timestamp parsing ---var timestamp = -1;if (data.ts != null) {  timestamp = data.ts;} else if (data.timestamp != null) {  timestamp = new Date(data.timestamp).getTime();}  if (timestamp == -1) {  timestamp = Date.now();}
// --- Telemetry and attributes ---var telemetry = {};var attributes = {  integrationName: metadata['integrationName'],};
// Keys to exclude from telemetry (already used or non-telemetry fields)var excludeFromTelemetryList = ["deviceName", "deviceType", "ts", "timestamp"];
// Parse all remaining JSON fields as telemetrytelemetry.putAll(toFlatMap(data, excludeFromTelemetryList, true));
// Result object with device attributes/telemetry datavar result = {  deviceName: deviceName,  deviceType: deviceType,  // customerName: customerName,  // groupName: groupName,  // assetName: assetName,  // assetType: assetType,  attributes: attributes,  telemetry: {    ts: timestamp,    values: telemetry  }};
/** Helper functions 'decodeToString', 'decodeToJson' and 'toFlatMap' are already built-in **/
return result;// Decode an uplink message from a buffer// payload - array of bytes// metadata - key/value object
/** Decoder **/
// decode payload to JSONvar data = decodeToJson(payload);
// --- Device name and type ---var deviceName = data.deviceName != null ? data.deviceName : 'Unknown Device';var deviceType = data.deviceType != null ? data.deviceType : 'default';// var customerName = 'Customer C';// var groupName = 'thermostat devices';
// use assetName and assetType instead of deviceName and deviceType// to automatically create assets instead of devices.// var assetName = 'Asset A';// var assetType = 'building';
// --- Timestamp parsing ---var timestamp = -1;if (data.ts != null) { timestamp = data.ts;} else if (data.timestamp != null) { timestamp = new Date(data.timestamp).getTime();}if (timestamp == -1) { timestamp = Date.now();}
// --- Telemetry and attributes ---var telemetry = {};var attributes = { integrationName: metadata['integrationName'],};
// Keys to exclude from telemetry (already used or non-telemetry fields)var excludeFromTelemetryList = ["deviceName", "deviceType", "ts", "timestamp"];
// Parse all remaining JSON fields as telemetrytoFlatMap(data, telemetry, excludeFromTelemetryList);
// Result object with device attributes/telemetry datavar result = { deviceName: deviceName, deviceType: deviceType, // customerName: customerName, // groupName: groupName, // assetName: assetName, // assetType: assetType, attributes: attributes, telemetry: { ts: timestamp, values: telemetry }};
/** Helper functions **/
function decodeToString(payload) { return String.fromCharCode.apply(String, payload);}
function decodeToJson(payload) { var str = decodeToString(payload); return JSON.parse(str);}
function toFlatMap(obj, result, excludeList, prefix) { prefix = prefix || ''; for (var key in obj) { if (excludeList.indexOf(key) !== -1) continue; var value = obj[key]; var fullKey = prefix ? prefix + '.' + key : key; if (typeof value === 'object' && value !== null && !Array.isArray(value)) { toFlatMap(value, result, excludeList, fullKey); } else { result[fullKey] = value; } }}
return result;To adapt this converter to your device:
- Different device name / type fields — replace
data.deviceNameanddata.deviceTypewith the field names your device actually sends (e.g.data.id,data.sensorType). - Timestamp — if your payload includes a Unix millisecond timestamp, name the field
ts; for an ISO 8601 string, name ittimestamp. If neither is present, the converter falls back to the server receive time automatically. - Telemetry fields — all JSON fields not listed in
excludeFromTelemetryListare mapped to telemetry automatically viatoFlatMap. To exclude additional non-telemetry fields (e.g. a firmware version you want as an attribute), add their names to the exclude list. - Static attributes — replace
modelandserialNumberin theattributesobject with the actual device properties from your payload or hard-coded values; remove the entries if not needed. - Assets instead of devices — uncomment
assetName/assetTypeand comment outdeviceName/deviceTypeto provision assets instead of devices. - Customer or group assignment — uncomment
customerNameorgroupNameand set the appropriate values to assign the device to a customer or device group.
Create the Pub/Sub Integration
Section titled “Create the Pub/Sub Integration”- Go to Integrations ⇾ Integrations and click + Add integration.
- Basic settings:
- Set Integration type to Pub/Sub.
- Enter a Name for the integration, or keep the default
Pub/Sub integration. - Leave Enable integration and Allow create devices or assets on so a device is created automatically on first message.
- Click Next.
- Uplink data converter:
- Click Select existing and choose the Pub/Sub Uplink Converter created above, or click Create new to define the decoder inline.
- Click Next.
- Connection:
- Project ID — your GCP project ID (e.g.
tb-pubsub-integration). - Subscription ID — the pull subscription name (e.g.
tb-uplink-sub). - Service account key — upload the JSON key file via Browse file, or click Use Secret storage to reference a stored secret.
- Project ID — your GCP project ID (e.g.
- Click Add.
Connection Settings
Section titled “Connection Settings”Project ID
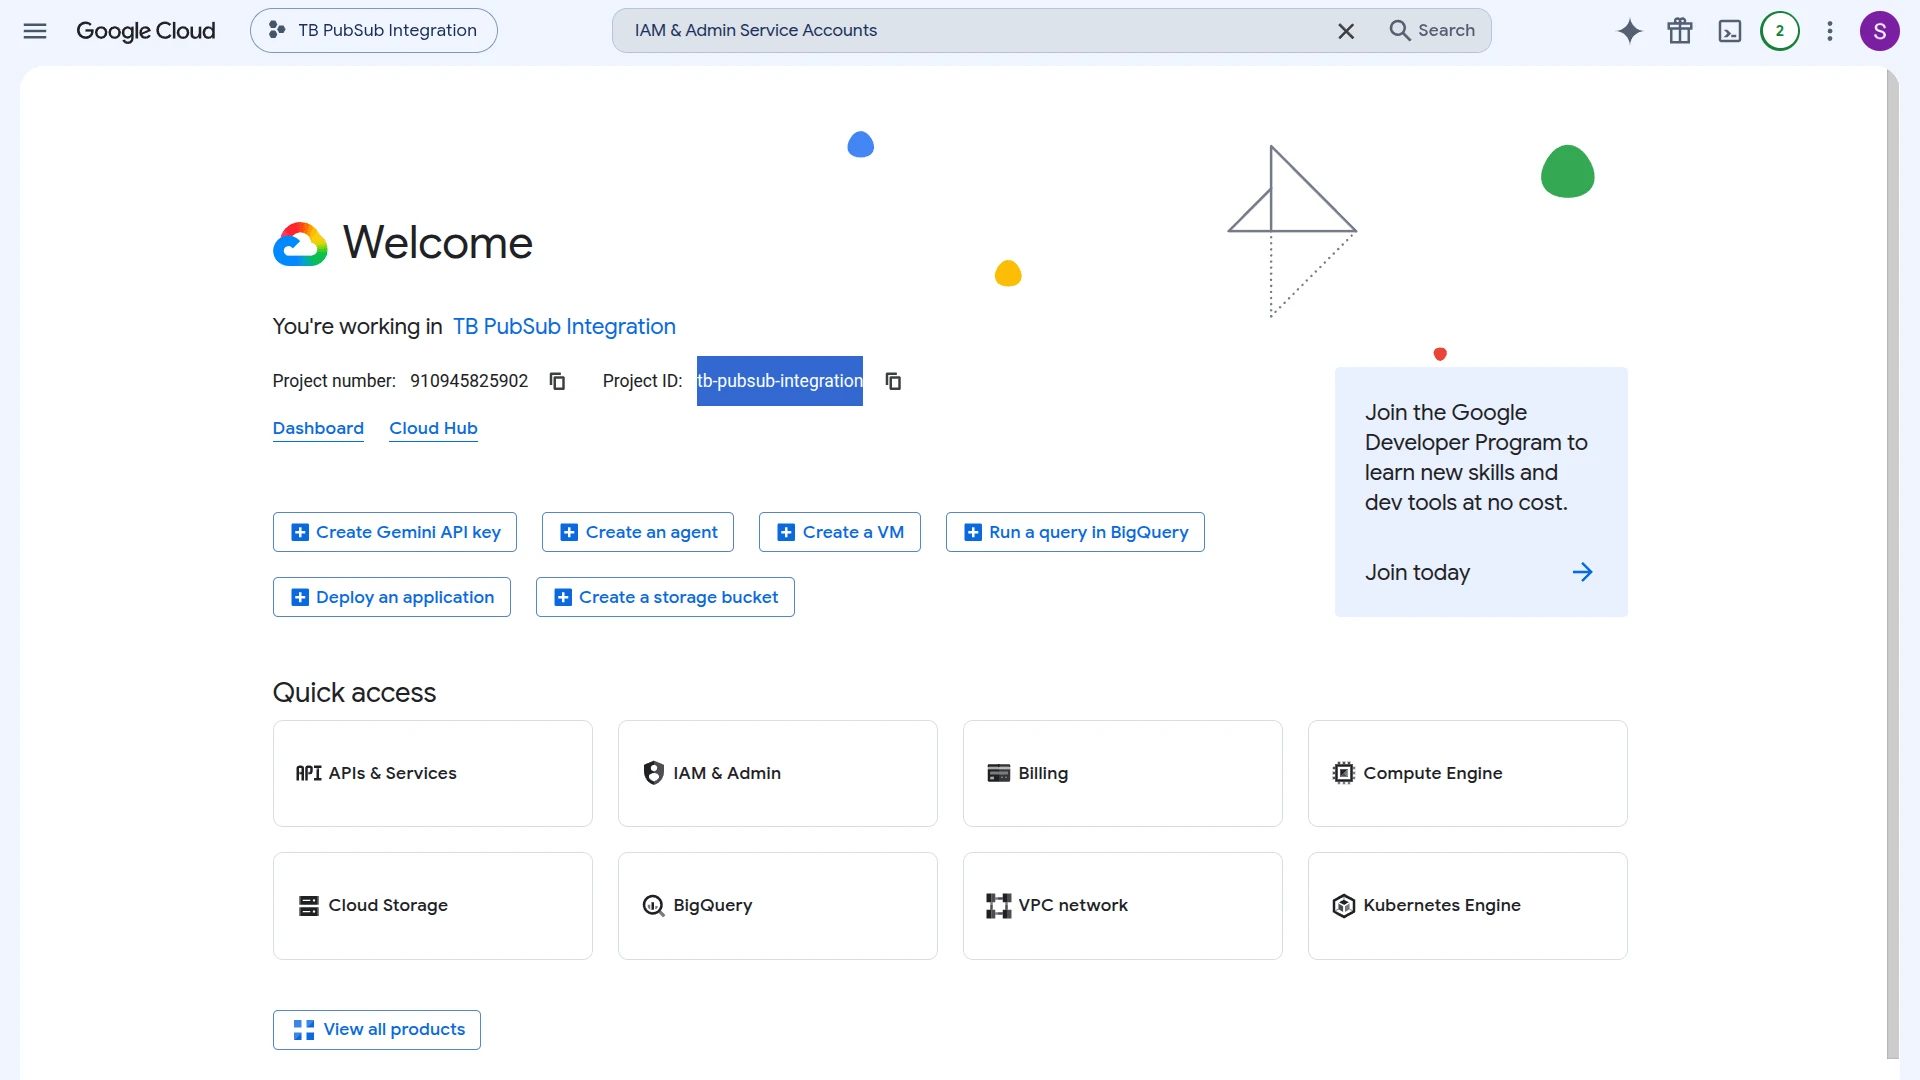
Your Google Cloud project ID. Found in the project selector dropdown in the GCP Console or on the Project info card on the dashboard.
Subscription ID
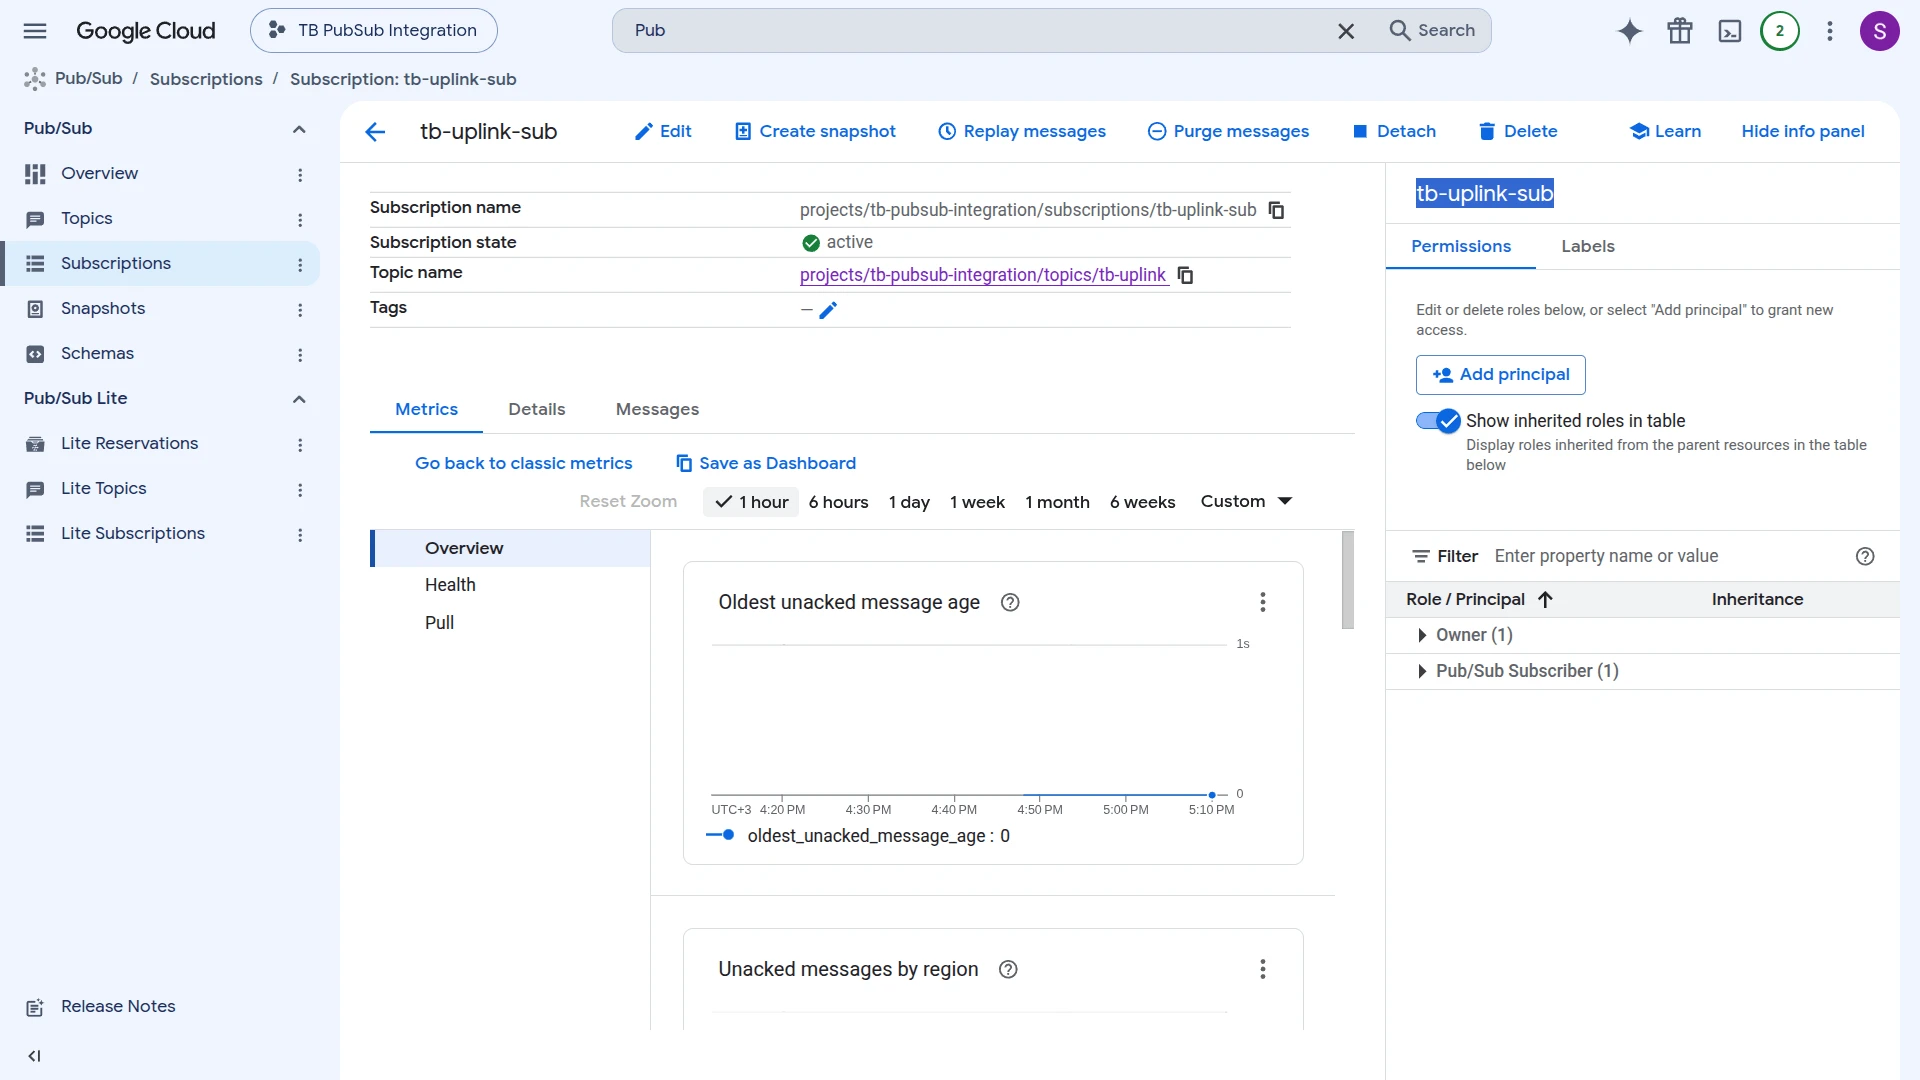
The pull subscription name on the uplink topic (e.g. tb-uplink-sub). The subscription must exist in GCP before the integration is created. ThingsBoard reads messages through this subscription — it is already bound to the topic in GCP.
Service Account Key
The GCP service account key JSON file. The account must have at least roles/pubsub.subscriber on the uplink subscription. Upload the file using Browse file, or store it in ThingsBoard Secret storage and reference it via Use Secret storage.
Execute Remotely
When enabled, ThingsBoard generates an Integration key and Integration secret that allow the integration to run as a separate process outside the ThingsBoard cluster — useful when access to GCP is restricted to a specific network. See Remote Integration.
Advanced Settings
| Parameter | Description |
|---|---|
| Description | Optional text description for the integration. |
| Metadata | Key-value pairs injected into every uplink message as integrationMetadata in the converter script. |
Test Uplink
Section titled “Test Uplink”Publish a Test Message to the Uplink Topic
Section titled “Publish a Test Message to the Uplink Topic”Publish a test message to the uplink topic using the gcloud CLI or the GCP Console.
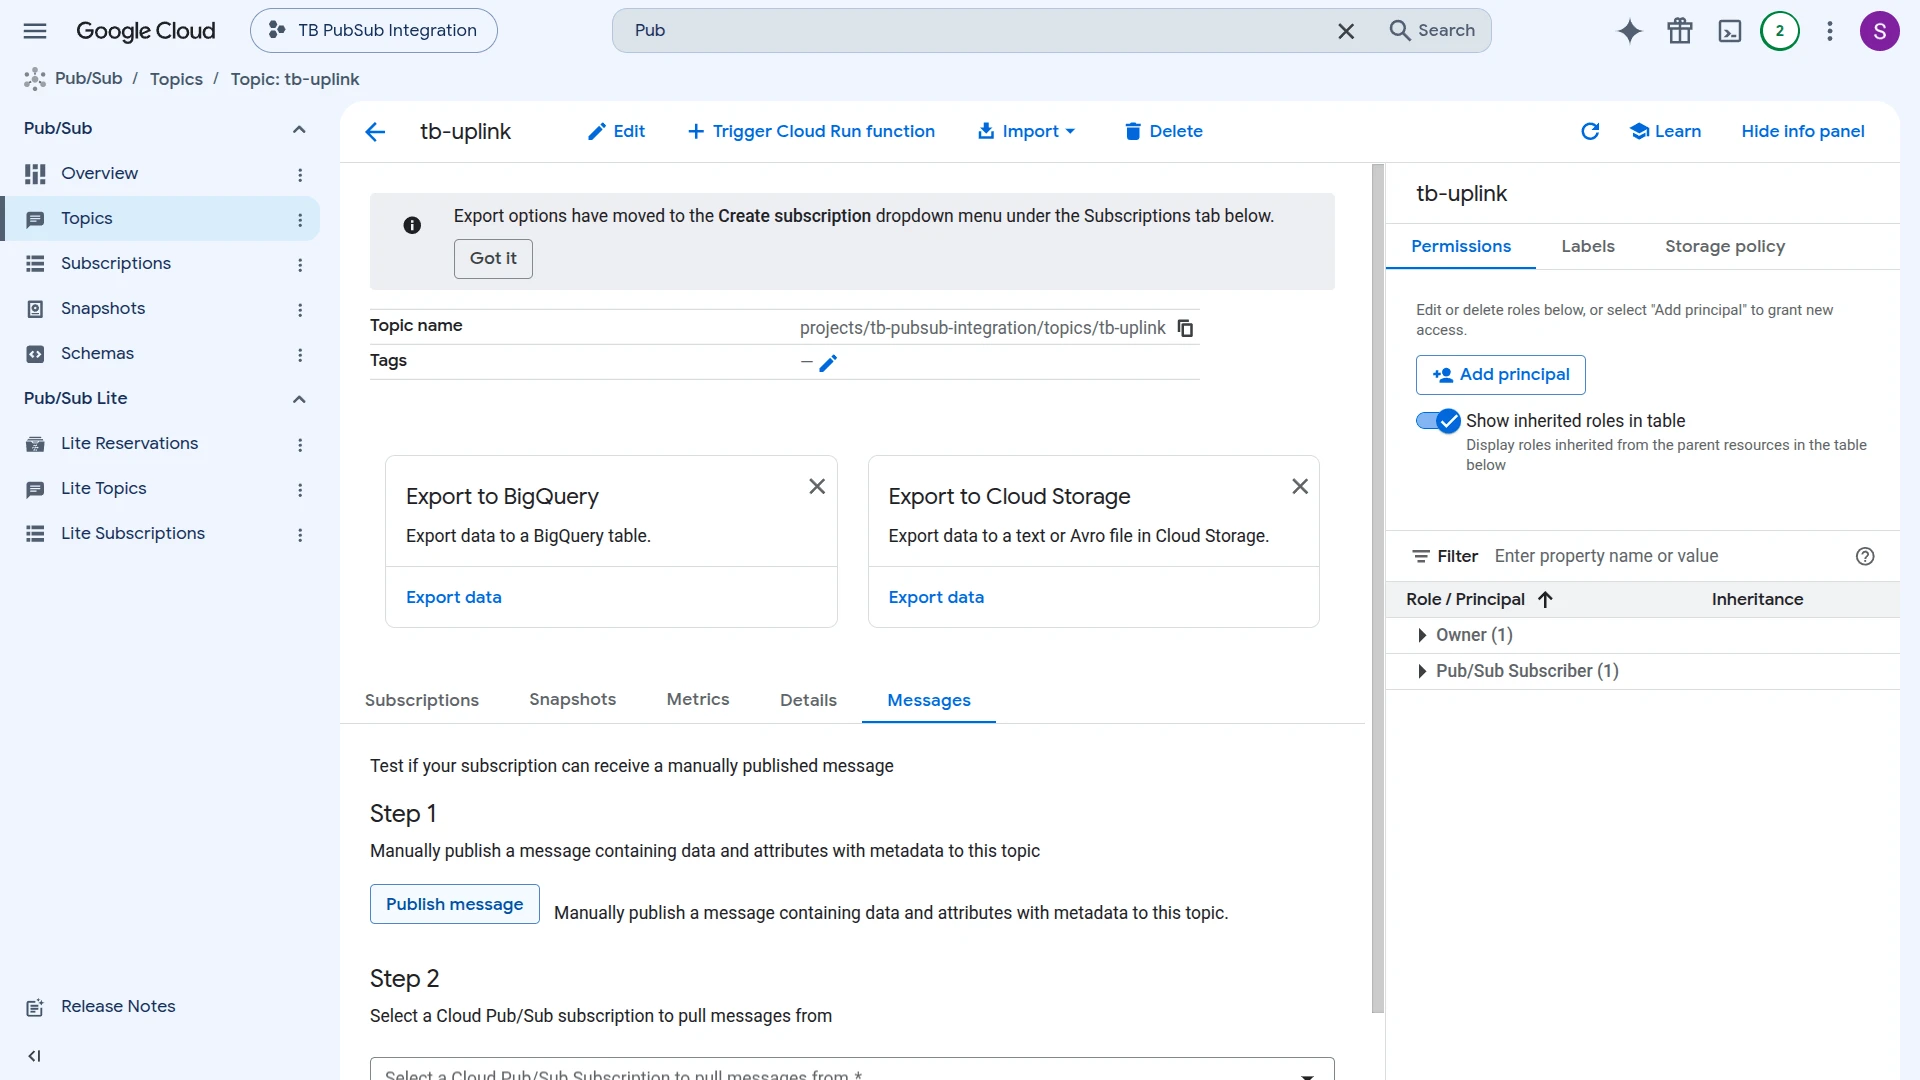
- Go to Pub/Sub ⇾ Topics and open the tb-uplink topic.
- On the Messages tab, click Publish message under Step 1.
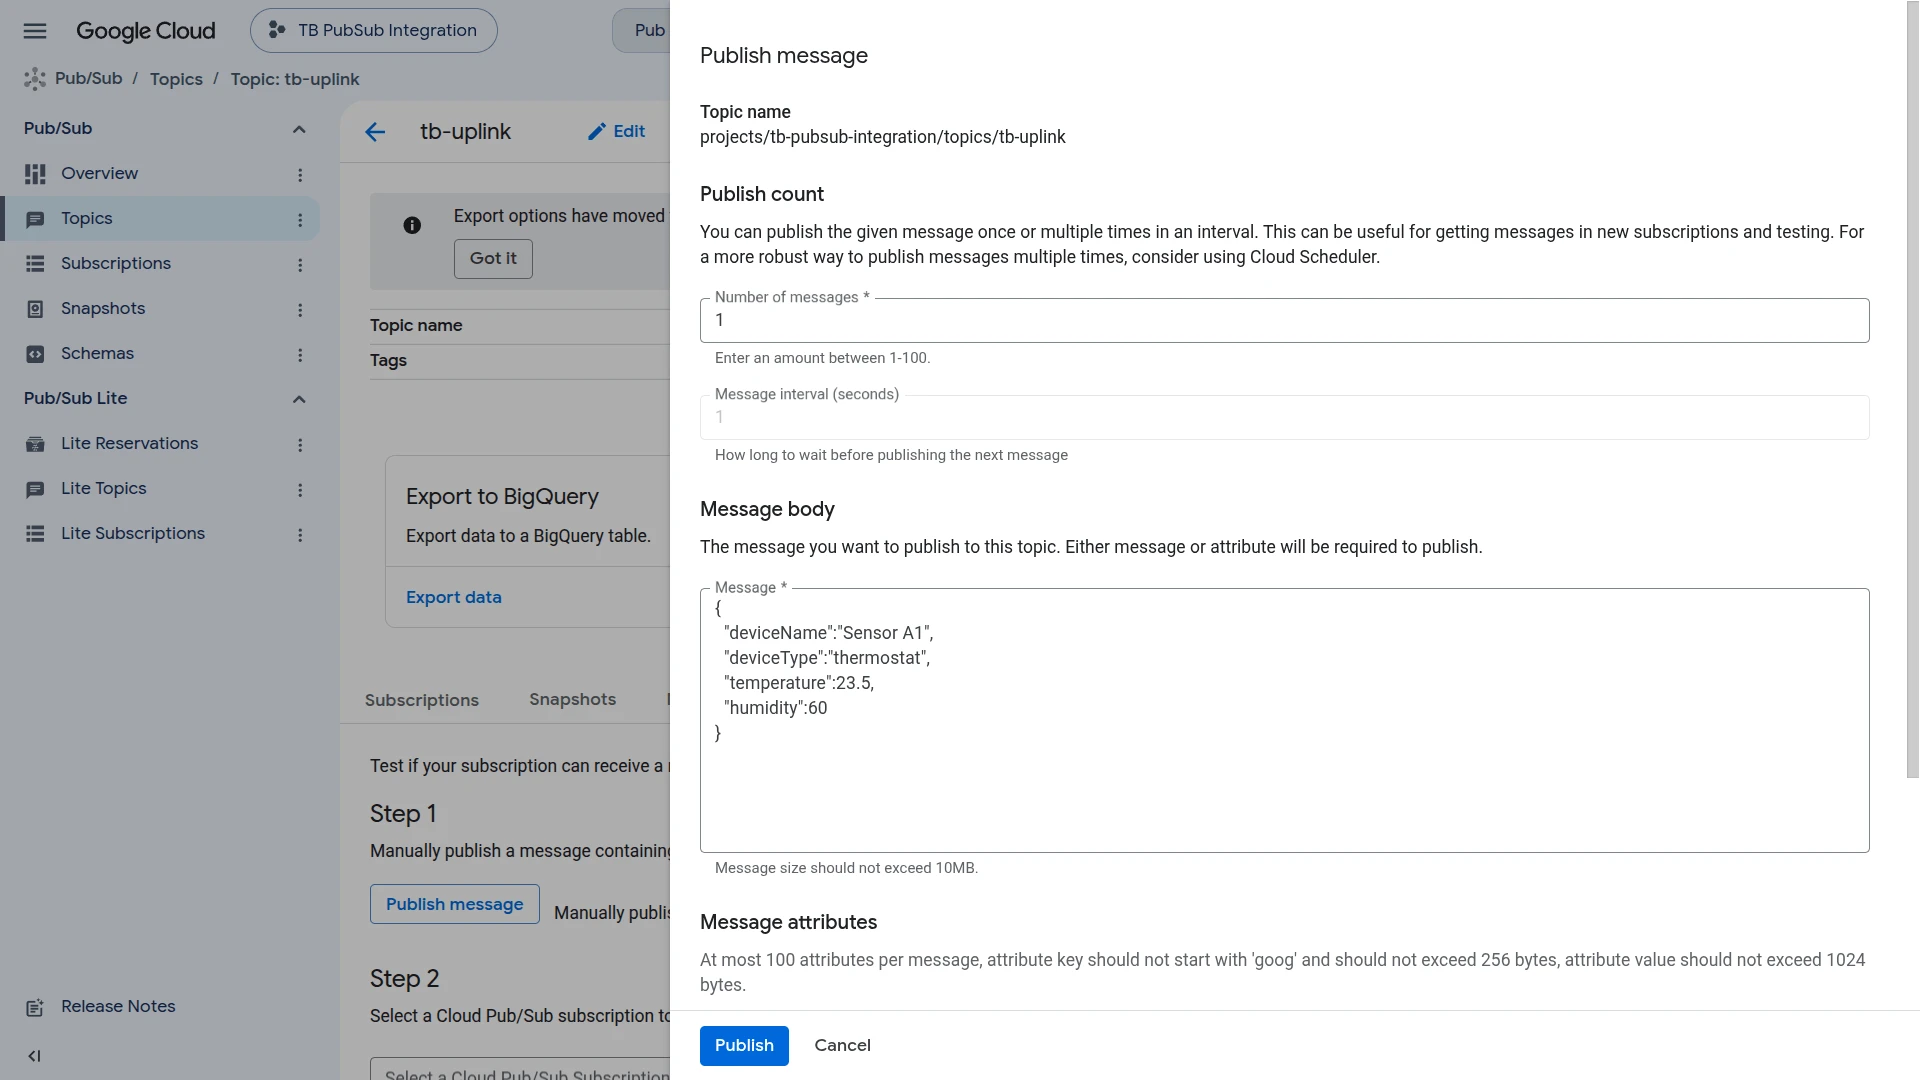
- Paste the JSON payload into the Message body field and click Publish.
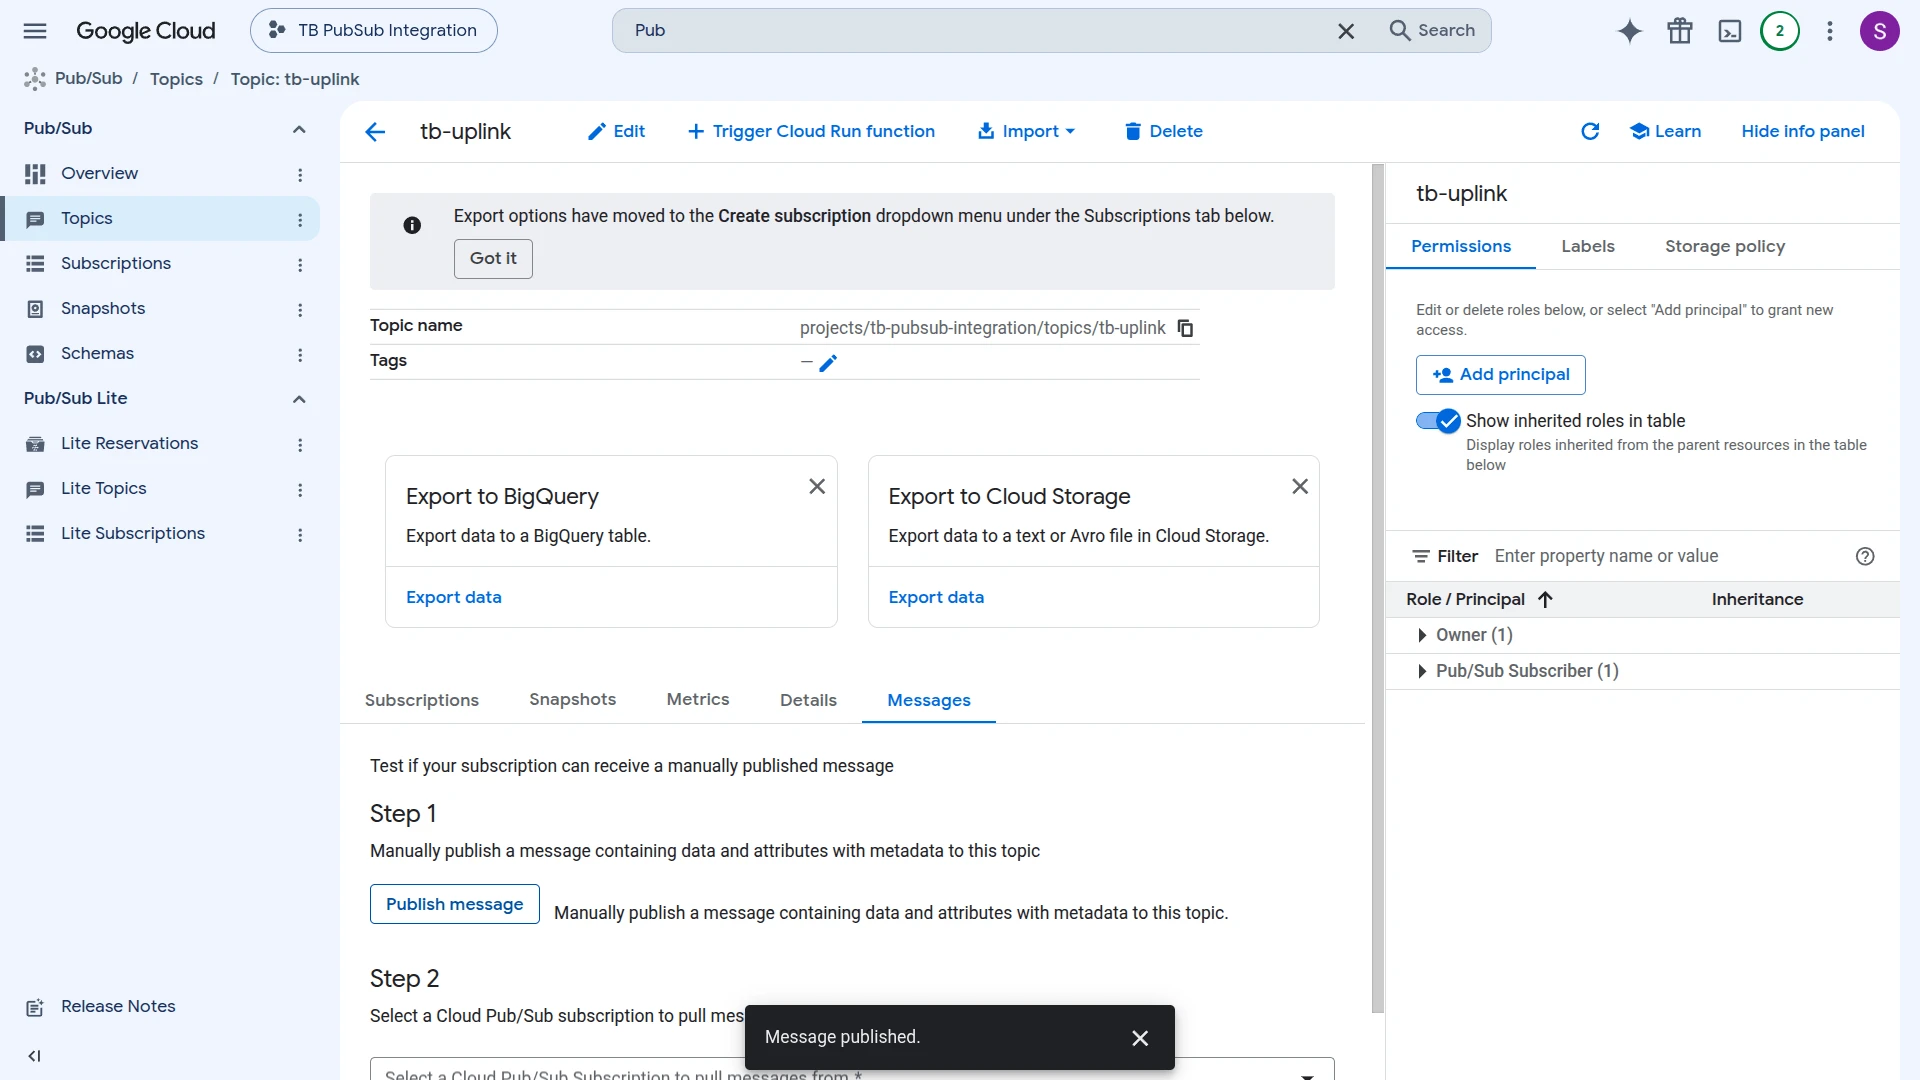
- A Message published confirmation appears once the message is delivered.
{ "deviceName":"Sensor A1", "deviceType":"thermostat", "temperature":23.5, "humidity":60}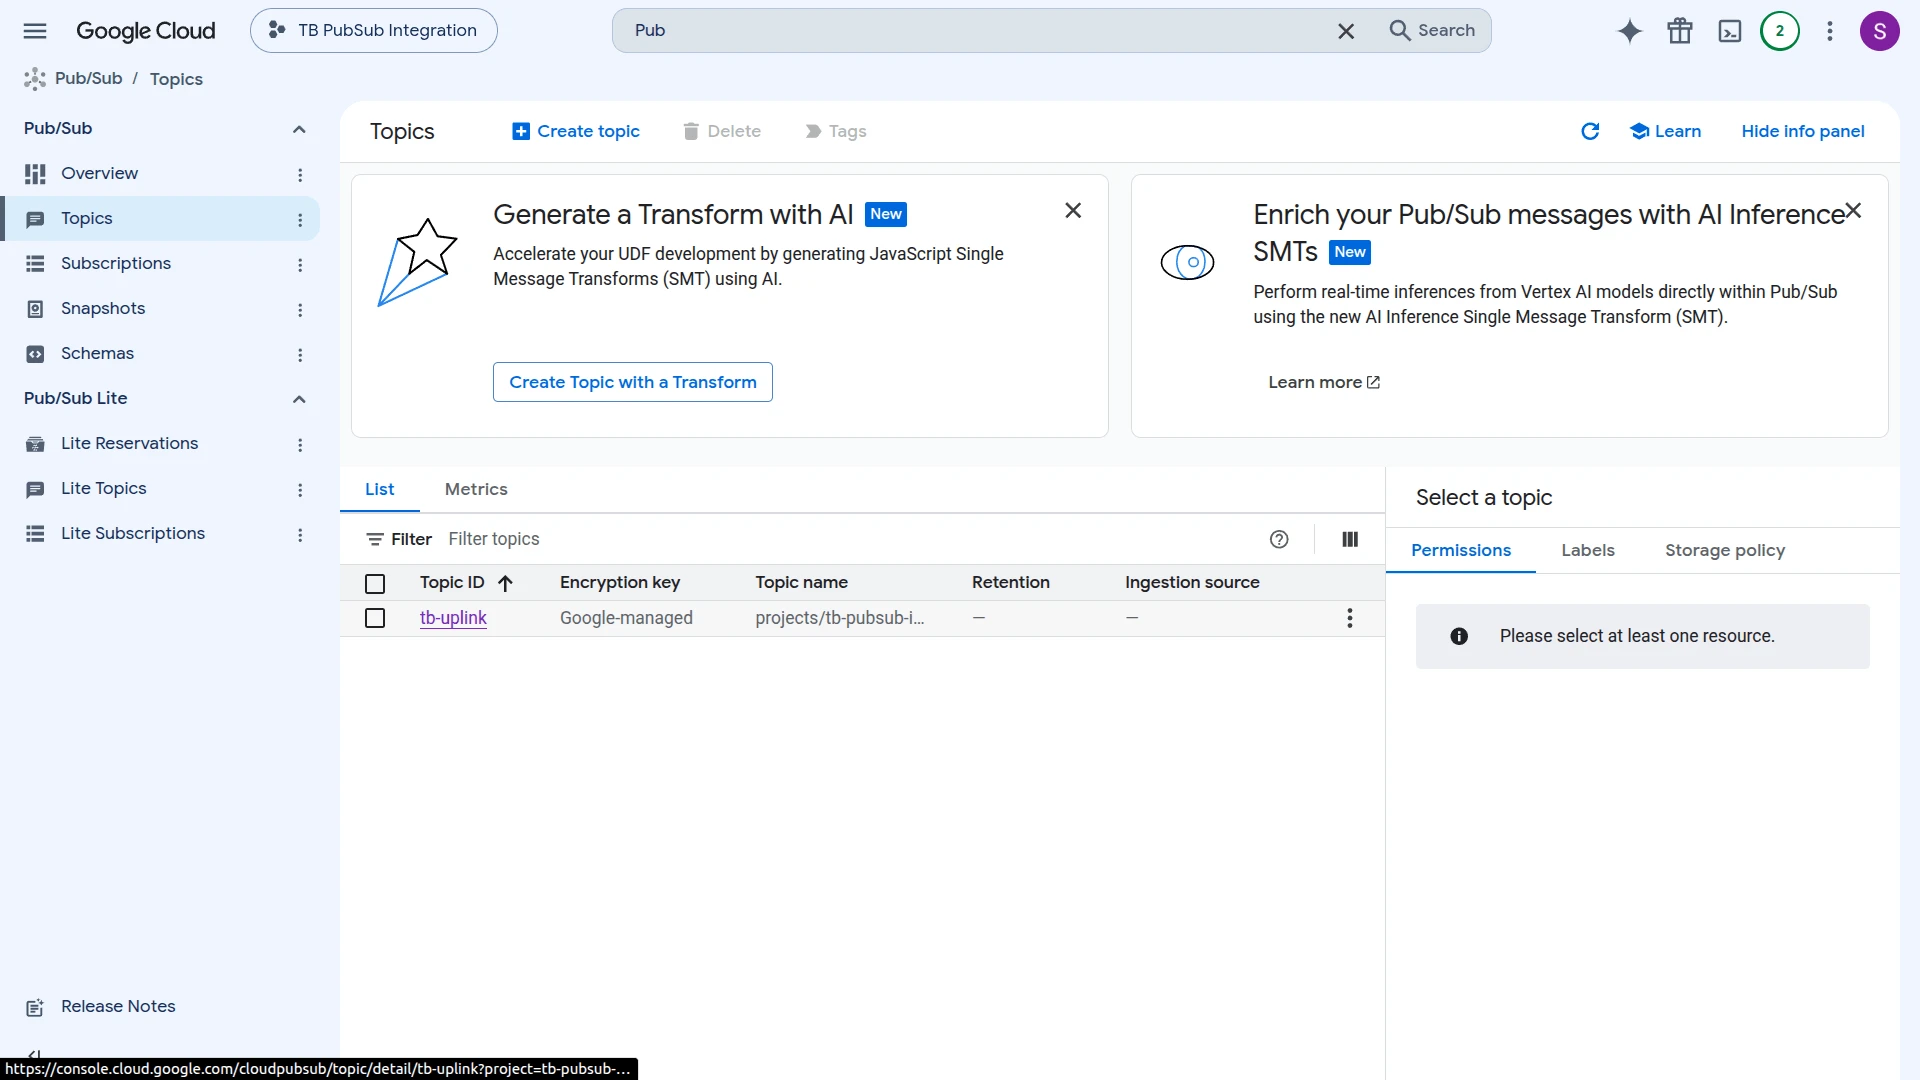
Replace tb-uplink with your topic name and my-gcp-project with your GCP project ID if they differ:
gcloud pubsub topics publish tb-uplink \ --message='{"deviceName":"Sensor A1","deviceType":"thermostat","temperature":23.5,"humidity":60}' \ --project=my-gcp-projectVerify Integration Events
Section titled “Verify Integration Events”Go to Integrations ⇾ Integrations, open the Pub/Sub integration, and check the Events tab. One Uplink event appears with status OK. Click … in the Message column to inspect the raw payload pulled from the subscription.
Verify Converter Events
Section titled “Verify Converter Events”Go to Integrations ⇾ Data converters, click the uplink converter, and open its Events tab. Click … in the respective column to inspect each field:
- In — the raw payload passed to the converter.
- Out — the decoded result:
deviceName,deviceType,attributes, andtelemetry(temperature, humidity). - Metadata —
integrationNameandpubSubMsgId(the unique message ID assigned by GCP Pub/Sub).
Verify Device Provisioning
Section titled “Verify Device Provisioning”Go to Devices & assets ⇾ Devices. The device Sensor A1 is automatically provisioned on the first message. Open it and check the Latest telemetry tab — temperature and humidity should reflect the published values.
Configure Downlink
Section titled “Configure Downlink”The Pub/Sub integration is uplink-only — it has no downlink converter. To publish messages from ThingsBoard back to a GCP Pub/Sub topic — for example, sending a command to a device or triggering a Cloud Function — add the GCP Pub/Sub rule node directly to a Rule Chain. It publishes the message payload it receives as-is, independent of the uplink integration.
Create the Downlink Topic
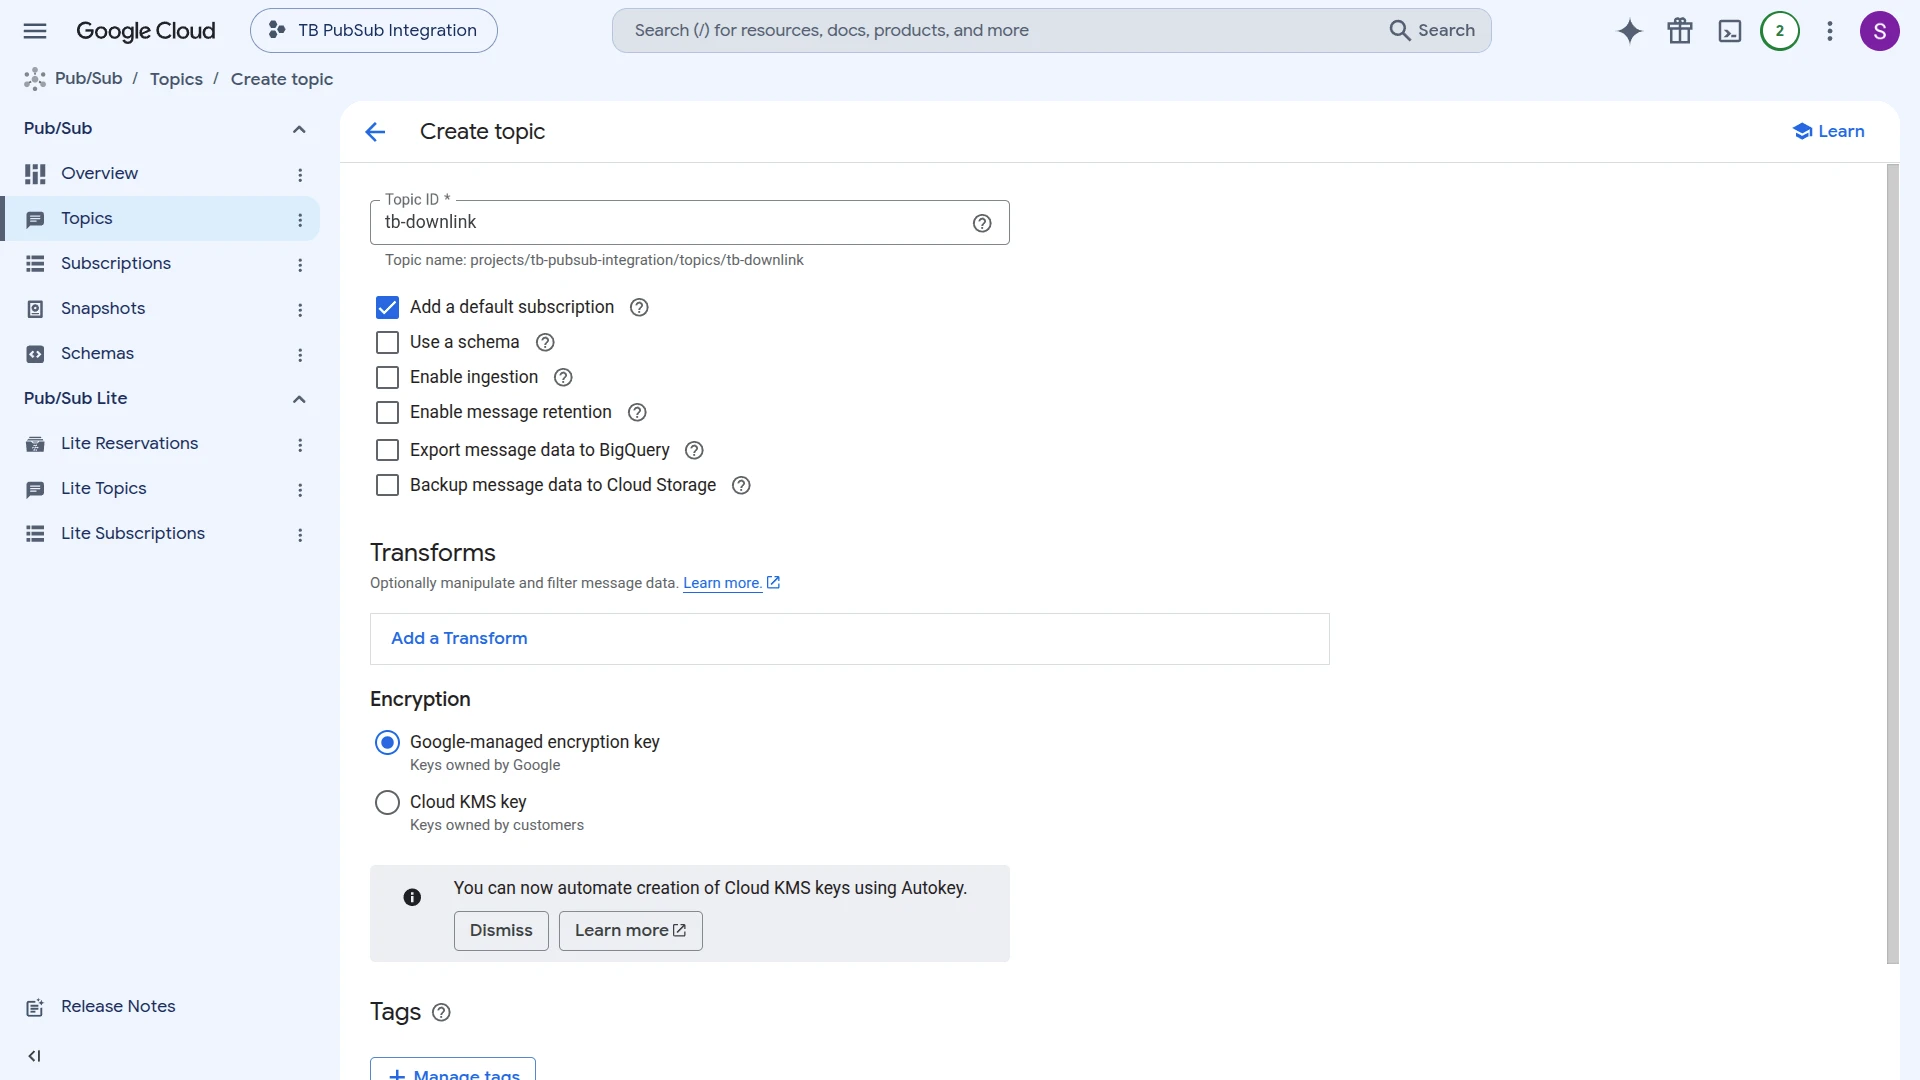
Section titled “Create the Downlink Topic”In the GCP Console, create a separate topic for outgoing messages (e.g. tb-downlink) — do not reuse the uplink topic.
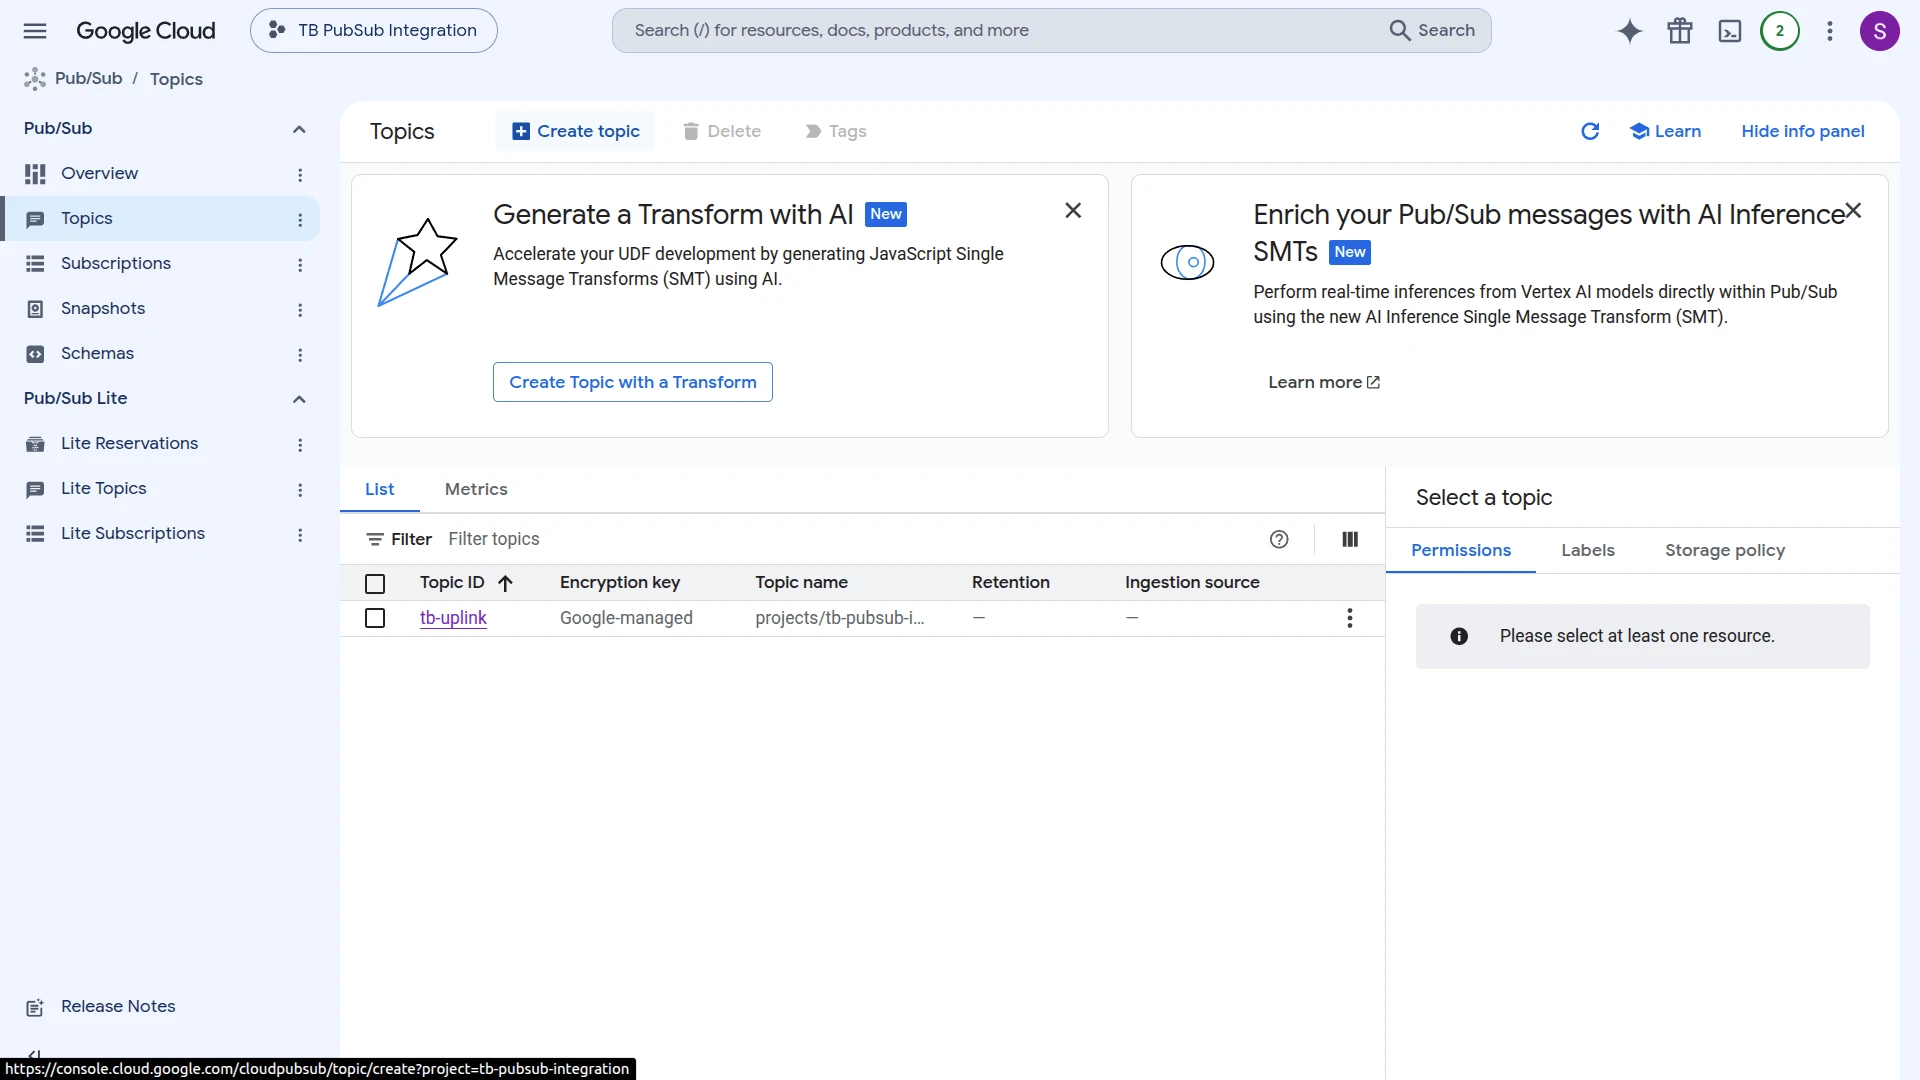
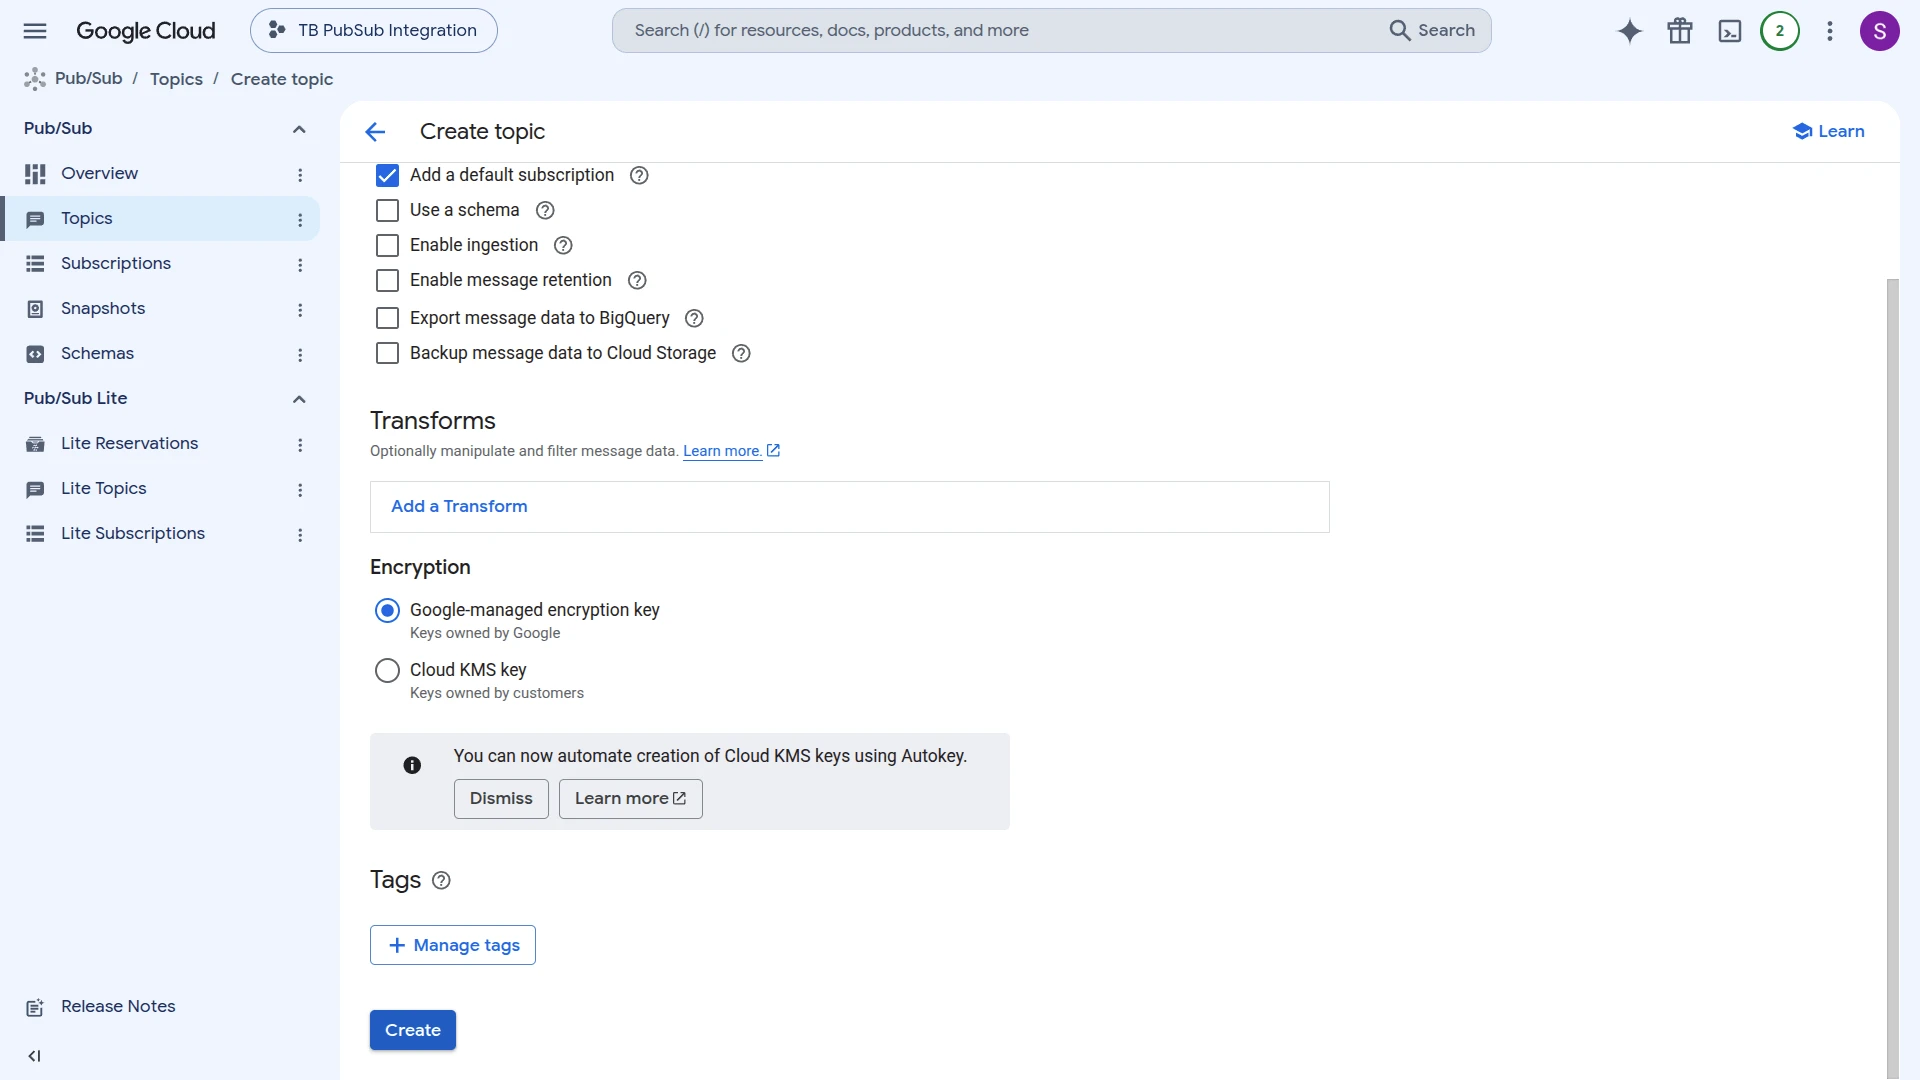
- Go to Pub/Sub ⇾ Topics and click Create topic.
- Enter a Topic ID (e.g.
tb-downlink). Keep Add a default subscription checked — it gives you a subscription (e.g.tb-downlink-sub) you can pull from later to verify published messages. - Scroll down and click Create.
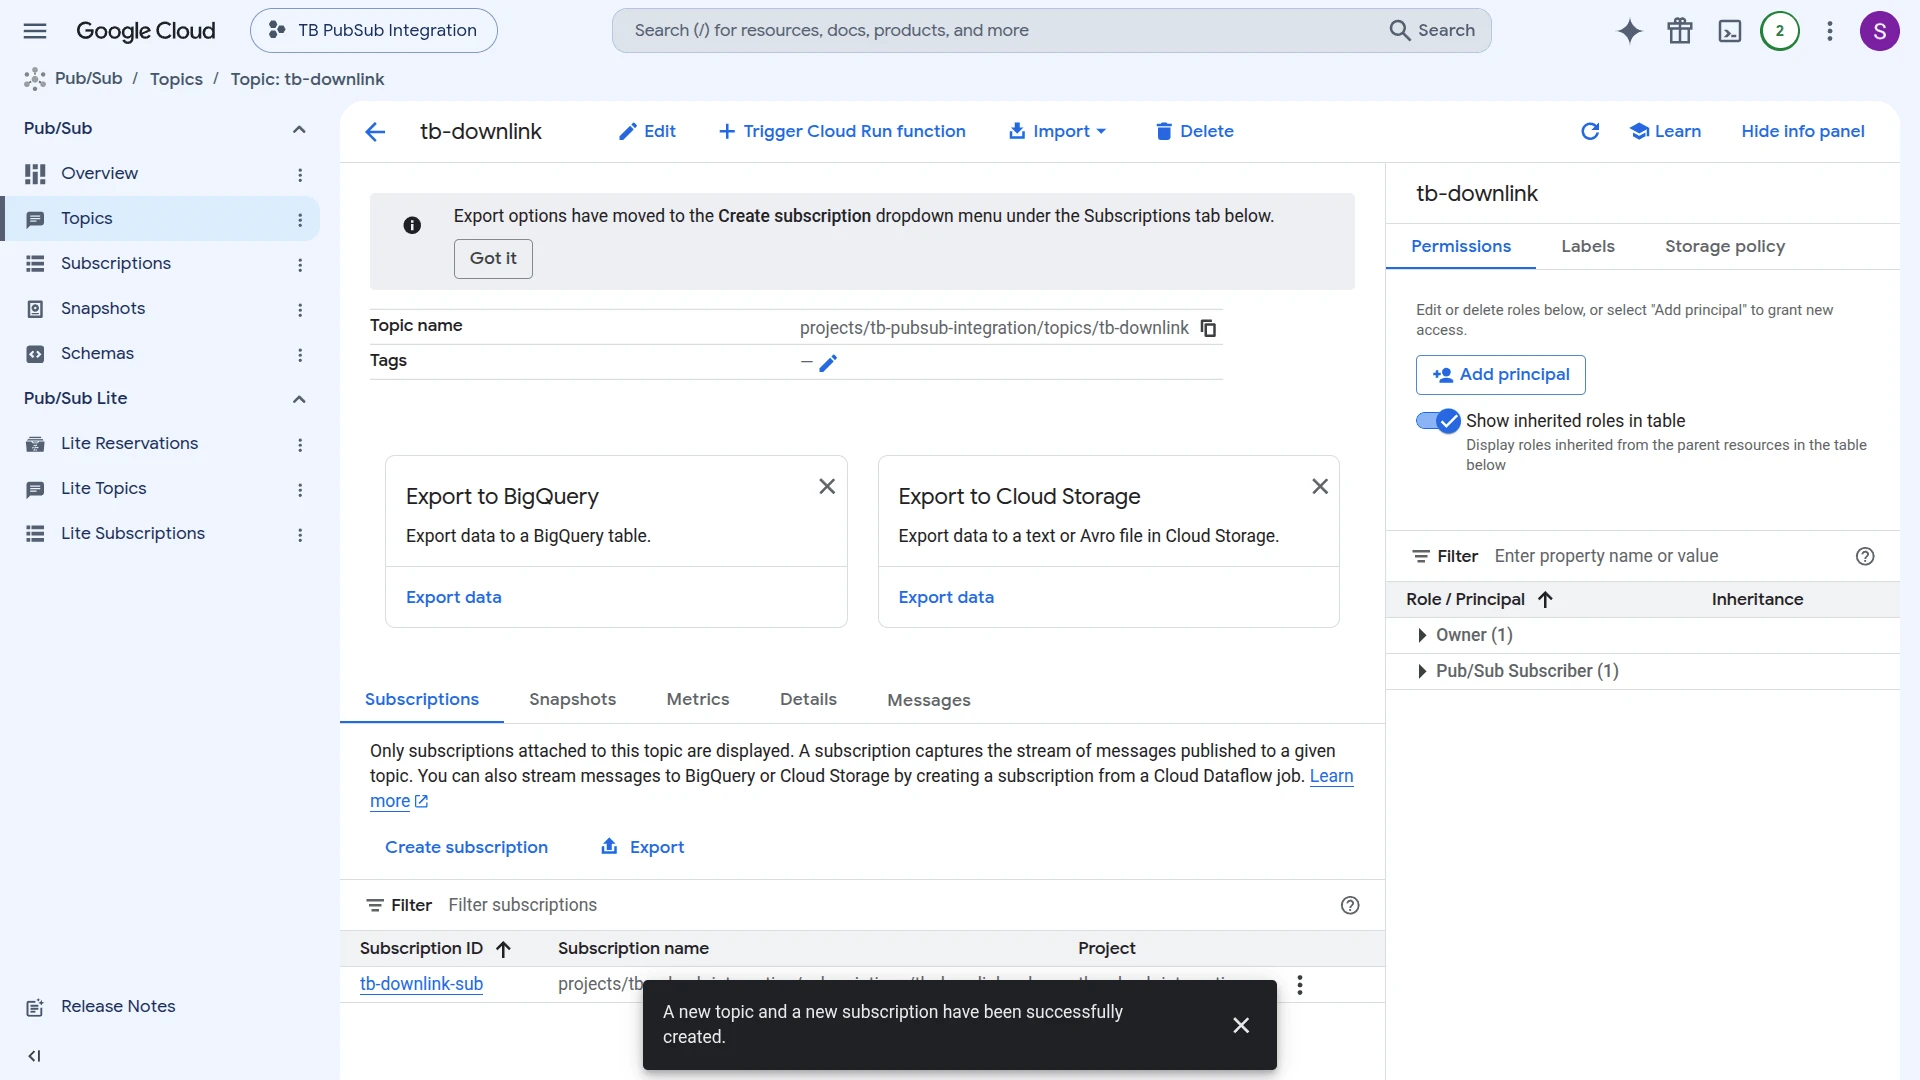
- GCP creates the topic and its subscription together, listed in the topic’s Subscriptions tab.
Grant Publish Access to the Service Account
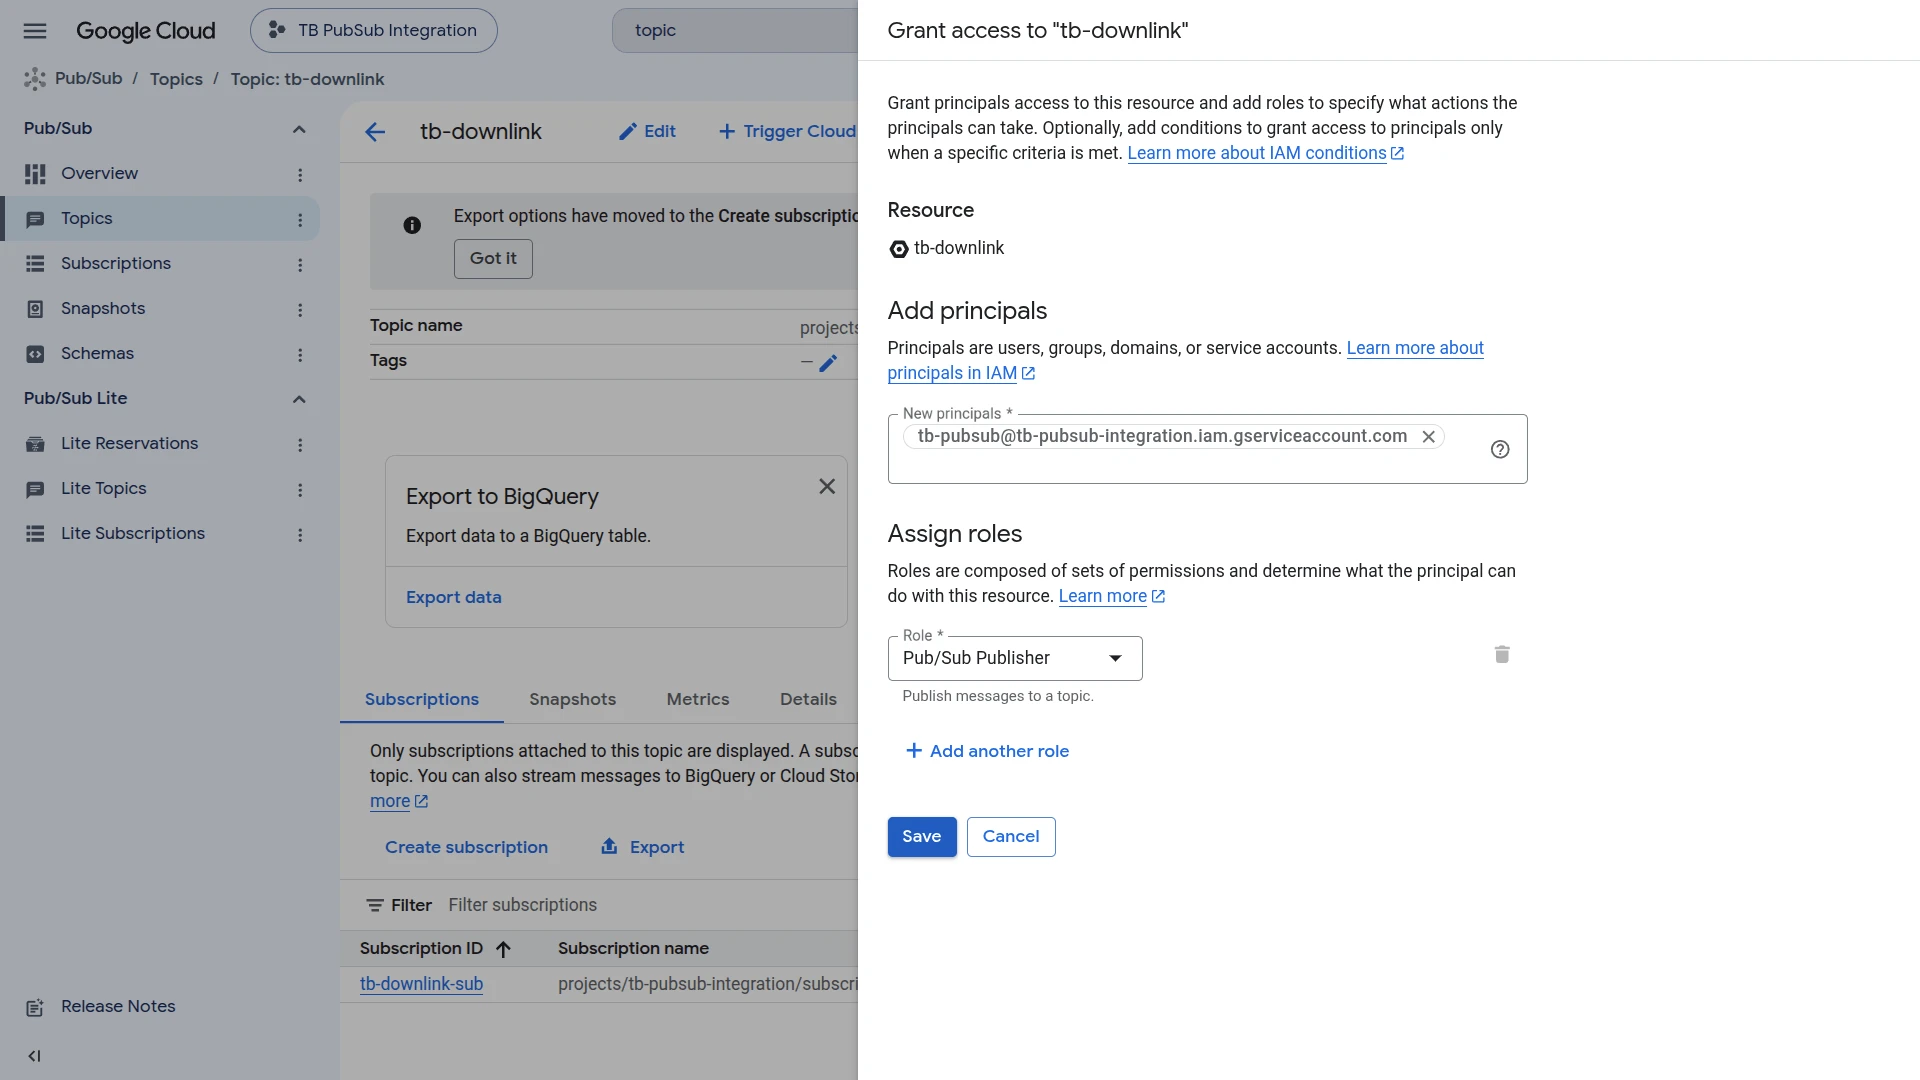
Section titled “Grant Publish Access to the Service Account”The service account created earlier (see Create a Service Account and Download the Key) only has the Pub/Sub Subscriber role, which lets it pull messages — it cannot publish. Grant it Pub/Sub Publisher on the new topic, or the rule node fails with a PERMISSION_DENIED error.
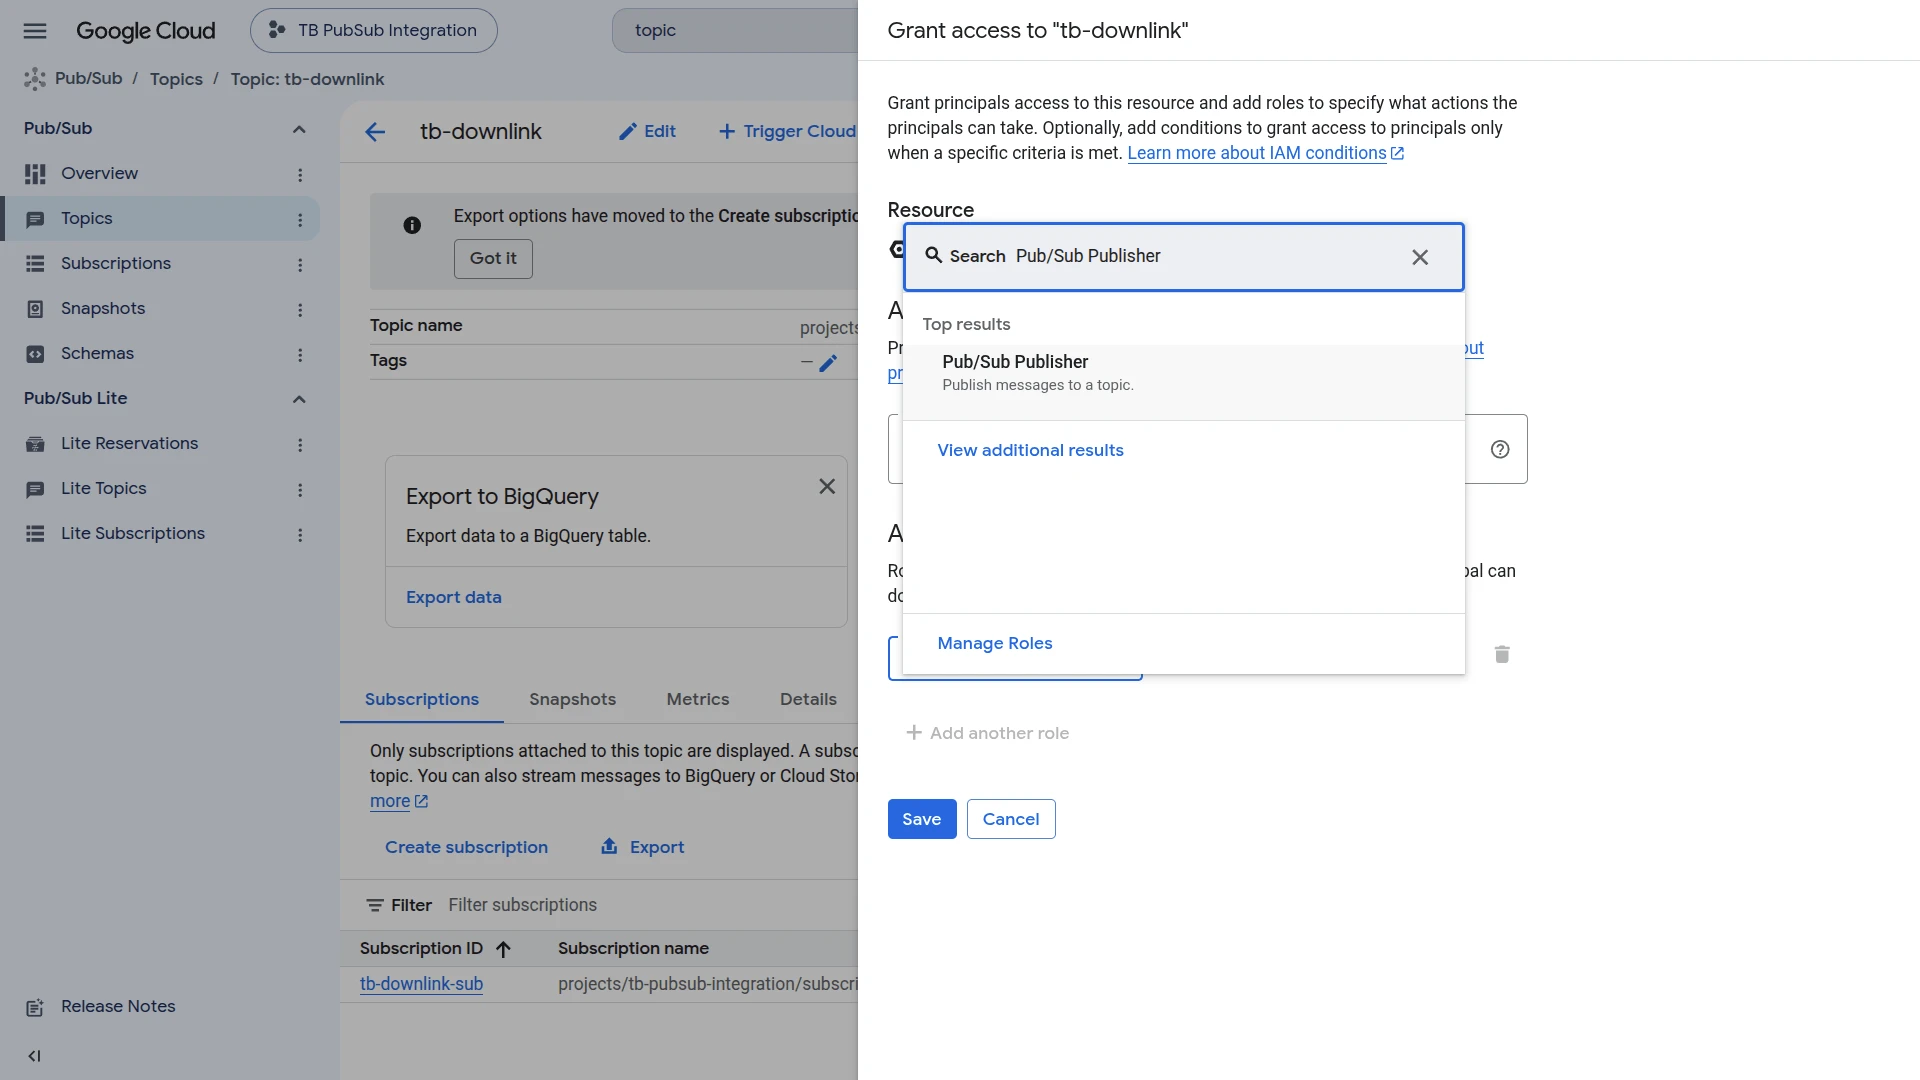
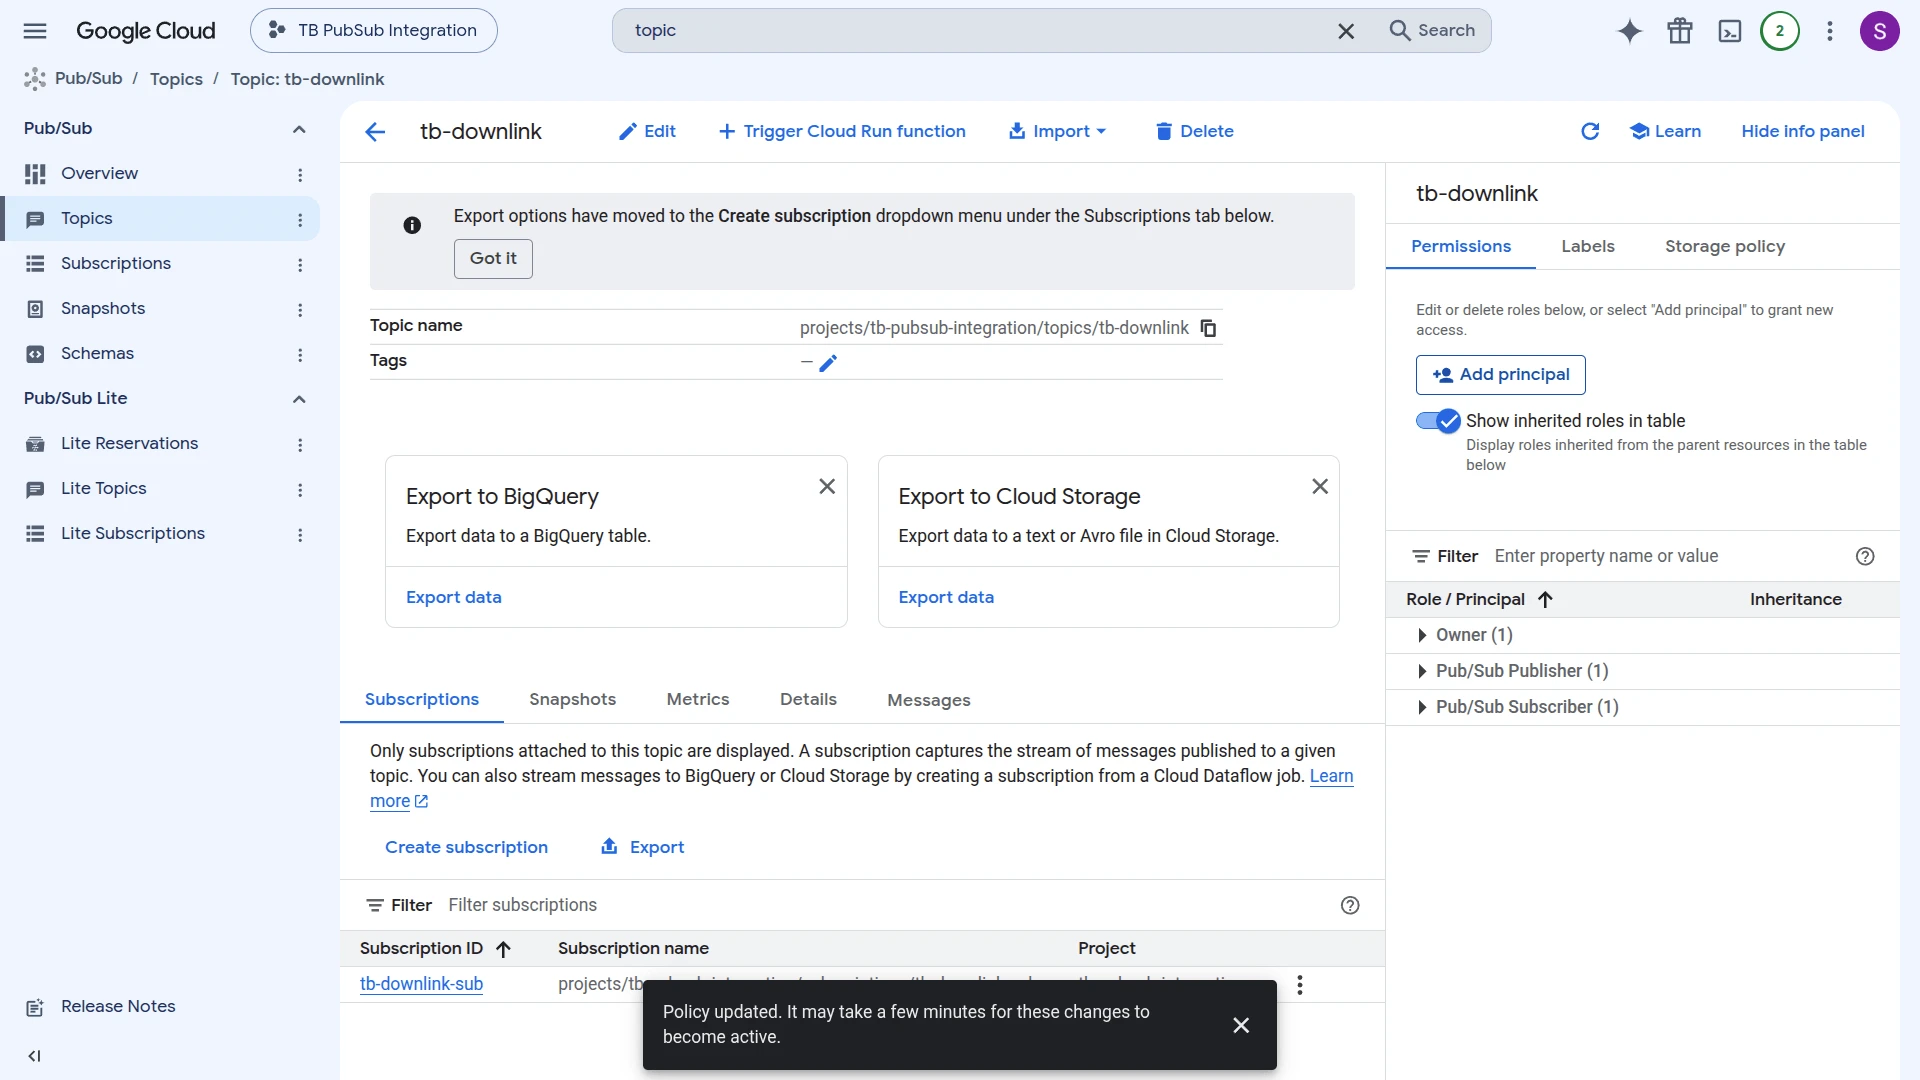
- Open the tb-downlink topic and go to its Permissions tab, then click Add principal.
- Under New principals, enter the service account’s email (e.g.
tb-pubsub@tb-pubsub-integration.iam.gserviceaccount.com). - Under Assign roles, select Pub/Sub Publisher, then click Save.
- The topic’s Permissions tab now lists Pub/Sub Publisher alongside the existing Pub/Sub Subscriber role.
Configure the Root Rule Chain
Section titled “Configure the Root Rule Chain”- Go to Data processing ⇾ Rule chains and open the Root Rule Chain.
- In the node palette on the left, search for gcp pubsub (under External) and drag it onto the canvas.
- In the Add rule node dialog, enter a Name (e.g.
PubSub Downlink), the GCP project ID (e.g.tb-pubsub-integration), and the Topic name (e.g.tb-downlink). - Upload the GCP service account key file — you can reuse the same key from the uplink service account now that it has the Publisher role.
- Optionally add Message attributes (Name/Value pairs using
${metadataKey}for a value from message metadata, or$[messageKey]for a value from the message body) to pass extra context likedeviceNameas a Pub/Sub attribute rather than in the payload. - Click Add, then connect the node’s input to the Message Type Switch node’s Attributes Updated relation (or another relation for whatever message type should trigger a downlink).
- Click Apply changes.
Trigger a Downlink
Section titled “Trigger a Downlink”Trigger the rule node by adding an attribute to device Sensor A1:
- Go to Devices & assets ⇾ Devices and open
Sensor A1. - Open the Attributes tab and click +.
- Enter key
powerState, keep type String, enter valueon, and click Add.
Verify Rule Node Events
Adding the attribute generates an Attributes Updated message that reaches the gcp pubsub node. Open the node’s Events tab — a debug event with Relation Type: Success confirms the publish succeeded. Click … in the Data column to see the payload sent, and … in the Metadata column to see the messageId GCP assigned to the message.
Verify Delivery in Google Cloud Pub/Sub
Pub/Sub has no “sent messages” log on the topic itself — read the message back through the subscription created earlier:
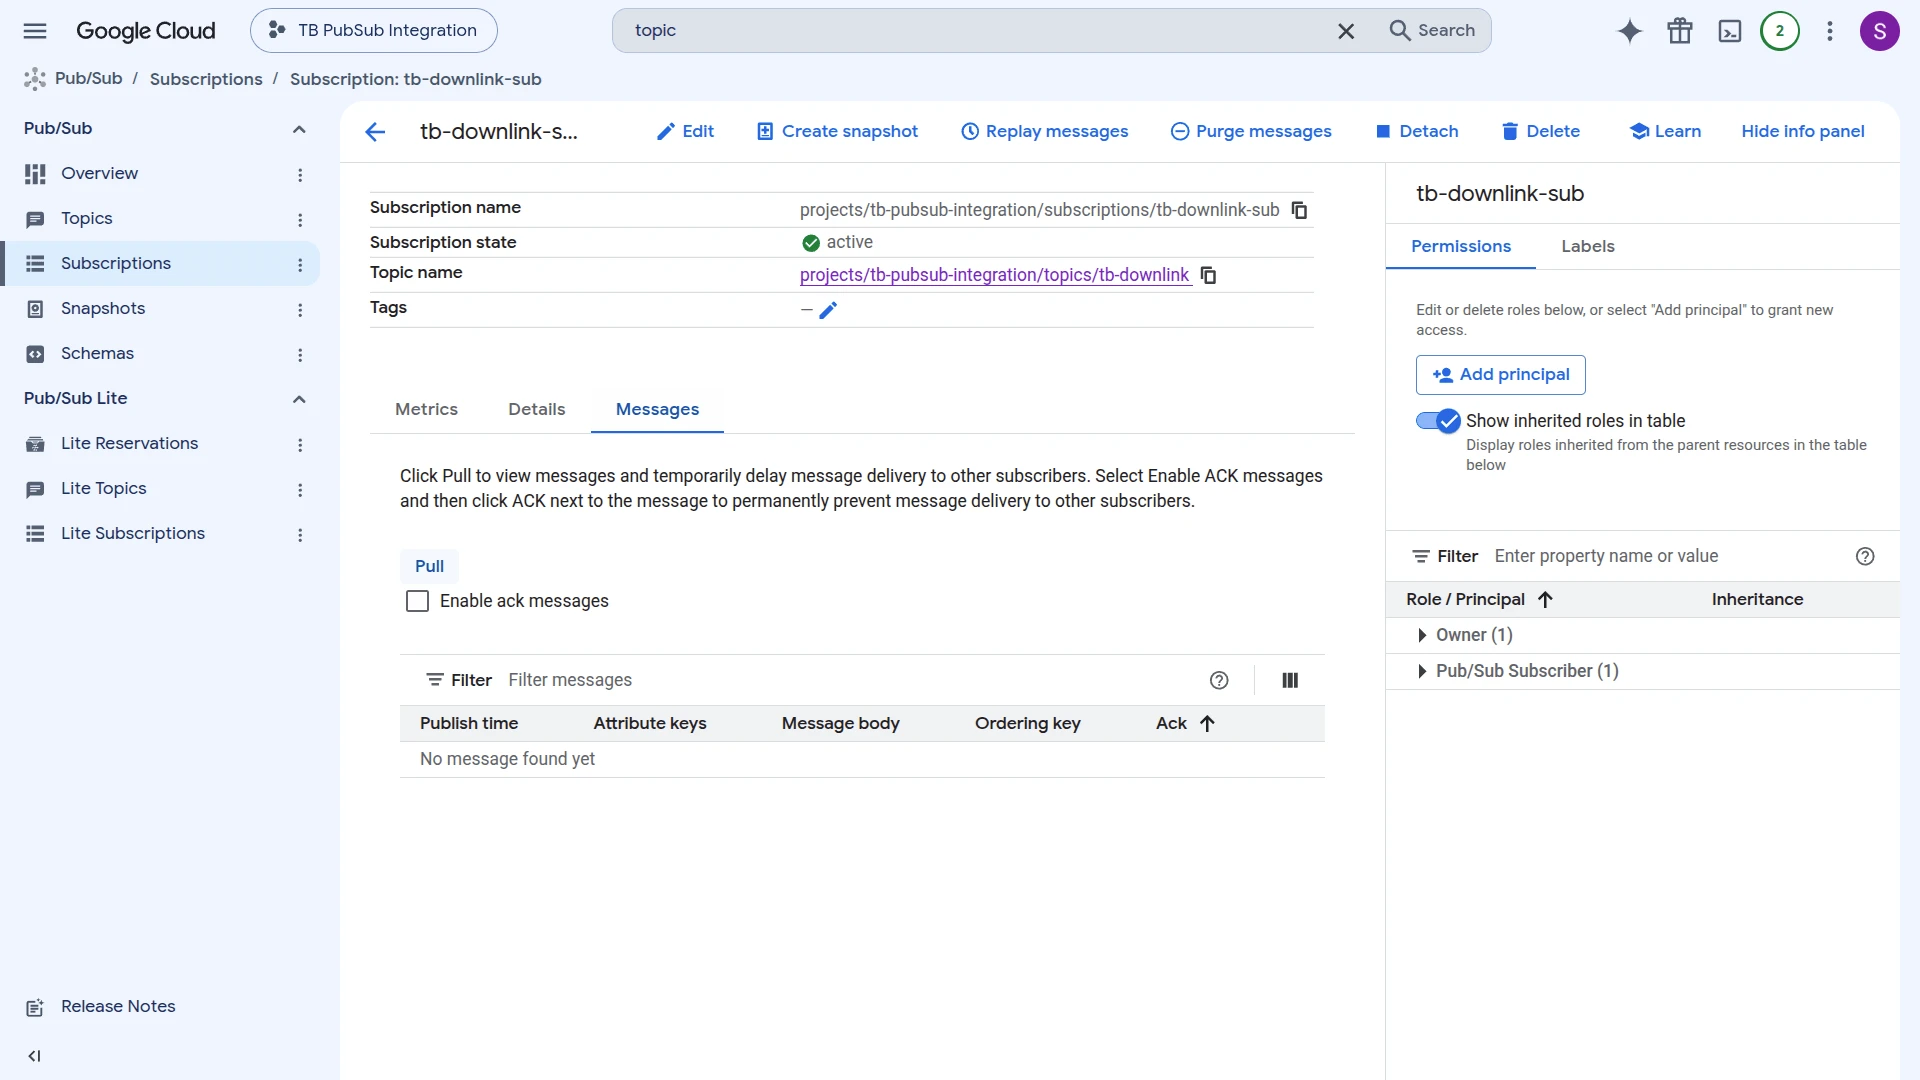
- Go to Pub/Sub ⇾ Subscriptions and open tb-downlink-sub.
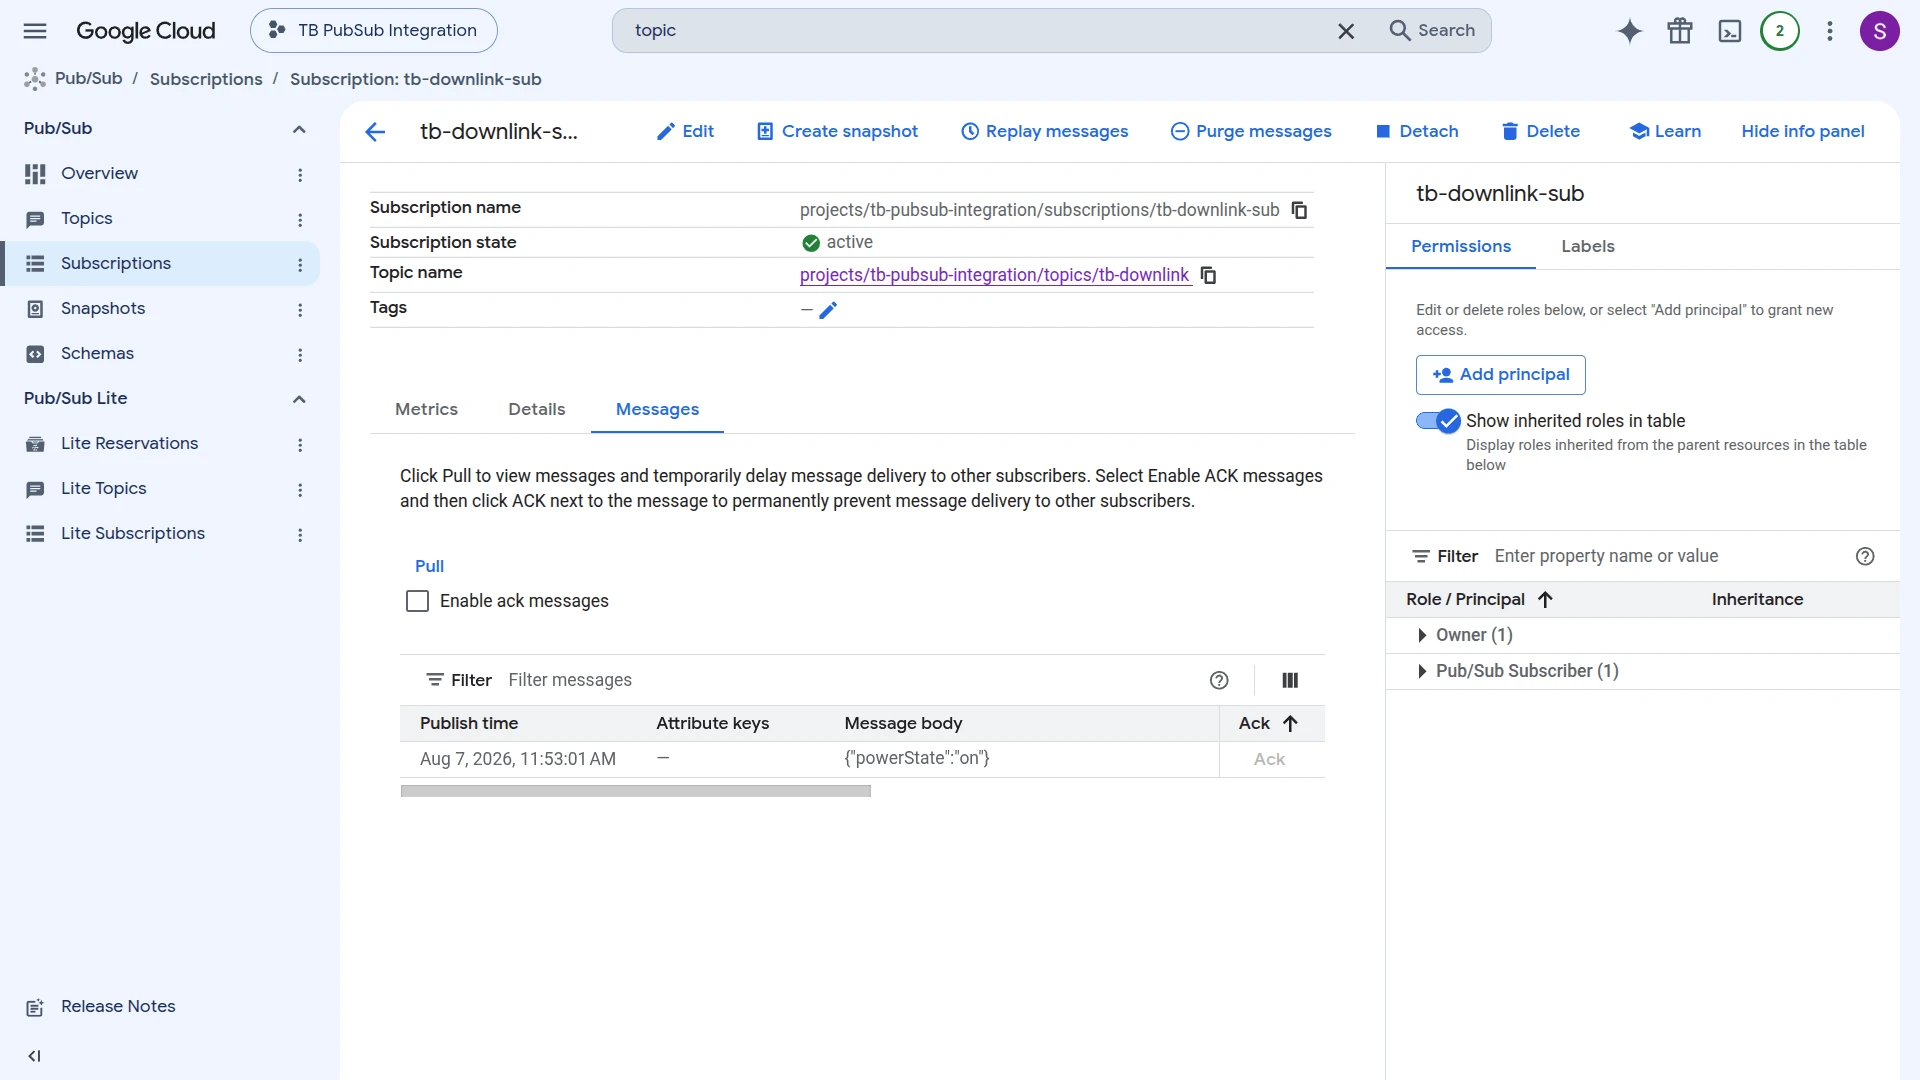
- Open the Messages tab and click Pull.
- The published message appears with its Message body — confirming it reached GCP.
Troubleshooting
Section titled “Troubleshooting”| Symptom | Likely cause | Fix |
|---|---|---|
| Integration status is not Active | Wrong Project ID or Subscription ID | Confirm both exactly match the values in the GCP Console. |
| Integration status is not Active | Invalid or incomplete Service account key | Verify the JSON is complete and belongs to an active service account. |
| Integration status is not Active | Missing subscriber role | Grant roles/pubsub.subscriber to the service account on the subscription. |
| Integration status is not Active | Pub/Sub API disabled | Enable the Cloud Pub/Sub API in your GCP project. |
| Messages not appearing in ThingsBoard | Processing errors | Check the integration Events tab for errors. |
| Messages not appearing in ThingsBoard | Subscription unbound or deactivated | Confirm the pull subscription is attached to the correct topic and no expiration policy has deactivated it. |
| Messages received but not decoded | Converter does not match the payload | Inspect Converter Events → In and adjust the decoder to the actual message format. |
| Device not created | Allow create devices or assets disabled | Open the integration, click the edit icon, and enable Allow create devices or assets. |
| Downlink not published to GCP | Wrong rule-node config or missing publisher role | Confirm the GCP Pub/Sub rule node has the correct Project ID, Topic name, and a key with roles/pubsub.publisher. |
See Also
Section titled “See Also”- Integrations Overview — how ThingsBoard connects to external platforms and how uplink/downlink flow works
- Uplink Data Converter — full decoder function reference: input parameters, output fields, and scripting patterns
- GCP Pub/Sub Rule Node — publish messages from the Rule Engine back to a GCP Pub/Sub topic (downlink)
- Remote Integration — run the integration outside the ThingsBoard server to reach a broker on a private network
- TBEL scripting reference — built-in functions and operators for writing converter scripts
- Rule Engine — how rule chains route messages to nodes like the GCP Pub/Sub Rule Node
Was this helpful?