AWS SQS Integration
AWS SQS Integration connects ThingsBoard to an Amazon Simple Queue Service queue. ThingsBoard polls the queue for incoming messages and transforms them into device telemetry and attributes via an uplink converter. This is useful for ingesting device data published to AWS SQS by external services or pipelines into ThingsBoard for real-time processing and visualization.
Prerequisites
Section titled “Prerequisites”Before you start, make sure you have:
- A running ThingsBoard instance with access to the Integrations center.
- Access to the AWS Management Console.
- An SQS queue created in the AWS region you plan to use.
- IAM credentials (Access Key ID and Secret Access Key) with permission to read from that queue.
AWS SQS setup
Section titled “AWS SQS setup”Open Amazon SQS in AWS
Section titled “Open Amazon SQS in AWS”- Sign in to the AWS Management Console.
- In the top-right corner, check the active AWS region. Switch the region to the one you want to use for the queue, for example
eu-north-1. - In the AWS search bar, type SQS.
- Click Simple Queue Service.
- In the left navigation panel, click Queues. The SQS console shows all queues in the currently selected region.
Create an SQS queue
Section titled “Create an SQS queue”If you already have a queue, you can skip this step.
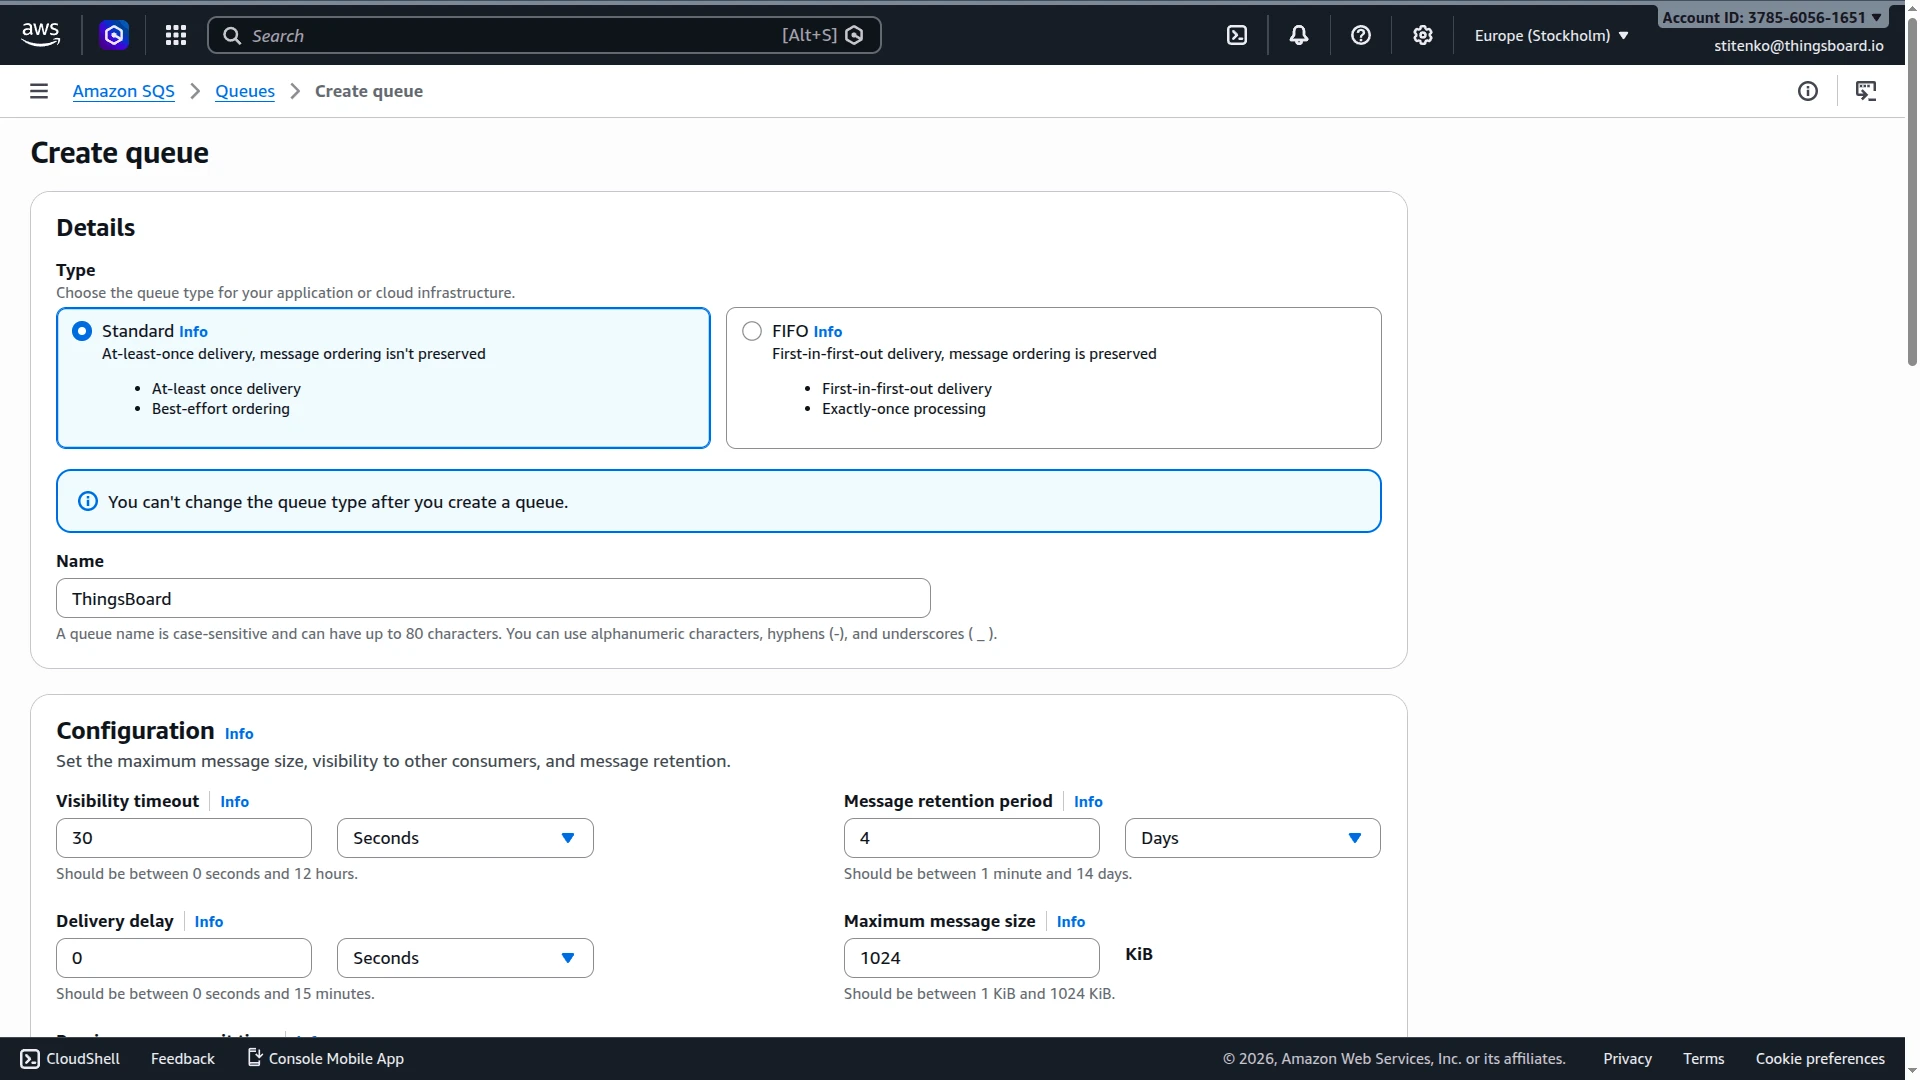
- On the Queues page, click Create queue.
- In the Details section, choose the queue type:
- Standard — high throughput, best-effort ordering.
- FIFO — strict ordering and exactly-once processing.
- In the Name field, enter the queue name. If you selected FIFO, the name must end with
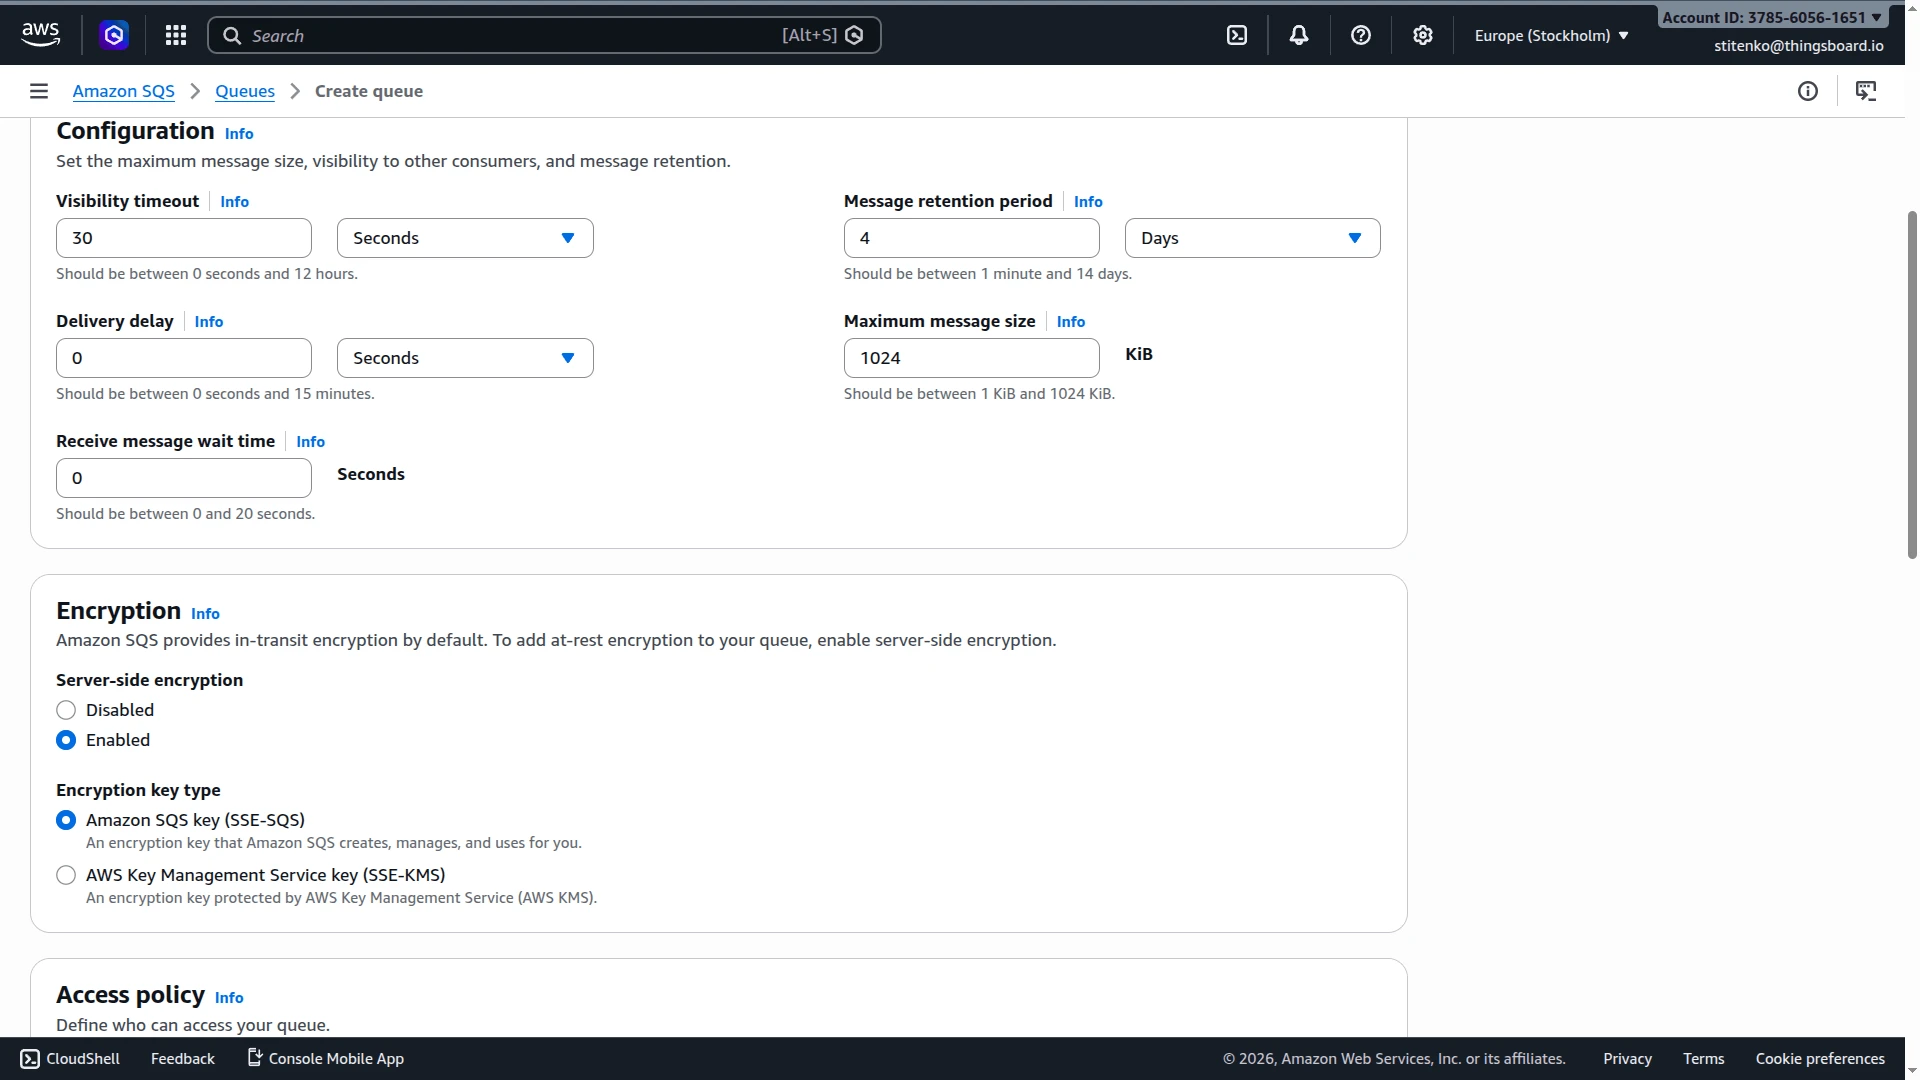
.fifo. - Configure the main queue parameters as needed: Visibility timeout, Message retention period, Delivery delay, Maximum message size, Receive message wait time.
- In the Encryption section, keep server-side encryption enabled unless you have a reason to disable it.
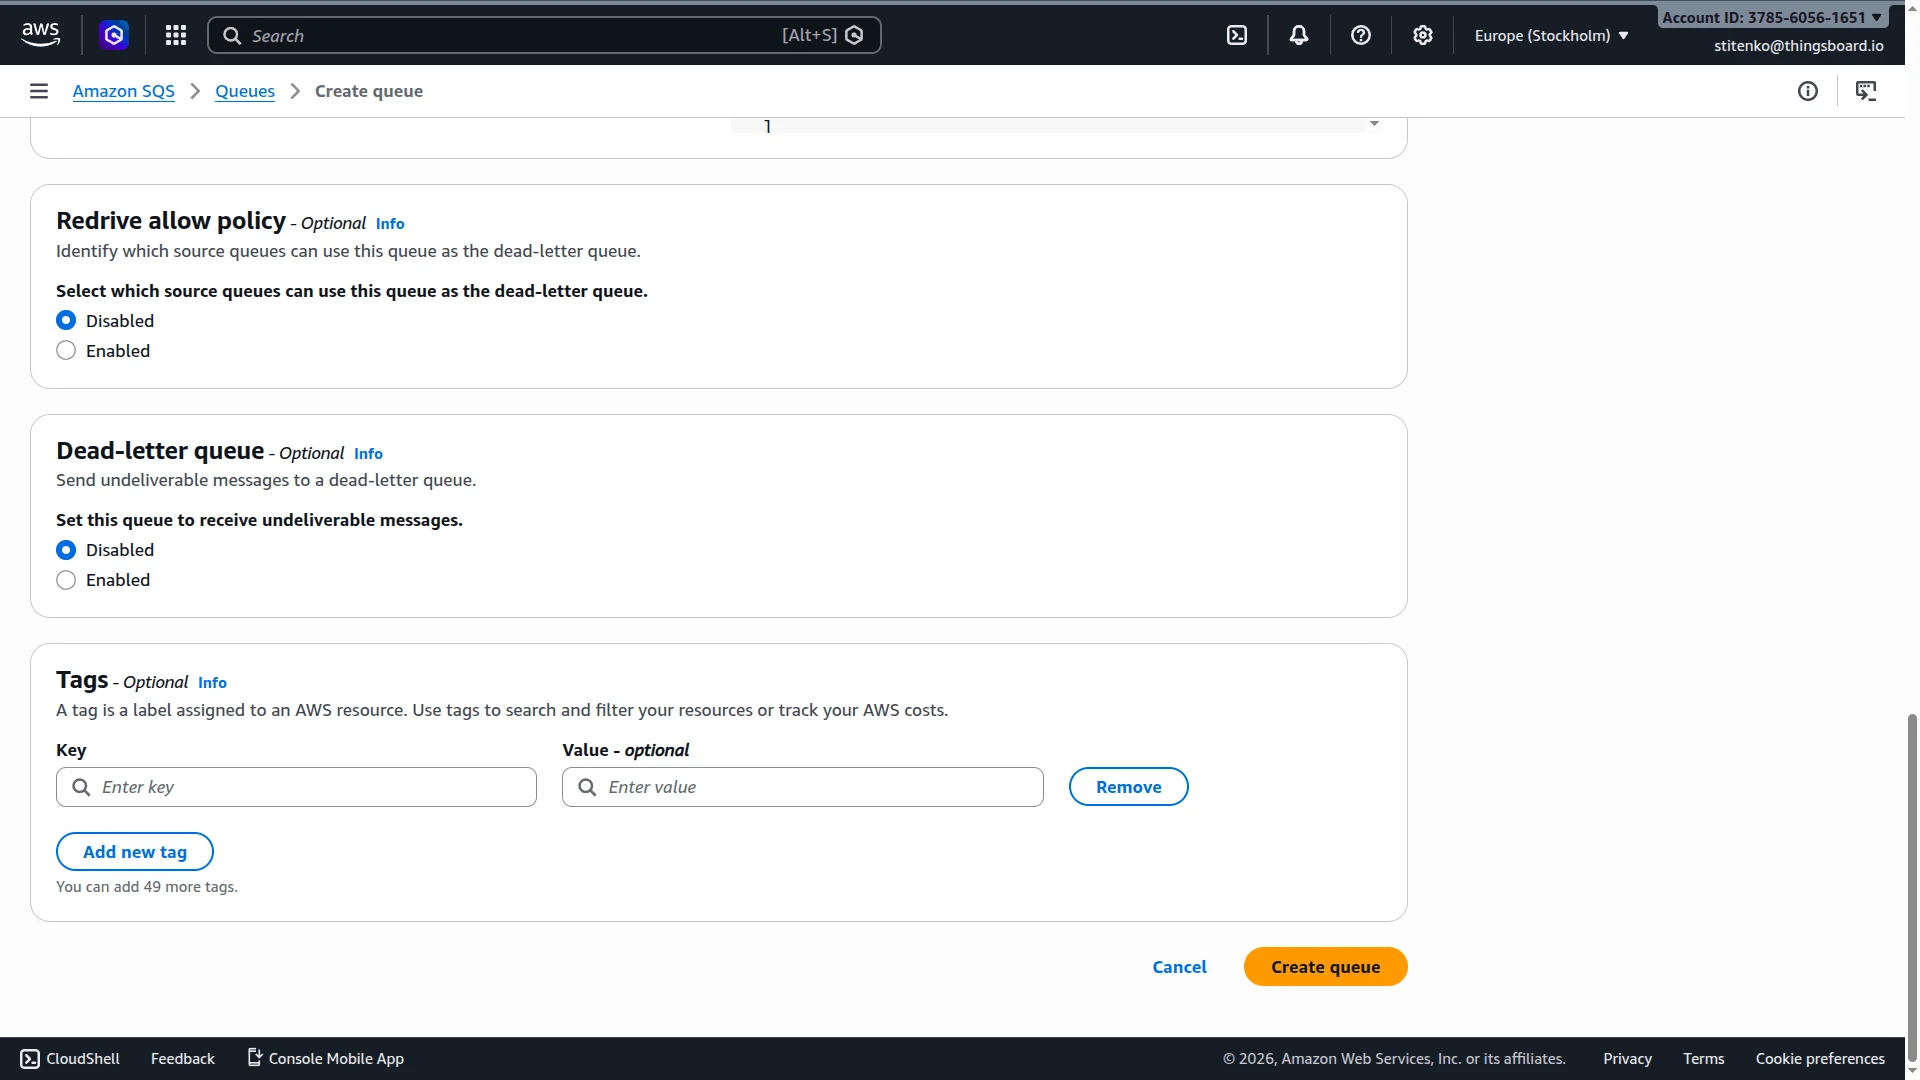
- Configure Dead-letter queue settings if required.
- Click Create queue.

Copy the queue URL
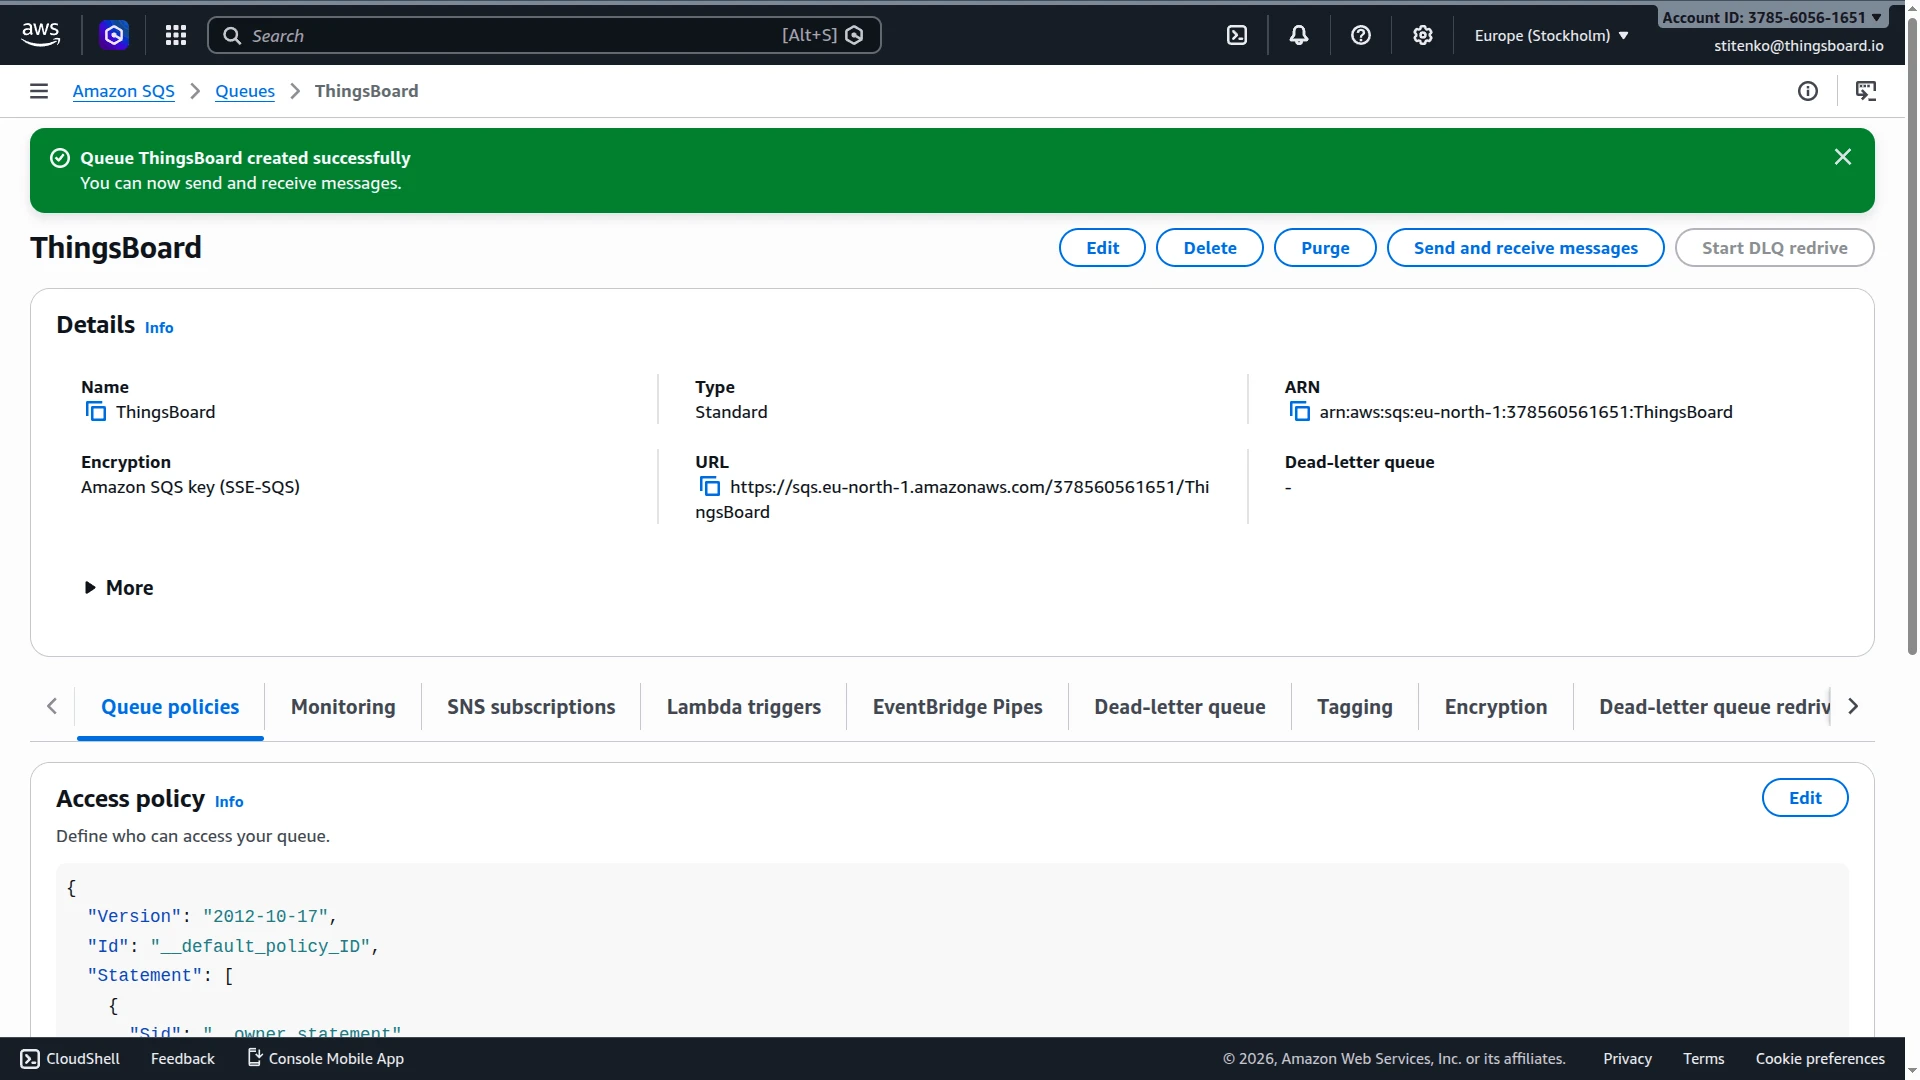
Section titled “Copy the queue URL”After the queue is created:
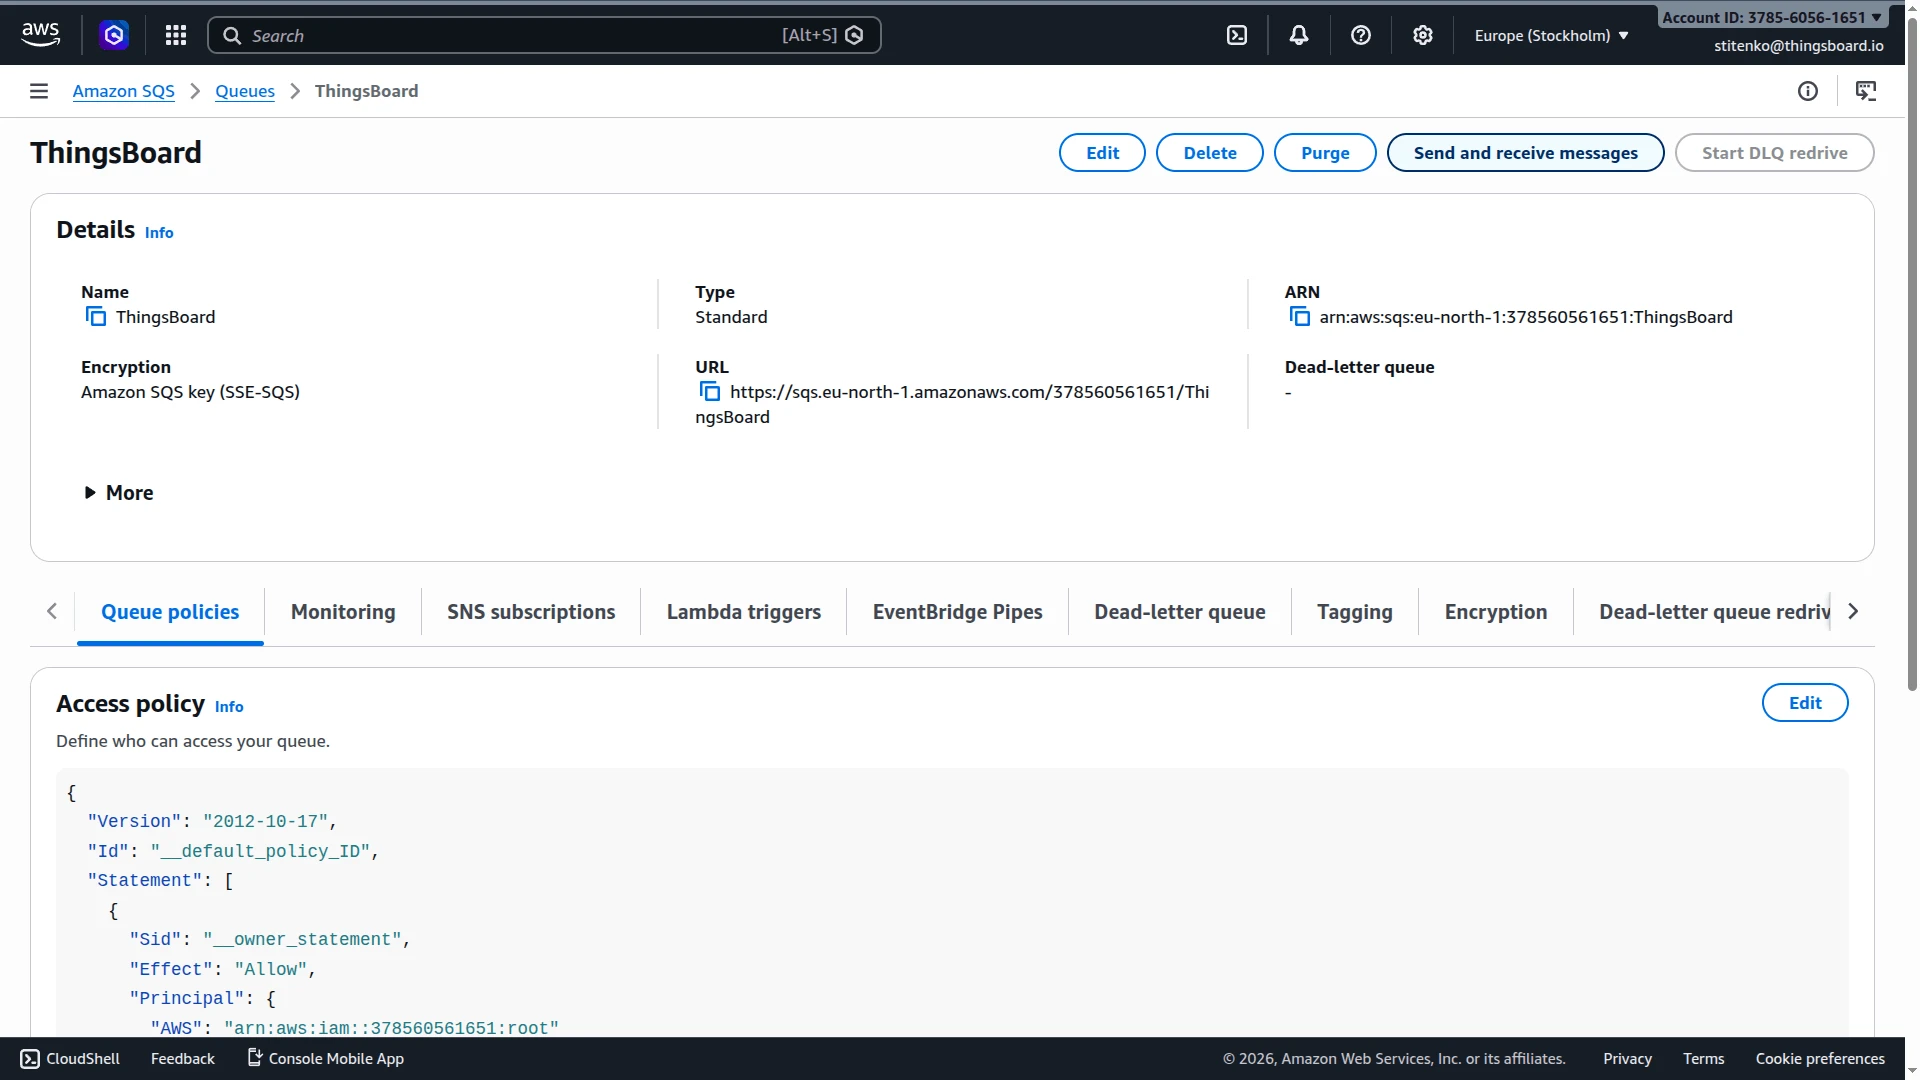
- Click the queue name in the list to open the queue details page.
- Copy the Queue URL.
You will need this value when configuring the integration in ThingsBoard. ThingsBoard expects the full queue URL, for example:
https://sqs.eu-north-1.amazonaws.com/378560561651/ThingsBoard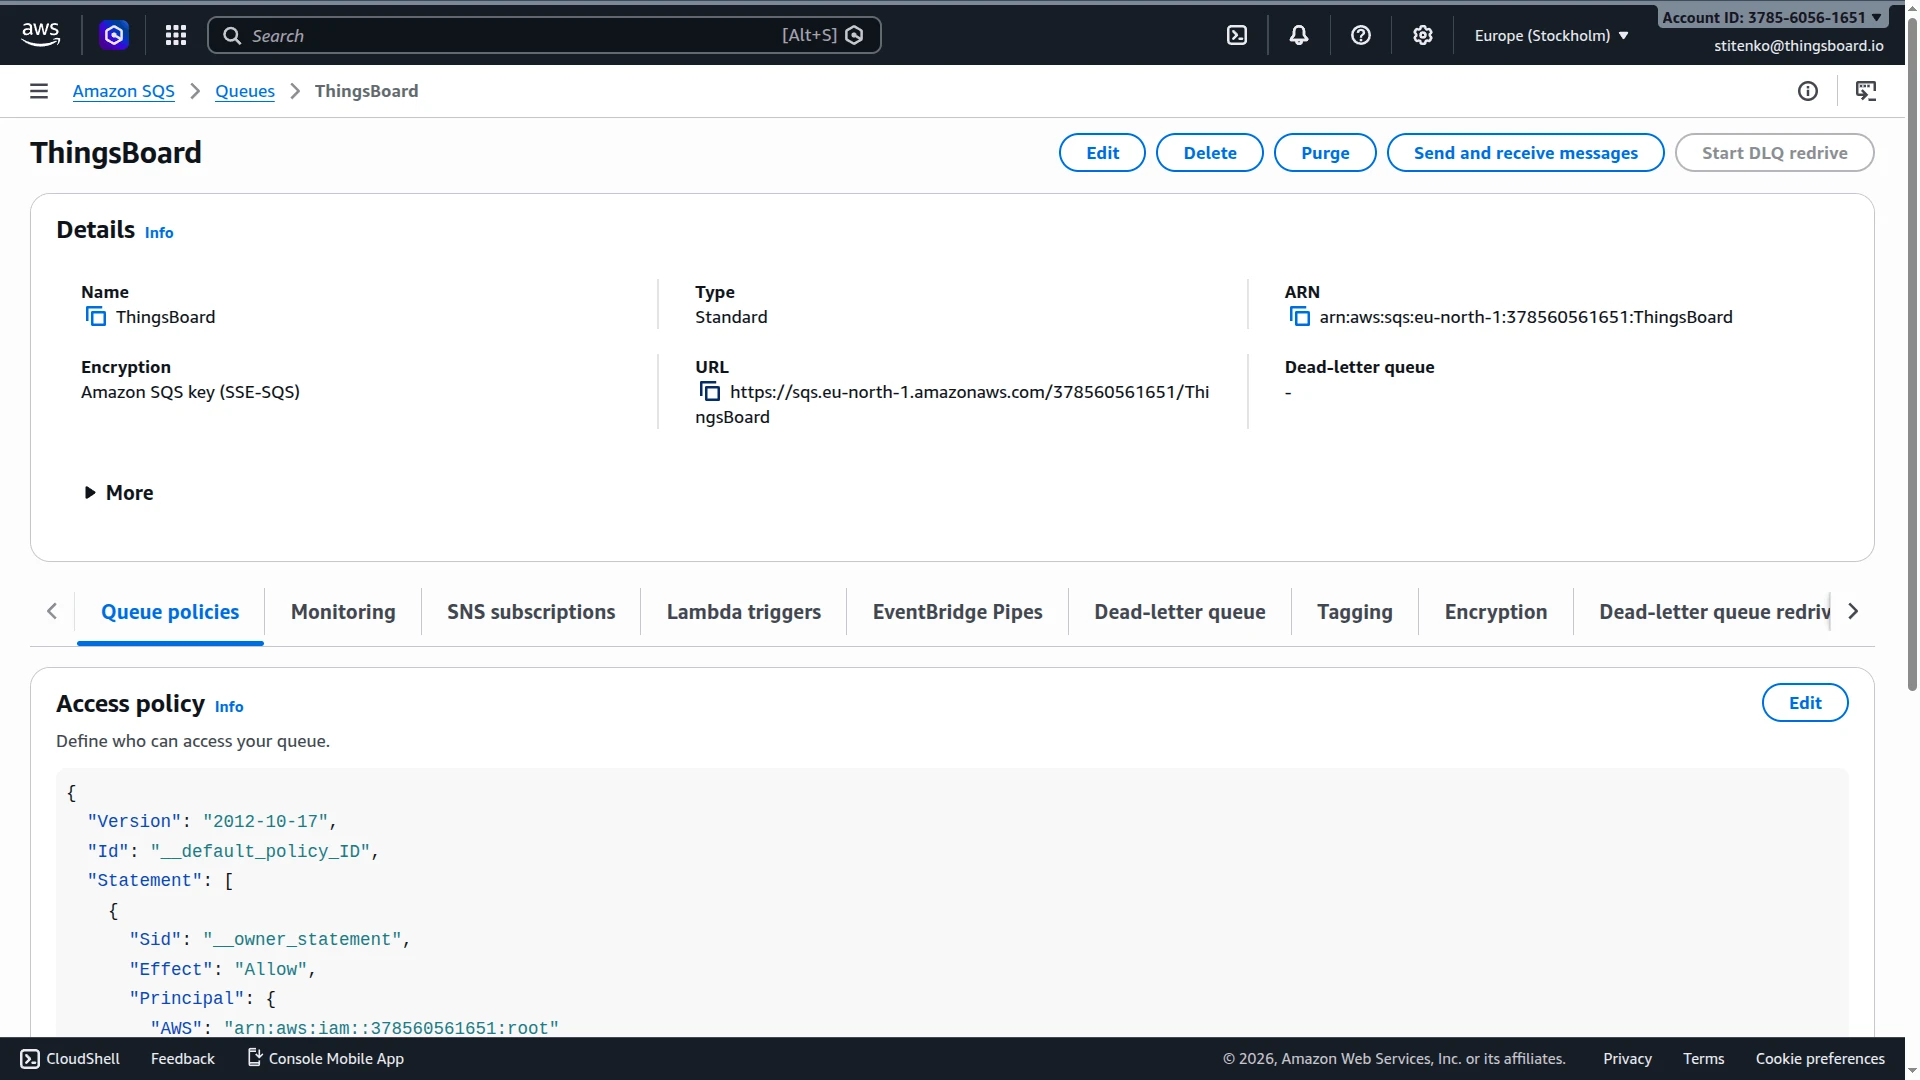
Create or verify AWS credentials
Section titled “Create or verify AWS credentials”The ThingsBoard integration authenticates to AWS using an Access Key ID and Secret Access Key. You need IAM credentials with permission to read from the target queue. AWS recommends using least-privilege IAM policies.
If you already have an IAM user with programmatic credentials and access to the target queue, skip to ThingsBoard integration setup.
- In the AWS Console search bar, type IAM and open Identity and Access Management (IAM).
- In the left menu, click Users, then click Create user.
- Enter a user name (e.g.
thingsboard-sqs-user) and complete user creation. - Open the newly created user. Go to the Permissions tab and click Add permissions.
- Choose Attach policies directly or create an inline policy. Grant at least the permissions listed in the example policy below. Save the changes.
- Open the Security credentials tab. In the Access keys section, click Create access key.
- Select the use case that best matches your deployment and click Create access key.
- Copy and securely store the Access key and Secret access key. You will not be able to view the secret again.
Example minimal IAM policy
Section titled “Example minimal IAM policy”Replace the region, account ID, and queue name with your values:
{ "Version": "2012-10-17", "Statement": [ { "Sid": "AllowThingsBoardSQSAccess", "Effect": "Allow", "Action": [ "sqs:ReceiveMessage", "sqs:DeleteMessage", "sqs:GetQueueAttributes" ], "Resource": "arn:aws:sqs:eu-north-1:378560561651:ThingsBoard" } ]}ThingsBoard integration setup
Section titled “ThingsBoard integration setup”Create an uplink converter
Section titled “Create an uplink converter”The AWS SQS integration uses a generic uplink converter.
The uplink converter decodes the SQS message body and maps it to the ThingsBoard data model. The message body is passed to the decoder as payload.
Sample payload:
{ "deviceName": "Thermometer A", "deviceType": "thermostat", "temperature": 18.6}The decoder function used in this tutorial:
// Decode an uplink message from a buffer// payload - array of bytes// metadata - key/value object
/** Decoder **/
// decode payload to JSONvar data = decodeToJson(payload);
// --- Device name and type ---var deviceName = data.deviceName != null ? data.deviceName : 'Unknown Device';var deviceType = data.deviceType != null ? data.deviceType : 'default';// var customerName = 'Customer C';// var groupName = 'thermostat devices';
// use assetName and assetType instead of deviceName and deviceType// to automatically create assets instead of devices.// var assetName = 'Asset A';// var assetType = 'building';
// --- Timestamp parsing ---var timestamp = -1;if (data.ts != null) {  timestamp = data.ts;} else if (data.timestamp != null) {  timestamp = new Date(data.timestamp).getTime();}if (timestamp == -1) {  timestamp = Date.now();}
// --- Telemetry and attributes ---var telemetry = {};var attributes = {  model: 'Model A',  serialNumber: 'SN111',  integrationName: metadata['integrationName'],};
// Keys to exclude from telemetry (already used or non-telemetry fields)var excludeFromTelemetryList = ["deviceName", "deviceType", "ts", "timestamp"];
// Parse all remaining JSON fields as telemetrytelemetry.putAll(toFlatMap(data, excludeFromTelemetryList, true));
// Result object with device attributes/telemetry datavar result = {deviceName: deviceName,deviceType: deviceType,// customerName: customerName,// groupName: groupName,// assetName: assetName,// assetType: assetType,  attributes: attributes,  telemetry: {    ts: timestamp,    values: telemetry  }};
/** Helper functions 'decodeToString', 'decodeToJson' and 'toFlatMap' are already built-in **/
return result;
// Decode an uplink message from a buffer// payload - array of bytes// metadata - key/value object
/** Decoder **/
// decode payload to JSONvar data = decodeToJson(payload);
// --- Device name and type ---var deviceName = data.deviceName != null ? data.deviceName : 'Unknown Device';var deviceType = data.deviceType != null ? data.deviceType : 'default';// var customerName = 'Customer C';// var groupName = 'thermostat devices';
// use assetName and assetType instead of deviceName and deviceType// to automatically create assets instead of devices.// var assetName = 'Asset A';// var assetType = 'building';
// --- Timestamp parsing ---var timestamp = -1;if (data.ts != null) { timestamp = data.ts;} else if (data.timestamp != null) { timestamp = new Date(data.timestamp).getTime();} if (timestamp == -1) { timestamp = Date.now();}
// --- Telemetry and attributes ---var telemetry = {};var attributes = { model: 'Model A', serialNumber: 'SN111', integrationName: metadata['integrationName'],};
// Keys to exclude from telemetry (already used or non-telemetry fields)var excludeFromTelemetryList = ["deviceName", "deviceType", "ts", "timestamp"];
// Parse all remaining JSON fields as telemetrytoFlatMap(data, telemetry, excludeFromTelemetryList);
// Result object with device attributes/telemetry datavar result = { deviceName: deviceName, deviceType: deviceType, // customerName: customerName, // groupName: groupName, // assetName: assetName, // assetType: assetType, attributes: attributes, telemetry: { ts: timestamp, values: telemetry }};
/** Helper functions **/
function decodeToString(payload) { return String.fromCharCode.apply(String, payload);}
function decodeToJson(payload) { var str = decodeToString(payload); return JSON.parse(str);}
function toFlatMap(obj, result, excludeList, prefix) { prefix = prefix || ''; for (var key in obj) { if (excludeList.indexOf(key) !== -1) continue; var value = obj[key]; var fullKey = prefix ? prefix + '.' + key : key; if (typeof value === 'object' && value !== null && !Array.isArray(value)) { toFlatMap(value, result, excludeList, fullKey); } else { result[fullKey] = value; } }}
return result;To adapt this converter to your device:
- Different field names — replace
data.deviceName,data.deviceType, anddata.temperaturewith the field names in your actual payload. - Additional telemetry — add more keys to the
telemetryobject (e.g.humidity: data.humidity). - Attributes — add an
attributeskey alongsidetelemetryto store static device properties.
Create the integration
Section titled “Create the integration”- Go to Integrations center ⇾ Integrations and click + Add integration.
- Basic settings:
- Set Integration type to AWS SQS.
- Enable integration and Allow create devices or assets are on by default.
- Click Next.
- Uplink data converter:
- Click Create new, enter a name, paste the decoder function from above, and click Add.
- Alternatively, click Select existing to reuse a previously created converter.
- Click Next.
- Connection:
- Queue URL (SQS URL) — paste the queue URL copied in Copy the queue URL.
- Polling period in seconds — how often ThingsBoard checks the queue for new messages (default:
5). - Region — the AWS region of the queue (e.g.
eu-north-1). - AWS access key id — the Access Key ID from create or verify AWS credentials section.
- AWS secret access key — the Secret Access Key.
- Read more about each parameter in Connection settings.
- Click Add to save the integration.
Connection settings
Section titled “Connection settings”Queue URL (SQS URL)
The full URL of the SQS queue ThingsBoard polls for uplink messages. The queue must exist in your AWS account before the integration can connect.
Polling period in seconds
How often ThingsBoard polls the SQS queue for new messages. Lower values reduce message latency but increase the number of API calls to AWS SQS.
Region
The AWS region where the queue is deployed (e.g. us-east-1, eu-north-1). Must match the region in the Queue URL.
AWS access key id / AWS secret access key
IAM credentials used to authenticate API requests. The associated IAM user or role must have sqs:ReceiveMessage, sqs:DeleteMessage, and sqs:GetQueueAttributes permissions on the target queue.
Execute remotely
When enabled, ThingsBoard generates an Integration key and Integration secret that allow the integration to run as a separate process outside the ThingsBoard cluster — useful when the SQS endpoint is only reachable from a restricted network. See Remote Integration.
Advanced settings
| Parameter | Description |
|---|---|
| Description | Optional text description for the integration. |
| Metadata | Key-value pairs injected into every uplink message as integrationMetadata in the converter script. |
Verify integration
Section titled “Verify integration”After saving the integration, confirm it appears in the list with Status: Active. Then send a test message from the AWS console to verify the full message flow end to end.
Send a test message from AWS
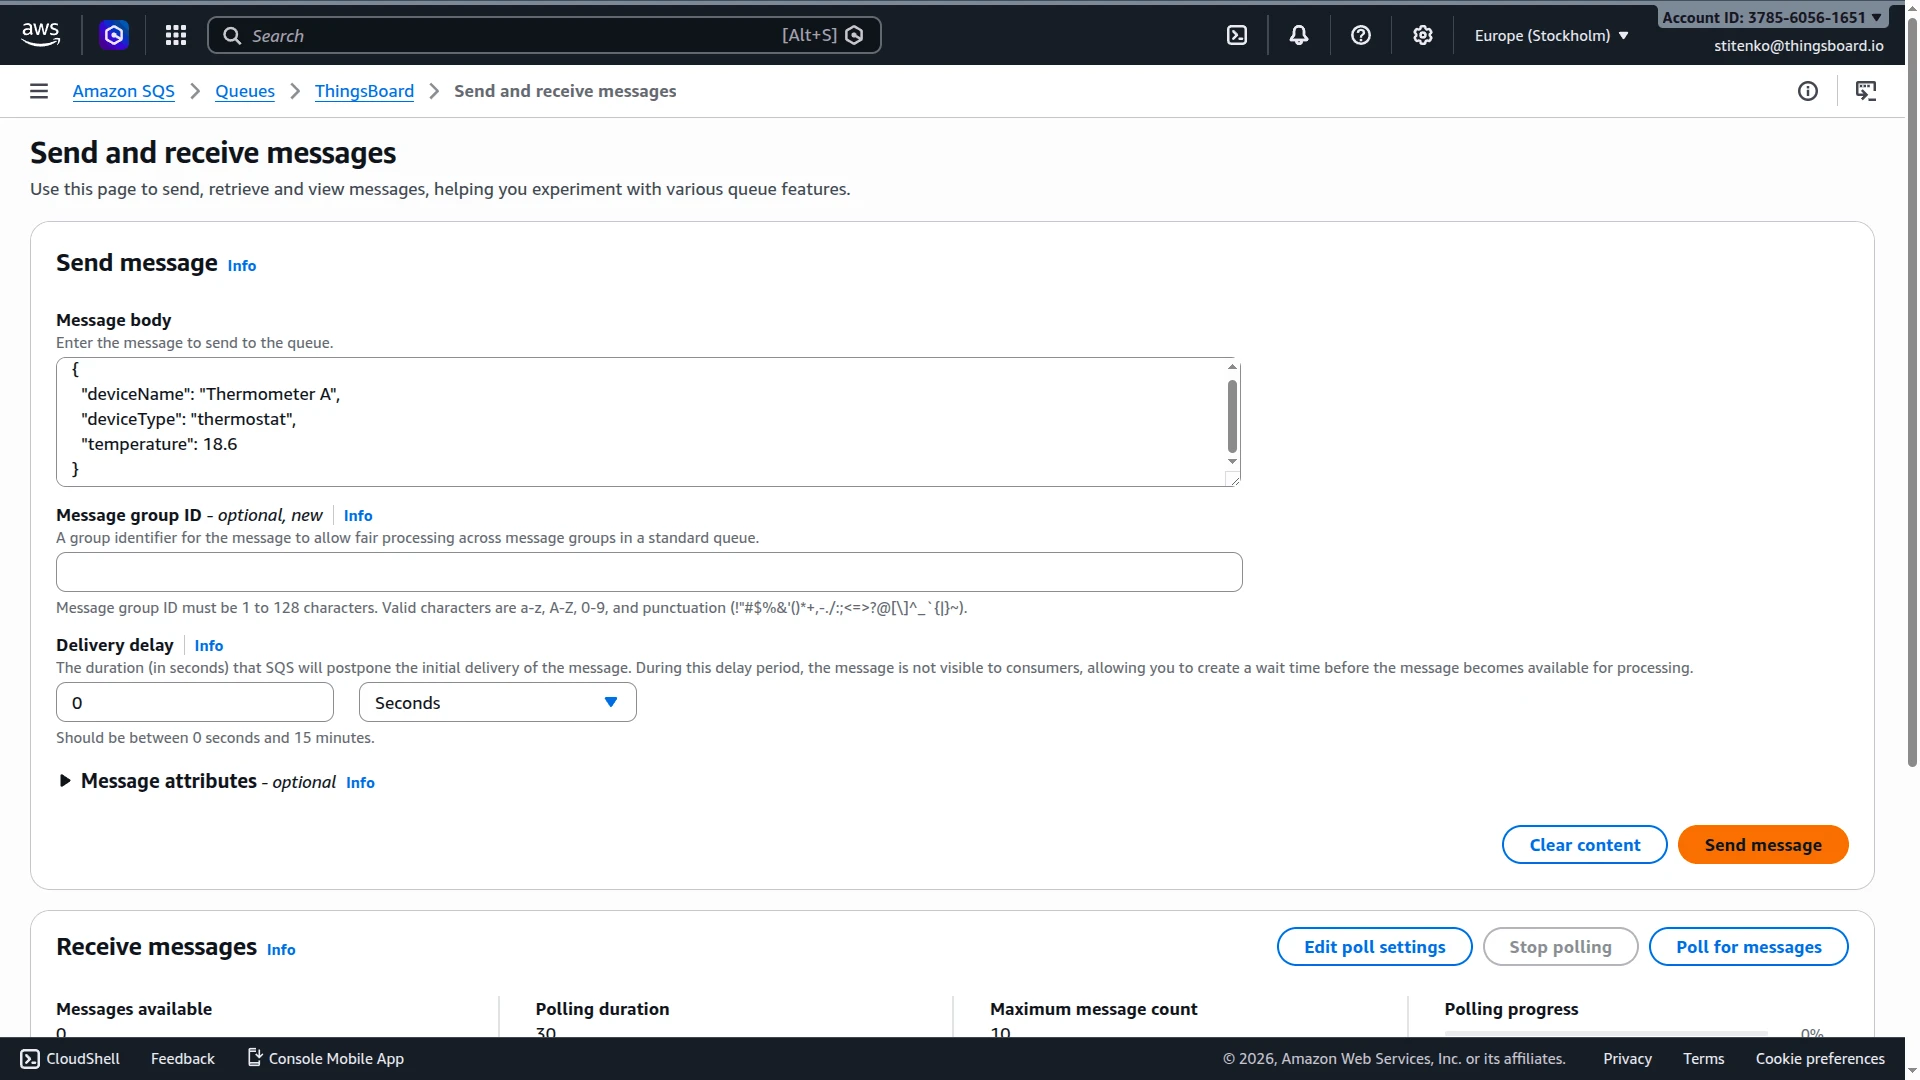
Section titled “Send a test message from AWS”- Open the ThingsBoard queue in the AWS SQS console and click Send and receive messages.
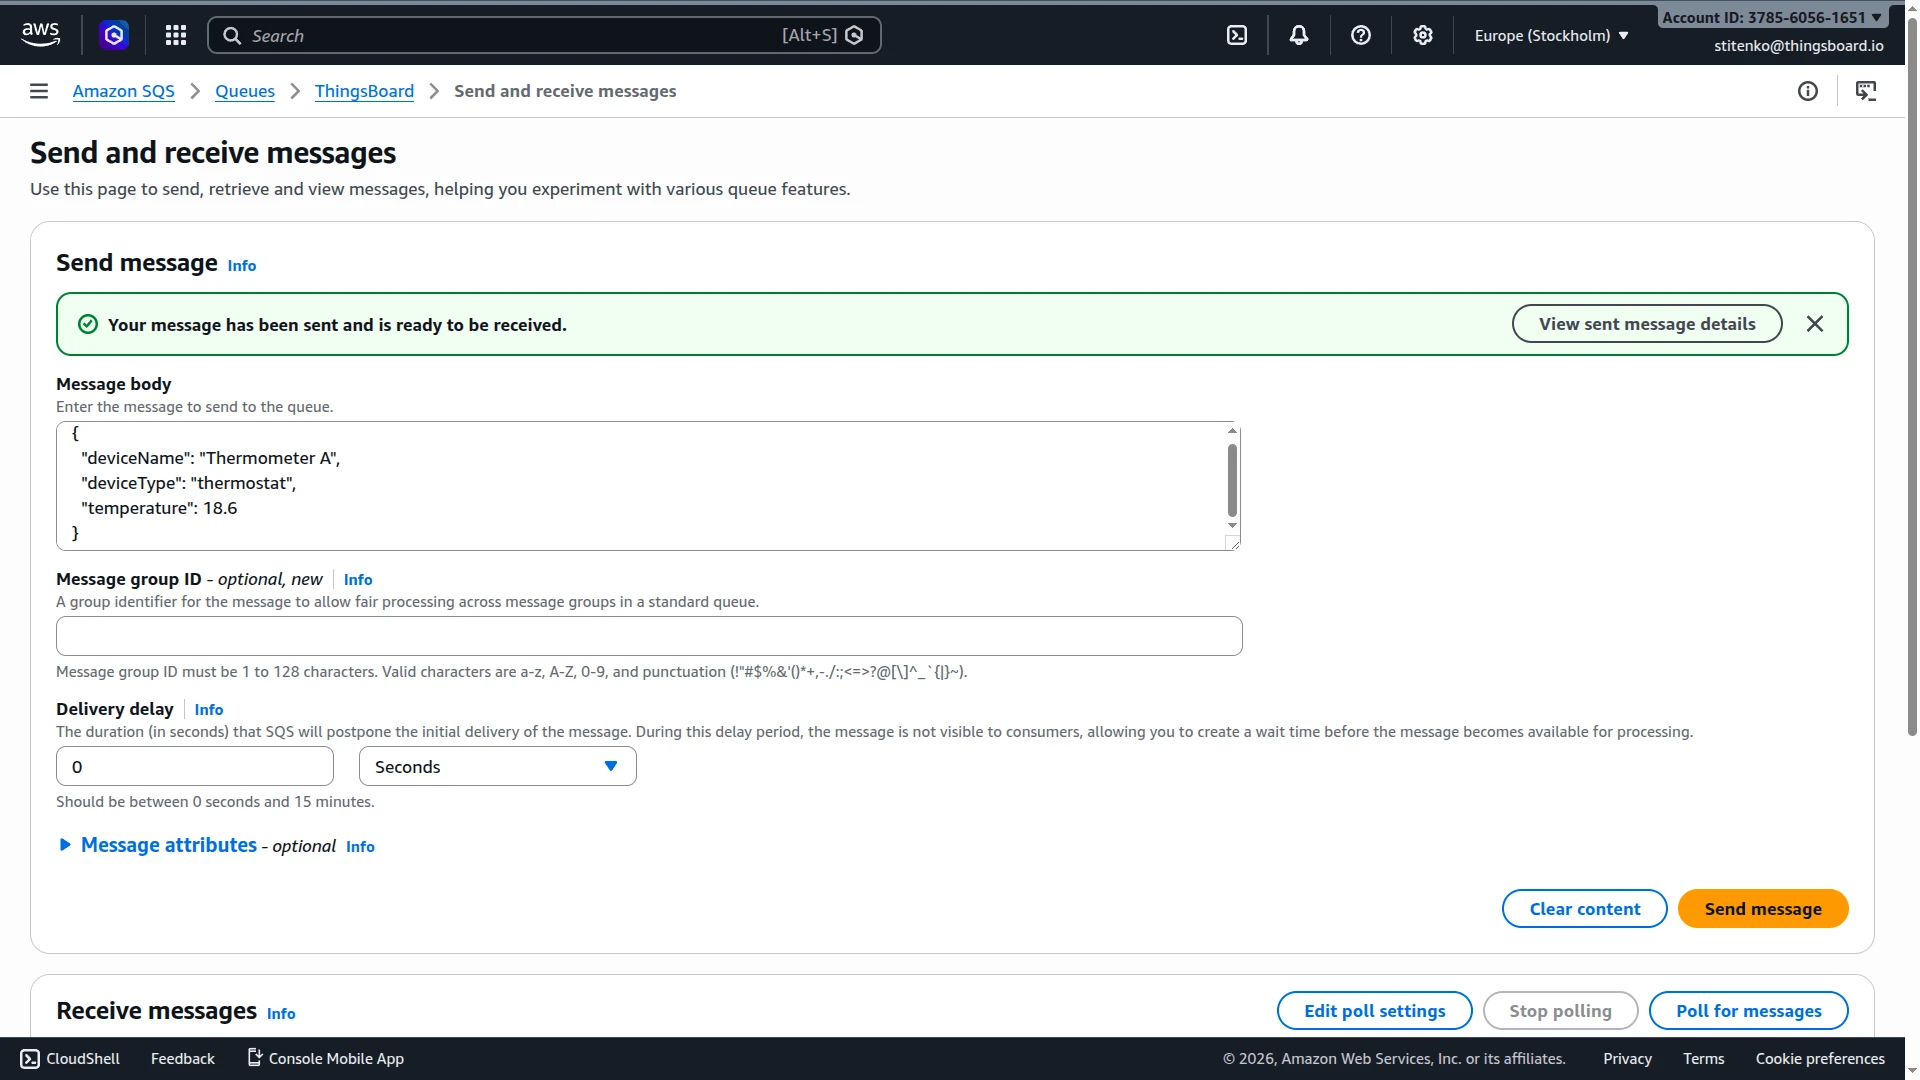
- In the Message body field, enter the test payload:
{"deviceName": "Thermometer A","deviceType": "thermostat","temperature": 18.6}
- Click Send message. A confirmation banner confirms the message is in the queue.
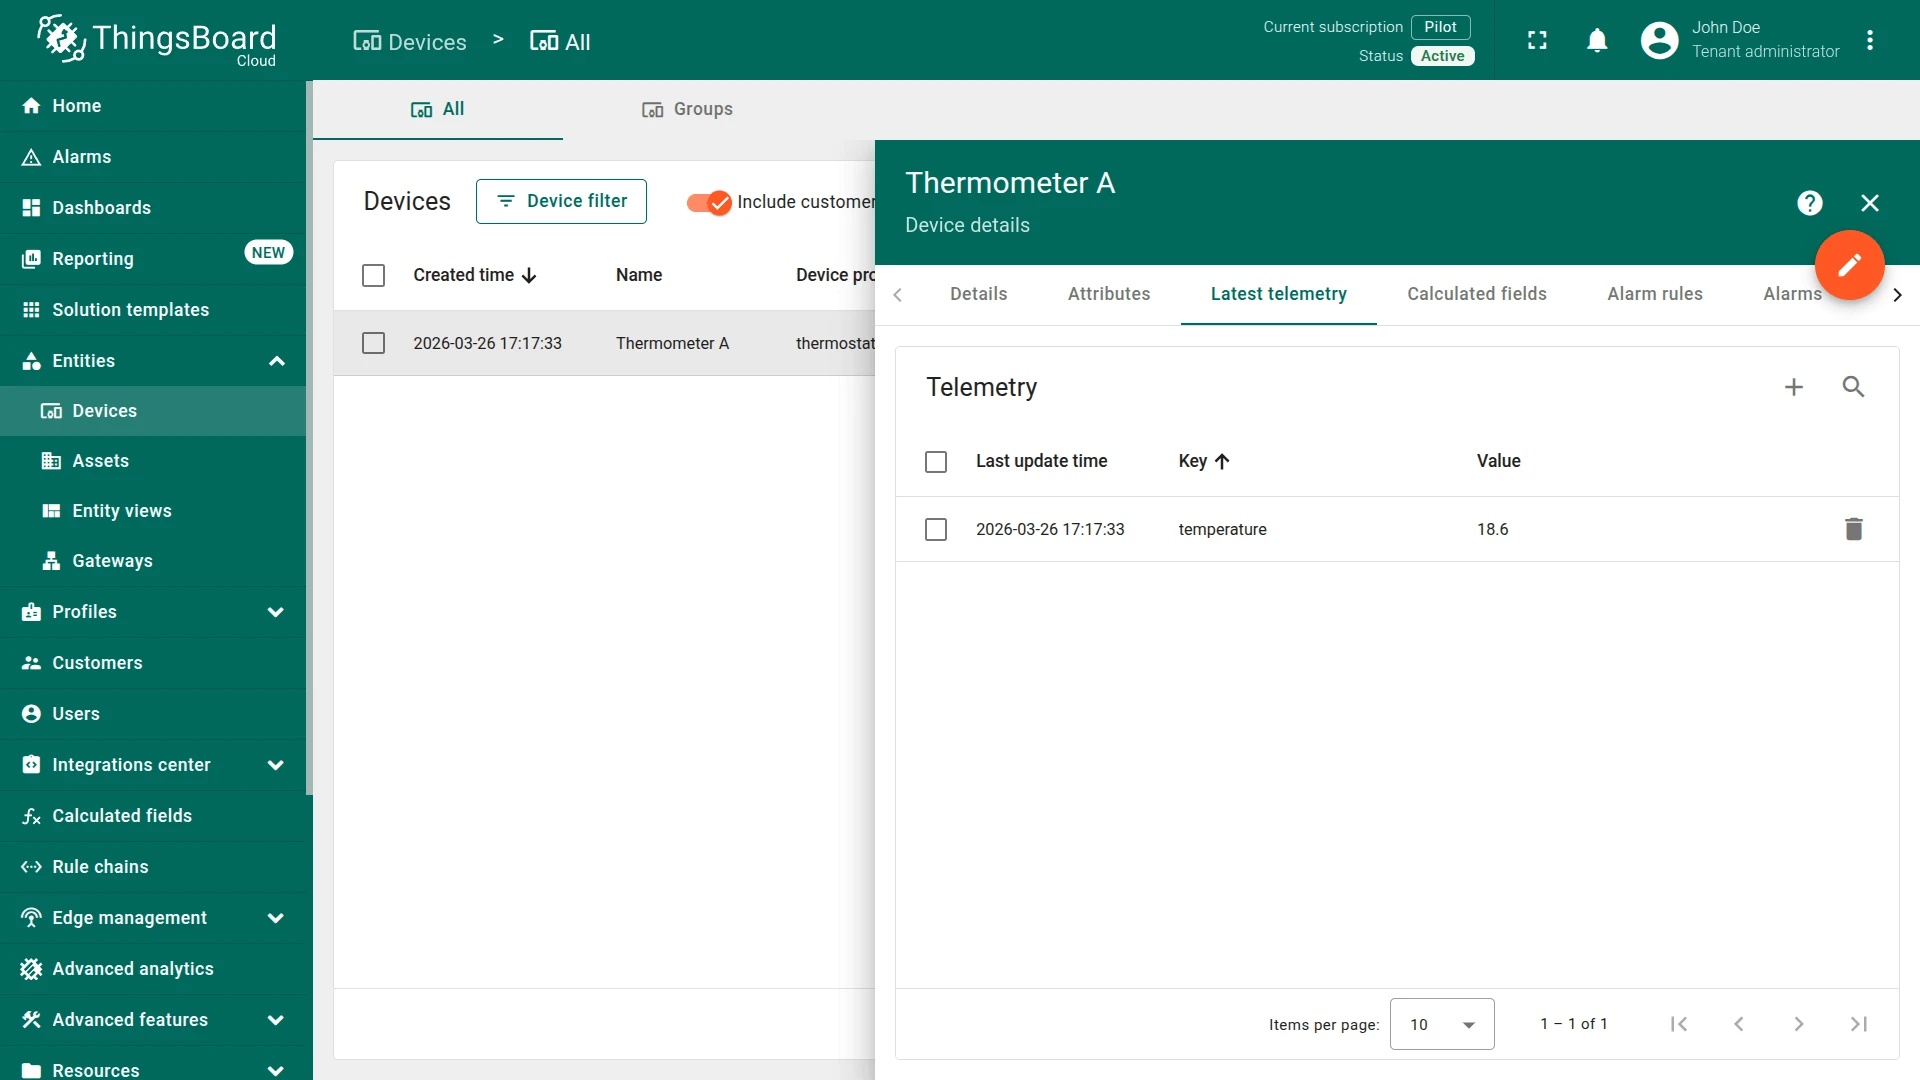
Check device telemetry
Section titled “Check device telemetry”Go to Entities ⇾ Devices. The device Thermometer A is automatically provisioned by the integration. Open it and check the Latest telemetry tab — the temperature key should have the value 18.6.
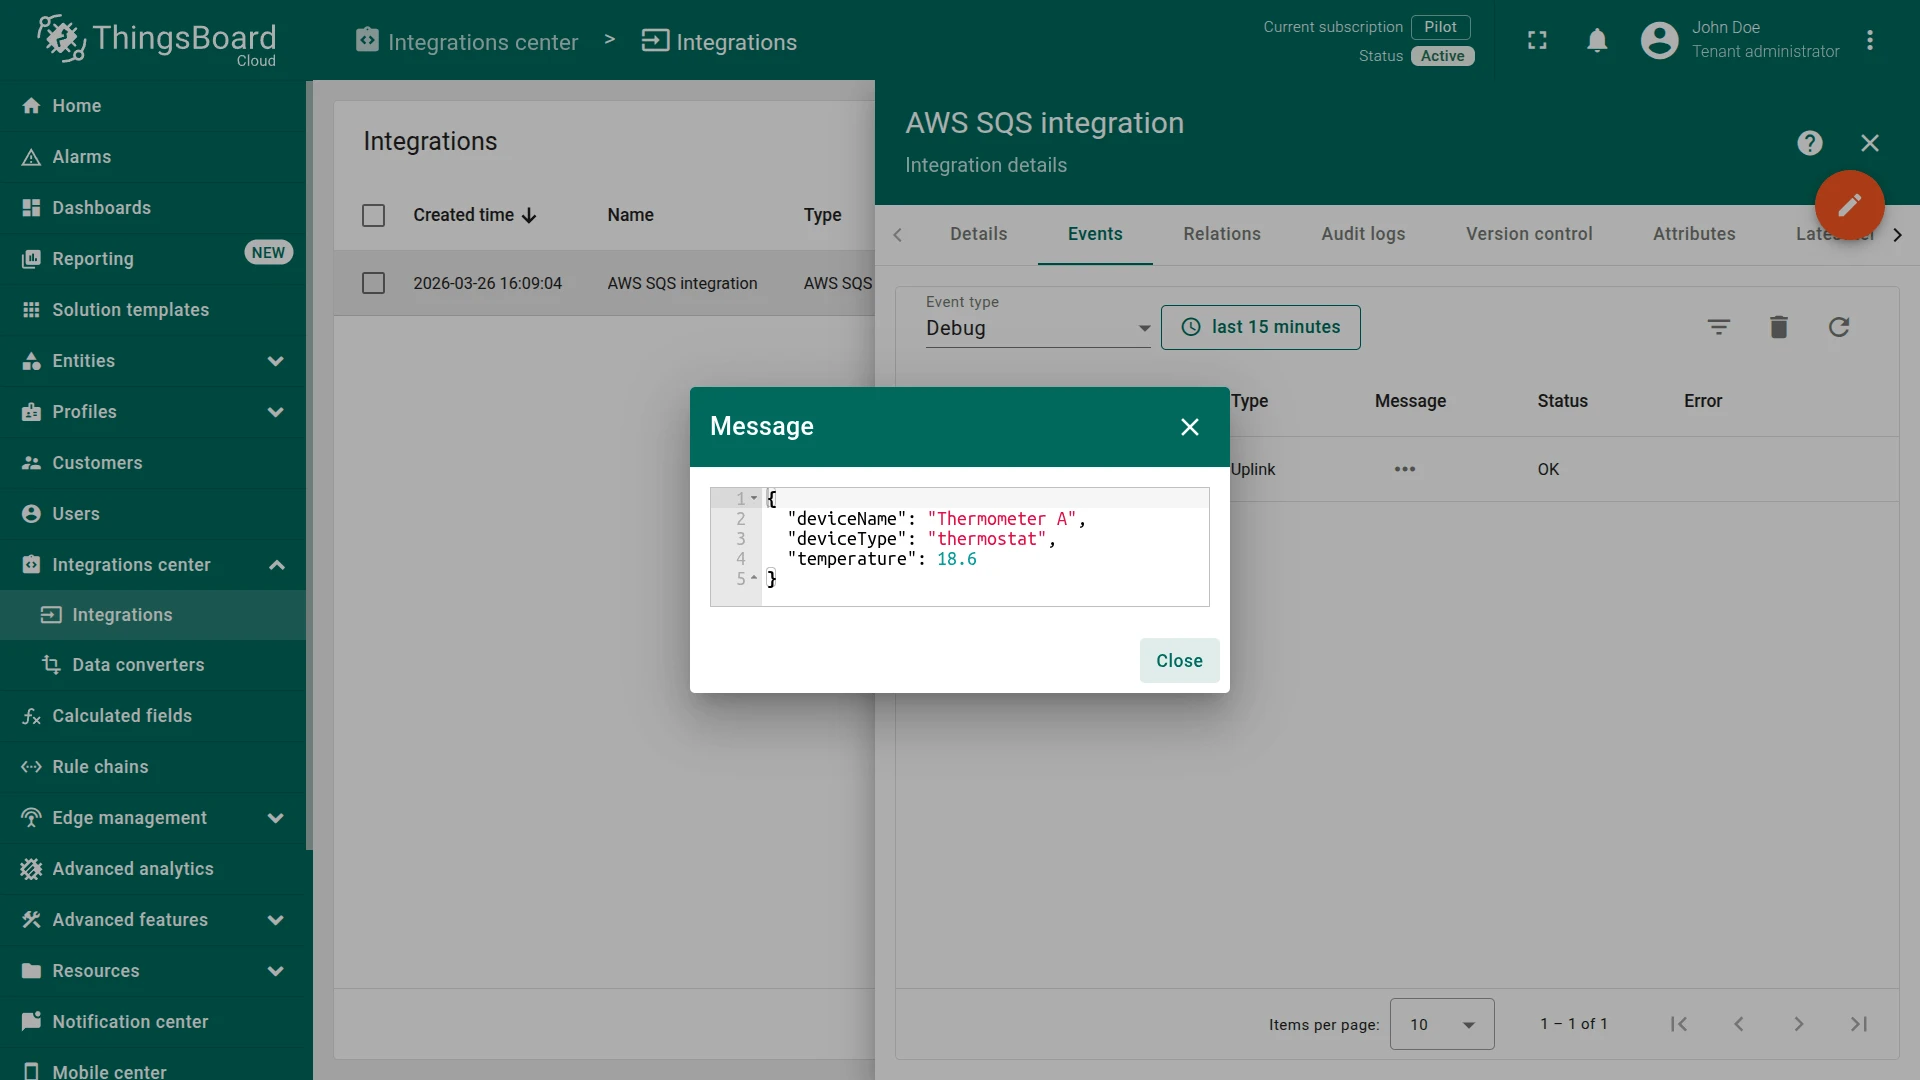
Inspect event logs
Section titled “Inspect event logs”Integration events — go to Integrations center ⇾ Integrations, click AWS SQS integration, and open the Events tab. Click … in the Message column to see the raw message body received from SQS.
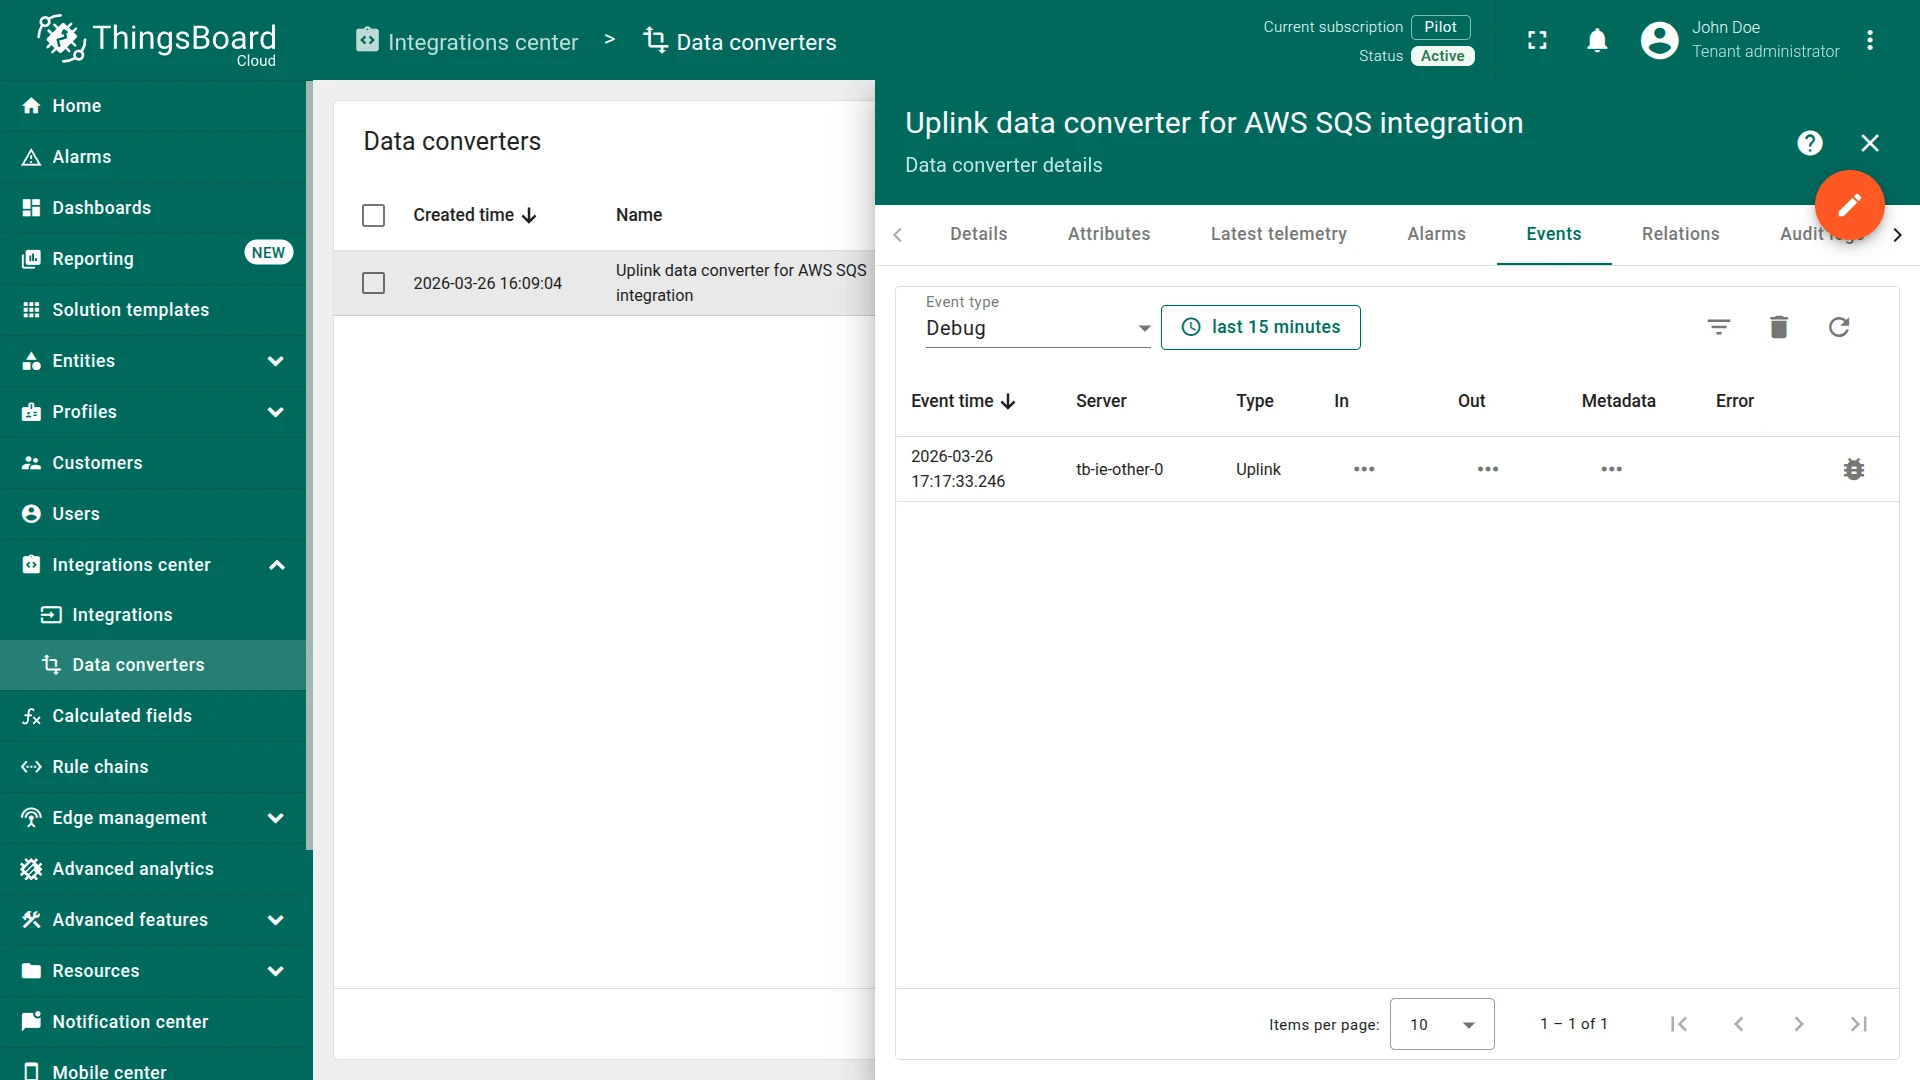
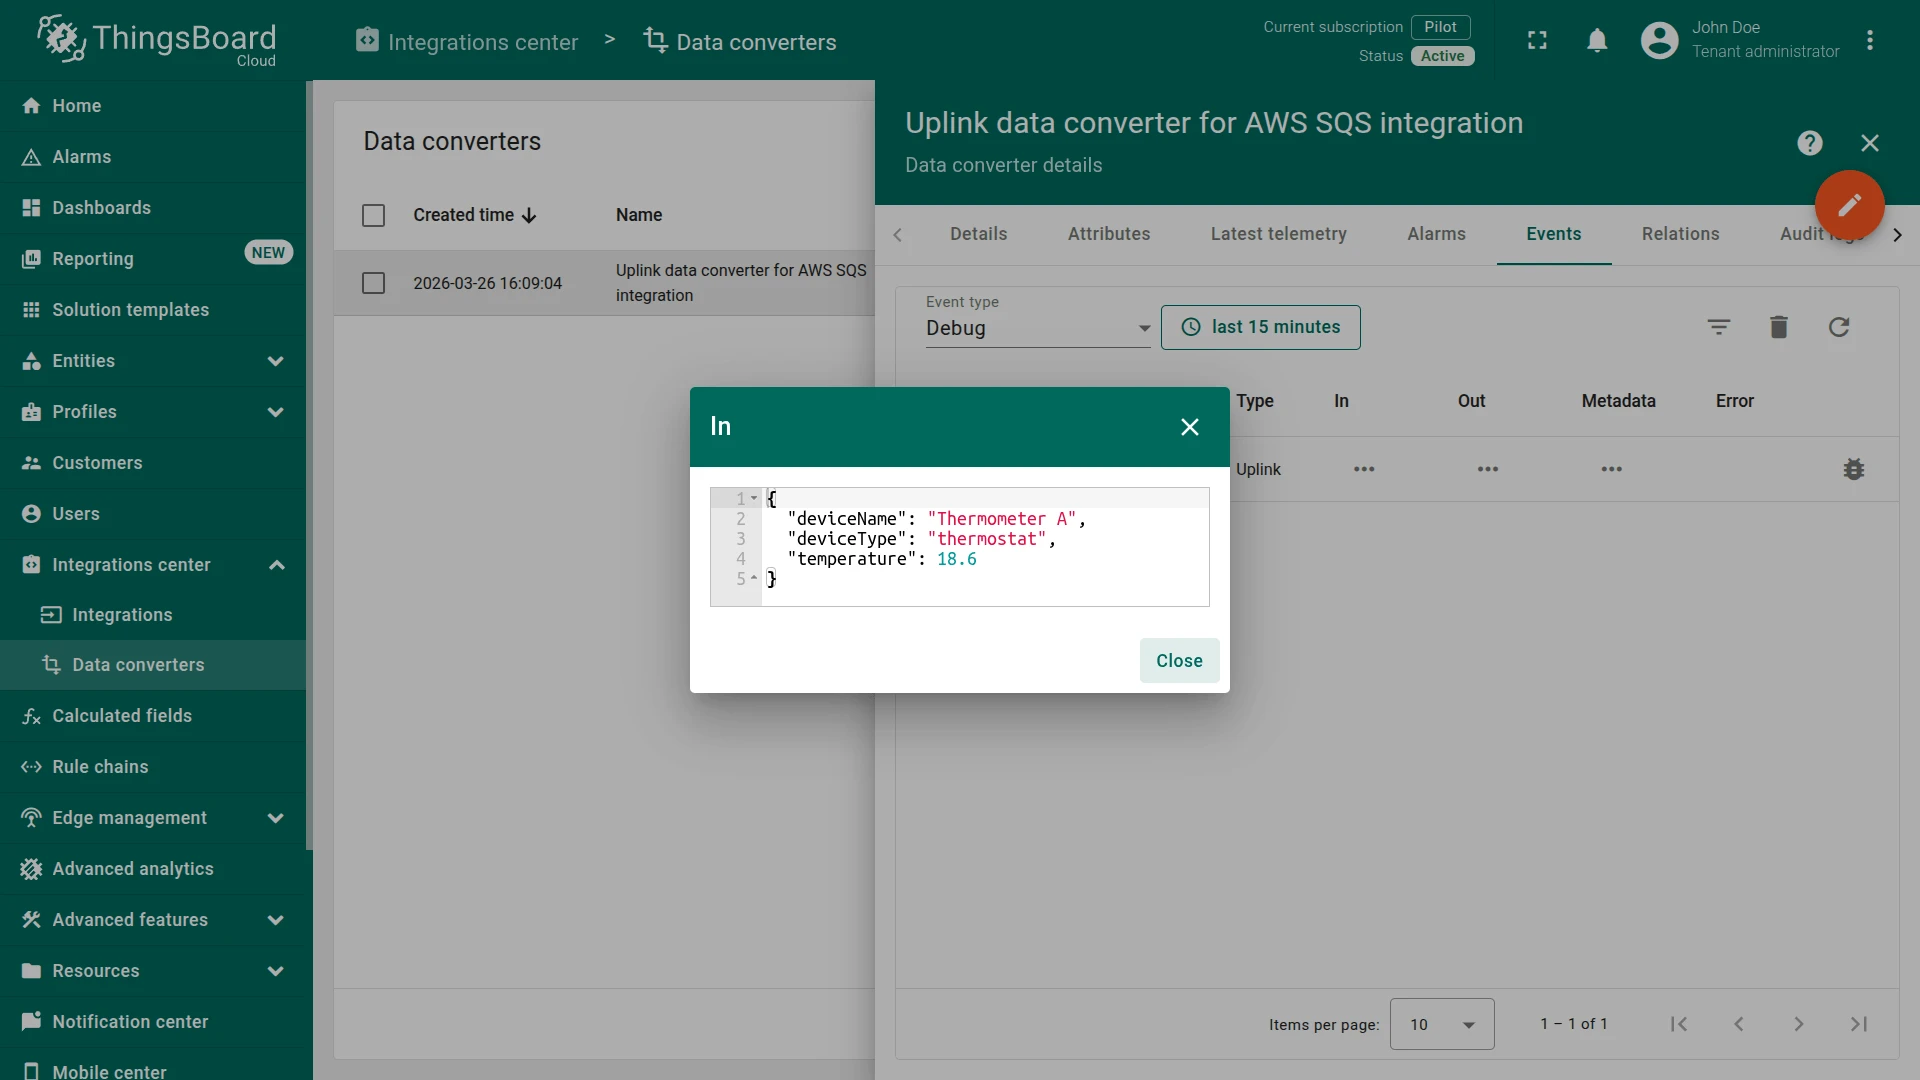
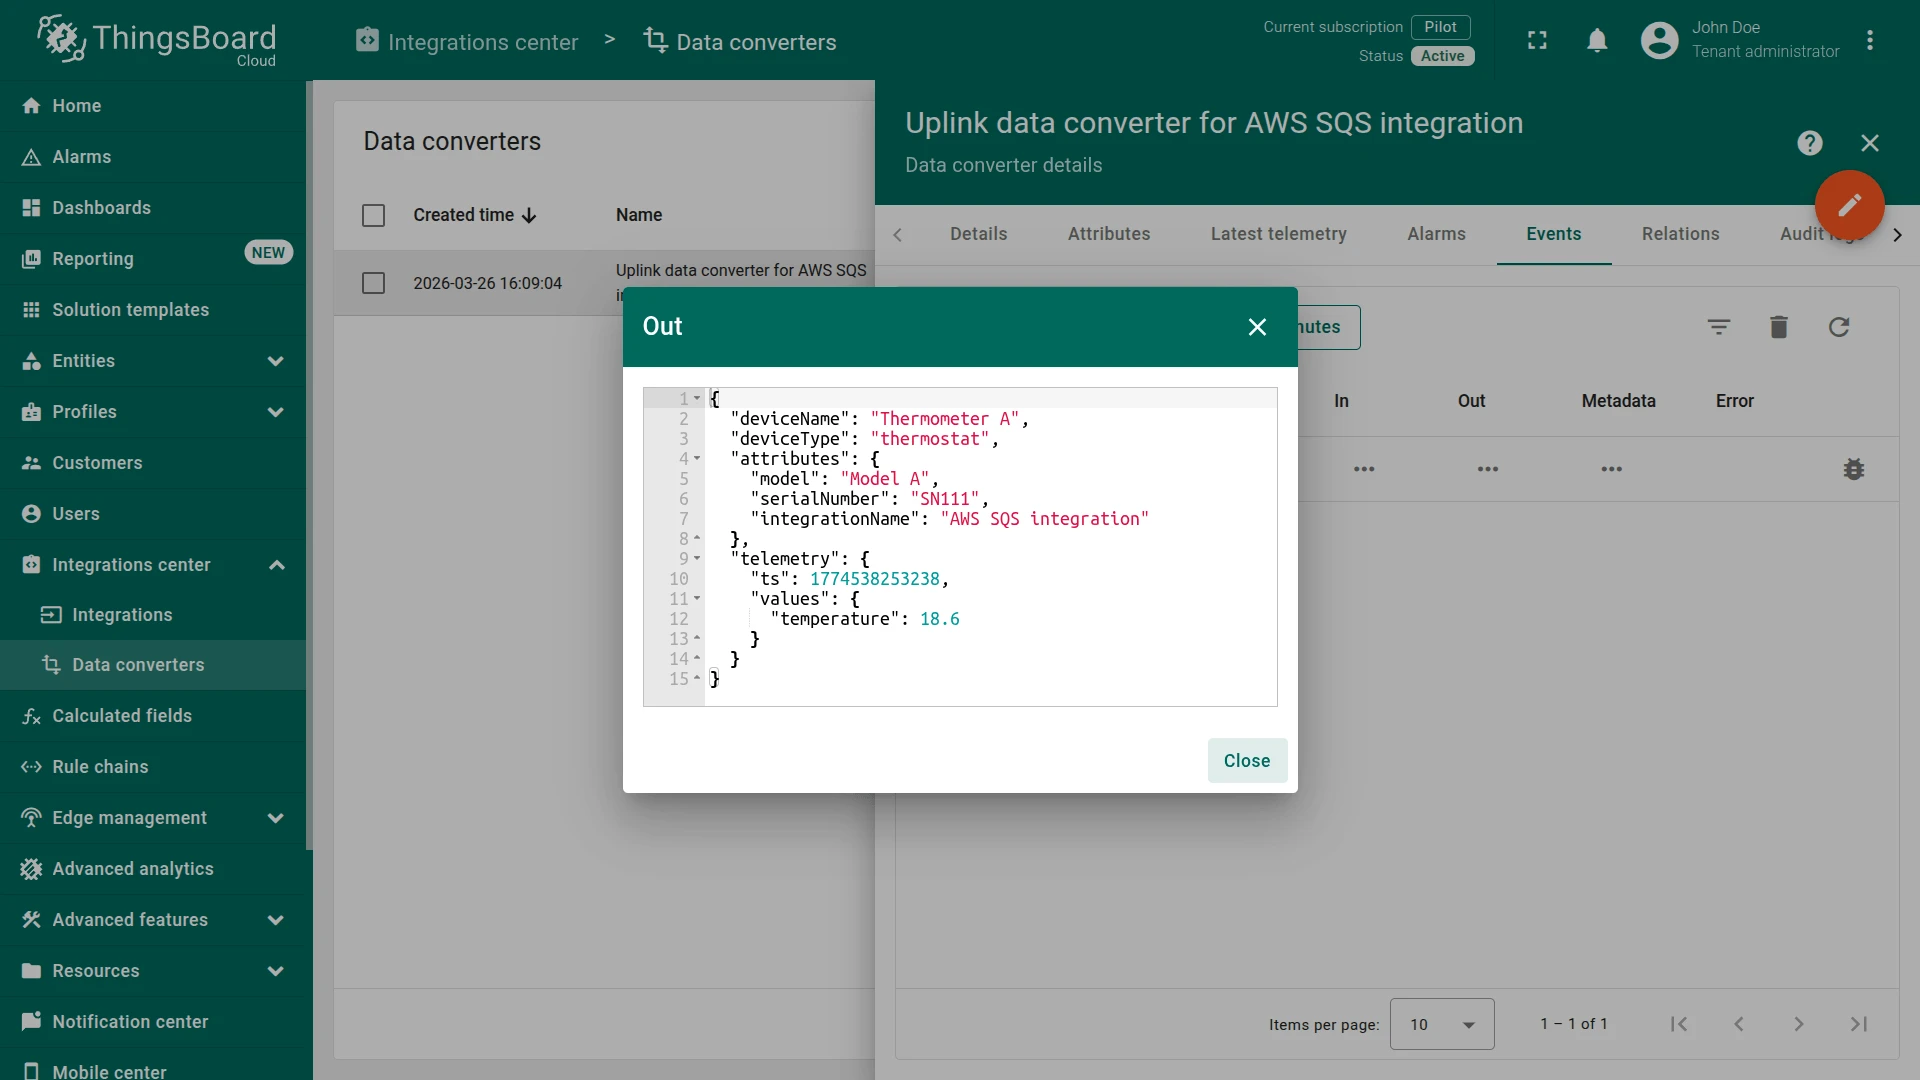
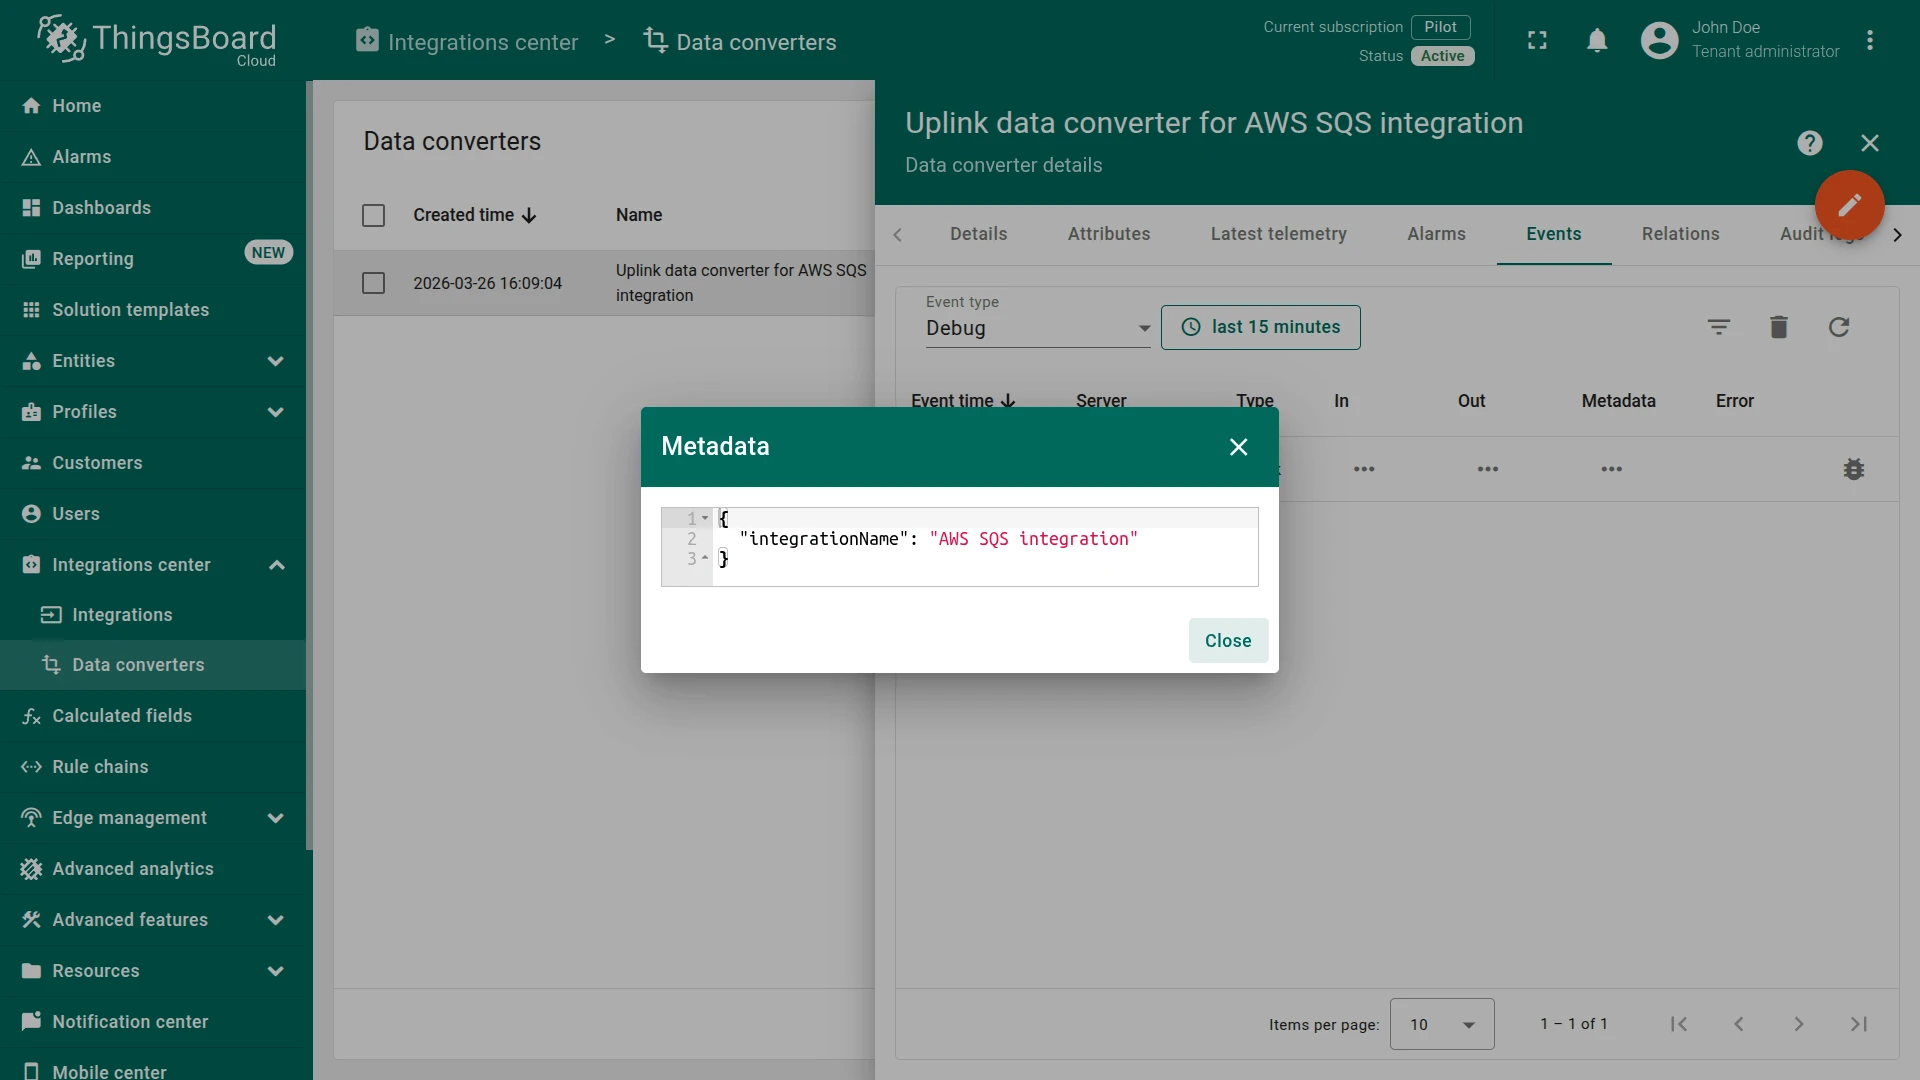
Converter events — go to Integrations center ⇾ Data converters, click the uplink converter, and open its Events tab. Click … in the respective column to inspect each field:
- In — the raw payload sent to the converter.
- Out — the decoded result: device name, type, attributes, and telemetry.
- Metadata — key-value pairs injected by the integration (e.g.
integrationName).
Troubleshooting
Section titled “Troubleshooting”Integration status is not Active
If the integration does not become Active after creation:
- Open the integration and verify that Queue URL is the full URL copied from the AWS SQS console (e.g.
https://sqs.eu-north-1.amazonaws.com/123456789012/ThingsBoard). - Confirm the Region field matches the region in the Queue URL.
- Check that the Access Key ID and Secret Access Key are correct and belong to an active IAM user.
- Verify the IAM policy grants
sqs:ReceiveMessage,sqs:DeleteMessage, andsqs:GetQueueAttributeson the target queue ARN.
Messages are not appearing in ThingsBoard
- Confirm the queue exists in the correct AWS region — the SQS console is region-specific.
- Check the integration Events tab for errors. A failed poll attempt will appear there with an error message.
- Verify the uplink converter script handles the actual message format. Use the converter Events tab to inspect the raw In payload and the decoded Out result.
- Make sure the Polling period in seconds is not set too high — lower it if you need faster message delivery.
Access denied or authentication errors
- Verify the Access Key ID and Secret Access Key in the integration connection settings.
- Confirm the IAM user is active and not subject to a permissions boundary that blocks SQS access.
- Confirm the IAM policy resource ARN exactly matches the target queue ARN, including the region and account ID.
Queue not found
This usually means one of the following:
- the Queue URL is incorrect or contains a typo;
- the Region field does not match the region where the queue was created;
- the queue was deleted or recreated — update the Queue URL in the integration settings to the new URL.
See also
Section titled “See also”Was this helpful?