Lesson 4. Alarm Management
Alarms trigger when telemetry crosses defined thresholds. This lesson configures alarm rules on the air-sensor device, adds an Alarms table widget to each dashboard state, and enables propagation so alarms bubble up the building hierarchy.
Step 4.1 Configure Alarm Rules
Section titled “Step 4.1 Configure Alarm Rules”Define Alarm rules at the device profile level to detect abnormal telemetry (e.g., temperature thresholds). These rules specify severity levels, trigger conditions, and automatic clearing logic, forming the foundation for alarm generation and monitoring.
High Temperature
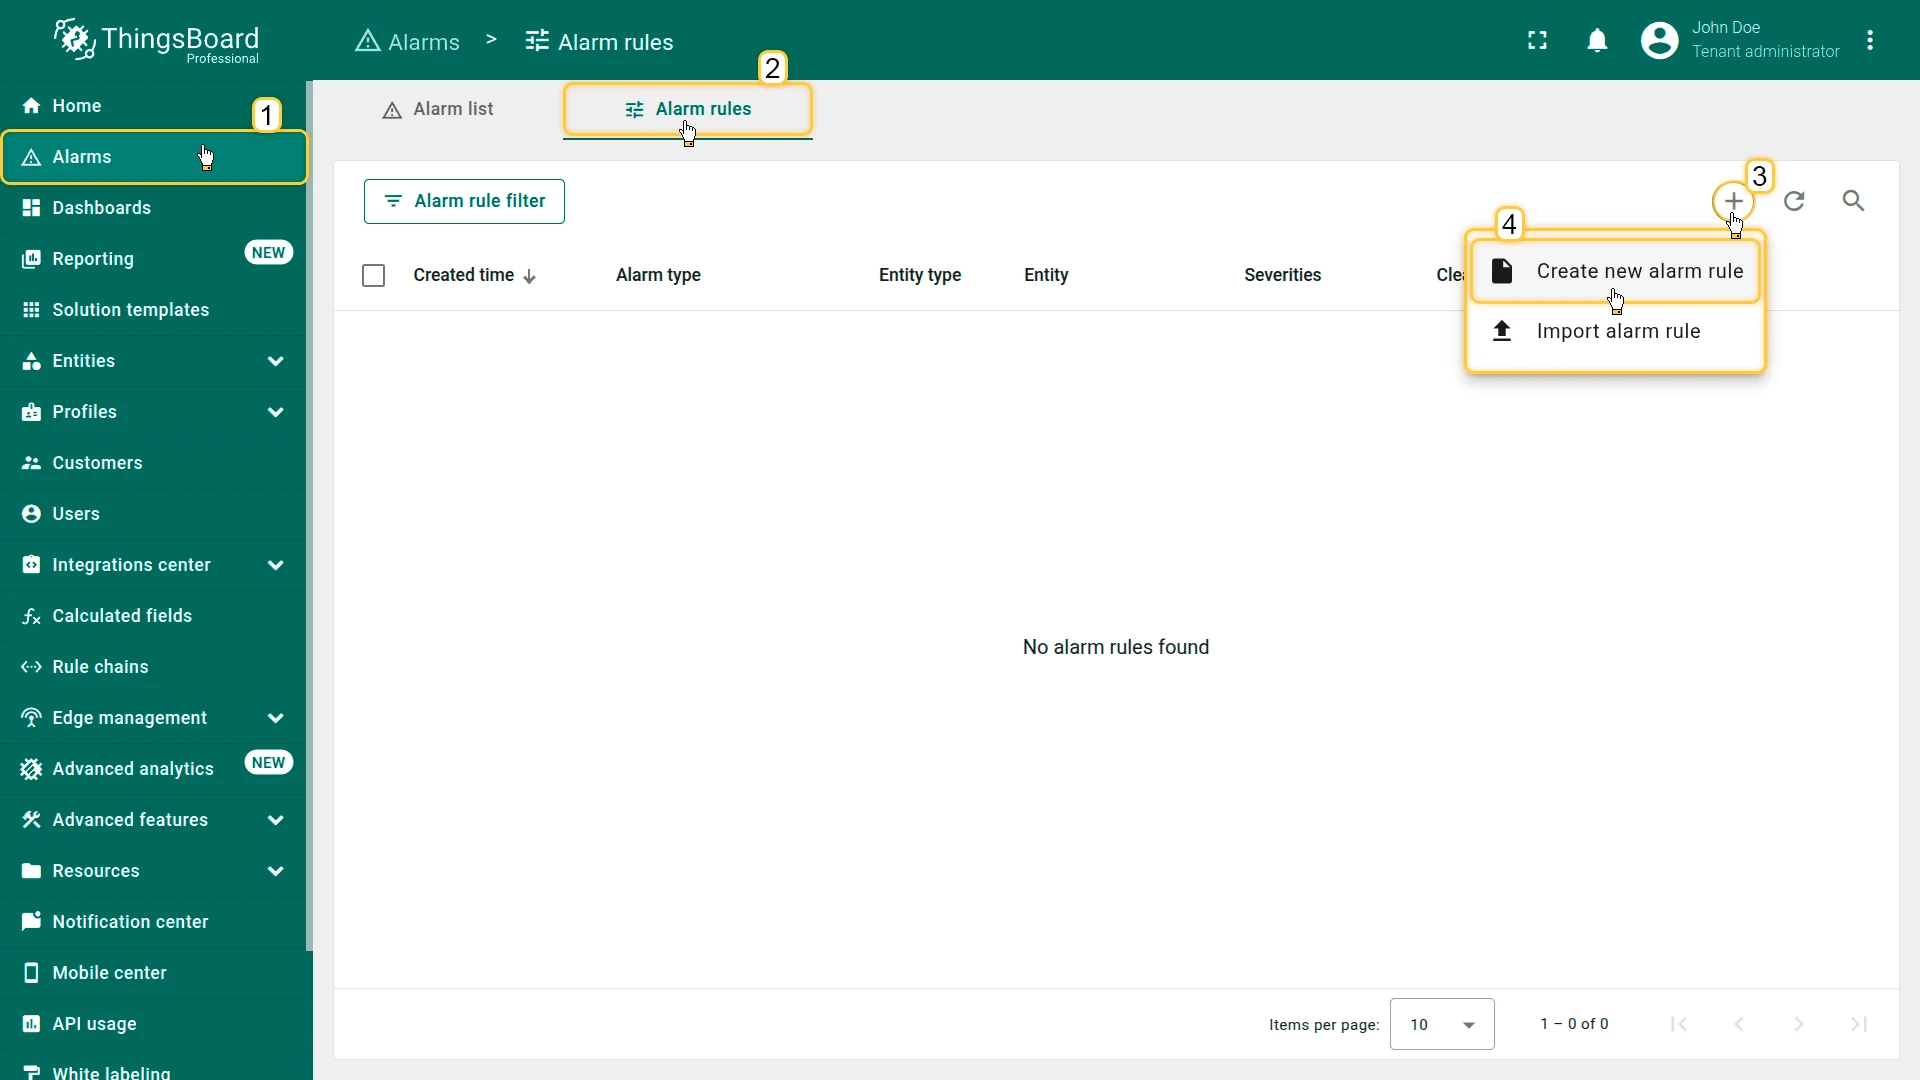
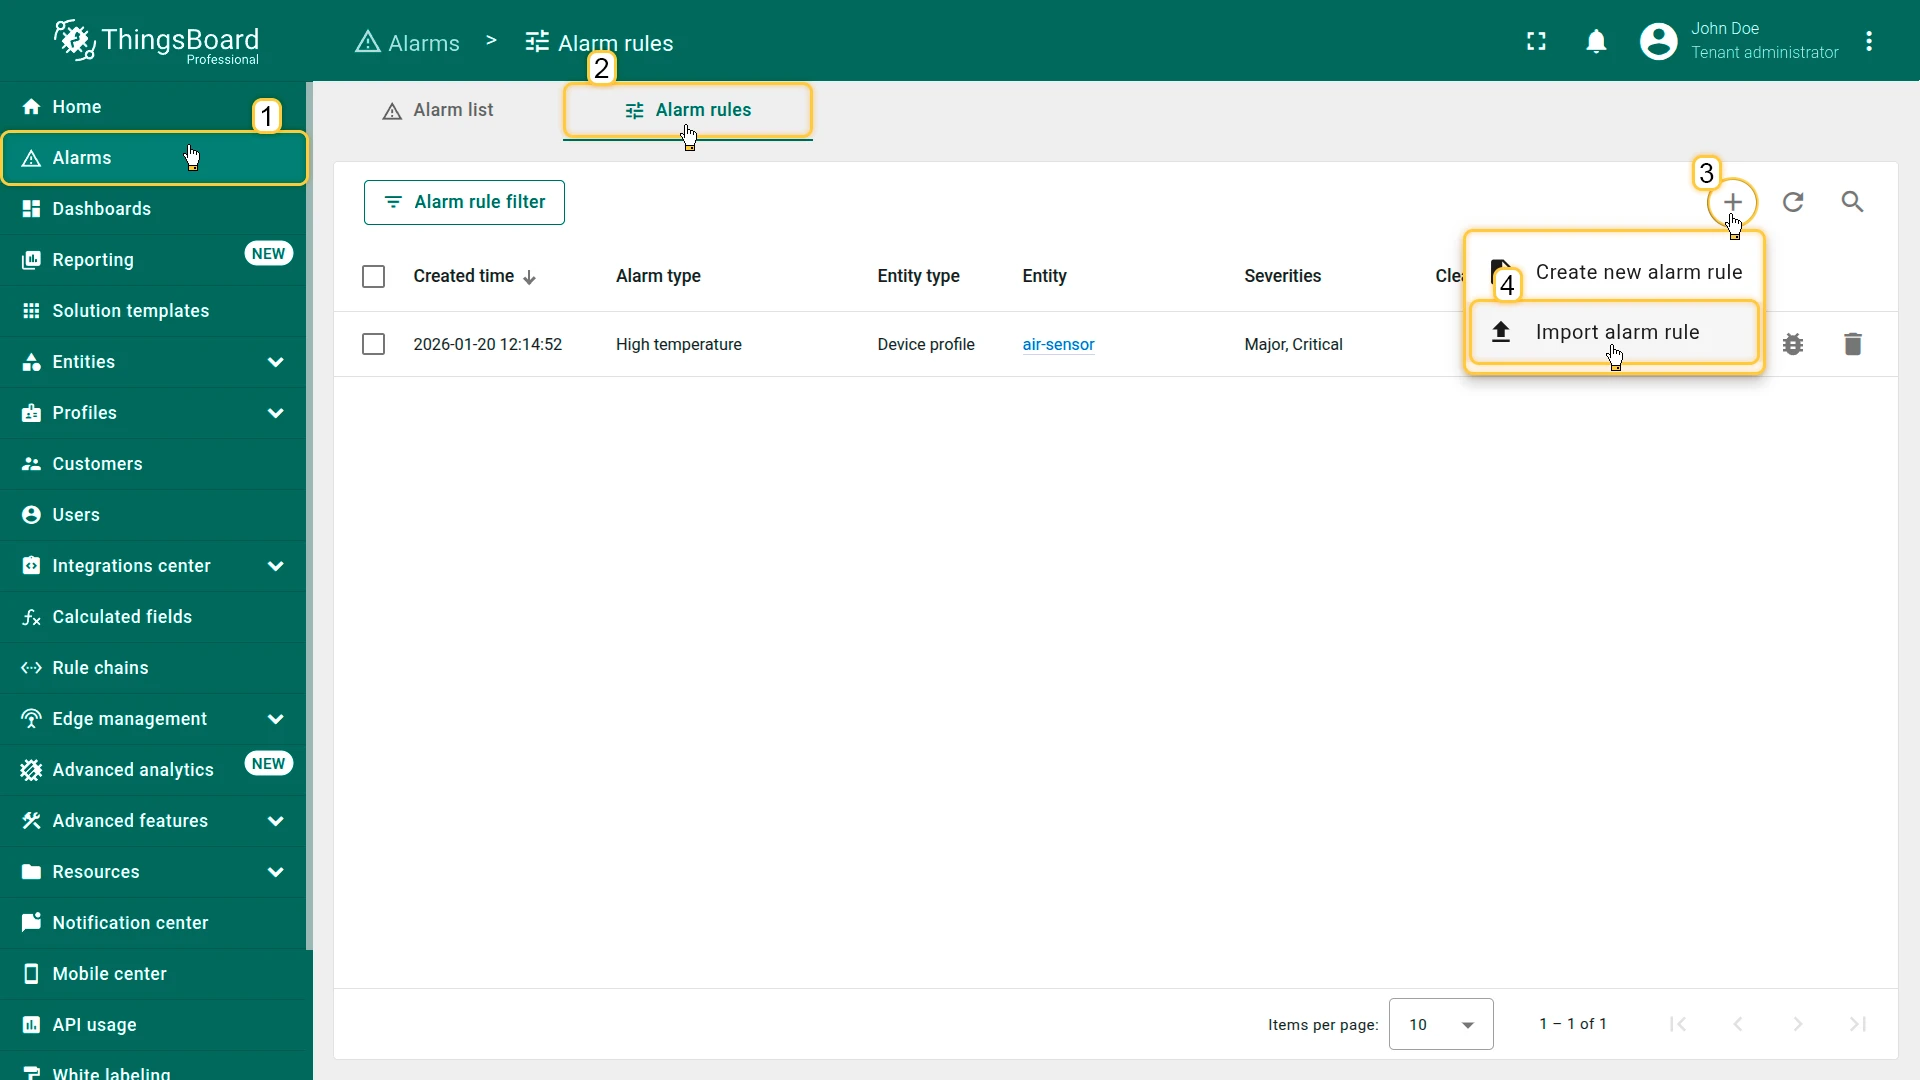
Section titled “High Temperature”- Go to the Alarms ⇾ Alarm rules.
- Click + Add alarm rule ⇾ Create new alarm rule.
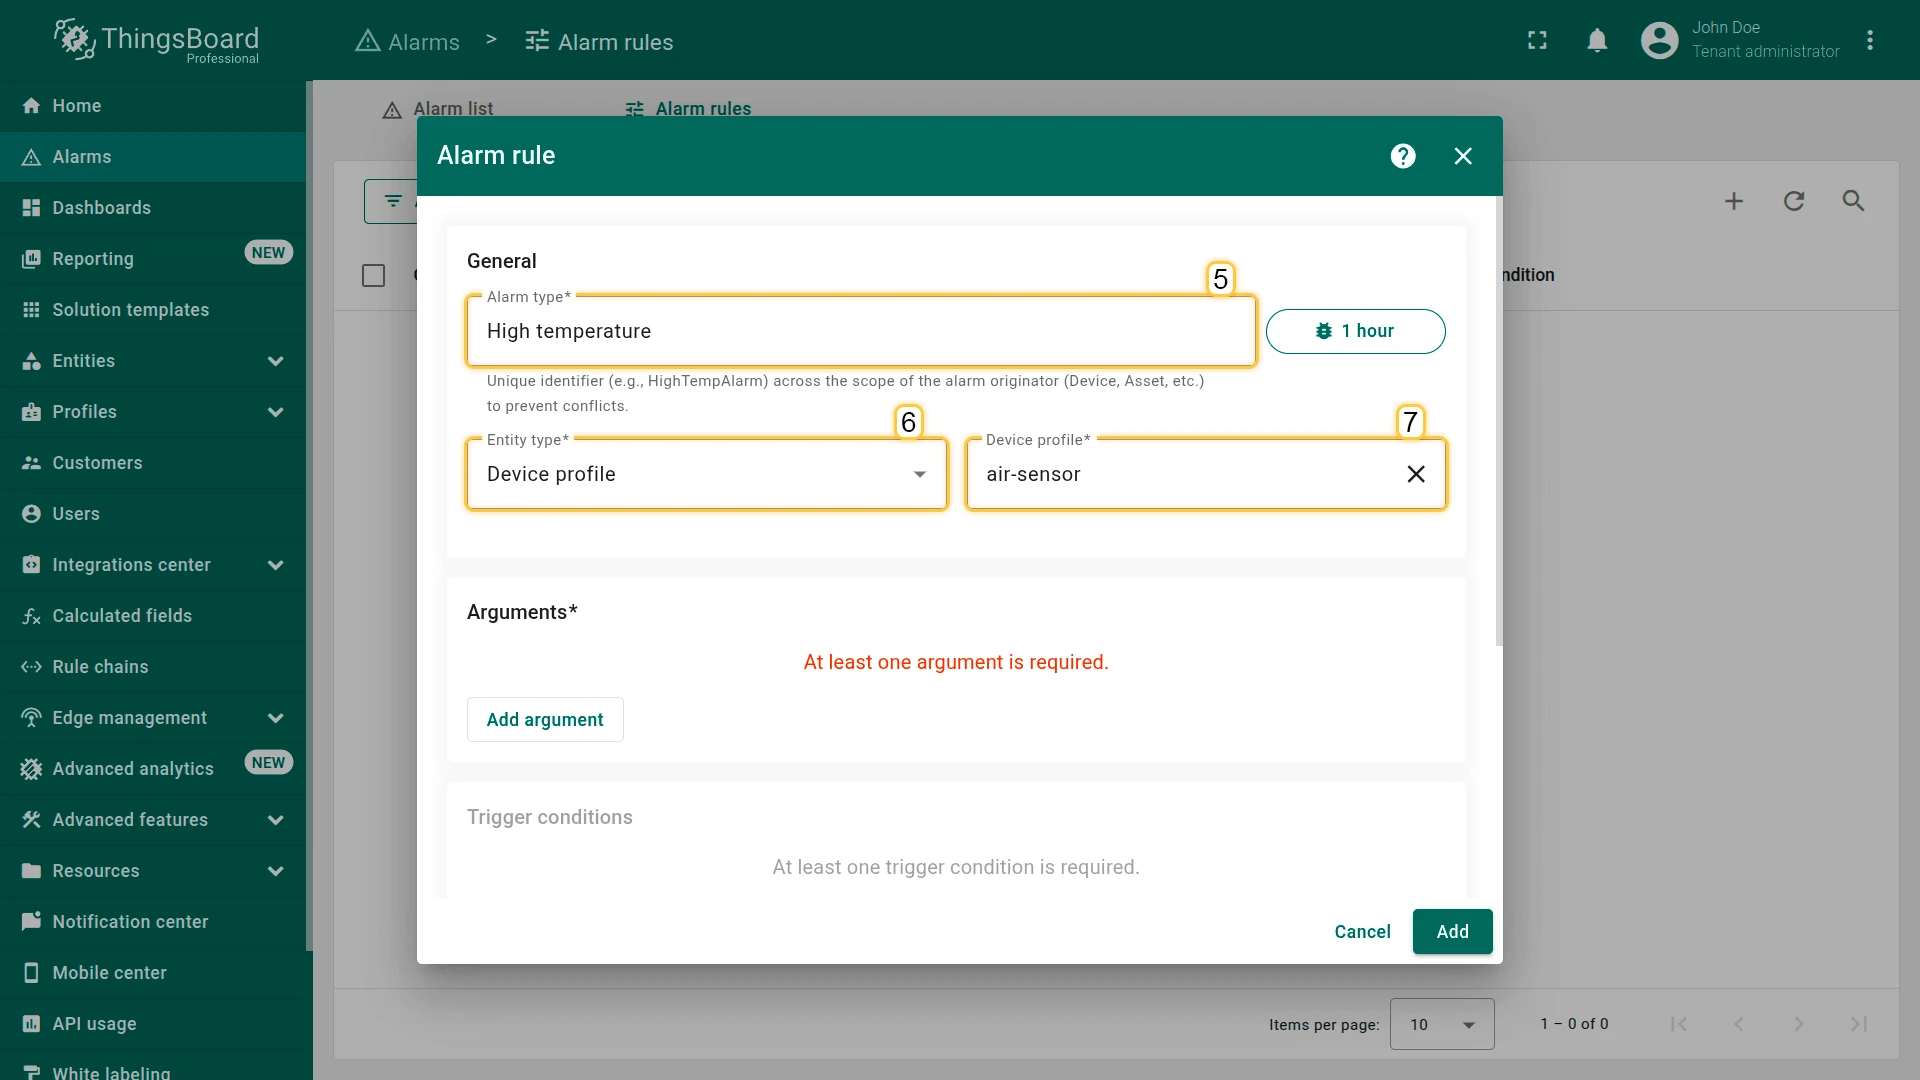
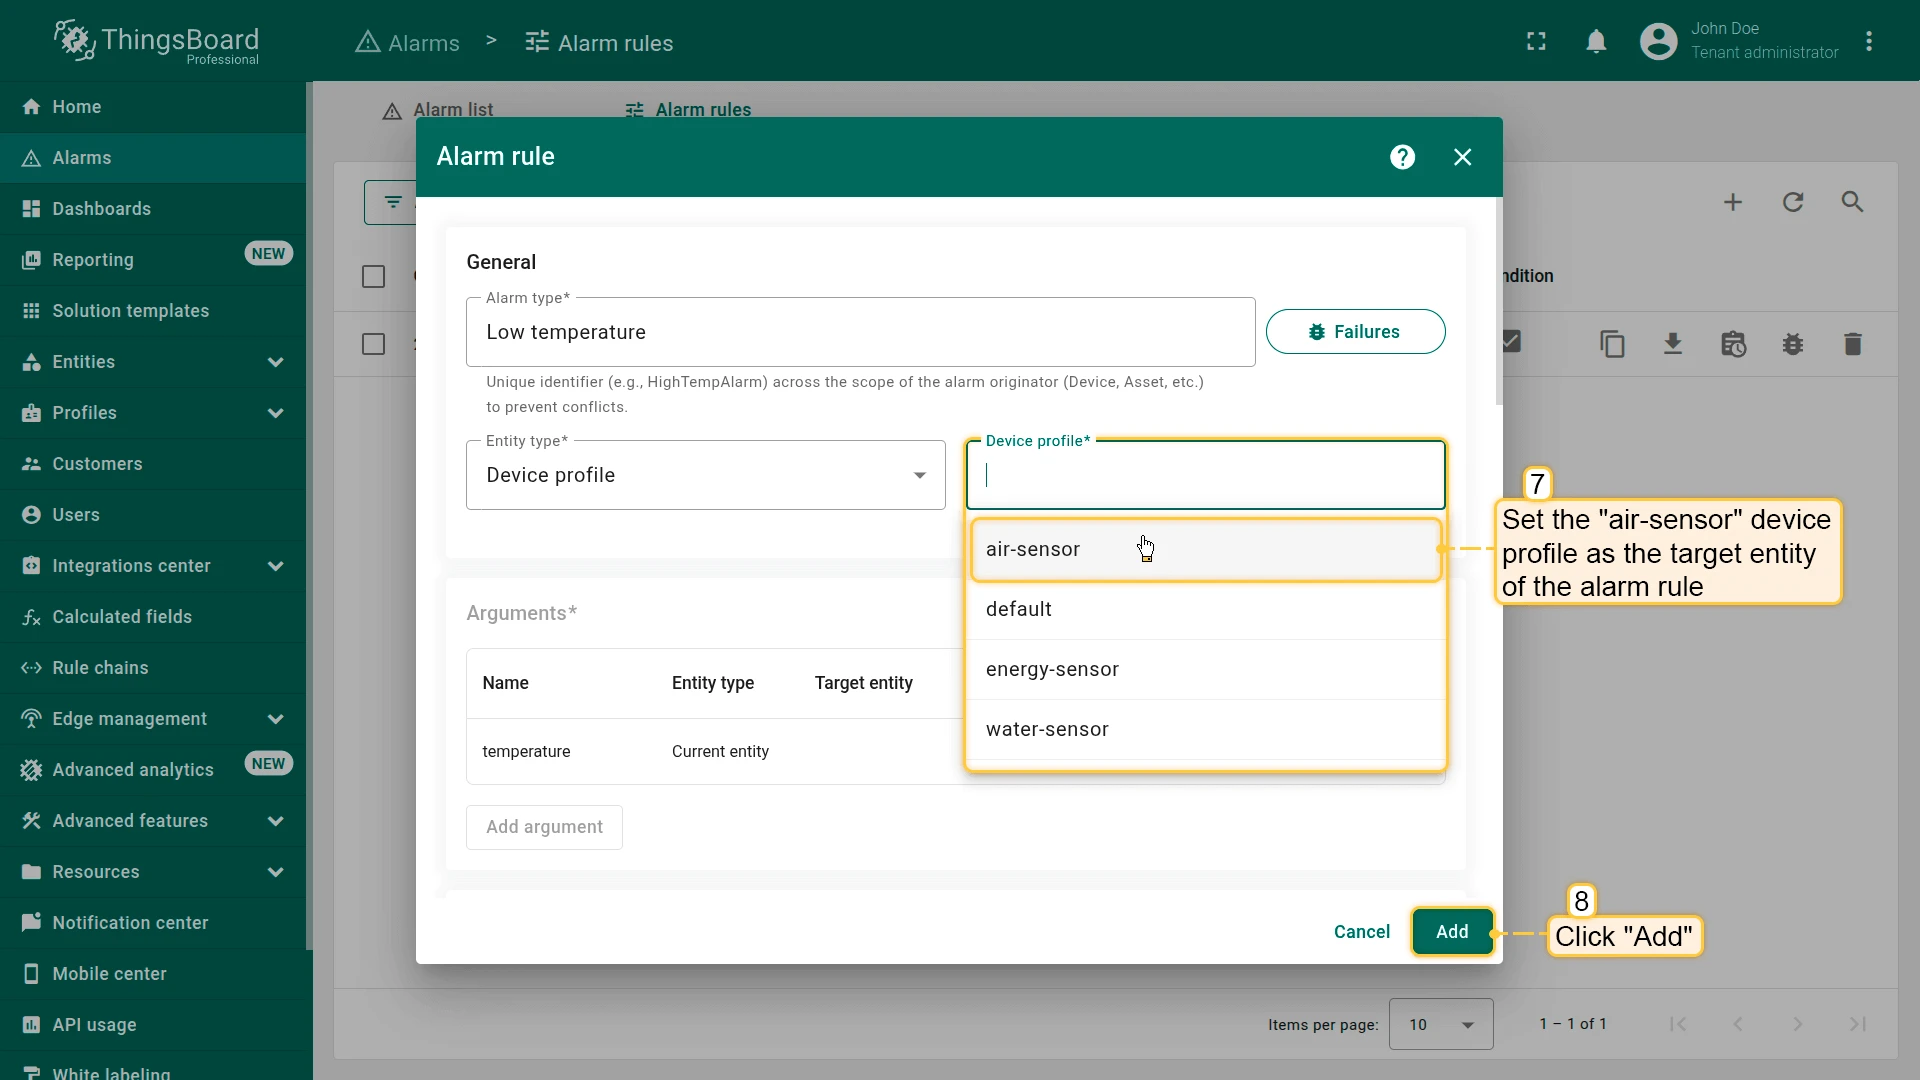
- In the General section set:
- Alarm type:
High temperature - Entity type: Device profile
- Device profile:
air-sensor
- Alarm type:
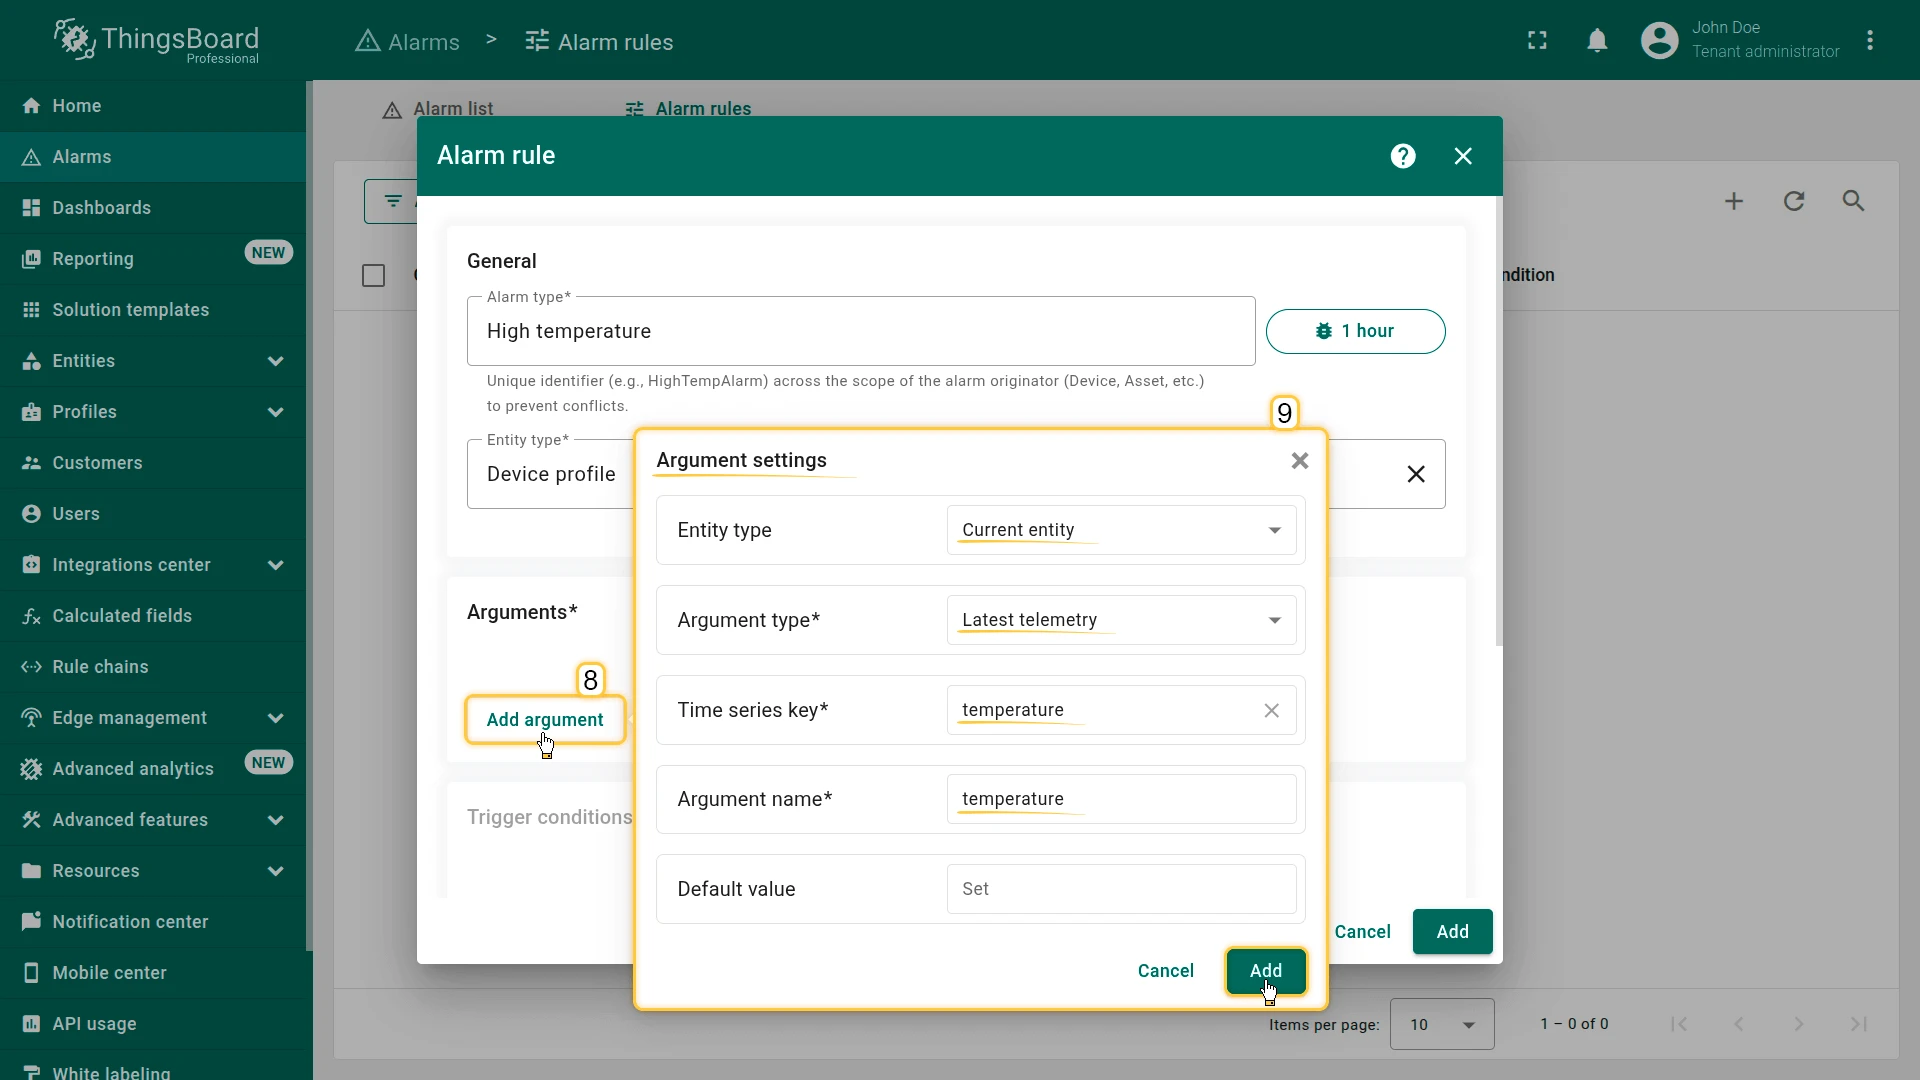
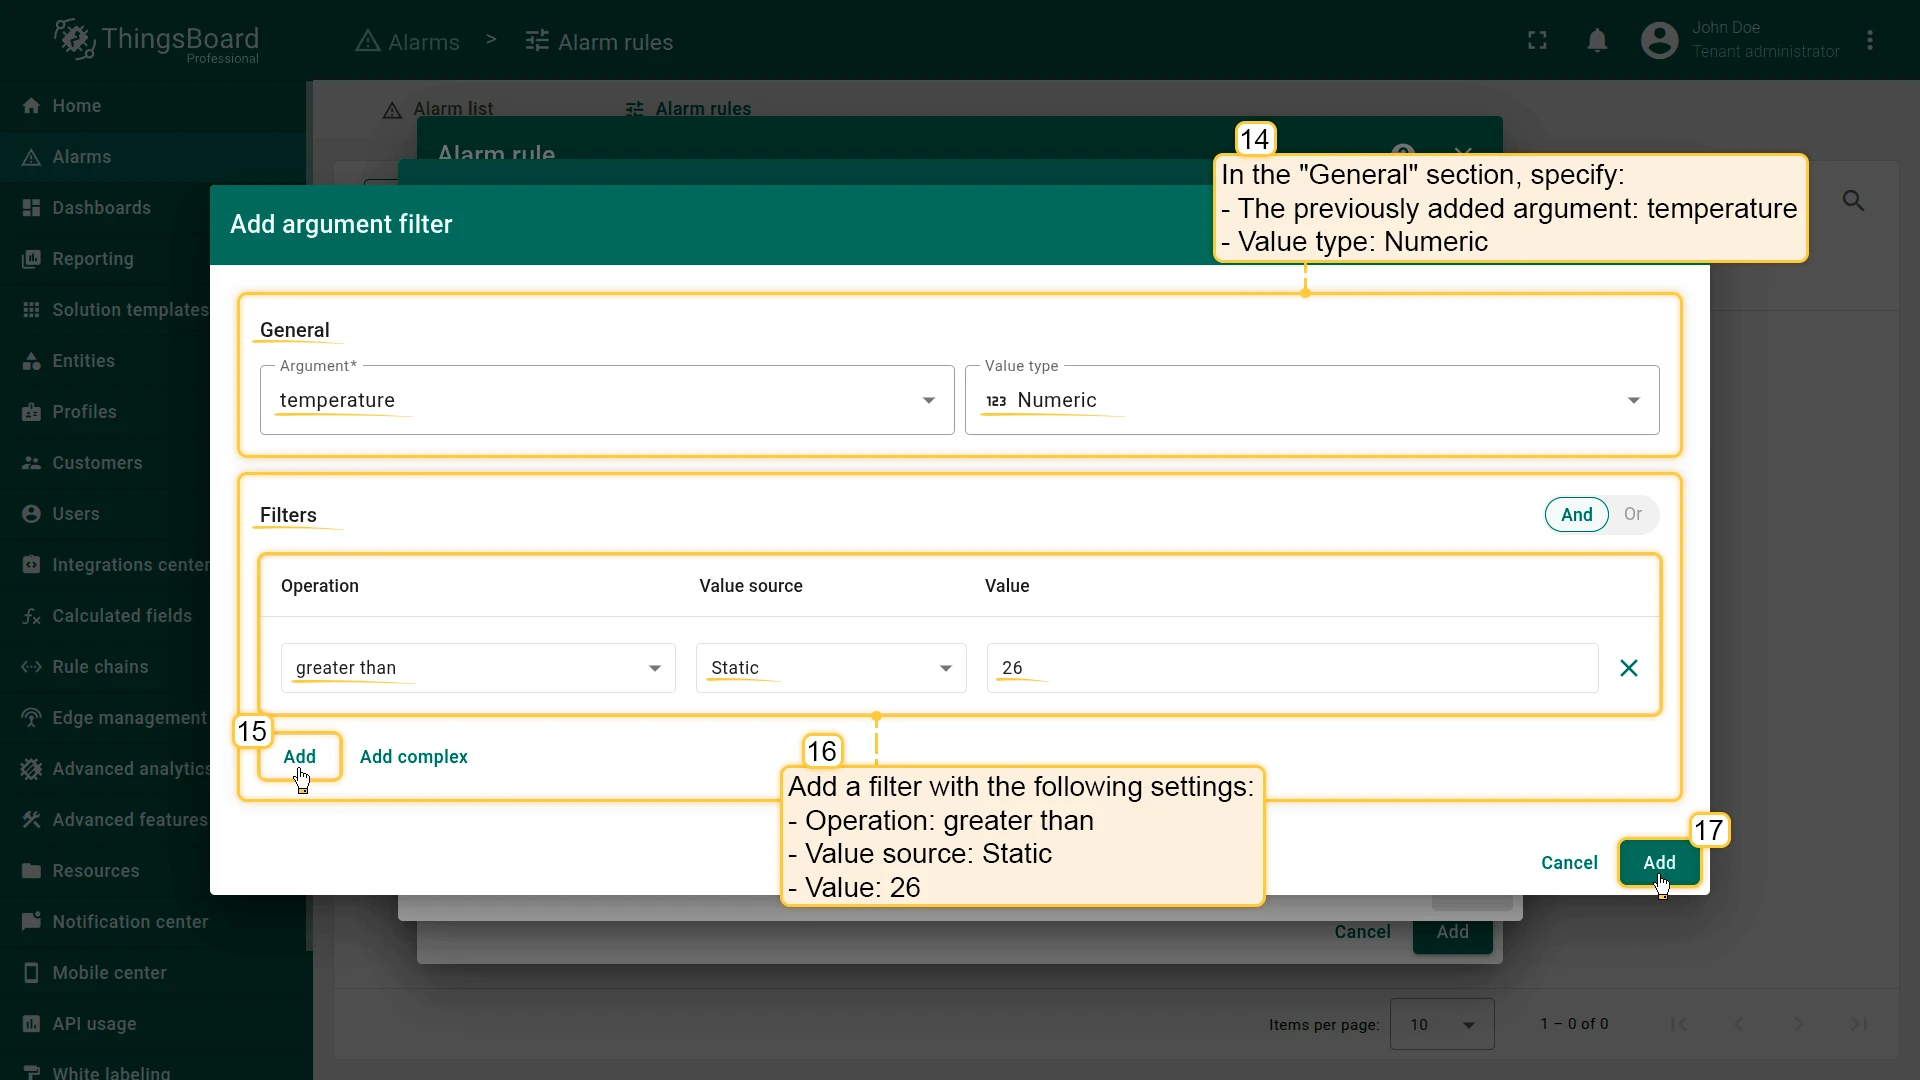
- In the Arguments section click Add argument and fill in:
- Entity type: Current entity
- Argument type: Latest telemetry
- Time series key:
temperature - Argument name:
temperature - Click Add.
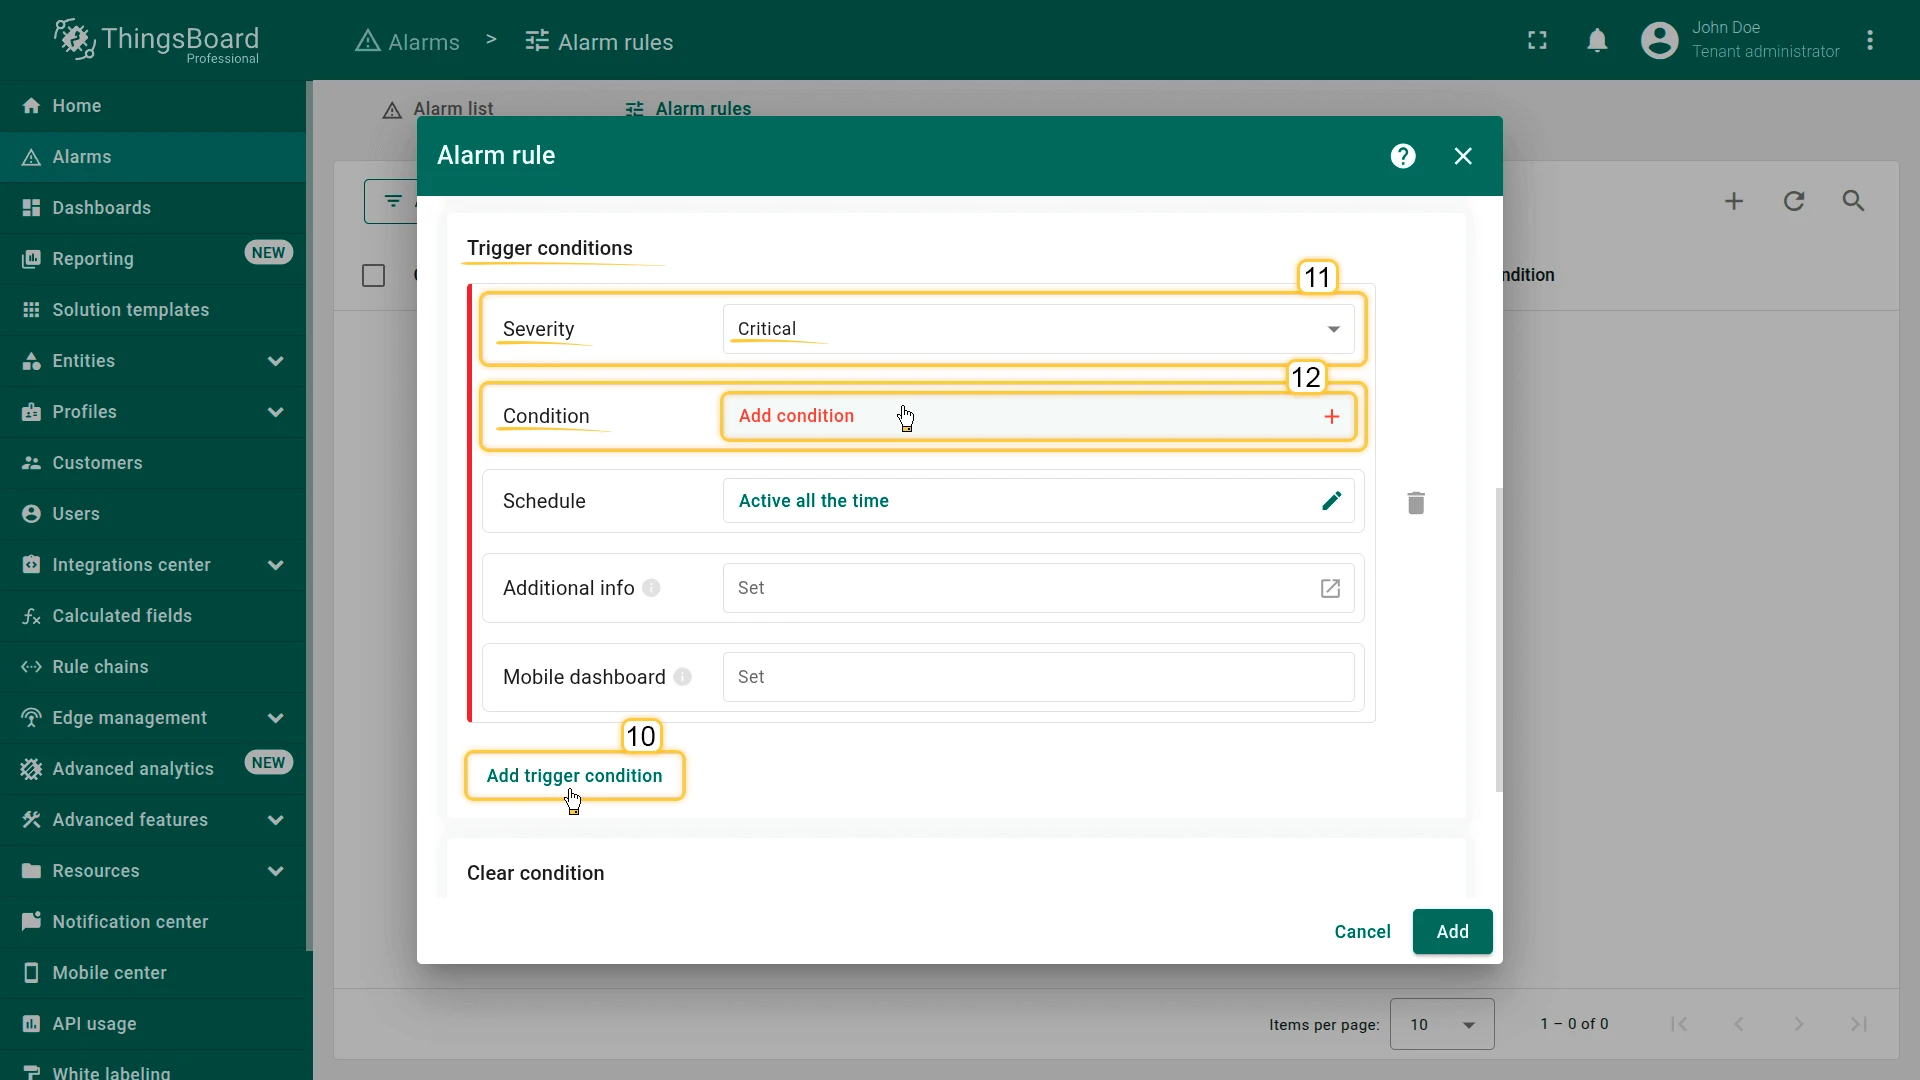
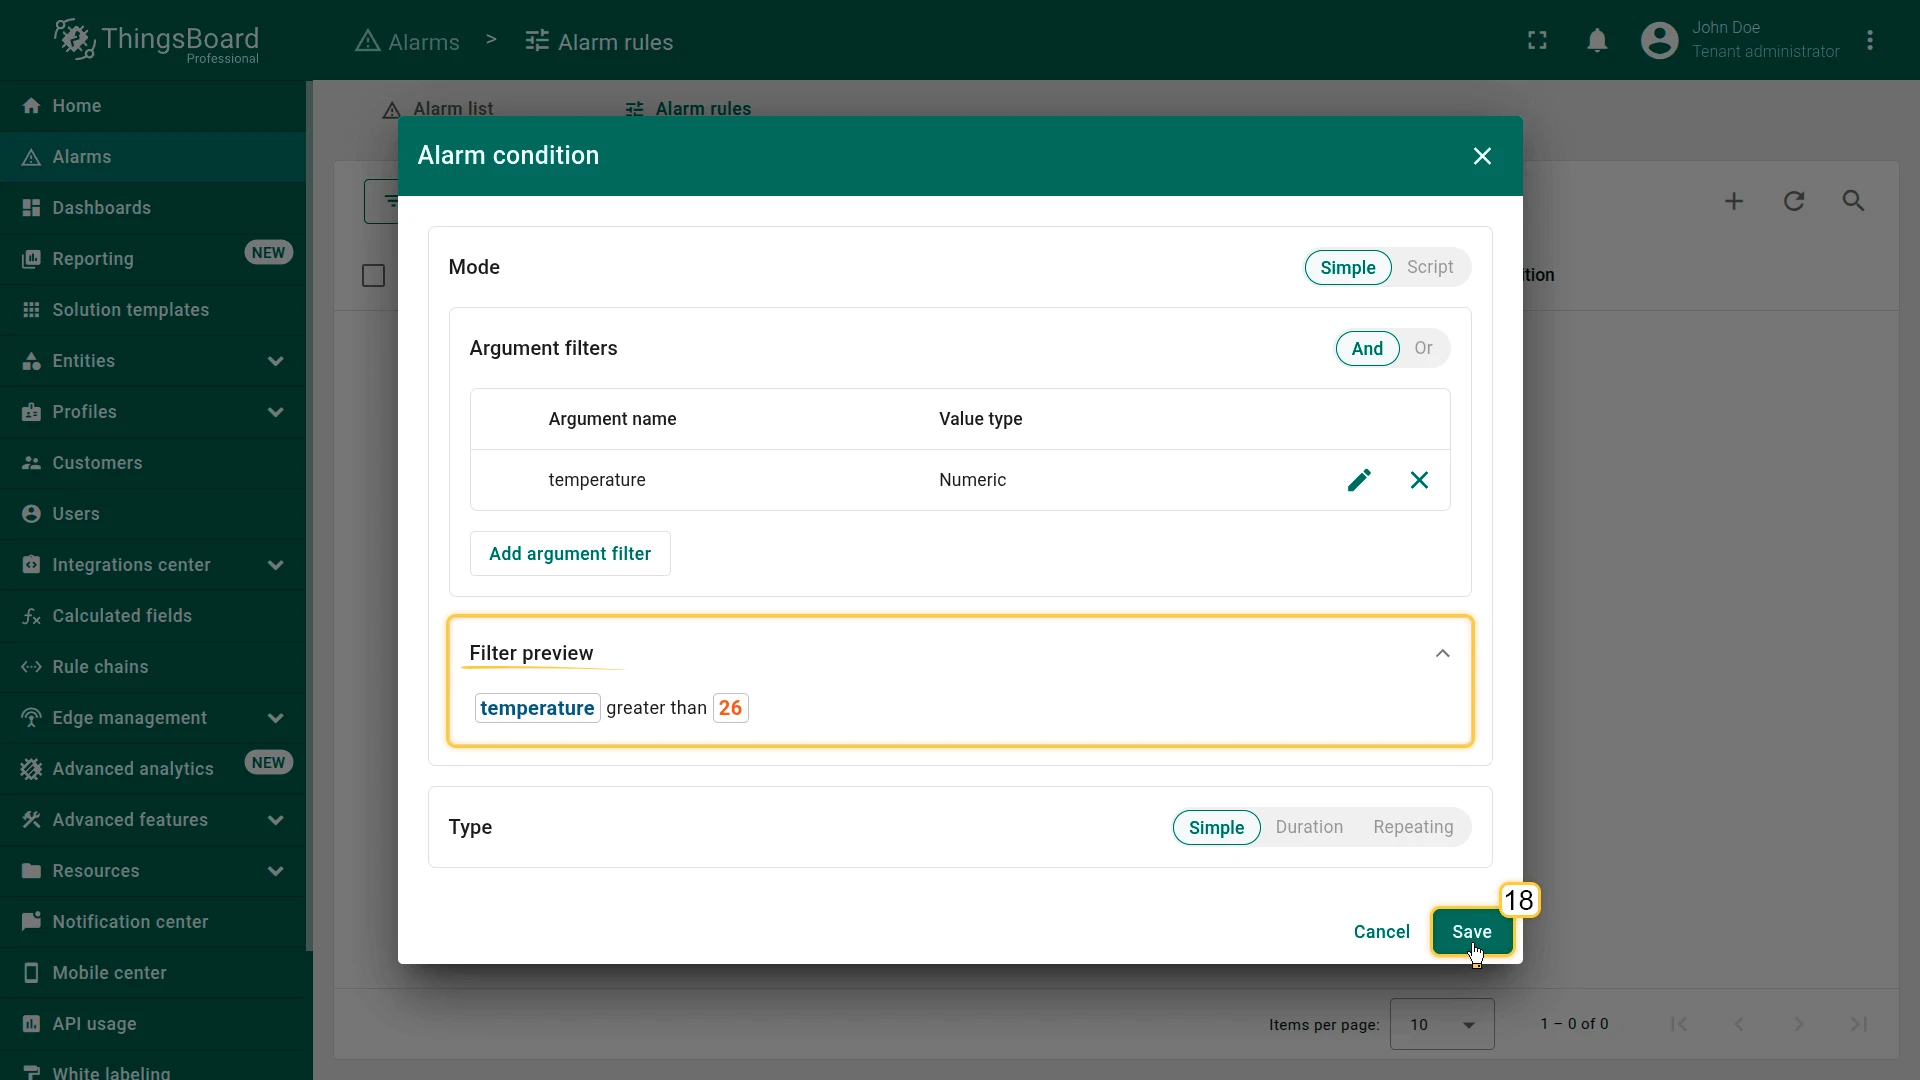
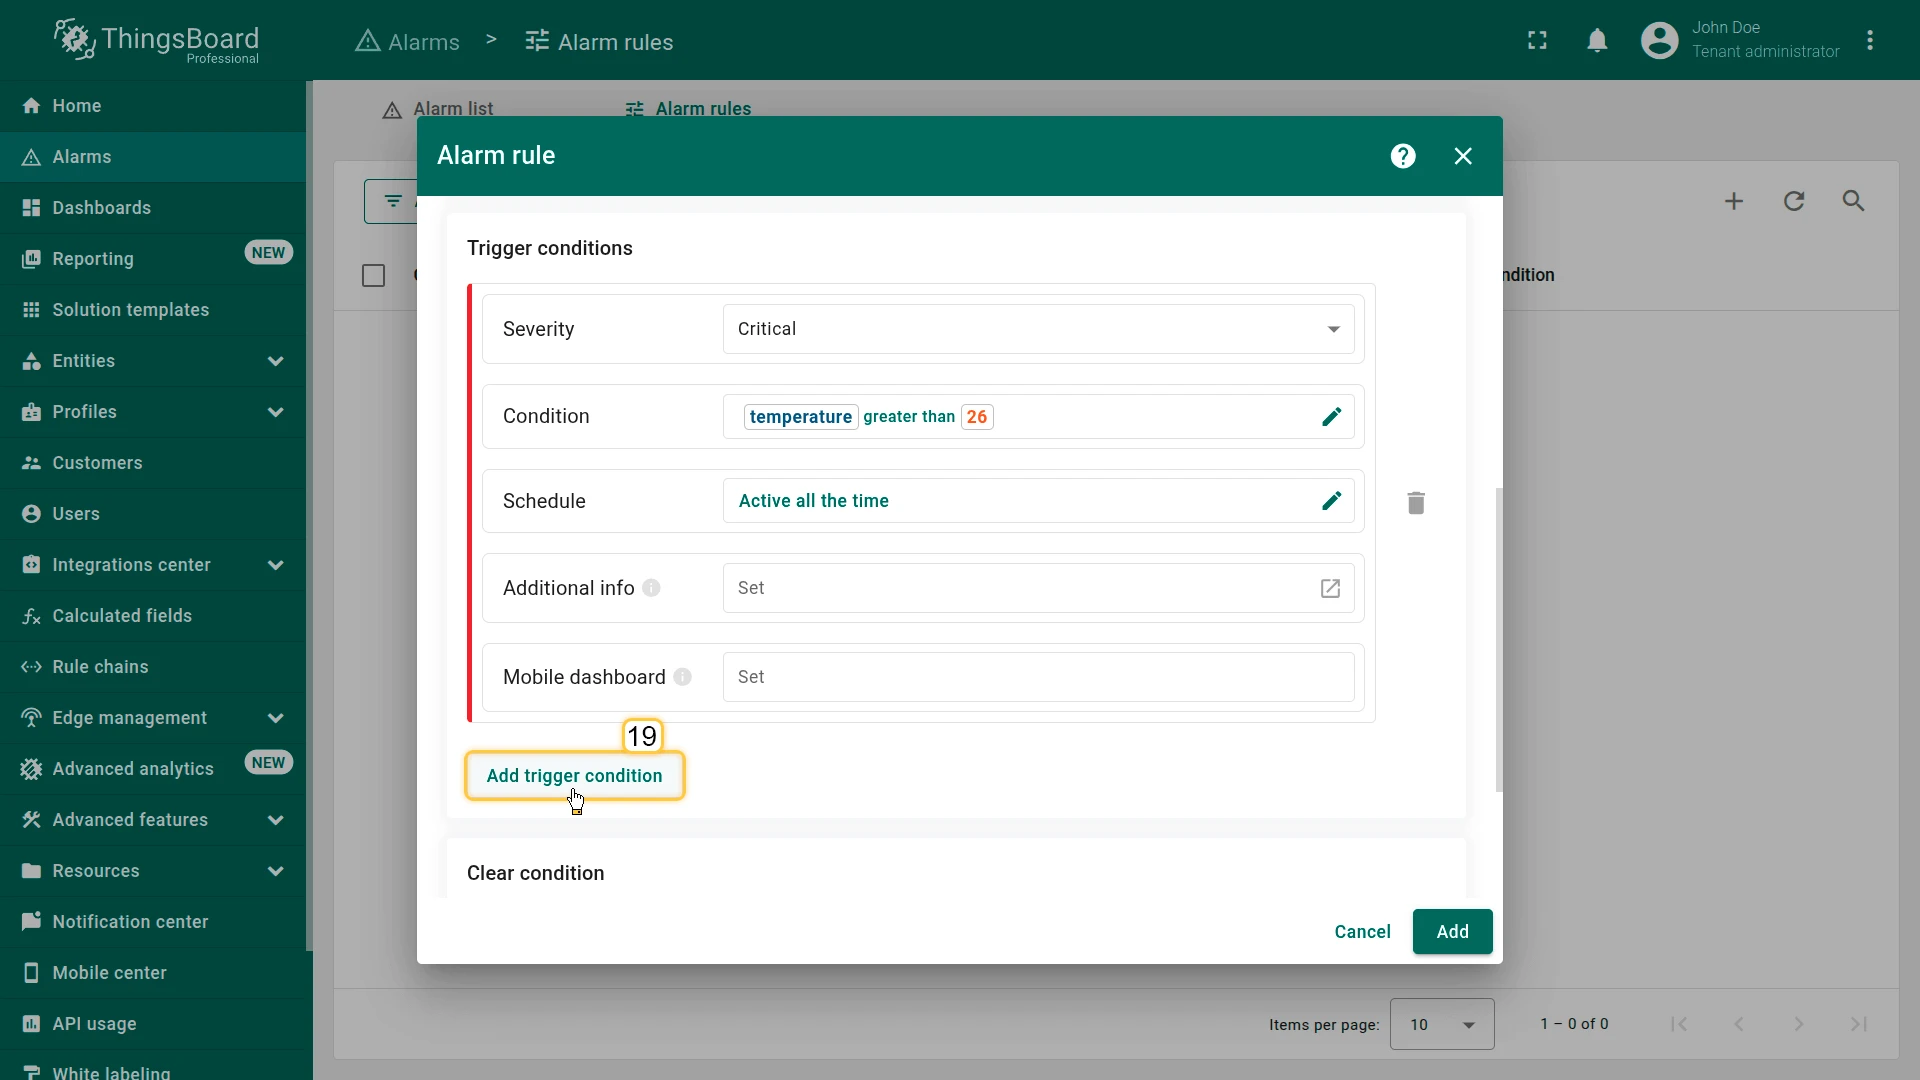
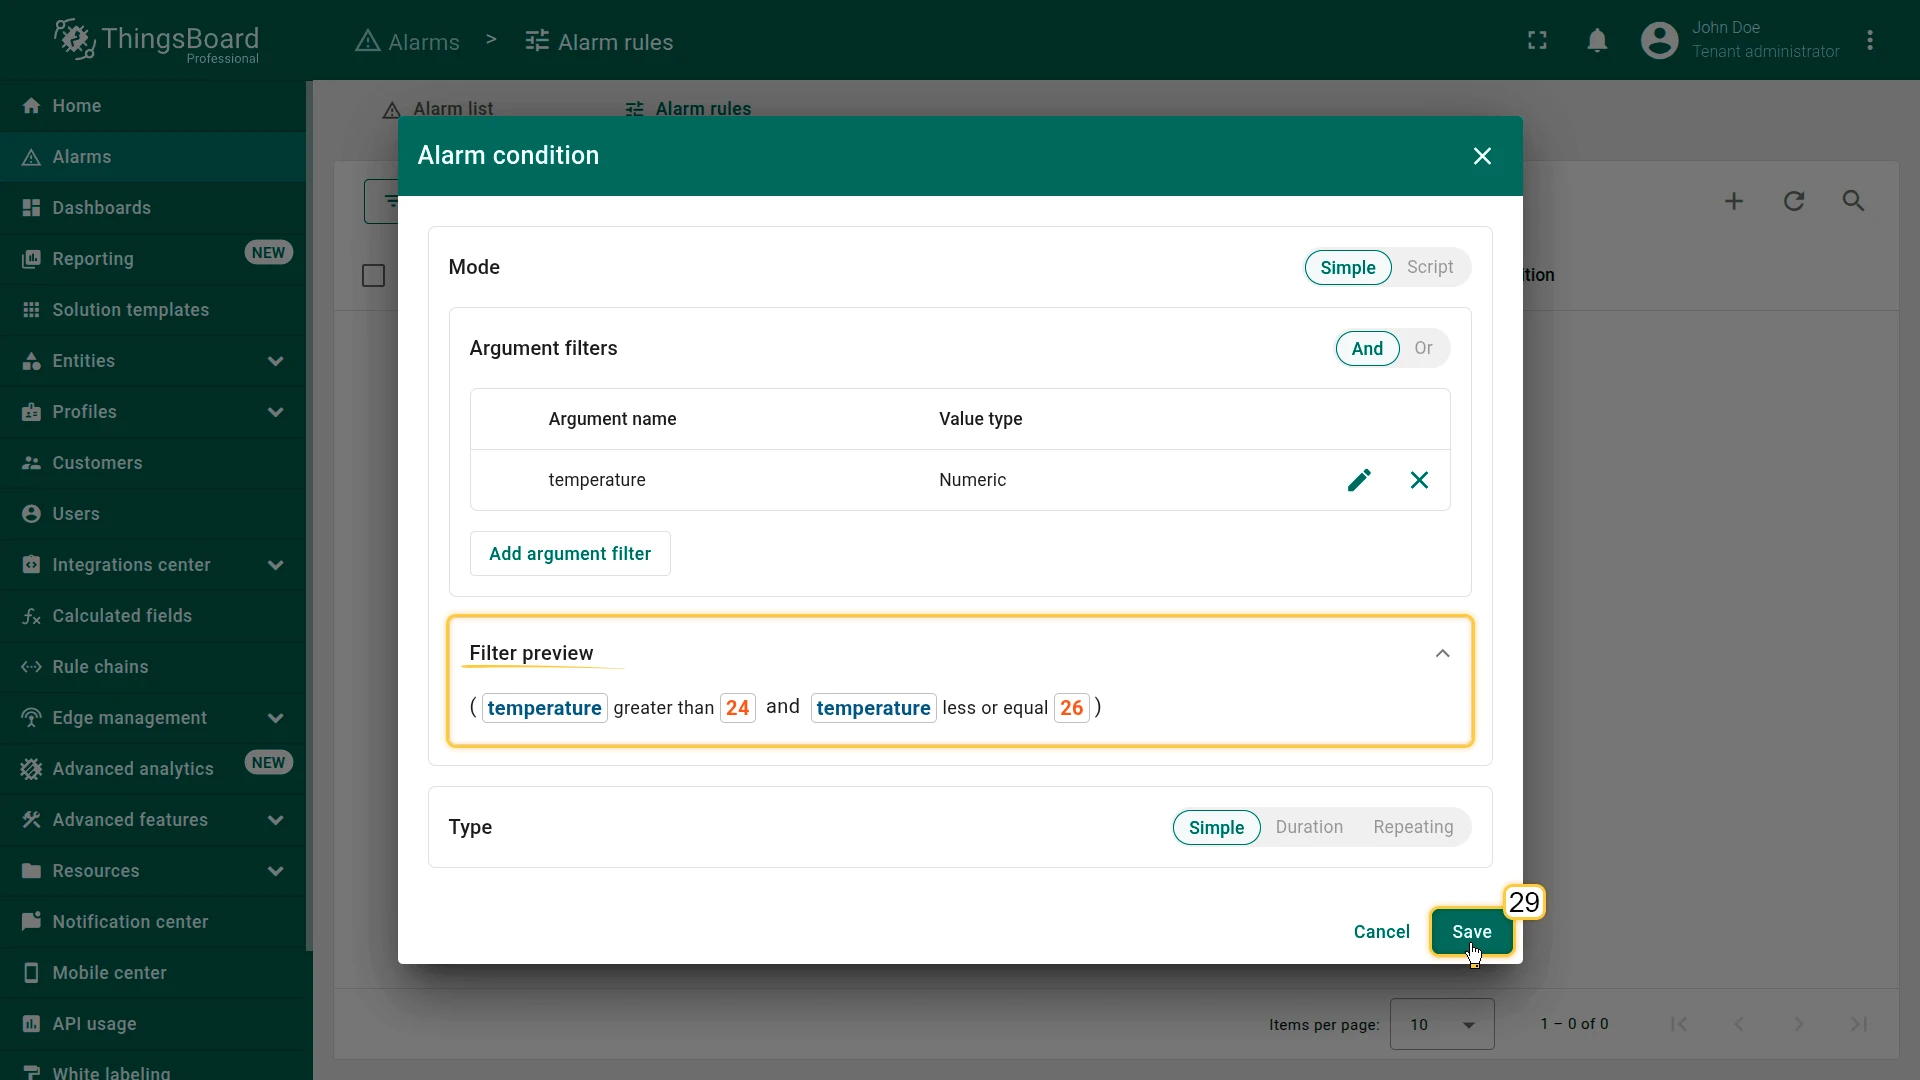
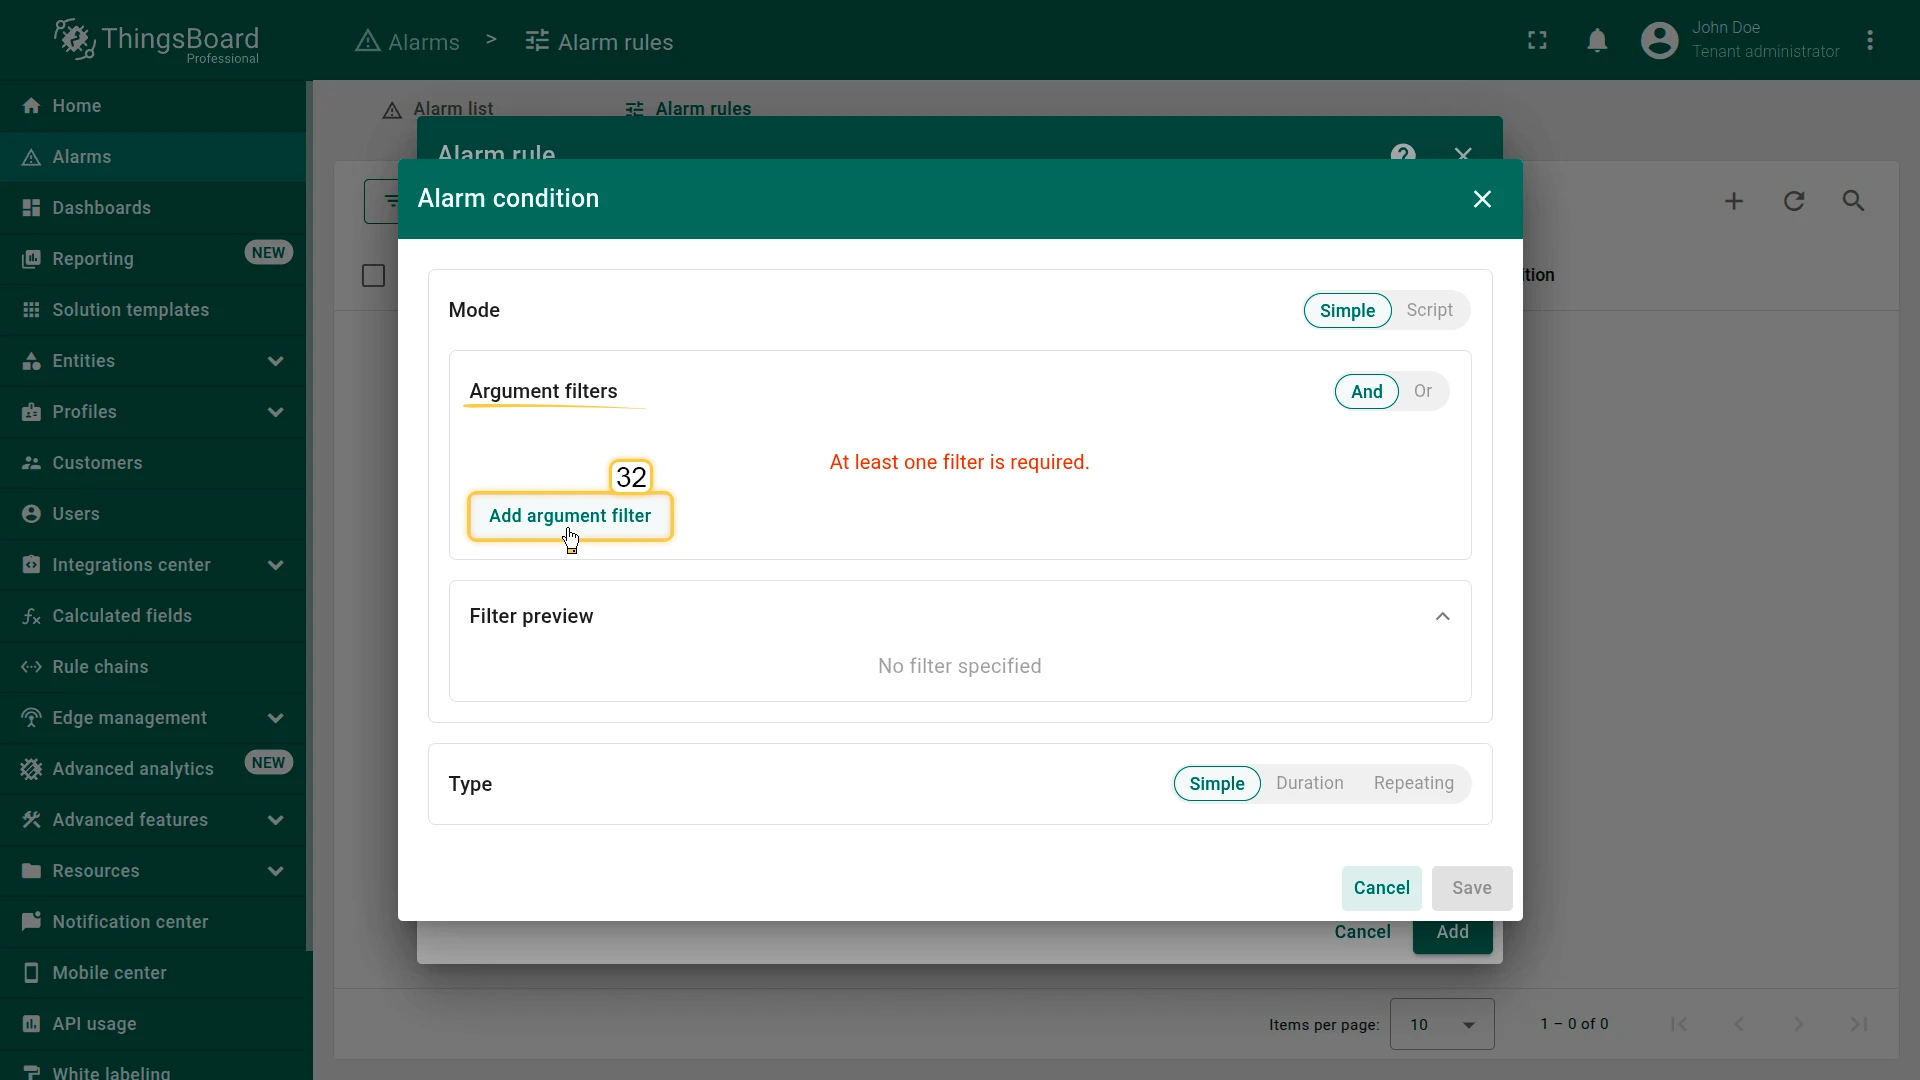
- In Create conditions click Add create condition:
- Severity: Critical
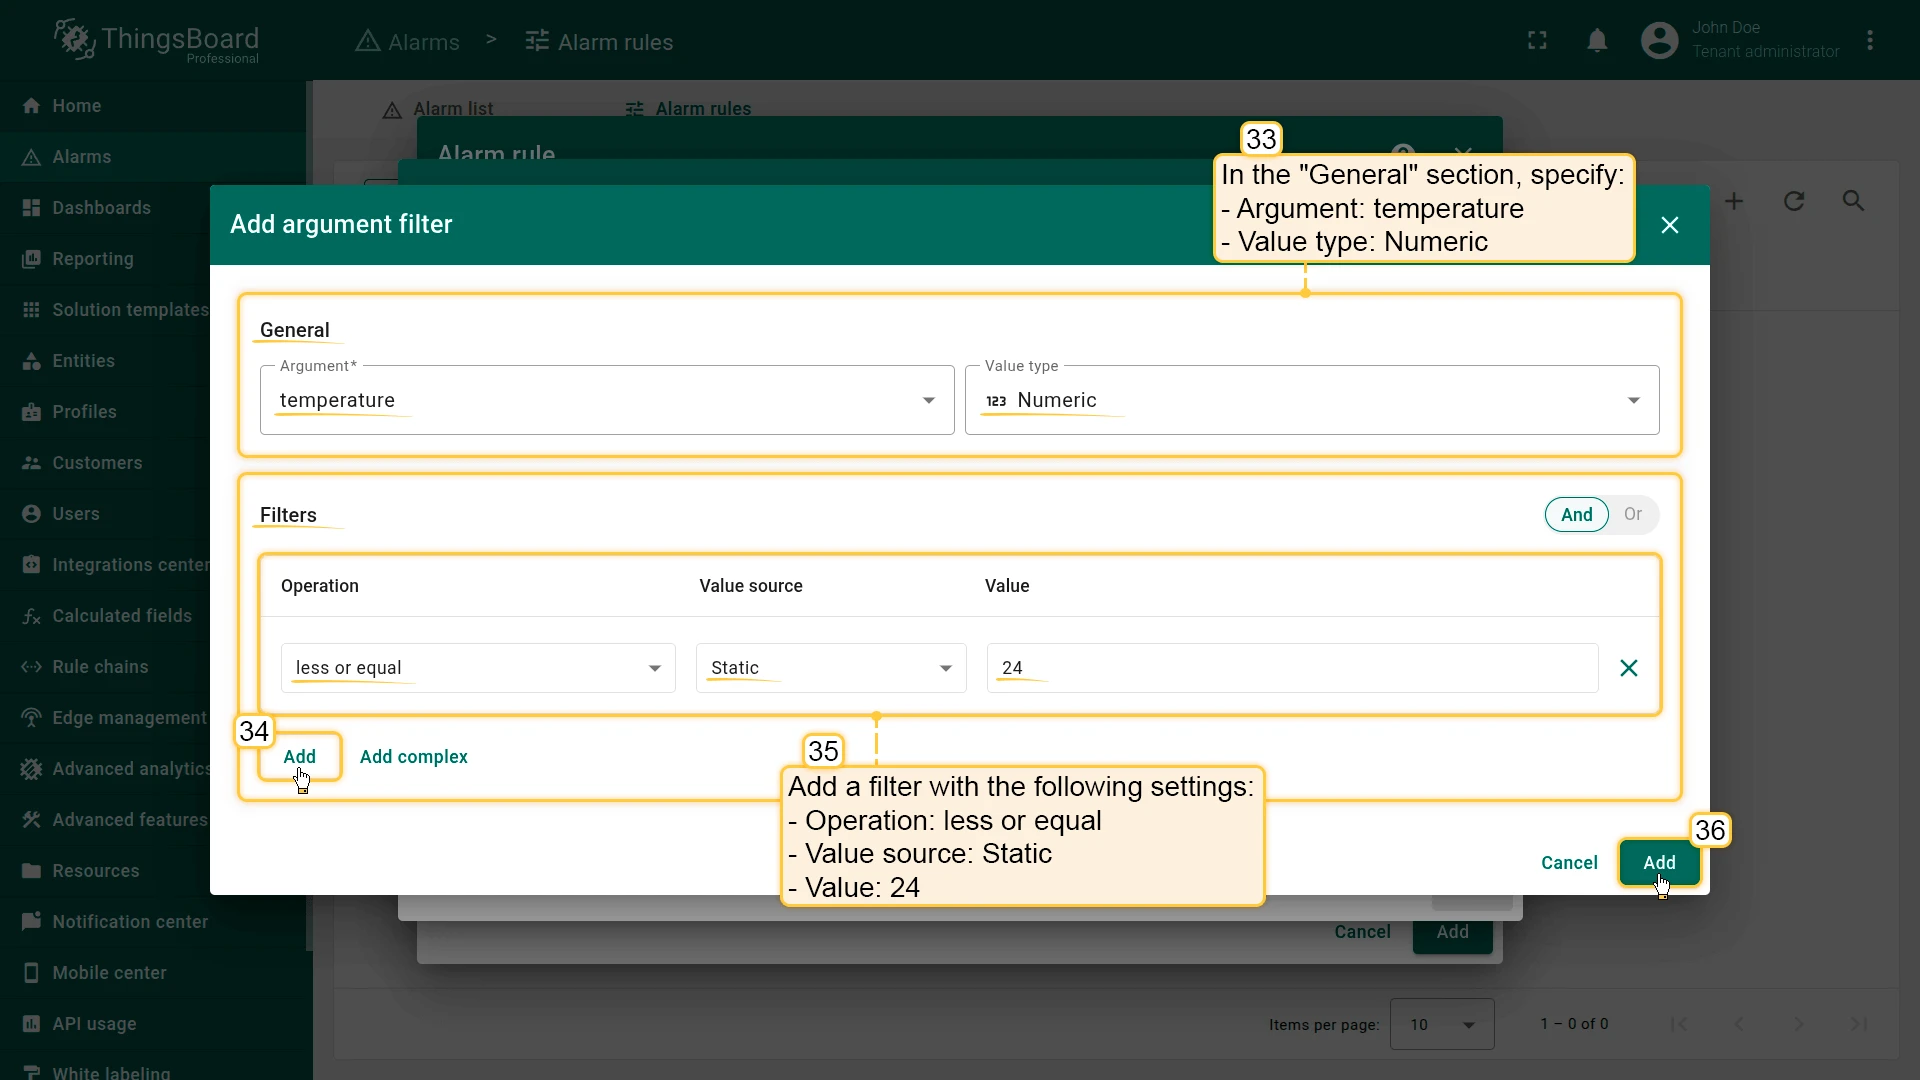
- Click Add condition ⇾ Add argument filter:
- Argument:
temperature, Value type: Numeric - Filter: operation greater than, value
26
- Argument:
- Click Add, then Save.
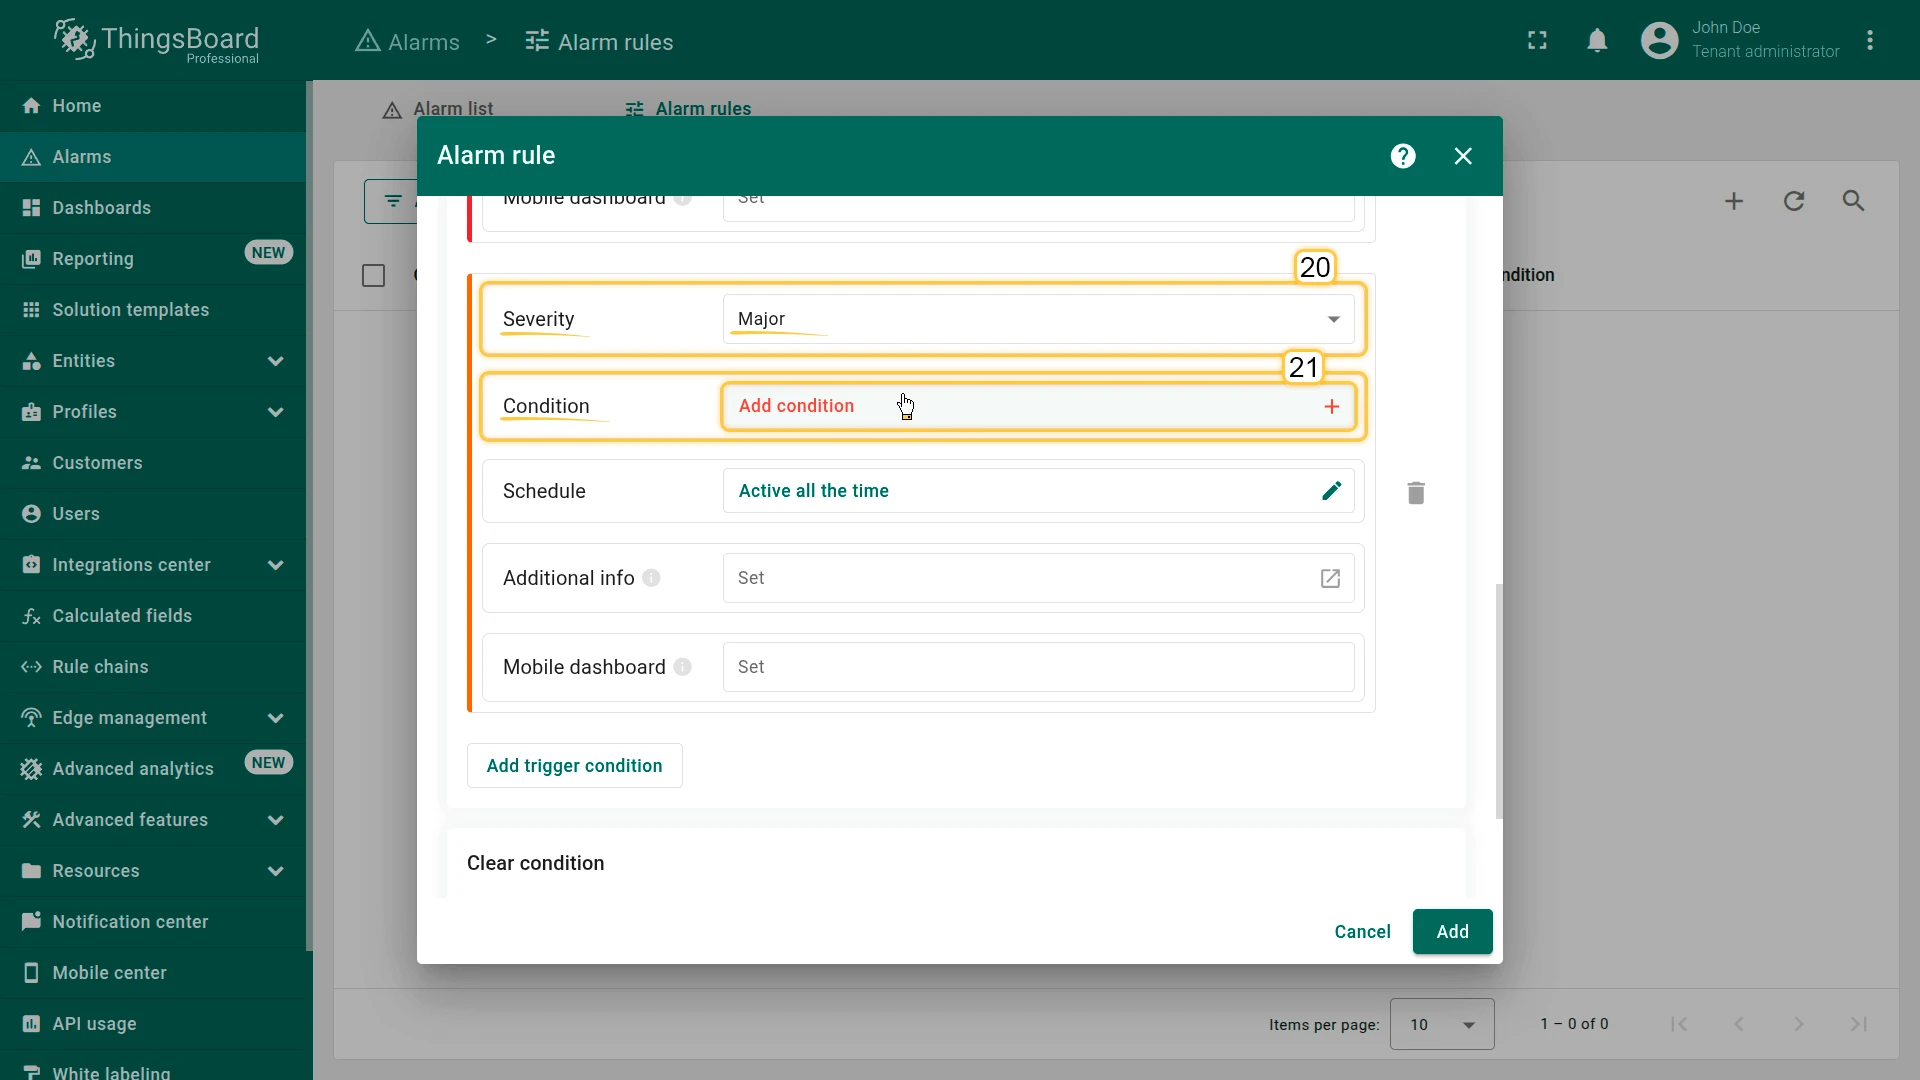
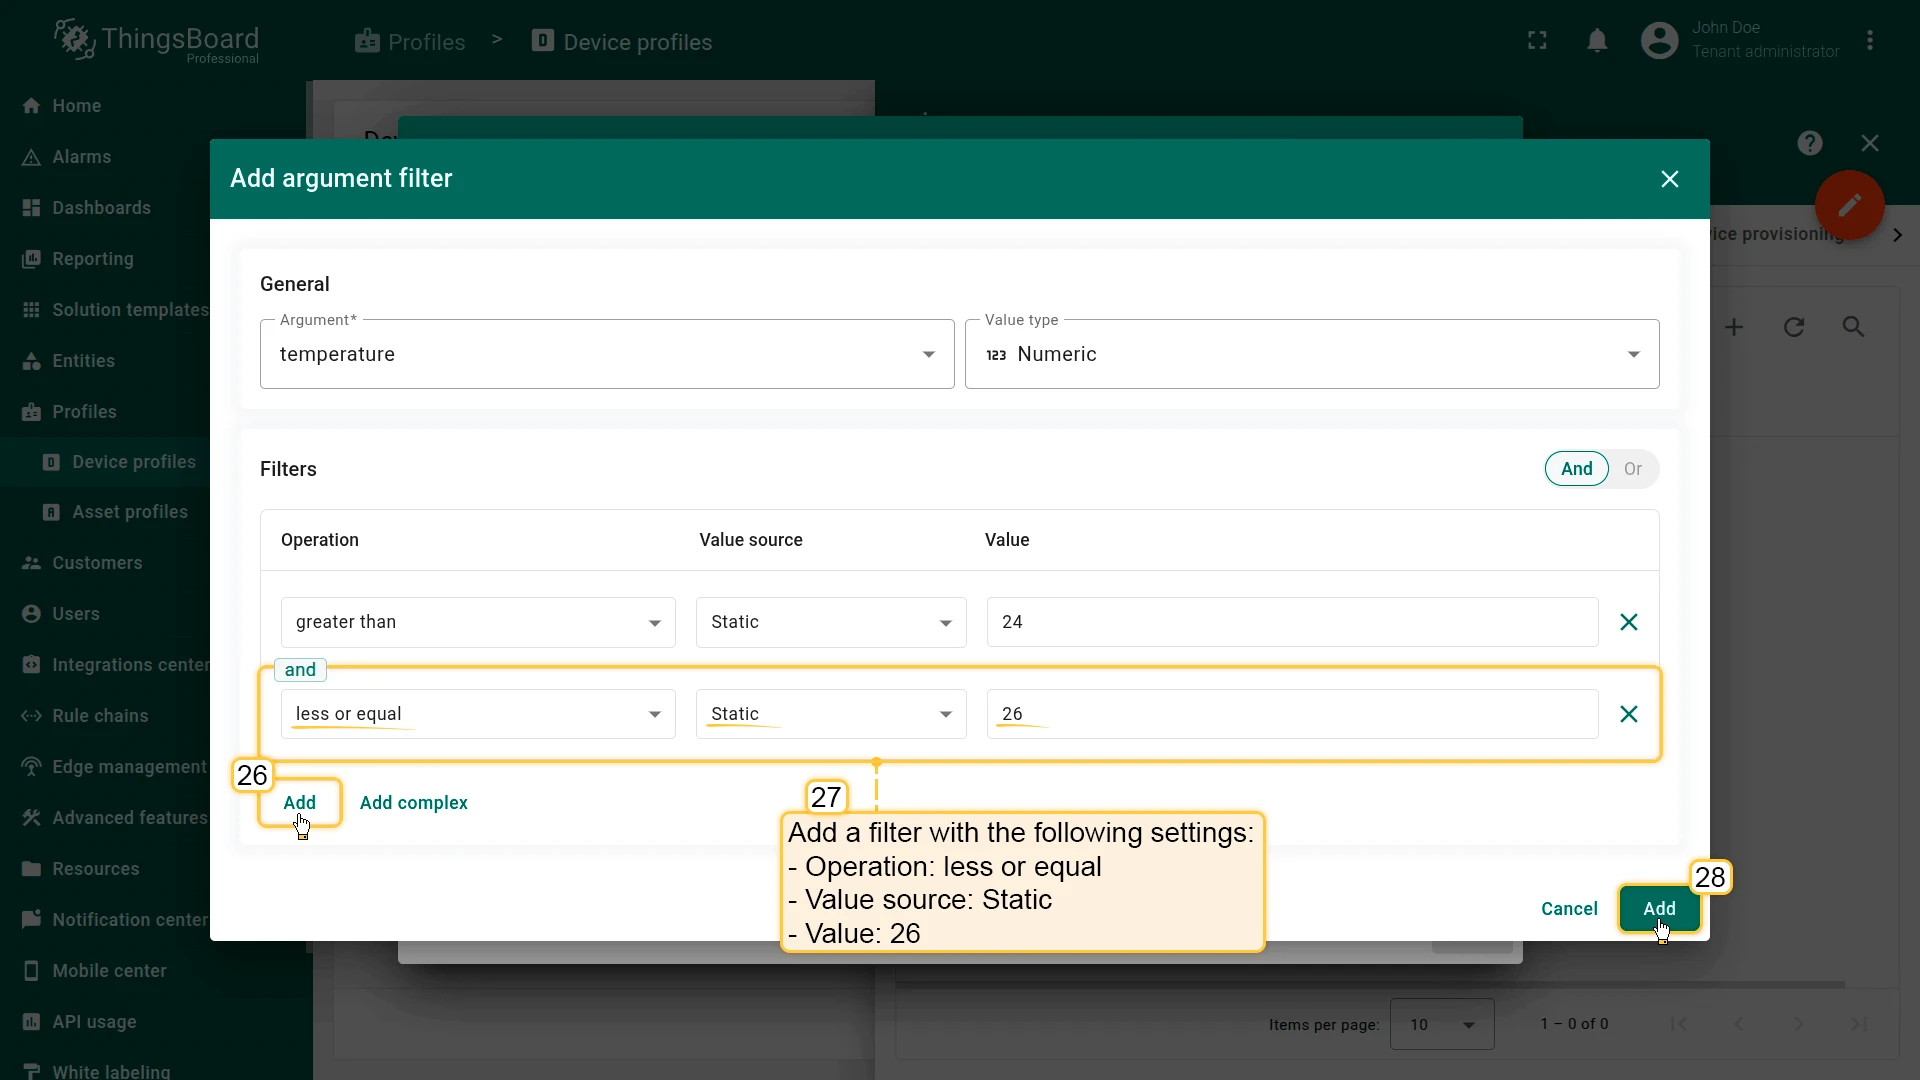
- Click Add create condition again:
- Severity: Major
- Click Add condition ⇾ Add argument filter:
- Argument:
temperature, Value type: Numeric - Filter 1: greater than
24 - Filter 2: less or equal
26
- Argument:
- Click Add, then Save.
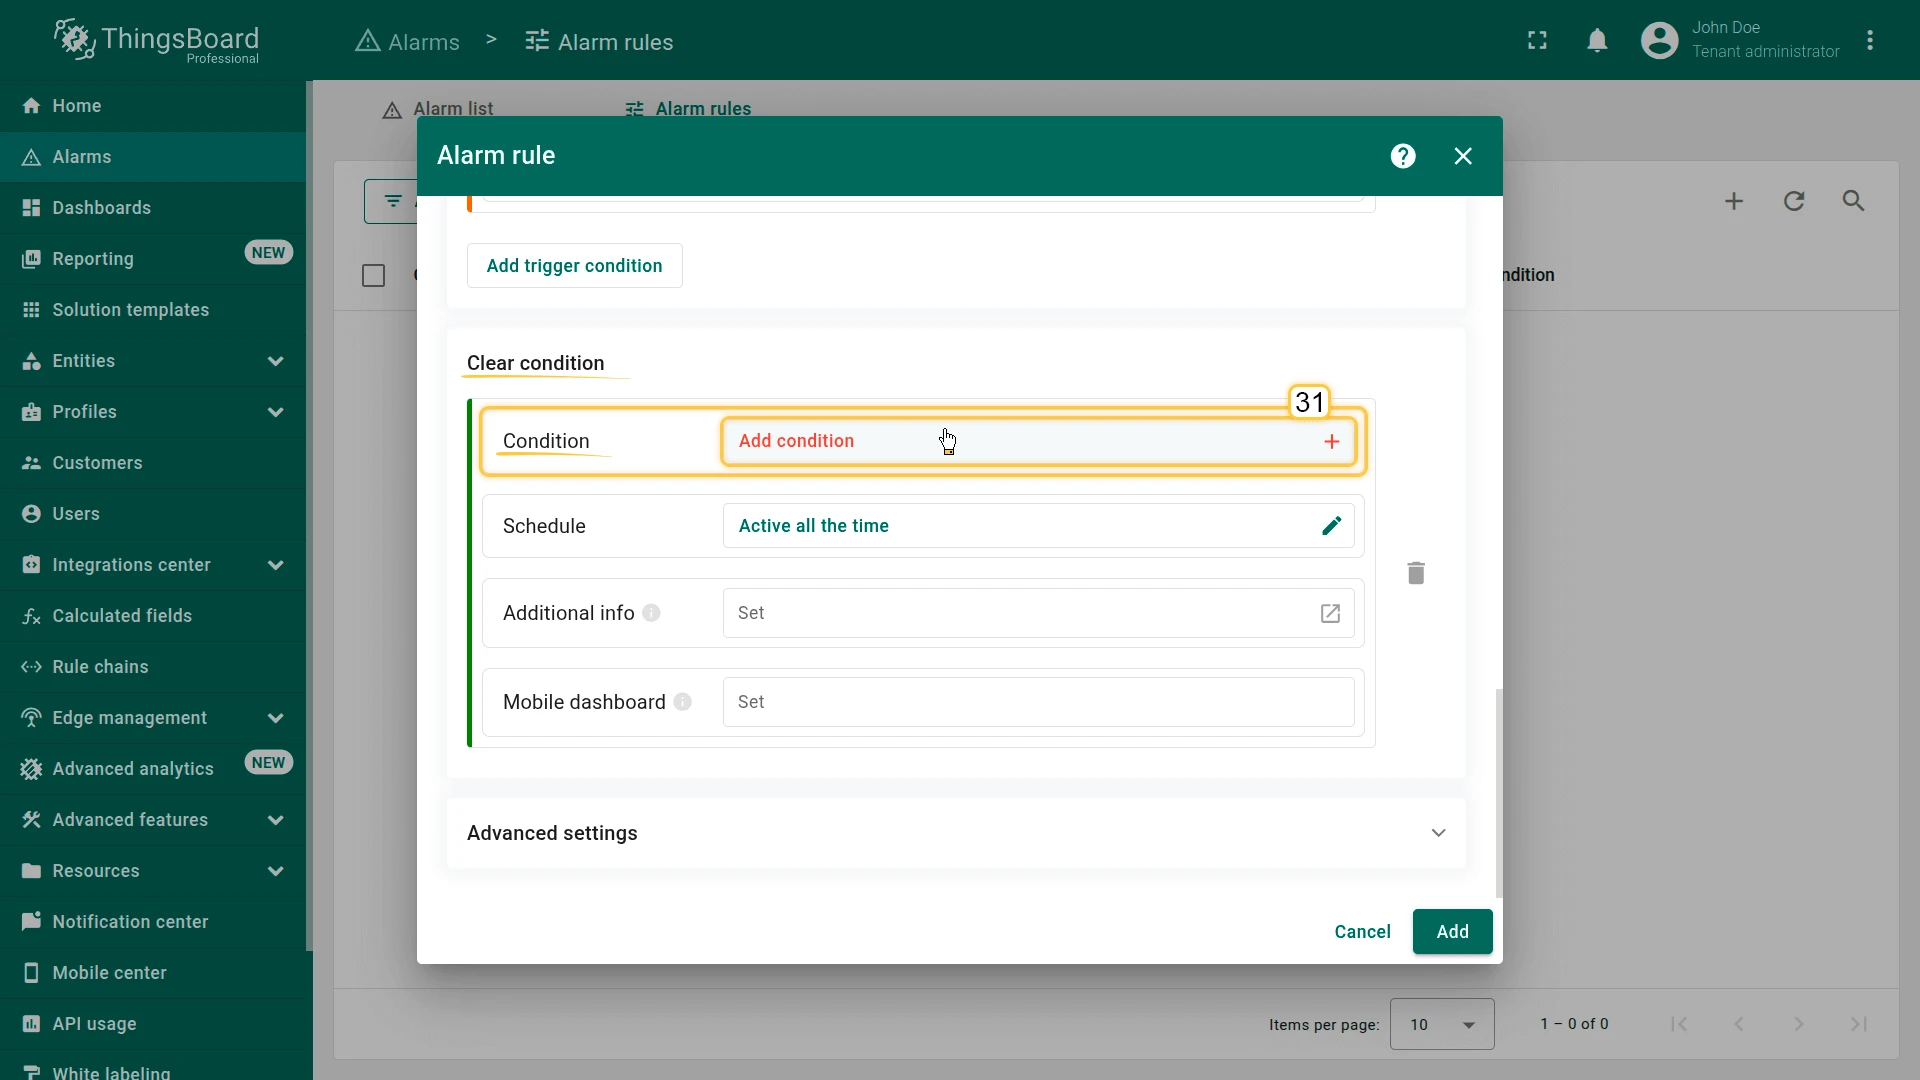
- In Clear conditions click Add clearing condition:
- Click Add condition ⇾ Add argument filter:
- Argument:
temperature, Value type: Numeric - Filter: less or equal
24
- Argument:
- Click Add, then Save.
- Click Add condition ⇾ Add argument filter:
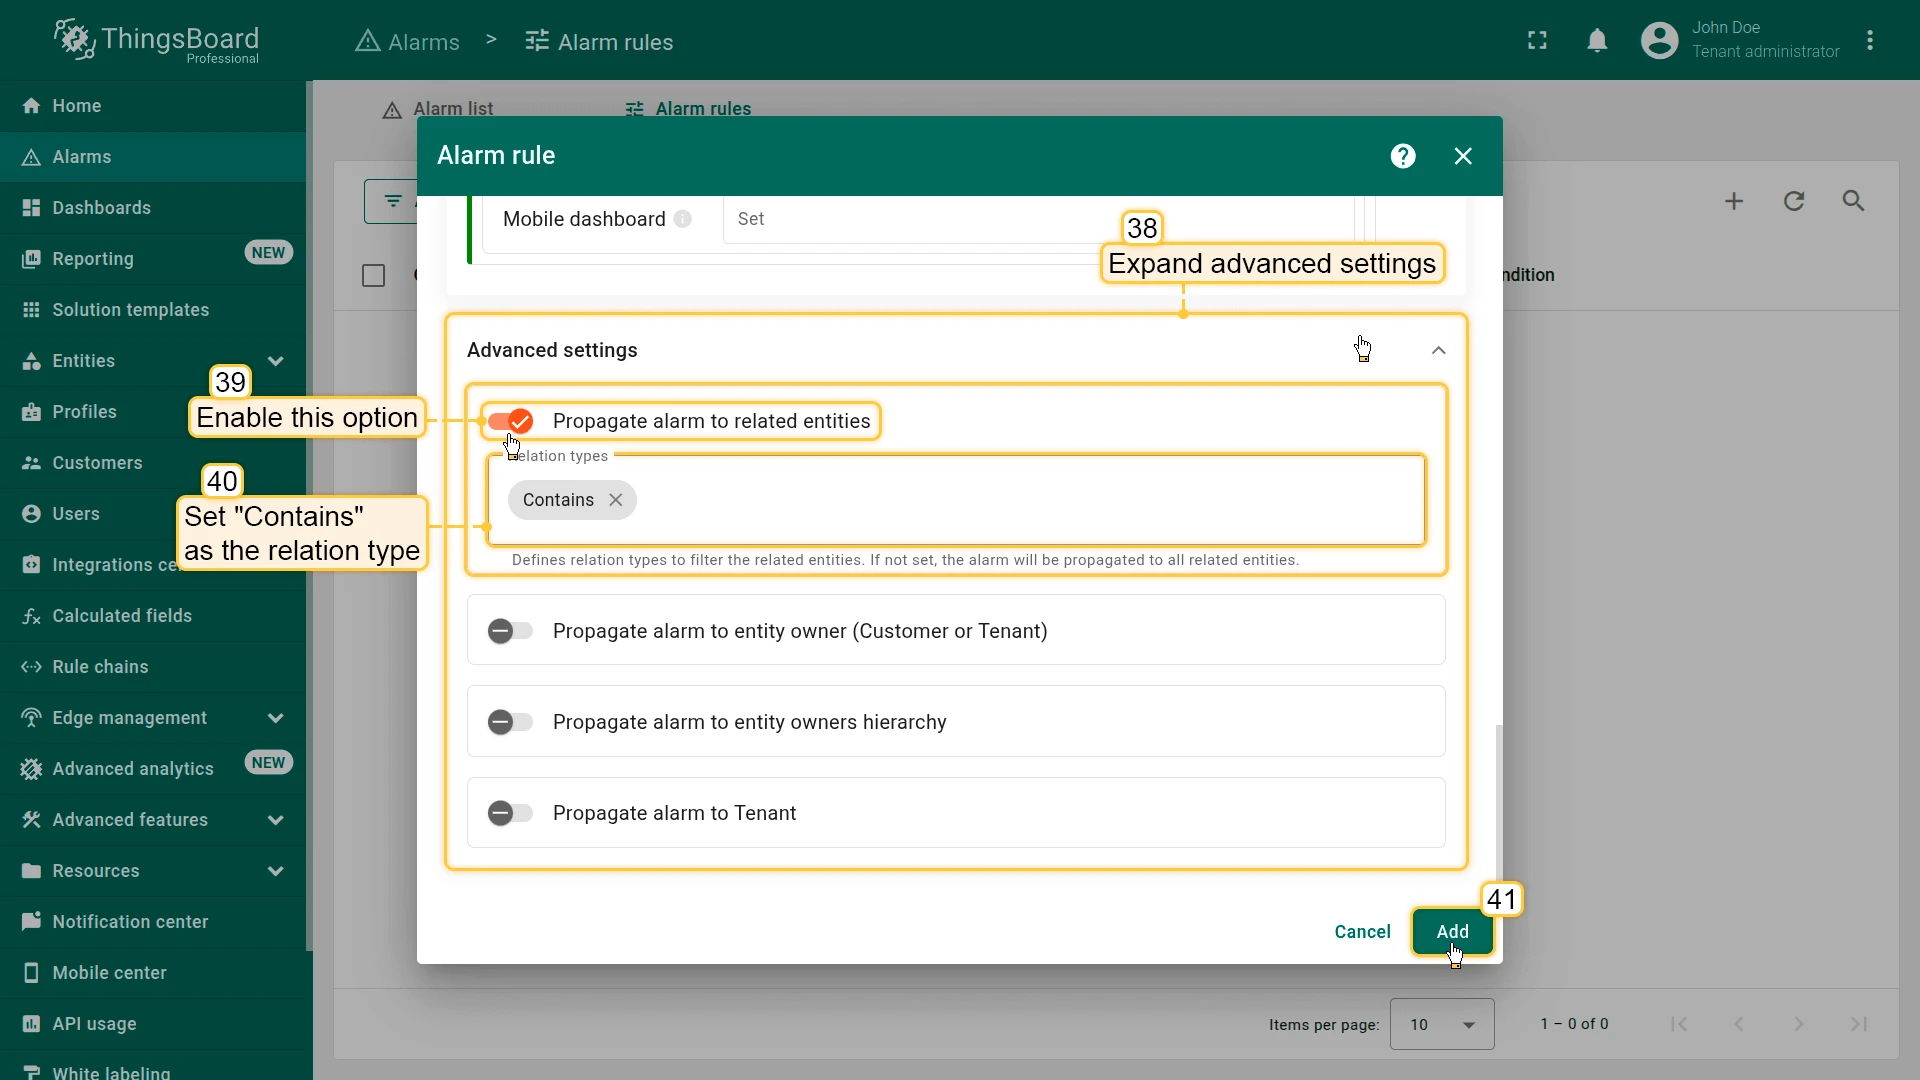
- Expand Advanced settings, enable Propagate alarm to related entities, set Relation type to
Contains. - Click Add to save the rule.


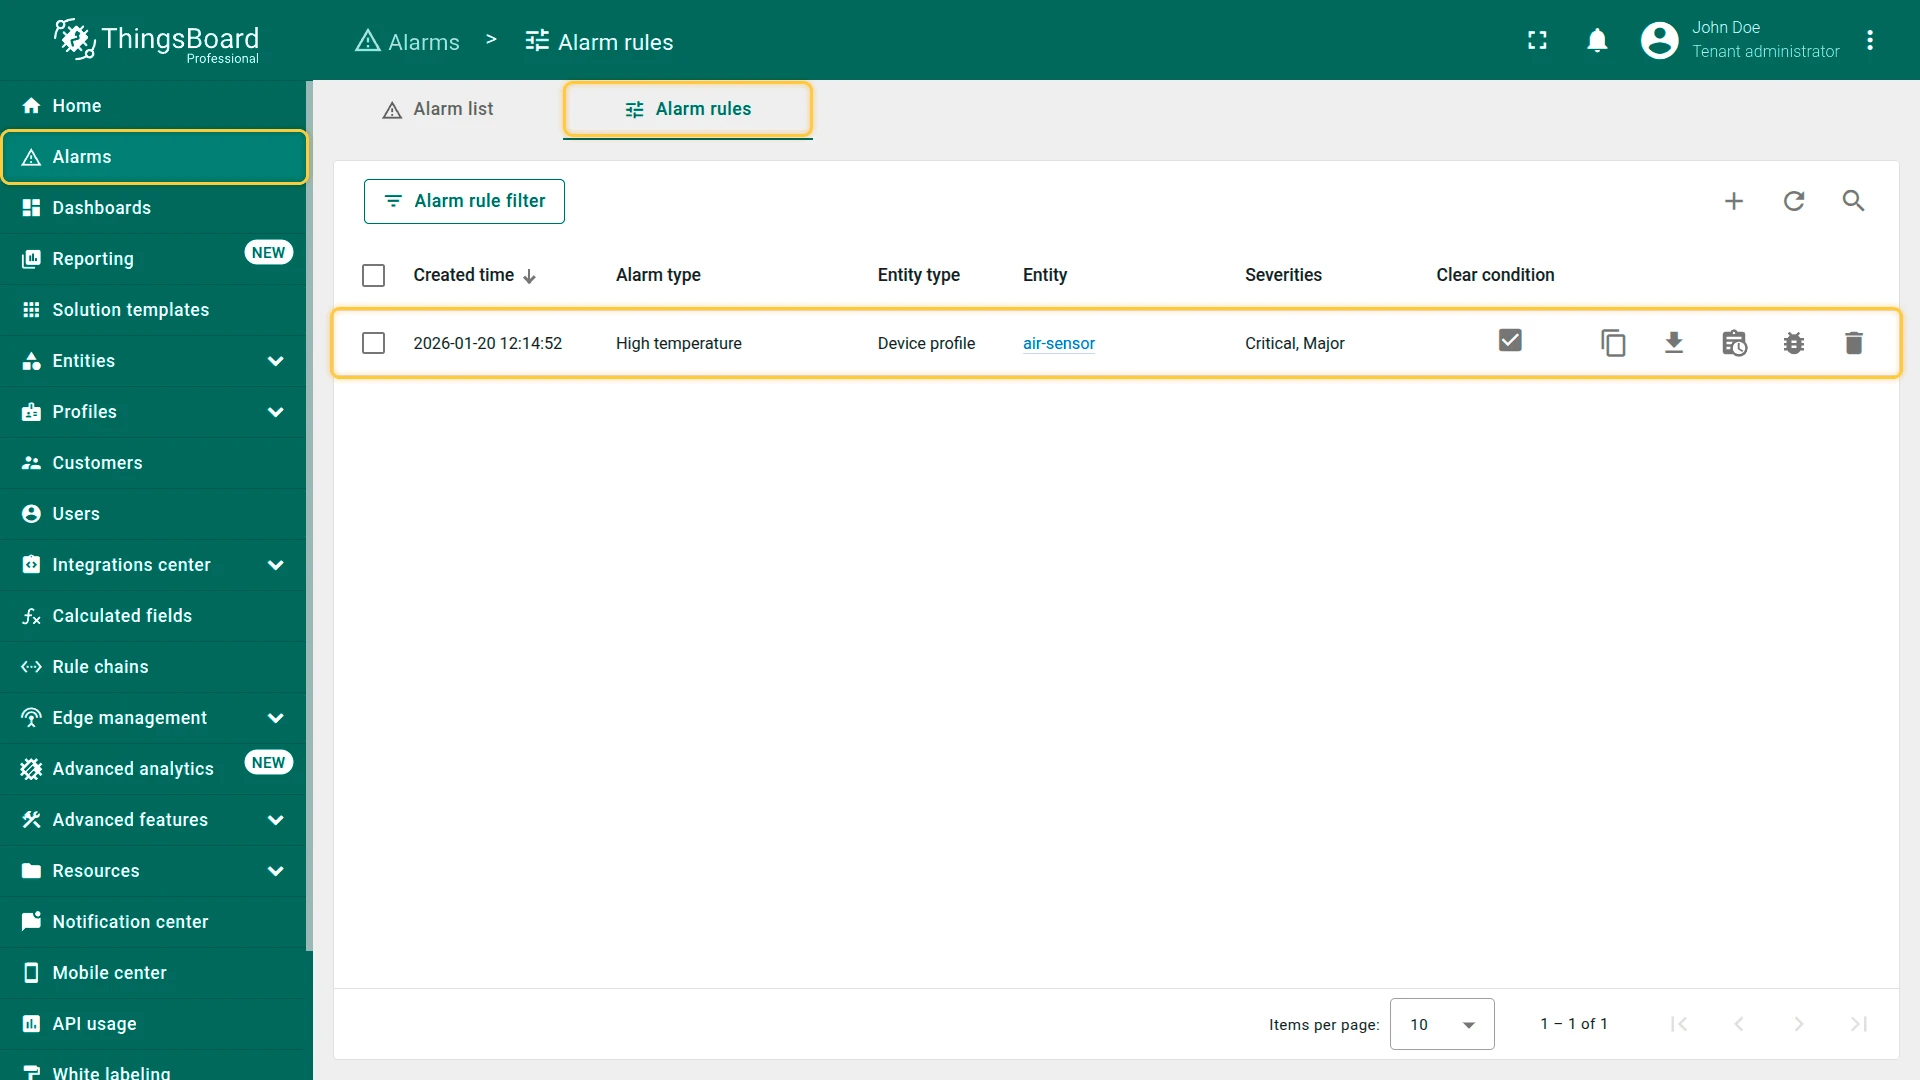
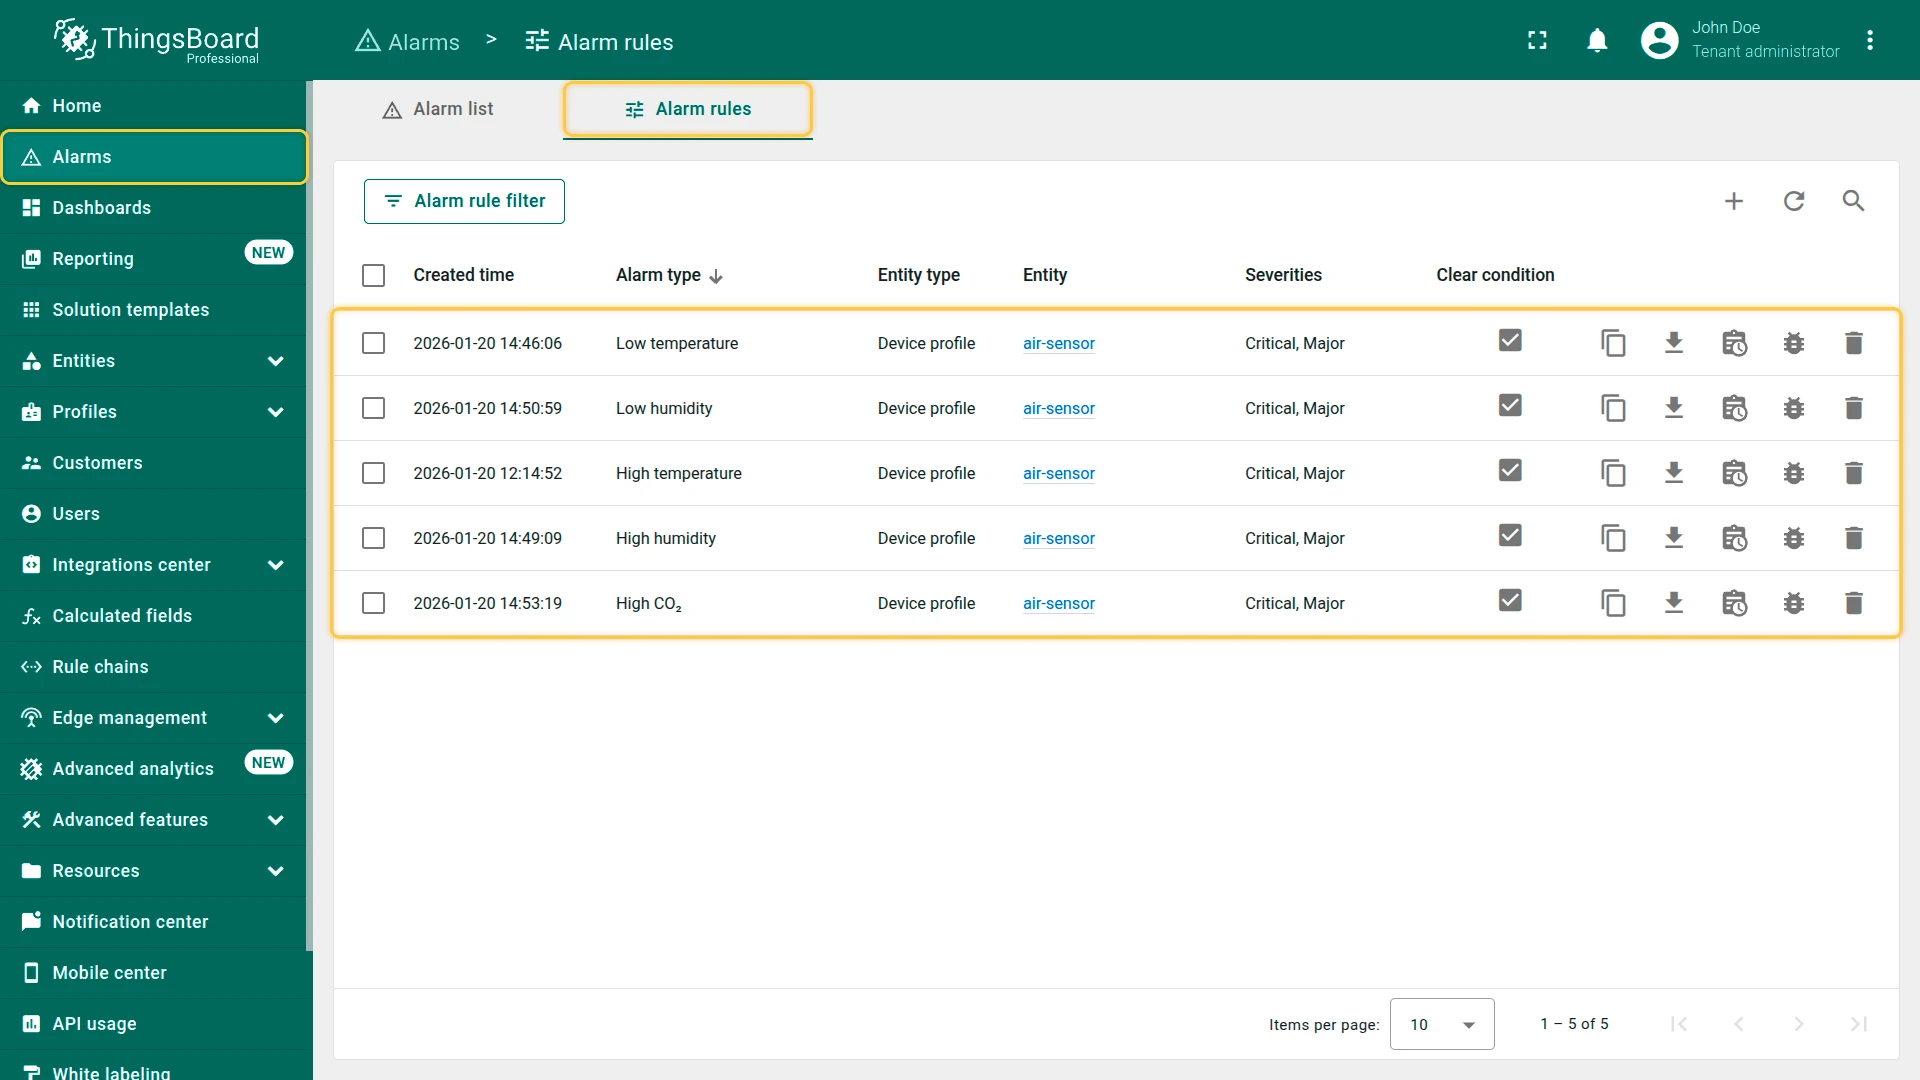
Additional Alarm Rules
Section titled “Additional Alarm Rules”Create the following rules for the air-sensor profile using the same steps. Enable Propagate alarm to related entities (Relation type: Contains) for each.
| Alarm type | Major condition | Critical condition | Clear condition |
|---|---|---|---|
| Low temperature | temperature < 20 AND temperature ≥ 18 | temperature < 18 | temperature ≥ 20 |
| High humidity | humidity > 60 AND humidity ≤ 65 | humidity > 65 | humidity ≤ 60 |
| Low humidity | humidity < 40 AND humidity ≥ 35 | humidity < 35 | humidity ≥ 40 |
| High CO₂ | co2 ≥ 490 AND co2 < 500 | co2 > 500 | co2 < 490 |
Step 4.2 Add Alarm Widget to Air Sensor State
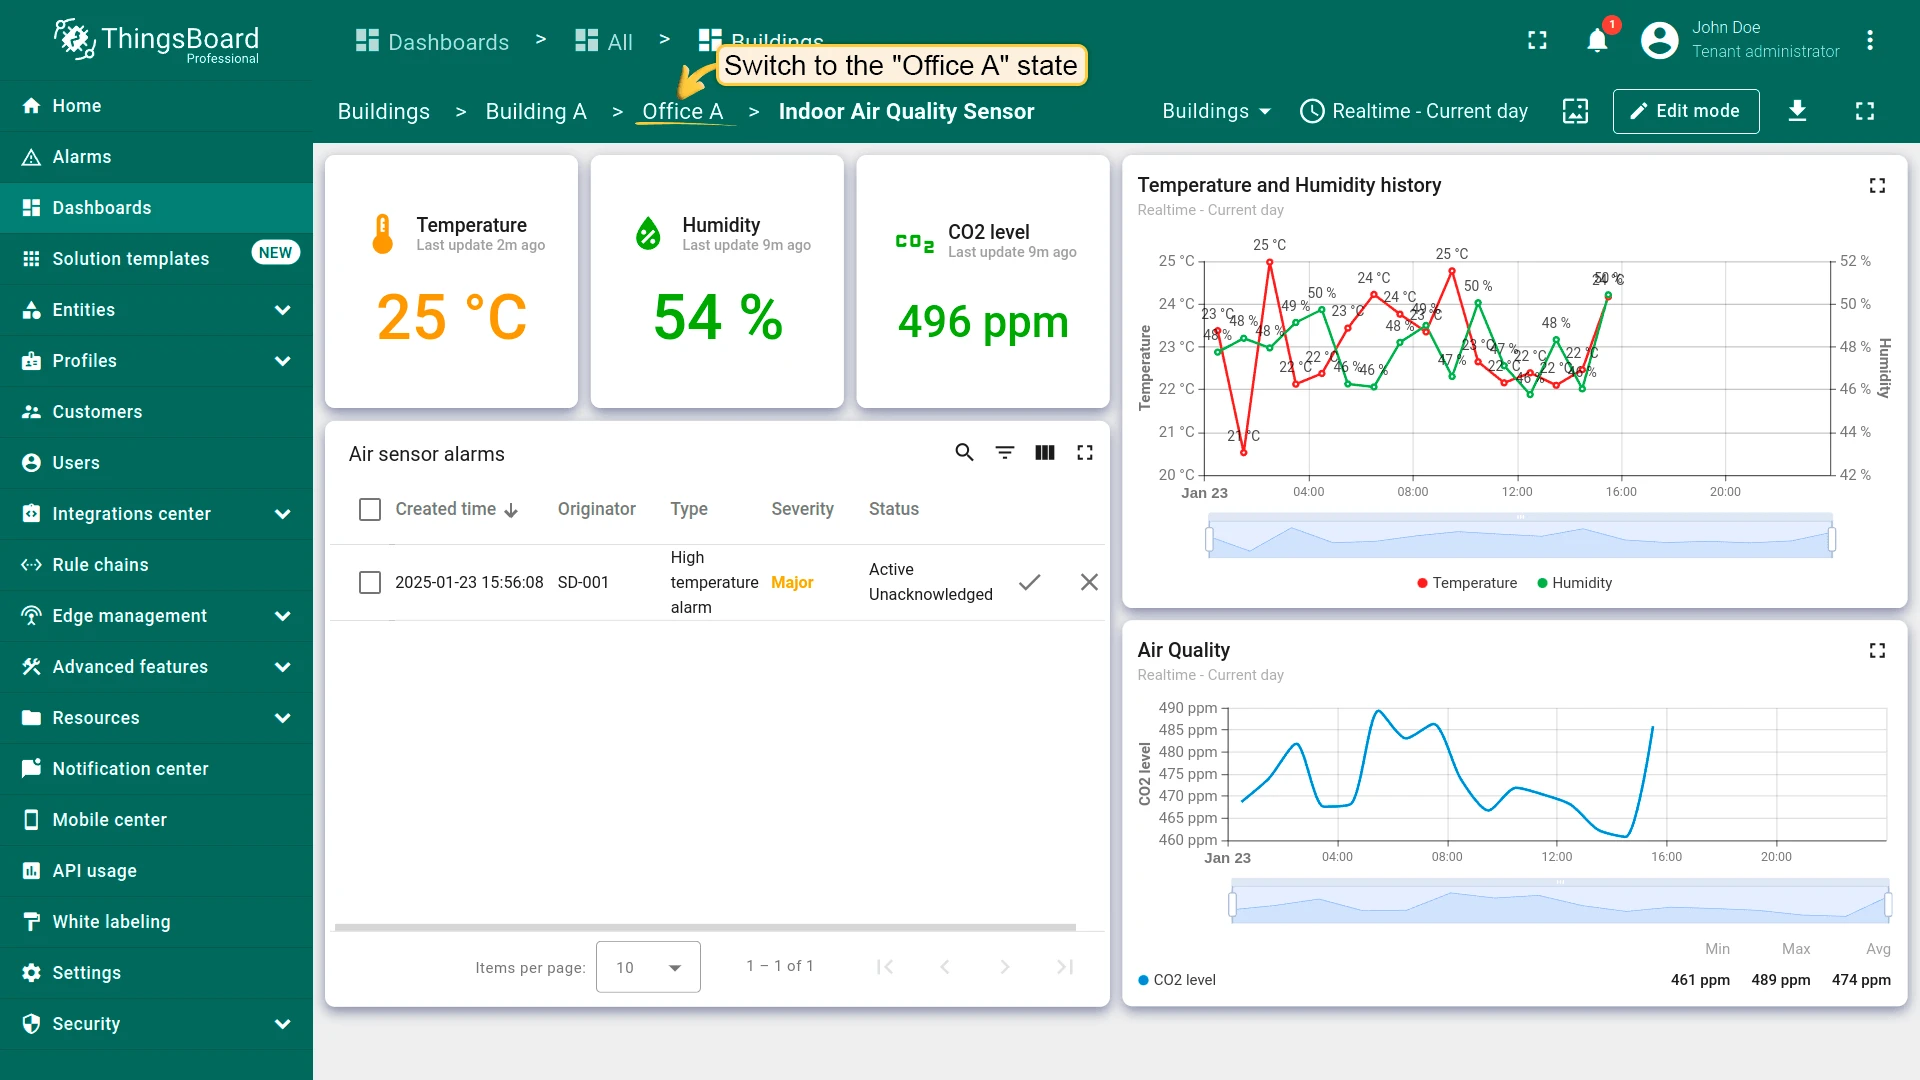
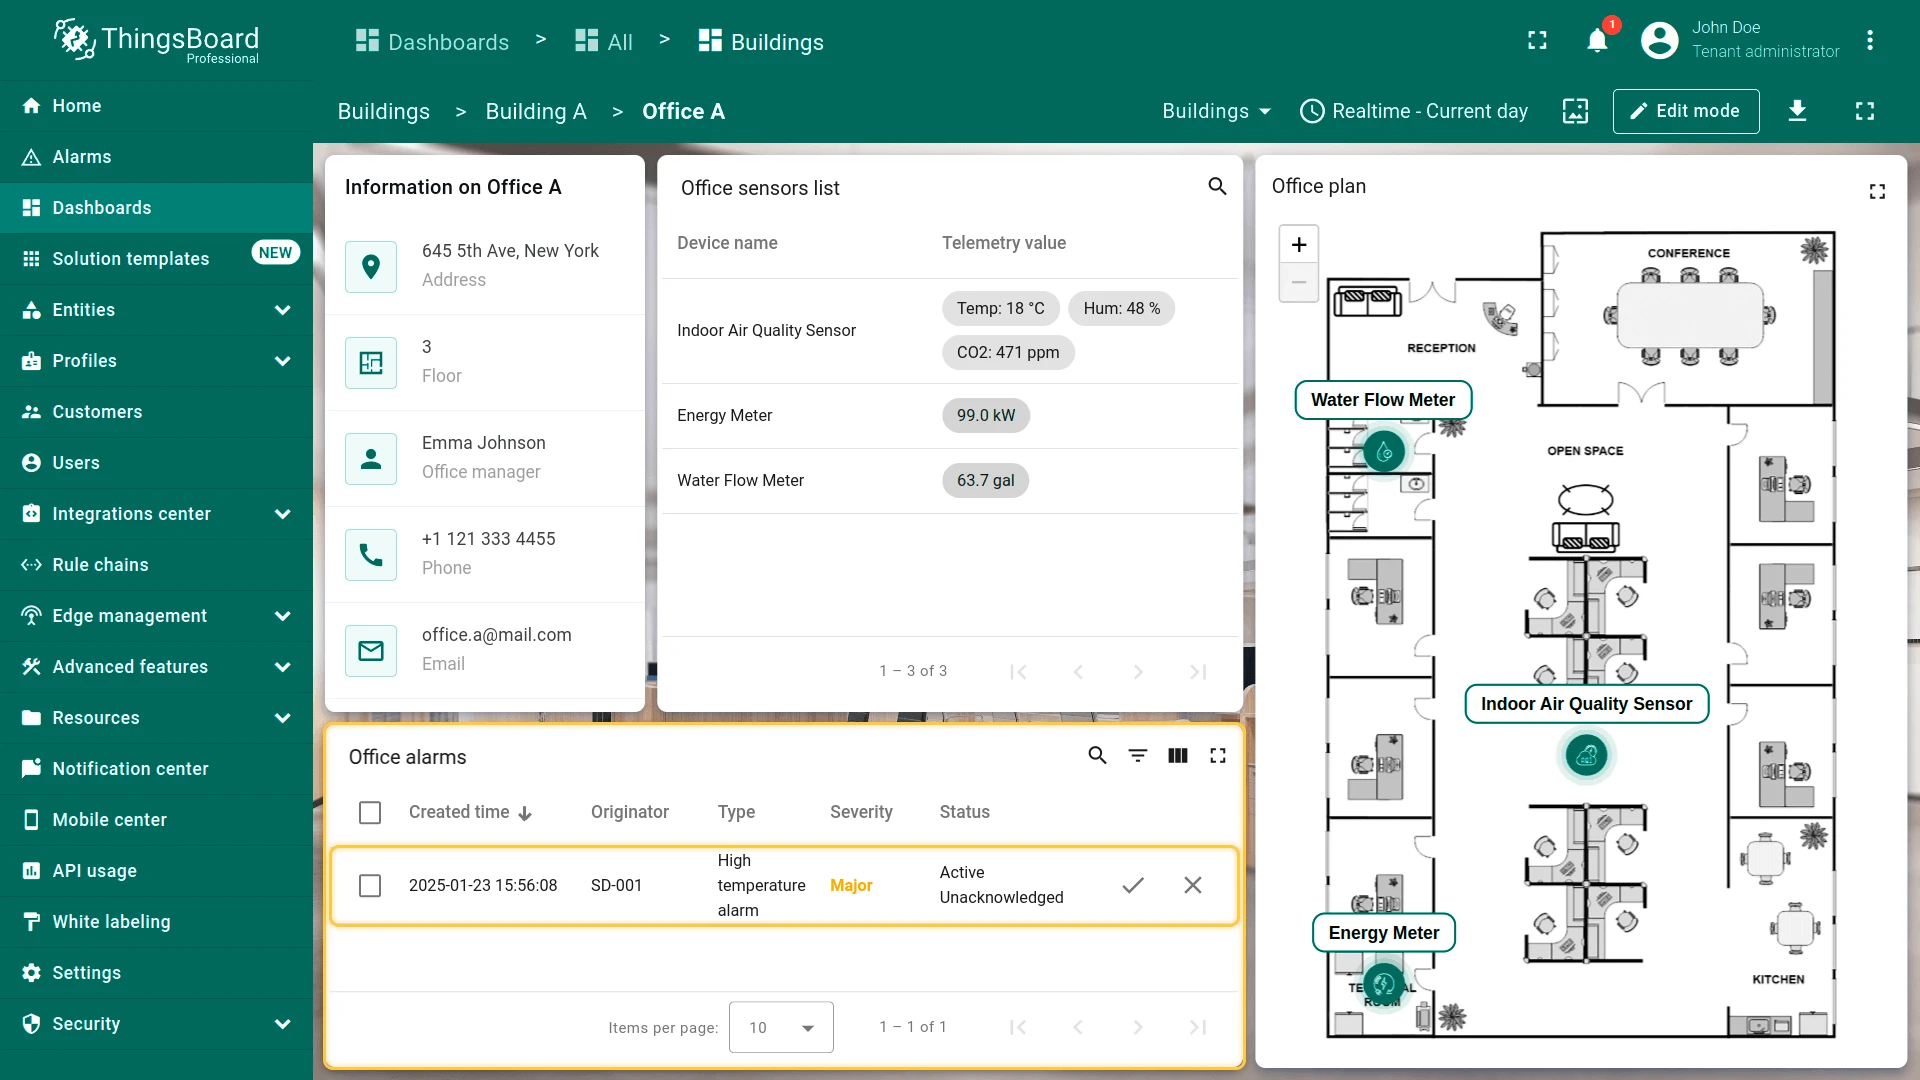
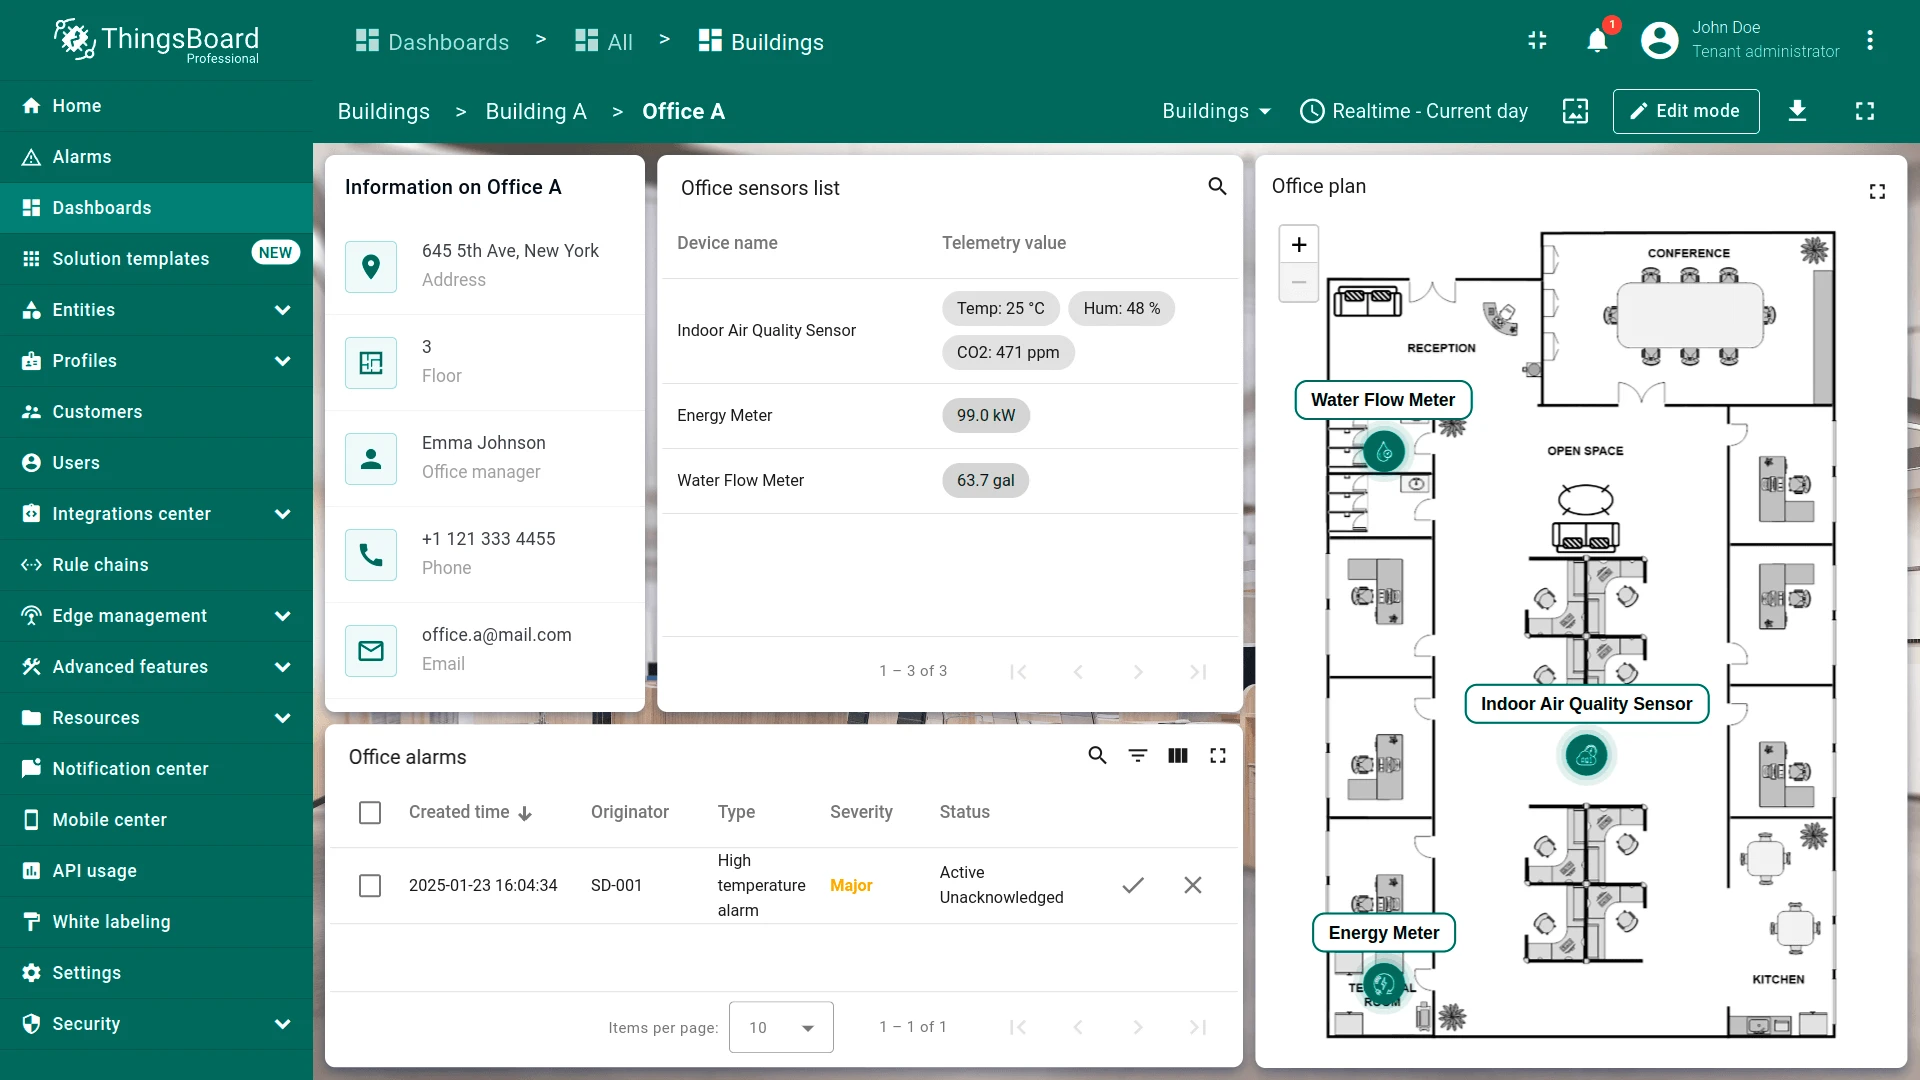
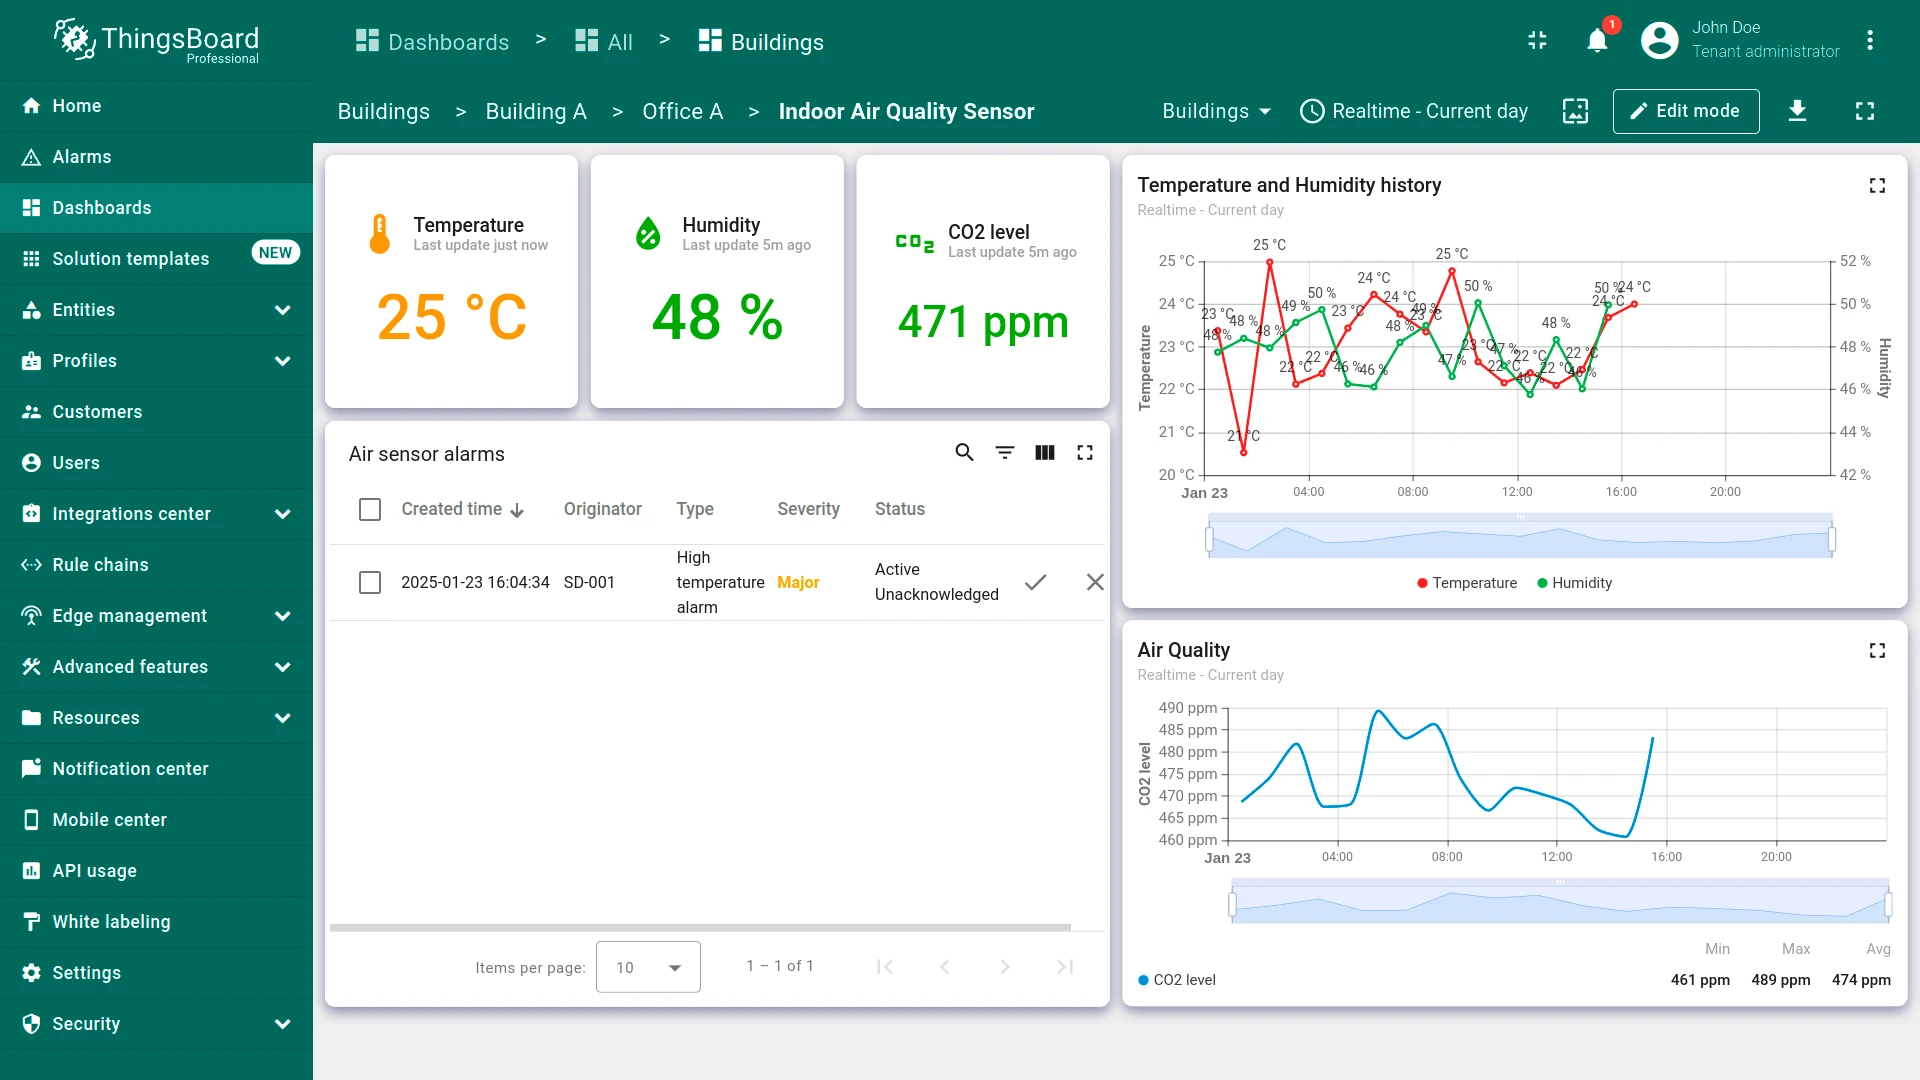
Section titled “Step 4.2 Add Alarm Widget to Air Sensor State”Add an Alarms table widget to the dashboard state to visualize active and historical alarms generated by devices. This allows users to monitor issues in real time directly from the dashboard.
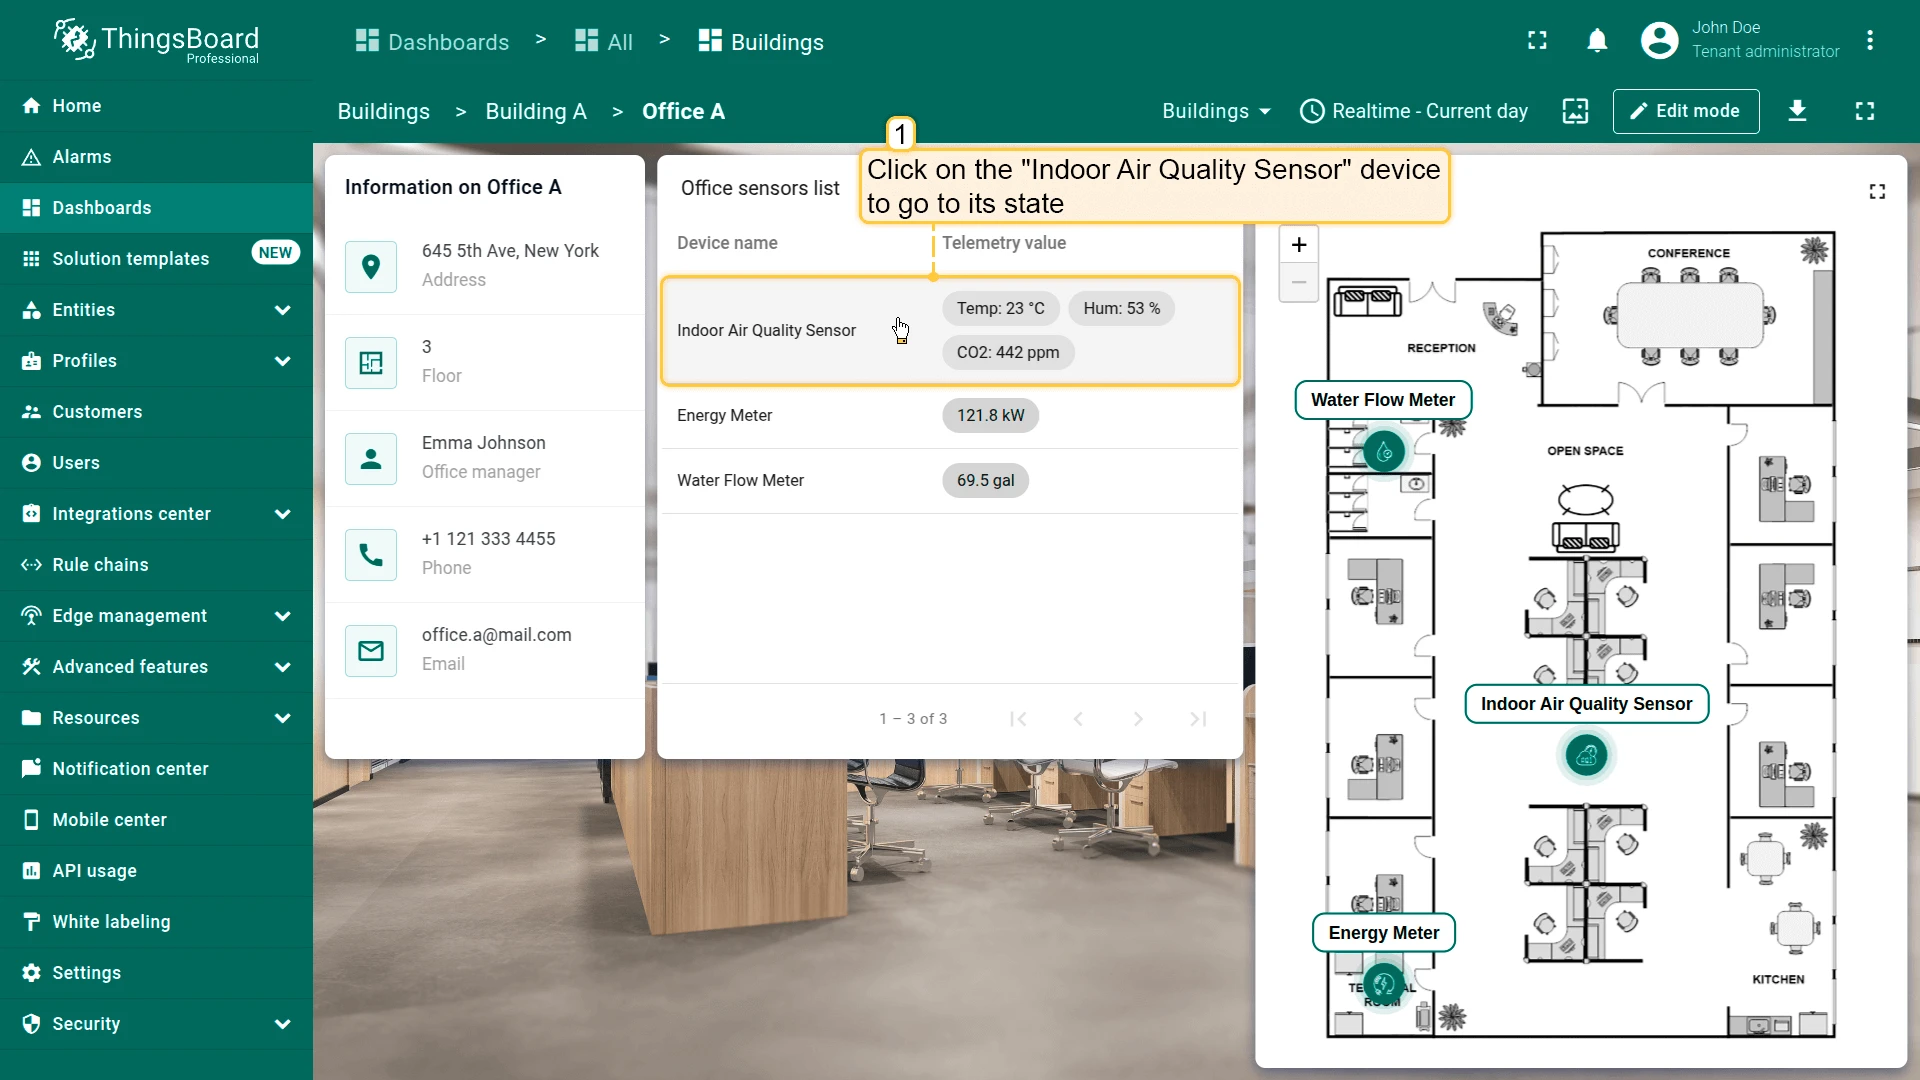
- Open Indoor Air Quality Sensor from Office sensors list to navigate it state.
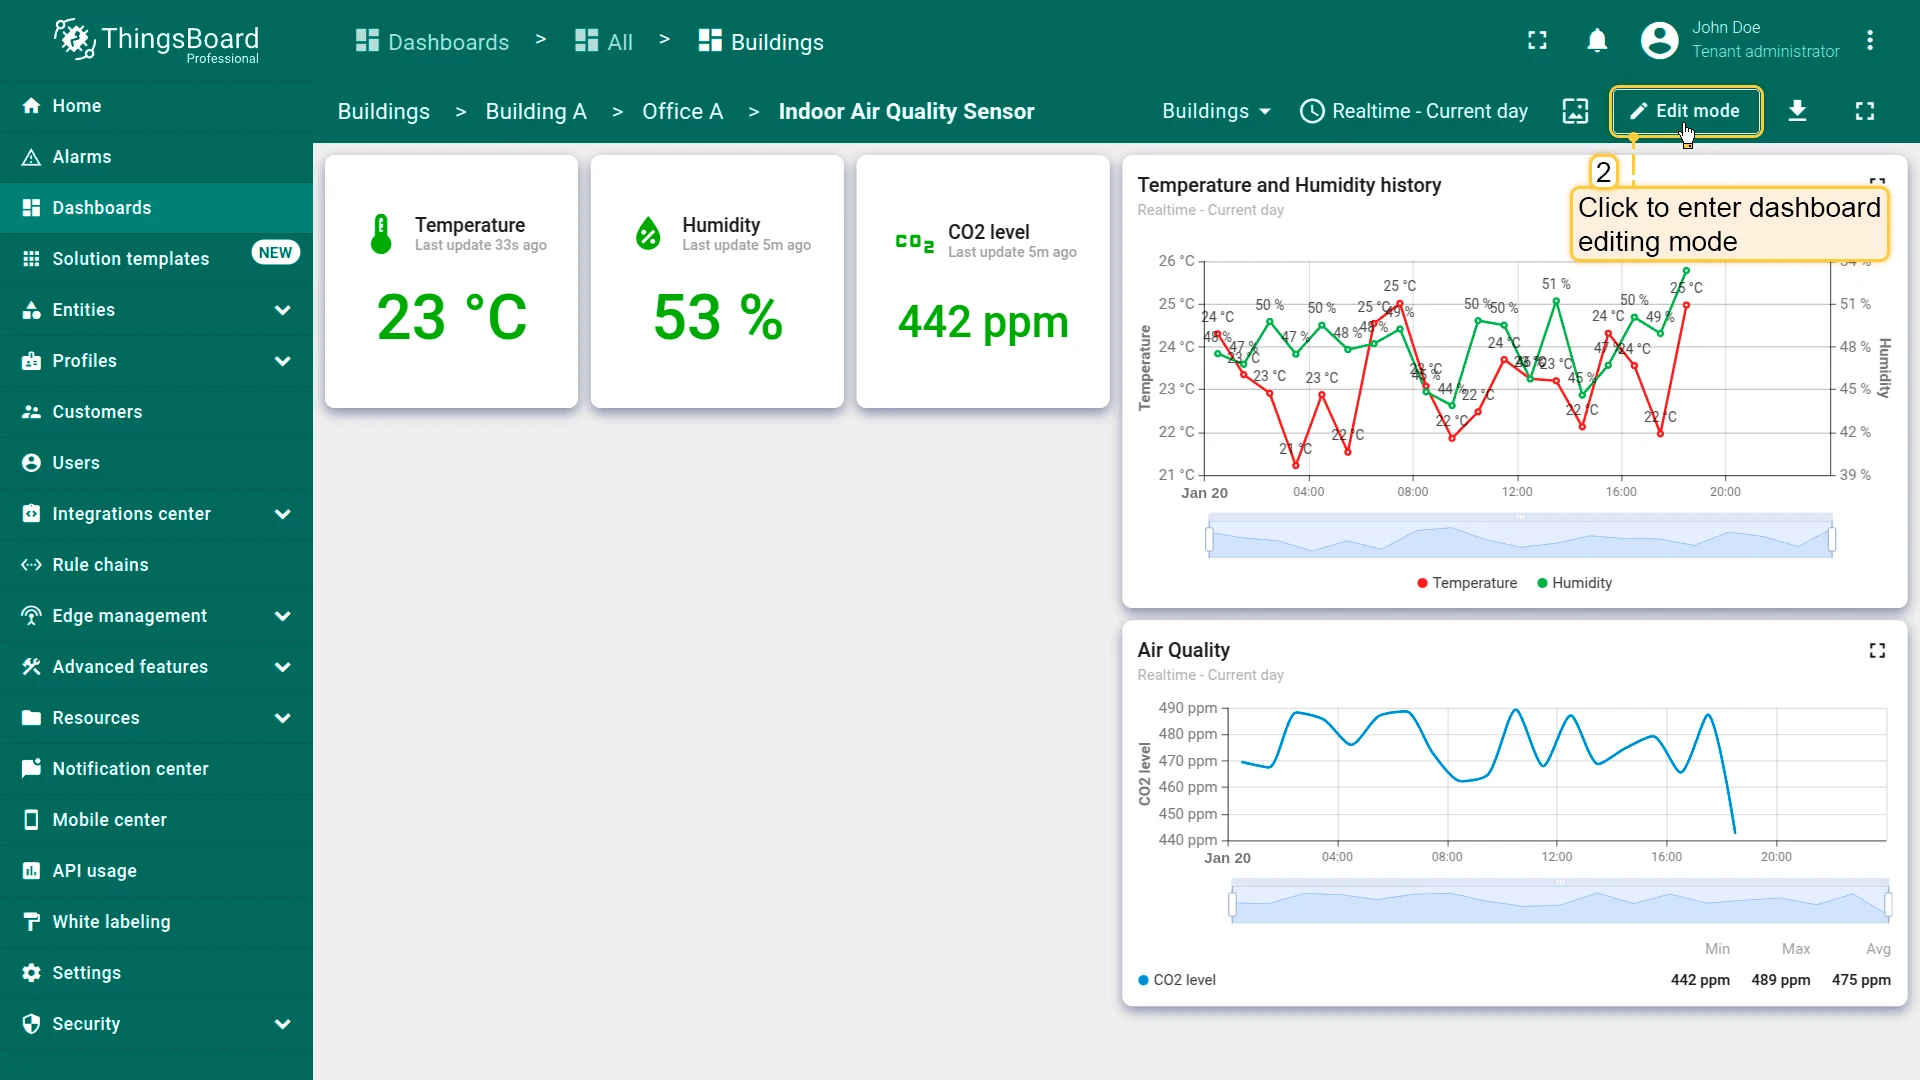
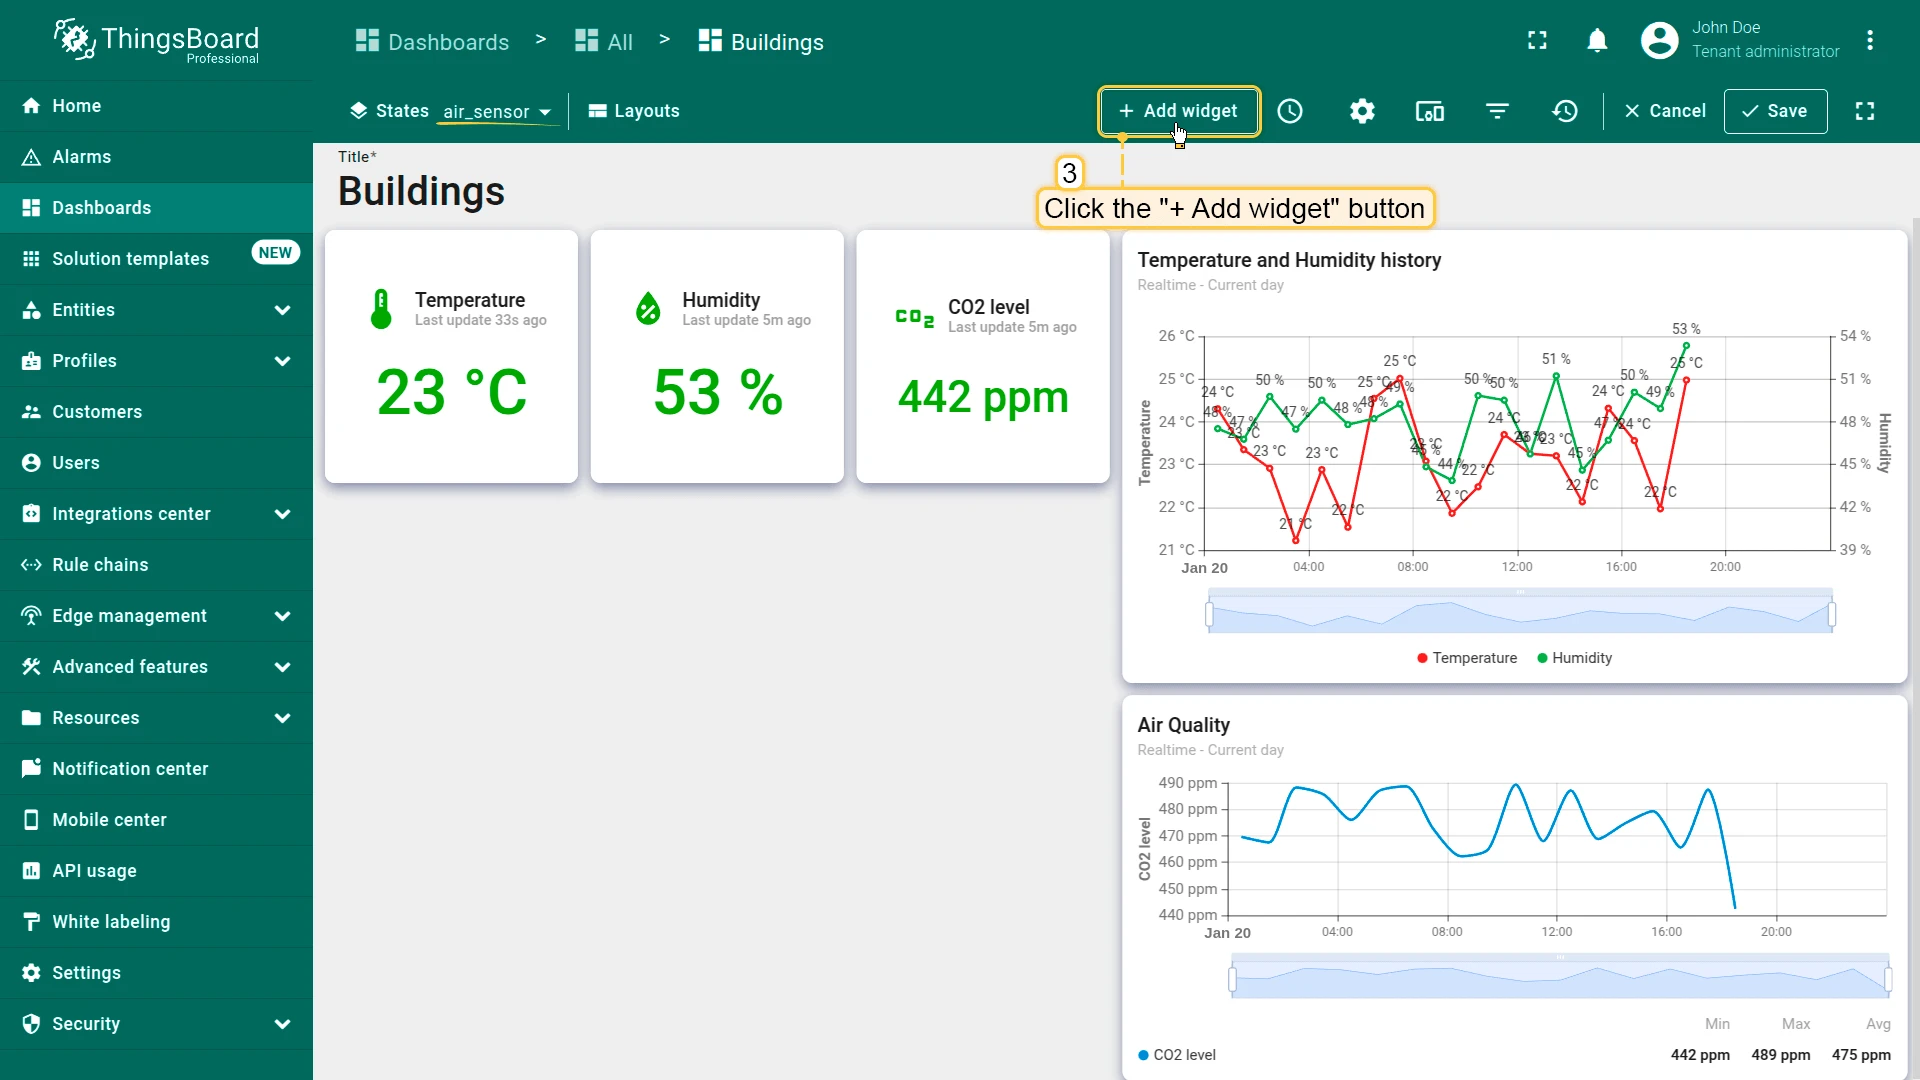
- Click + Add widget in edit mode.
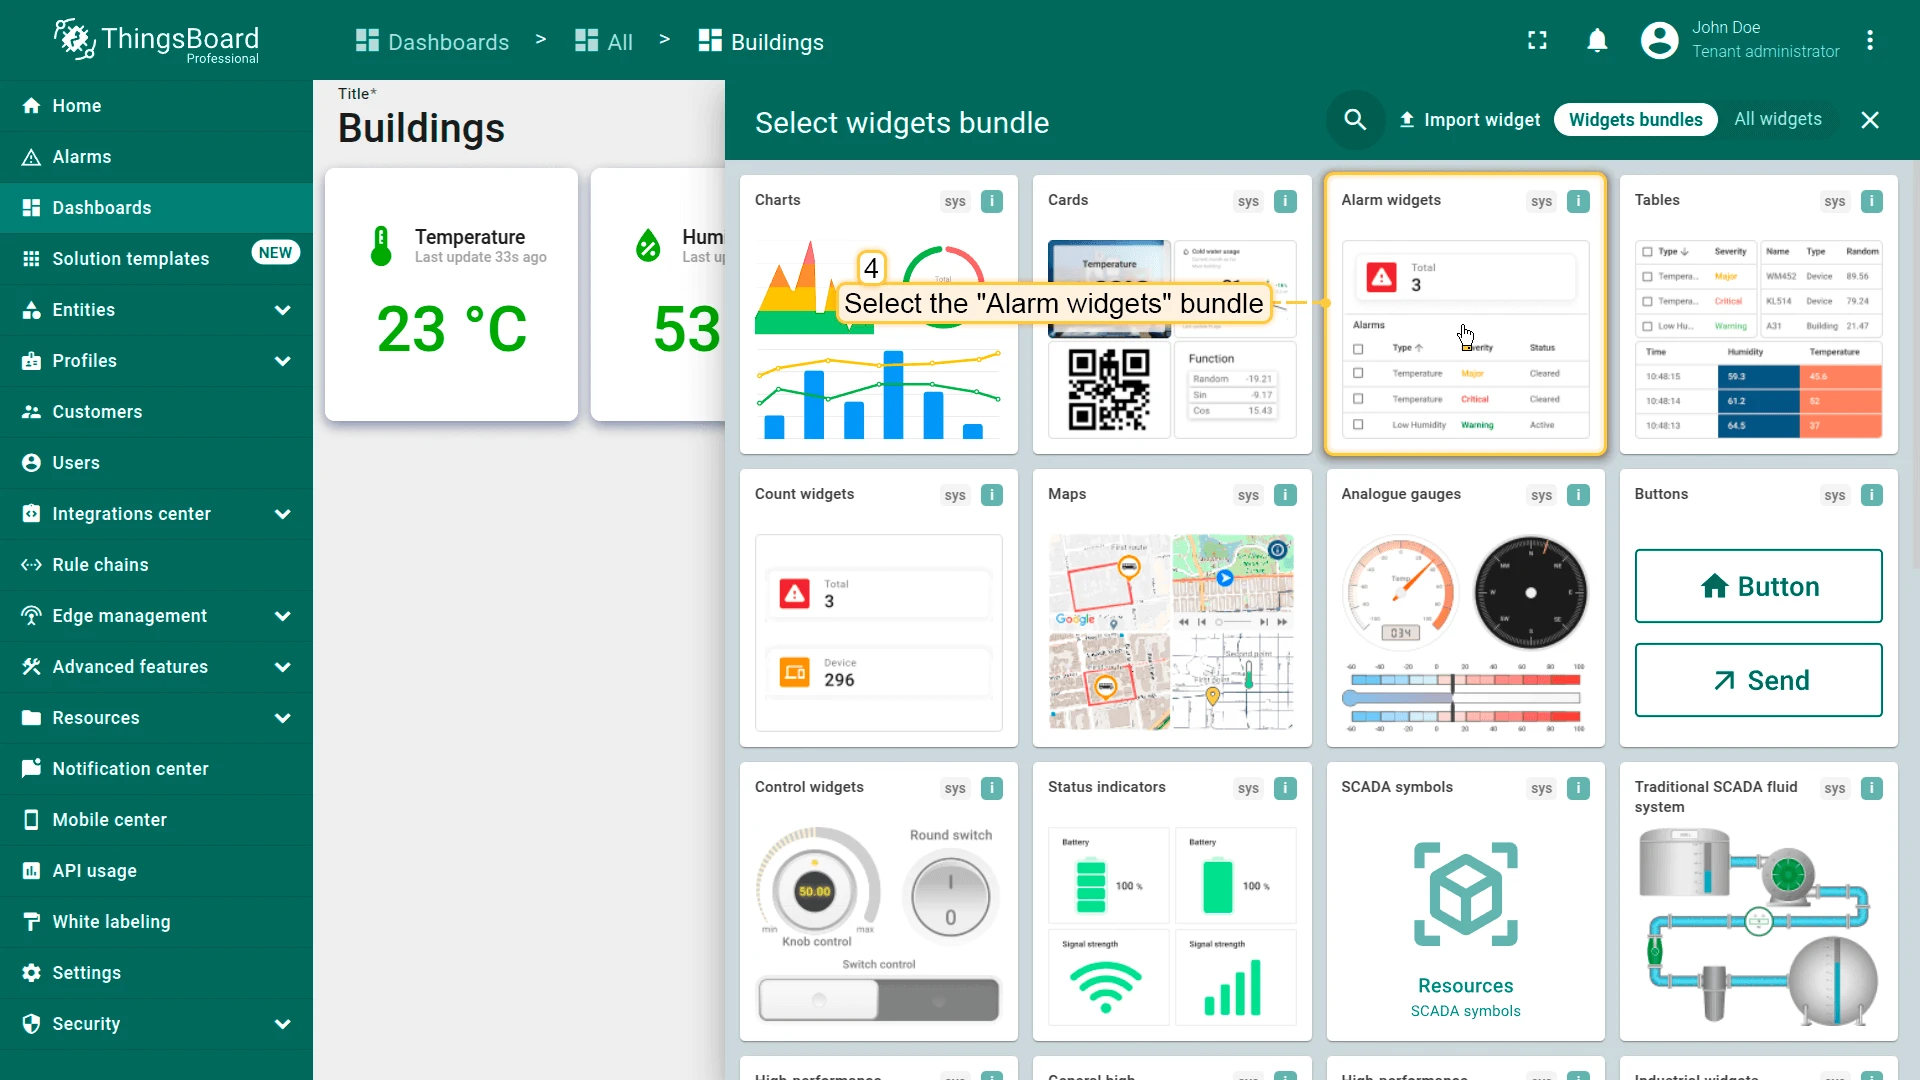
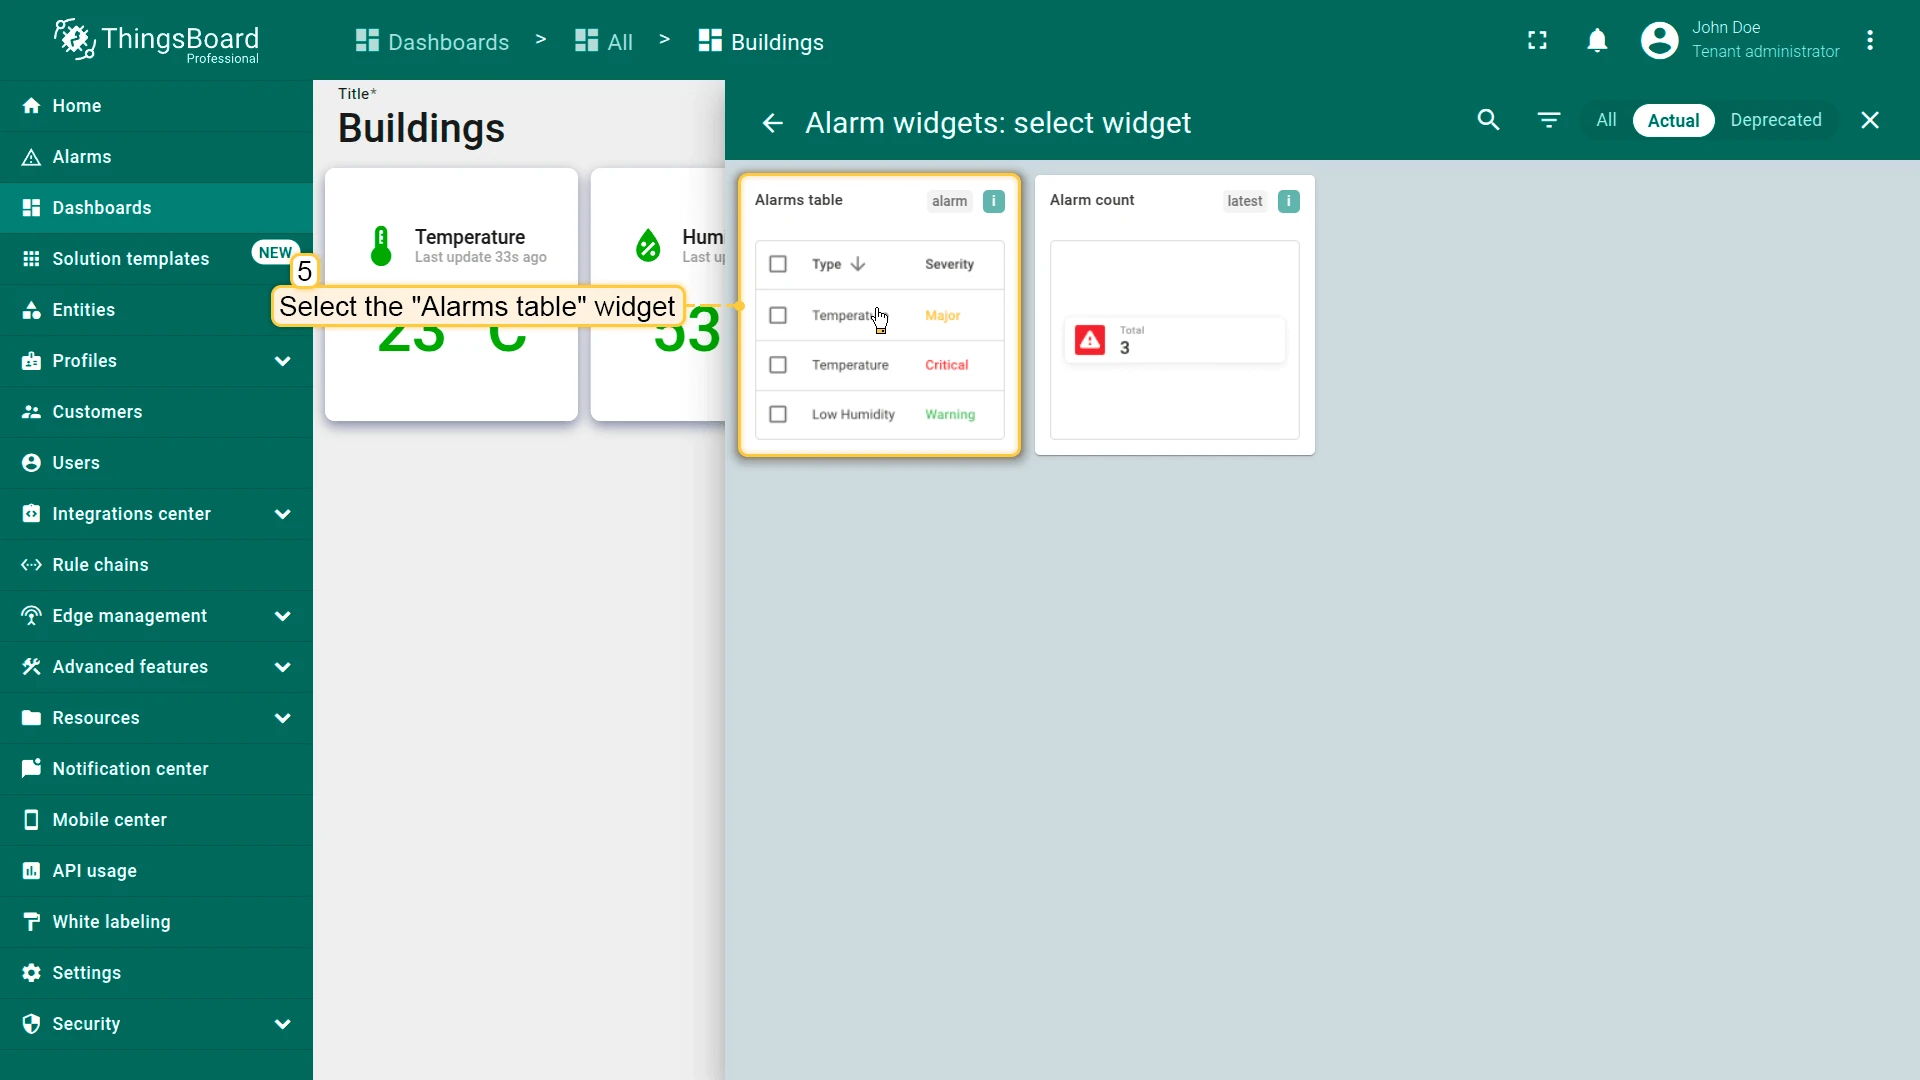
- Select Alarm widgets ⇾ Alarms table.
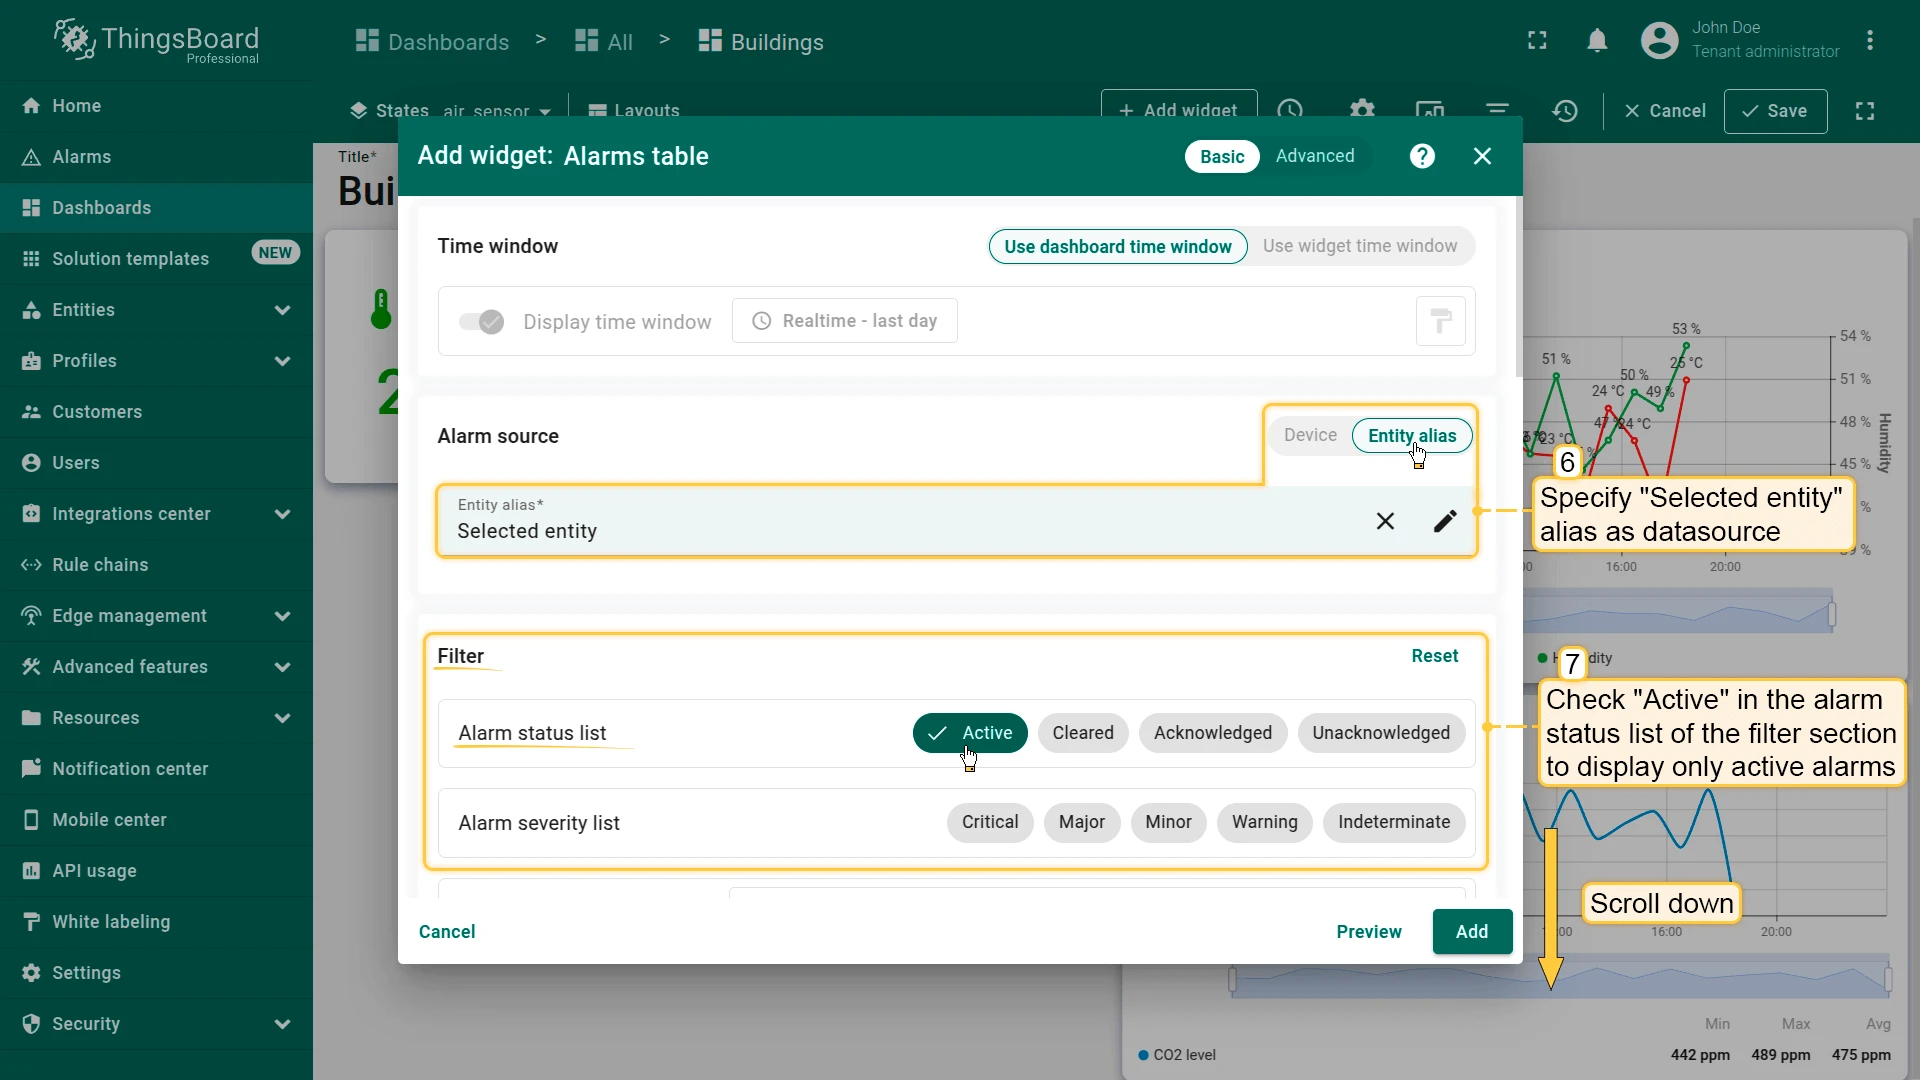
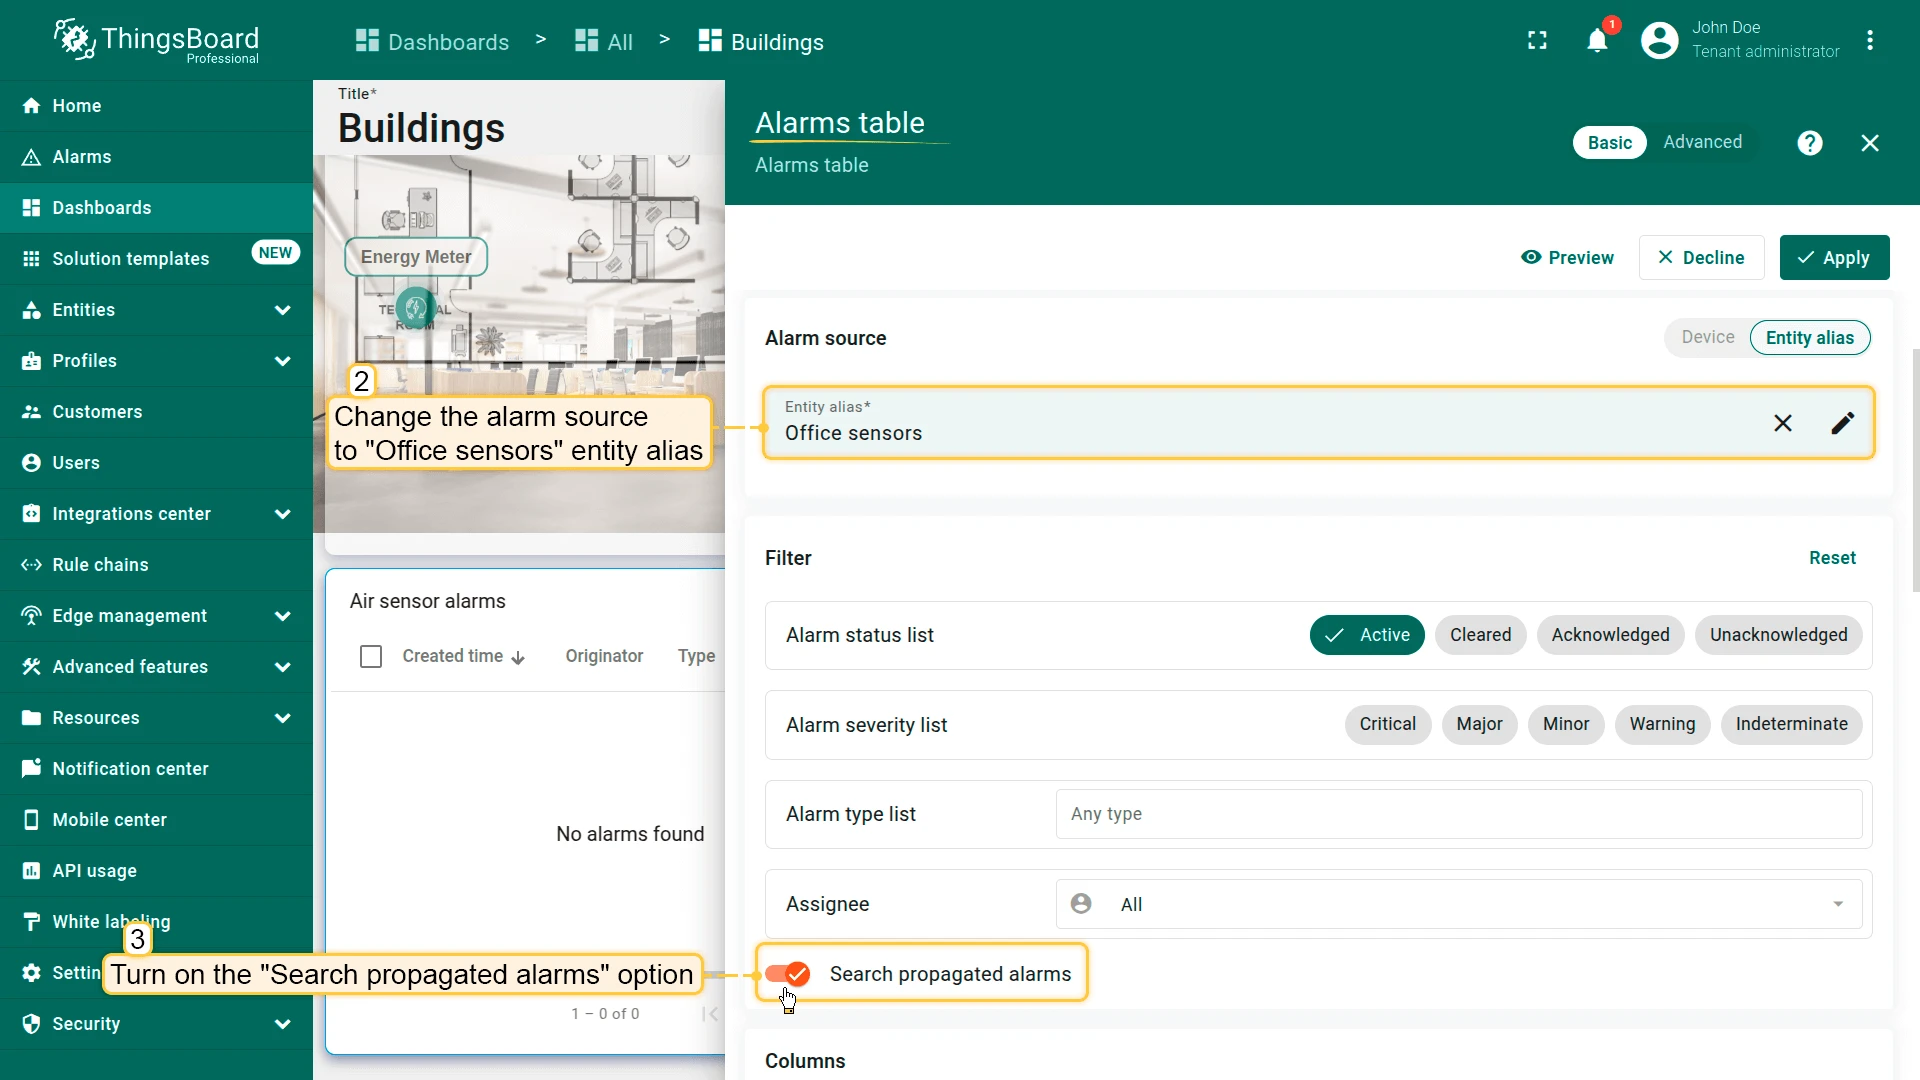
- Set the datasource to the Selected entity alias.
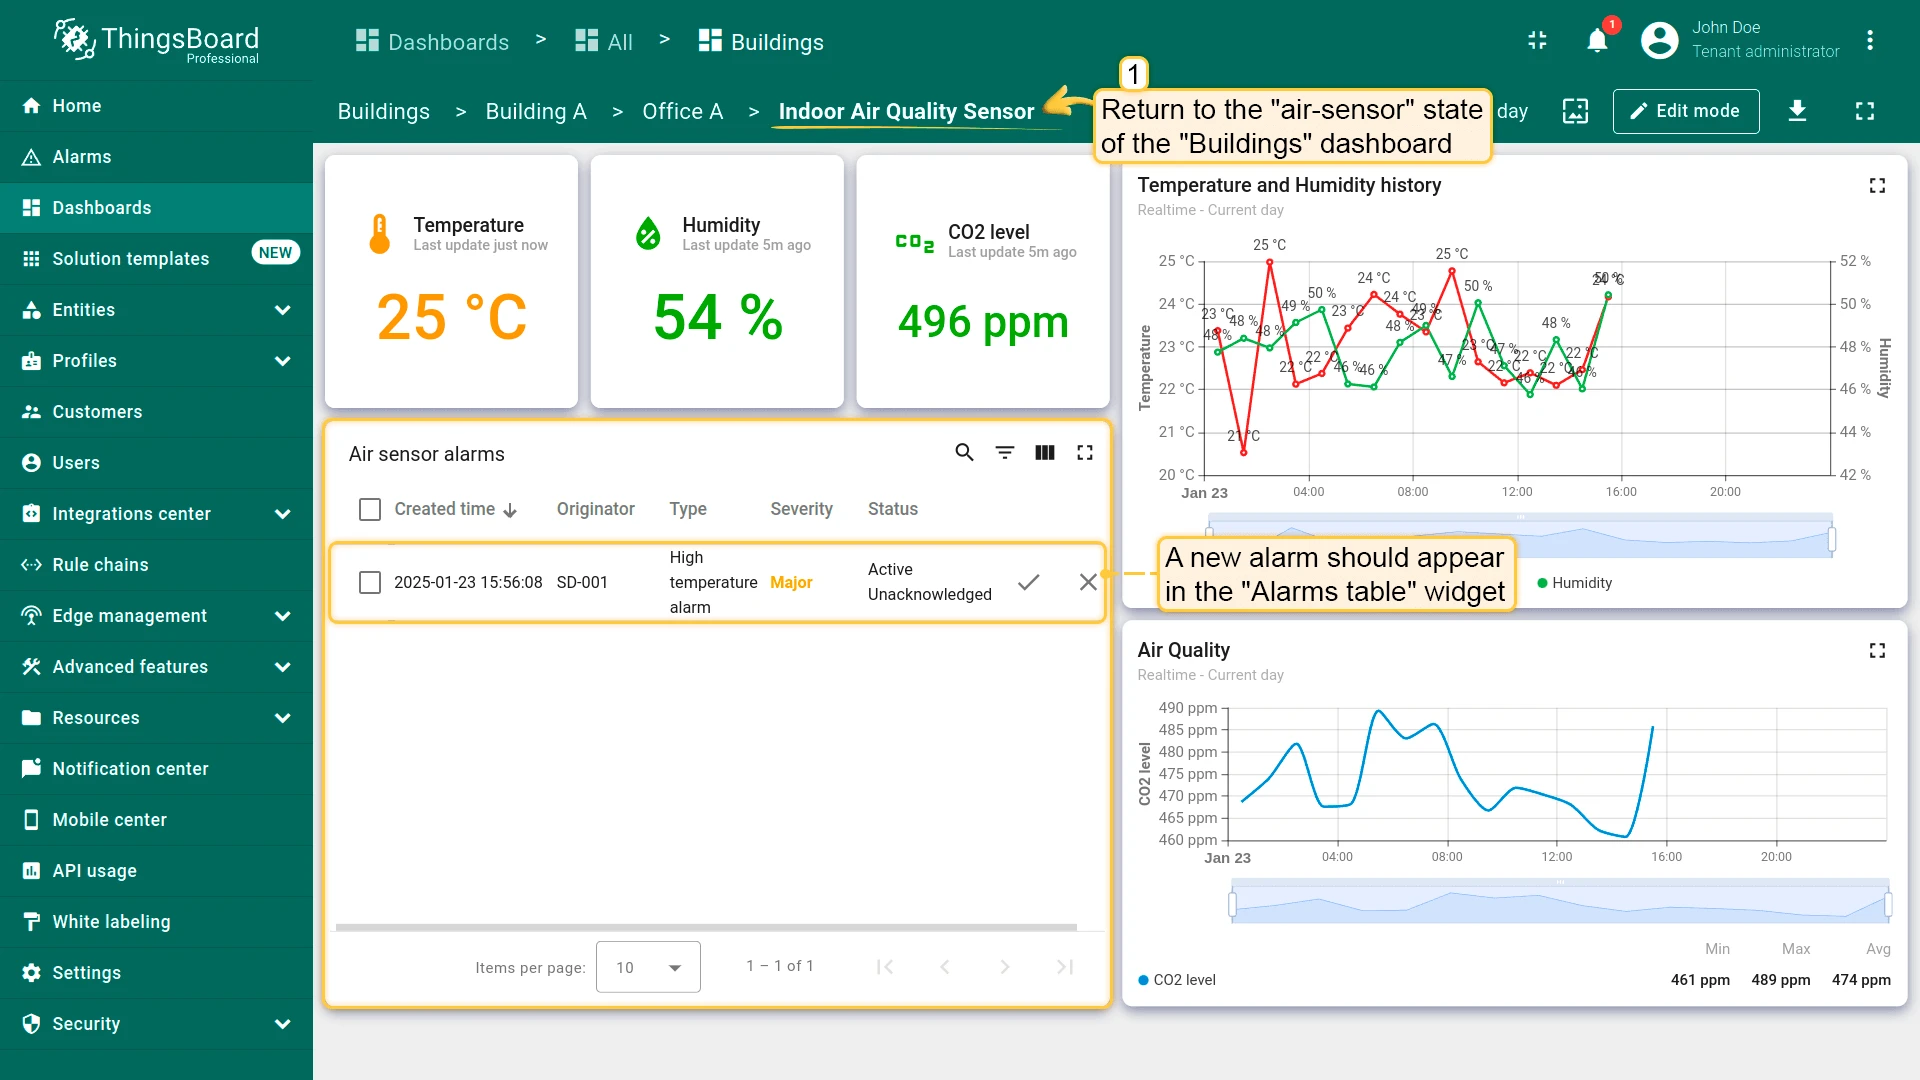
- Filter section: check Active in the alarm status list (show only active alarms).
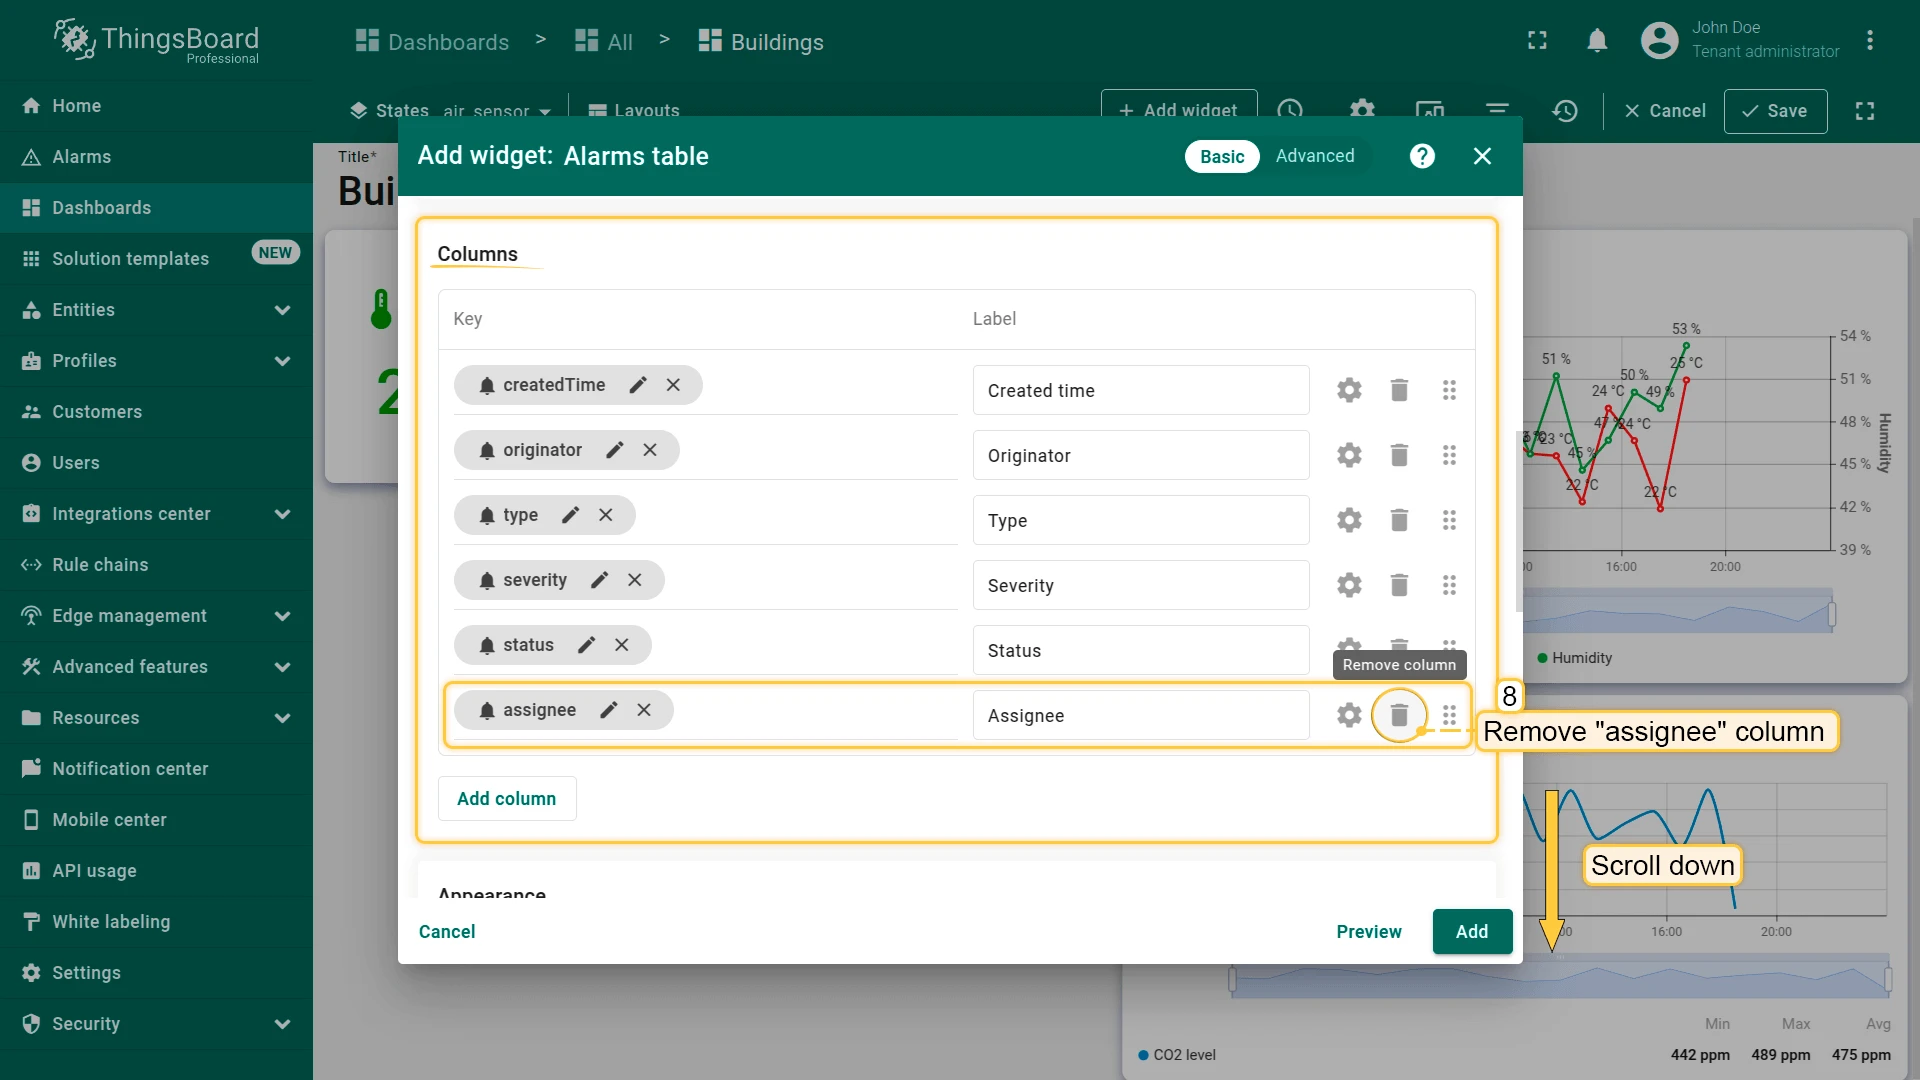
- Remove the Assignee column from the columns list.
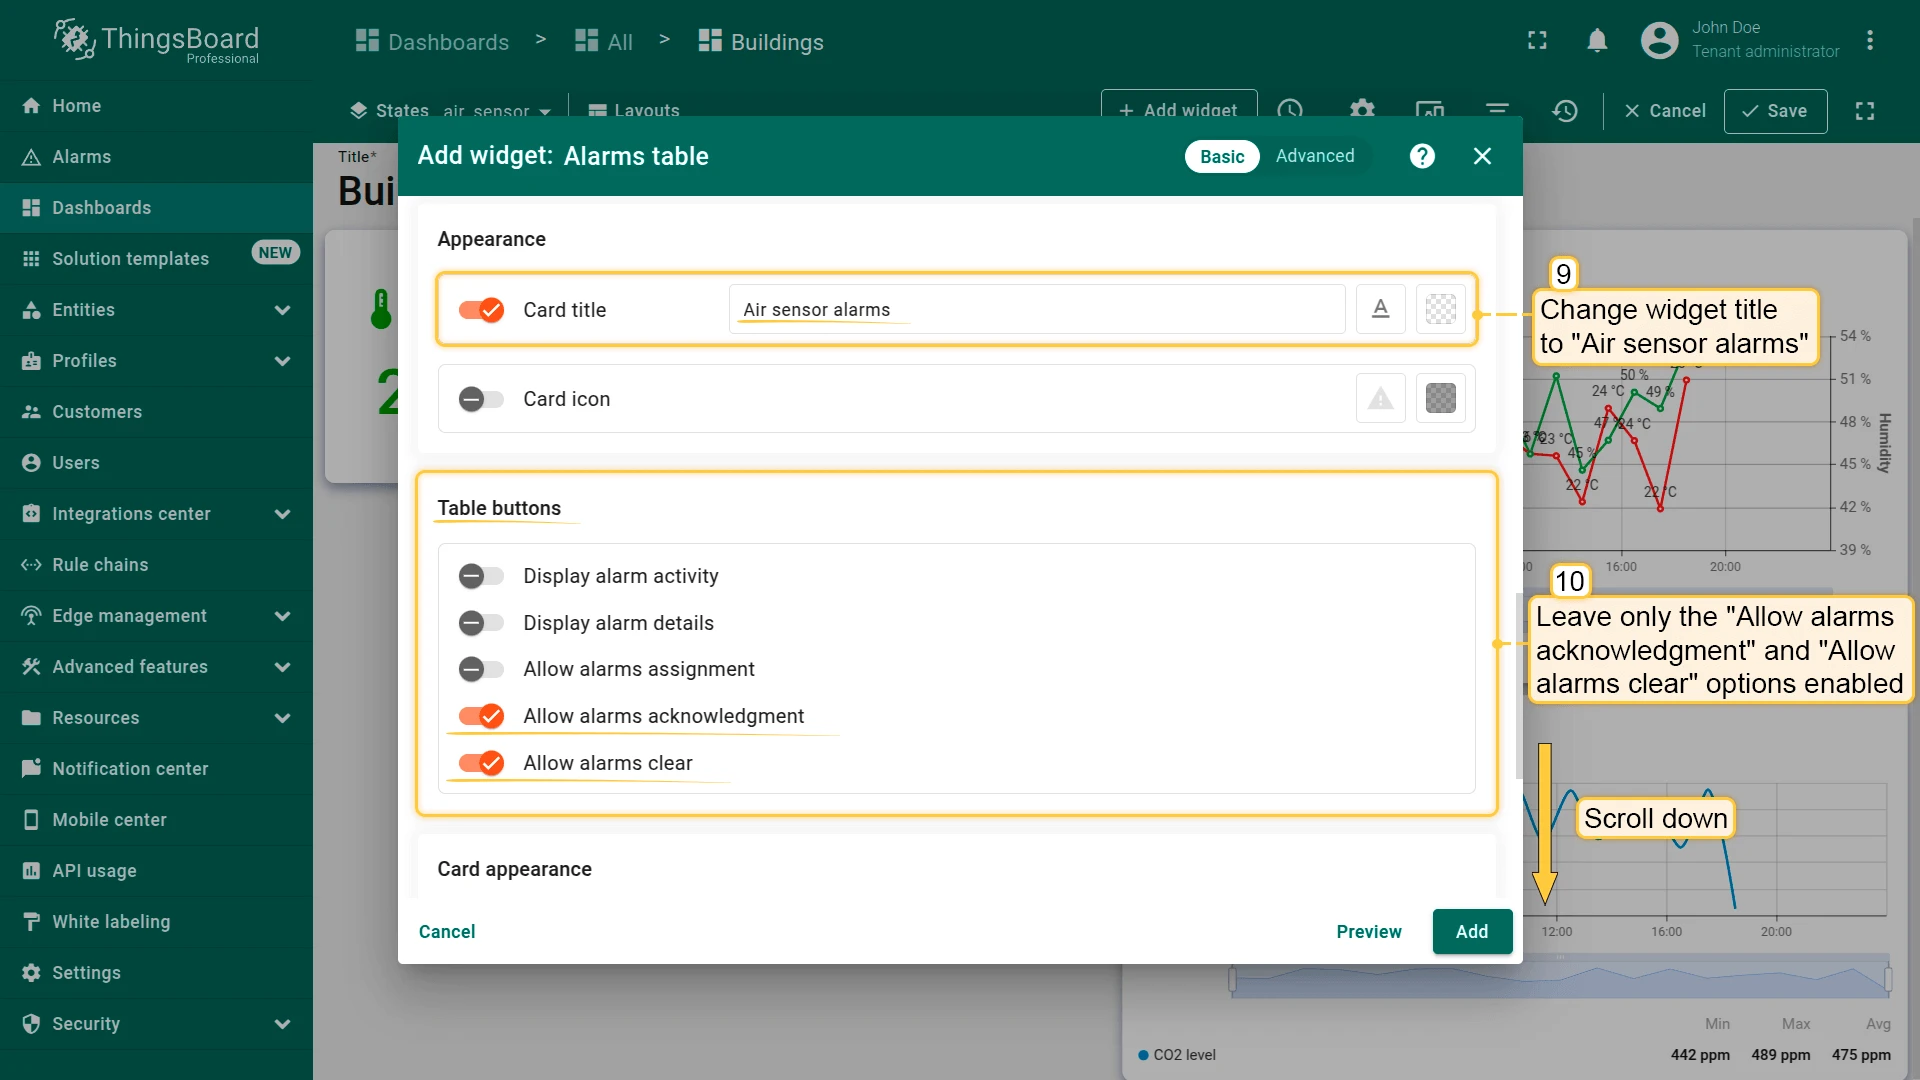
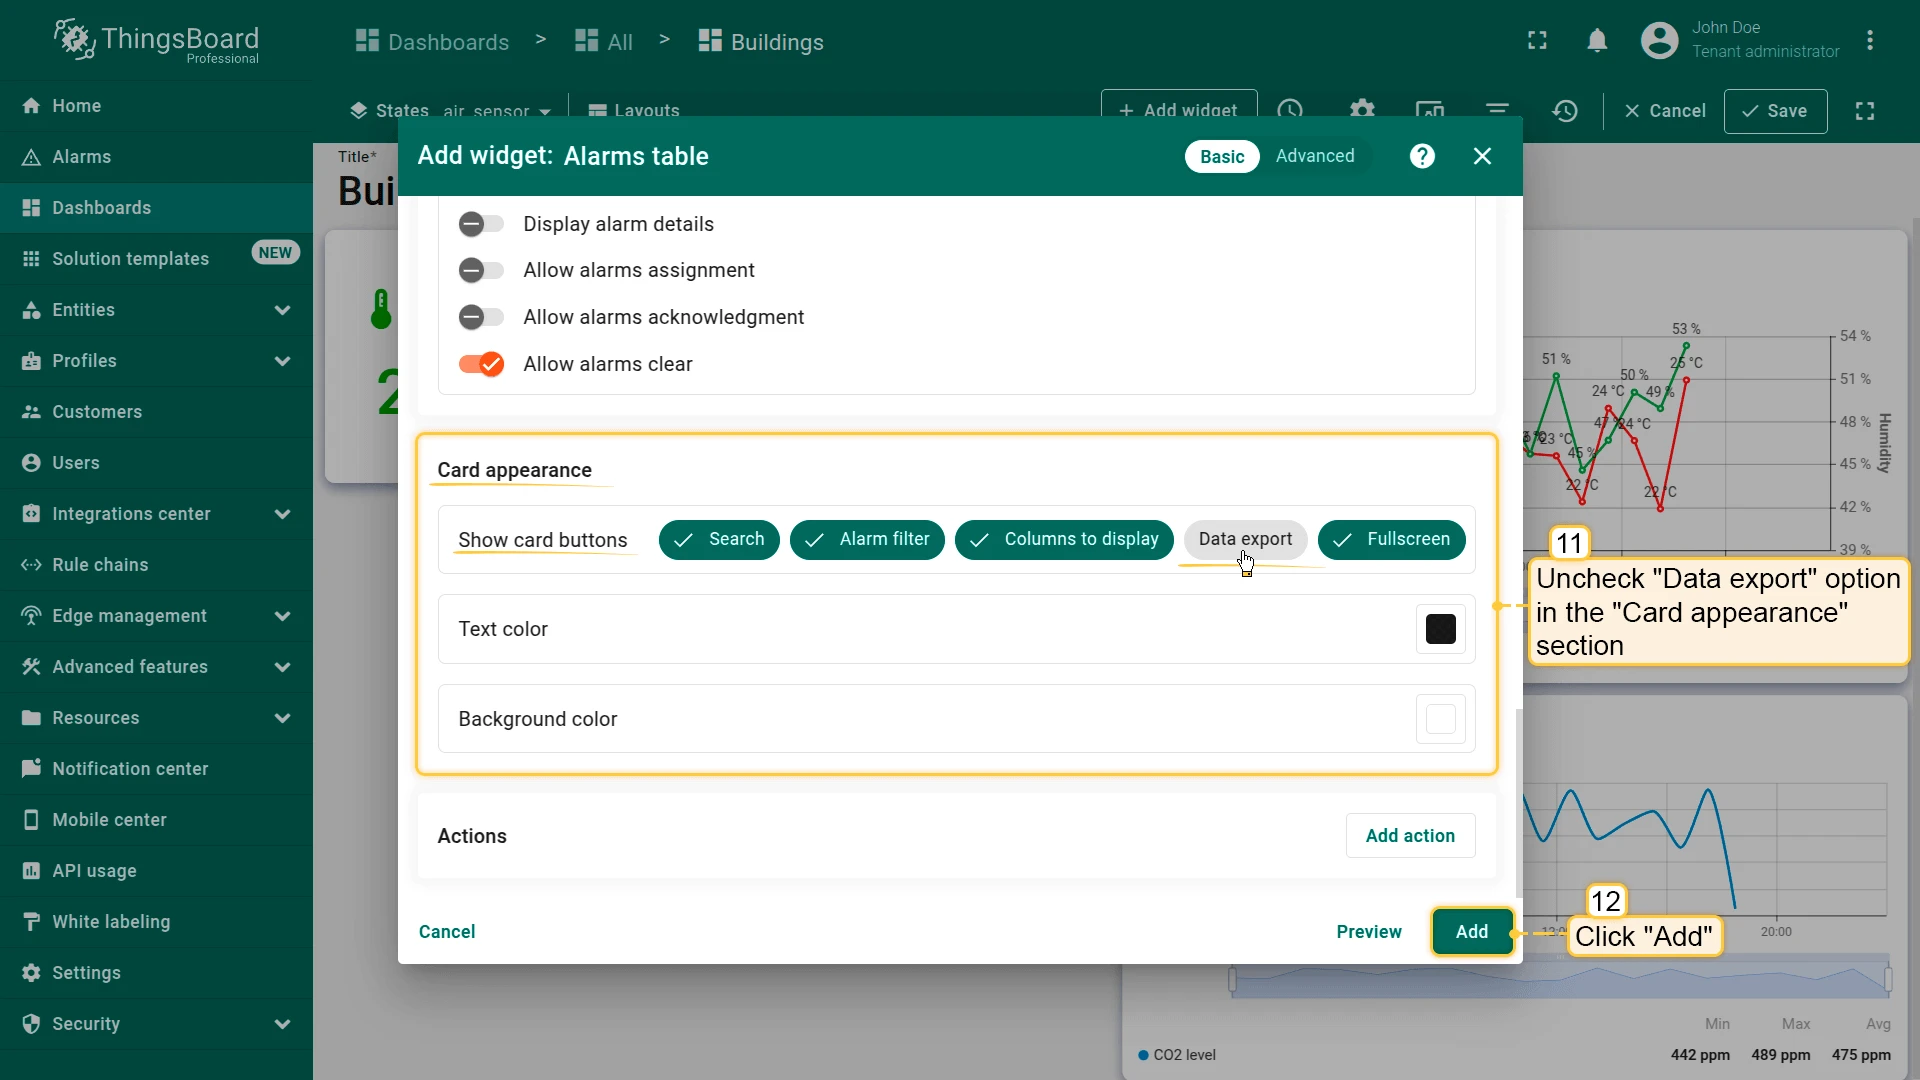
- Card title: Air sensor alarms
- Table buttons: leave only Allow alarms acknowledgment and Allow alarms clear enabled.
- Disable Data export in the Card appearance section.
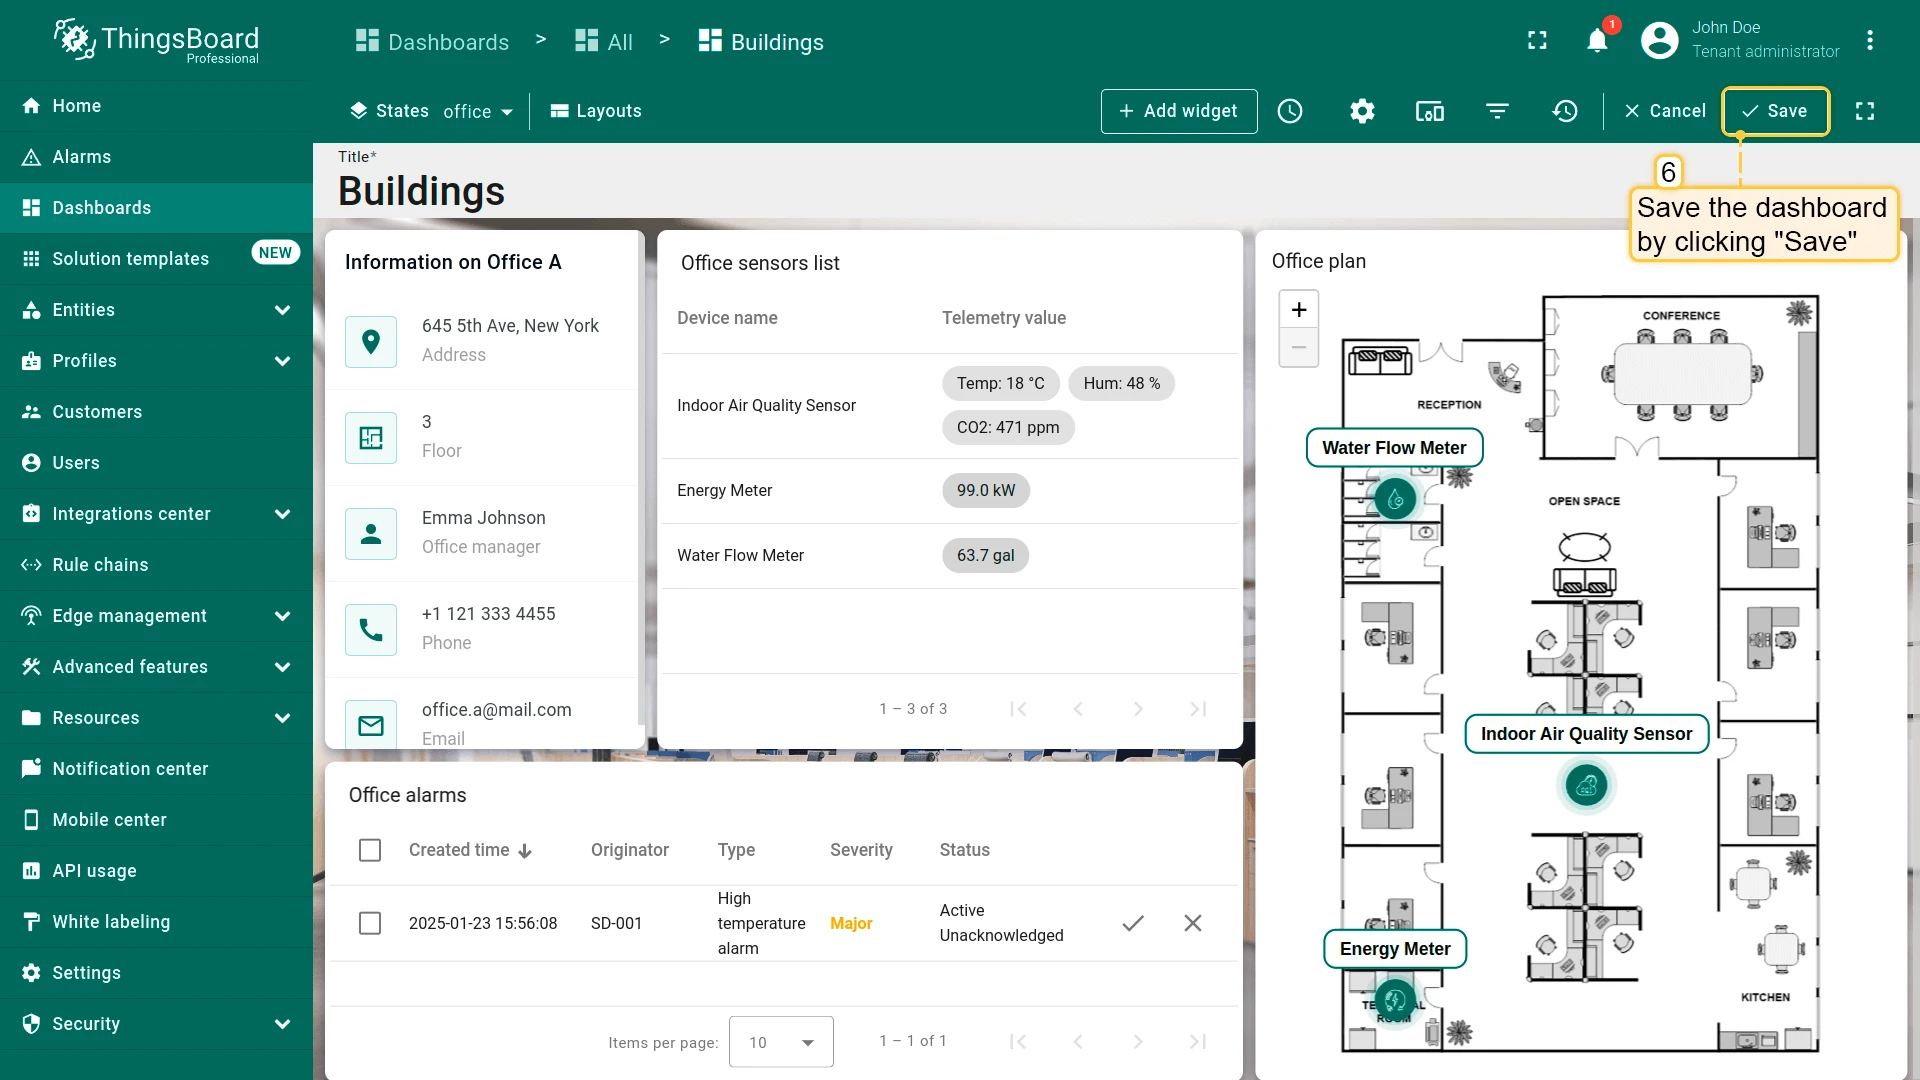
- Click Add.
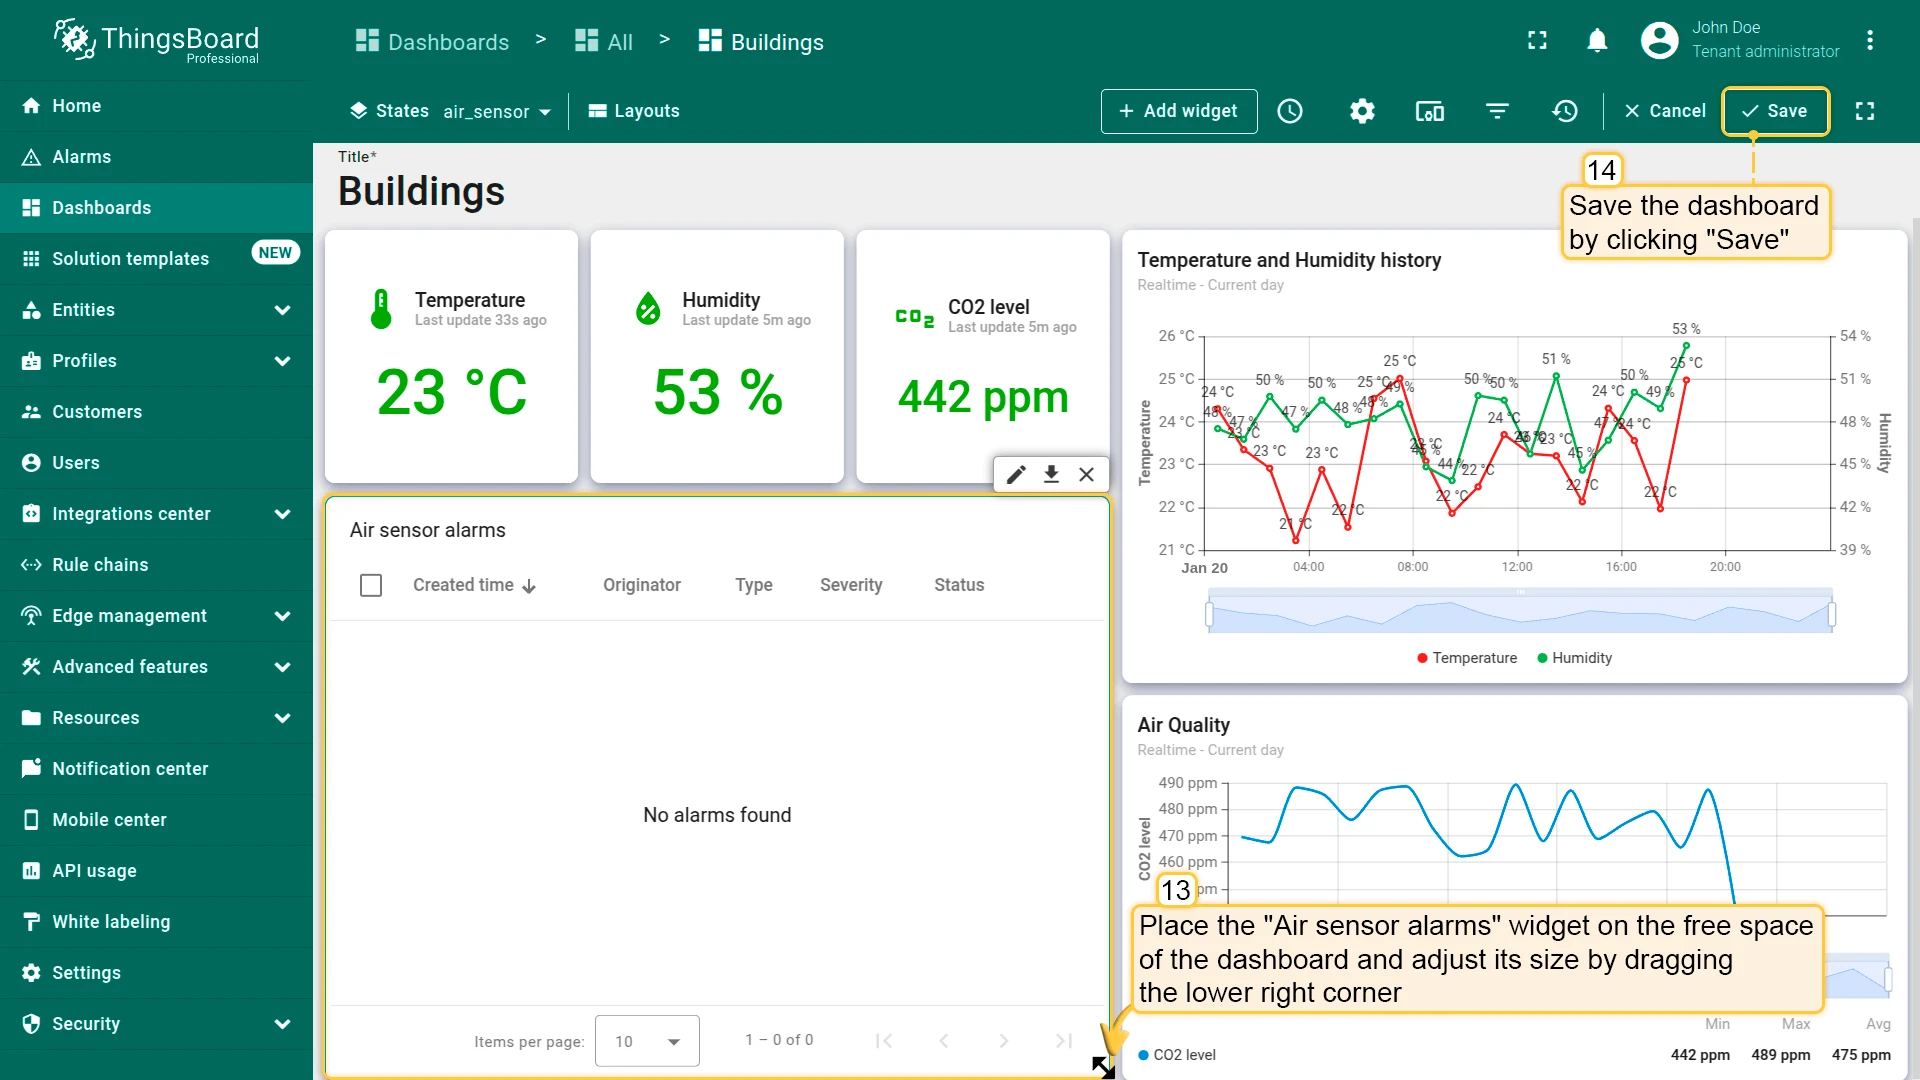
- Place the widget, resize, and save the dashboard.
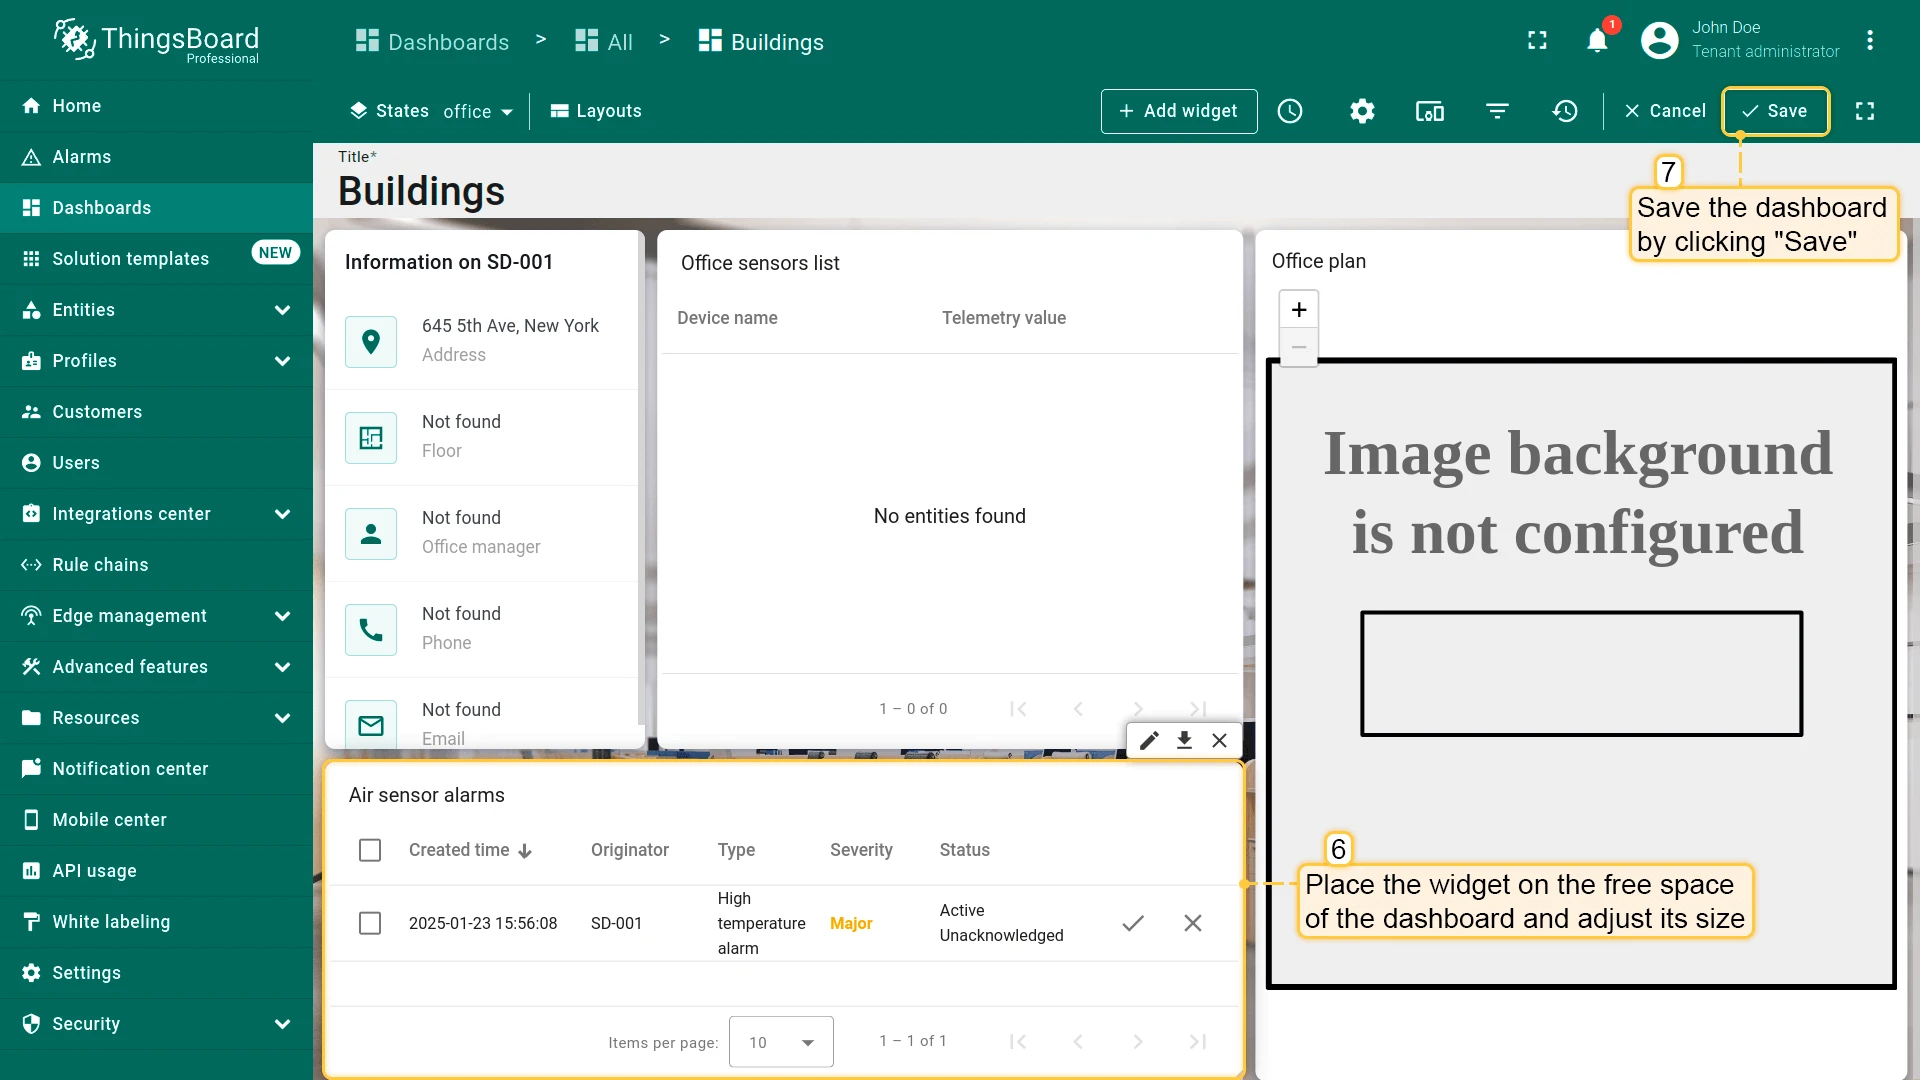
Step 4.3 Test Alarm Triggering
Section titled “Step 4.3 Test Alarm Triggering”Simulate telemetry data that exceeds defined thresholds to verify that alarms are triggered, displayed correctly in the widget, and follow the configured severity levels.
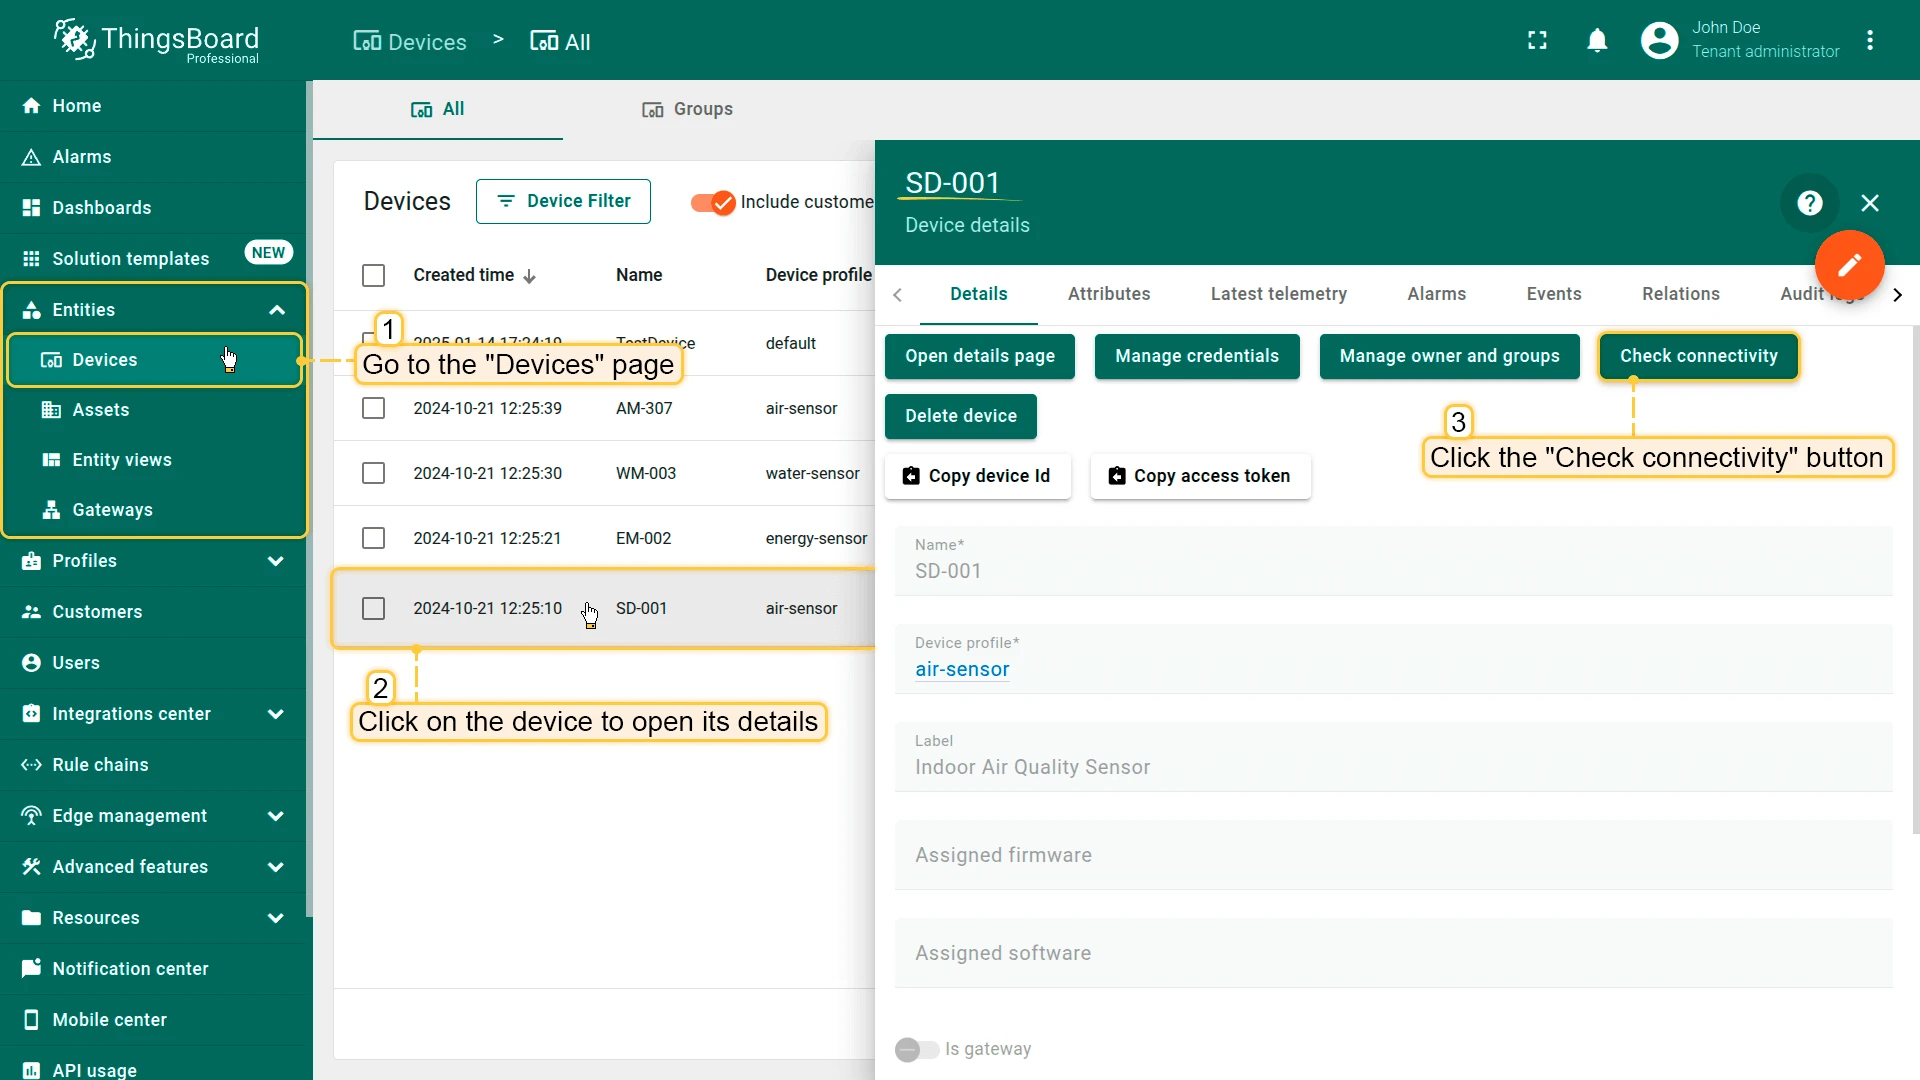
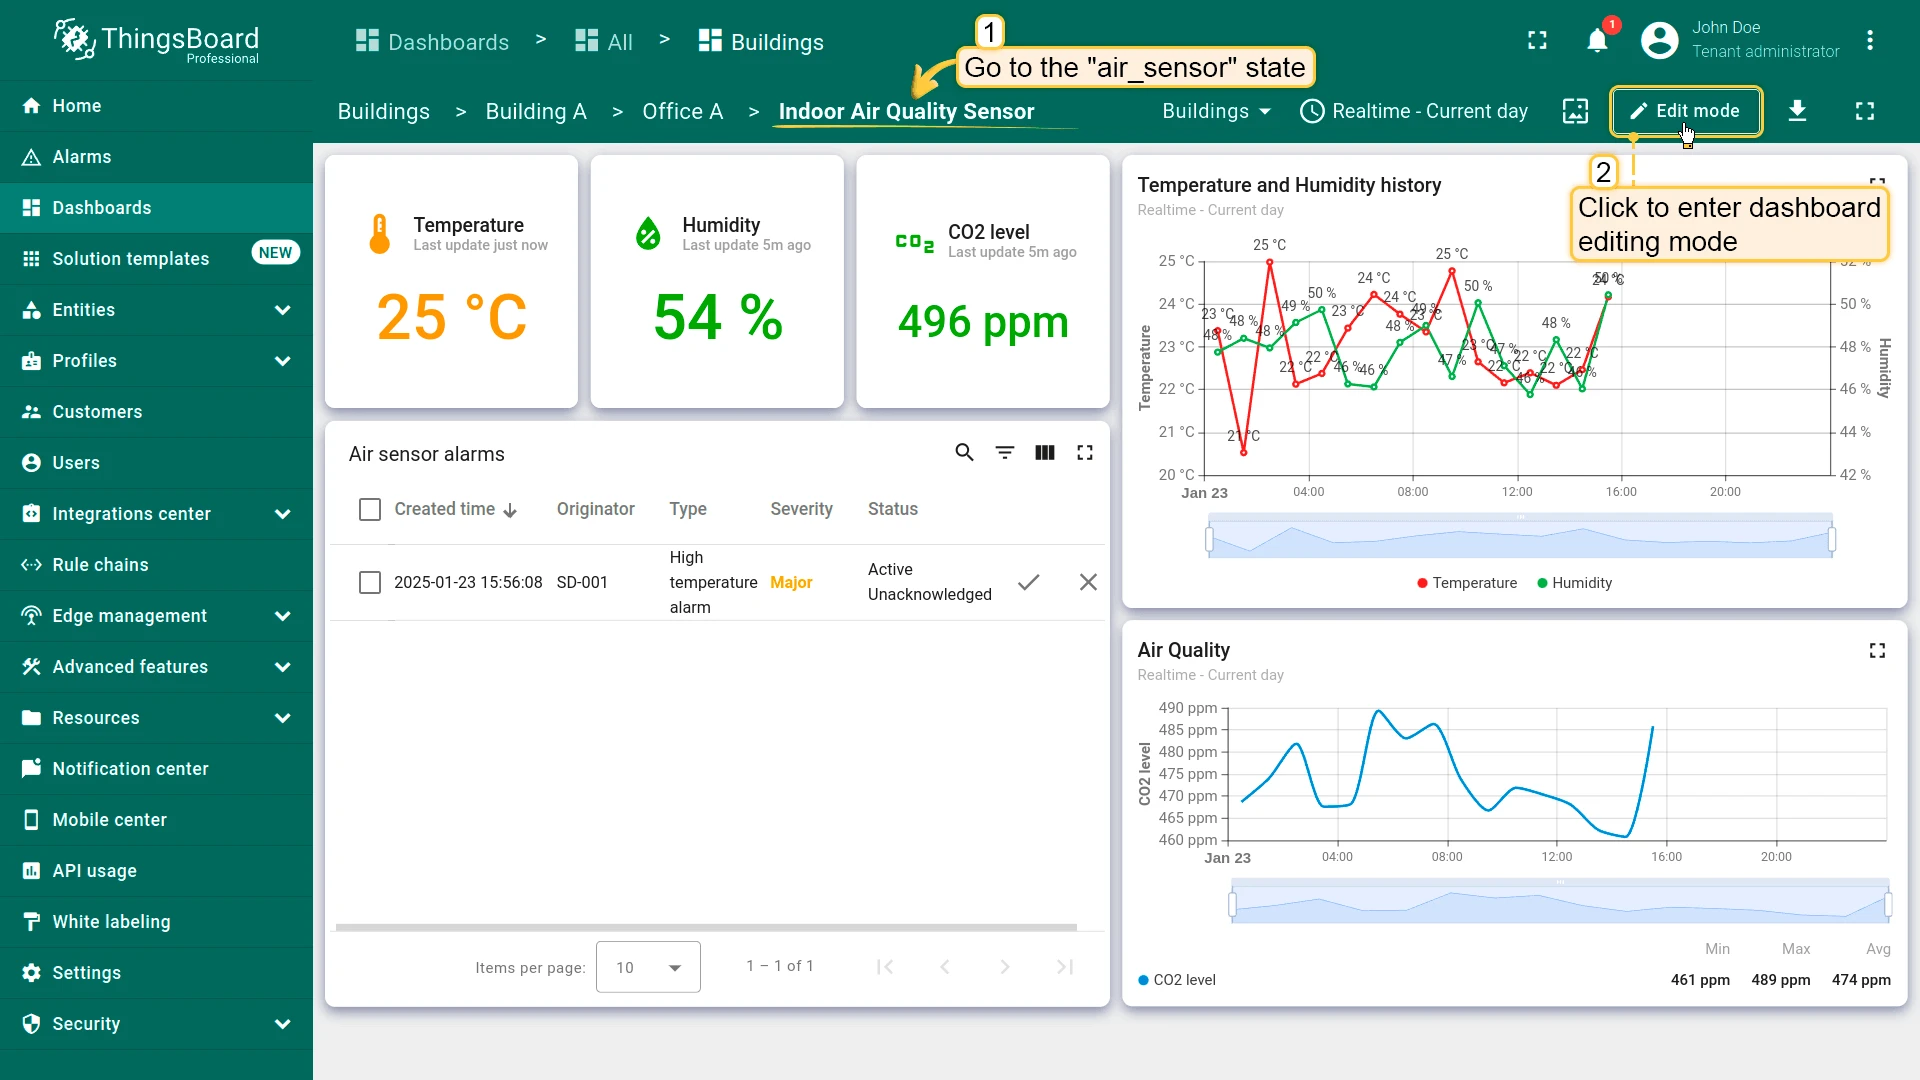
- Go to Entities ⇾ Devices and open SD-001 (Indoor Air Quality Sensor).
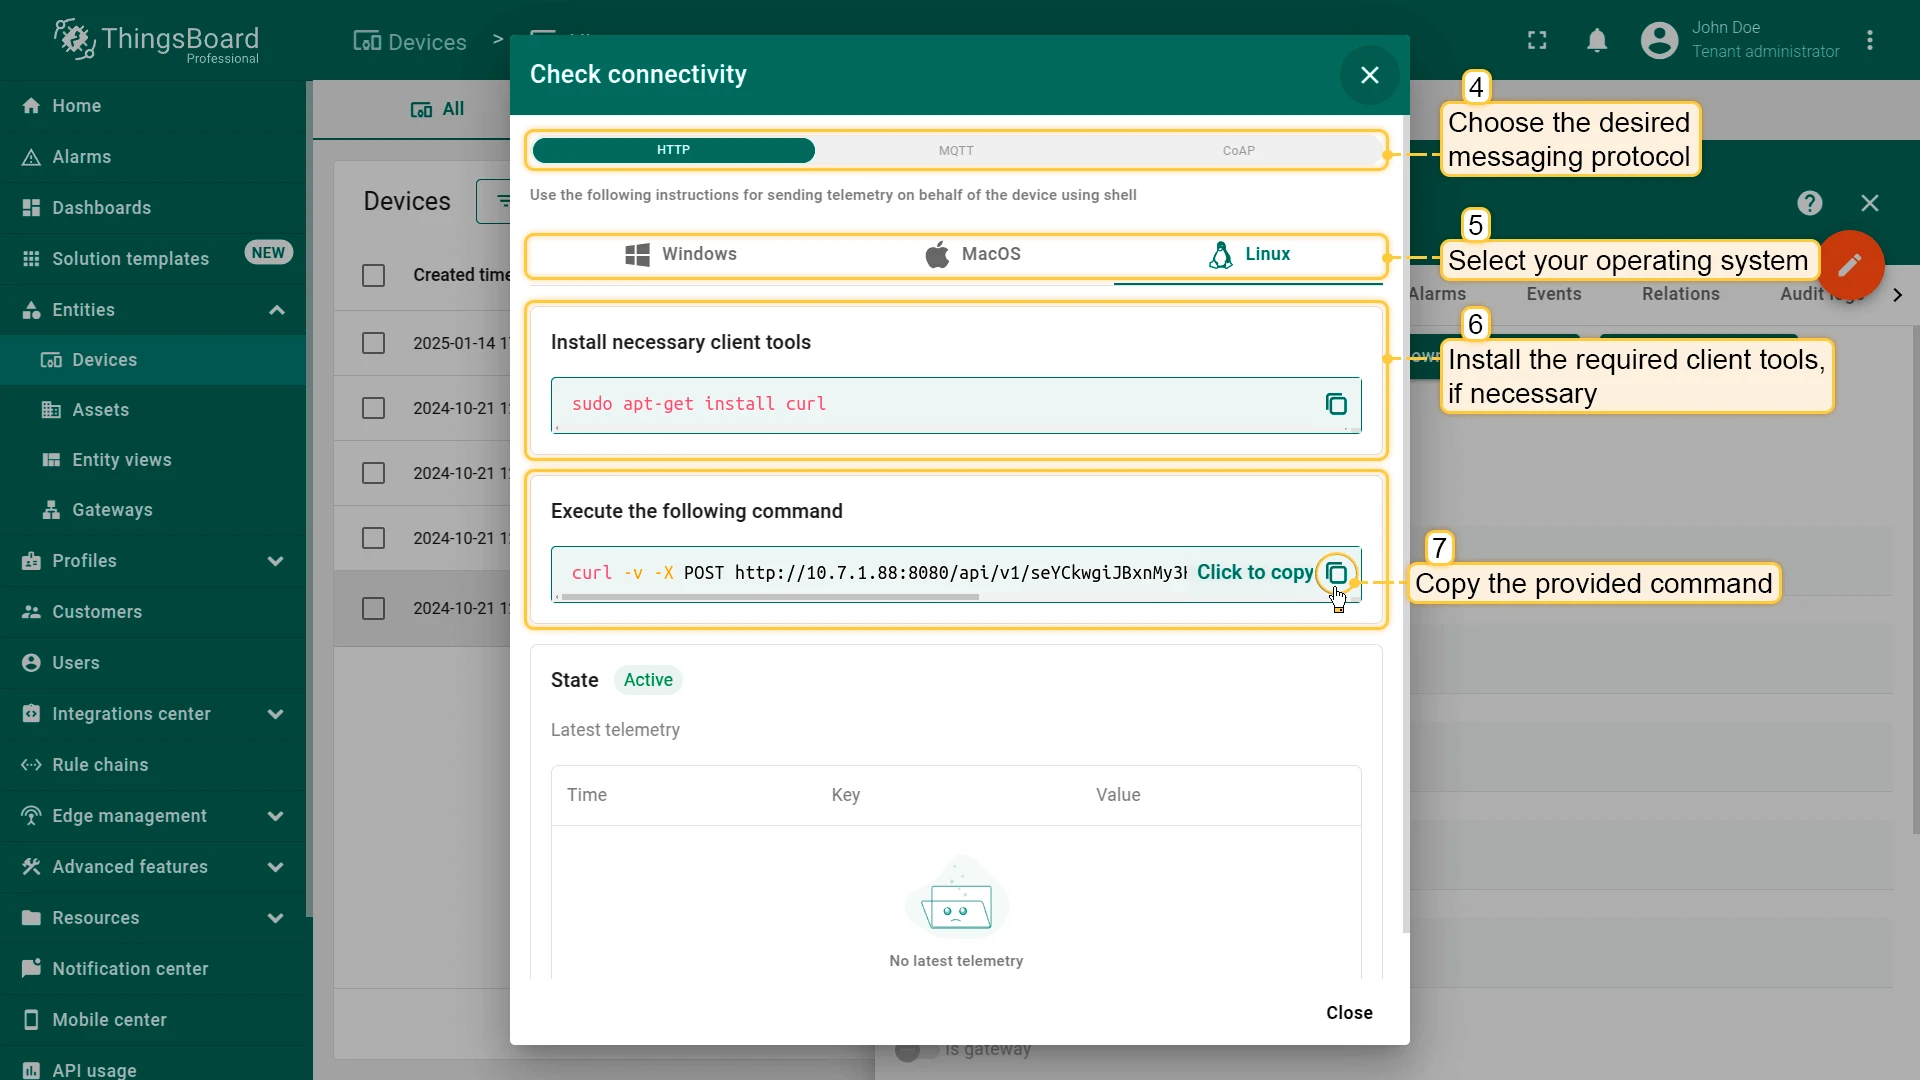
- Click Check connectivity in the Device details panel.
- Select your messaging protocol and operating system. Copy the provided
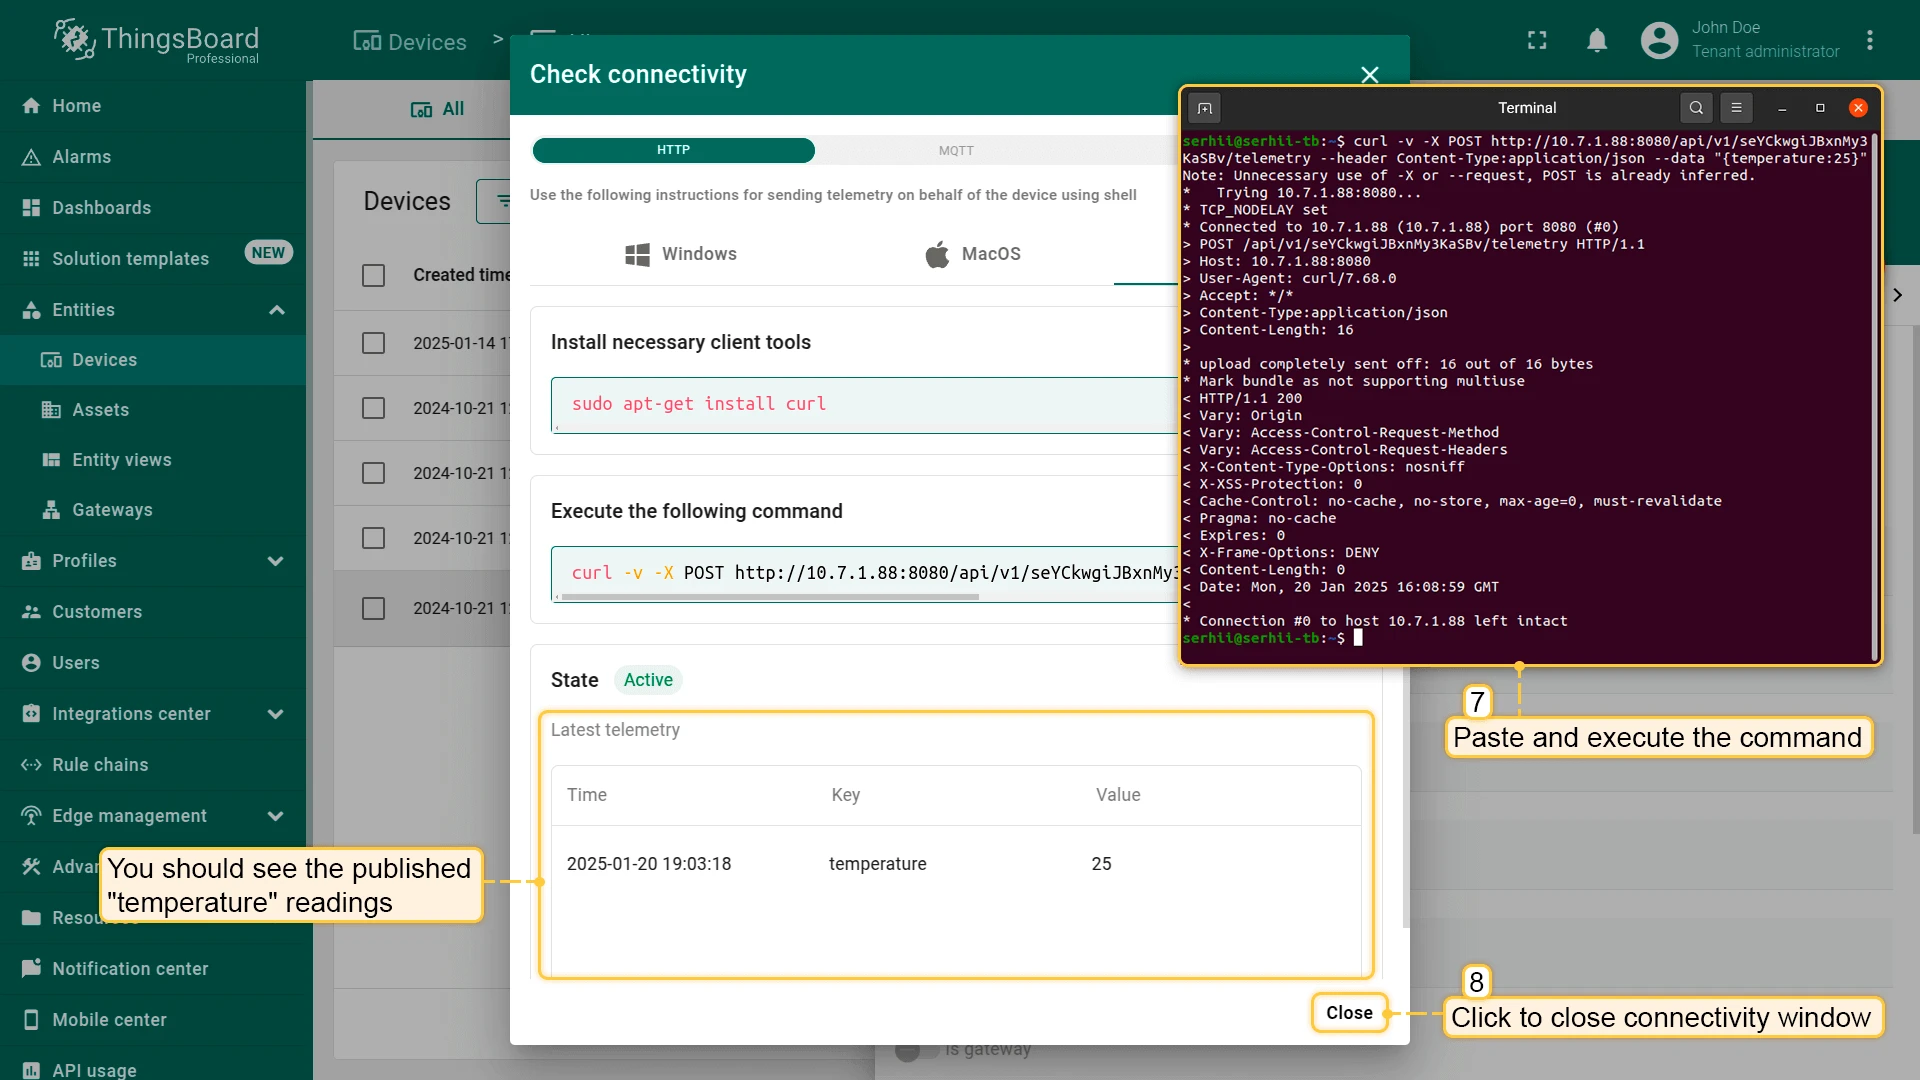
curlcommand. - In the command, change the temperature value to
25(triggers Major) or27(triggers Critical). - Paste and execute the command in your terminal.
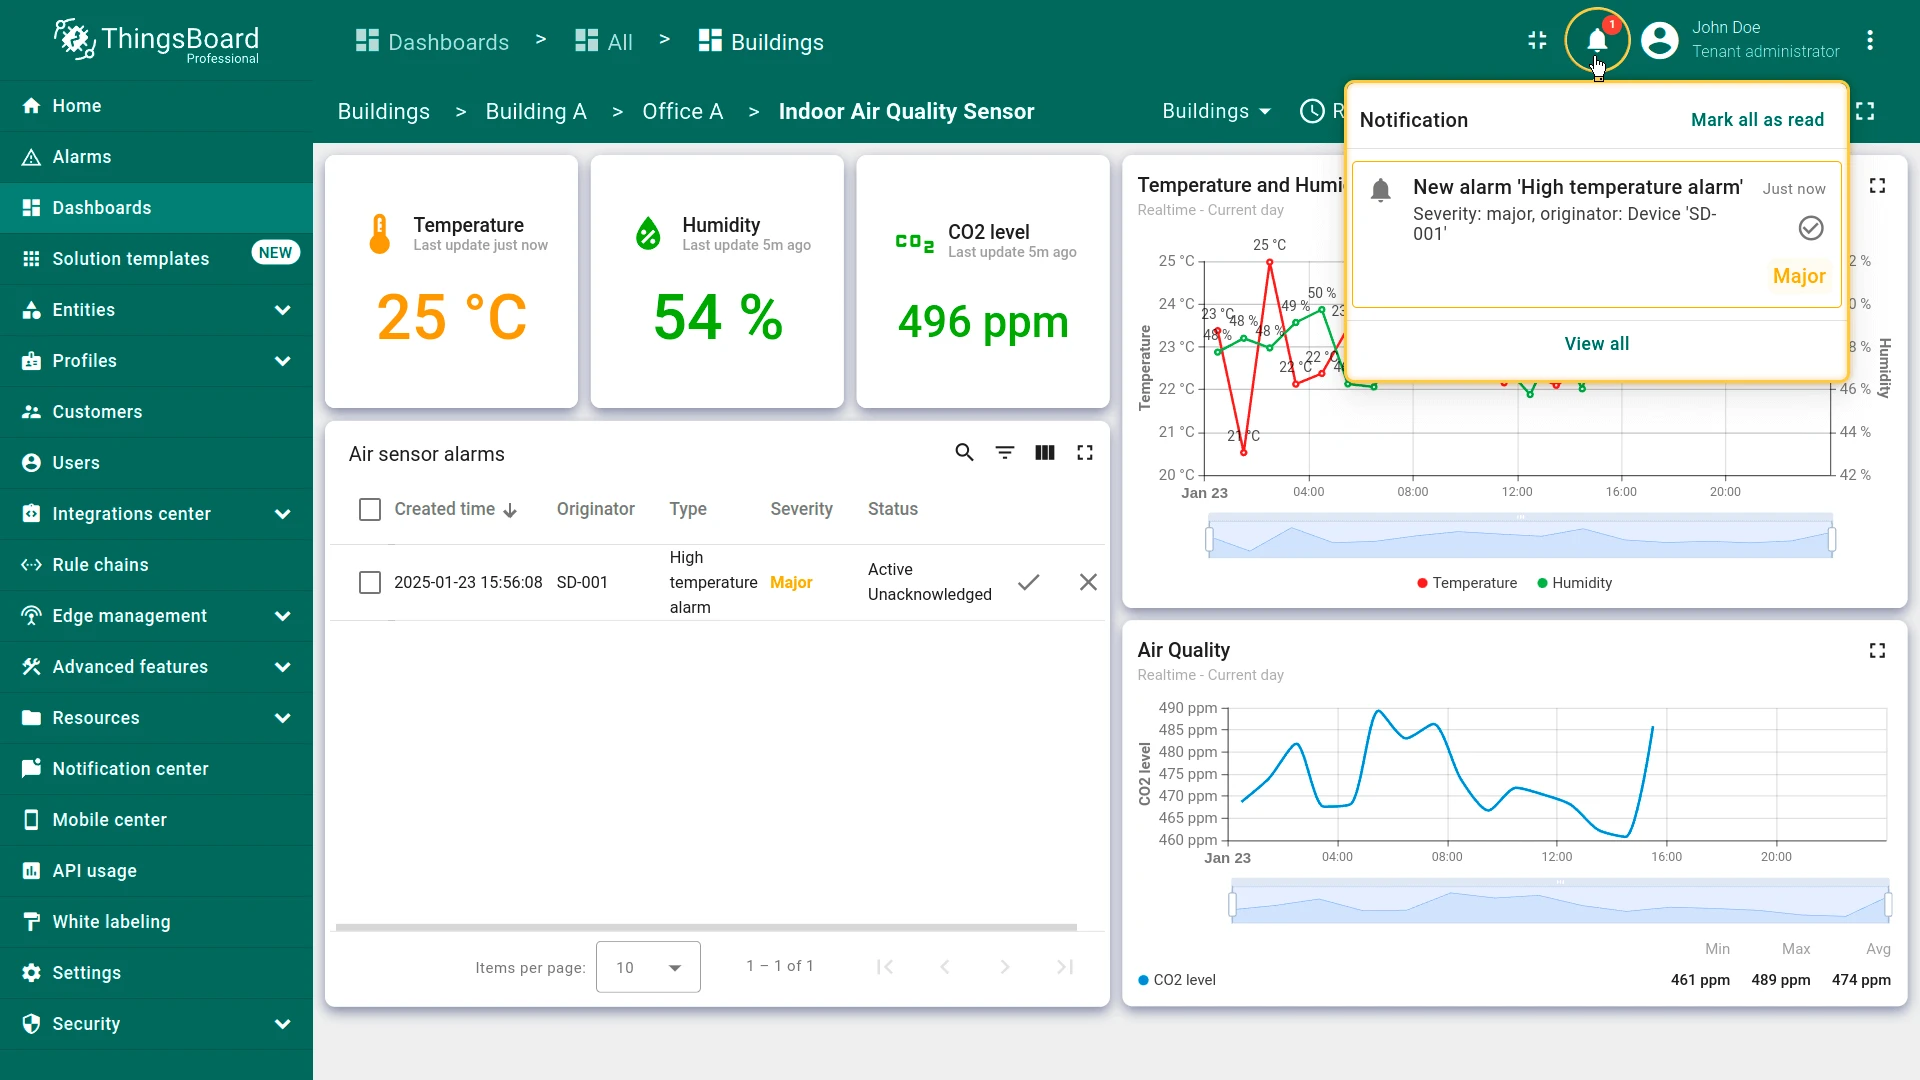
- Return to the dashboard — the alarm should appear in the Air sensor alarms widget within a few seconds.
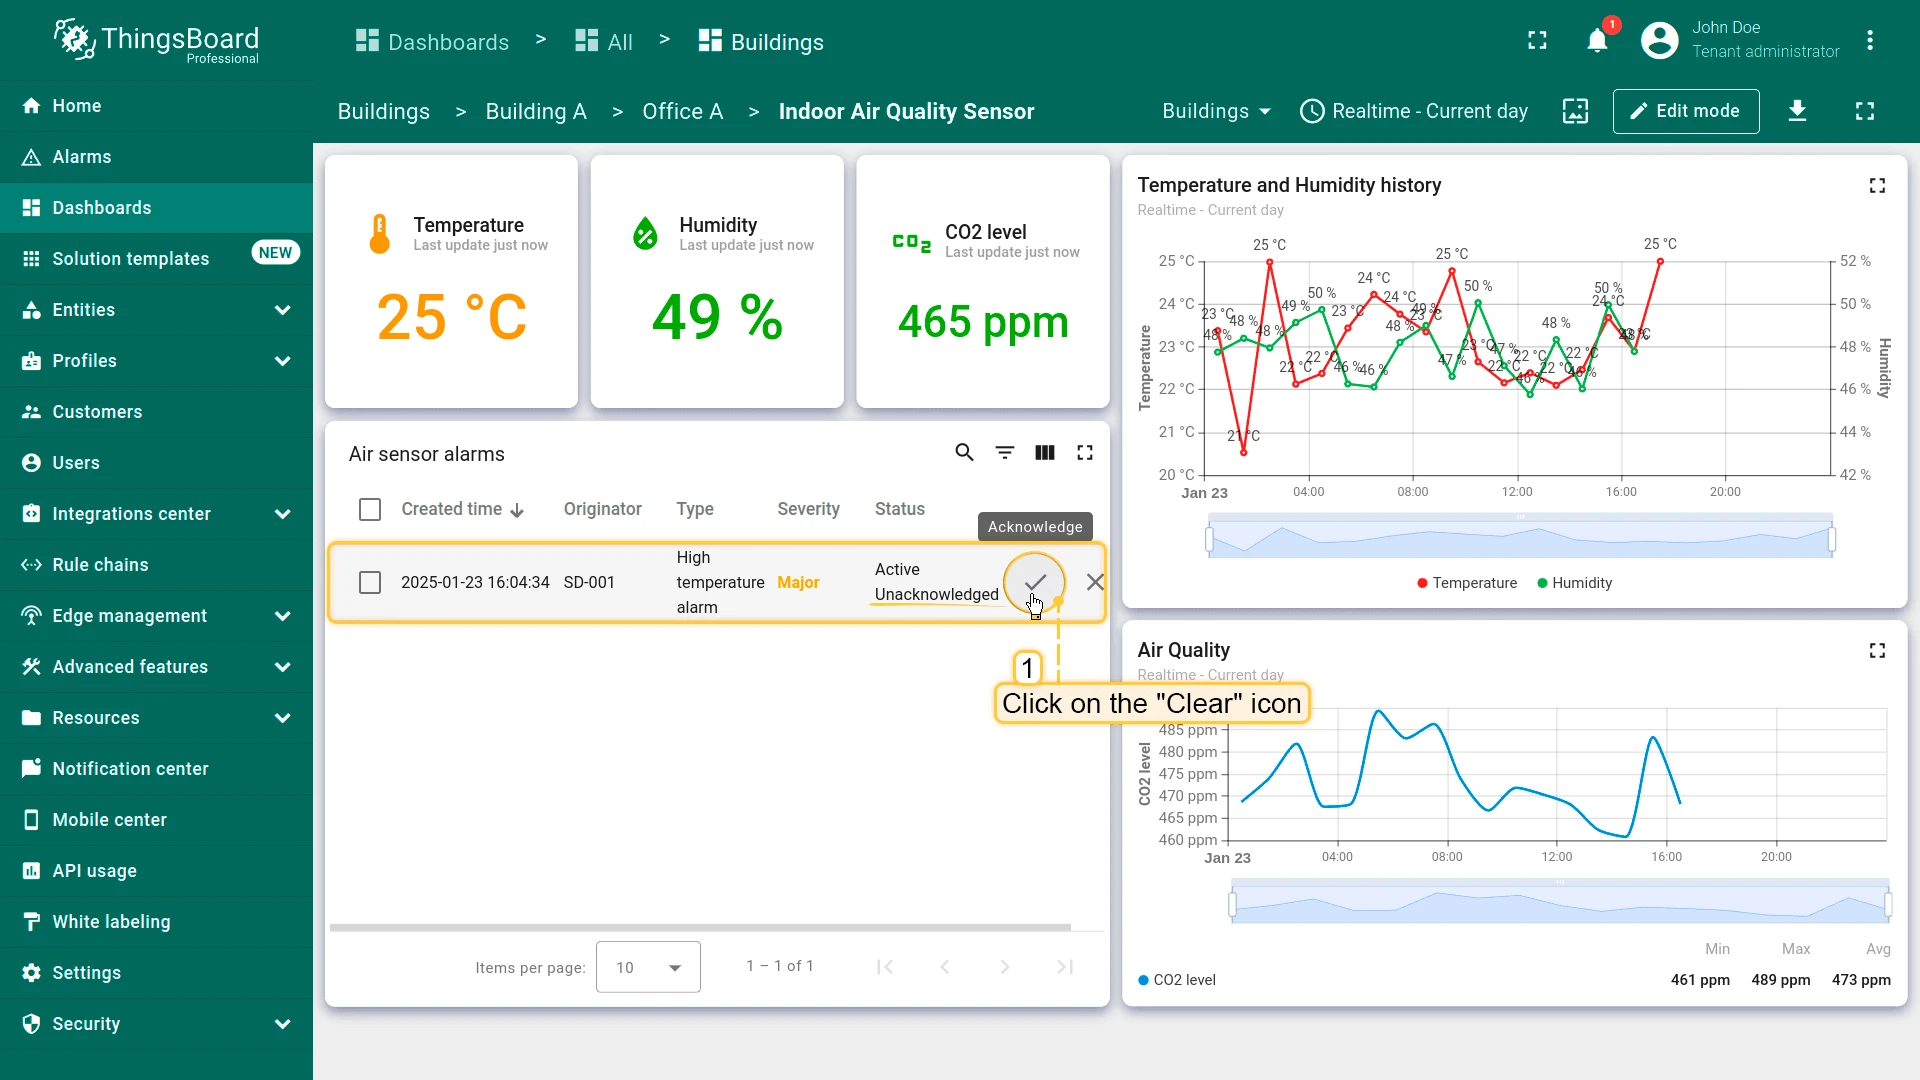
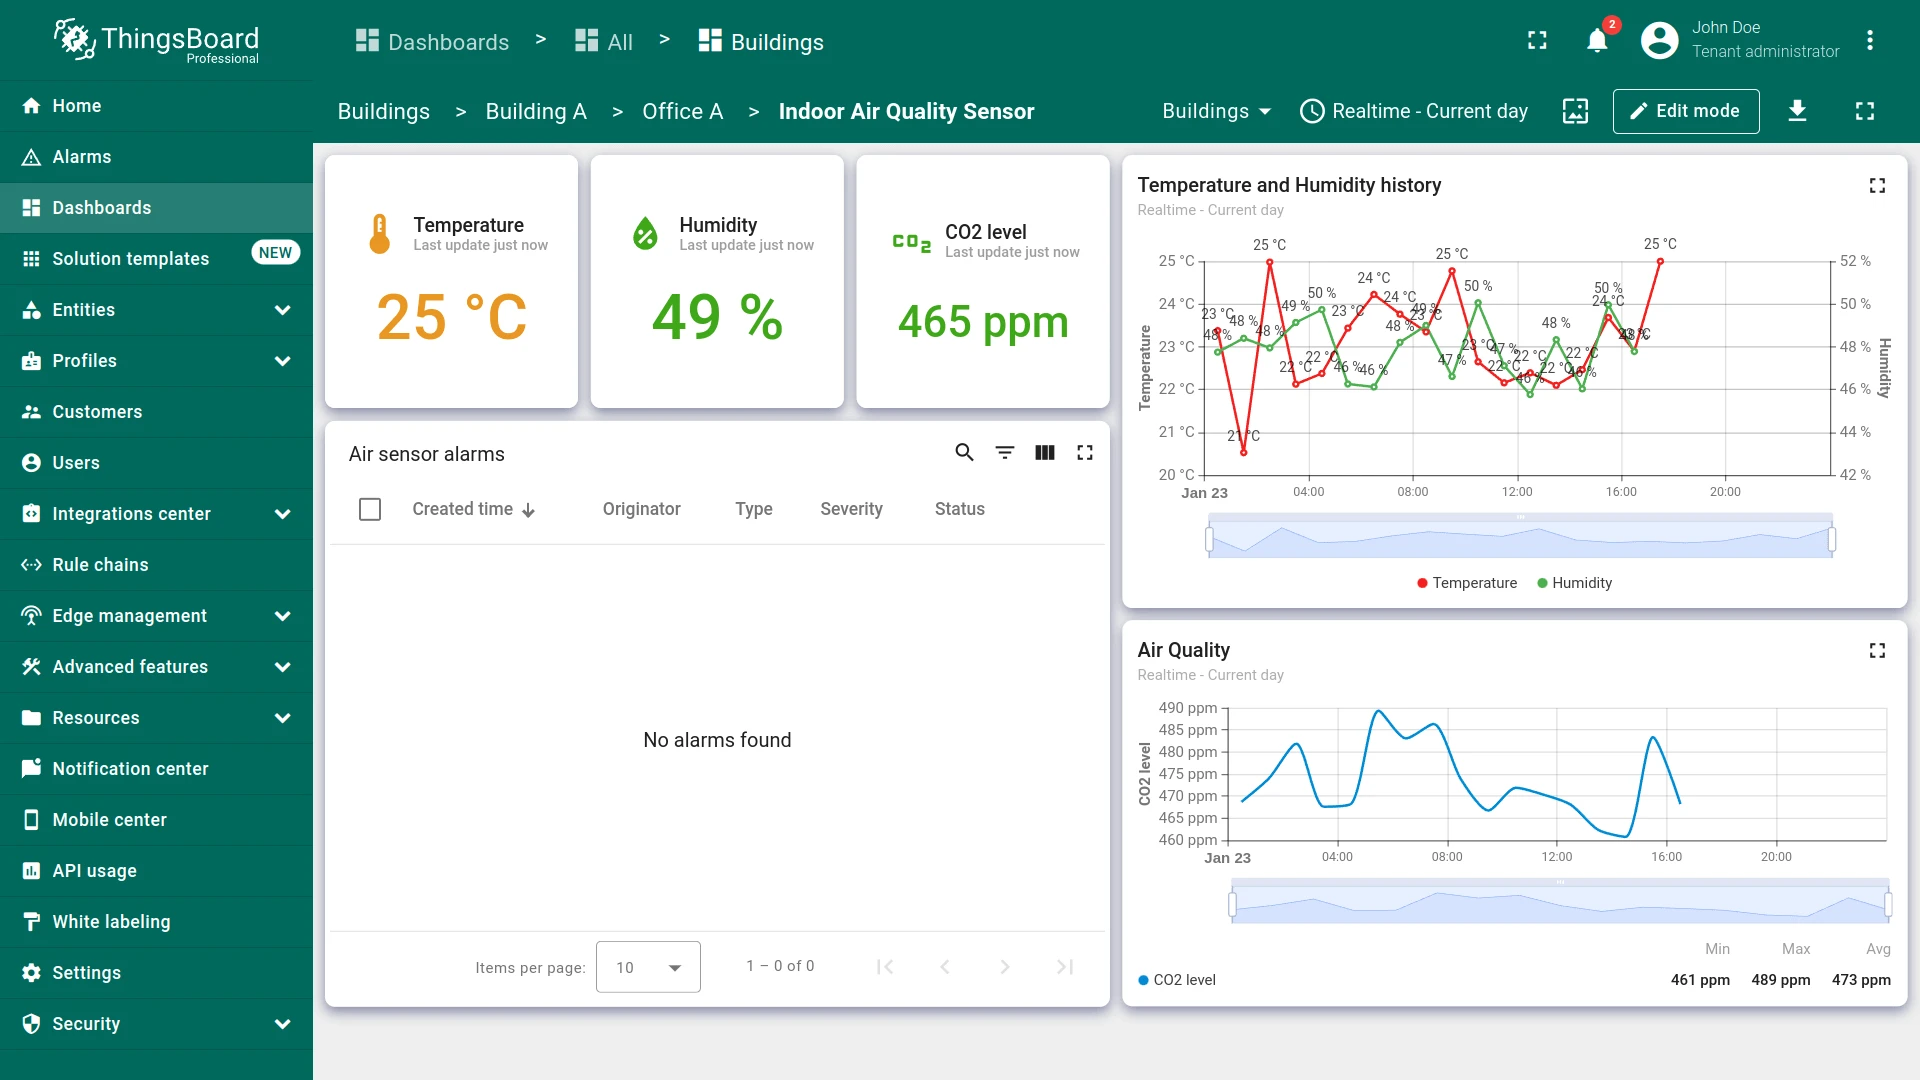
Acknowledge an Alarm
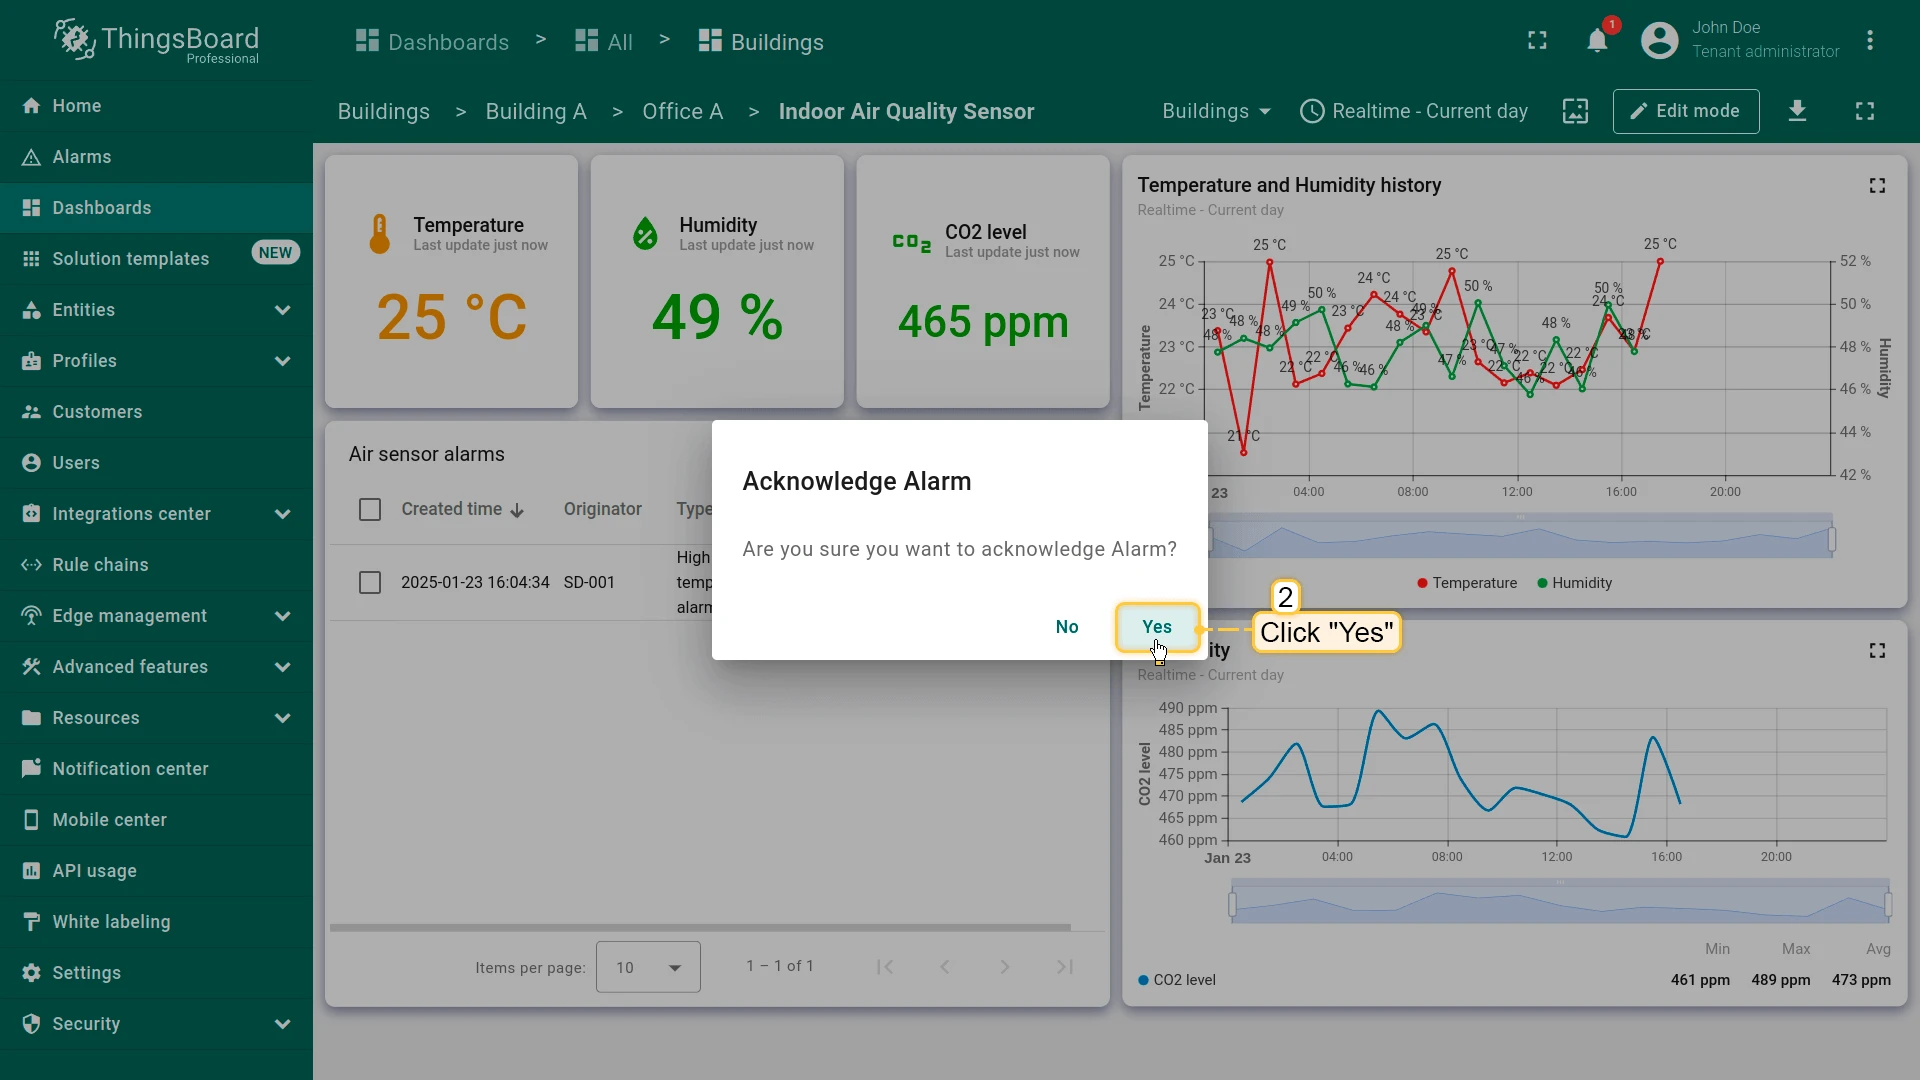
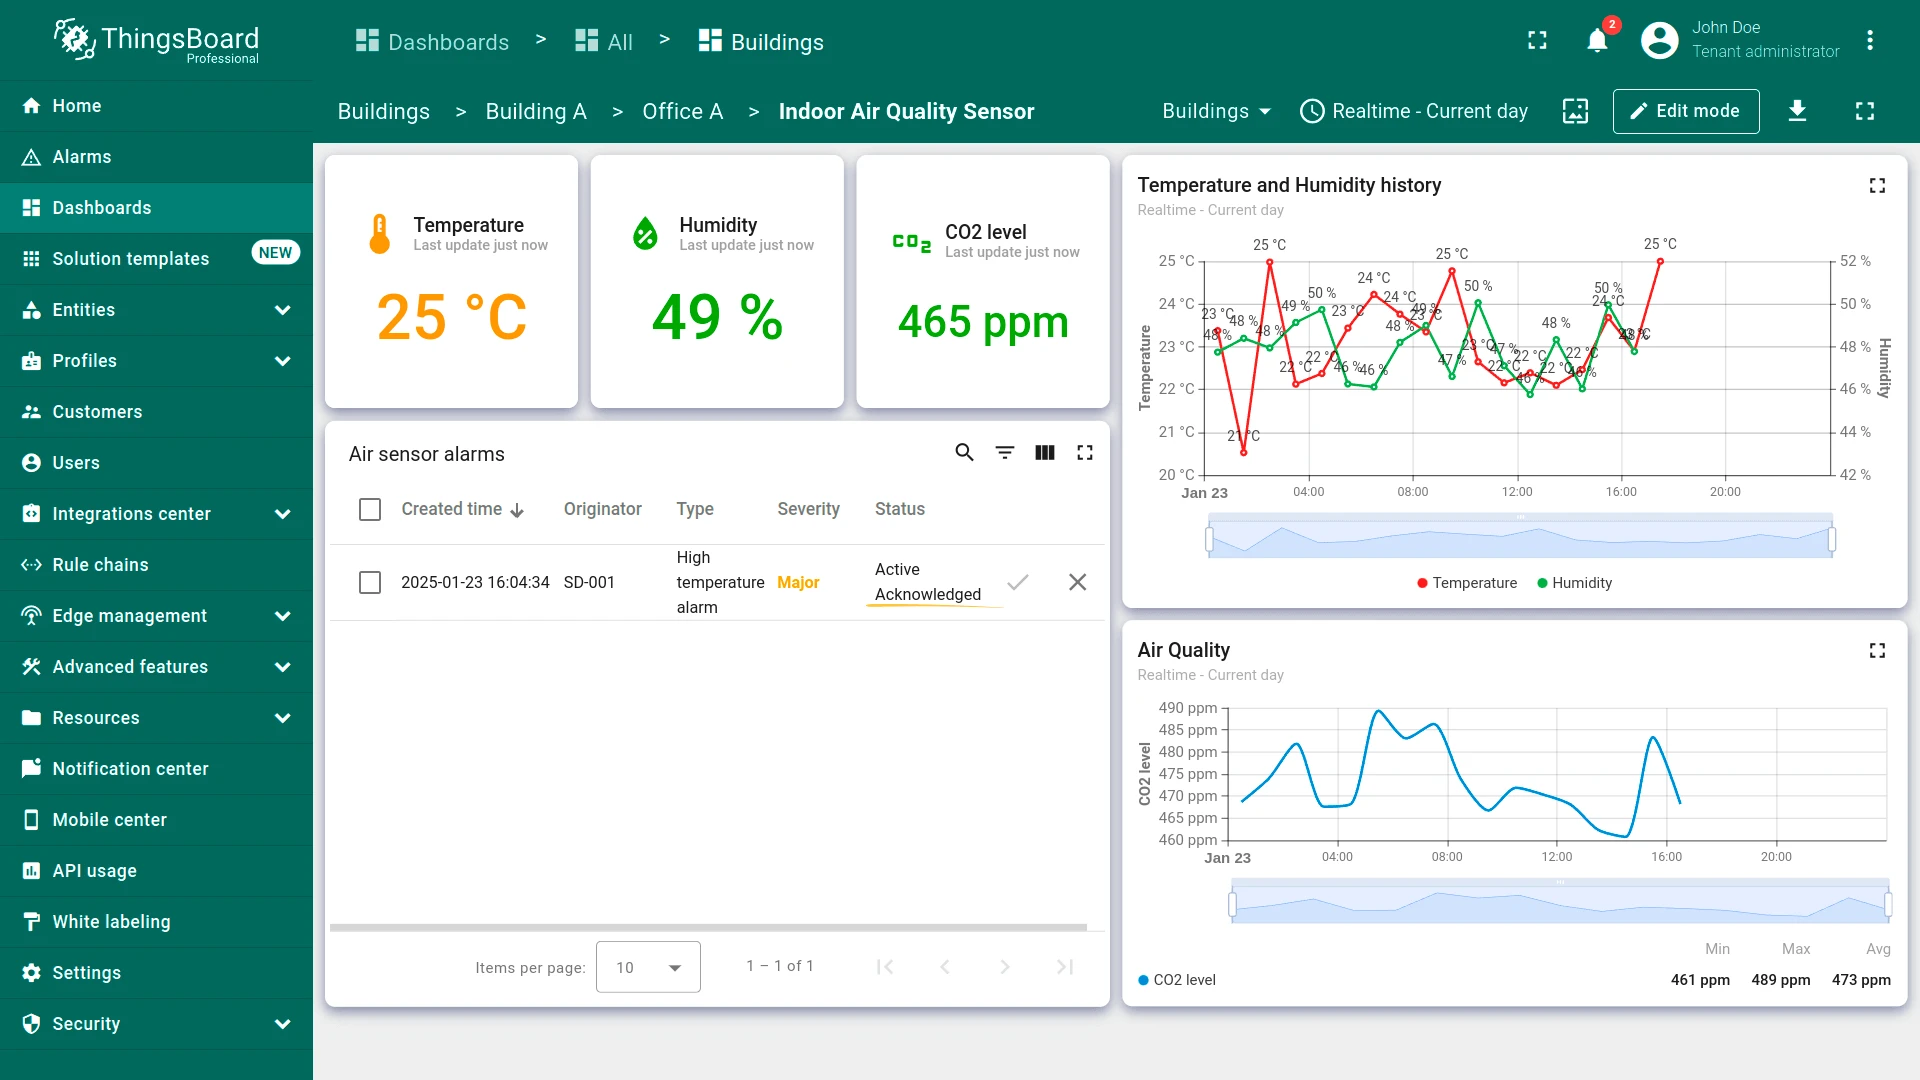
Section titled “Acknowledge an Alarm”Once an operator has seen the alarm and is handling it, they can acknowledge it to signal that the event is known — the alarm remains active but is marked as acknowledged.
- In the Air sensor alarms widget, click the Acknowledge (check) icon in the alarm row.
- Confirm the action in the dialog.
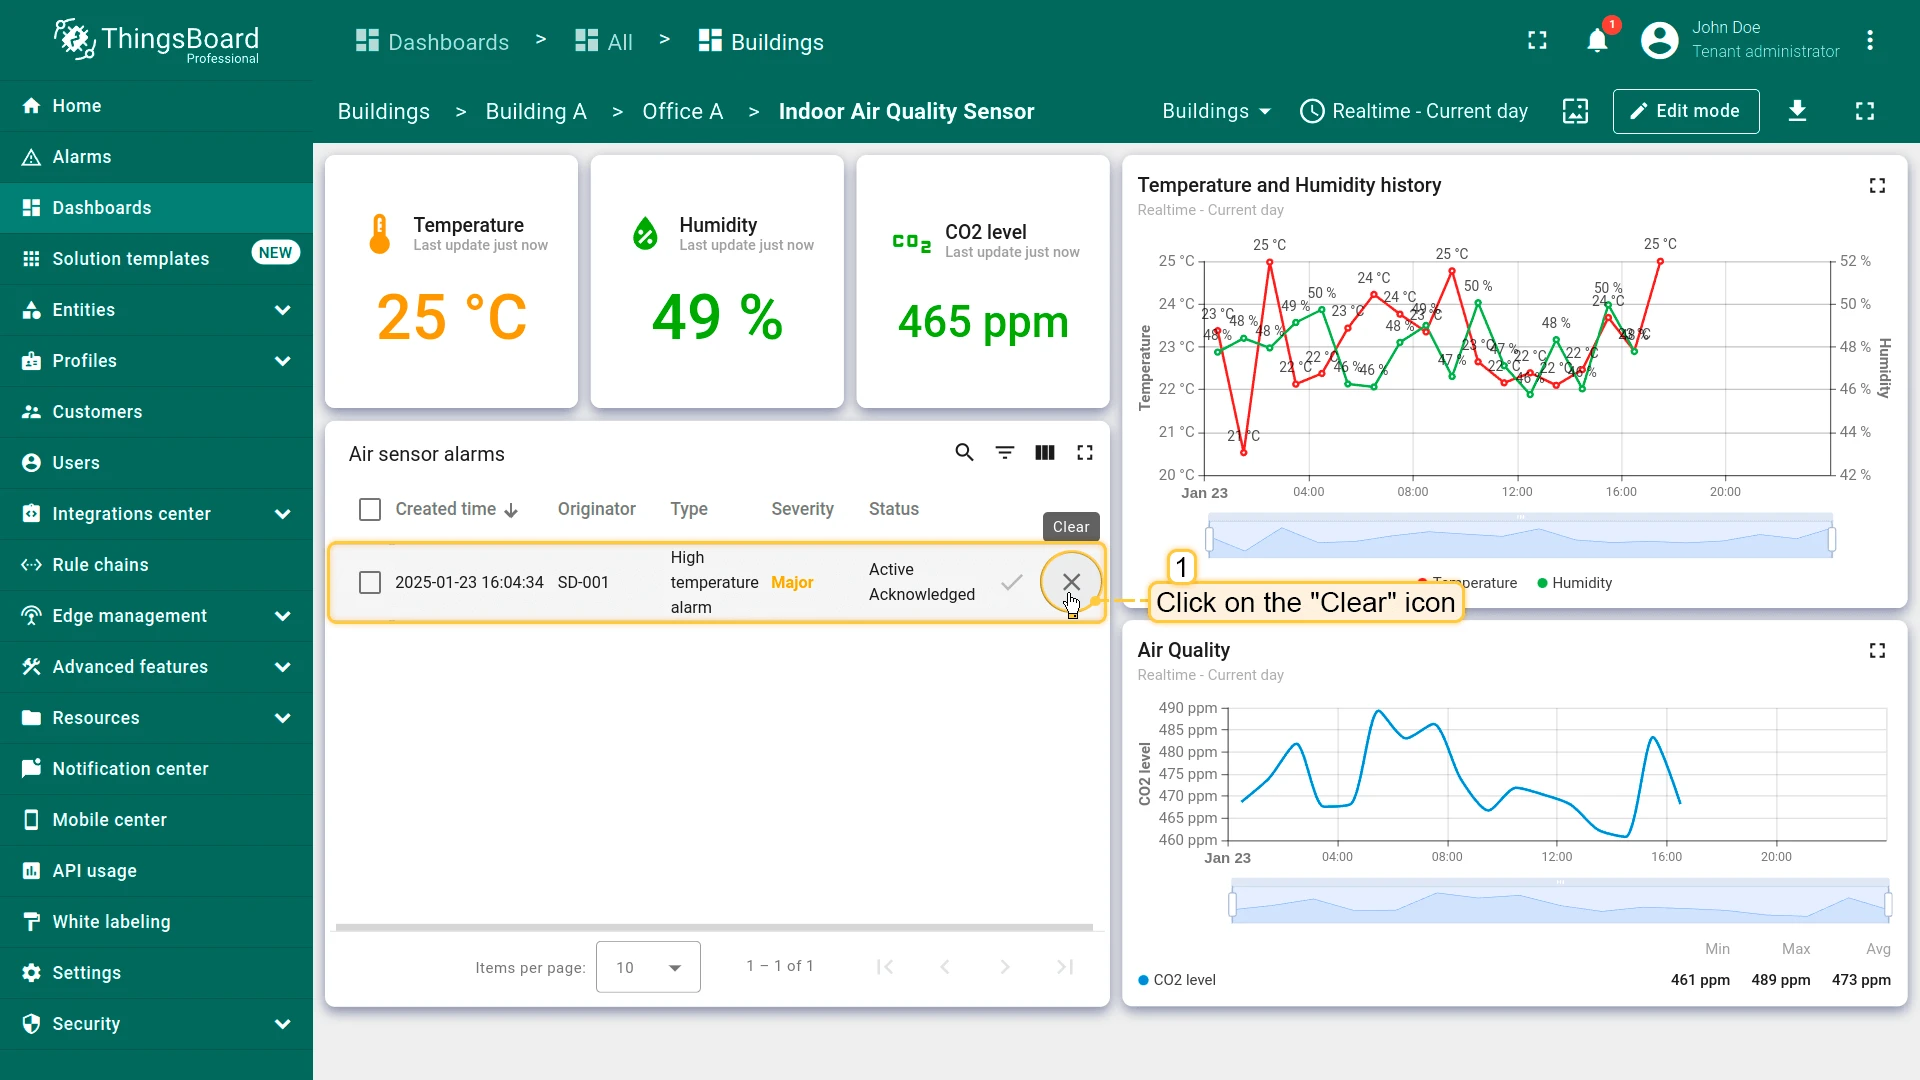
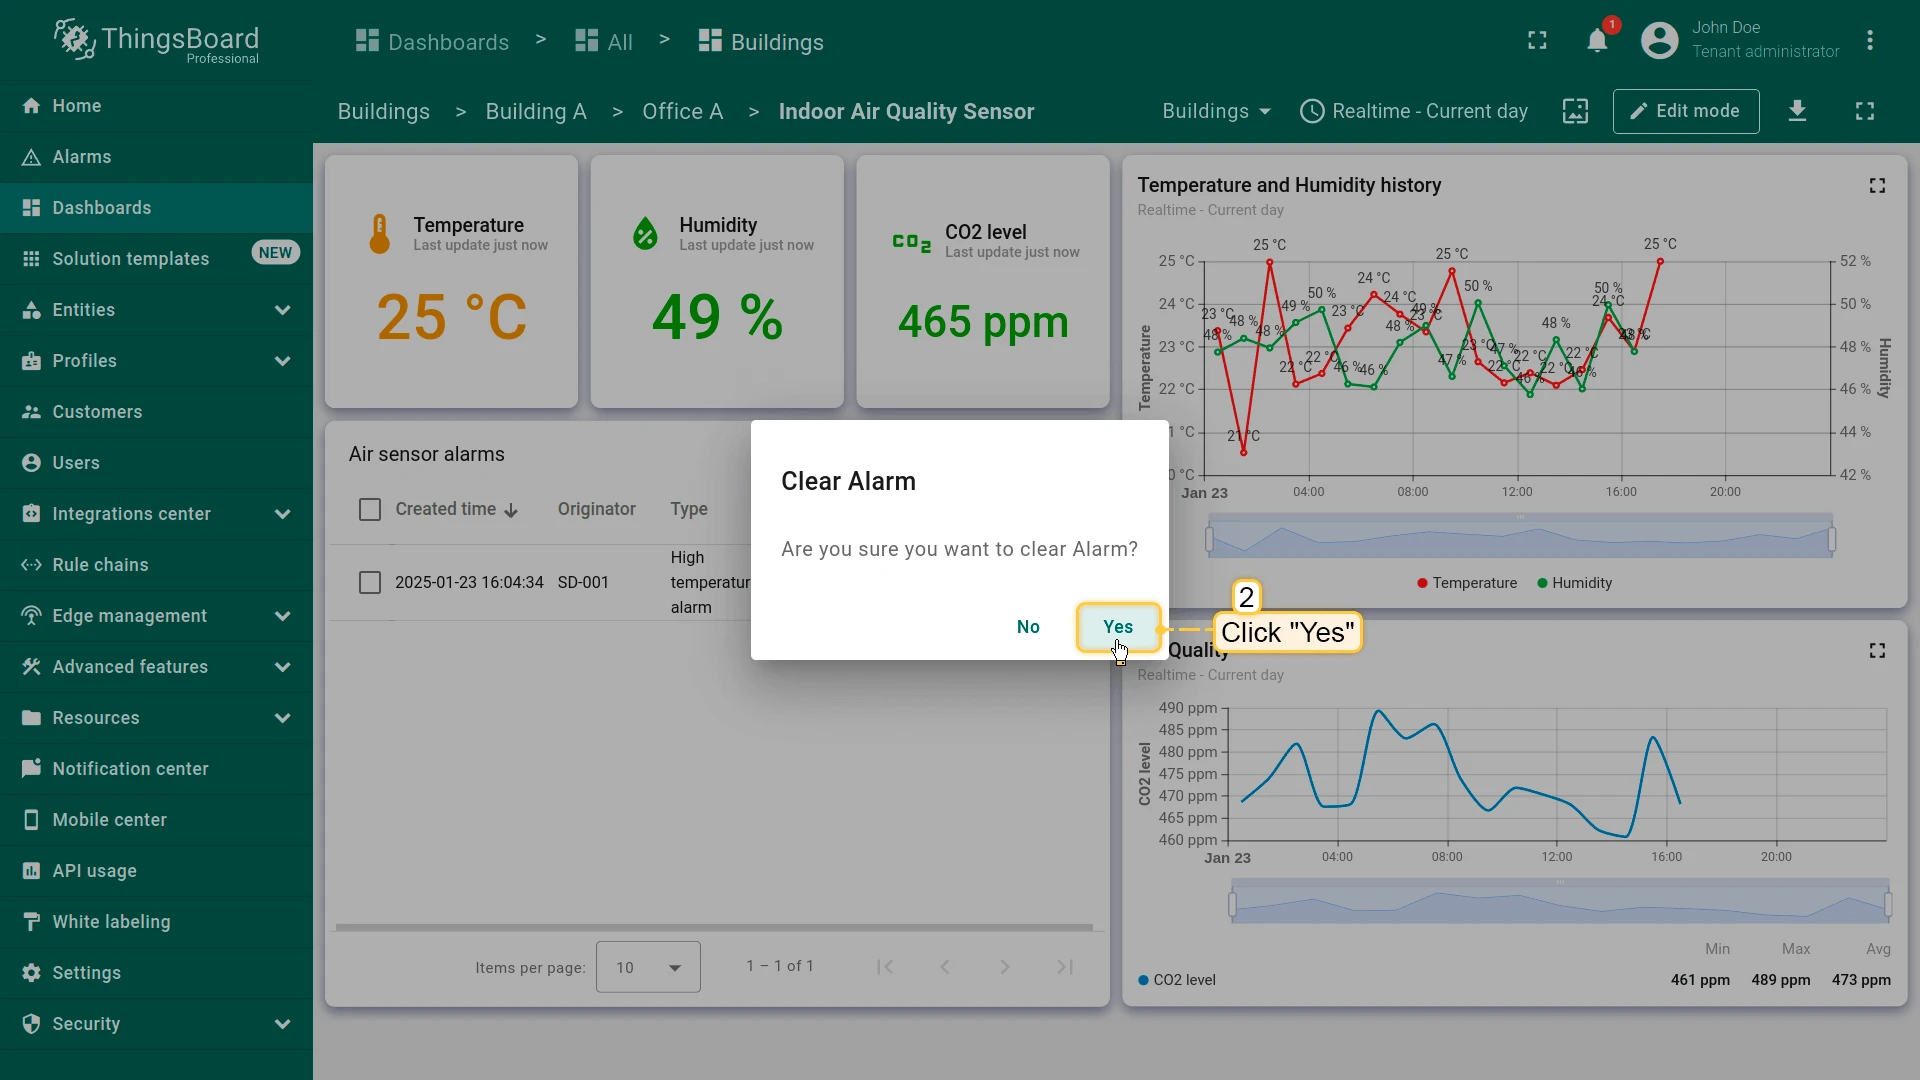
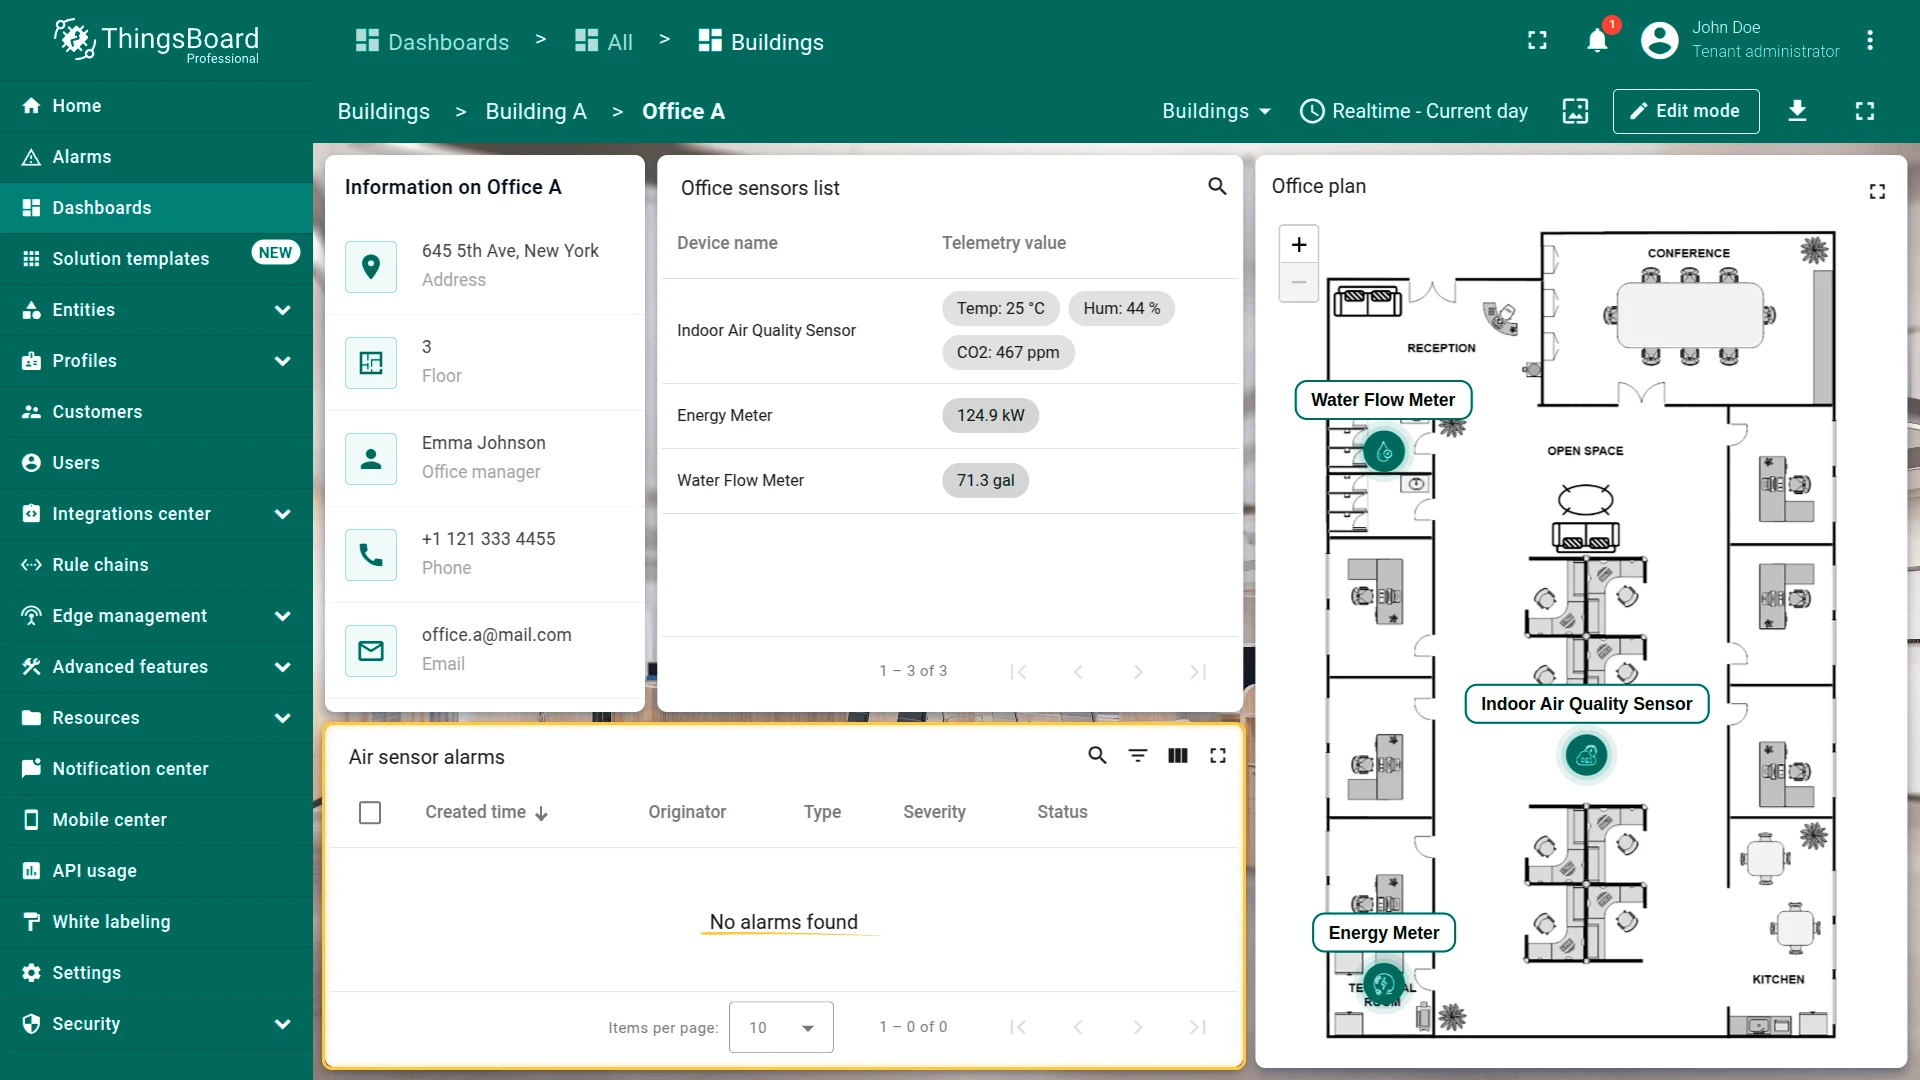
Clear an Alarm
Section titled “Clear an Alarm”Alarms auto-clear when the condition is met (temperature ≤ 24 °C). You can also clear manually.
- Click the Clear (X) icon in the alarm row.
- Confirm the action.
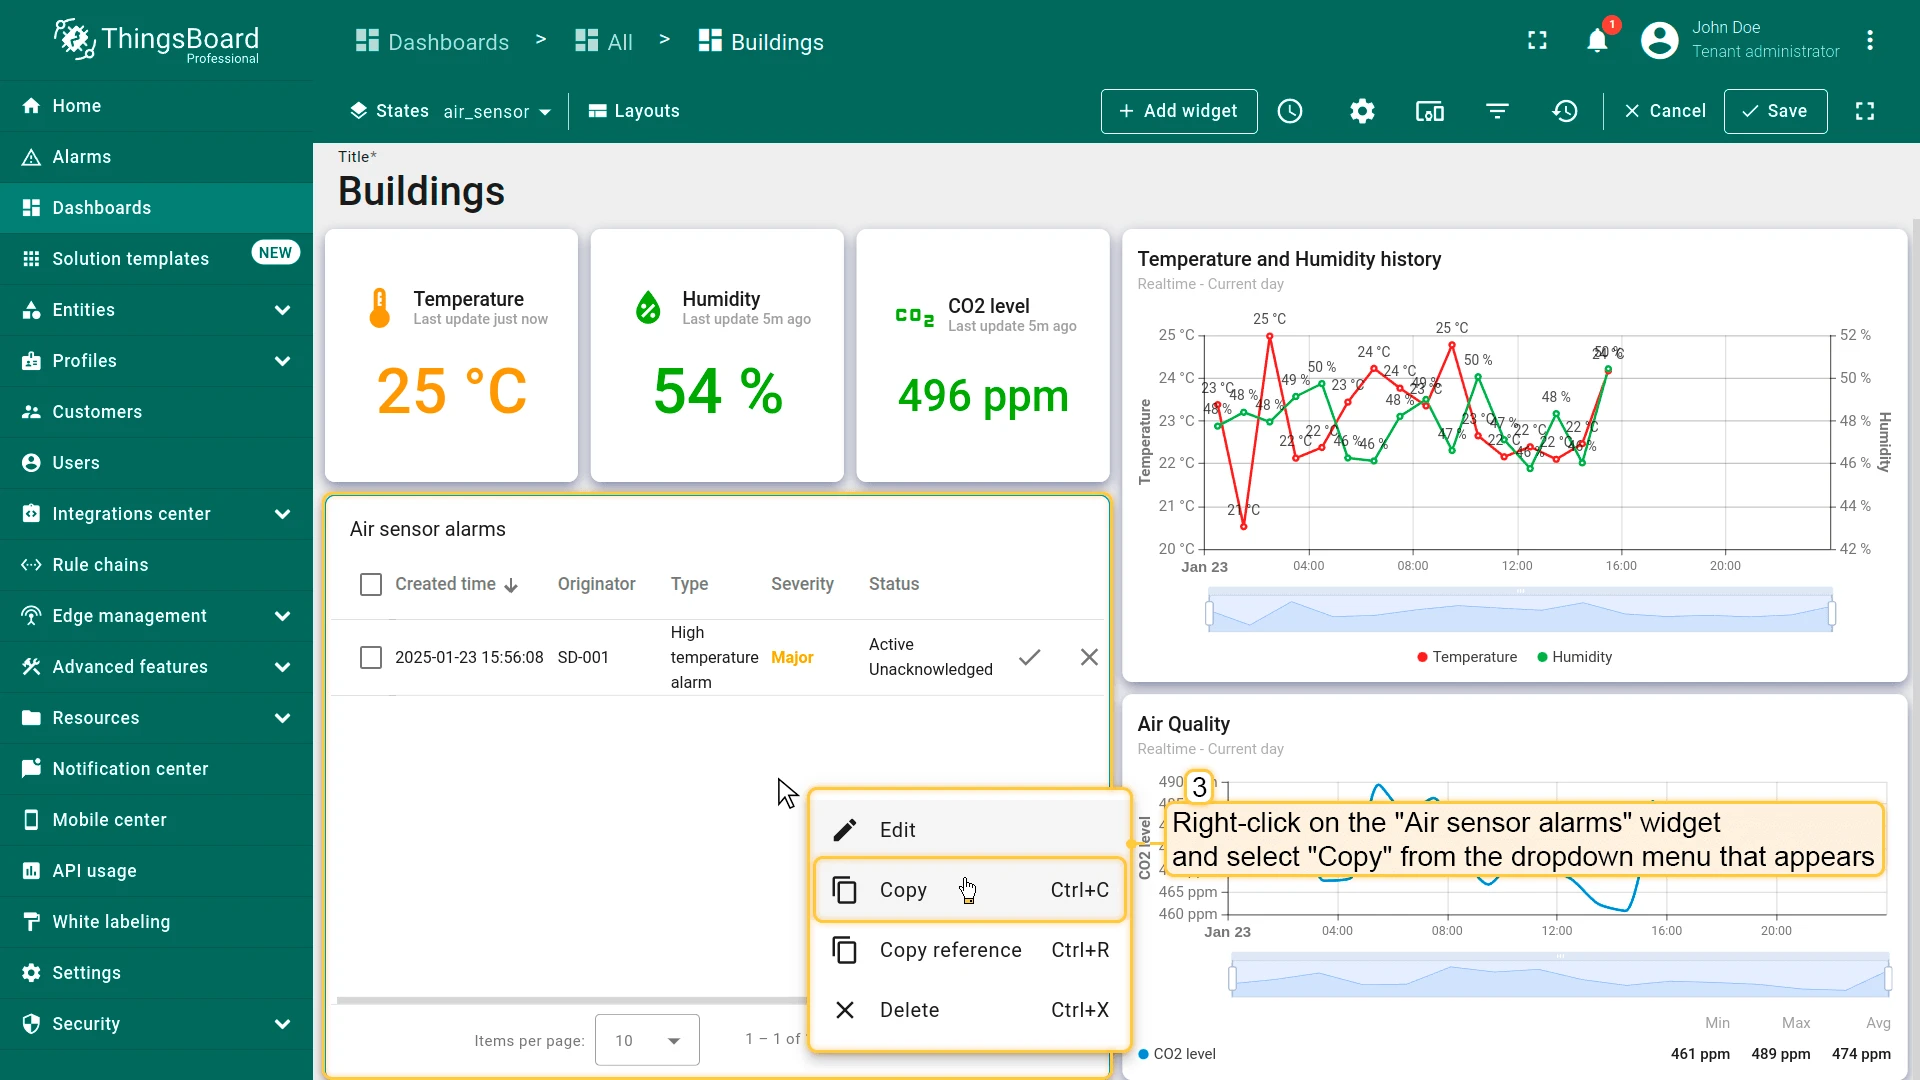
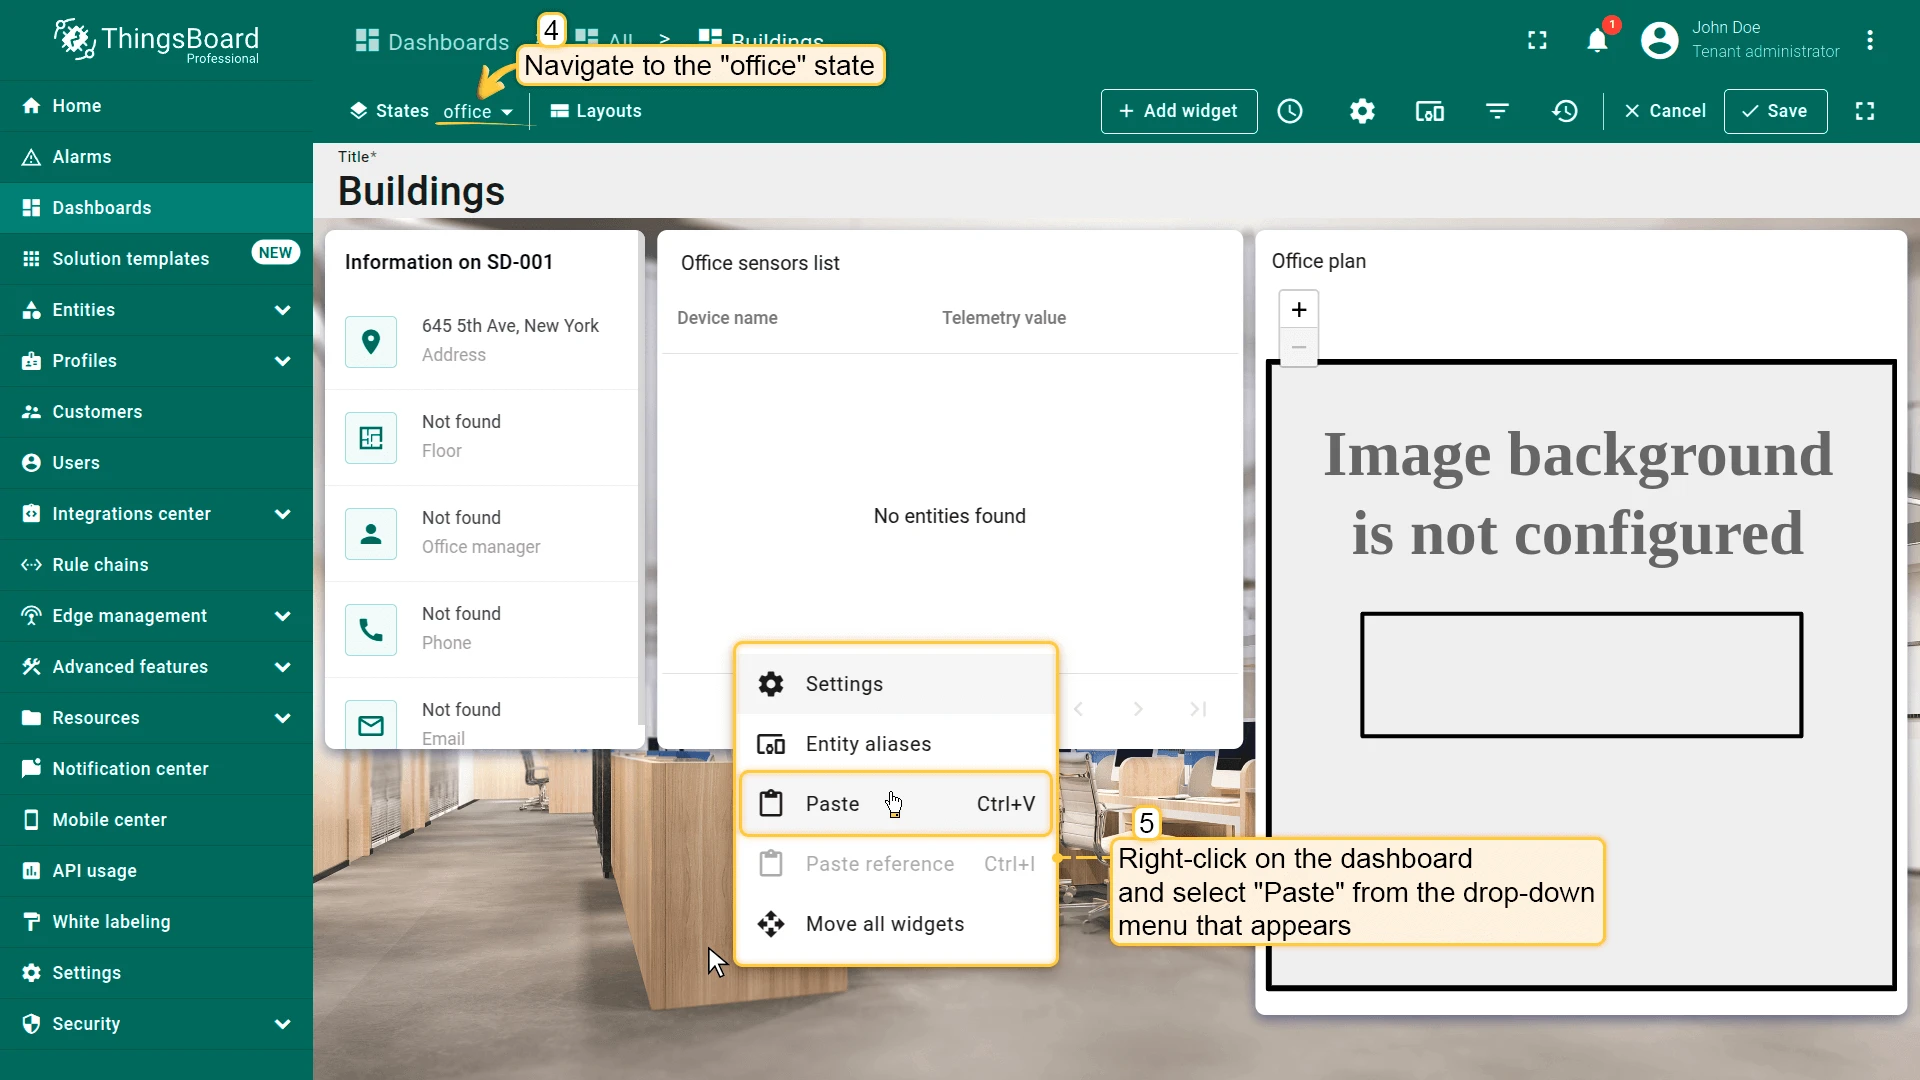
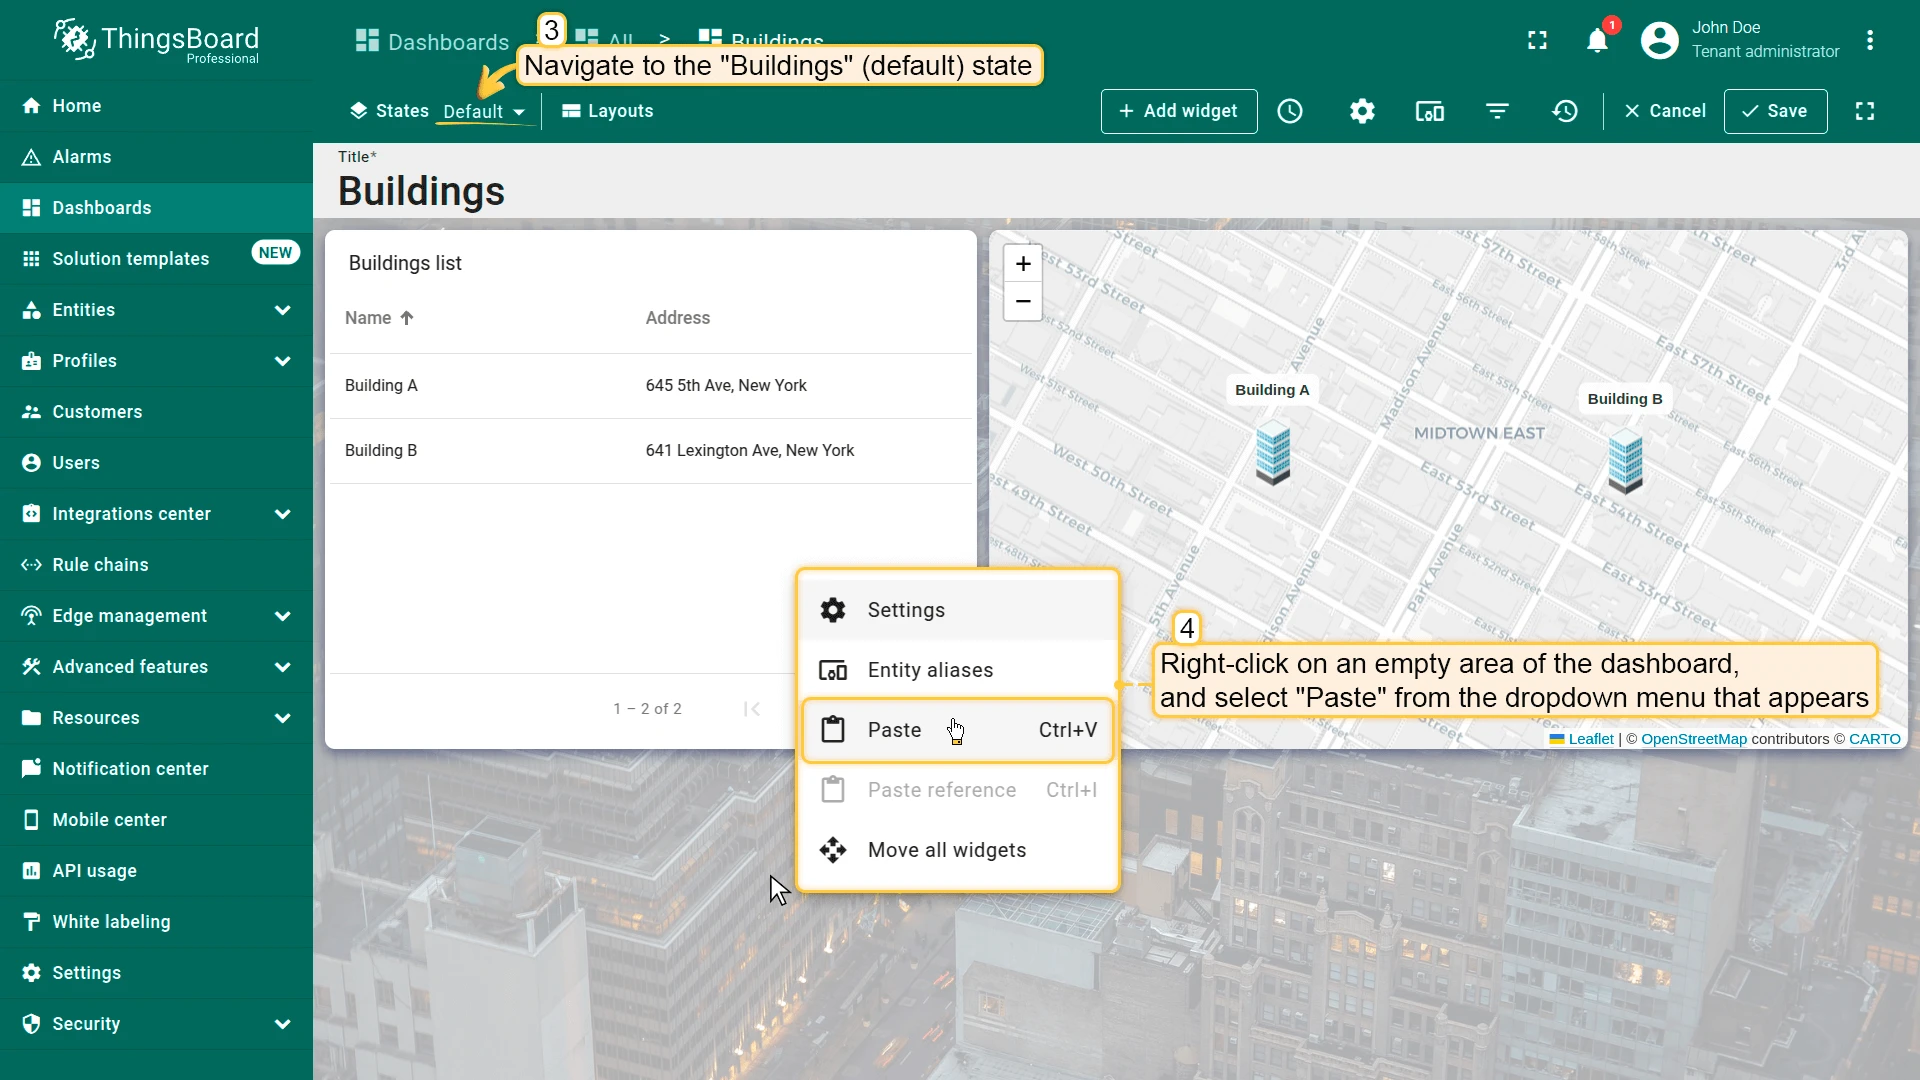
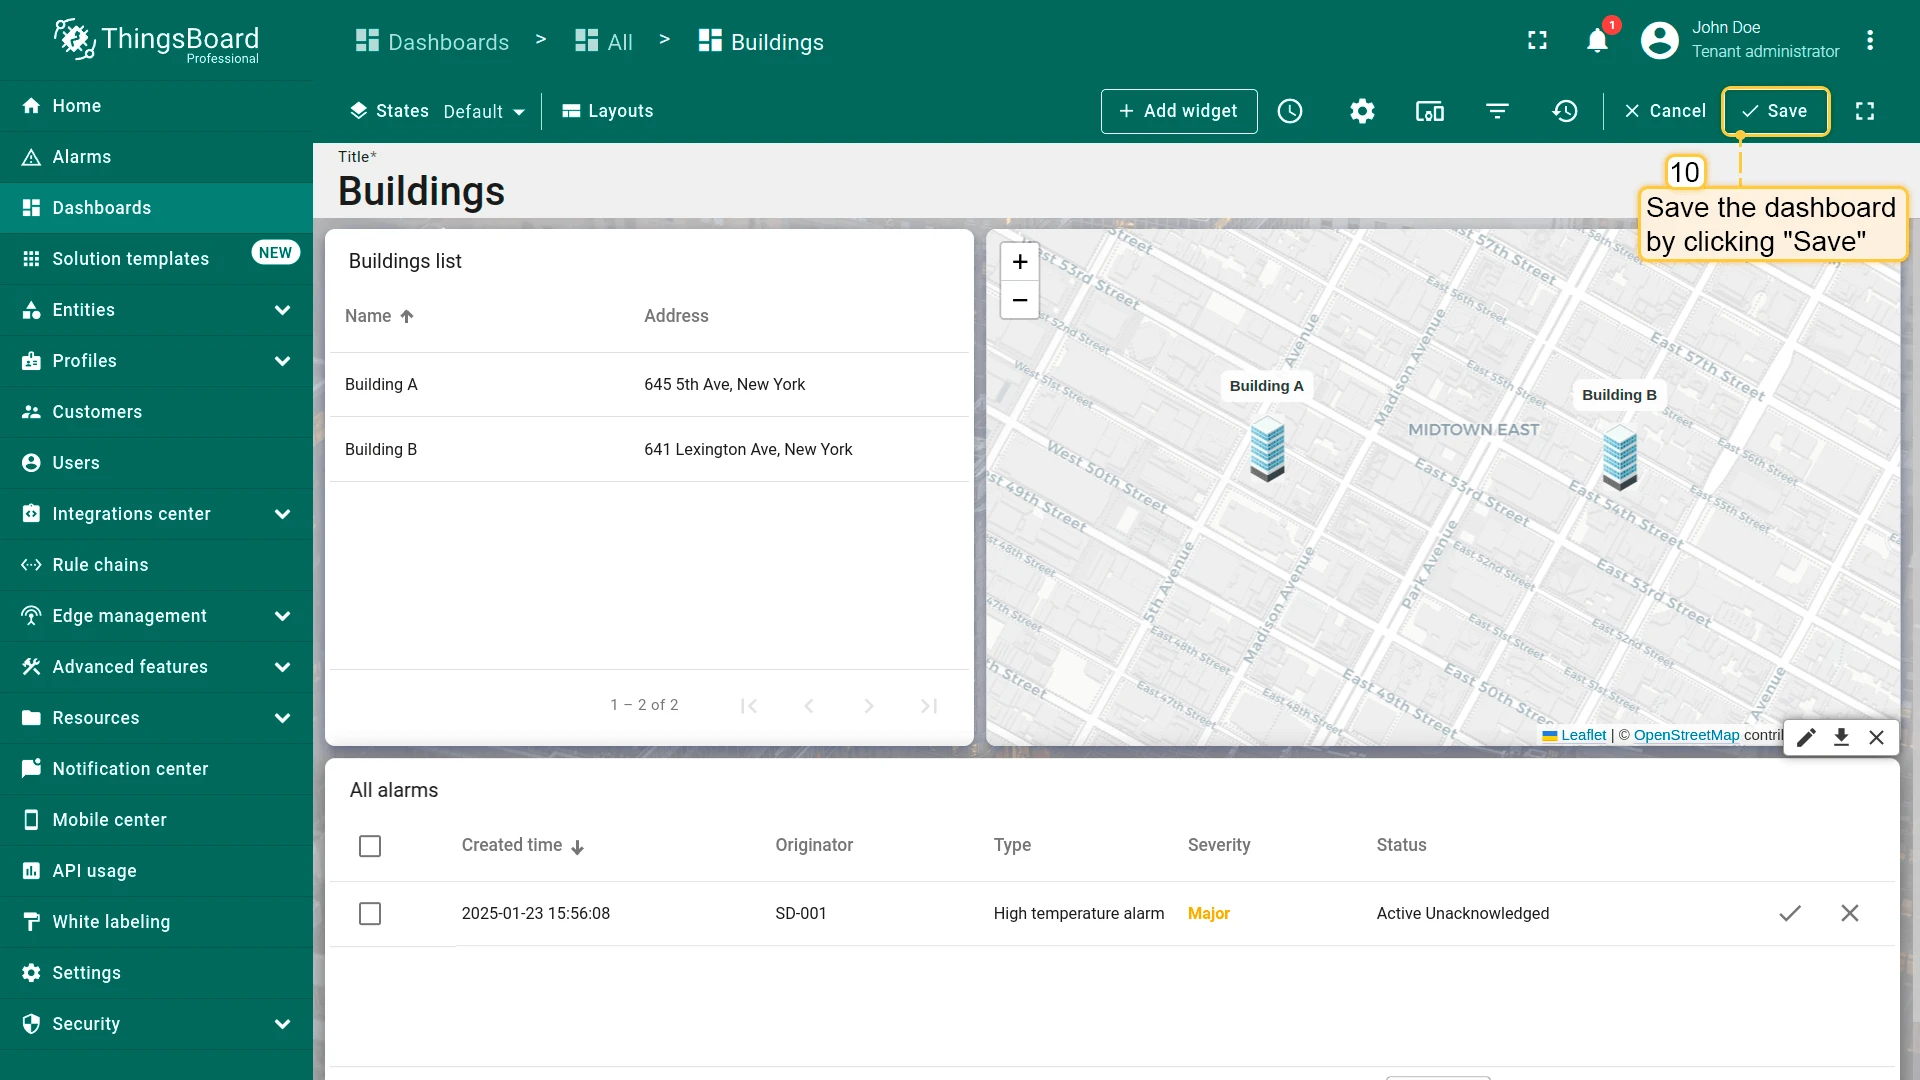
Step 4.4 Propagate Alarm Widget to All States
Section titled “Step 4.4 Propagate Alarm Widget to All States”Ensure consistent alarm visibility across the dashboard by adding the alarms widget to all relevant states, enabling centralized monitoring regardless of the selected entity level. Enable Search propagated alarms so parent-level widgets show alarms from all child entities in the hierarchy.
Office State
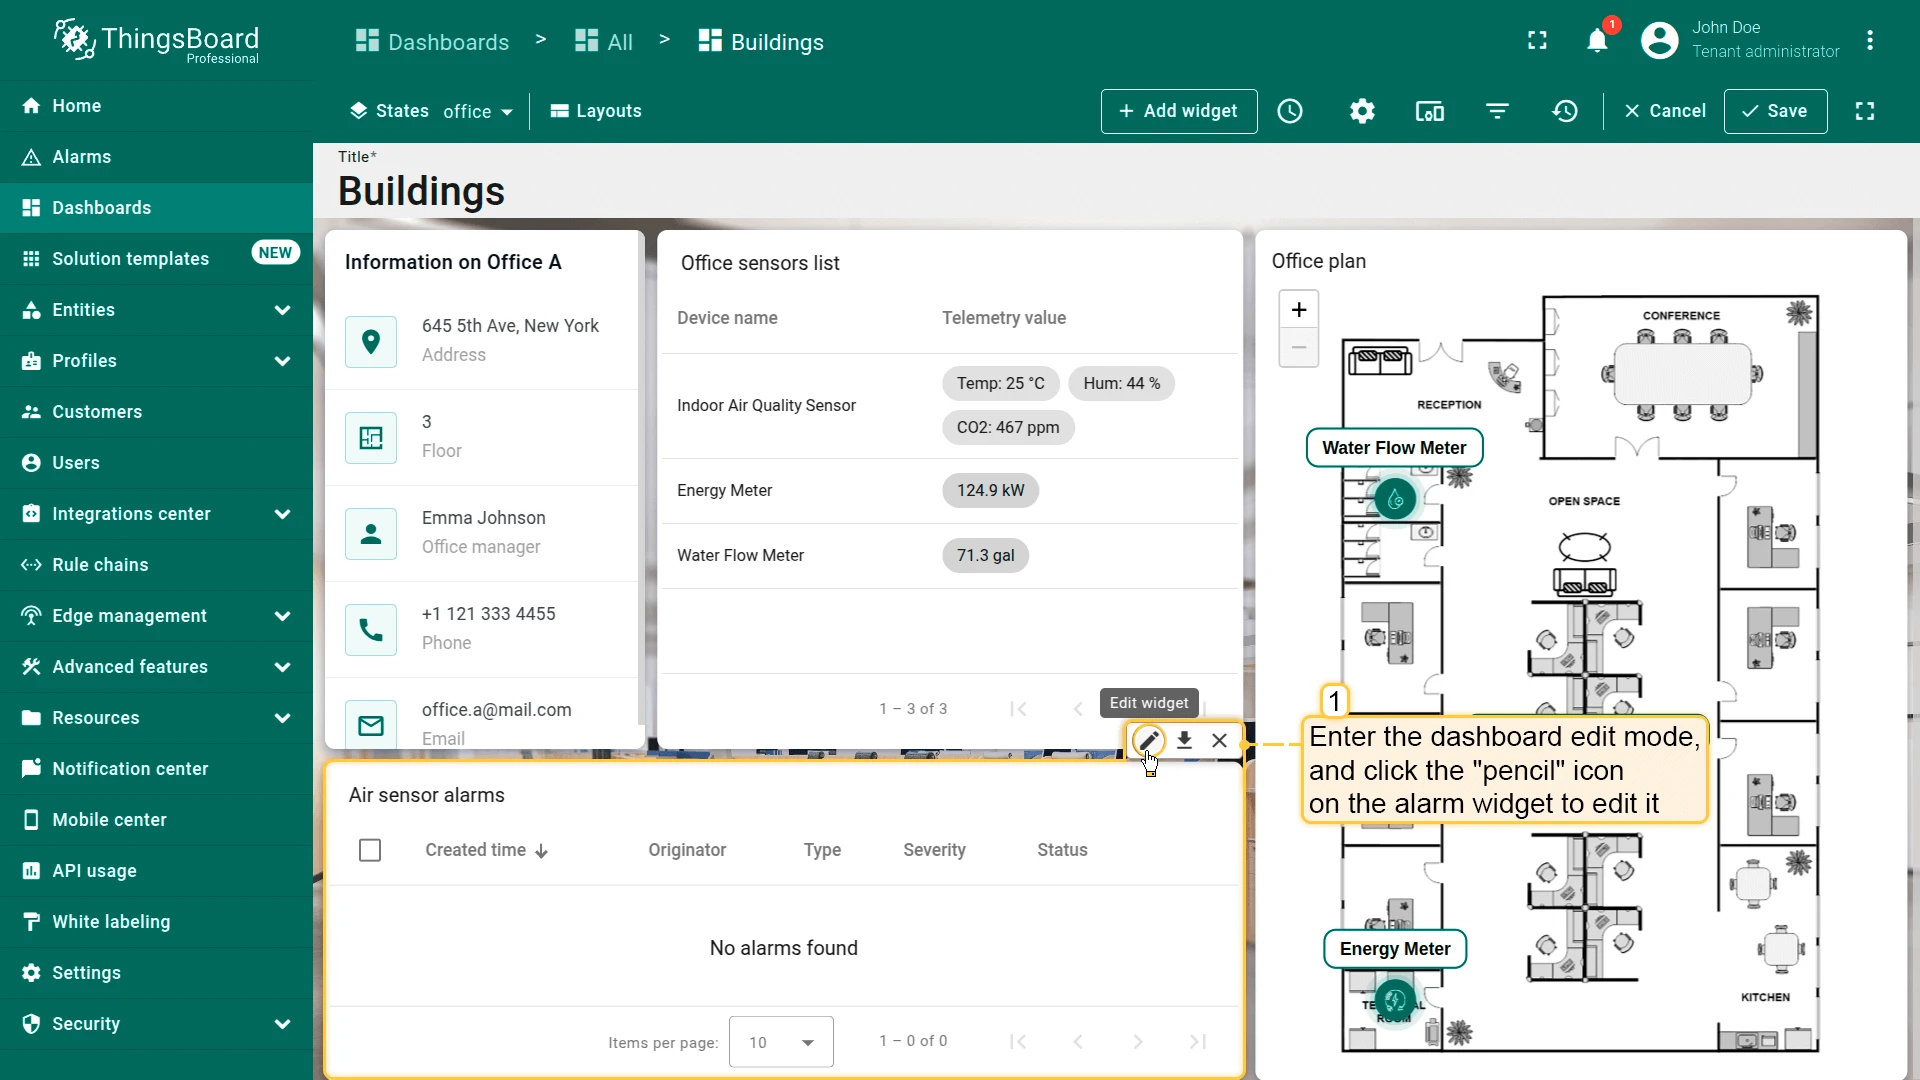
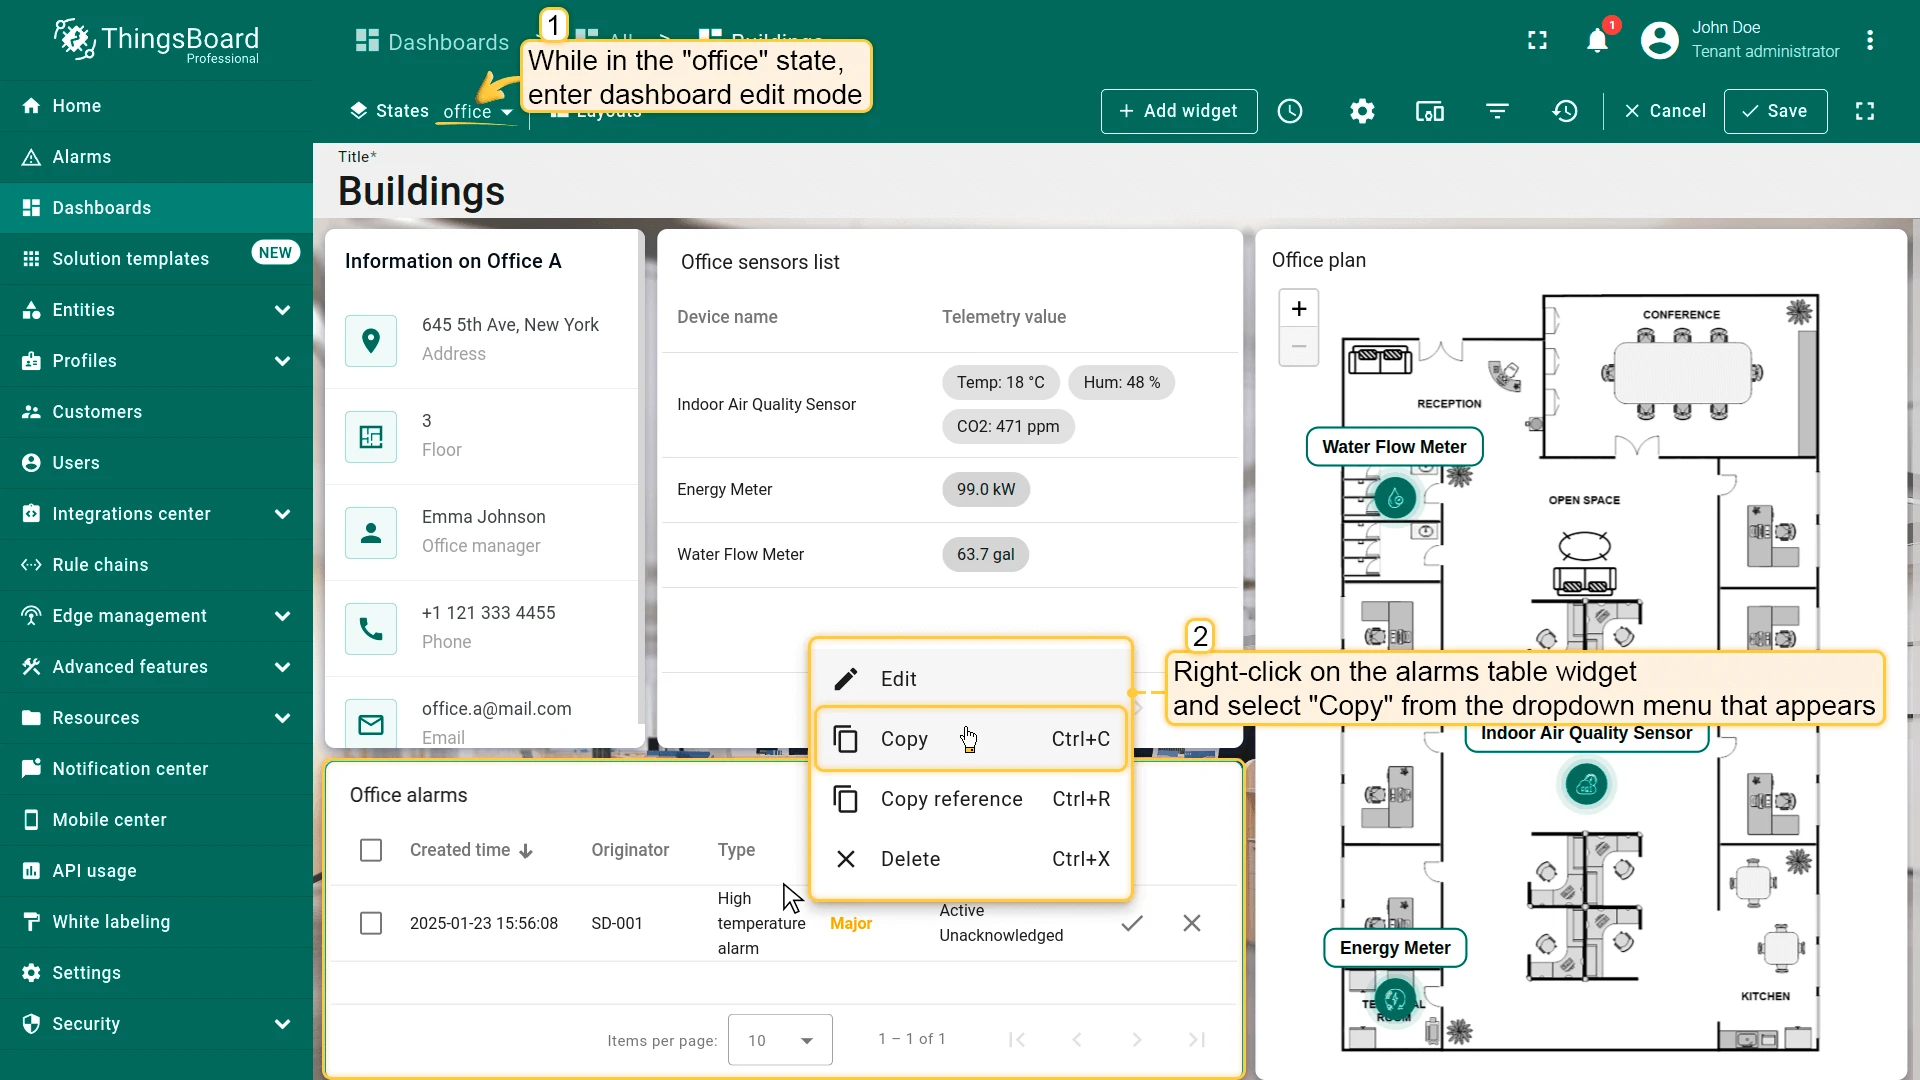
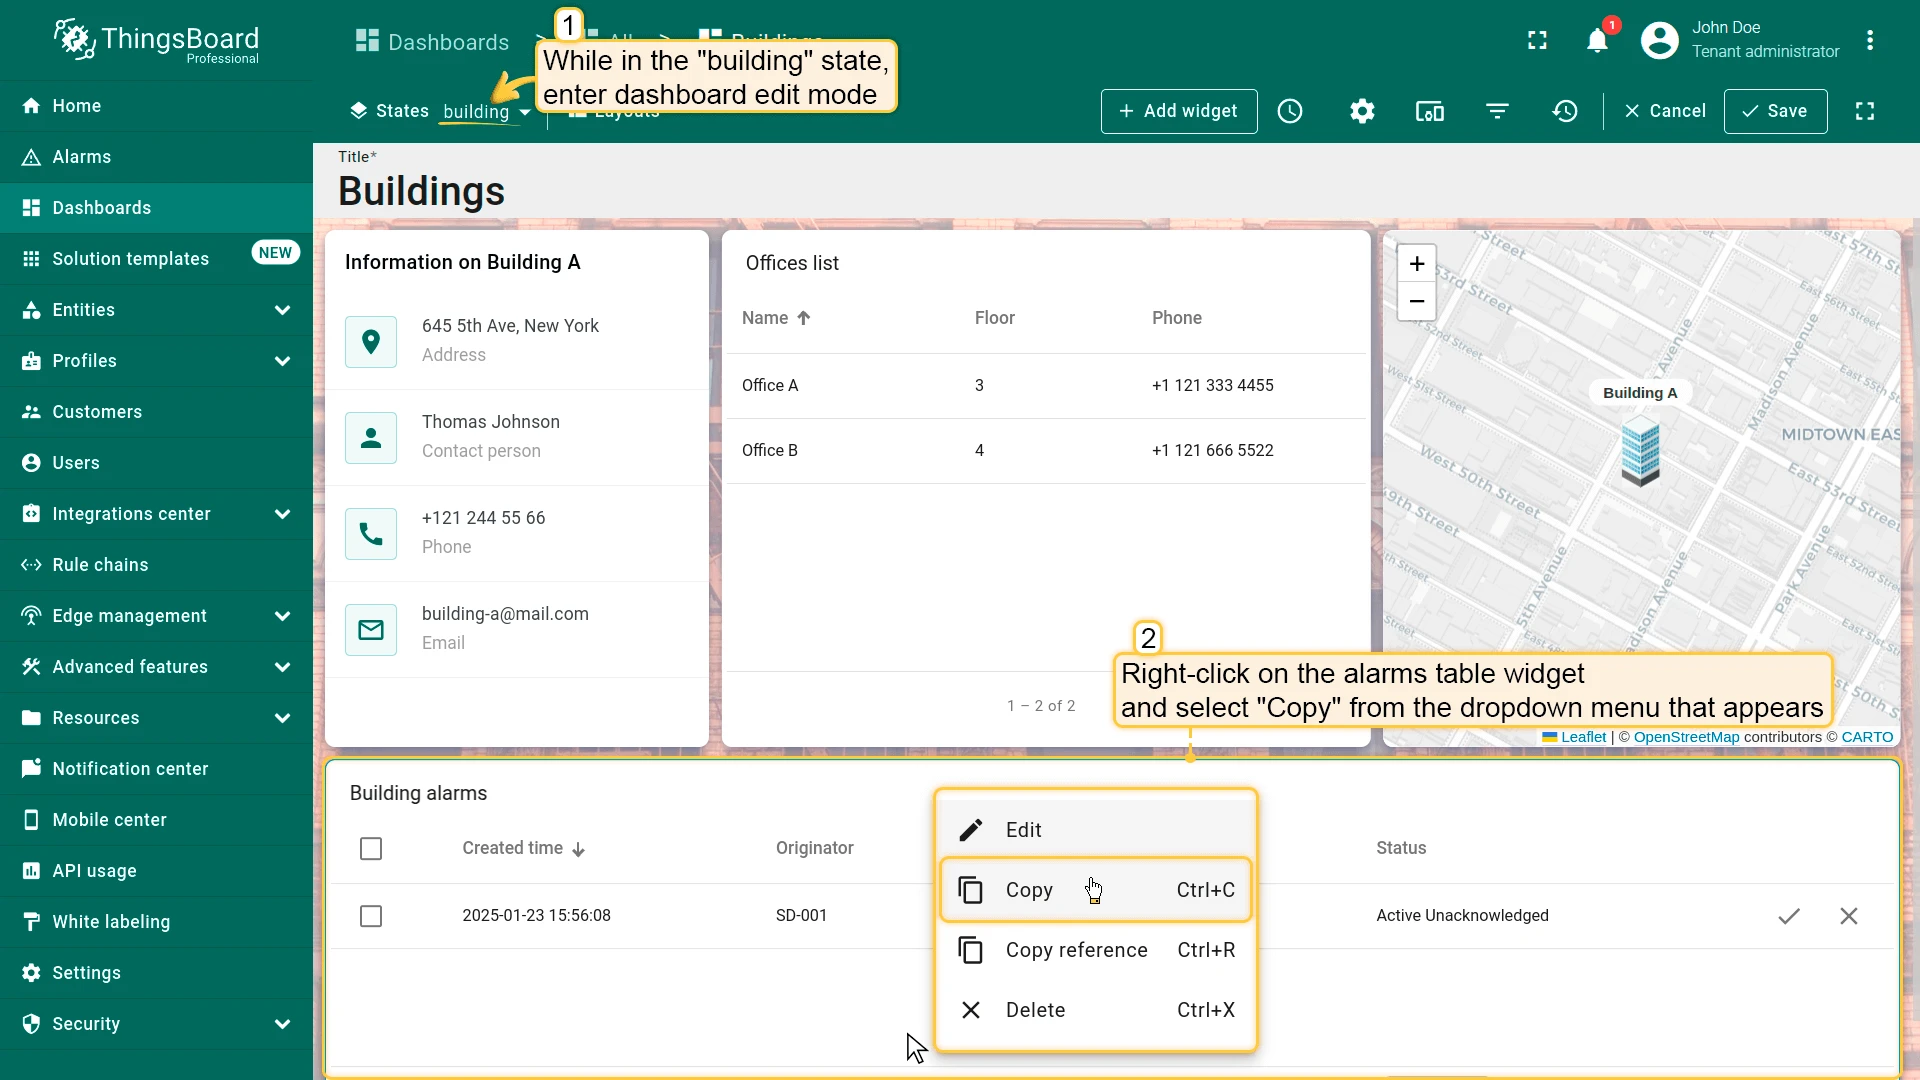
Section titled “Office State”- In the air_sensor state (edit mode), right-click the Air sensor alarms widget and select Copy.
- Navigate to the office state, right-click an empty area, and select Paste.
- Place and resize the widget.
- Click the pencil icon on the pasted widget to edit it.
- Change the alarm source alias to Office sensors (the Device search query alias created in Lesson 2).
- Enable Search propagated alarms.
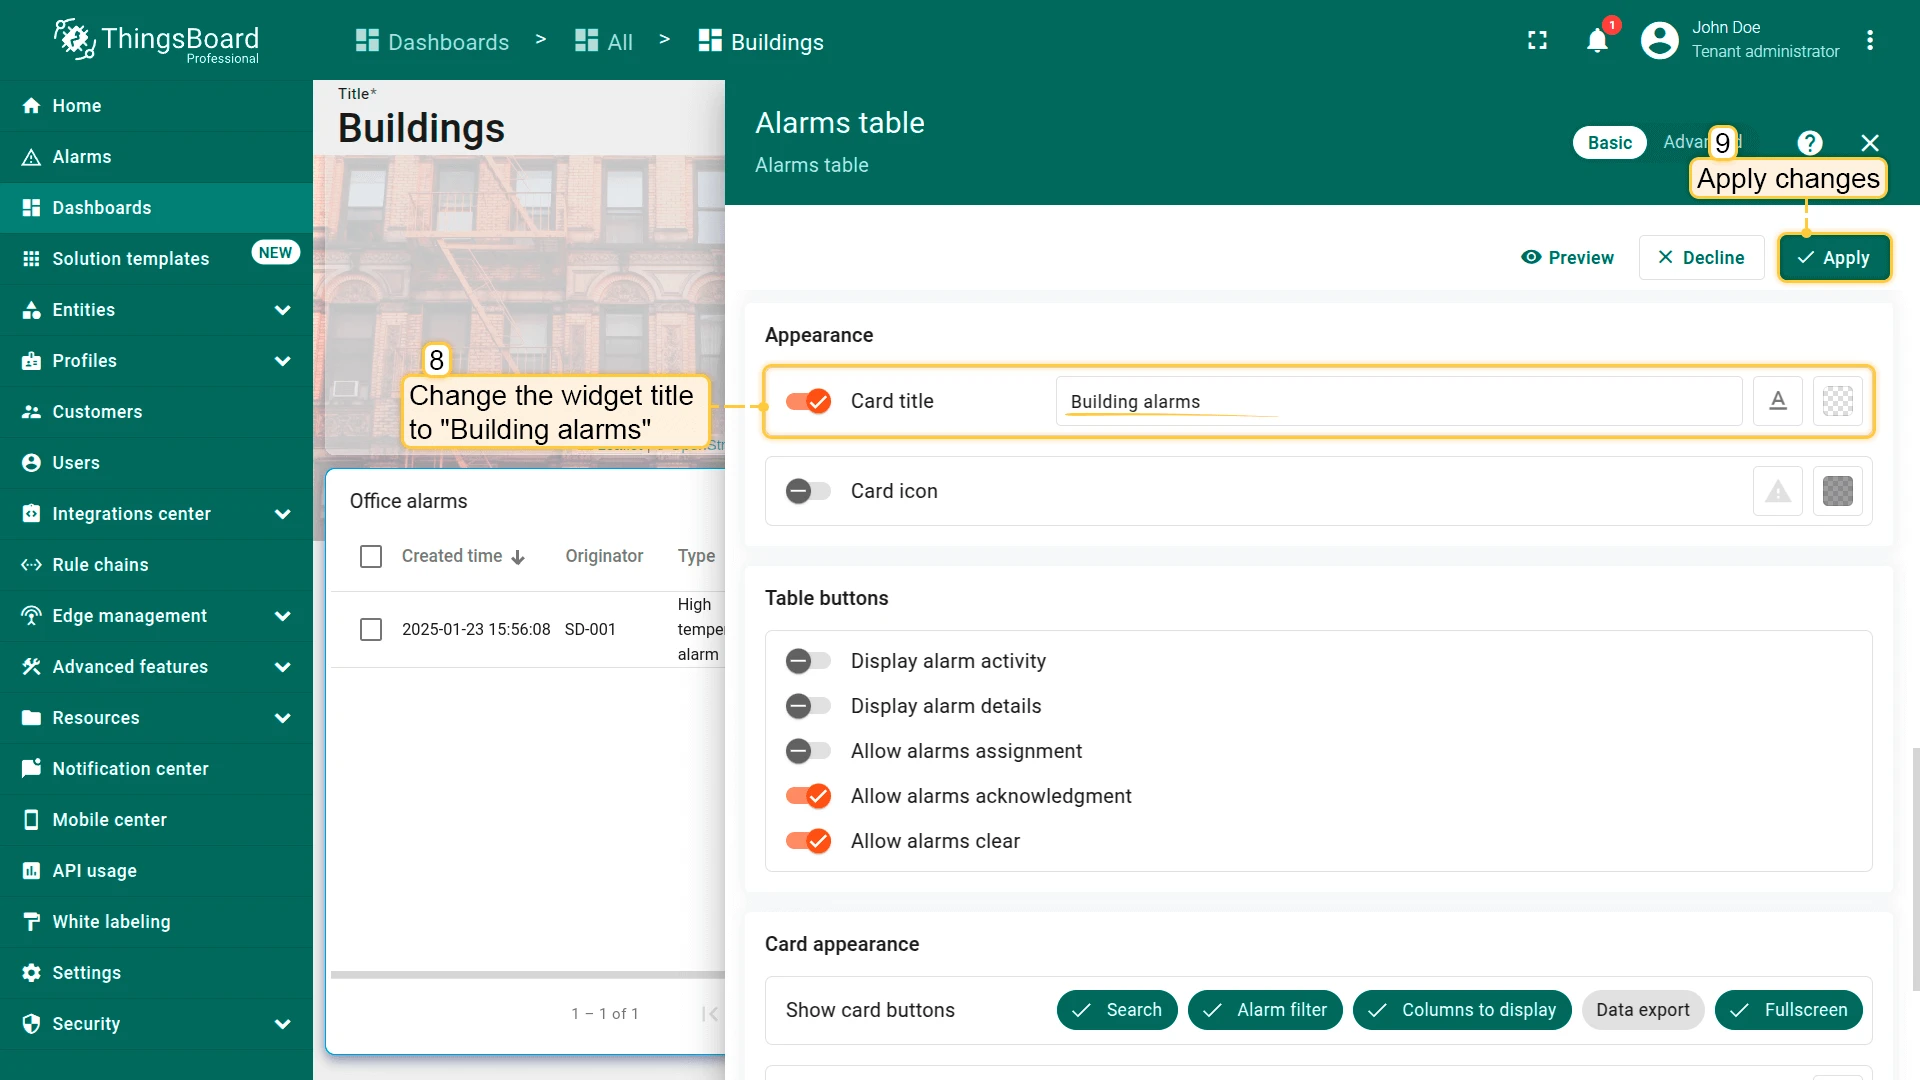
- Change the widget title to Office alarms.
- Click Apply, then save the dashboard.

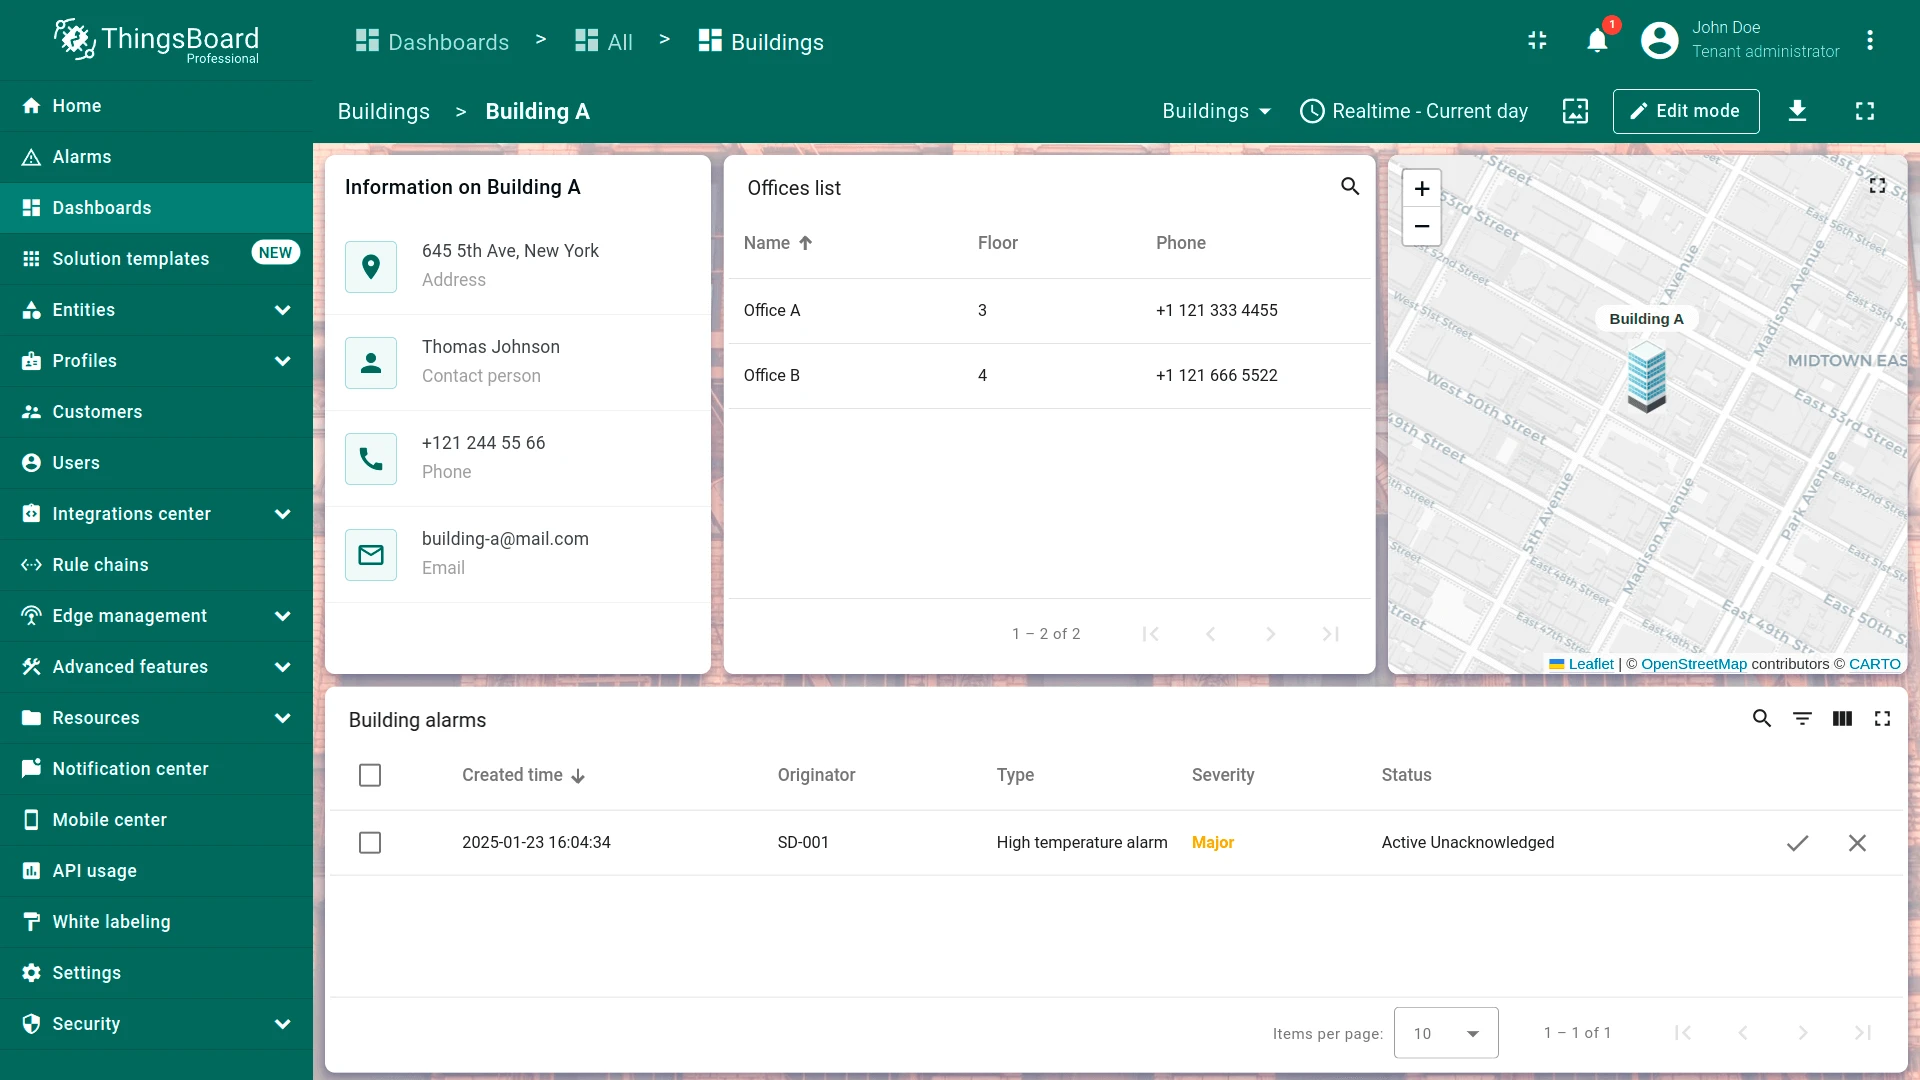
Building State
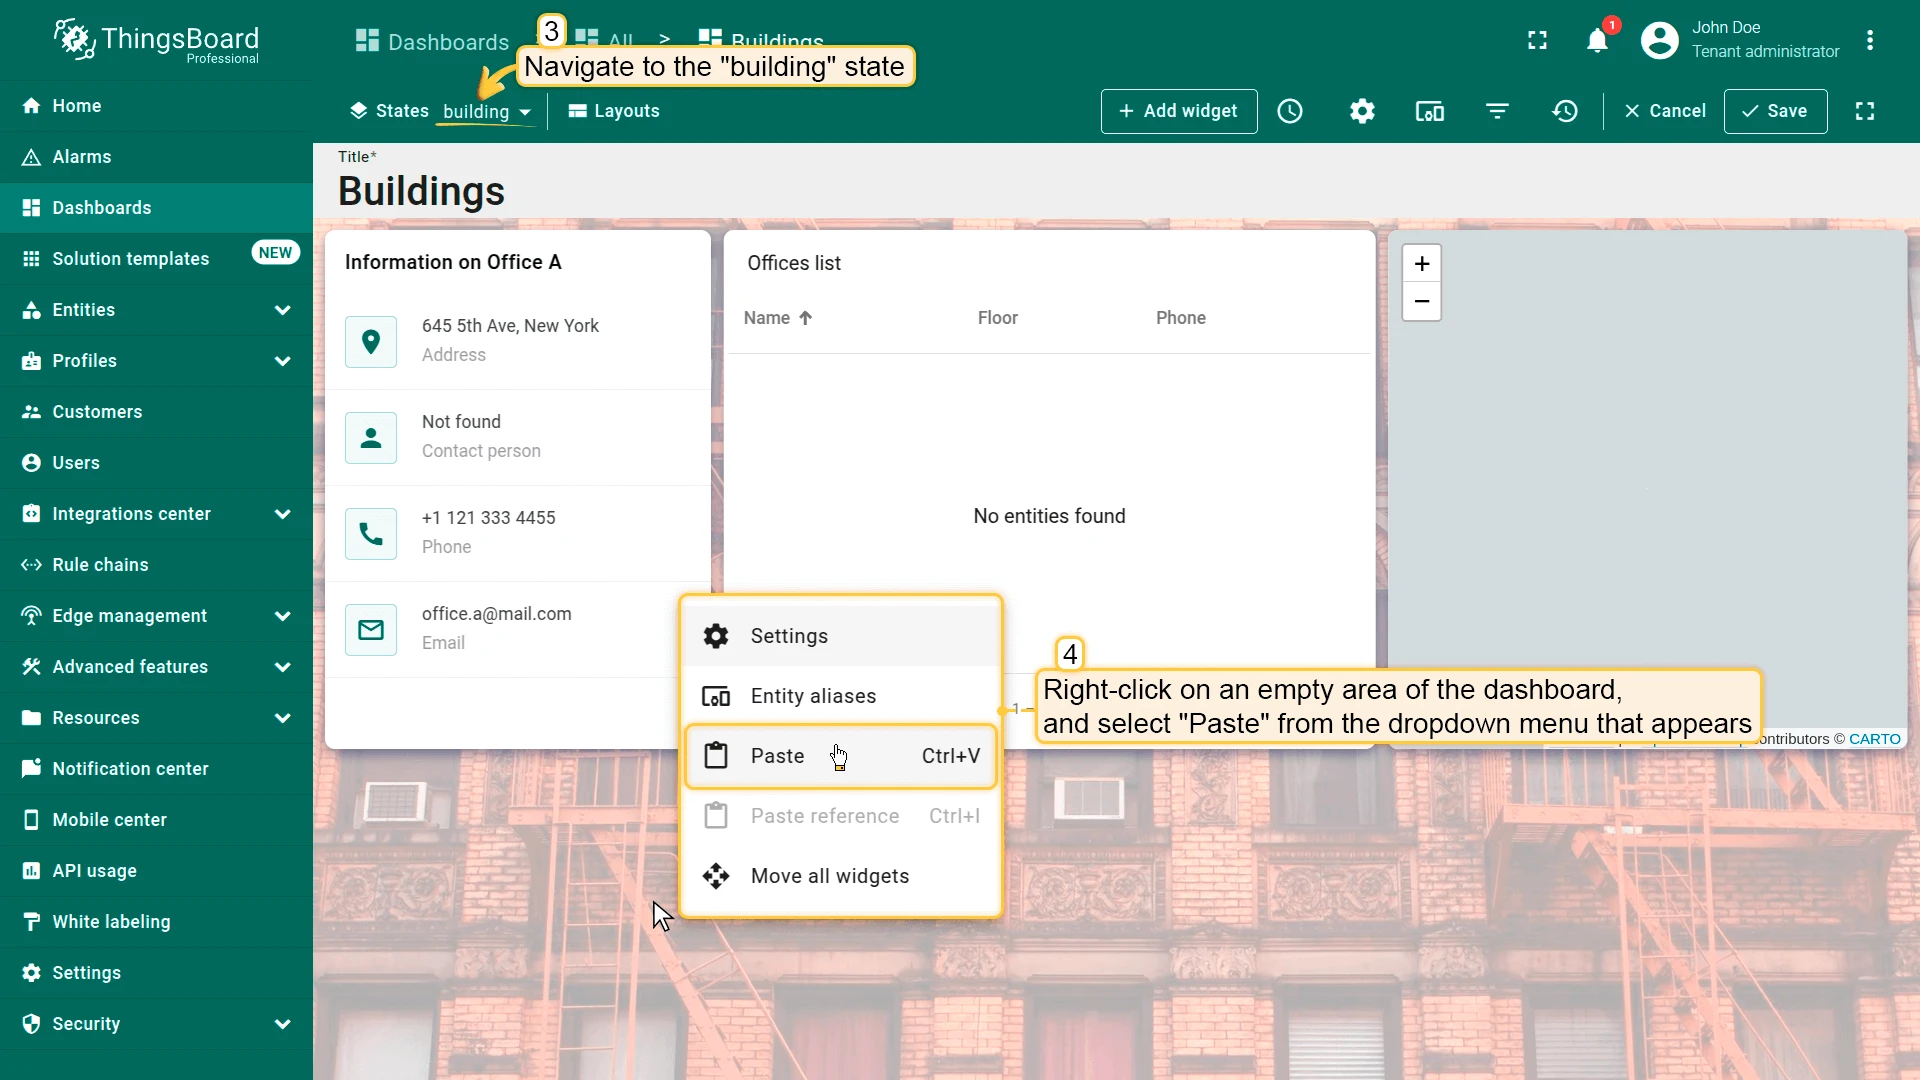
Section titled “Building State”- In the office state (edit mode), right-click the Office alarms widget and select Copy.
- Navigate to the building state, right-click, and select Paste.
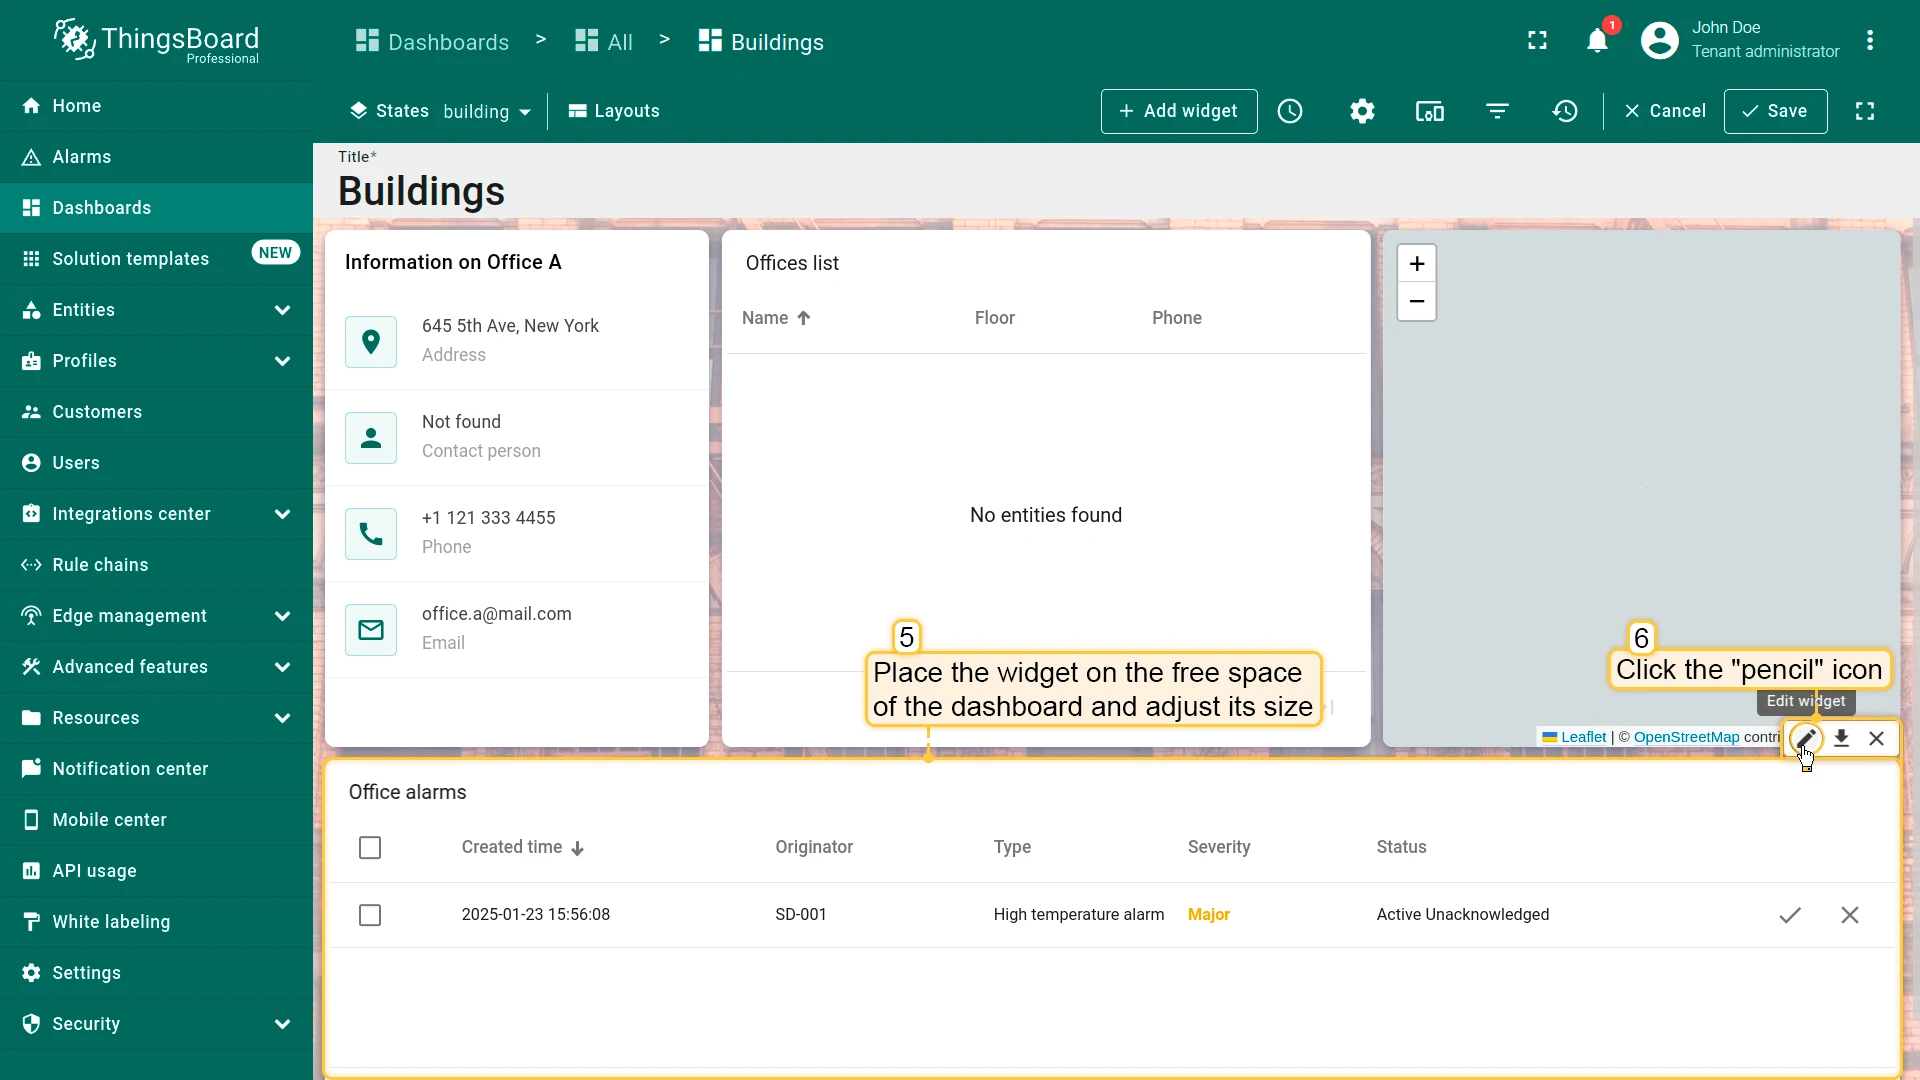
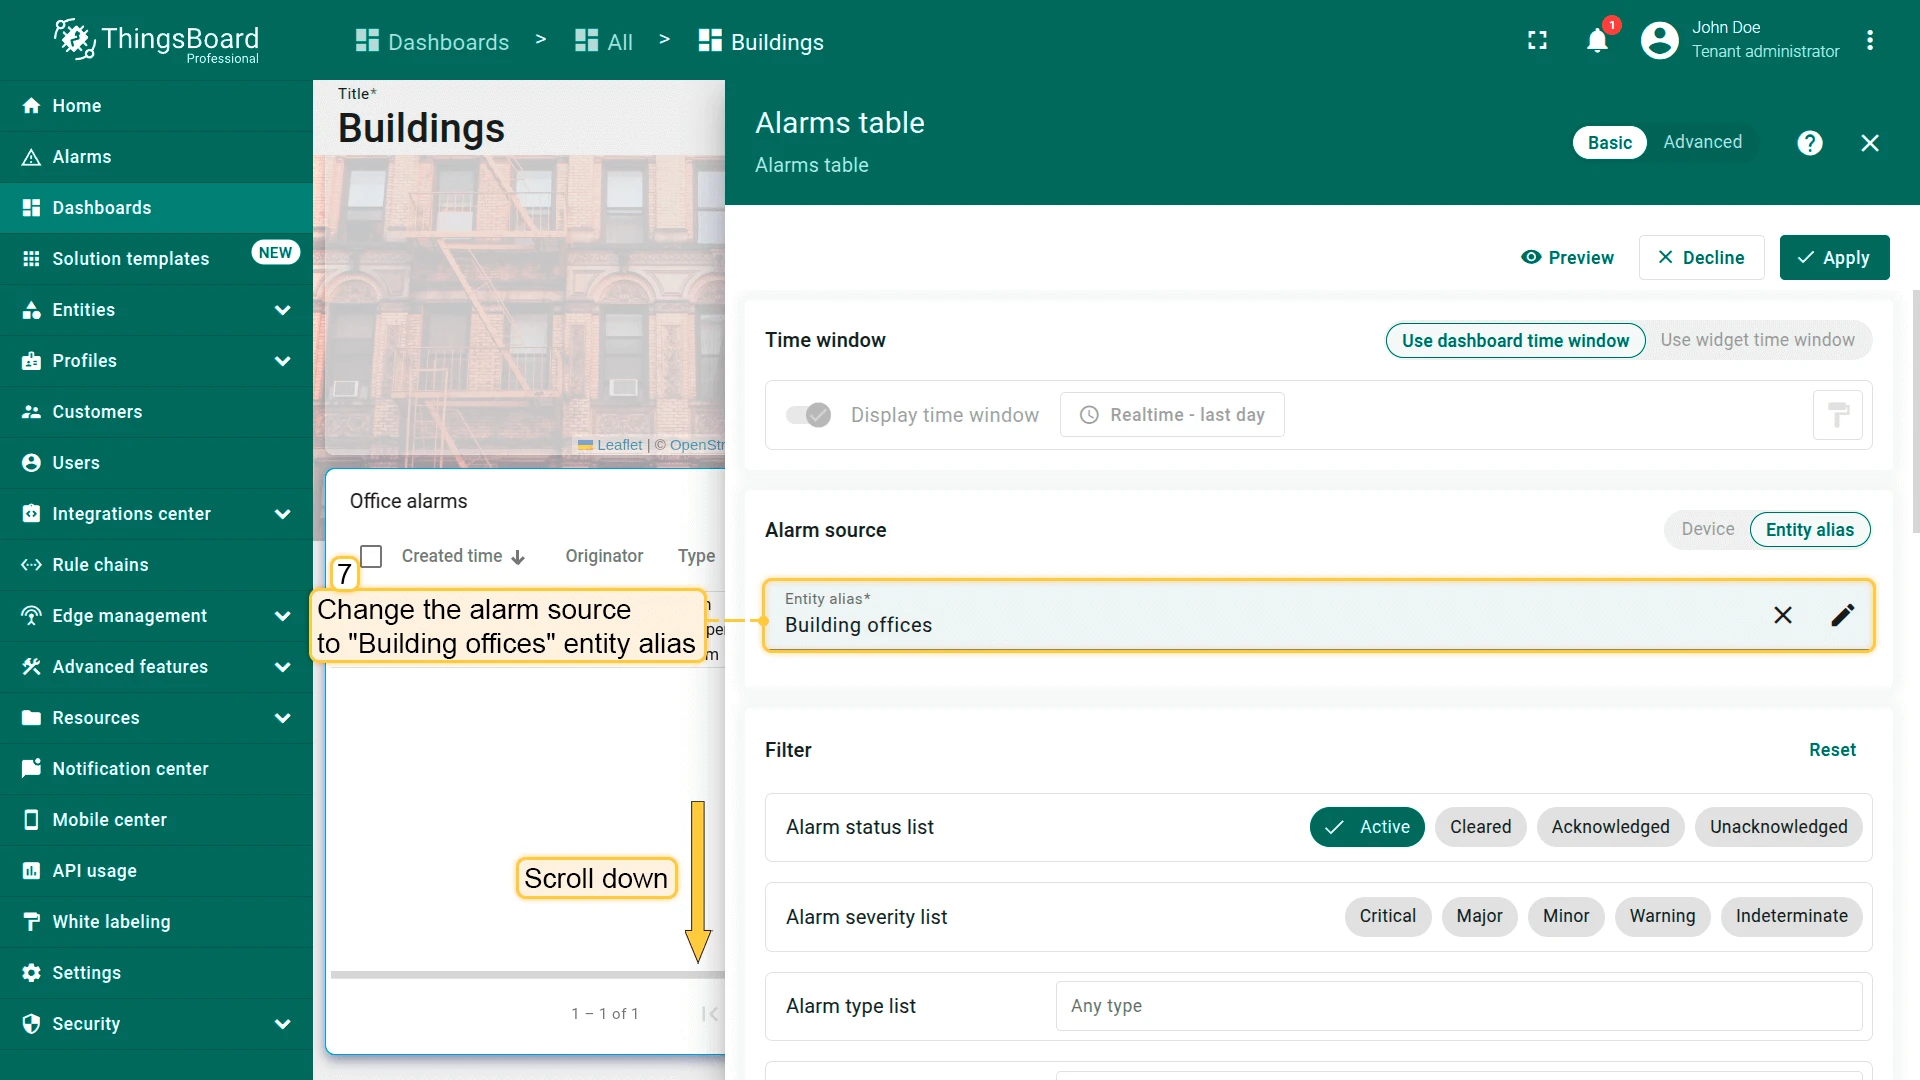
- Place and resize the widget, then click the pencil icon.
- Change the alarm source alias to Building offices.
- Verify Search propagated alarms is still enabled.
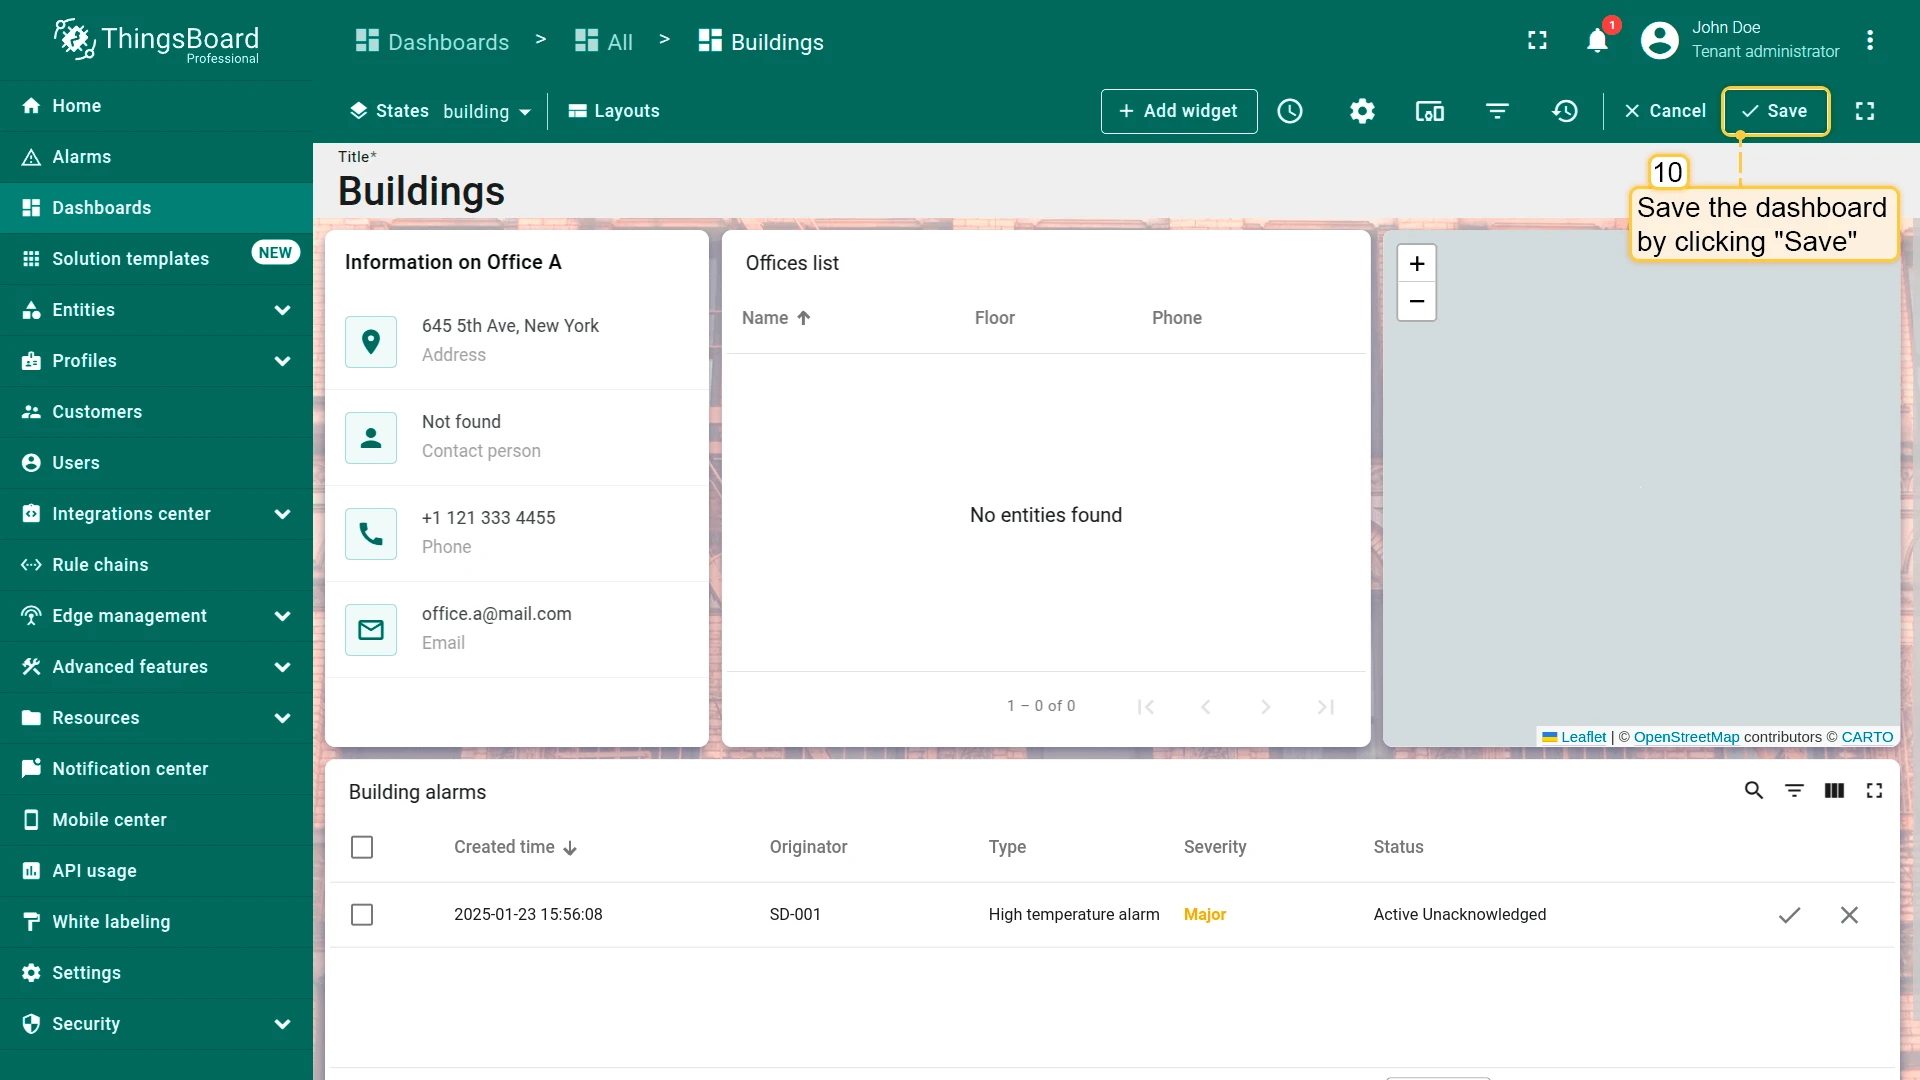
- Change the title to Building alarms.
- Click Apply, then save the dashboard.
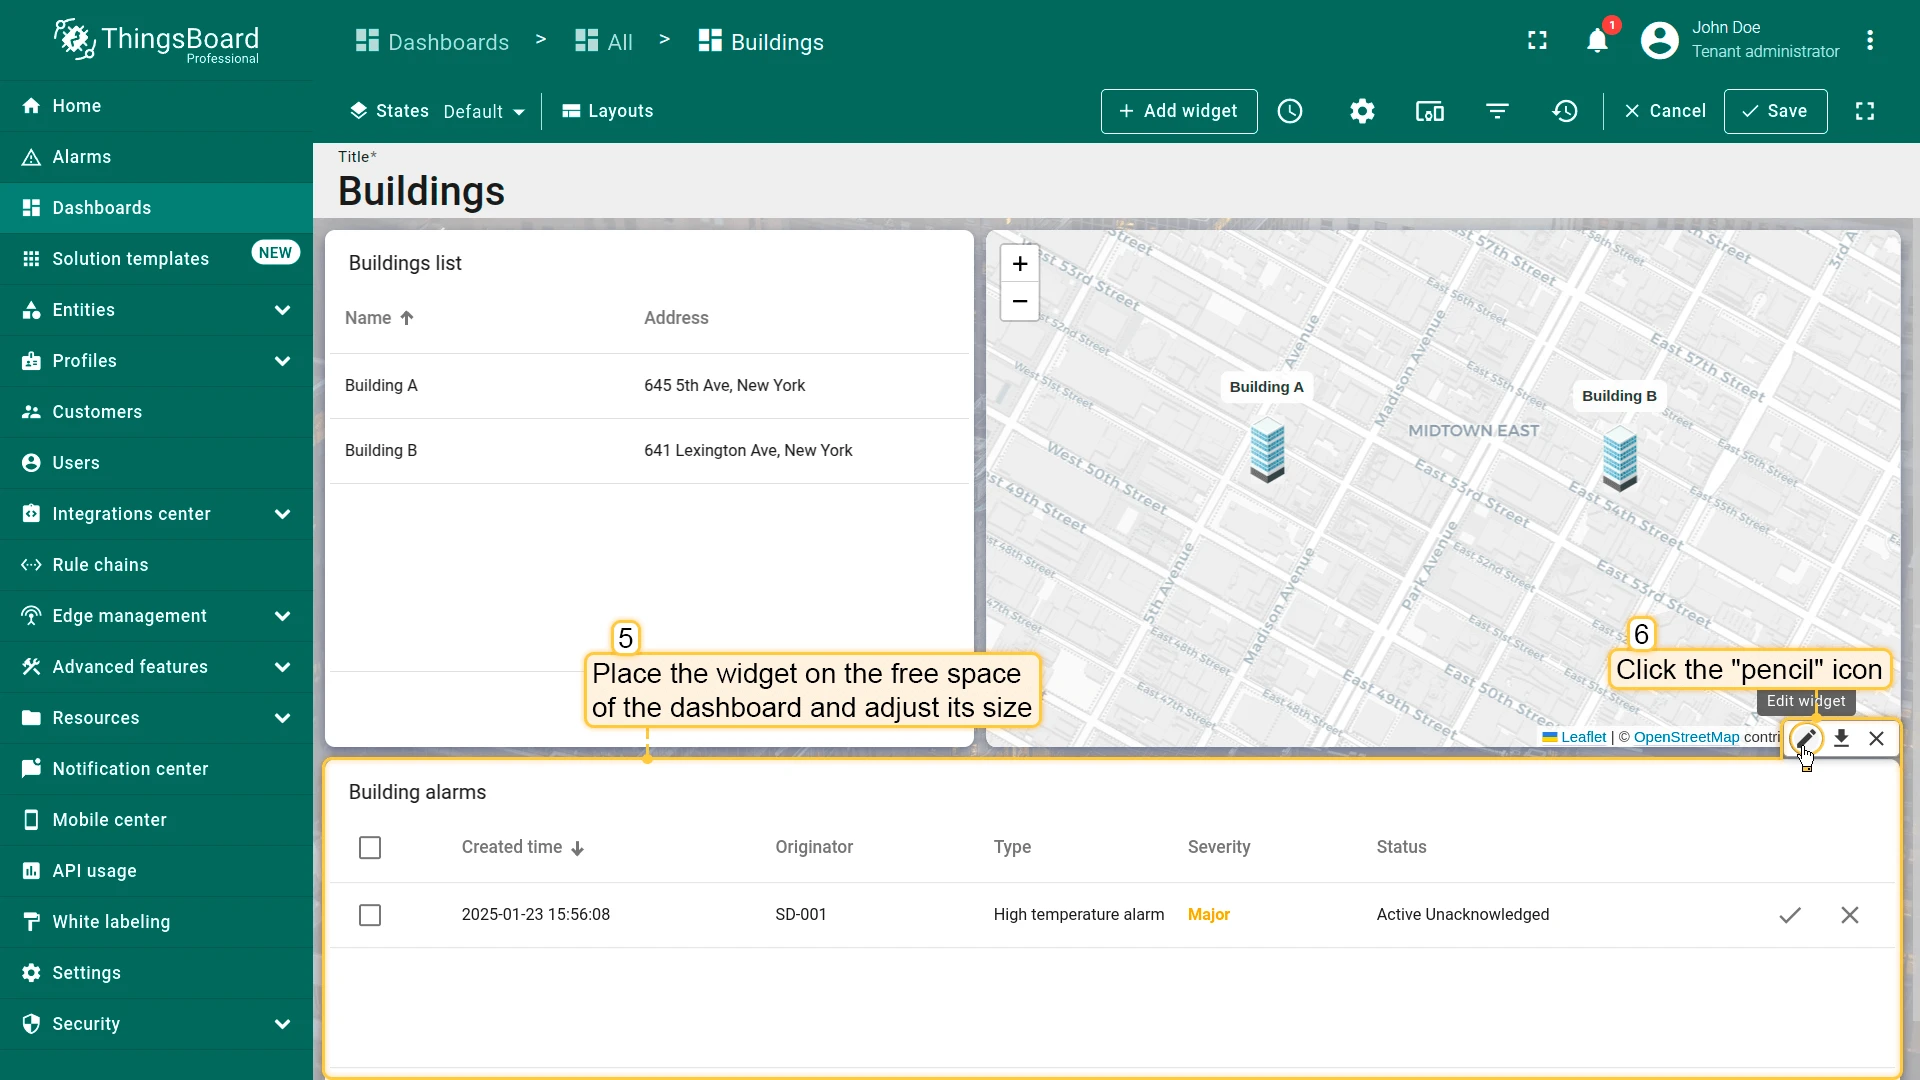
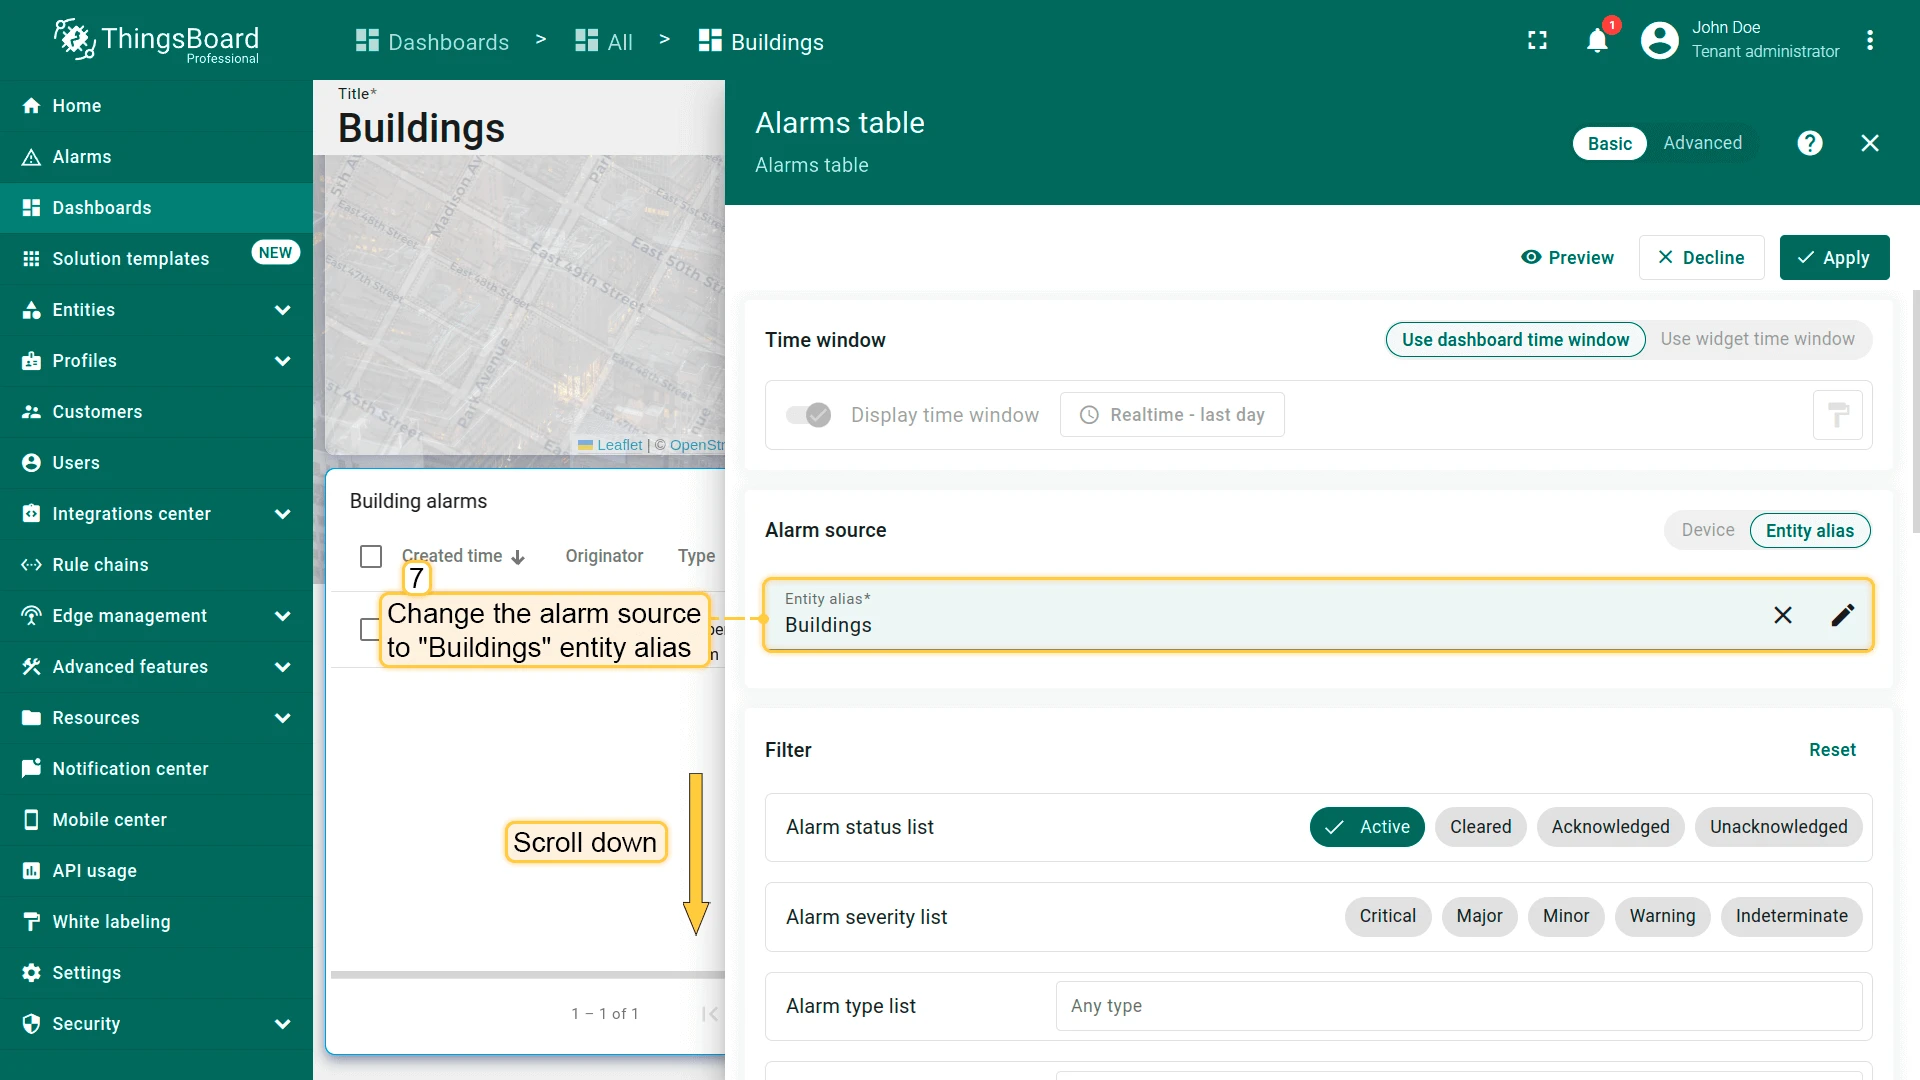
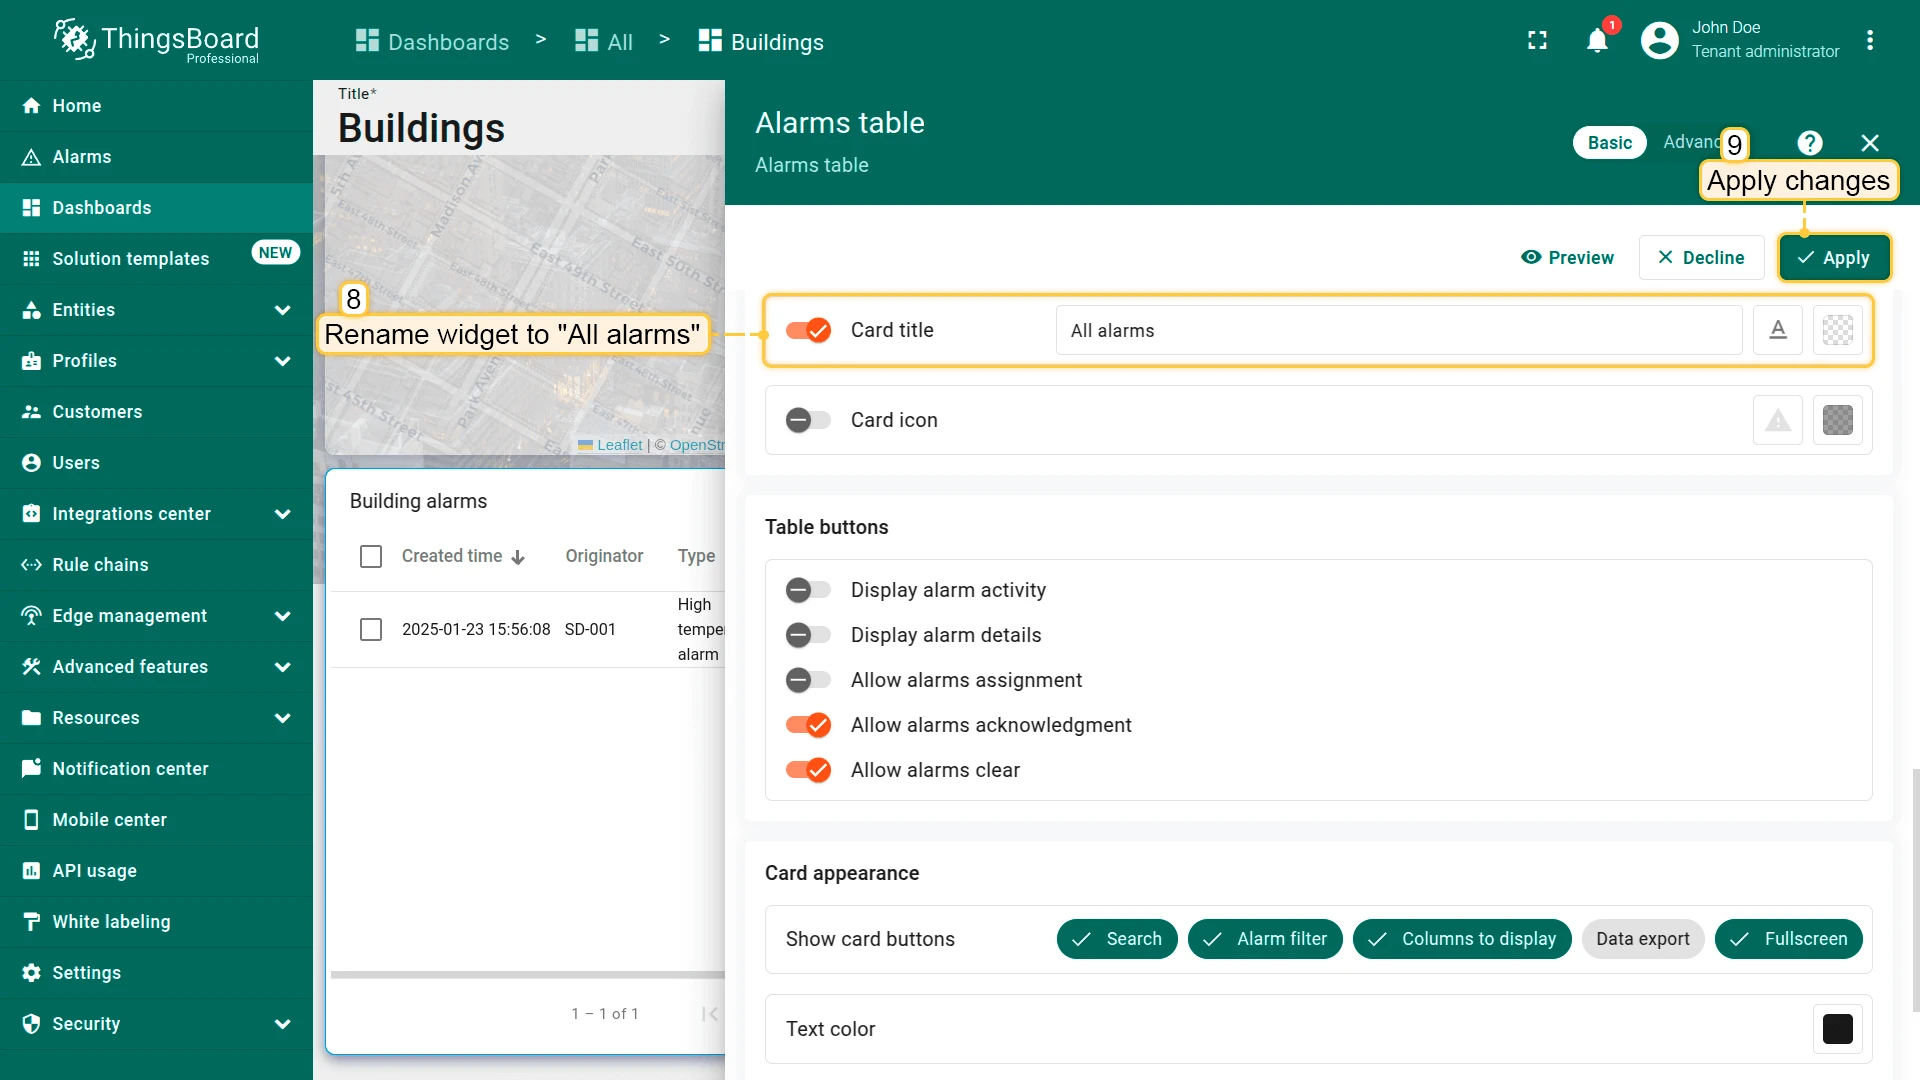
Default (Buildings) State
Section titled “Default (Buildings) State”- In the office state (edit mode), copy the alarm widget again.
- Navigate to the default Buildings state and paste it.
- Place and resize, then click the pencil icon.
- Change the alarm source alias to Buildings.
- Verify Search propagated alarms is enabled.
- Change the title to All alarms.
- Click Apply, then save the dashboard.
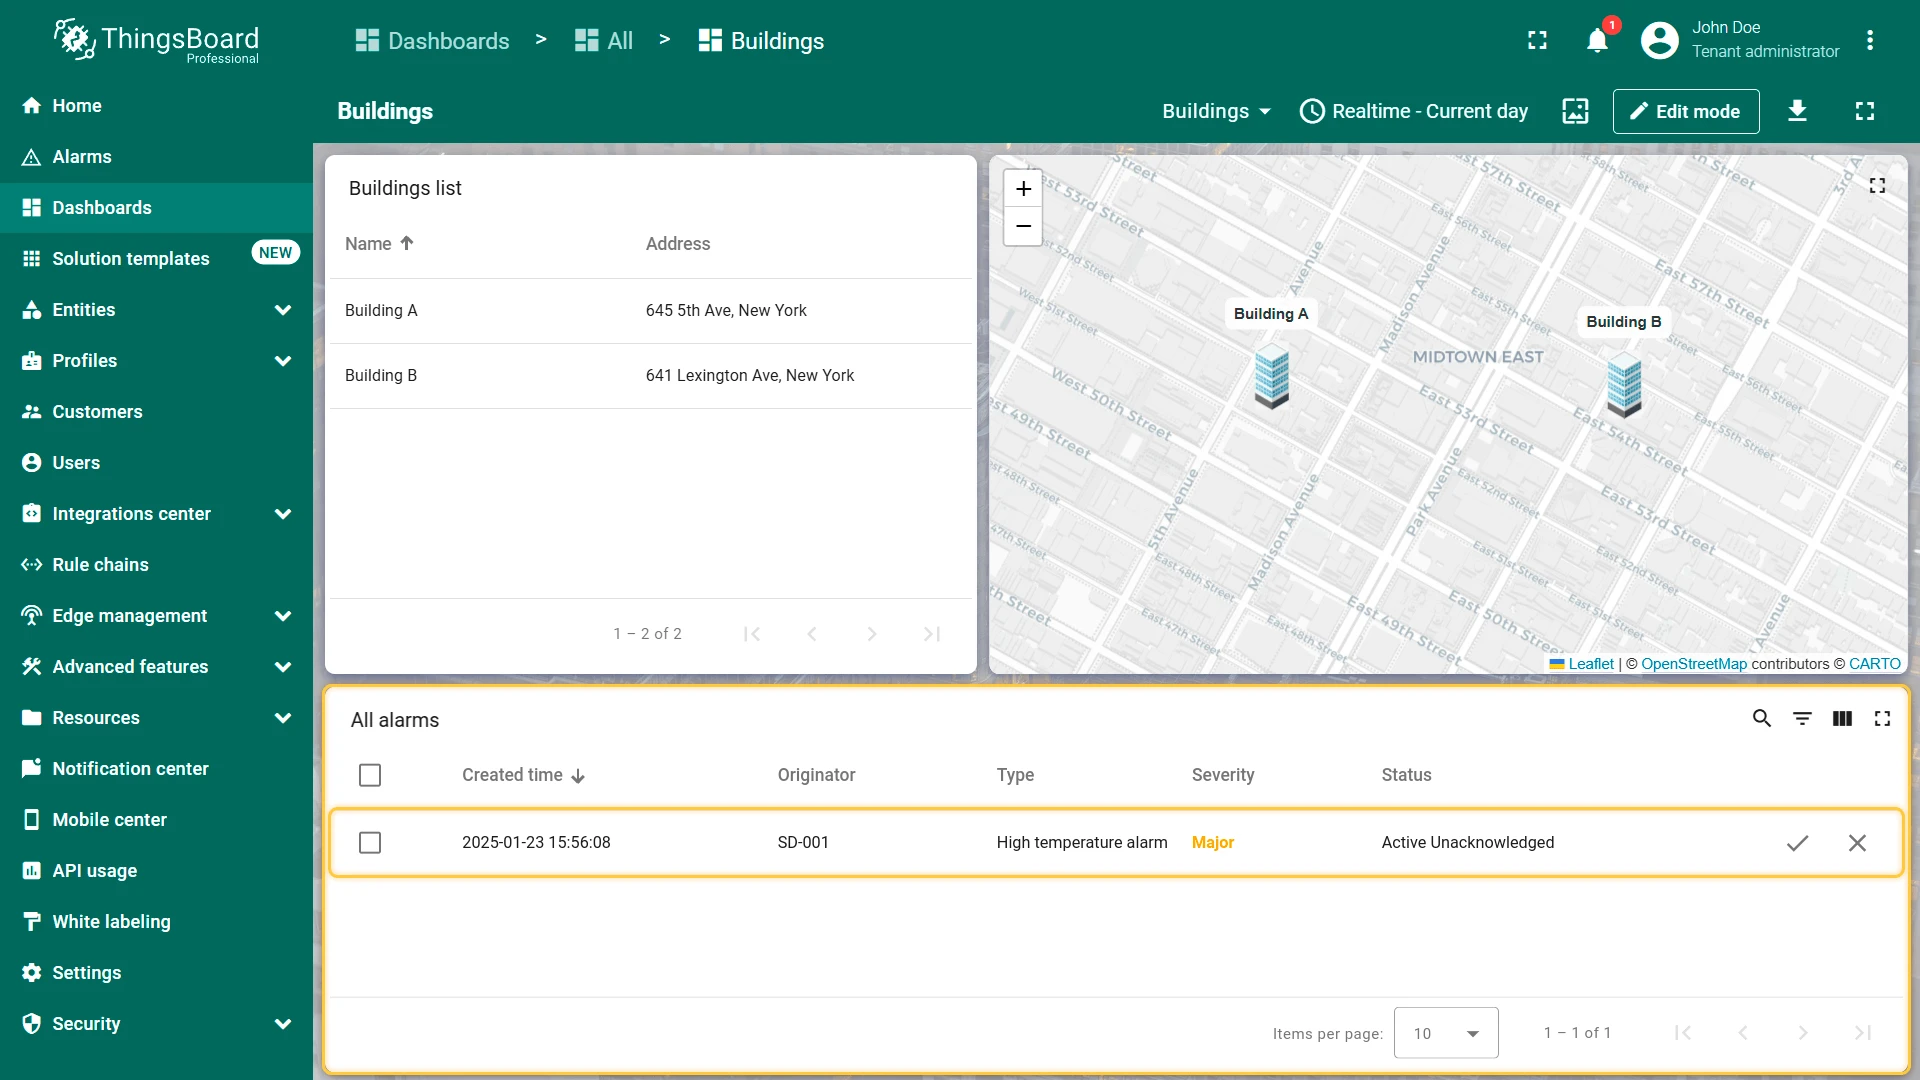
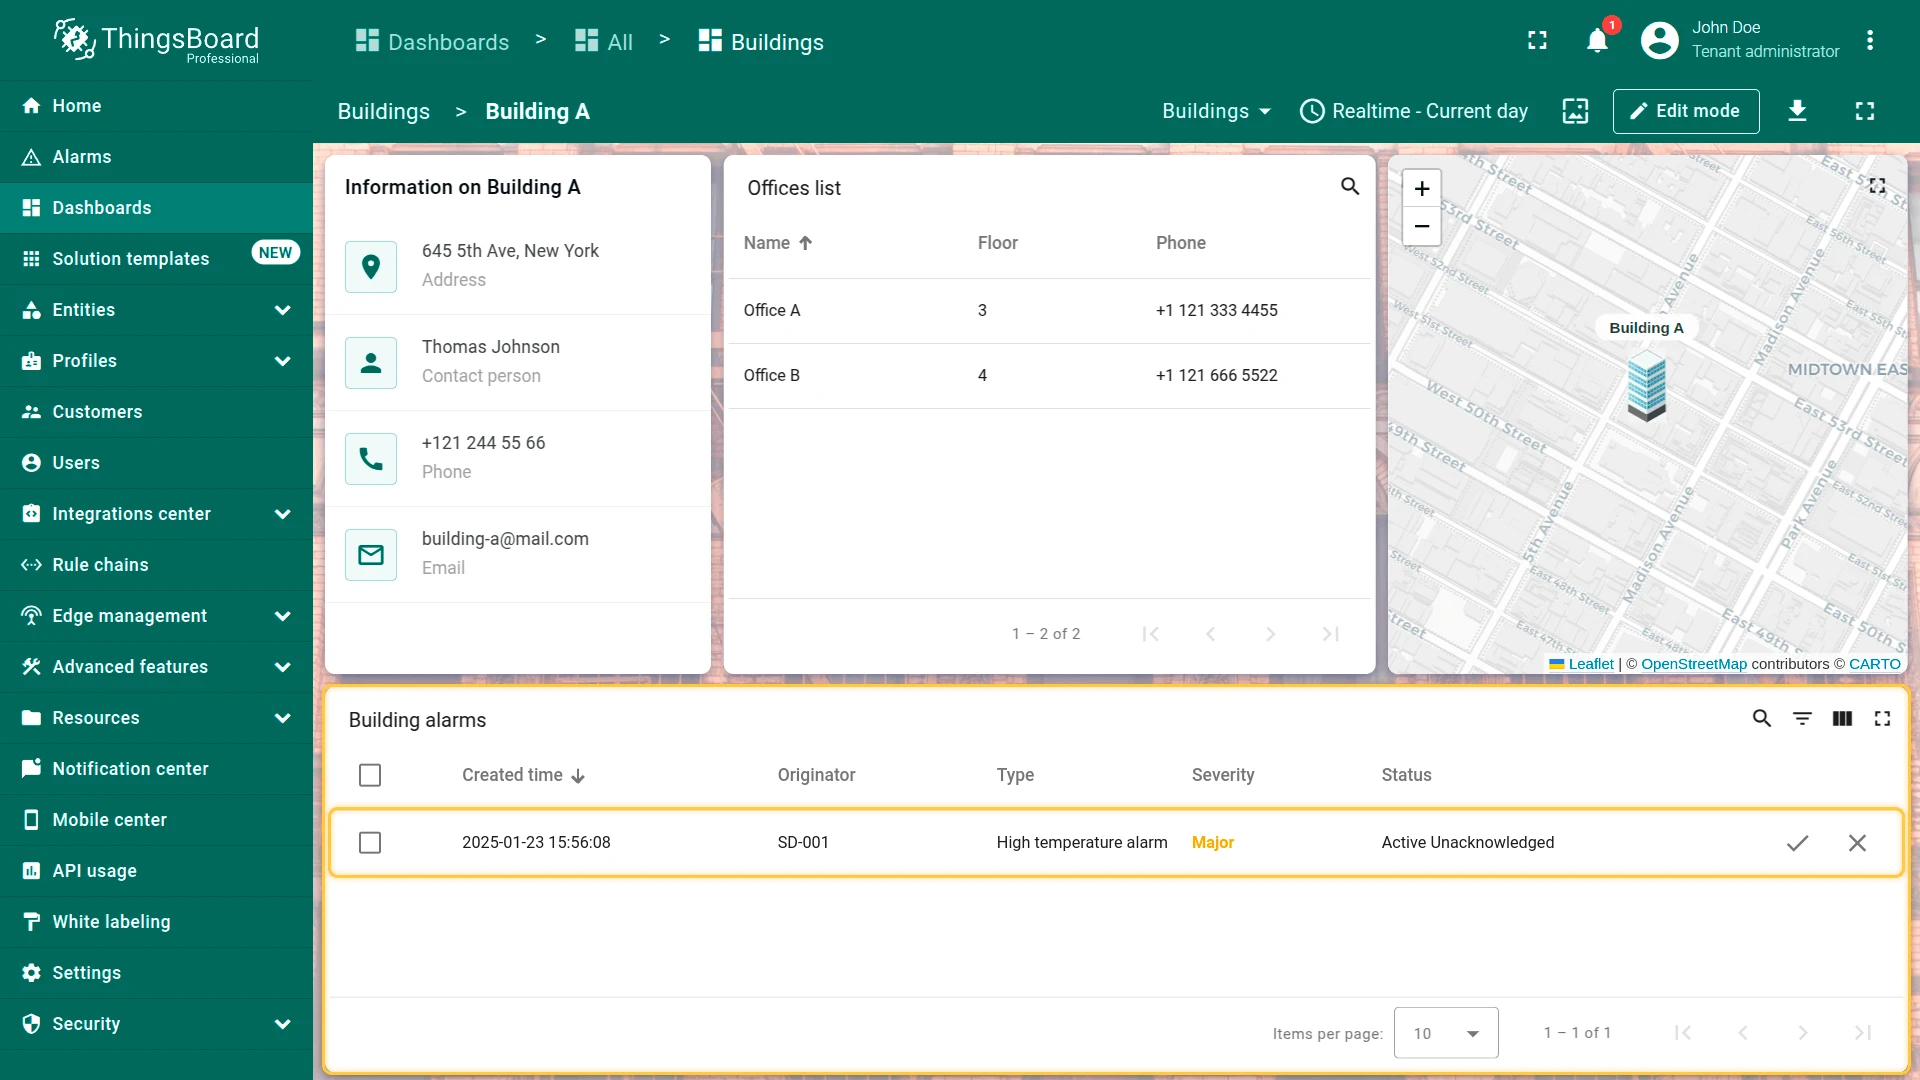
Final View
Section titled “Final View”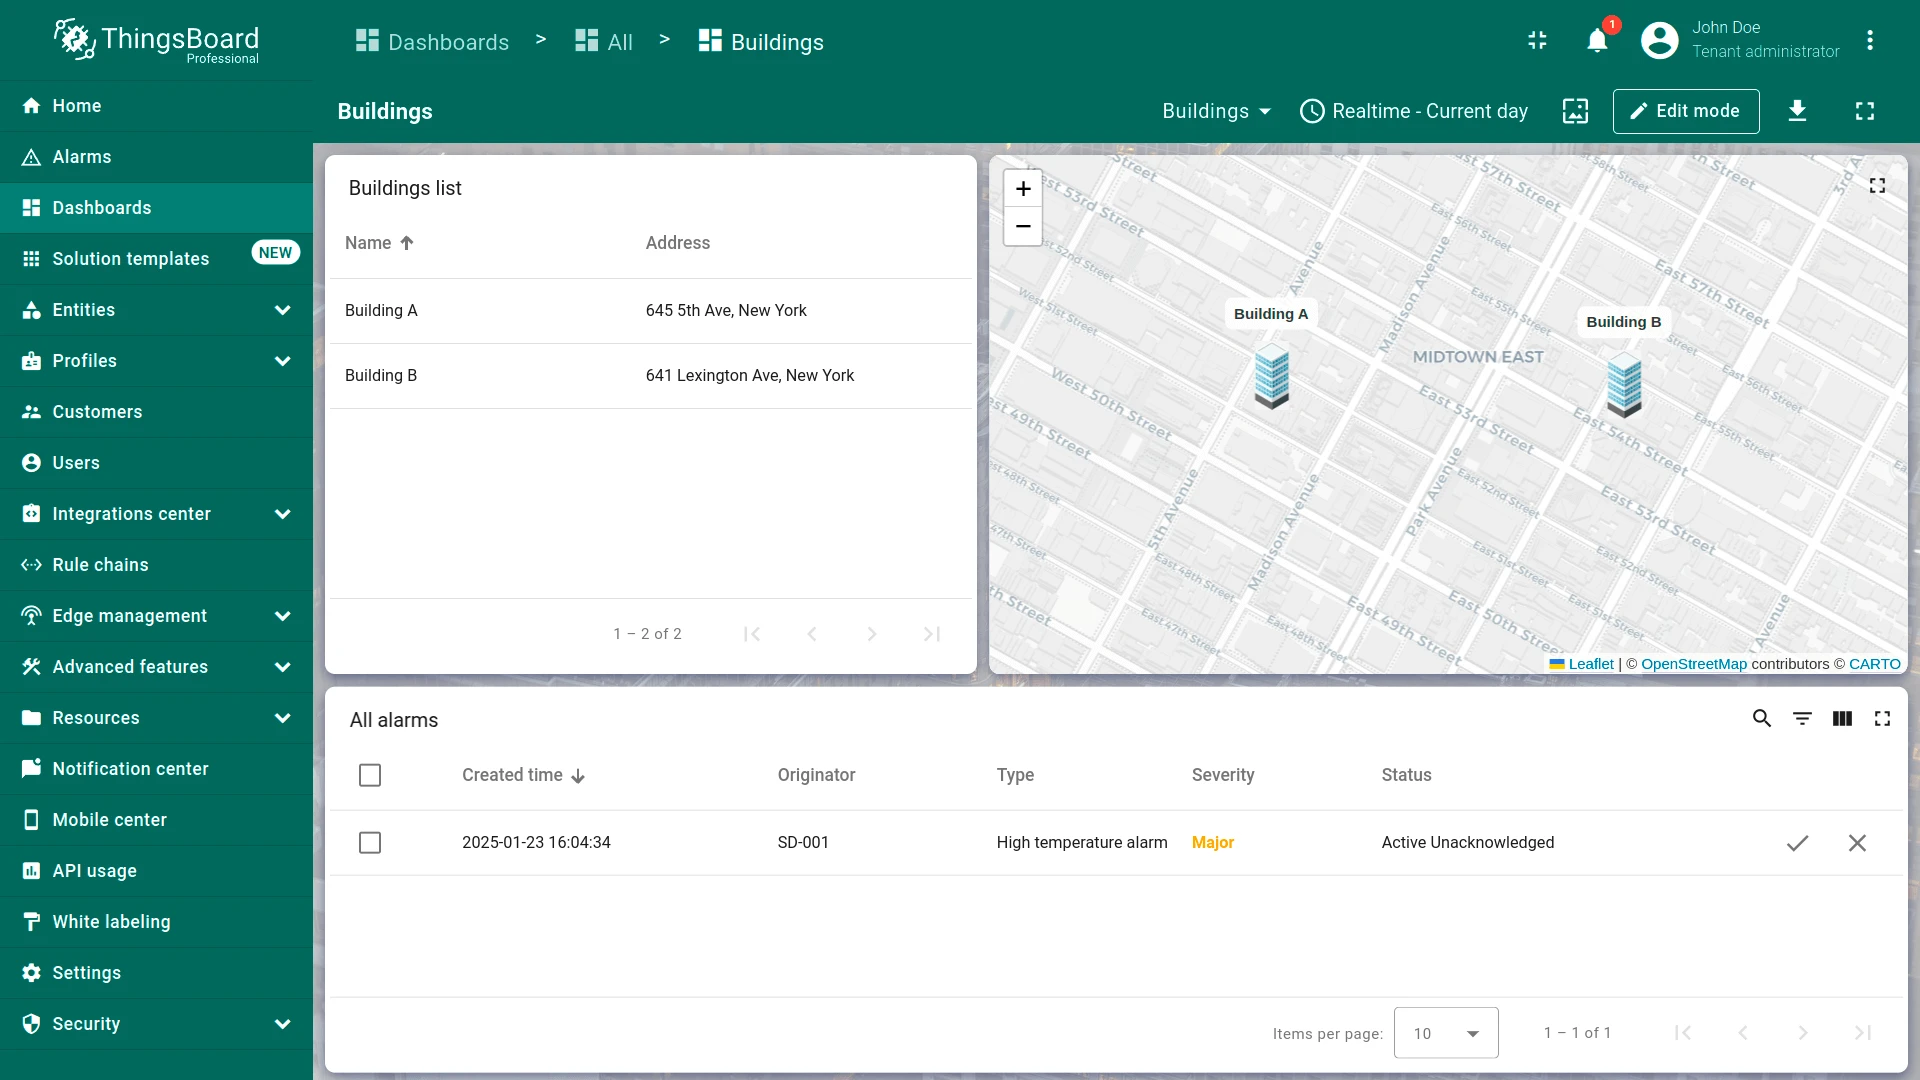
Best Practices: Alarms, Propagation, and Multi-Level Monitoring
Section titled “Best Practices: Alarms, Propagation, and Multi-Level Monitoring”Alarm Rule Hierarchies — Configure rules at the device profile level so they apply automatically to all devices of that type. Use severity levels (Major, Critical) to express urgency, not just on/off triggers.
Propagation Strategy — Enable Propagate alarm to related entities with the correct Relation type (usually Contains) so alarms bubble up to parent entities (office → building → default). This eliminates the need for separate monitoring at each level.
Search Propagated Alarms — This widget setting shows alarms from all child entities, not just the entity directly selected. Use it at parent levels (building, office) so operators get a complete view without drilling into every device state.
Alarm Filtering — Use the Active filter in widgets to show only unresolved alarms. Provide table buttons for Acknowledge (signals handling has begun) and Clear (manual resolution). Disable Assignee column if not using the assignment workflow.
Clear Conditions — Always define clear conditions matching your real-world recovery criteria (e.g., temperature ≤ 24 °C to resolve a high-temp alarm). Alarms cleared manually remain in history with “Cleared” status for audit trails.
Widget Reuse Across States — Copy-paste the same Alarms table widget to different states, then change the datasource alias and title. This pattern ensures consistent behavior and appearance across the hierarchy while adapting to the context of each state level.
Checklist for moving on
Section titled “Checklist for moving on”Was this helpful?