Lesson 5. Sharing with Customers
This lesson implements multi-tenant data isolation by creating customers, assigning device and asset ownership, sharing dashboards, and verifying that each customer accesses only their own data through role-based access control.
Scenario:
- Customer A rents Office A in Building A (devices: SD-001, EM-002, WM-003).
- Customer B rents Office B in Building A (device: AM-307).
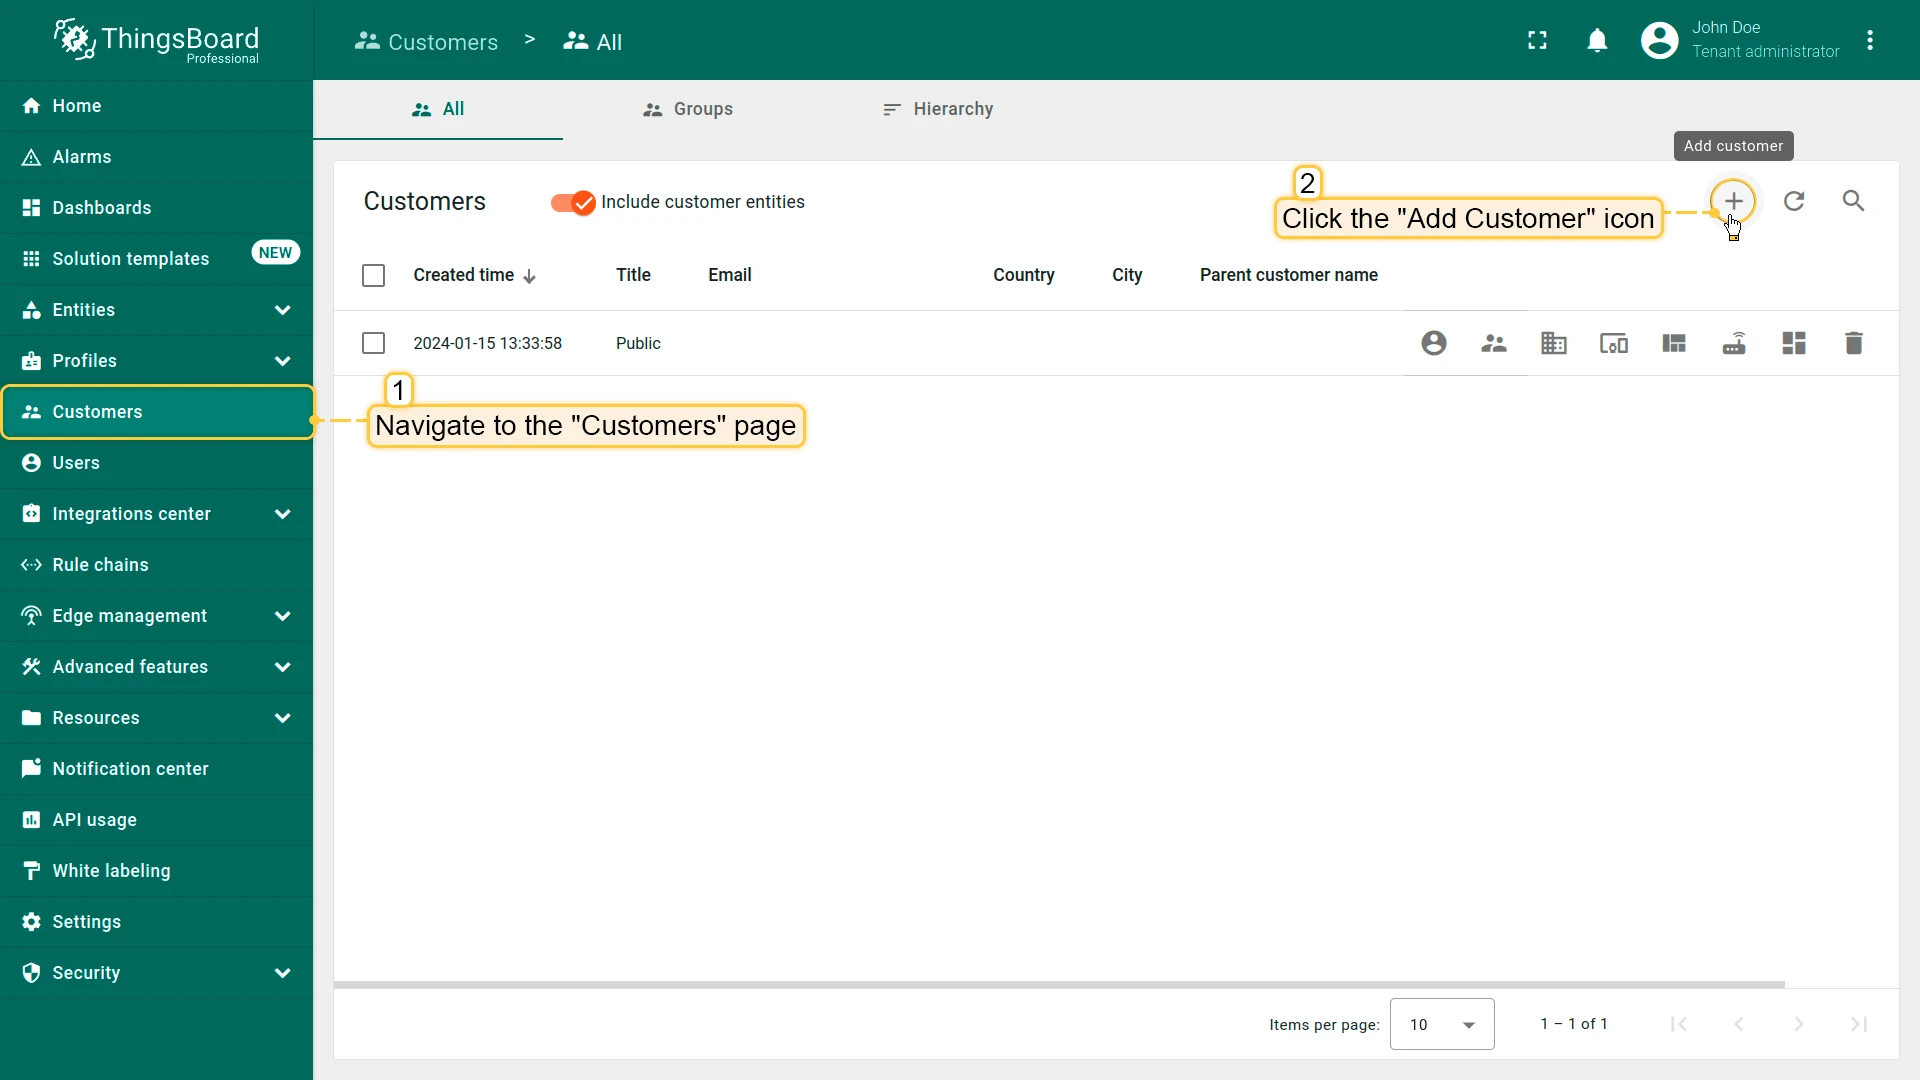
Step 5.1. Add Customers
Section titled “Step 5.1. Add Customers”Create customer entities that represent tenants (e.g., office renters) who will access specific resources in the system. Each customer will later be granted access only to their own devices, assets, and data.
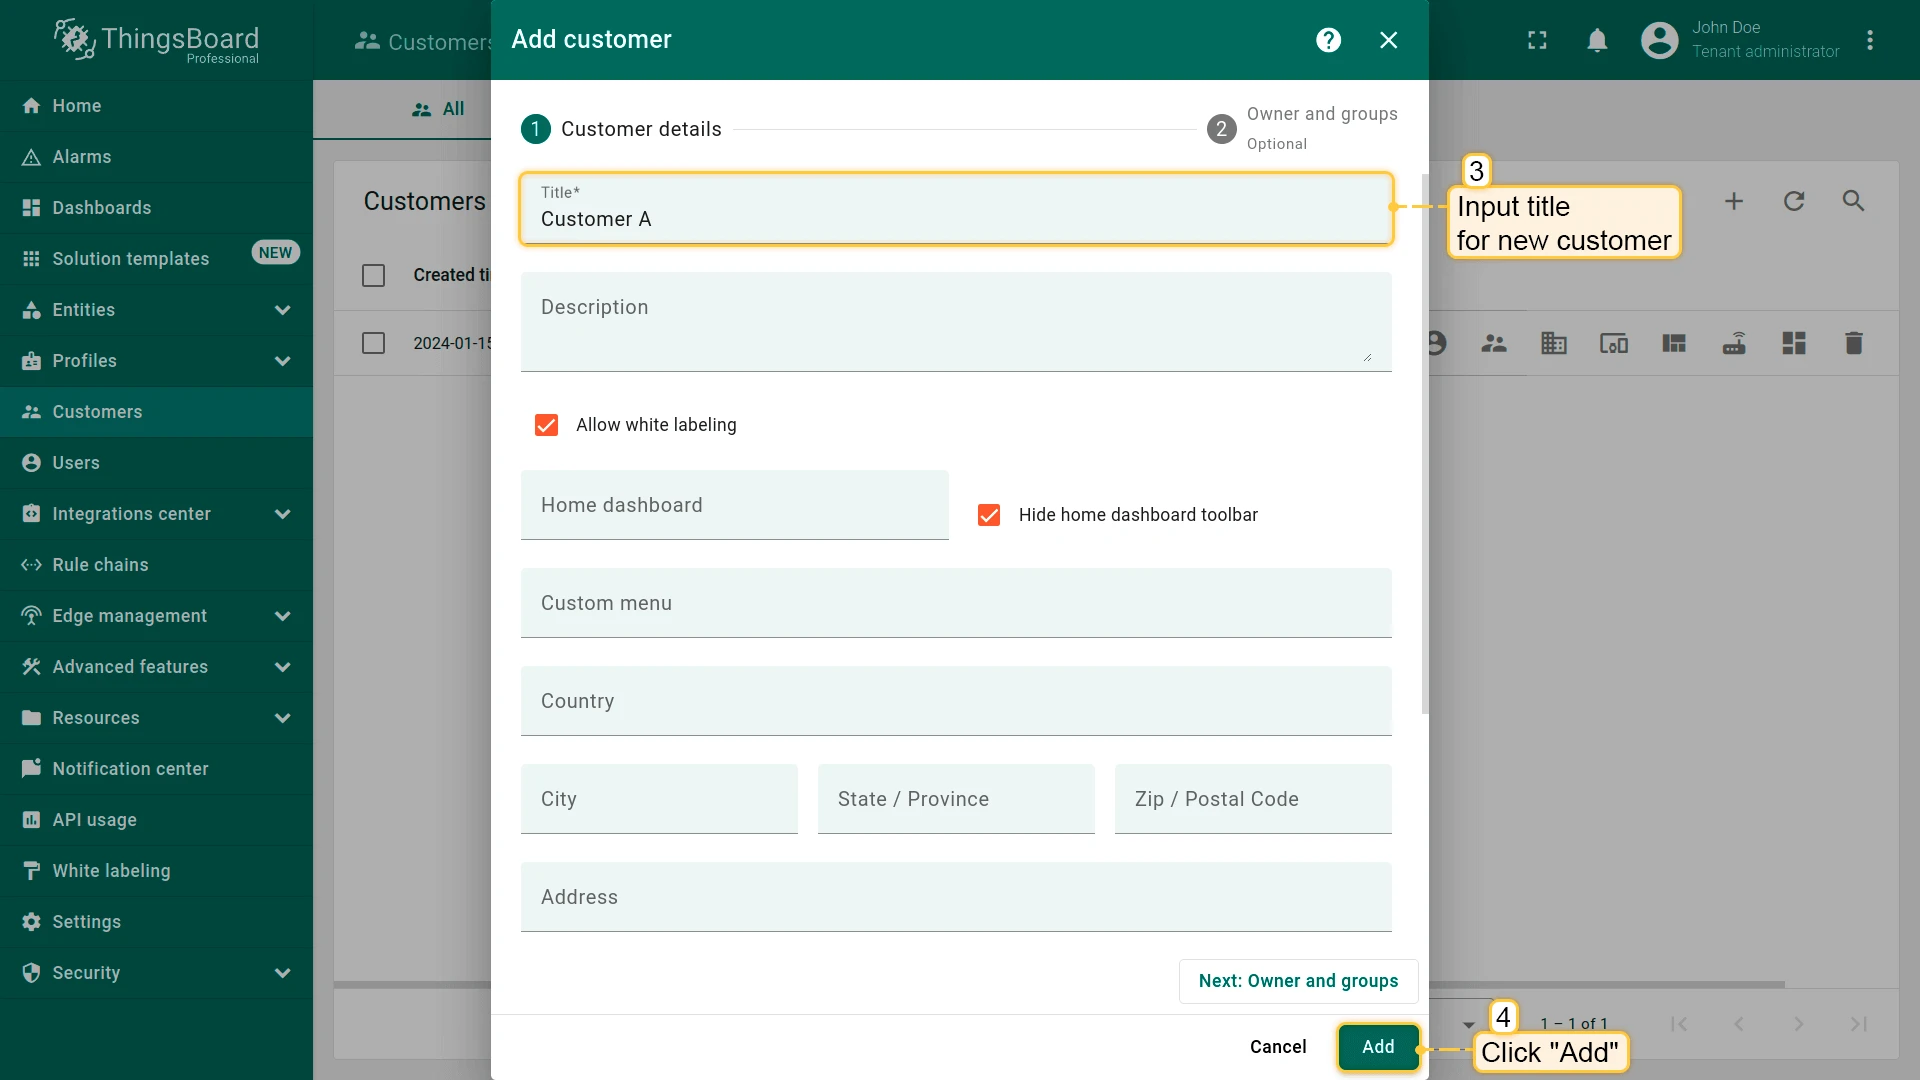
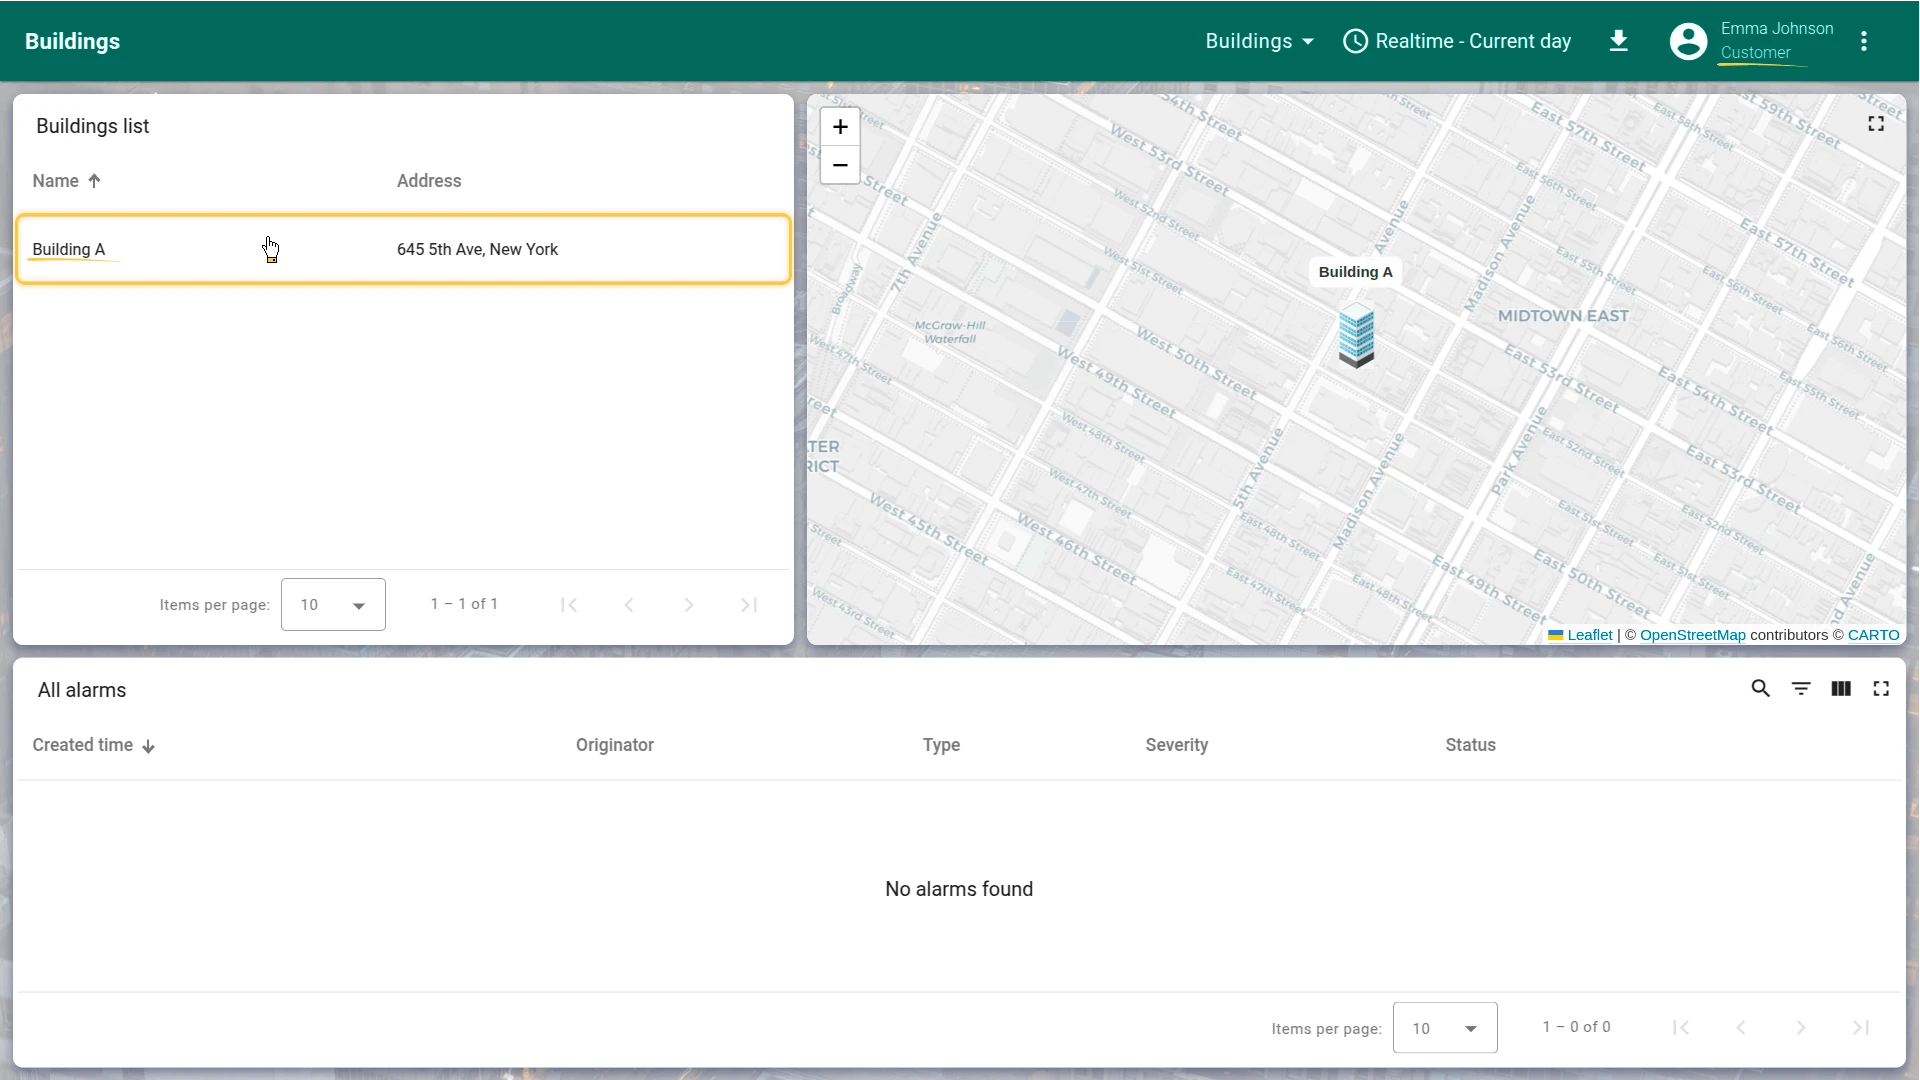
- Open Customers and click + Add customer.
- Enter the customer’s name and additional personal details if necessary.
- Click Add to finalize adding the new customer.
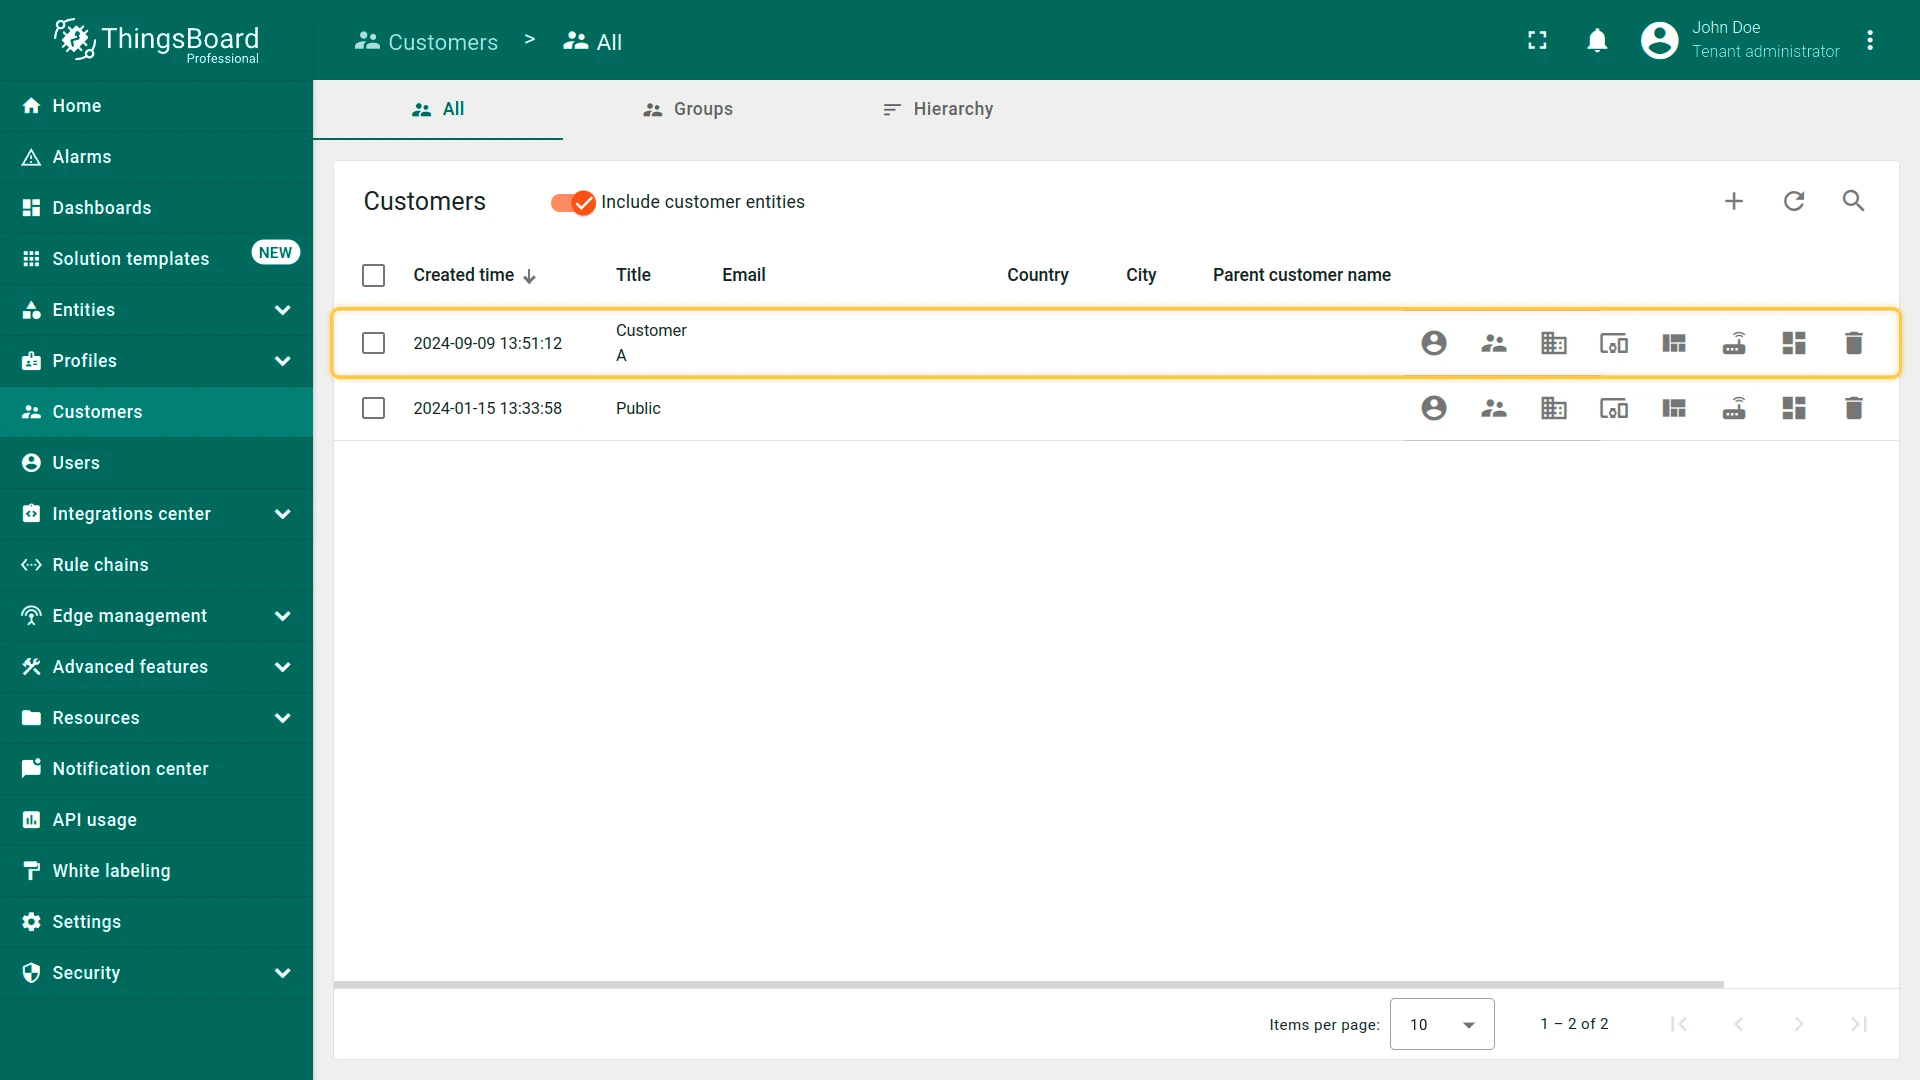
Repeat to create Customer B and assign it to Office renters group.

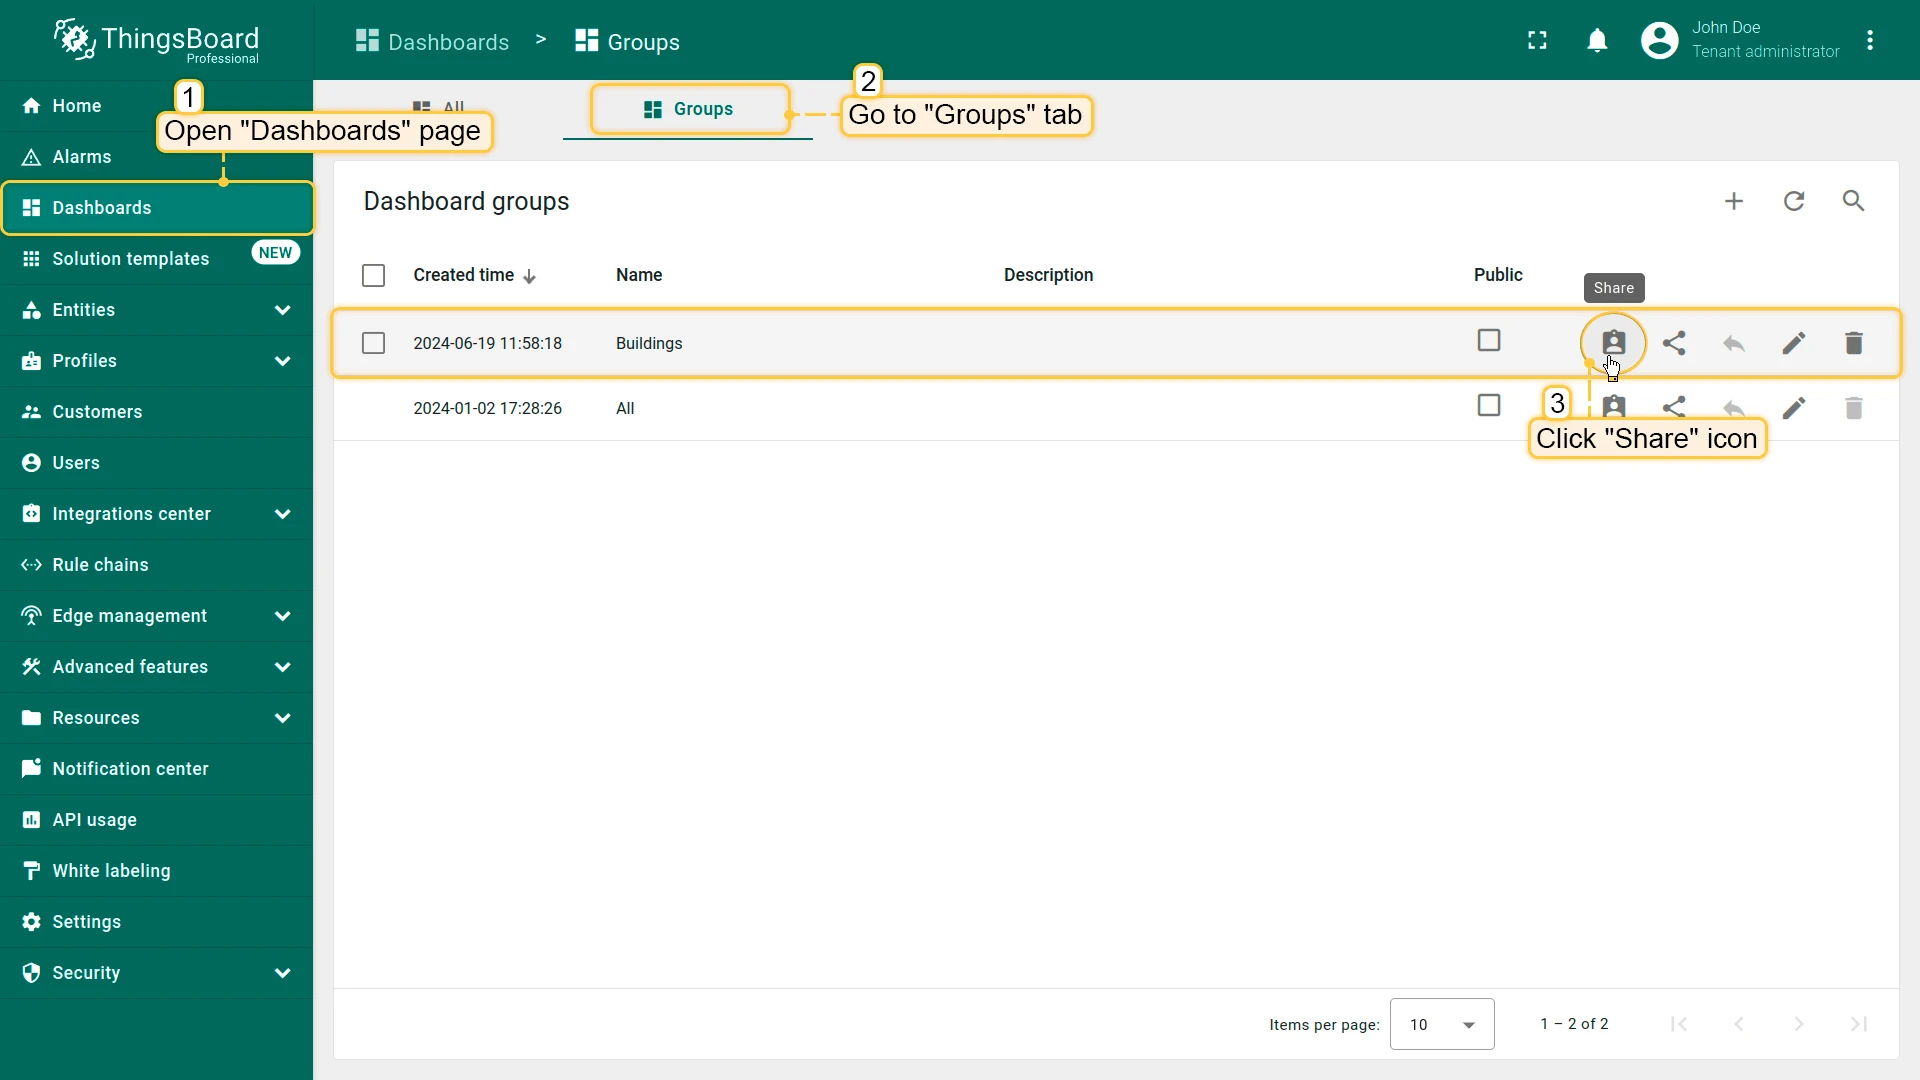
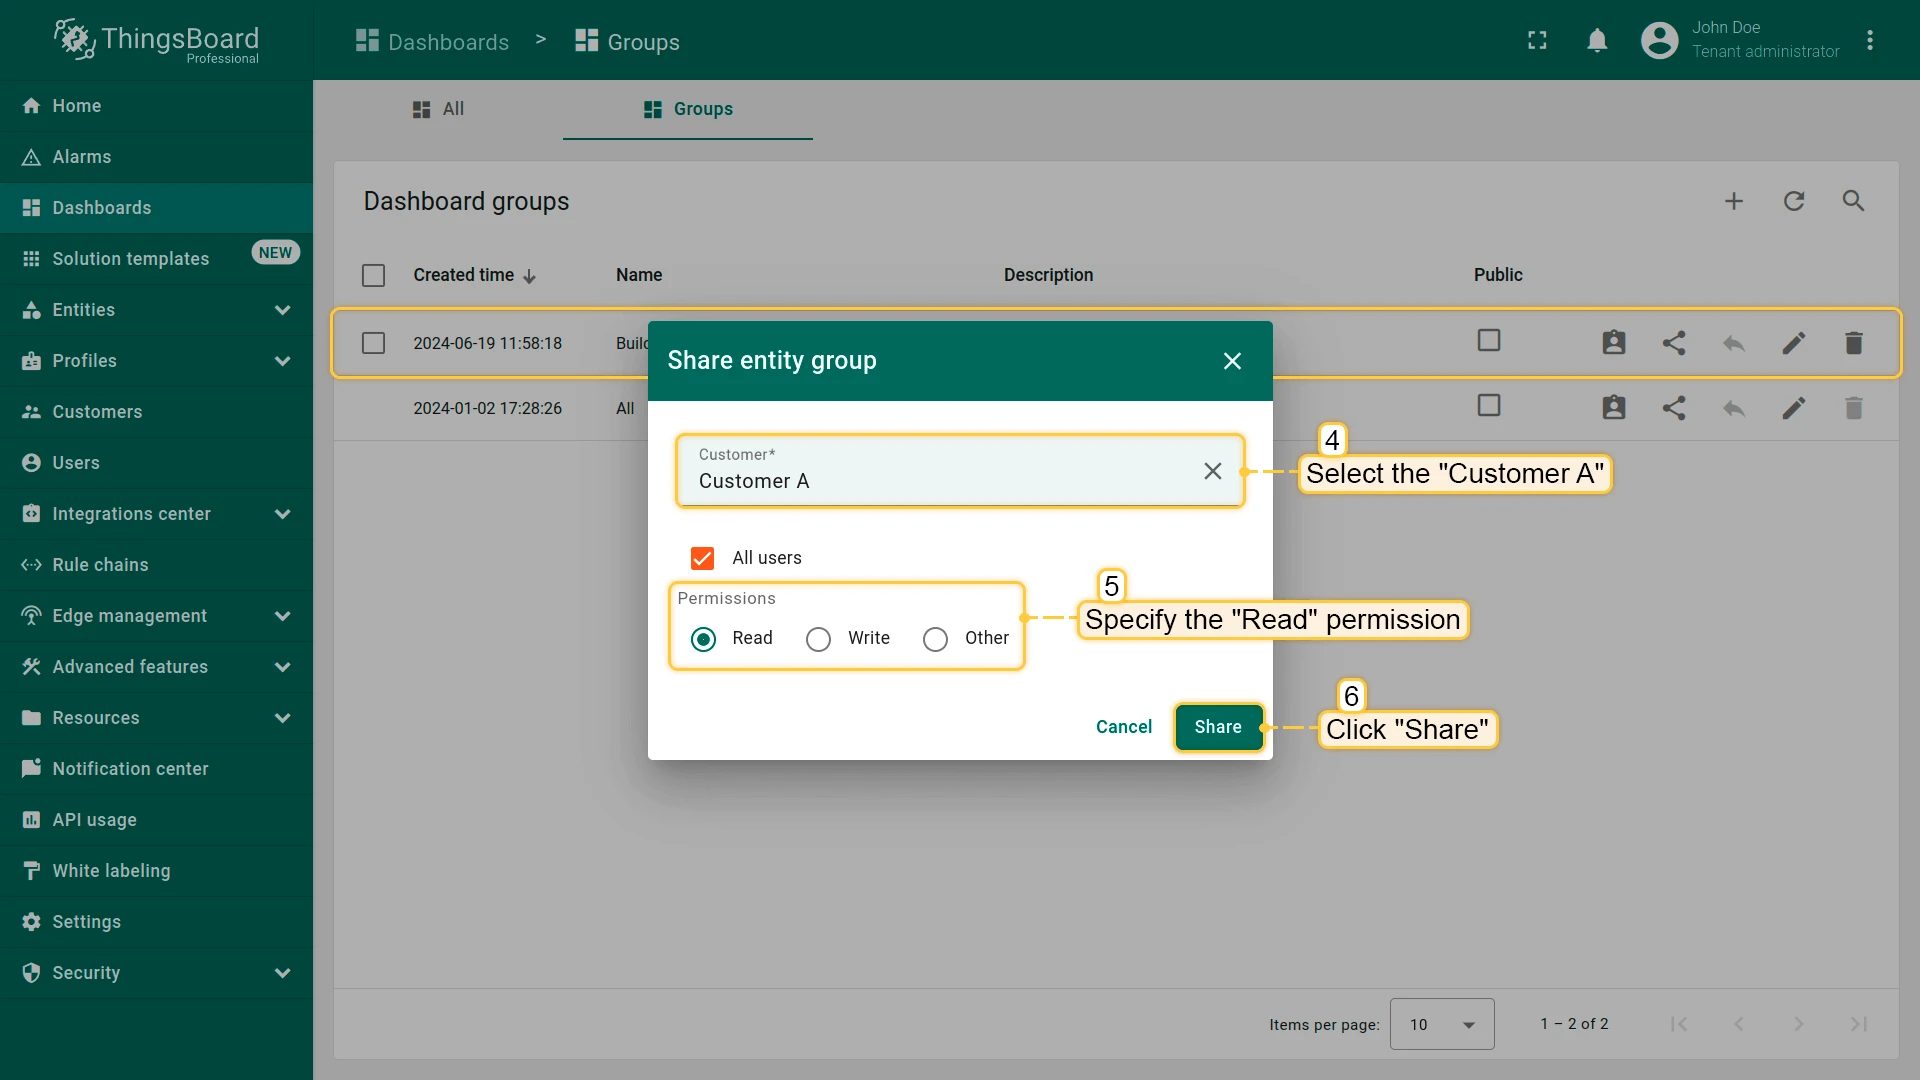
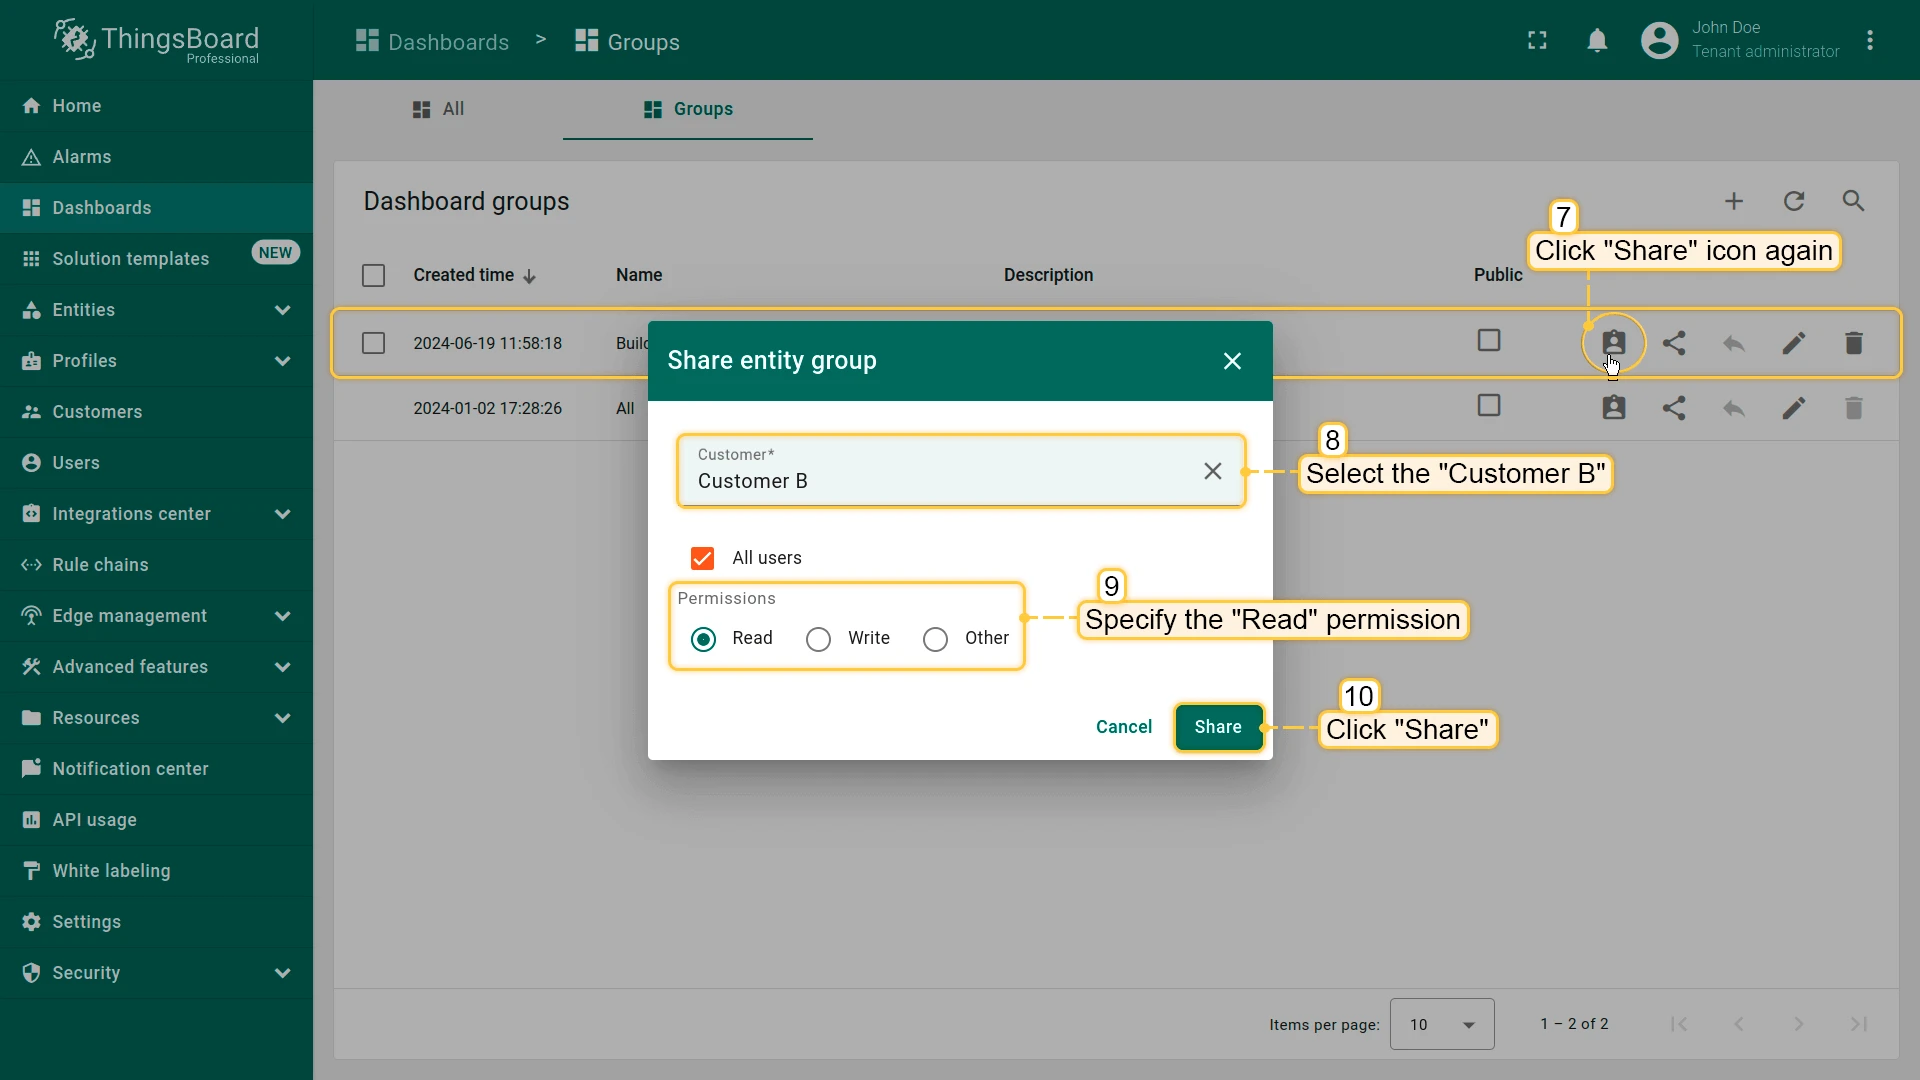
Step 5.2. Share the Dashboard
Section titled “Step 5.2. Share the Dashboard”Grant customers access to the dashboard by sharing the dashboard group, since dashboards cannot be shared individually. This enables multiple customers to view the same dashboard with appropriate permissions.
- Open Dashboard ⇾ Groups and find Buildings.
- Click Share for the group.
- Select Customer A, set permission to Read, and click Share.
- Repeat for Customer B.
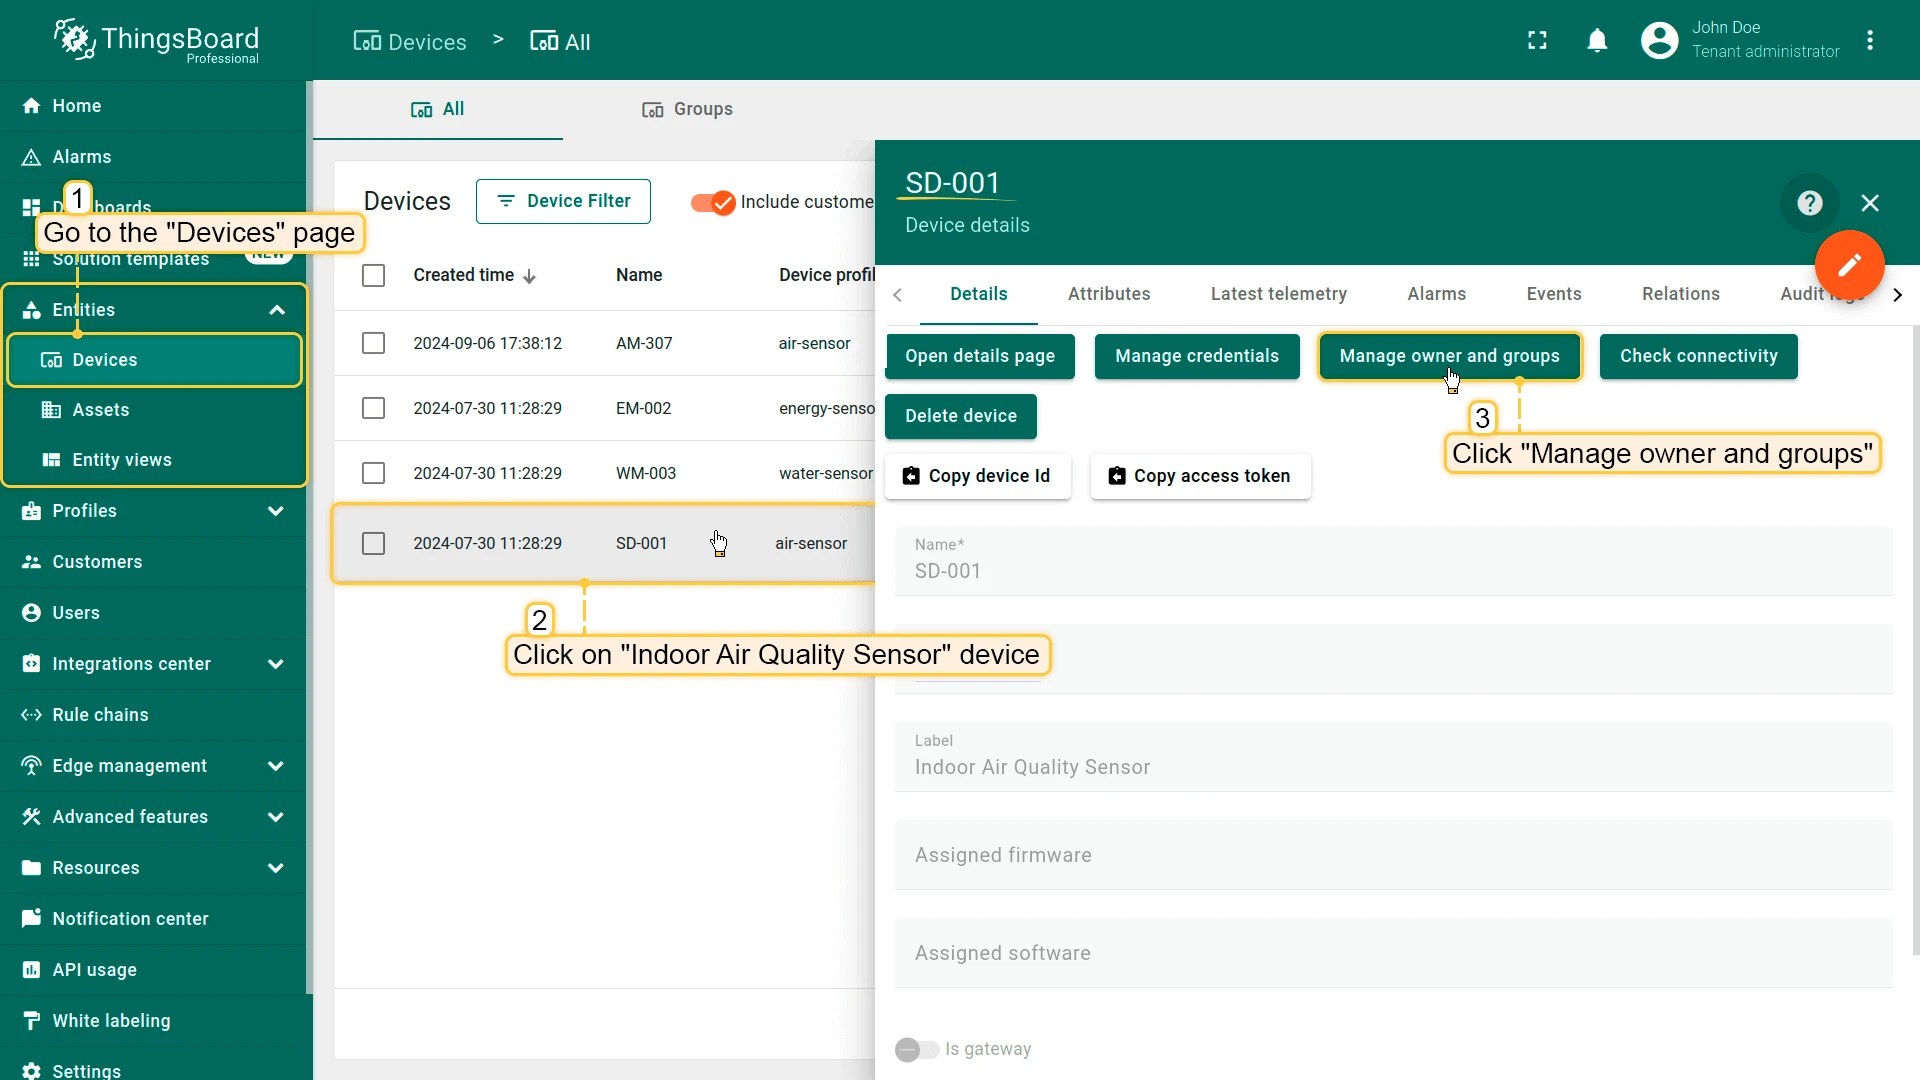
Step 5.3. Assign Device Ownership
Section titled “Step 5.3. Assign Device Ownership”Define data isolation by assigning devices to specific customers. Ownership ensures that each customer can access only their own devices and related telemetry.
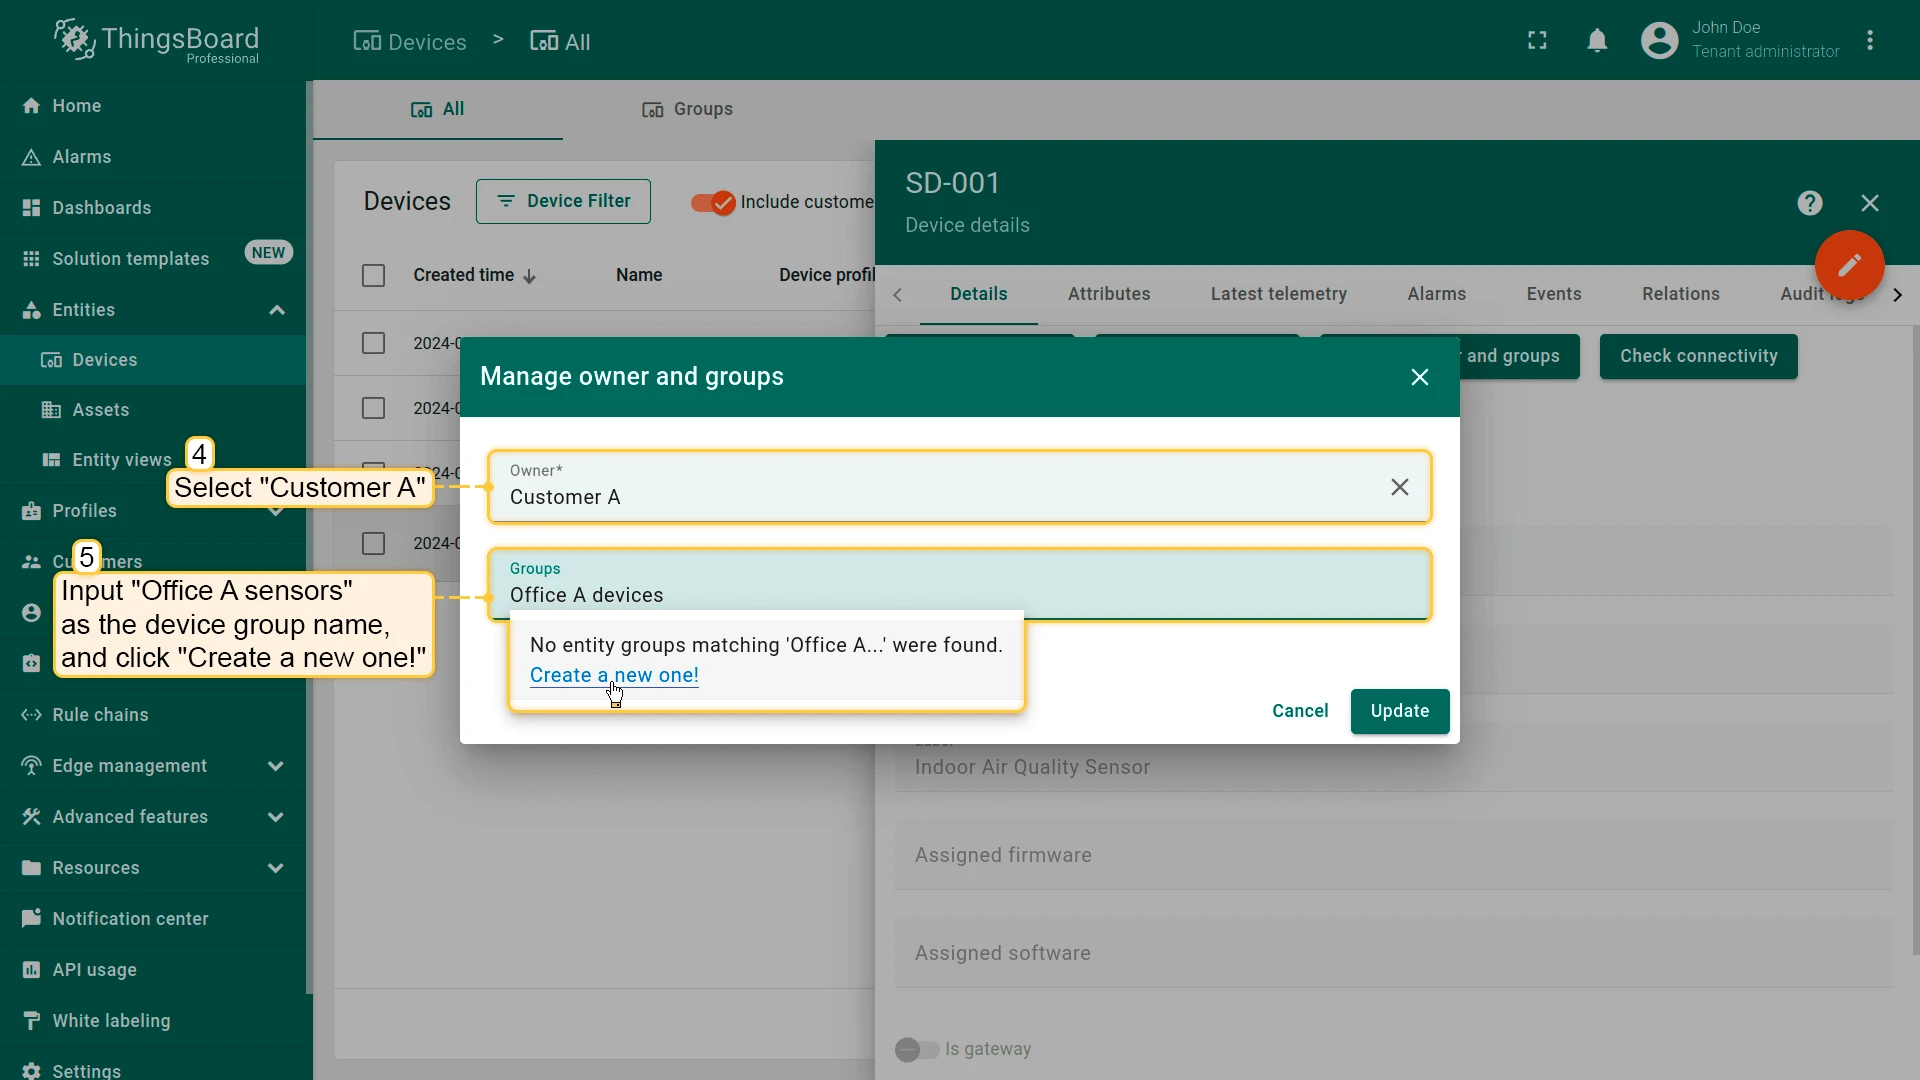
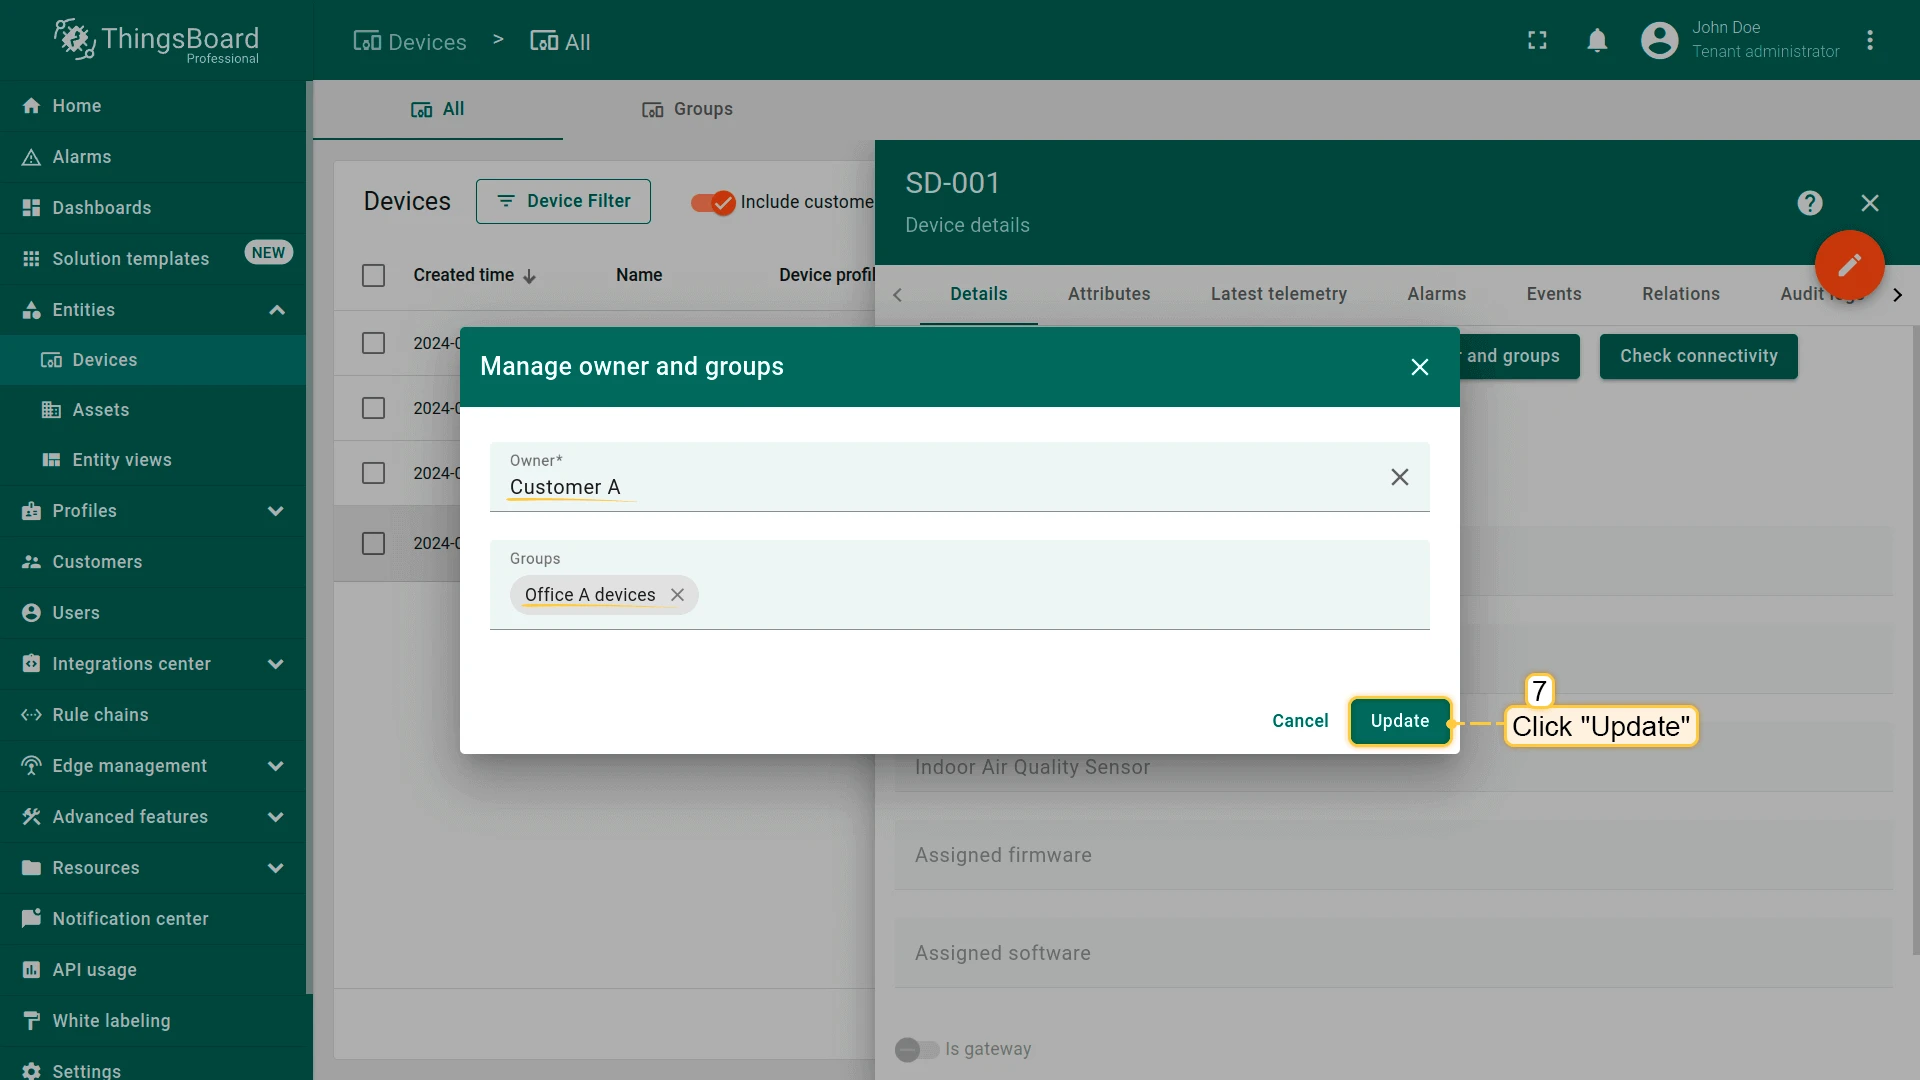
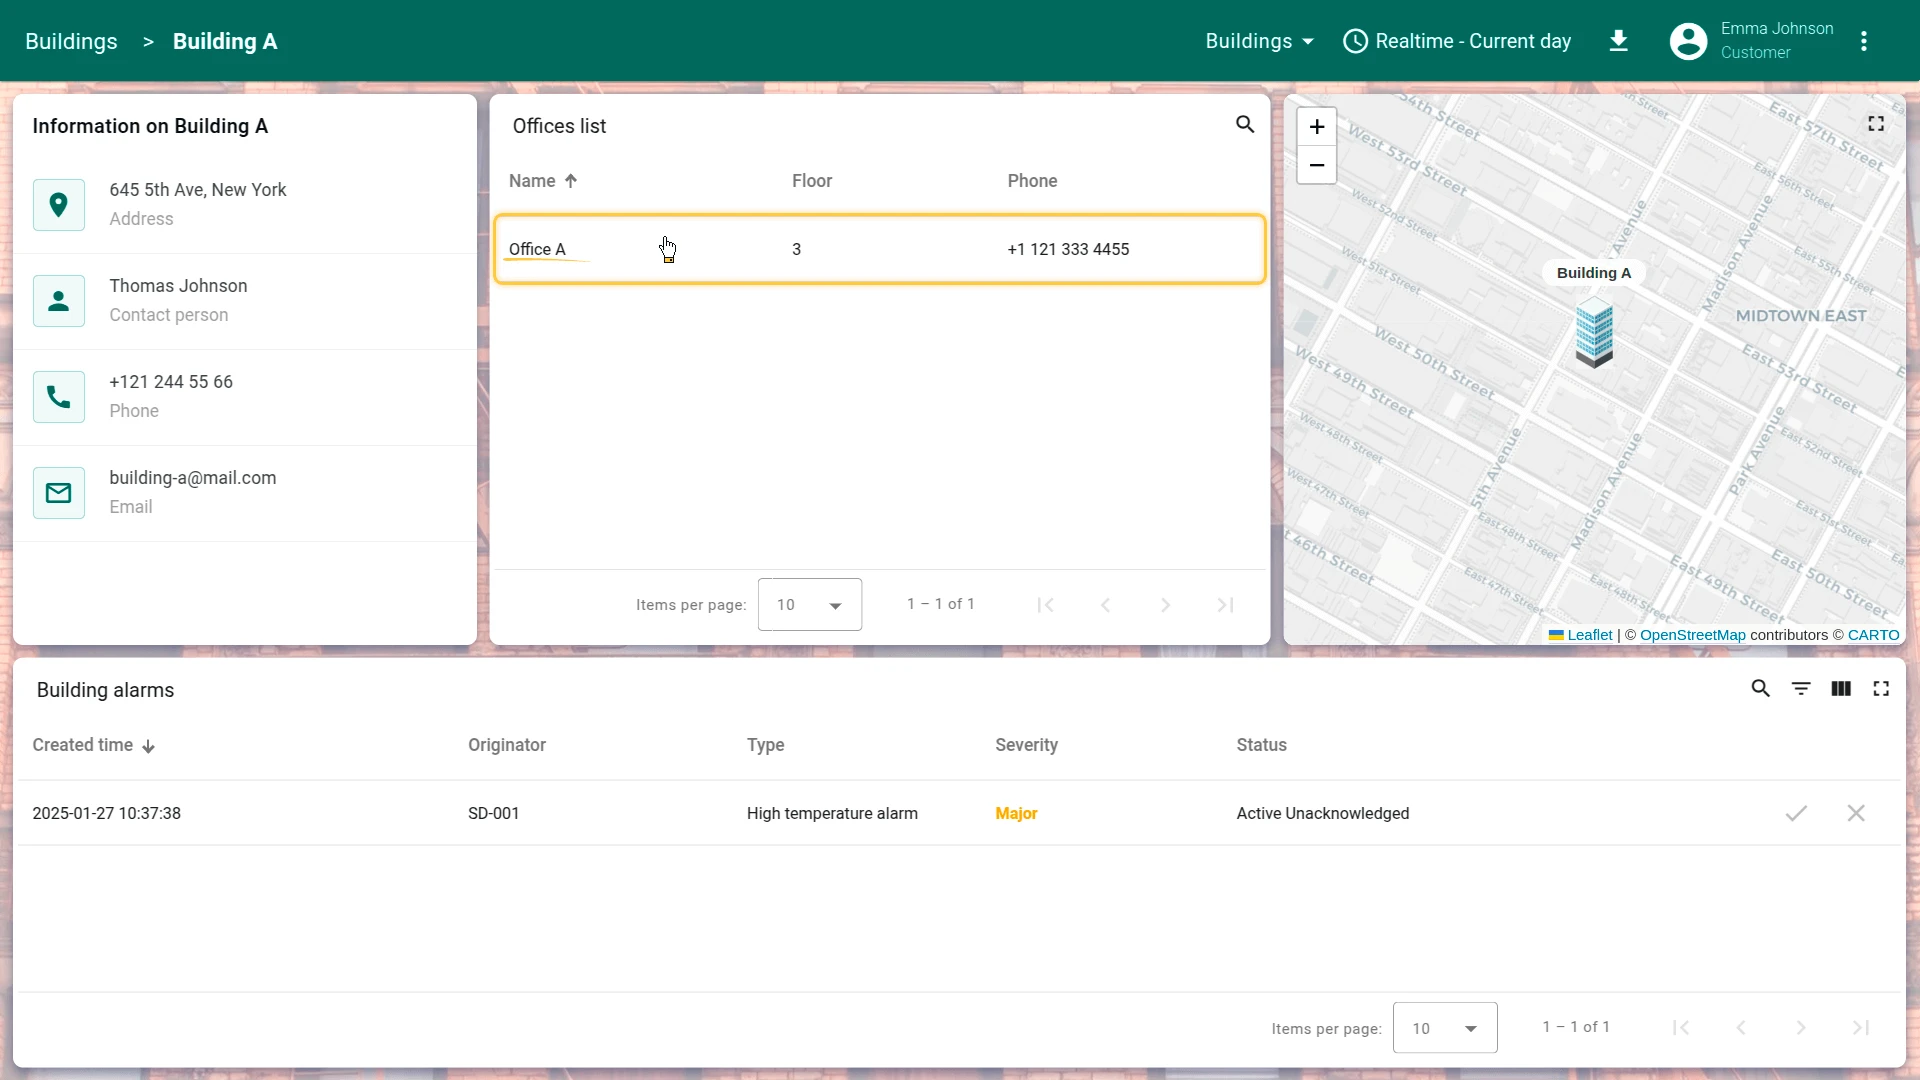
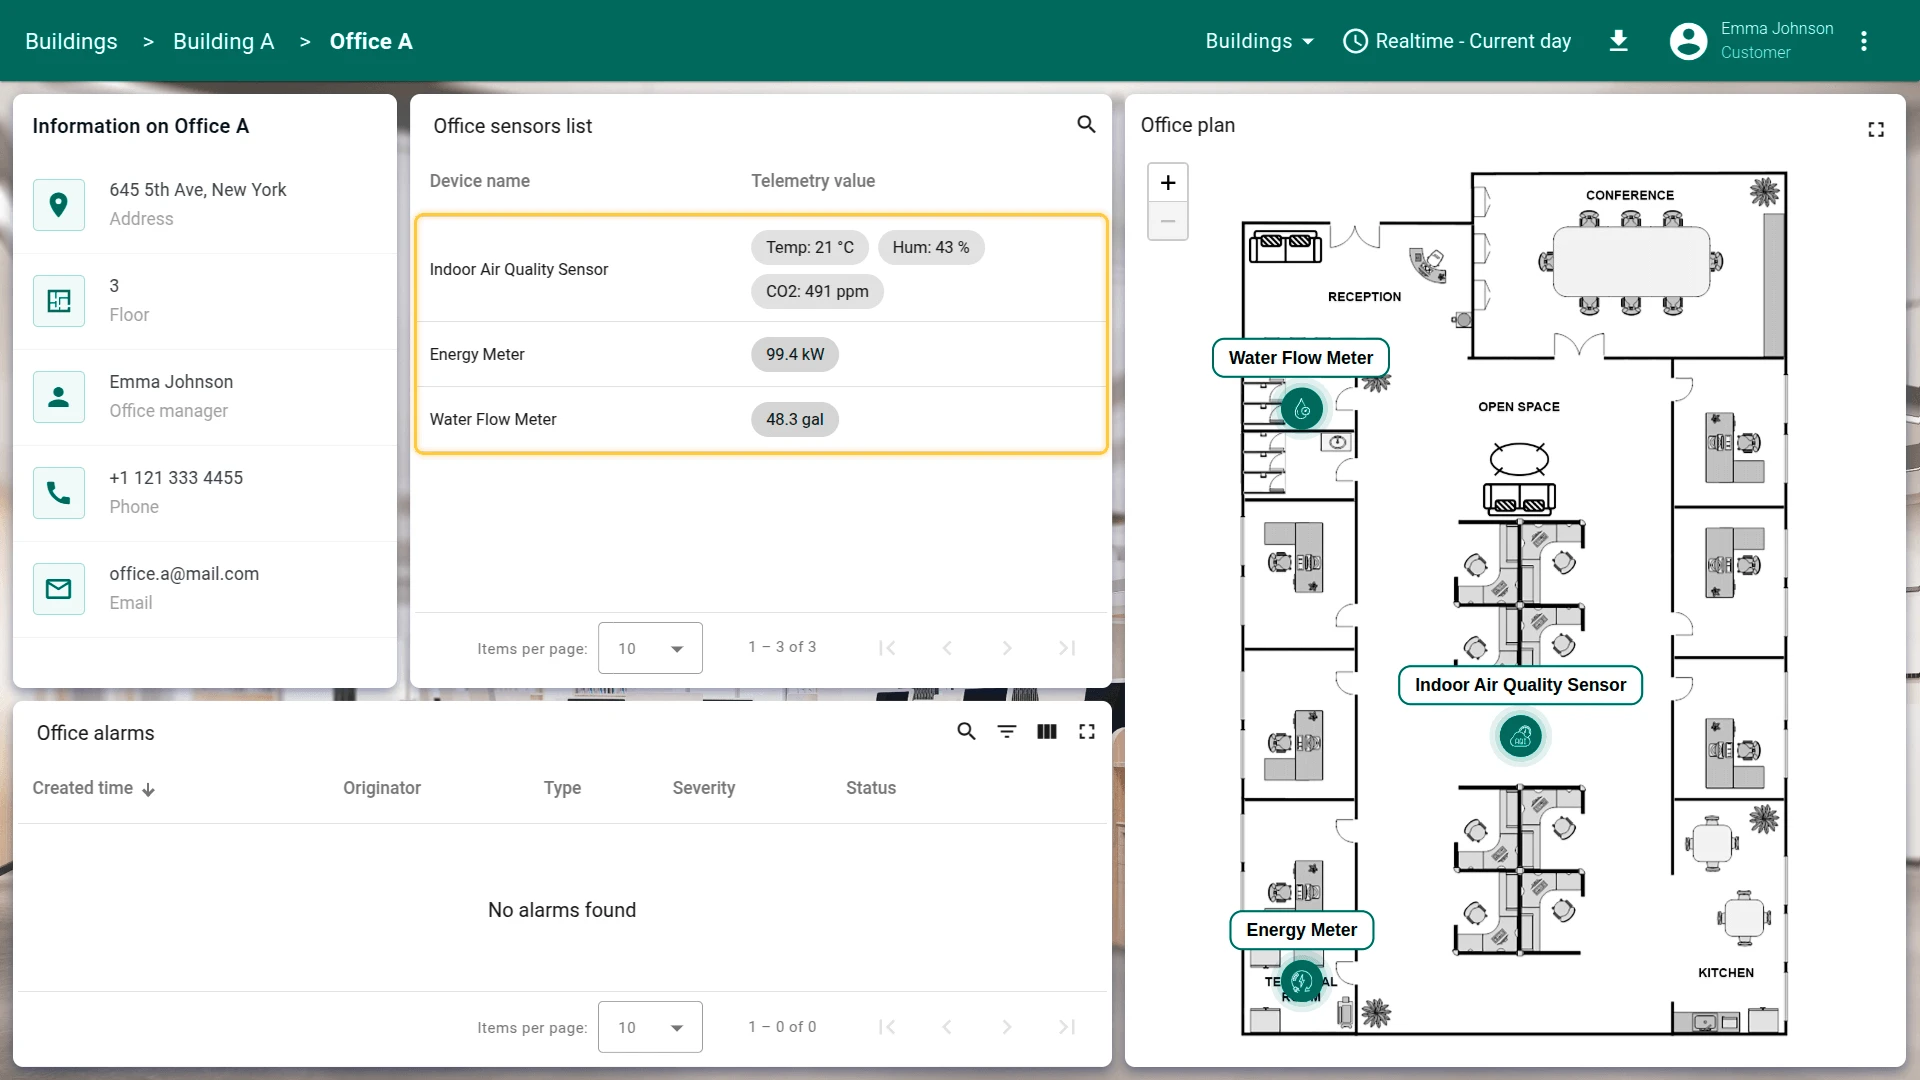
- Open the Devices page. Click on SD-001 (Indoor Air Quality Sensor) to open its details. Click the Manage owner and groups button.
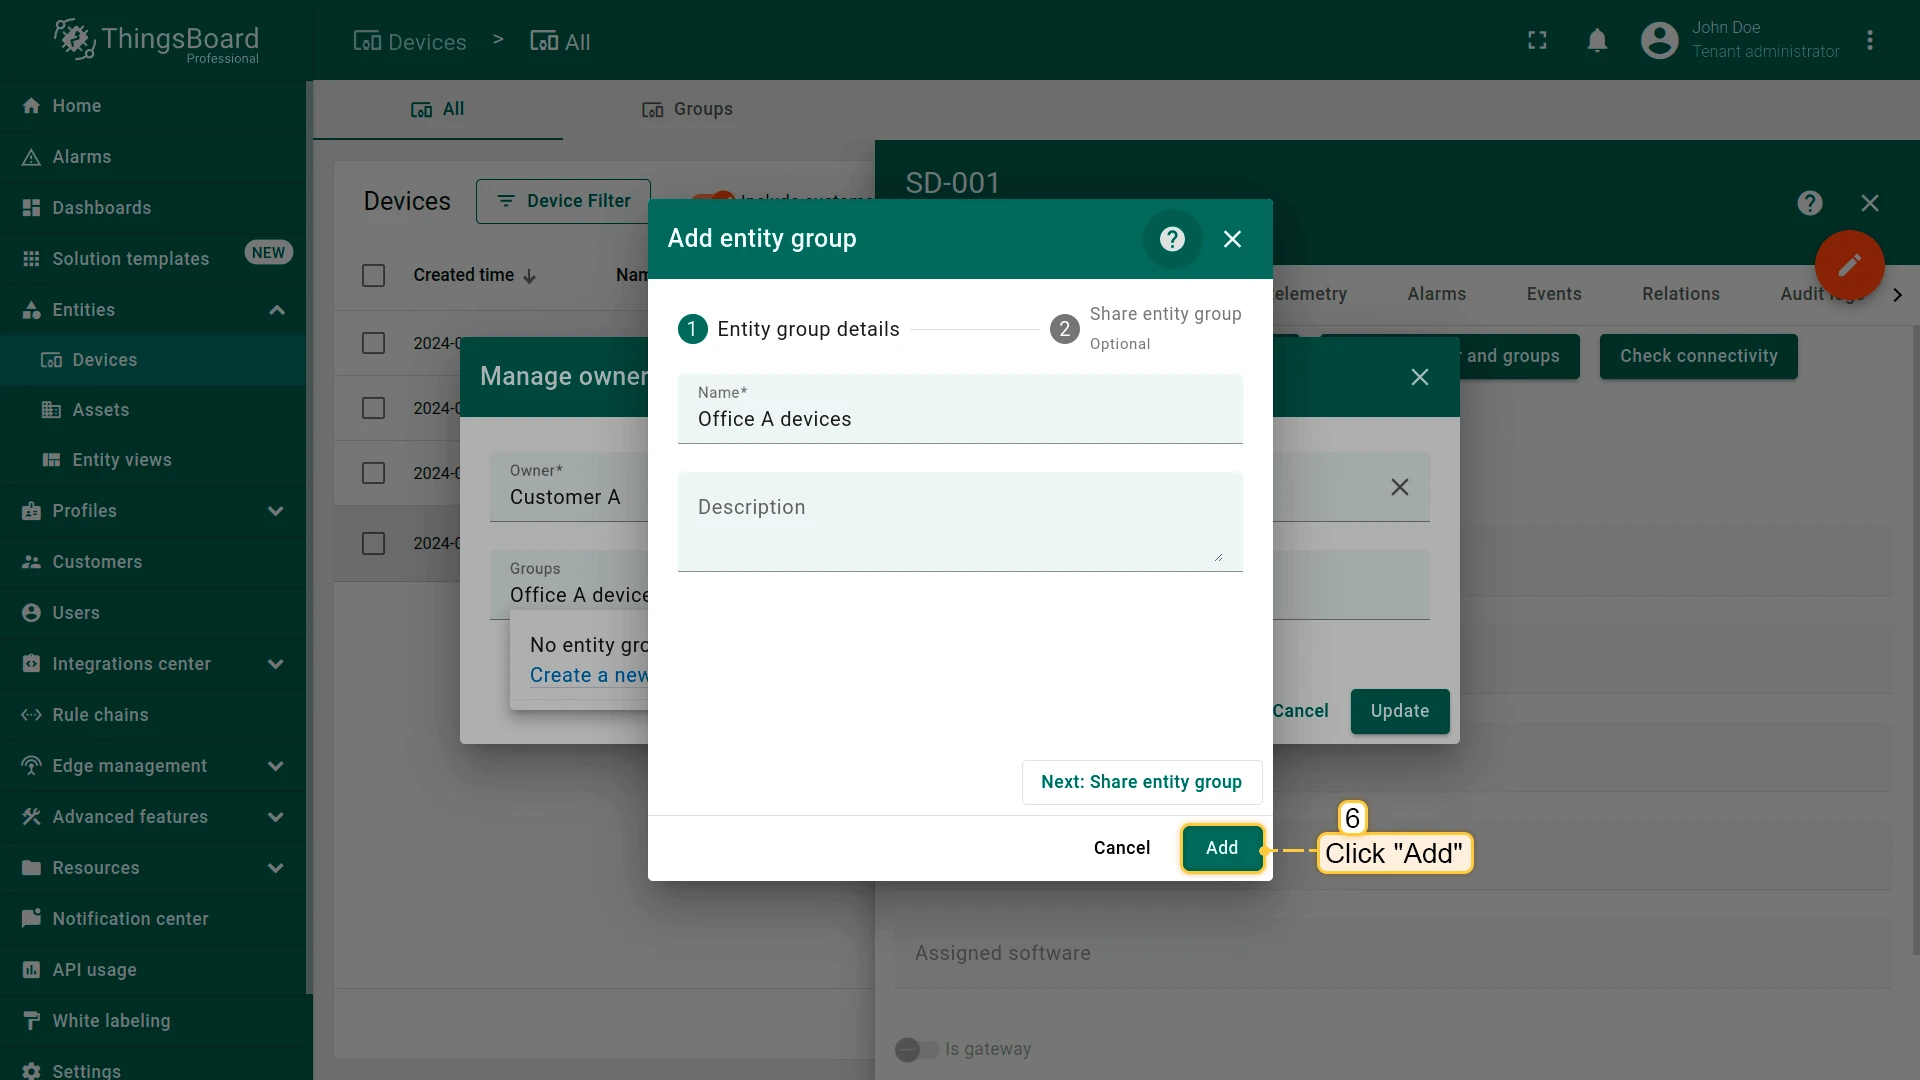
- In the Owner row, select Customer A from the drop-down list. Create a new device group: in the Groups row, input the desired group name, for example
Office A sensors, then click Create a new one!. - Click Add to confirm creation of the device group.
- Click Update to confirm the change of the device owner. You can always change the owner back to the tenant.
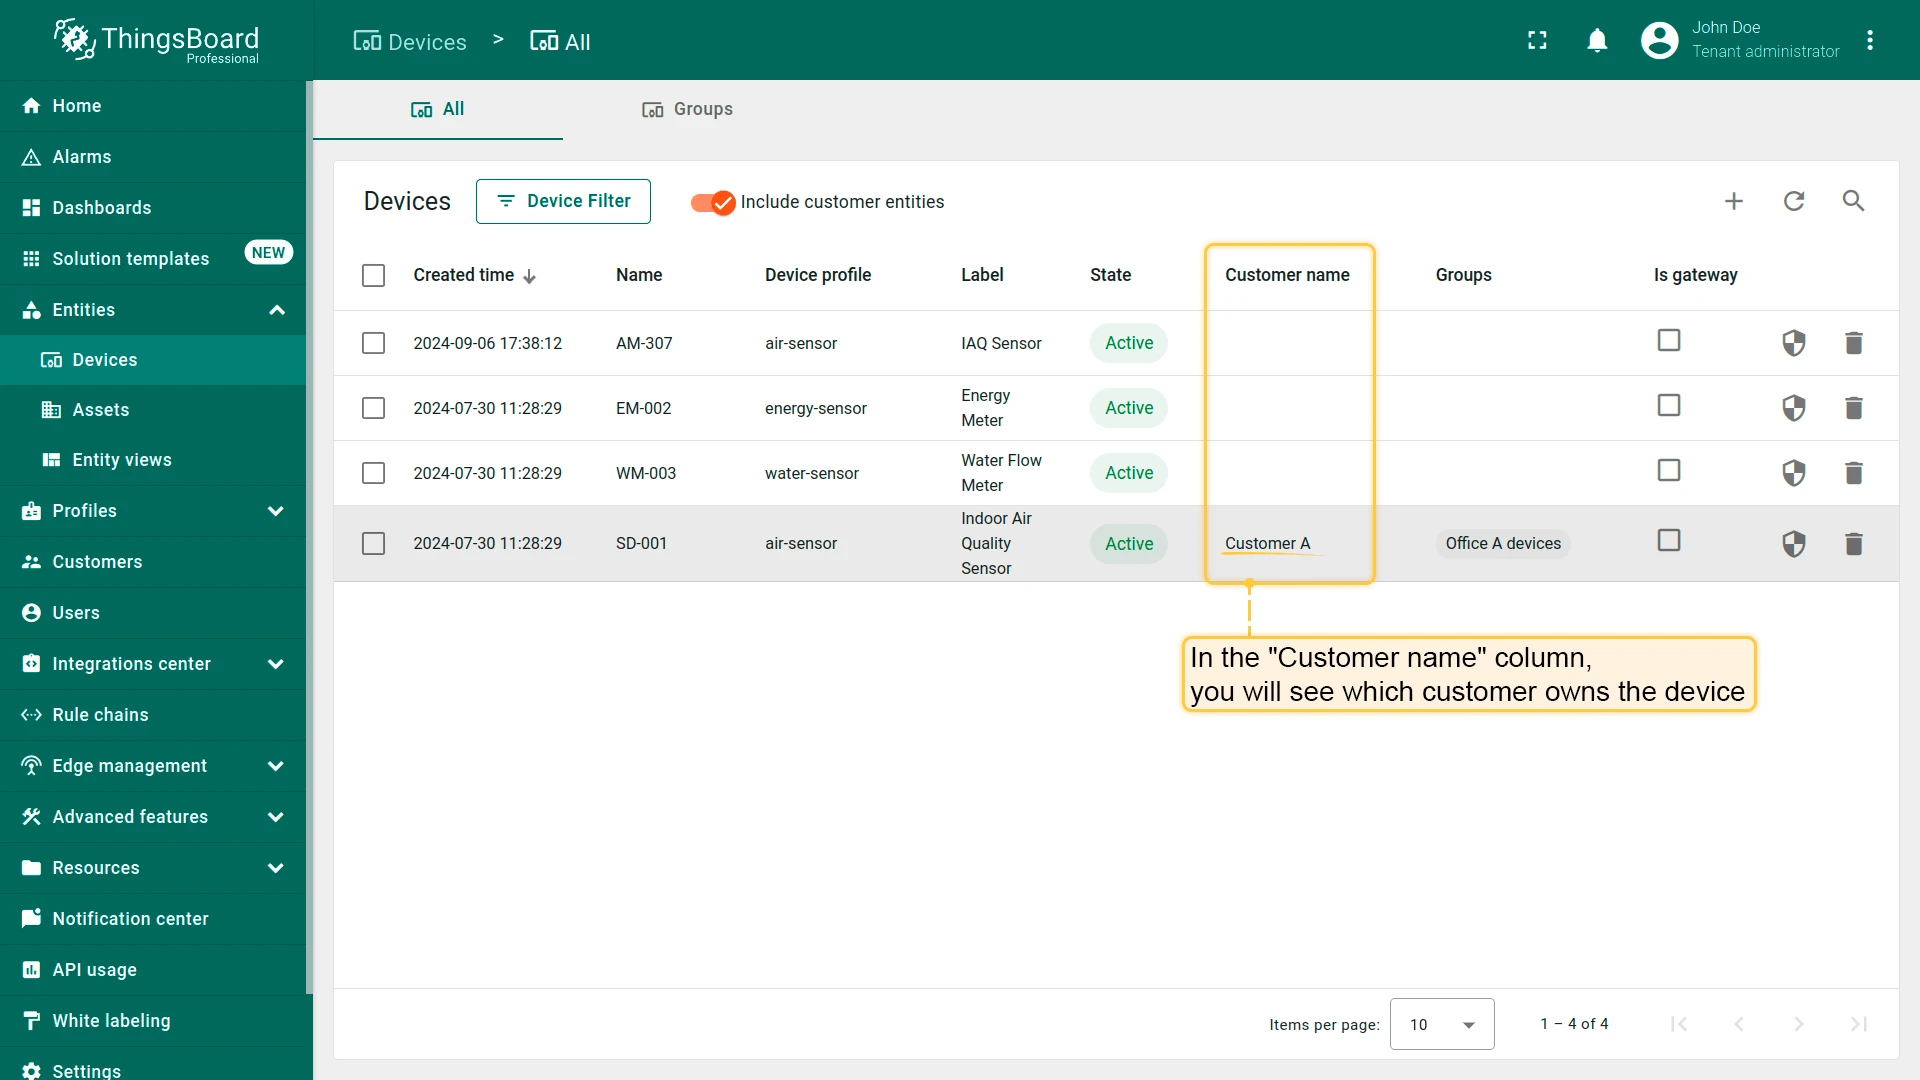
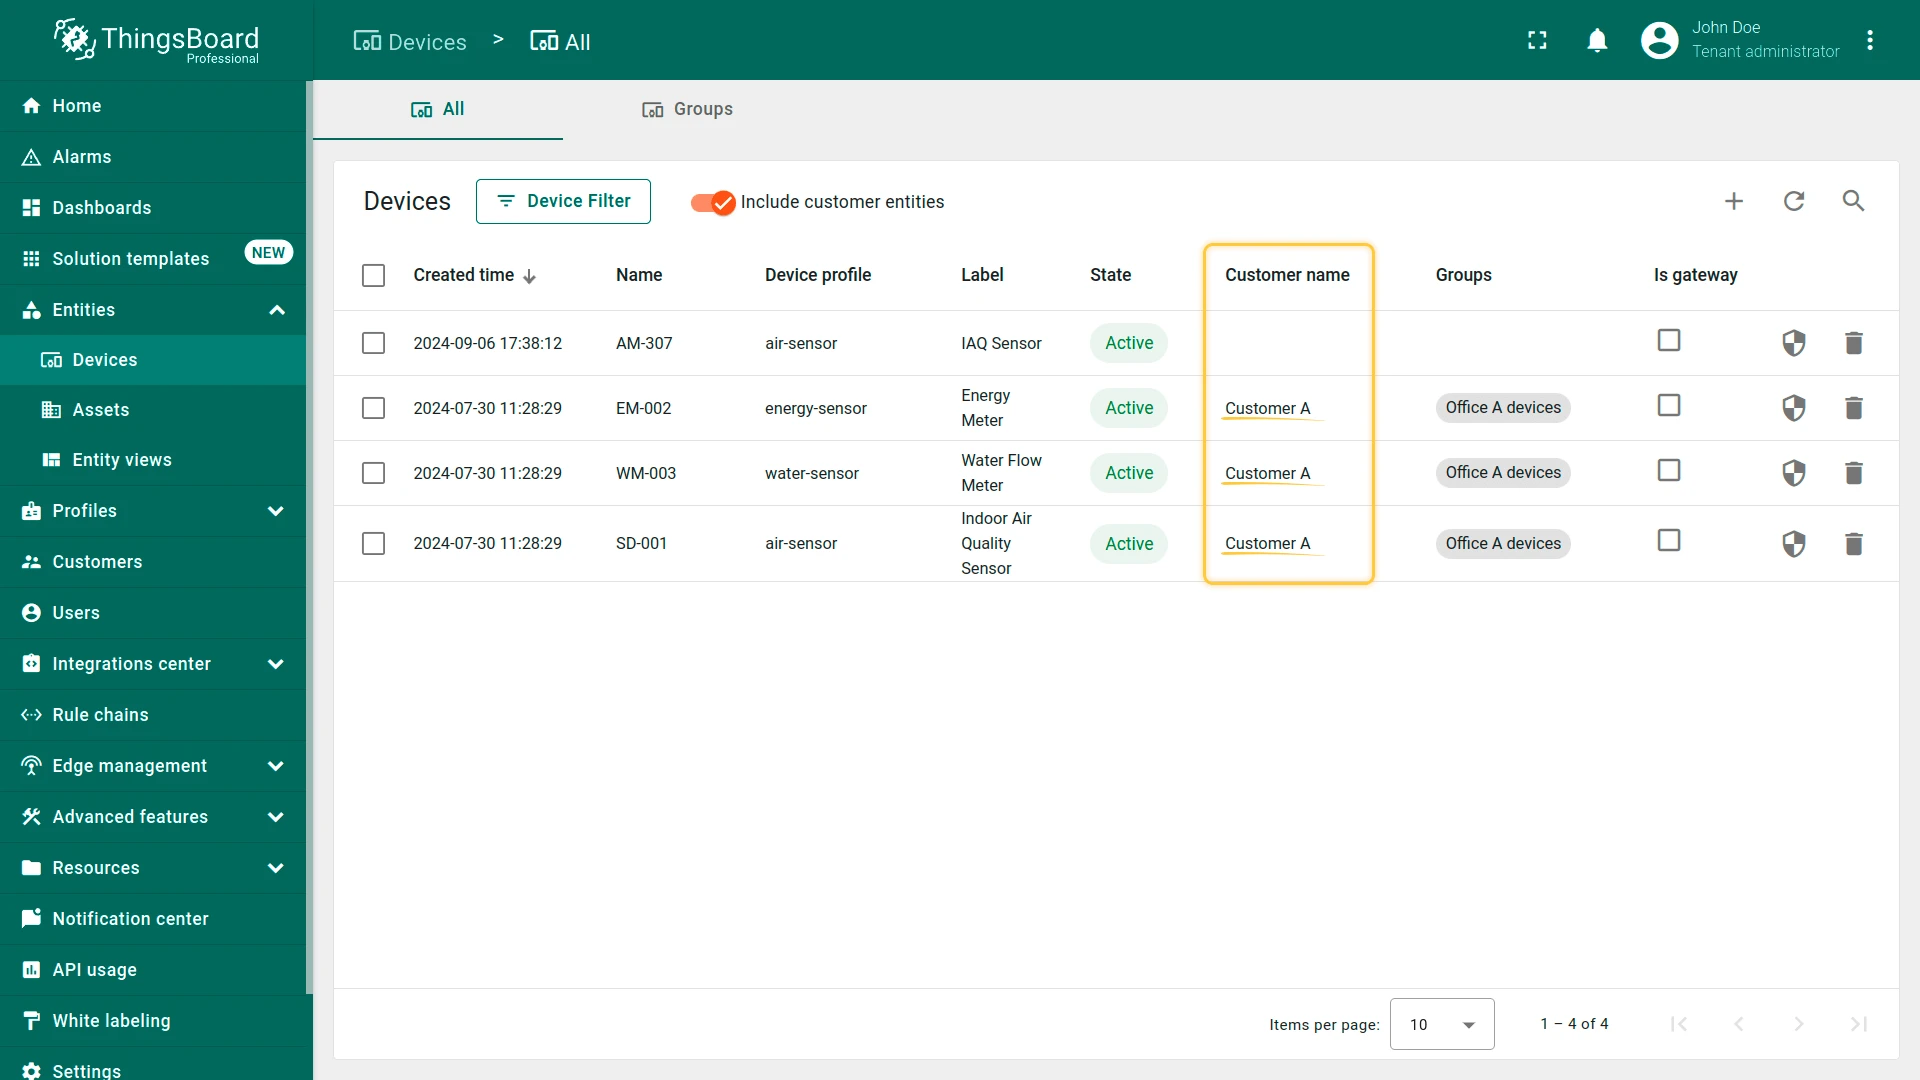
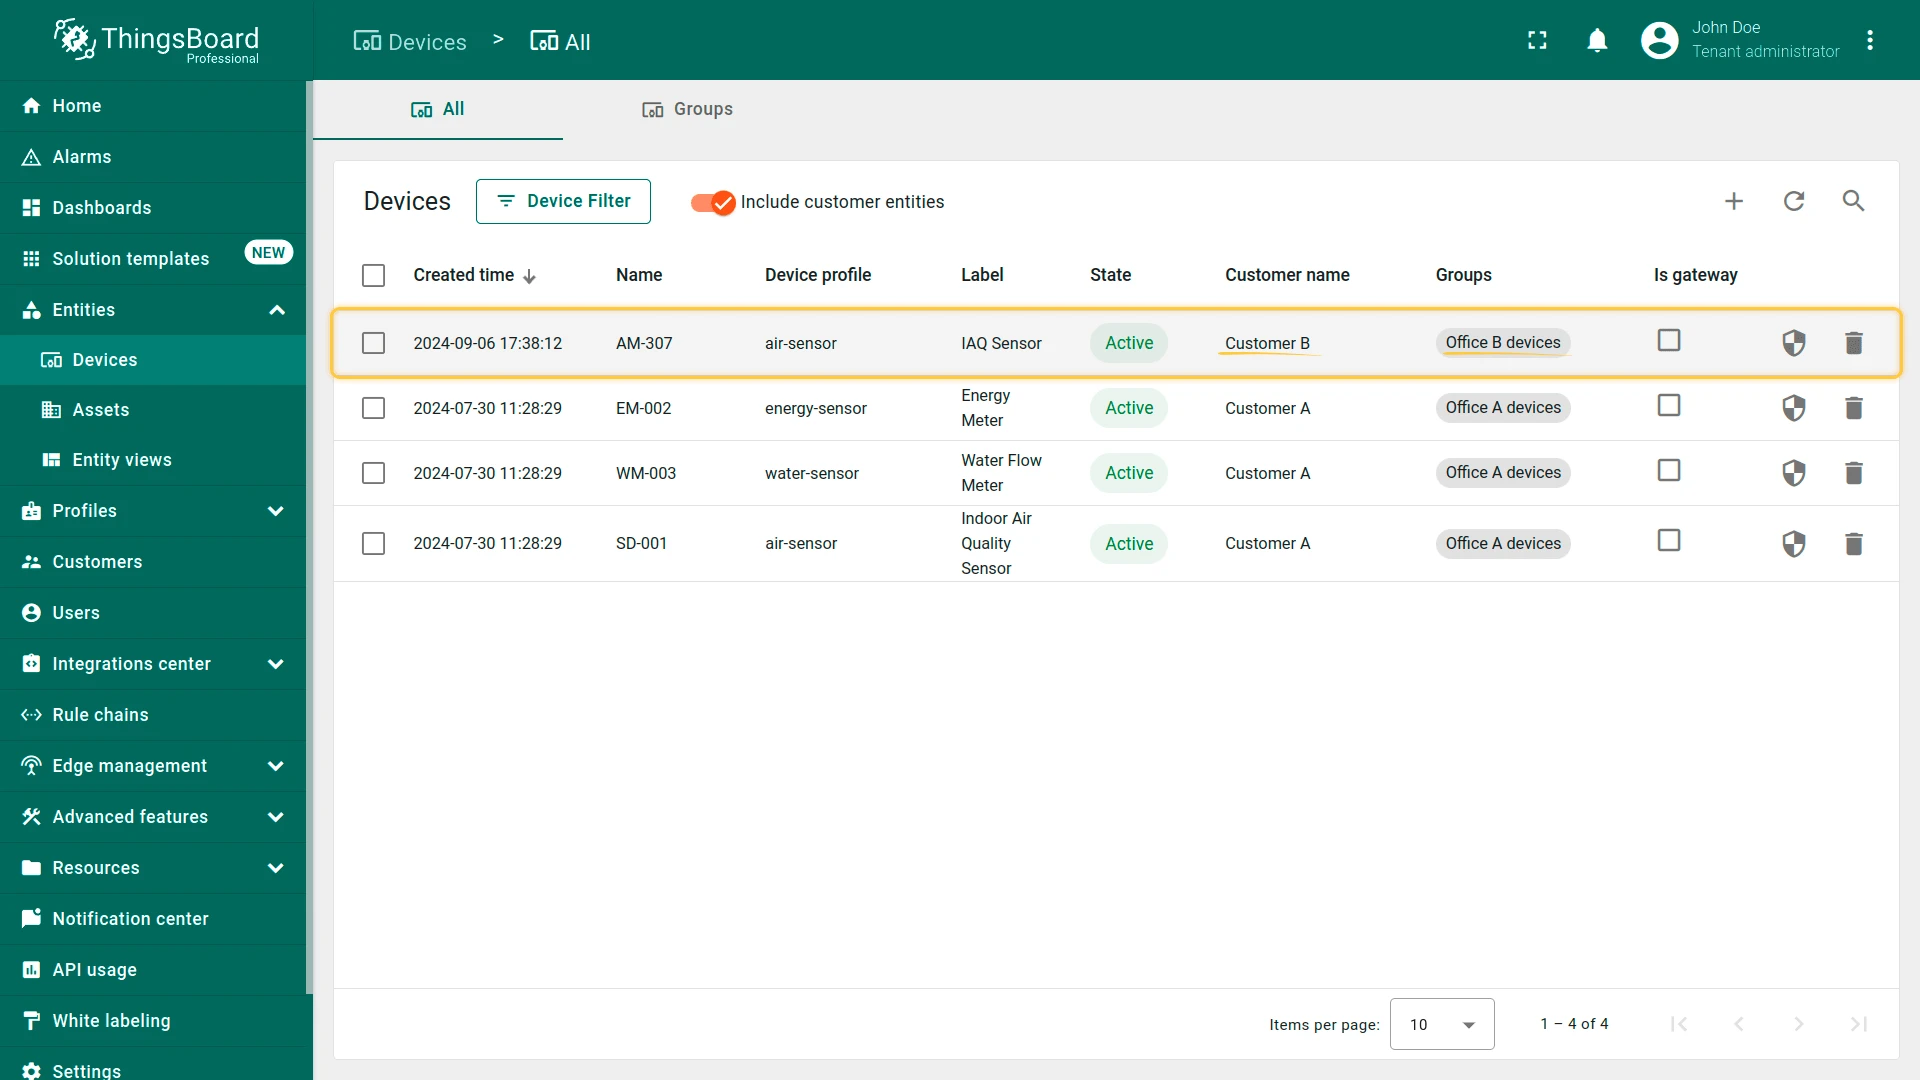
- On the device page, in the Customer name column, you can see which customer the device belongs to.
- Assign Customer A as the owner of EM-002 (Energy Meter) and WM-003 (Water Flow Meter). Then assign Customer B as the owner of AM-307 (Indoor Air Quality Sensor).
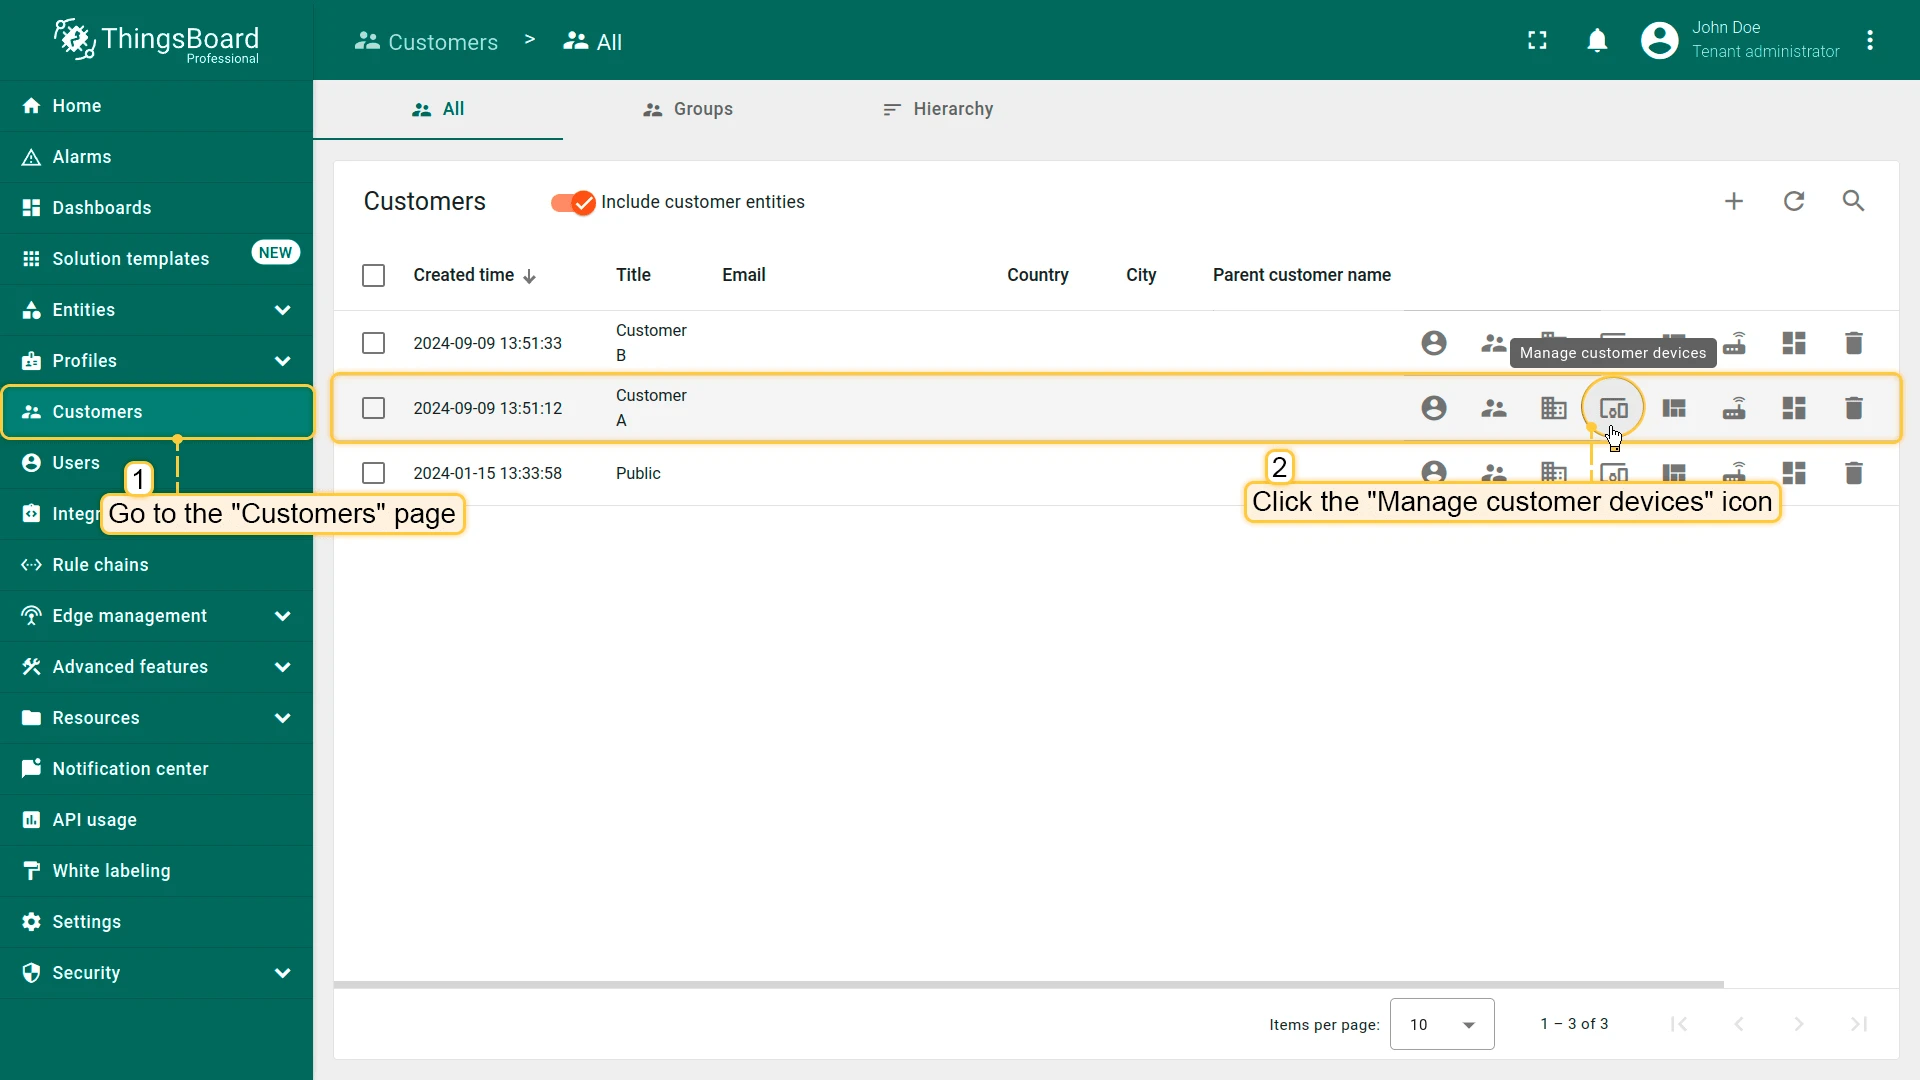
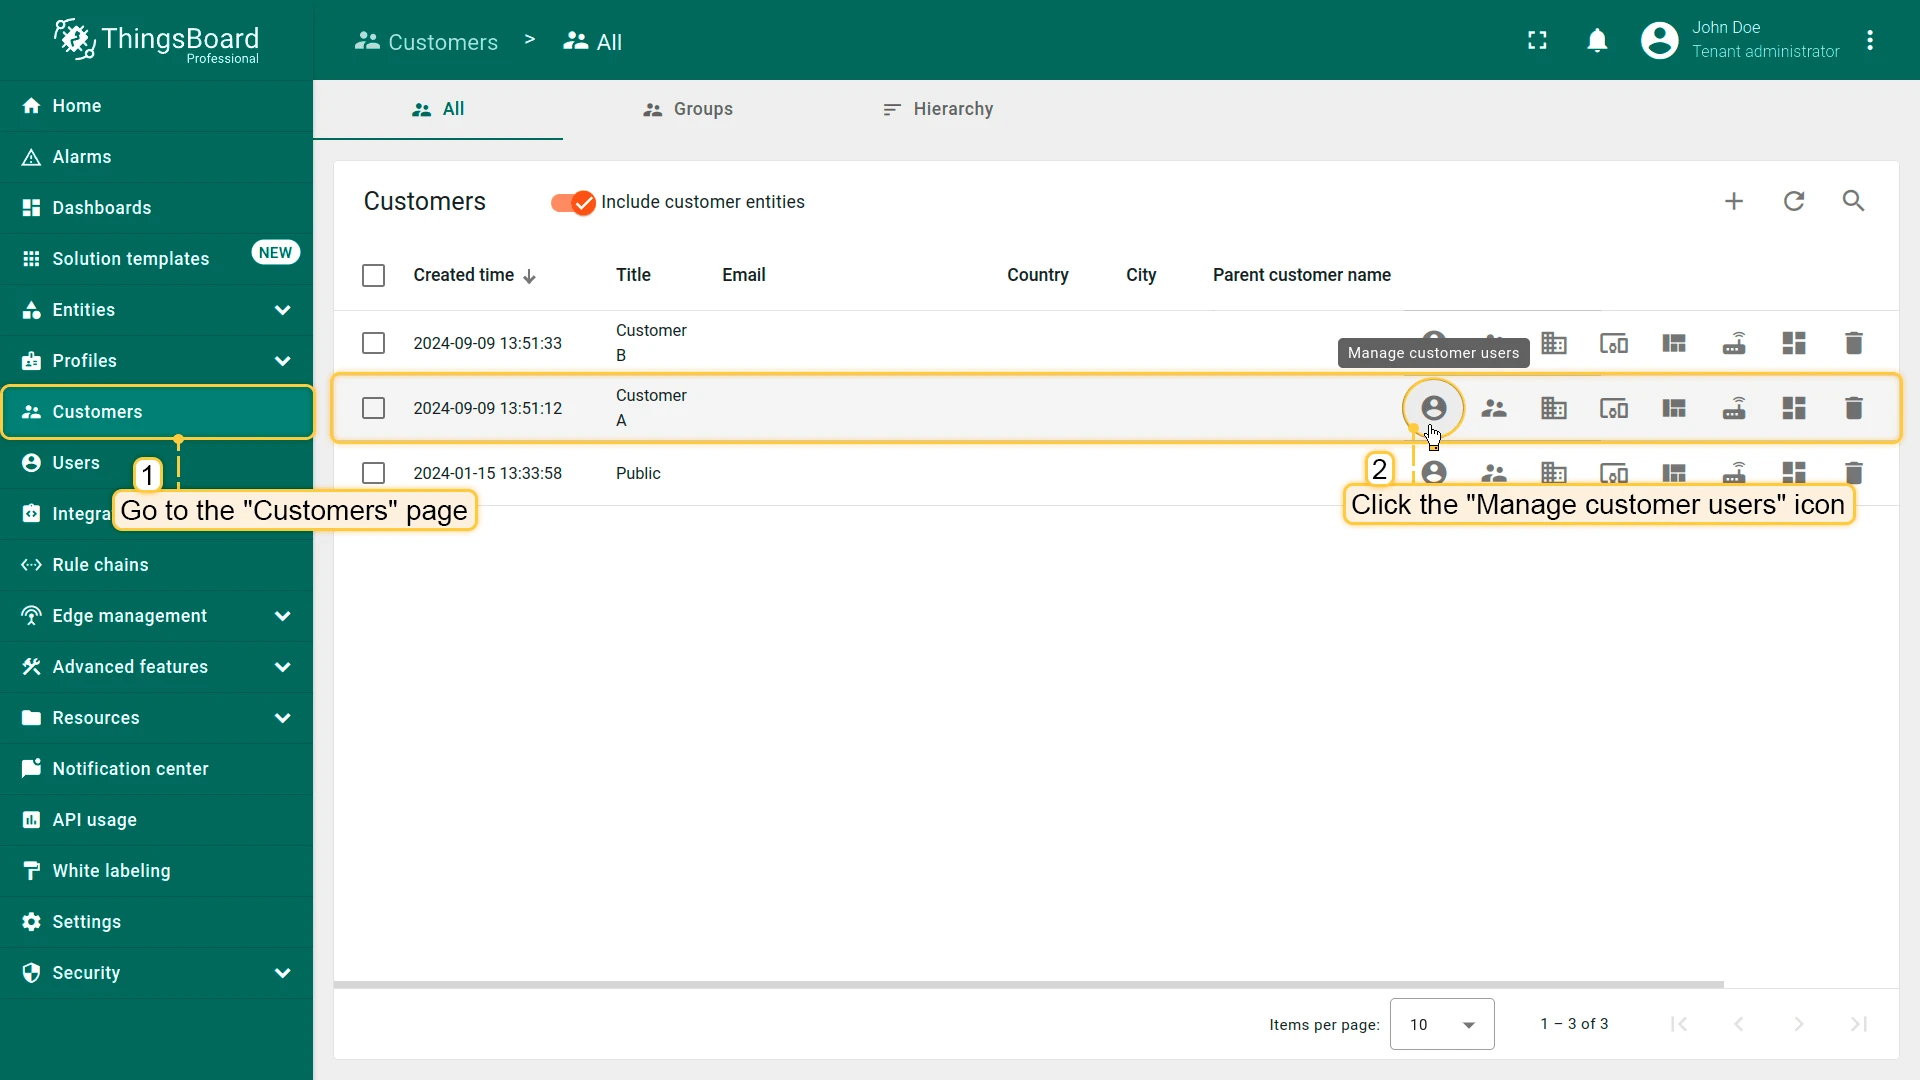
- Navigate to the Customers page and find Customer A in the list. Click the Manage customer devices icon to verify their devices.
- Verify Customer B’s device in the same way.
- Open Devices and select SD-001 (Indoor Air Quality Sensor).
- Click Manage owner and groups.
- Set owner to Customer A.
- Create a new group: - Enter name (e.g., Office A sensors) - Click Create a new one!, then Add
- Click Update to apply changes.
Similarly, assign Customer A as the owner of “EM-002” (Energy Meter) and “WM-003” (Water Flow Meter) devices, and Customer B as the owner of “AM-307” (Indoor Air Quality Sensor).
Make sure that the devices are assigned to Customer A.
- Open Customers and find Customer A.
- Click Manage customer devices.
- View devices in Office A devices group.

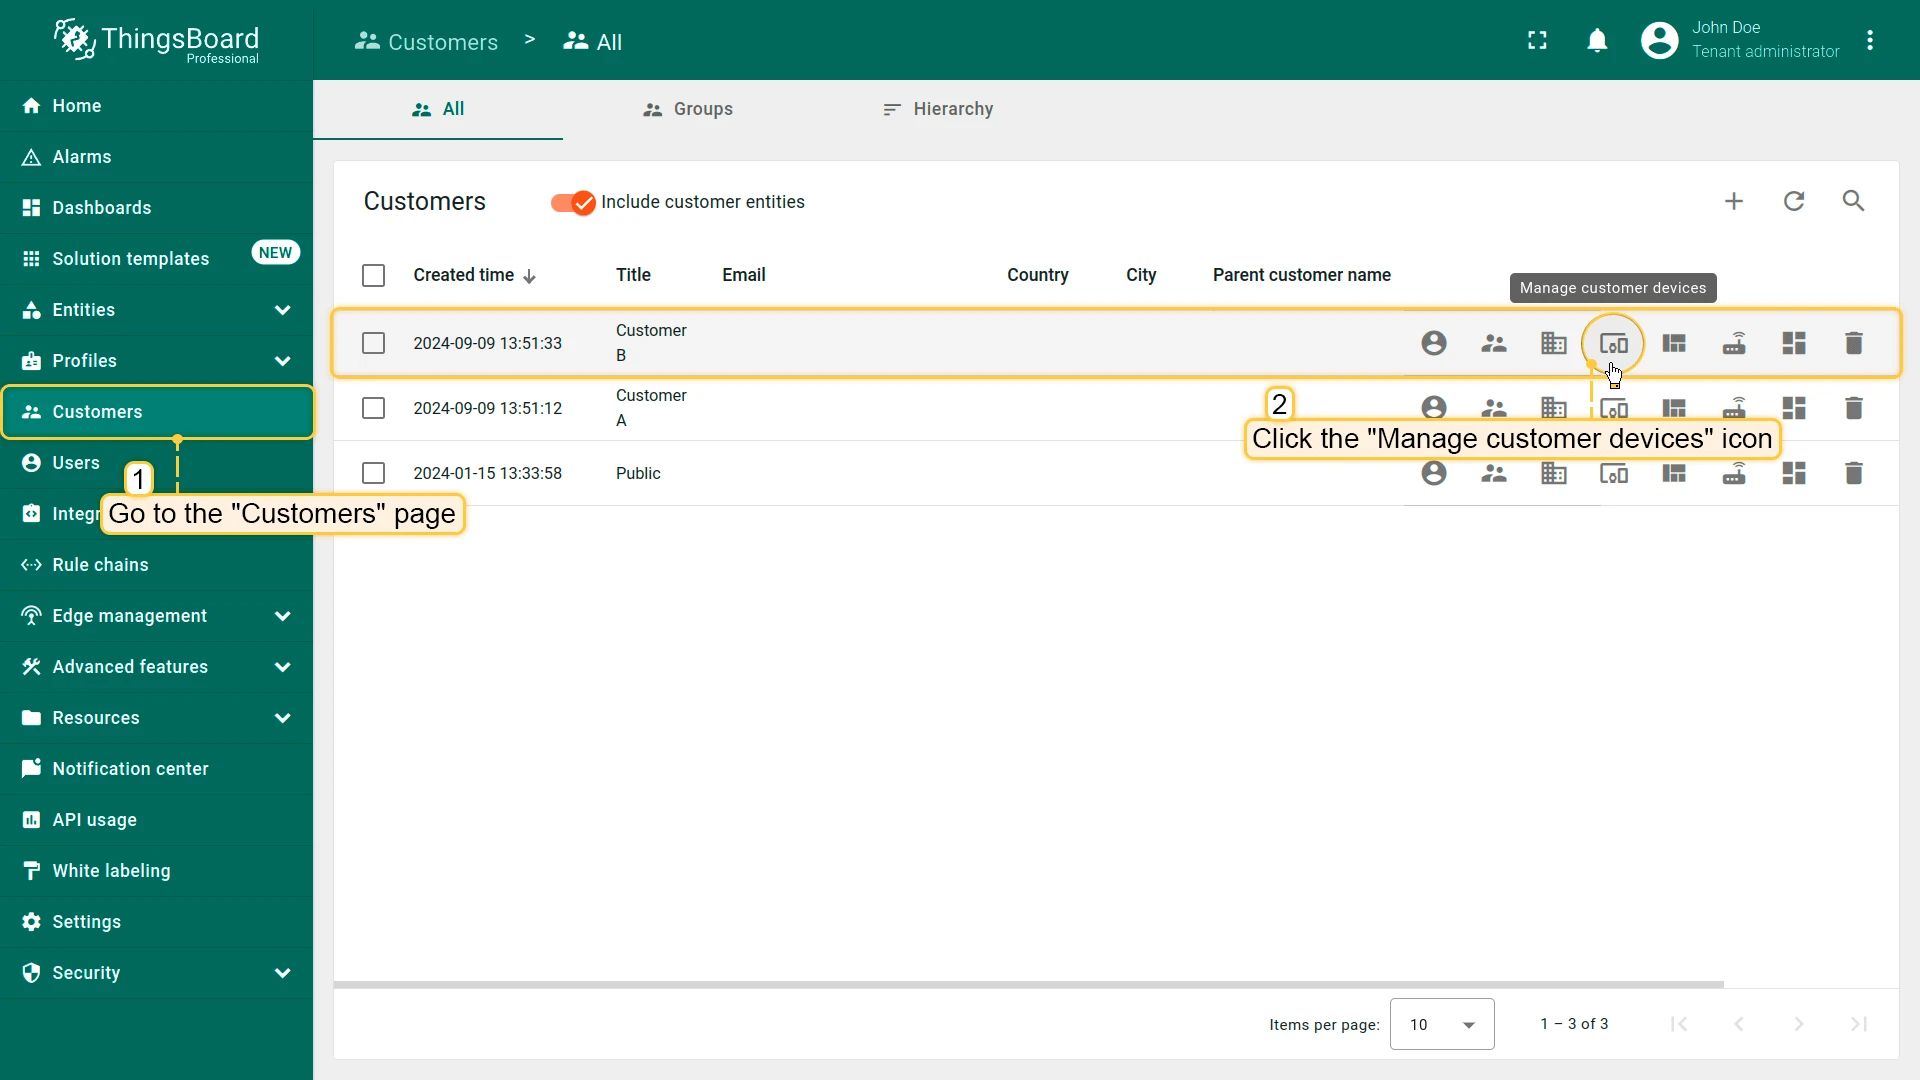
Make sure that the devices are assigned to Customer B.
- Open Customers and find Customer B.
- Click Manage customer devices.
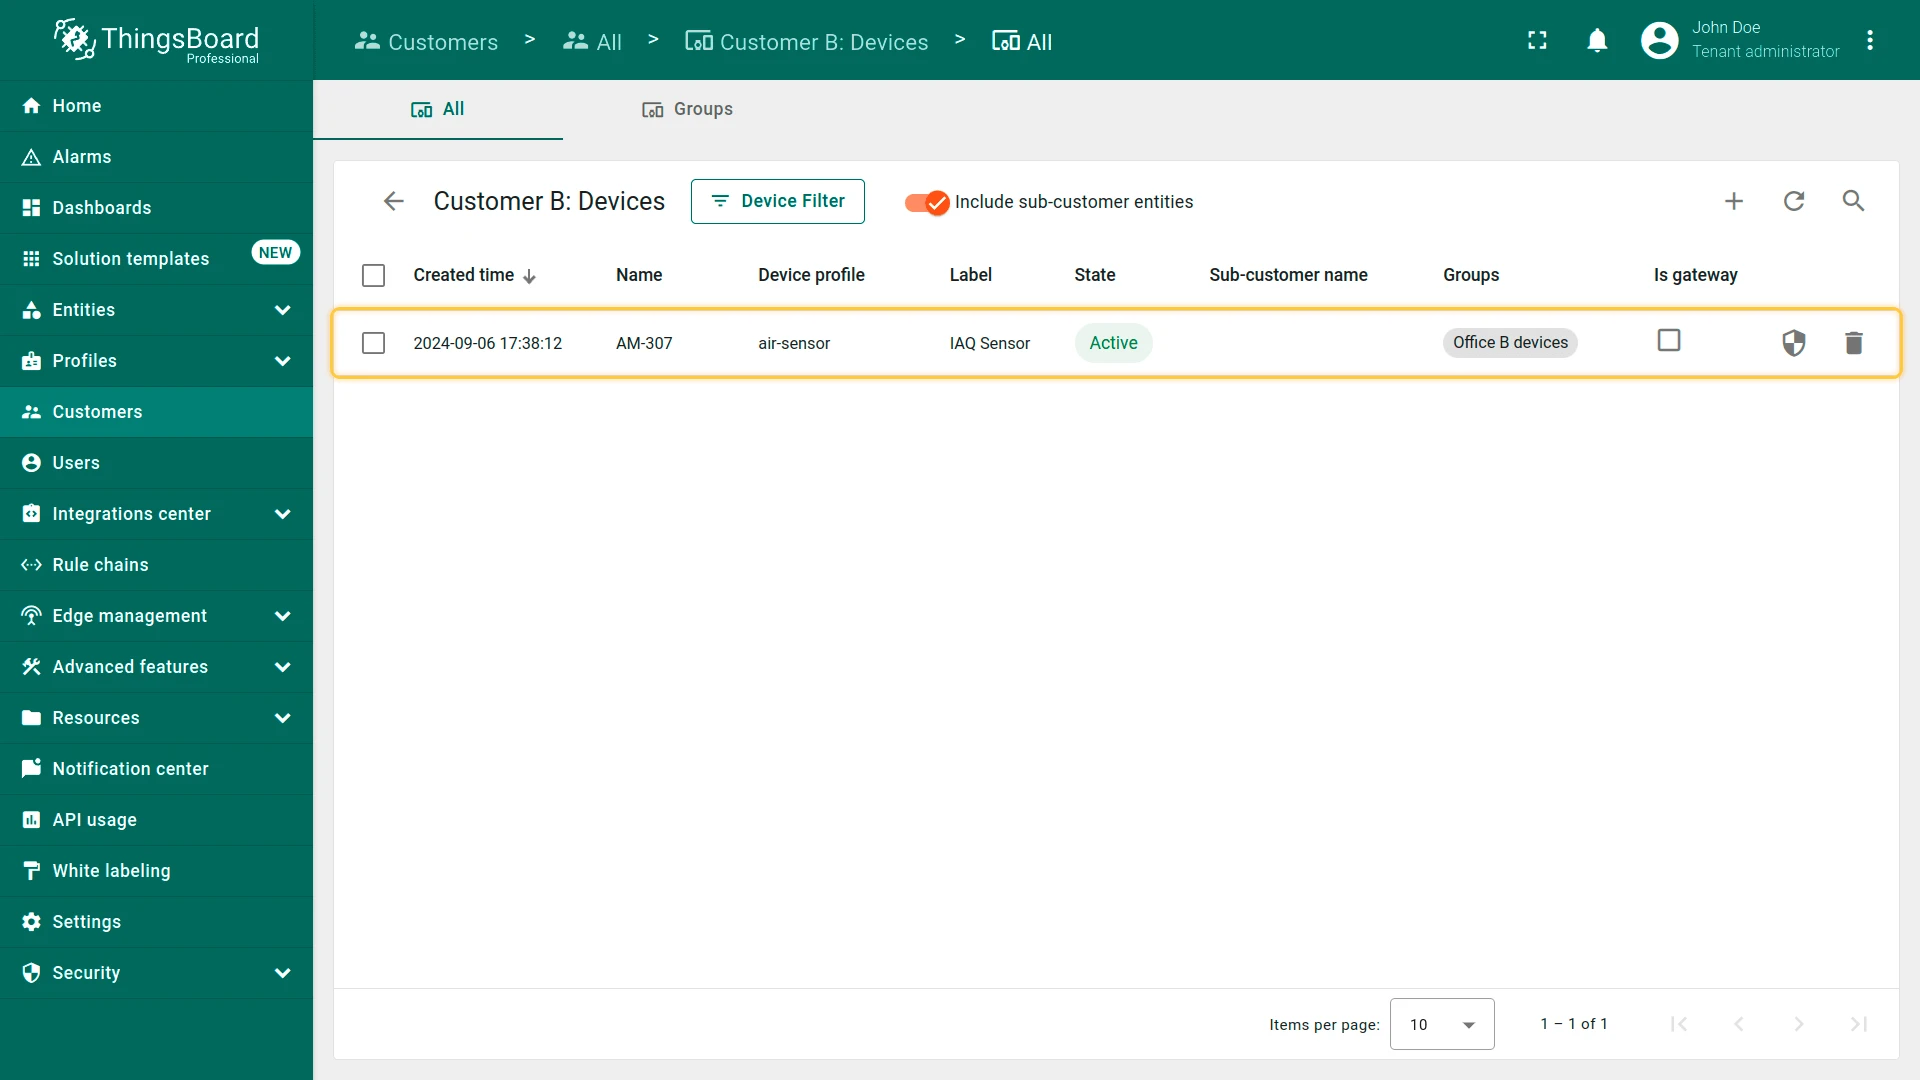
- View devices in Office B devices group.
Step 5.4. Access to Assets
Section titled “Step 5.4. Access to Assets”Configure access to assets so that customers can view only the assets associated with their environment (e.g., rented office), maintaining proper data separation.
Changing Owner of Assets
Section titled “Changing Owner of Assets”Office assets must be owned by the respective customer so only that customer can access the office data.
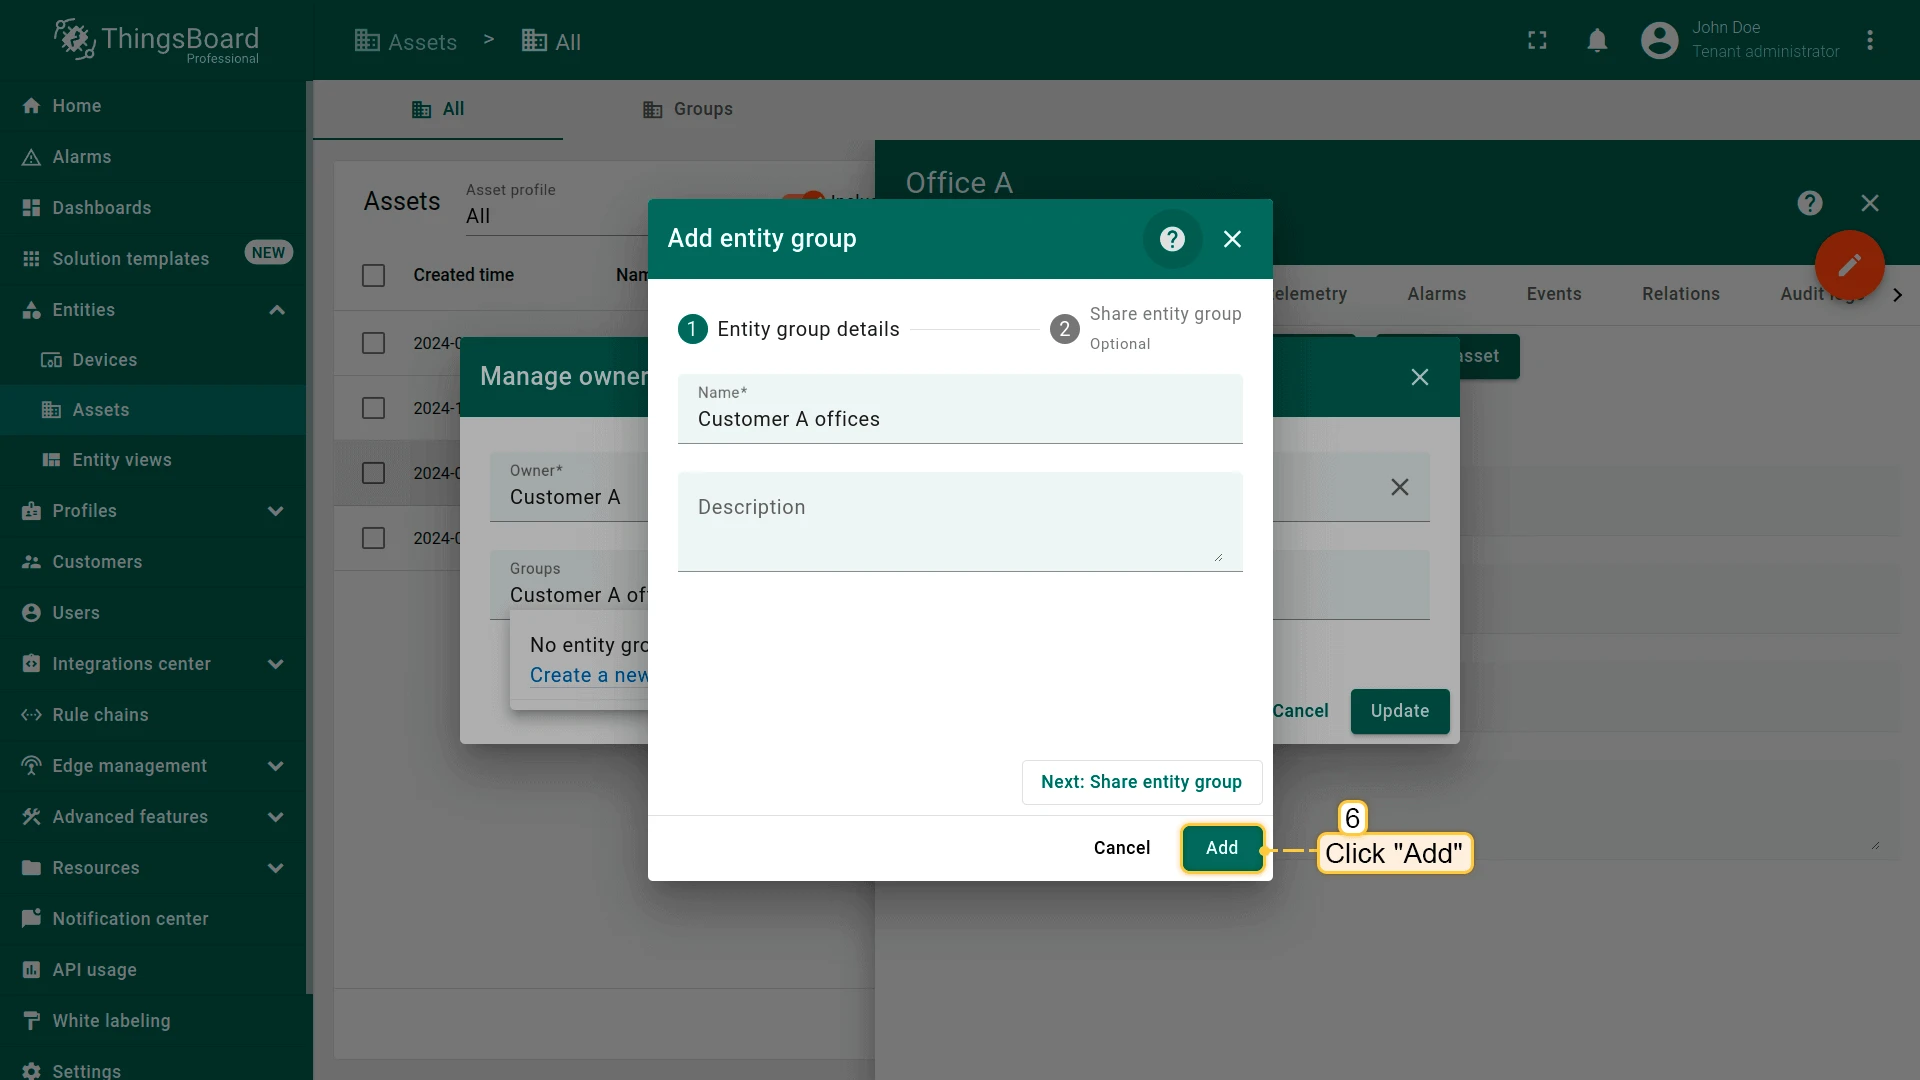
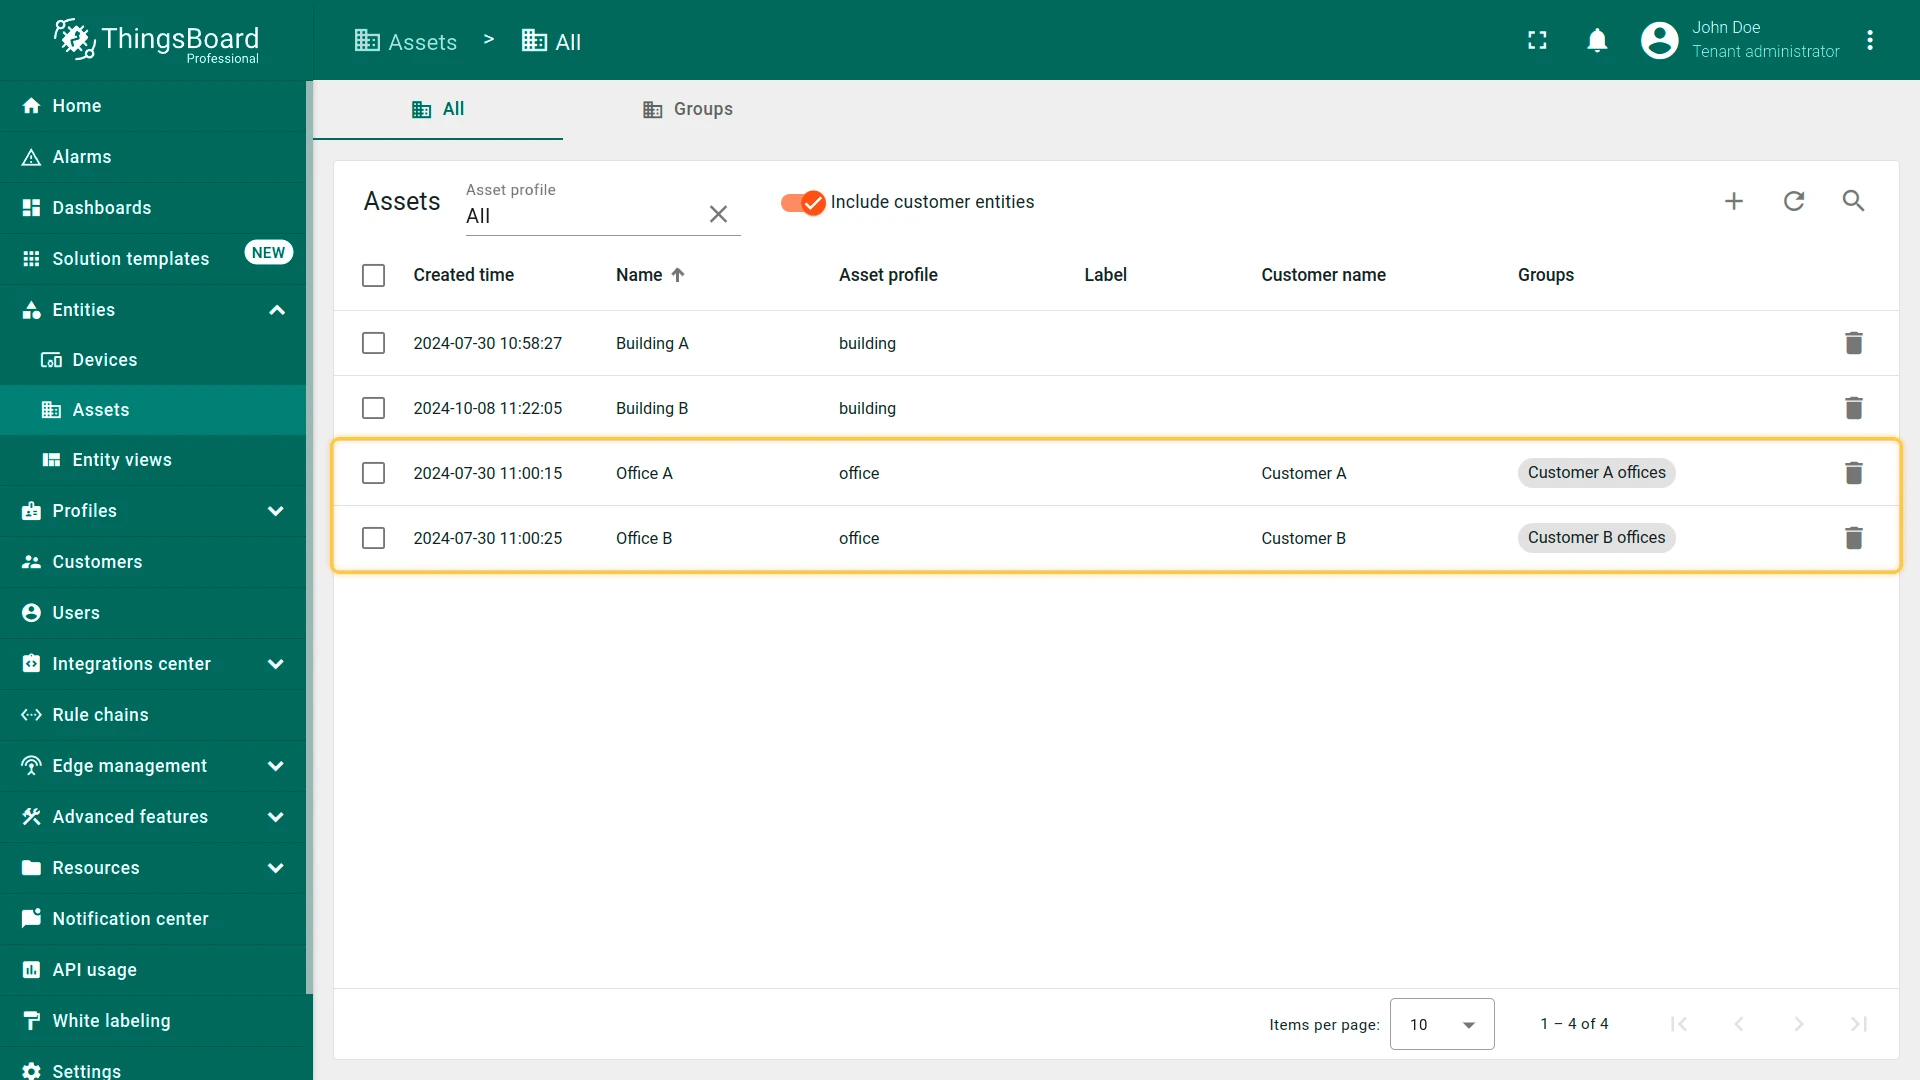
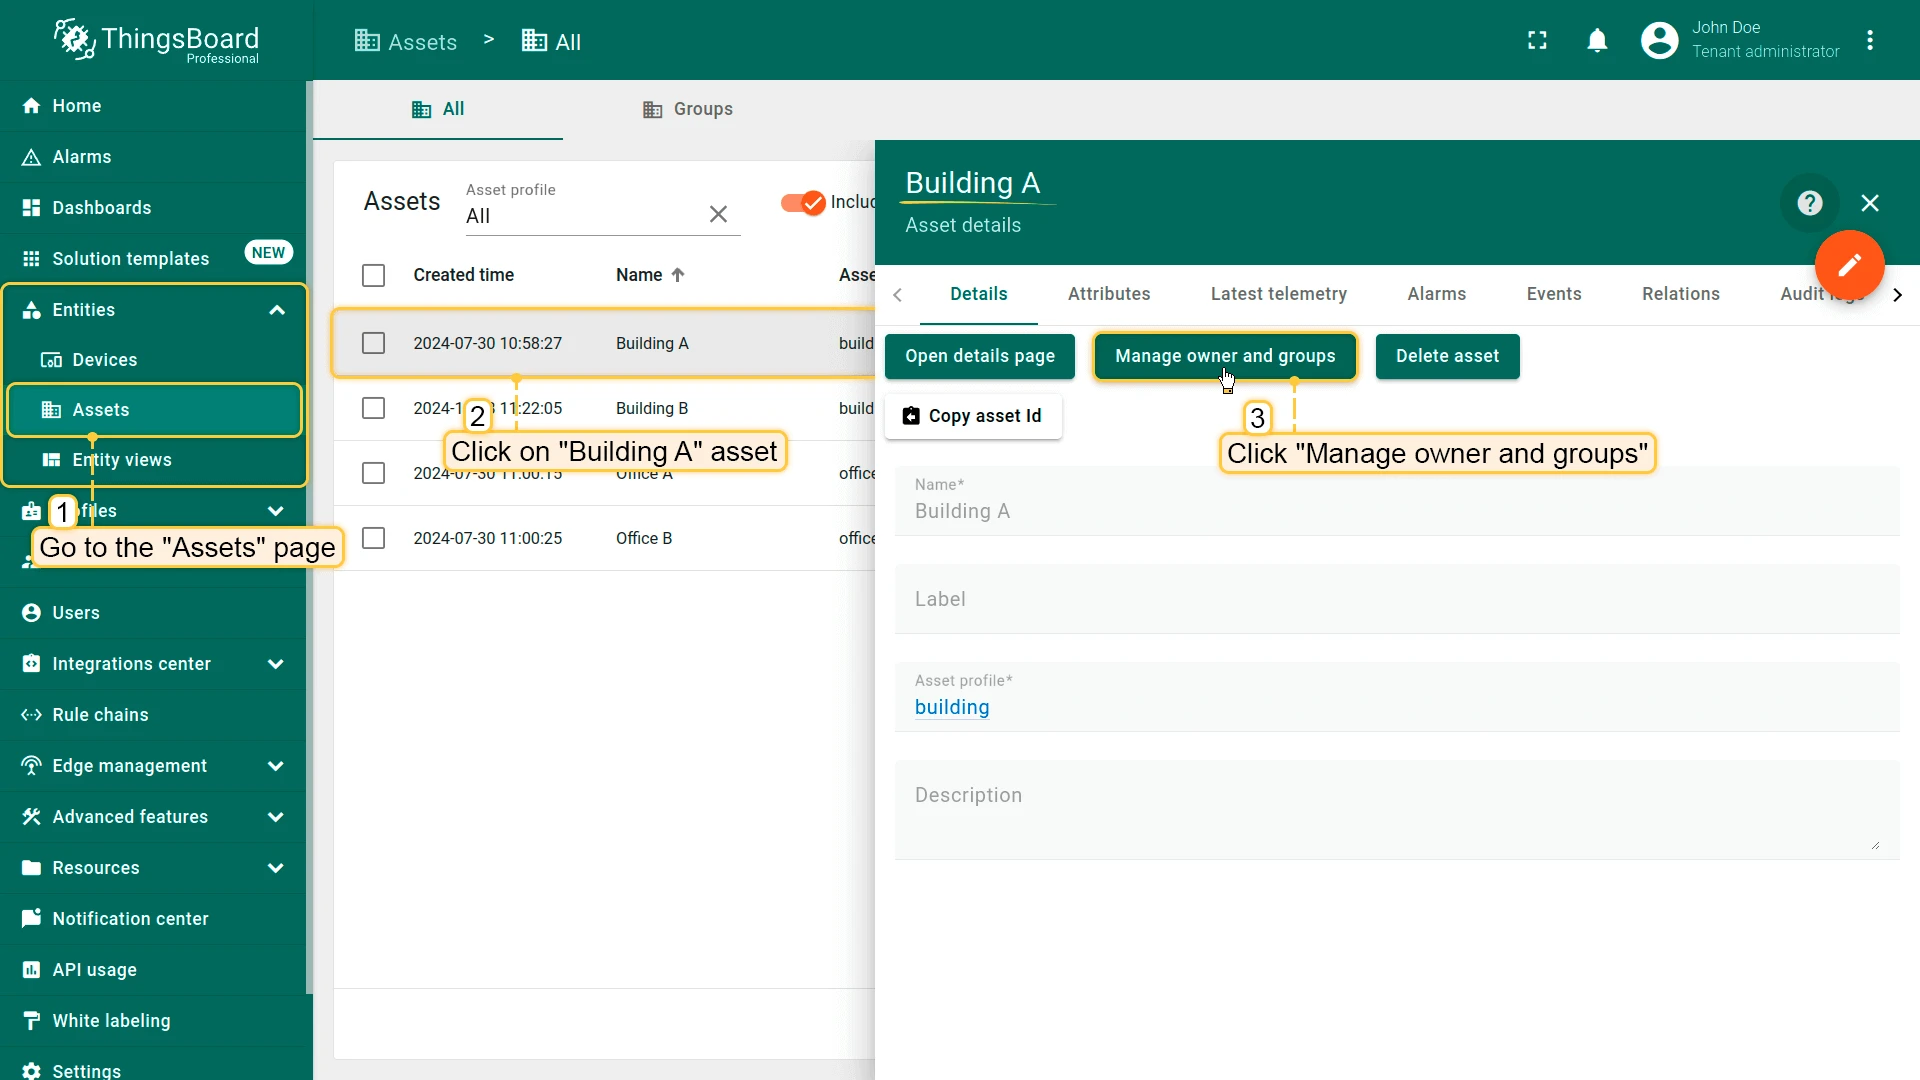
- Open Assets and select Office A.
- Click Manage owner and groups.
- Set owner to Customer A.
- Create and add group: - Enter name (e.g., Customer A offices) - Click Create a new one!, then Add
- Click Update.
- Repeat for Office B with Customer B.


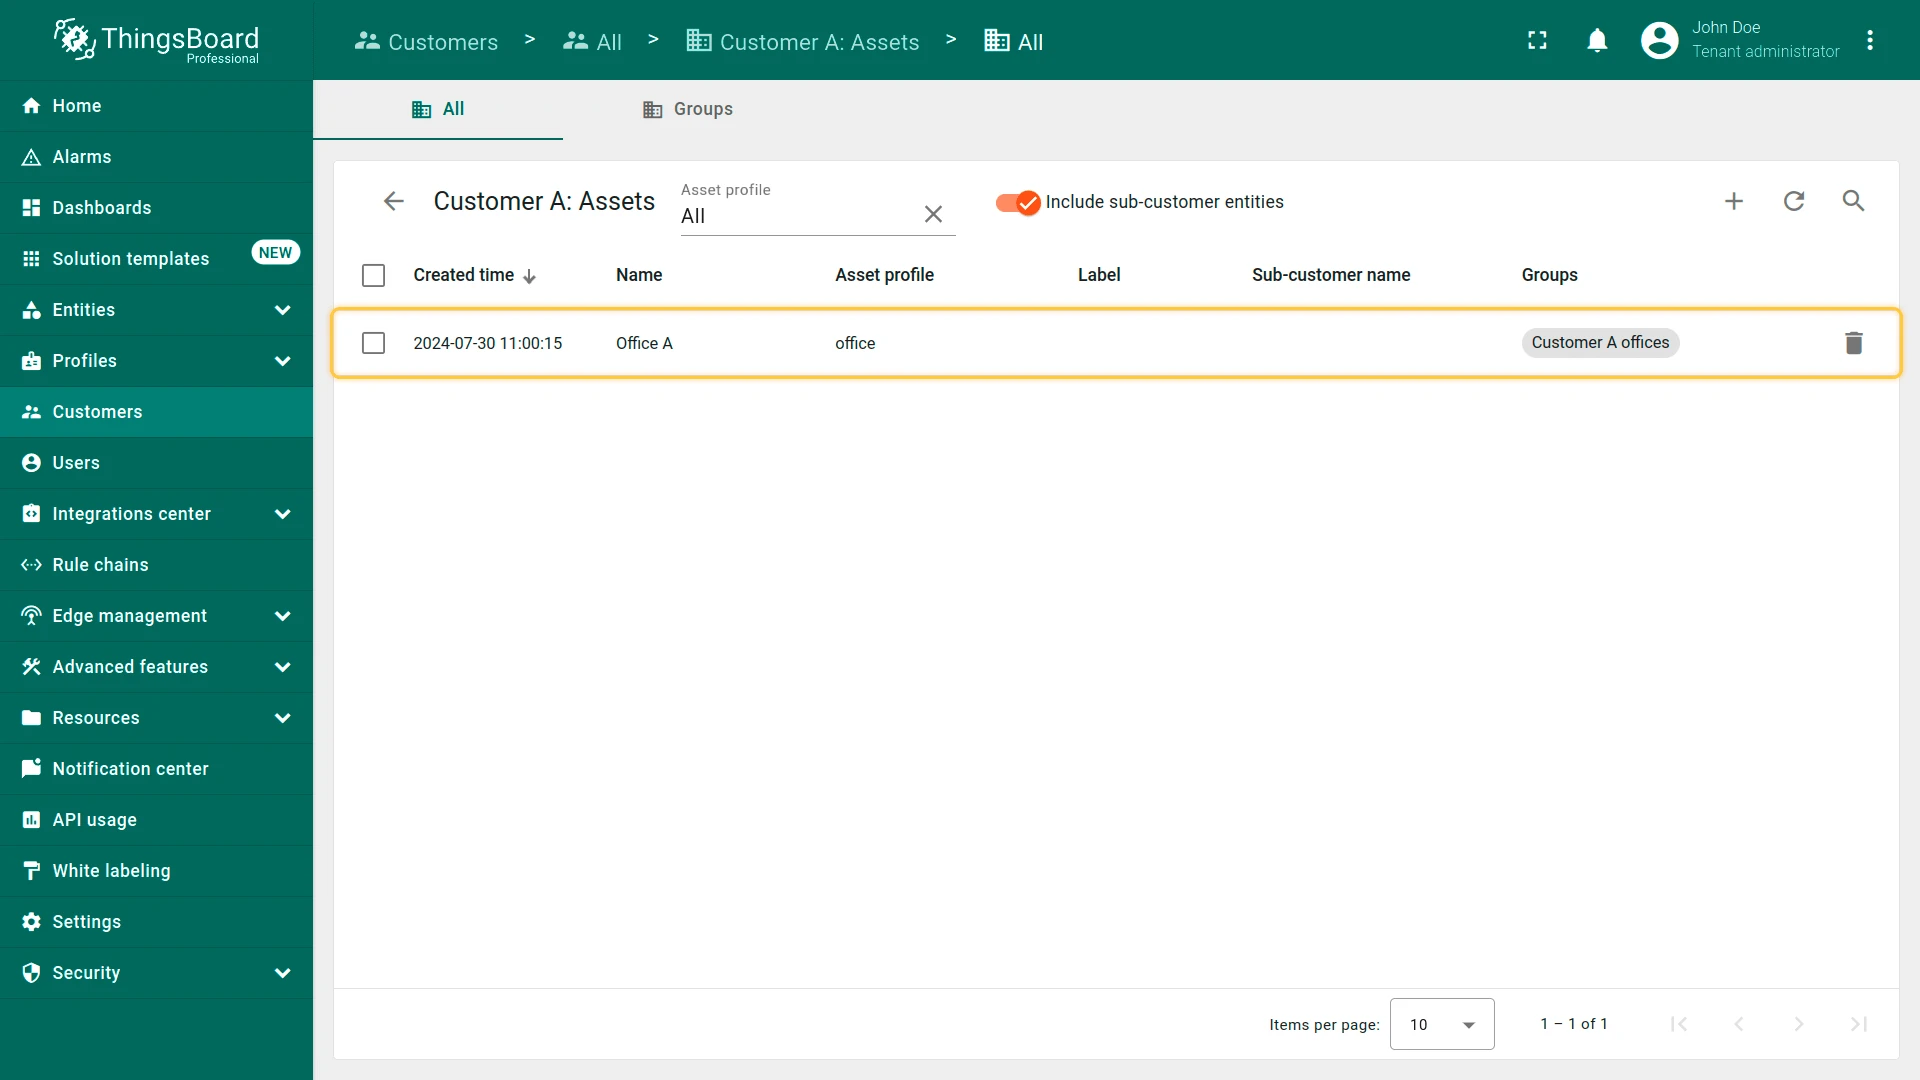
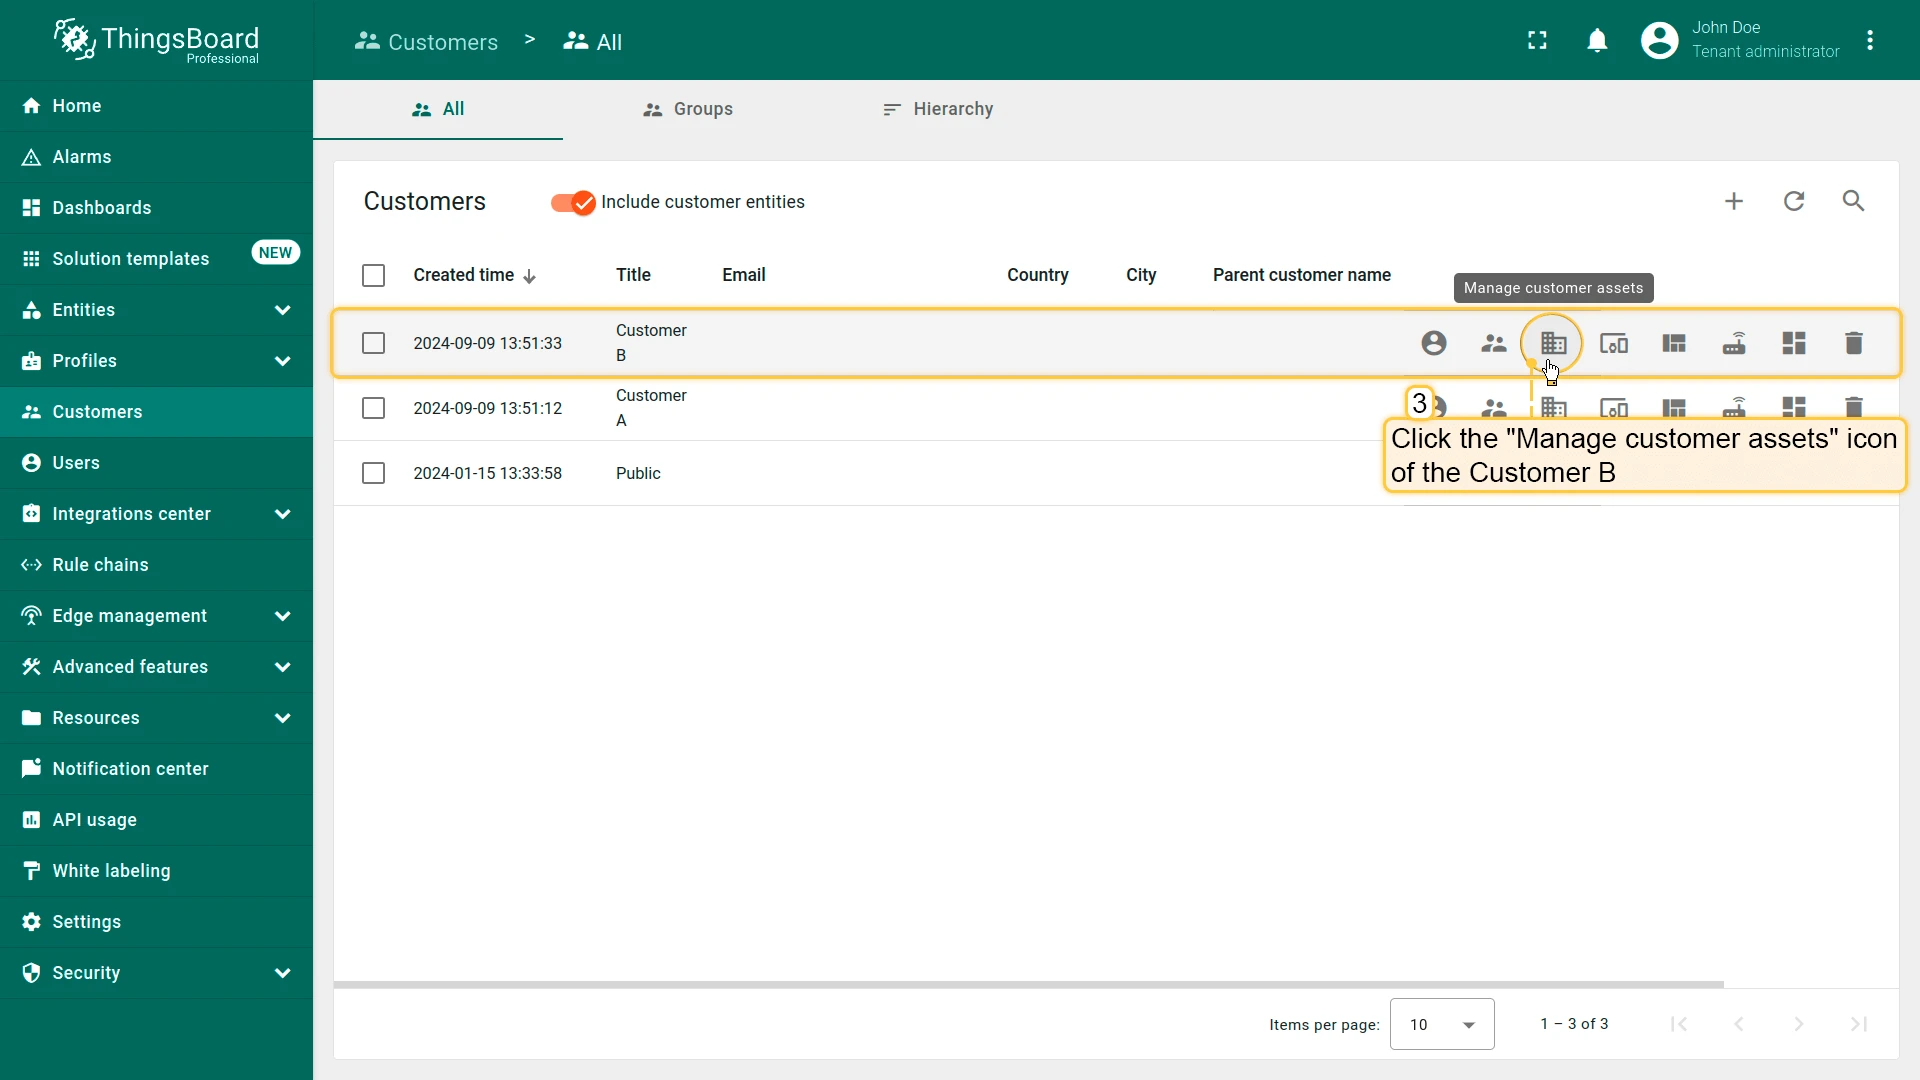
Navigate to the Customers page and click the Manage customer assets icon next to Customer A to verify.
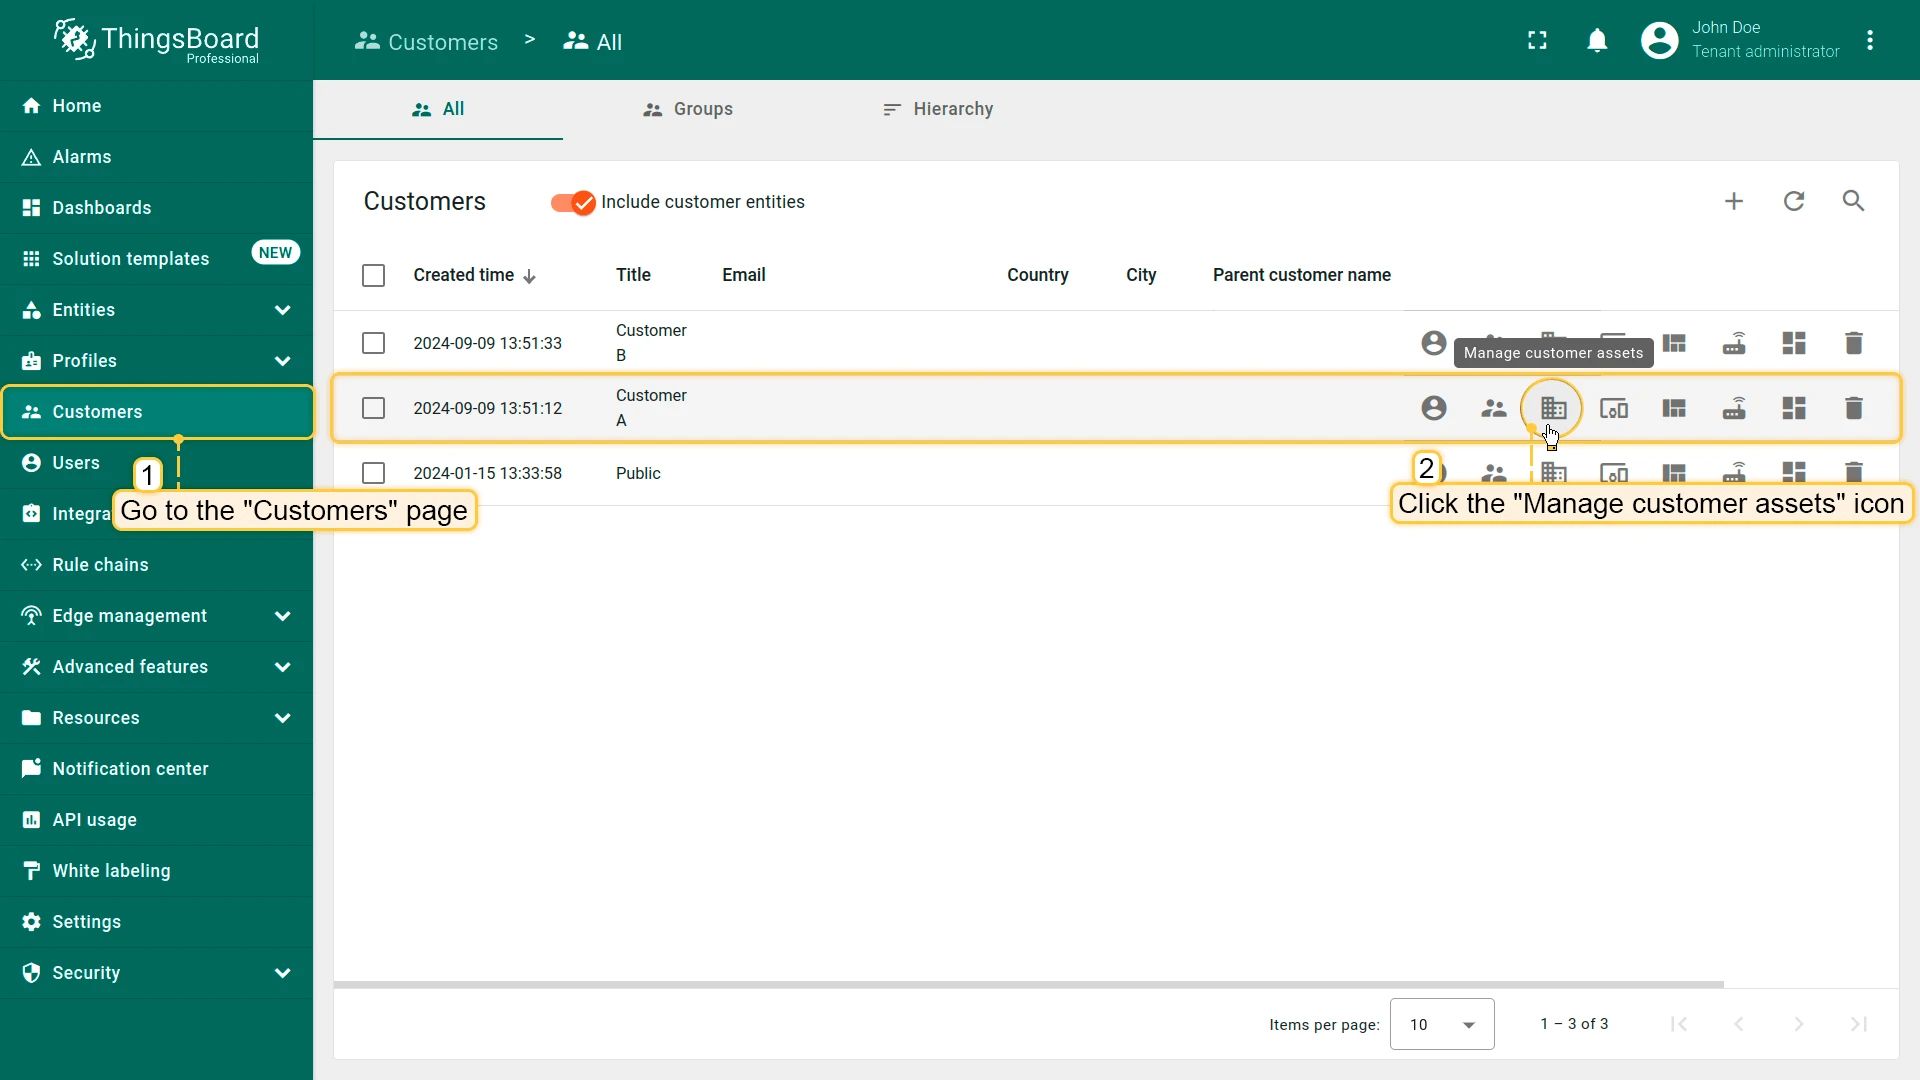
Find Customer B and click the Manage customer assets icon to verify.

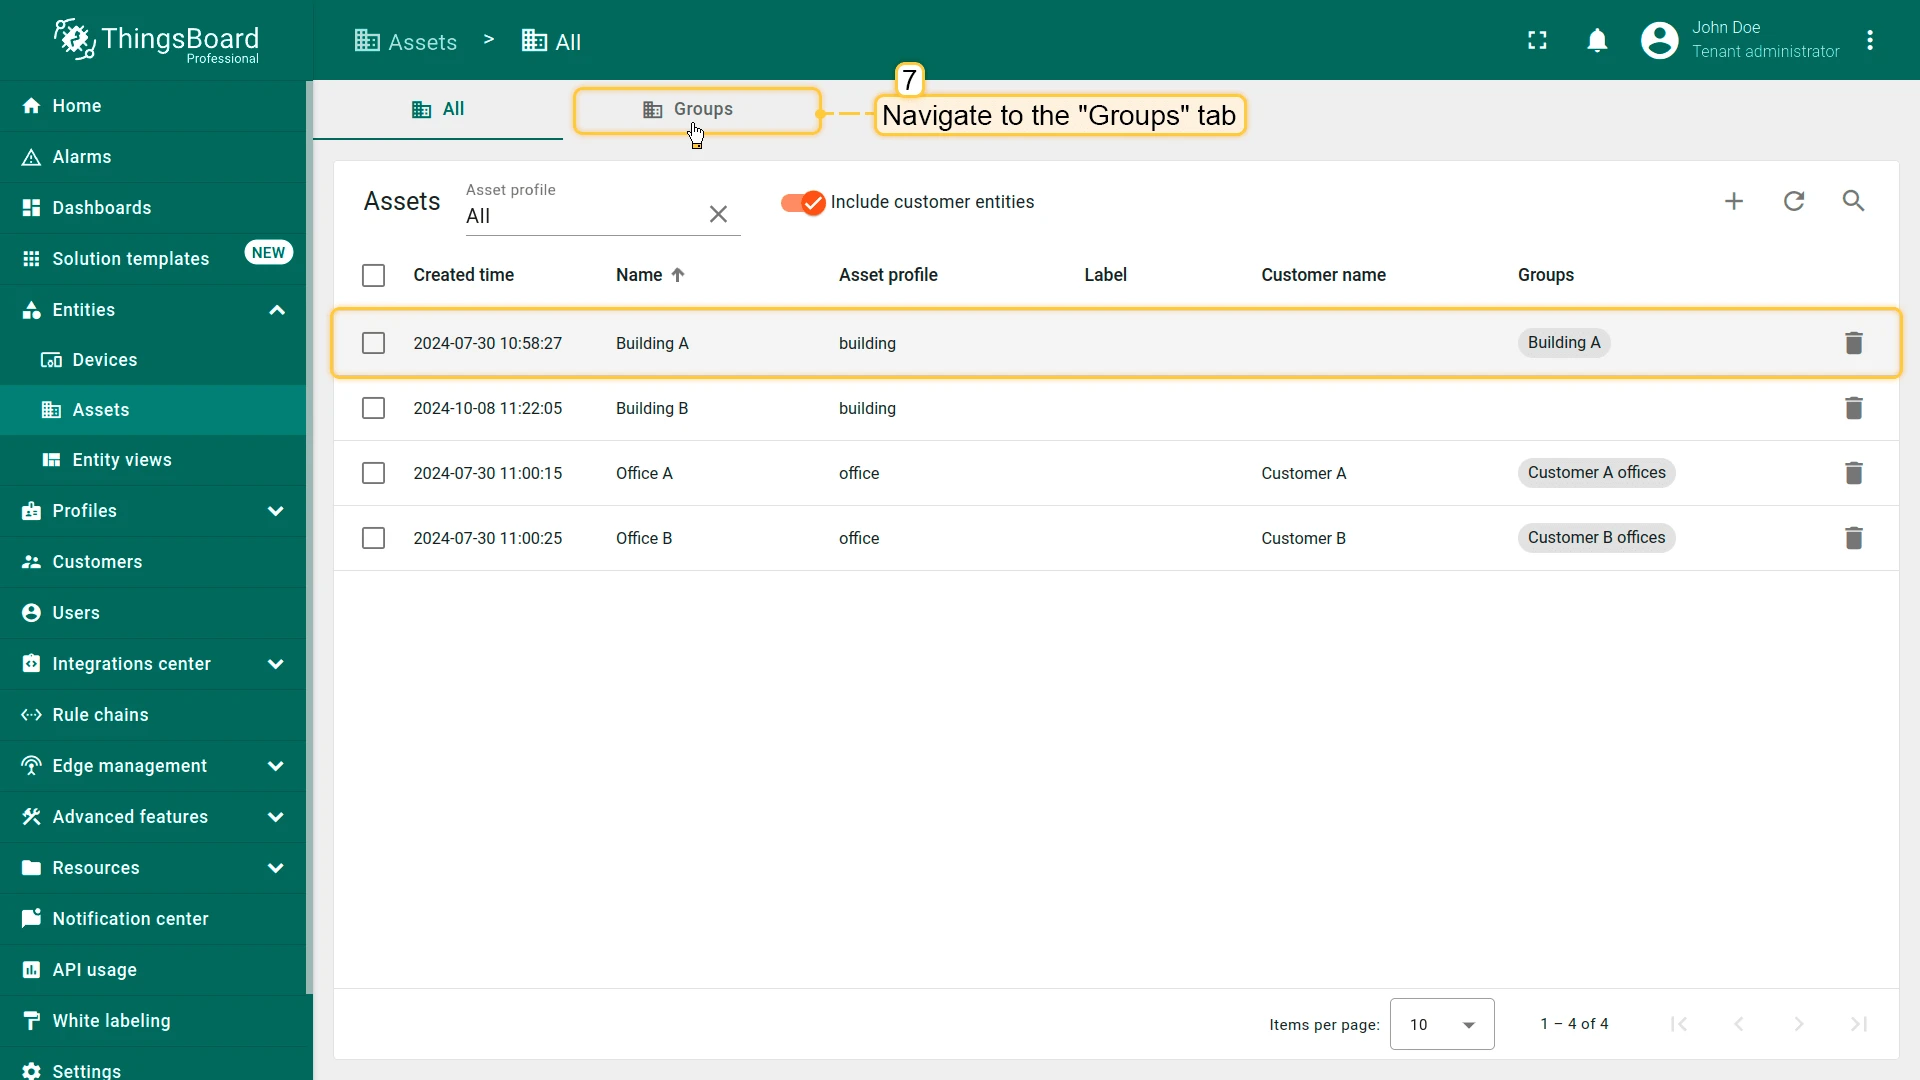
Sharing Assets (Building A)
Section titled “Sharing Assets (Building A)”Building A is used by both customers, so it must be shared — not owned — by each of them.
- Open Assets and select Building A.
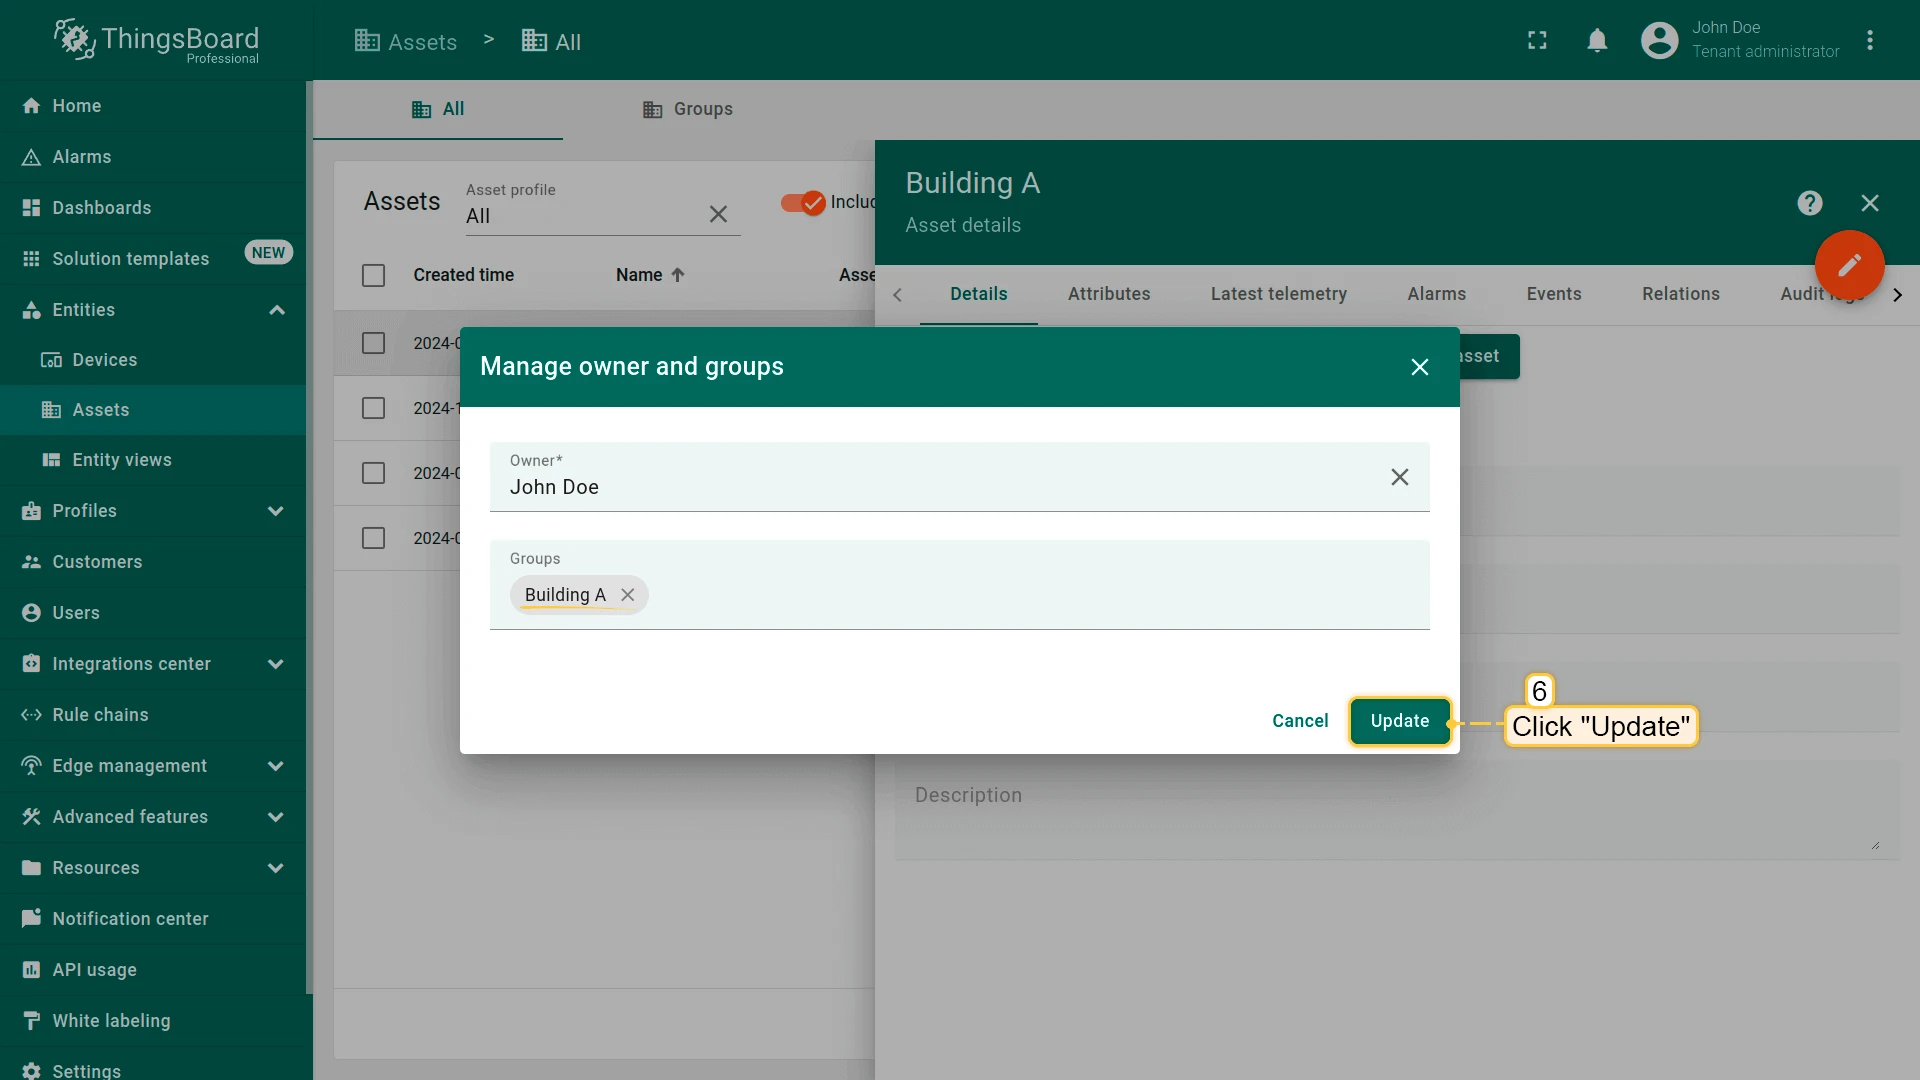
- Click Manage owner and groups.
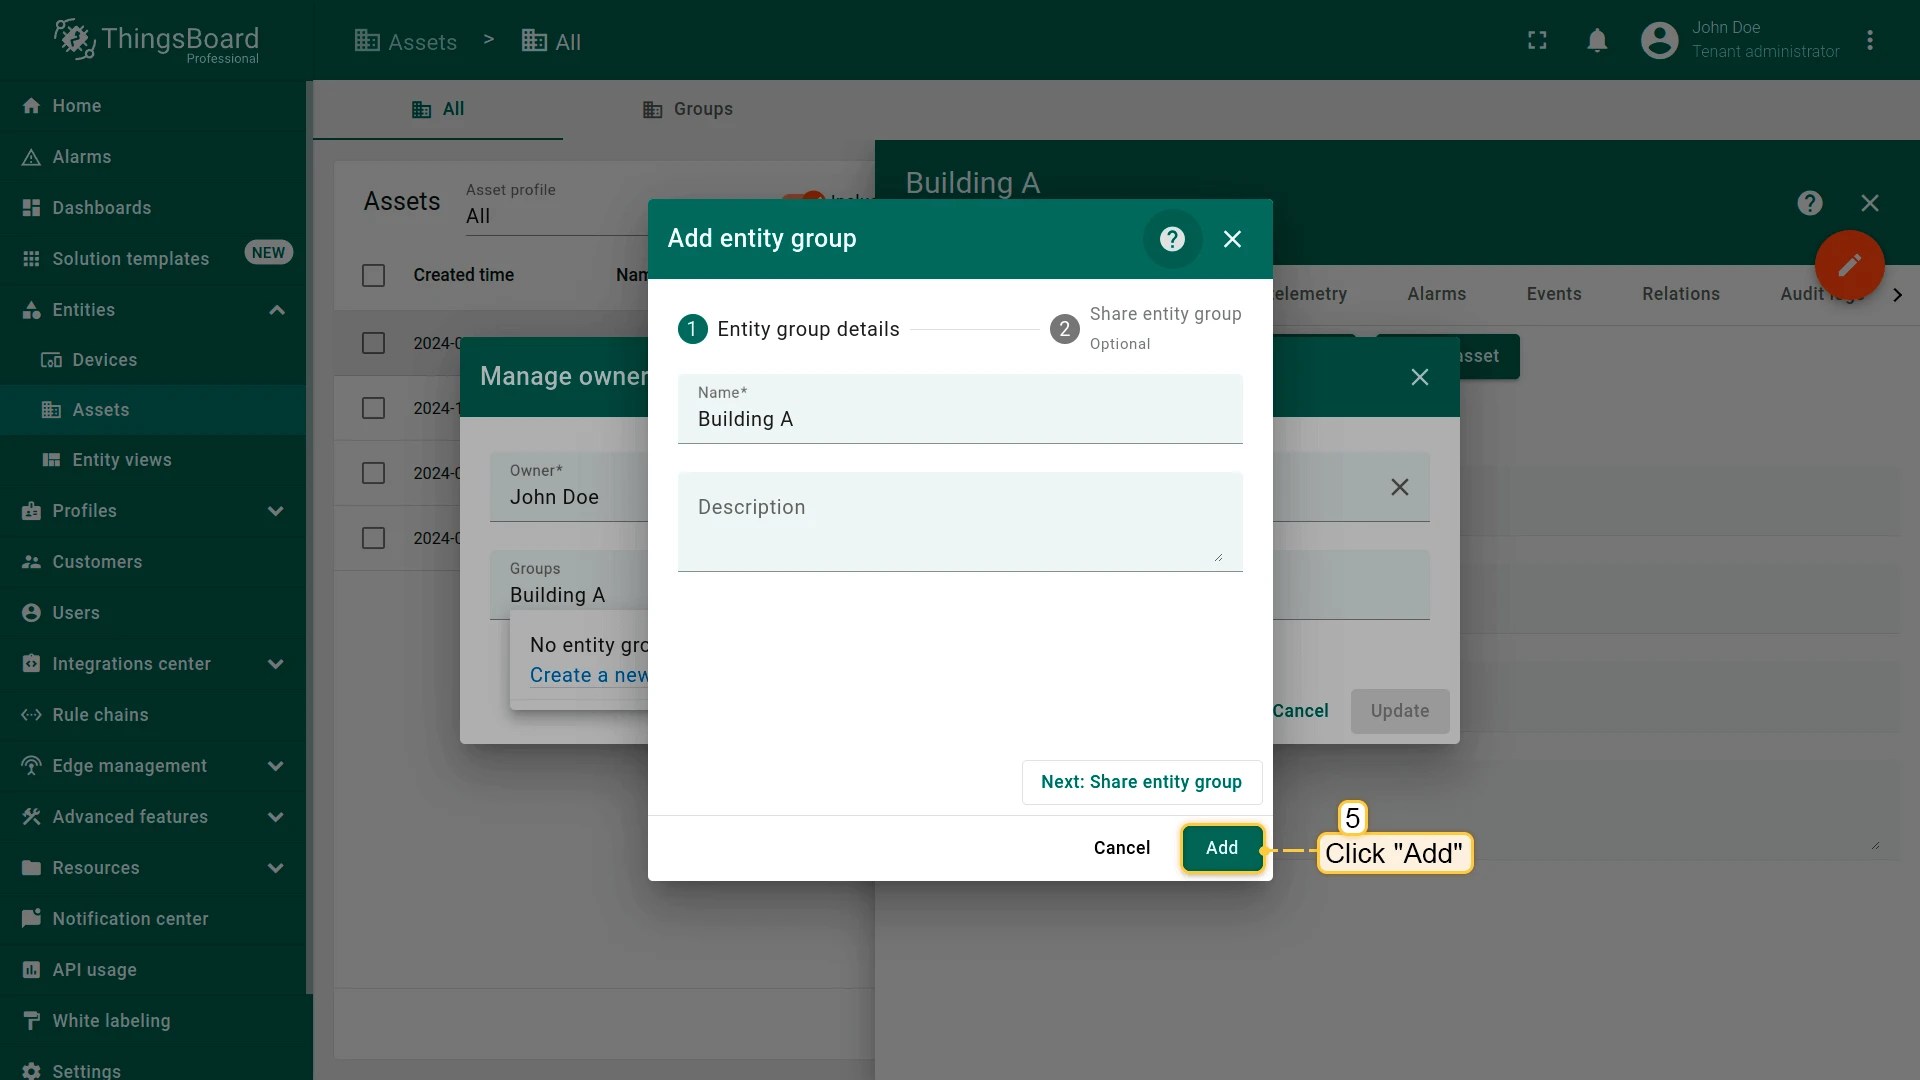
- Create and add group:
- Name: Building A
- Click Create a new one!
- Then click Add
- Click Update.
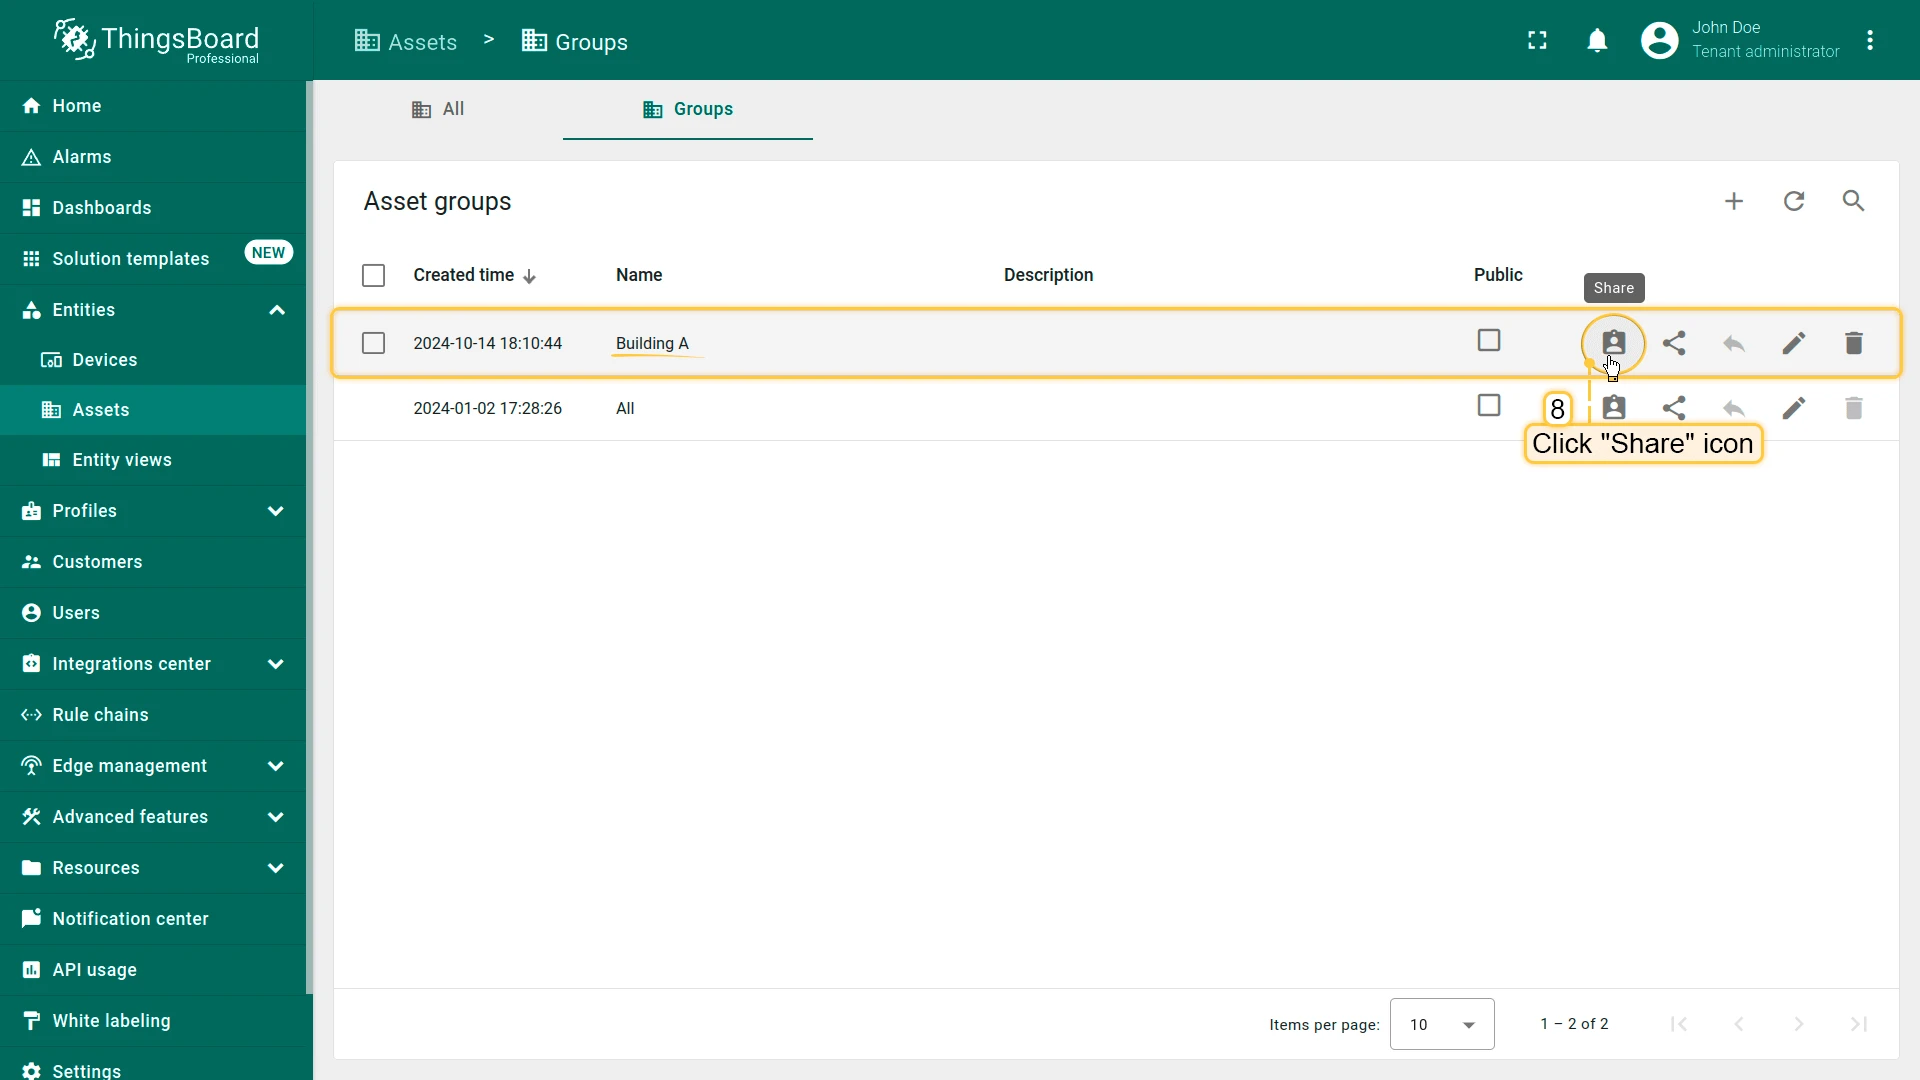
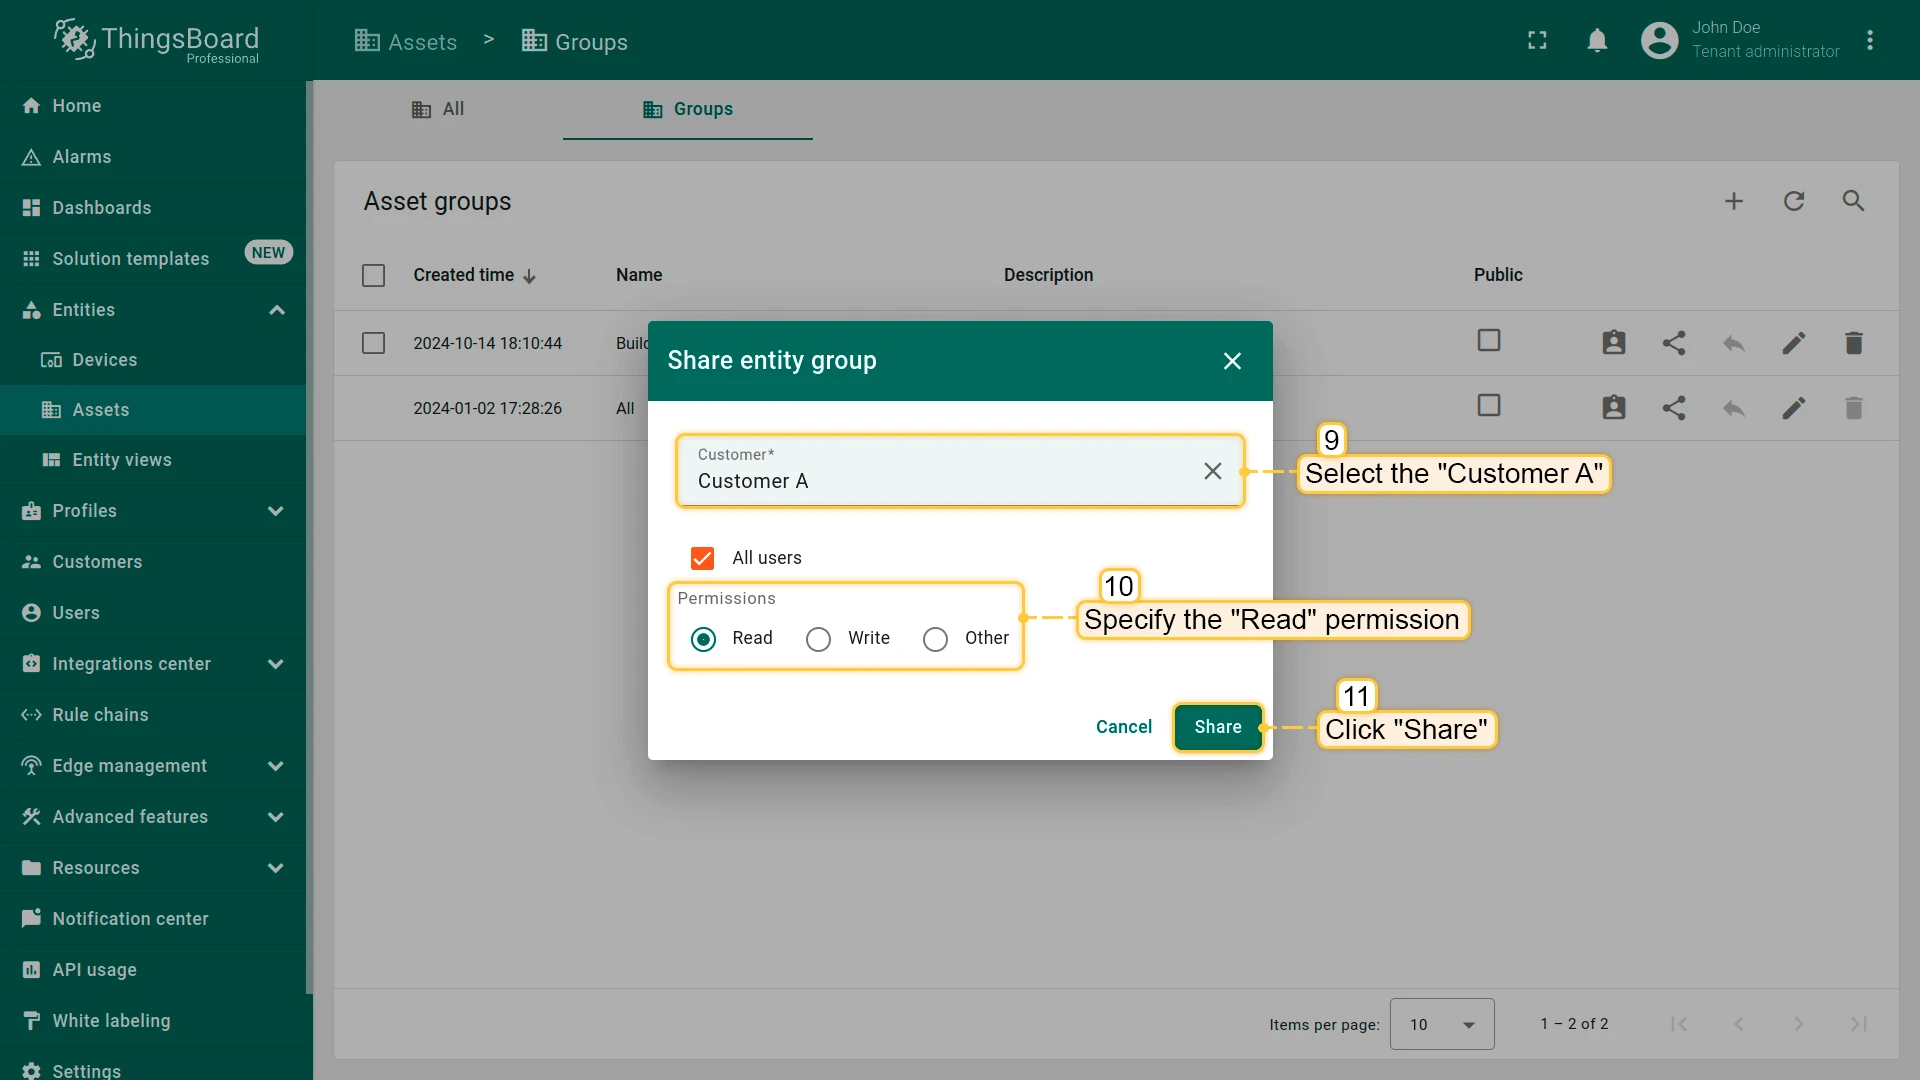
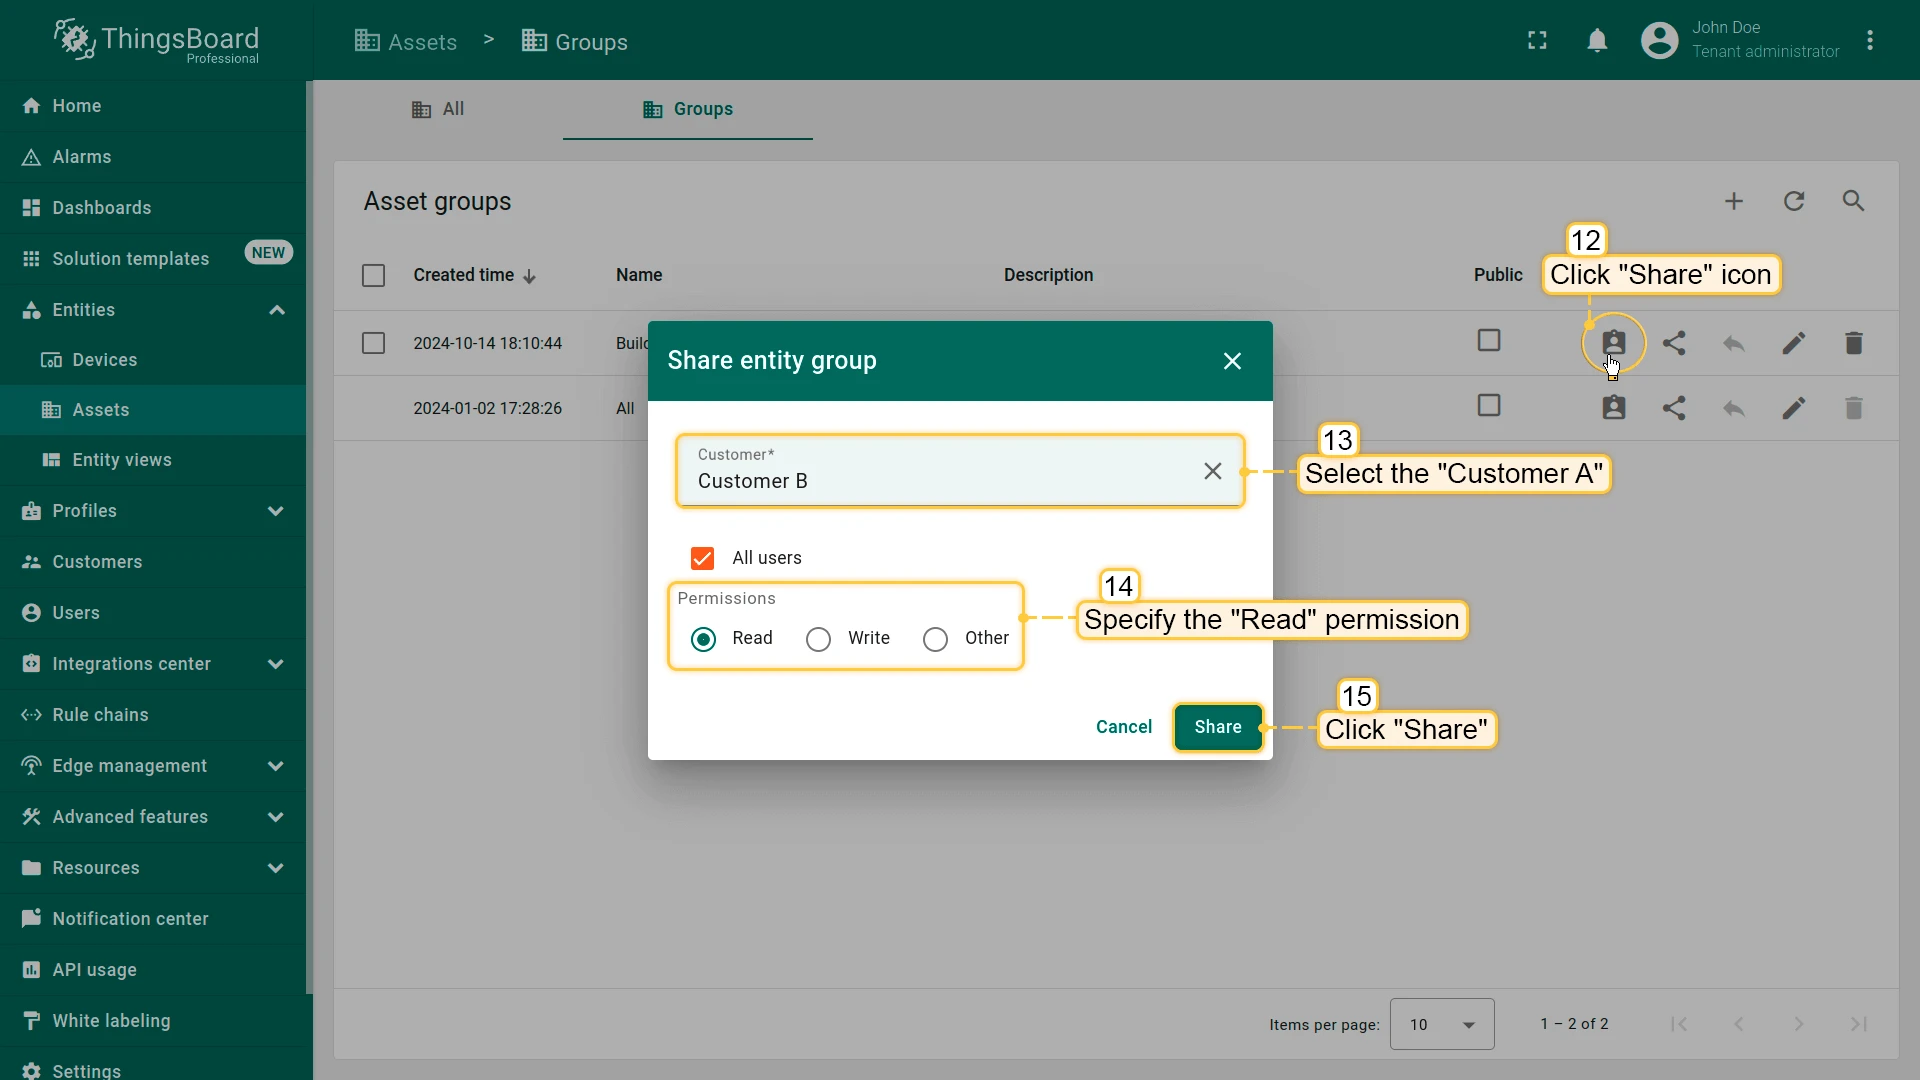
- Open Groups tab and click Share for Building A.
- Grant Read access to Customer A and Customer B.

Step 5.5. Add Customer Users
Section titled “Step 5.5. Add Customer Users”Create user accounts under each customer to enable secure login and interaction with assigned dashboards, devices, and assets.
Customer A — Emma Johnson
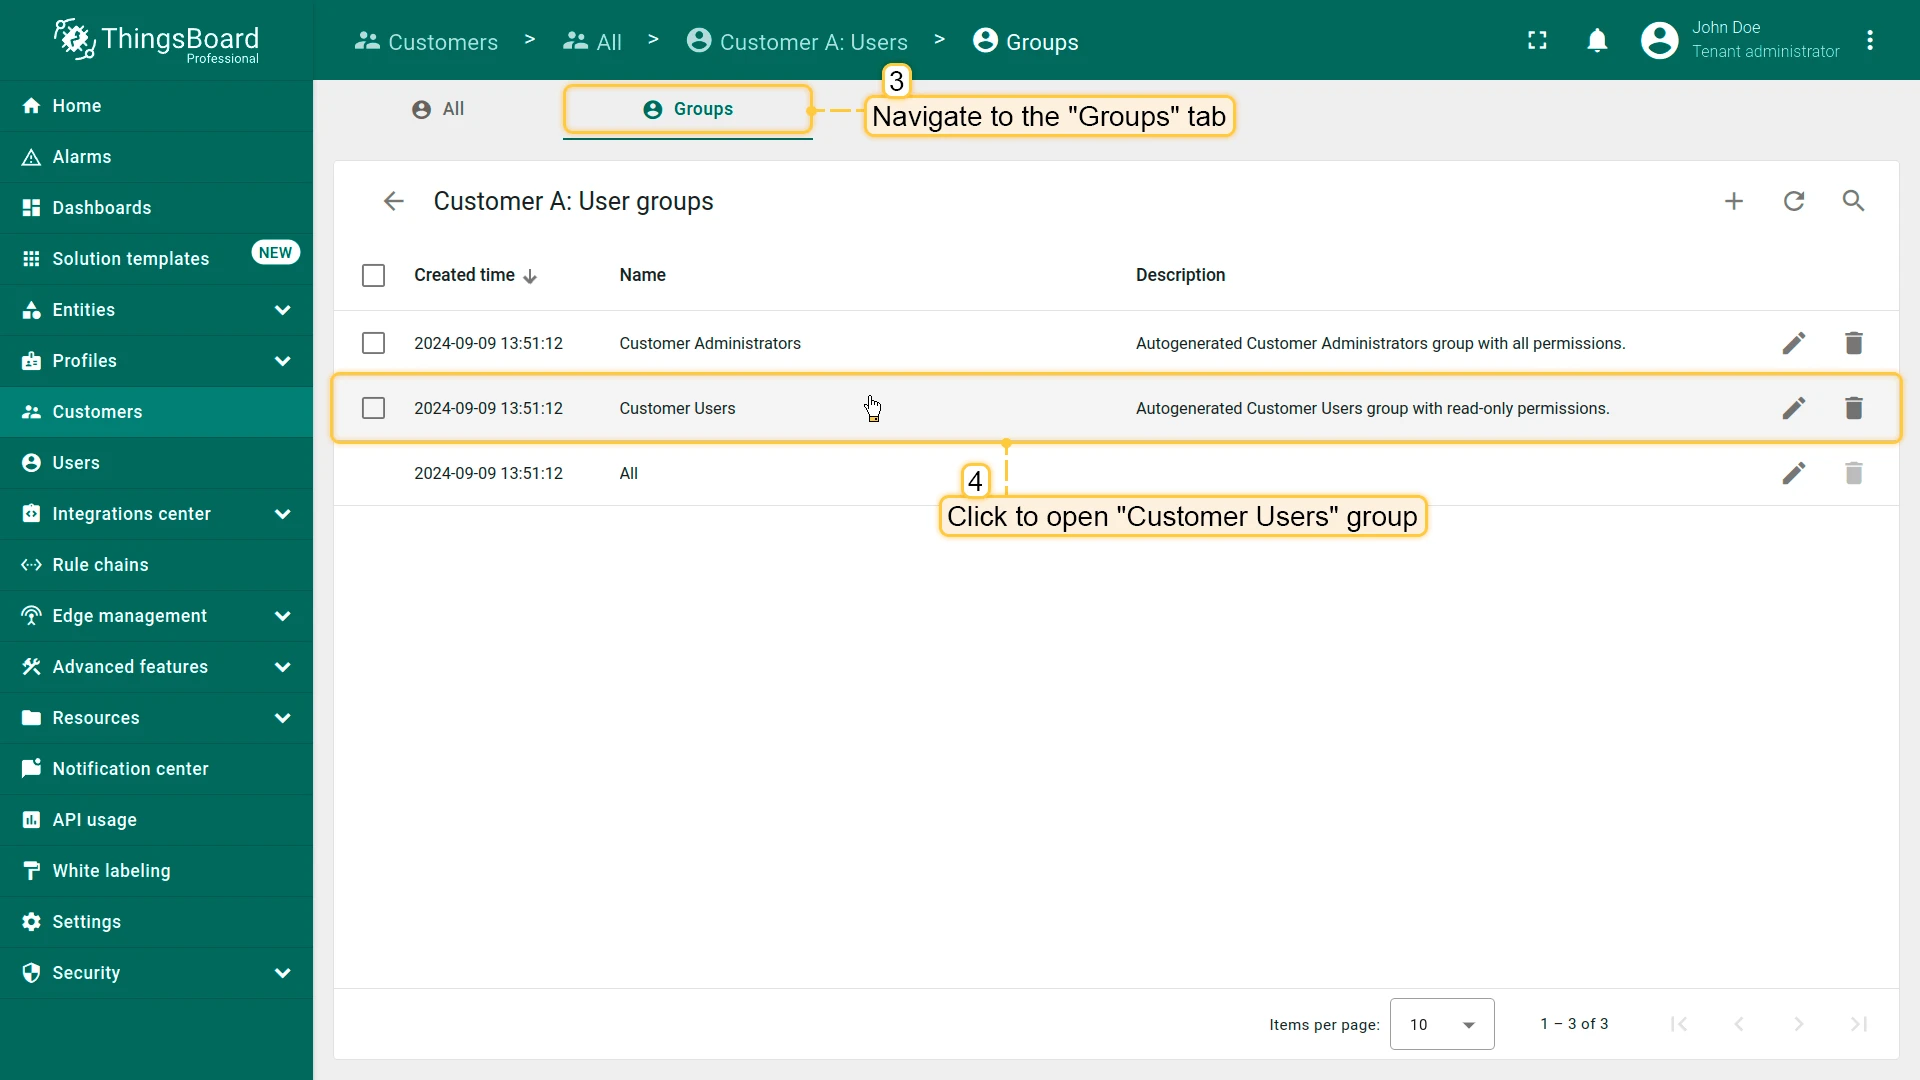
Section titled “Customer A — Emma Johnson”- Open Customers and click Manage customer users.
- Open Groups ⇾ Customer Users.
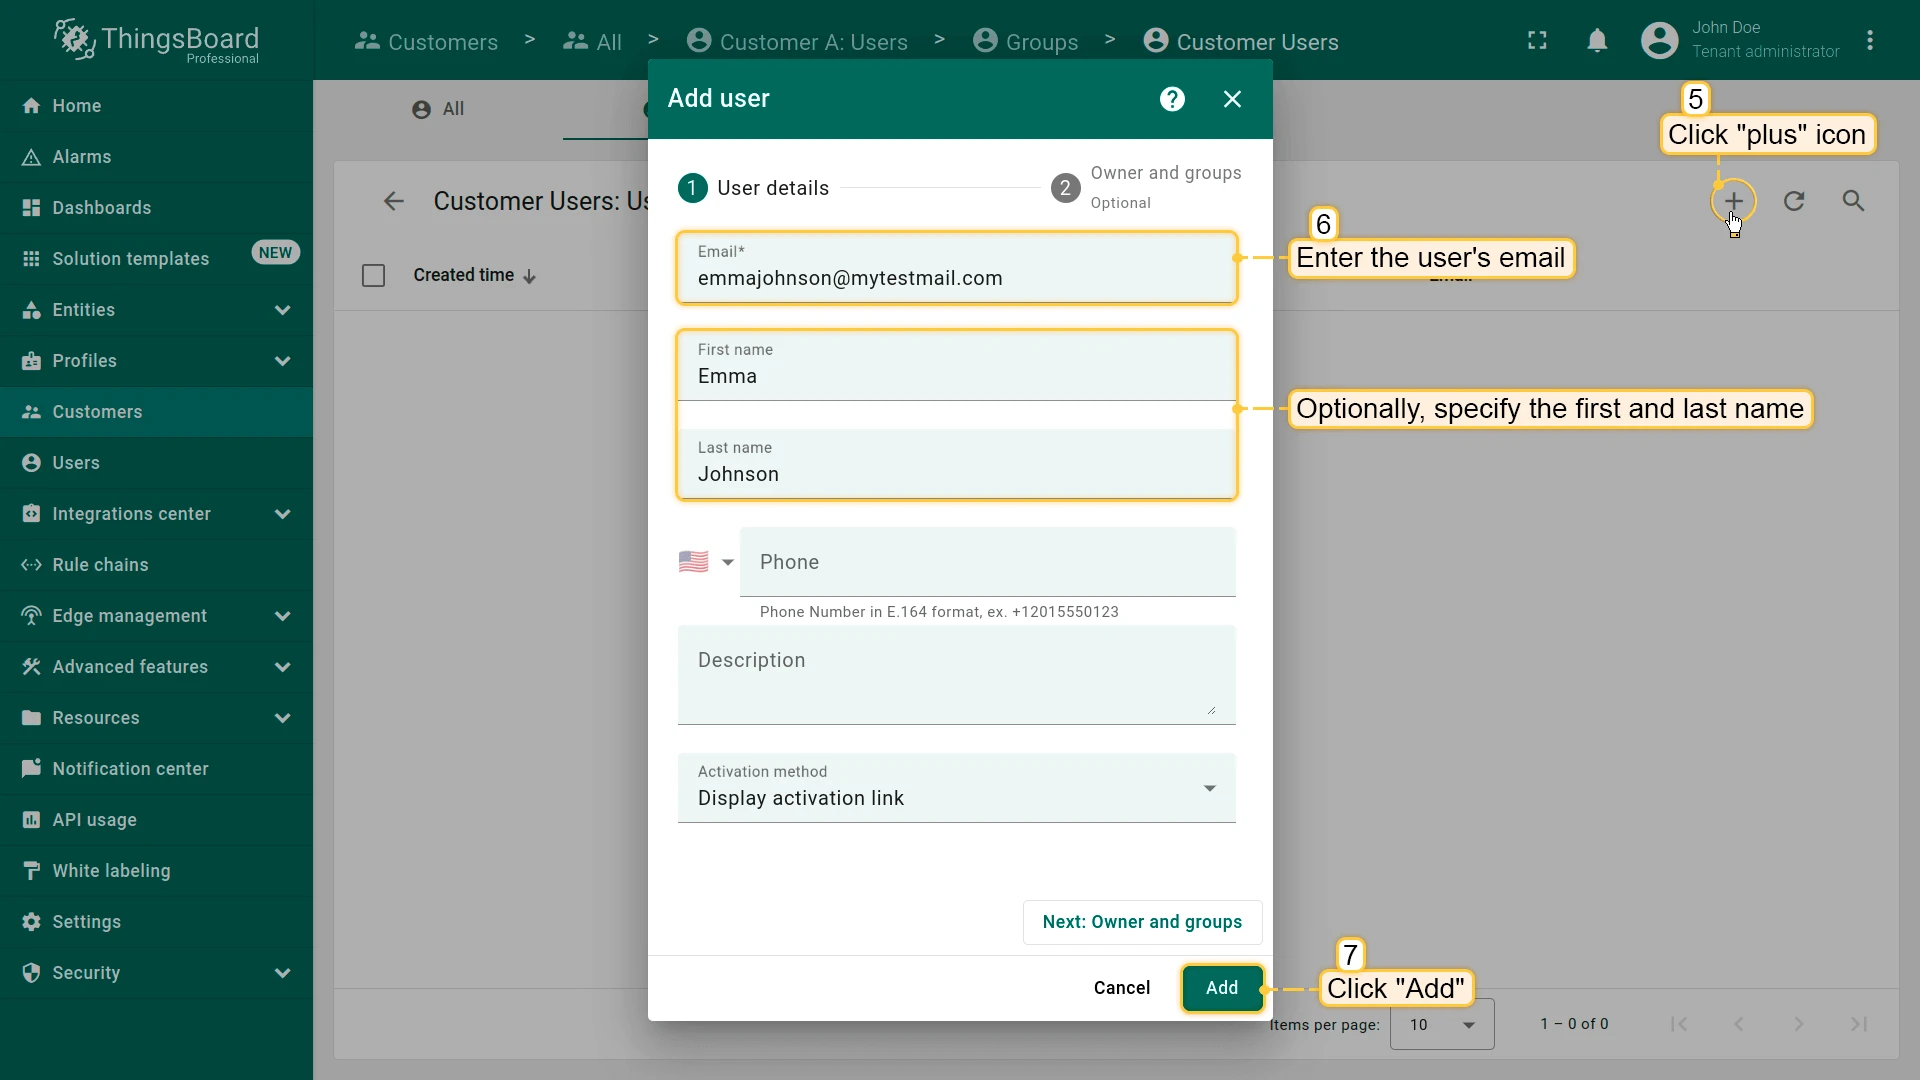
- Click +, enter user details, and click Add.
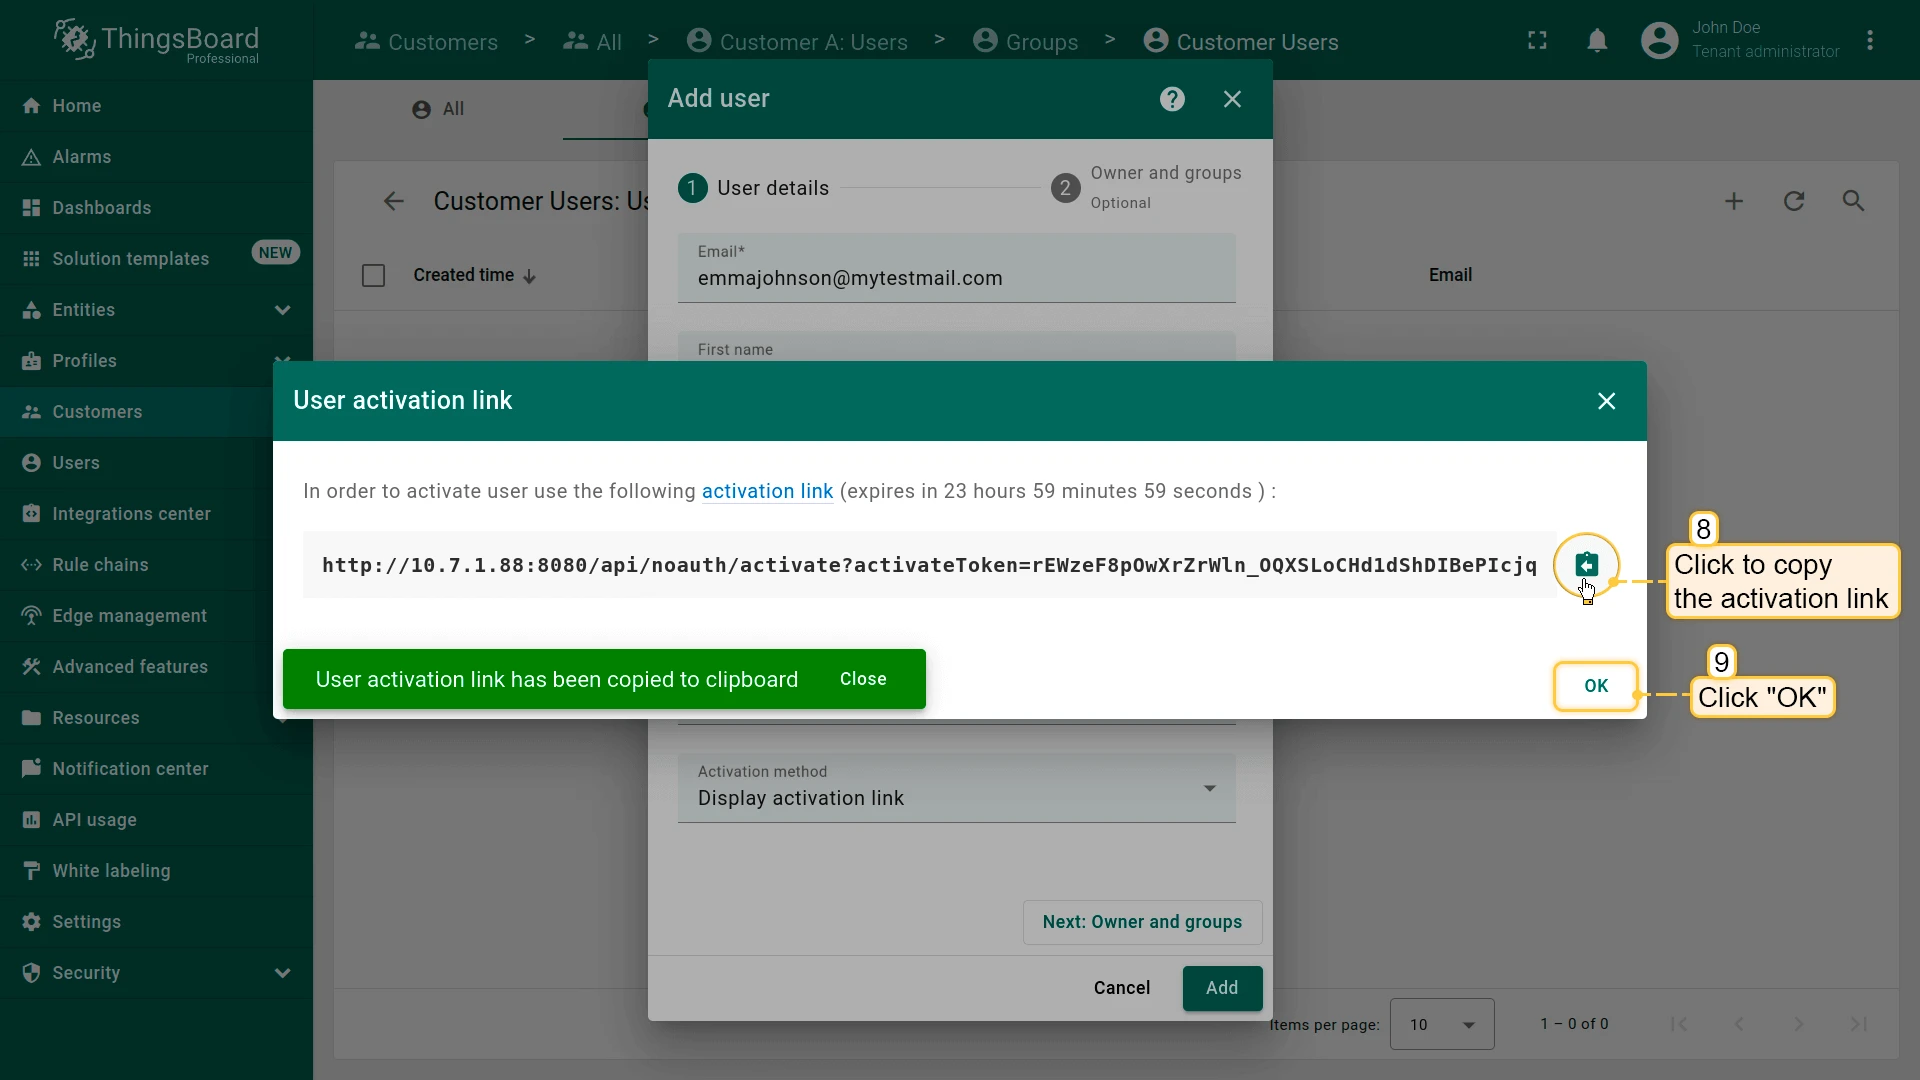
- Copy activation link and click OK.
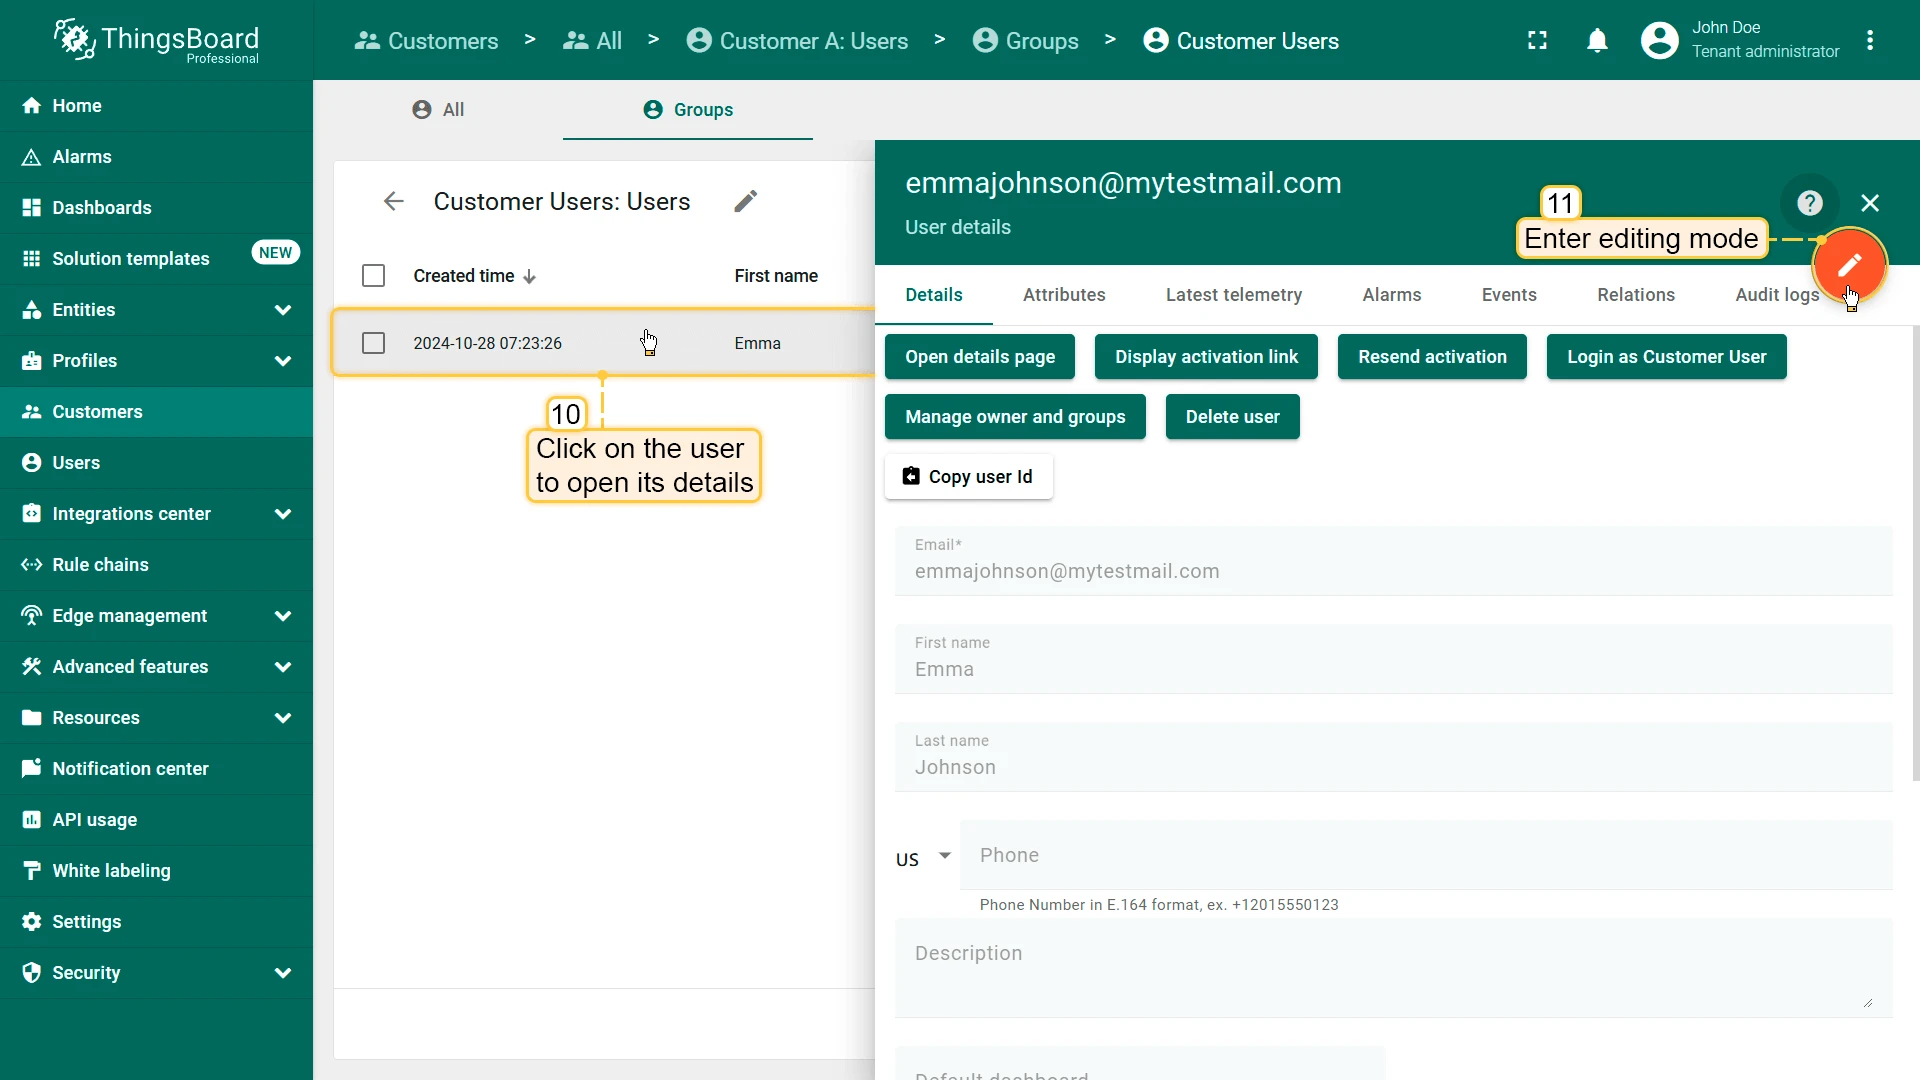
- Open the created user and enter edit mode.
- Set default dashboard to Building and enable Always fullscreen.
- Apply changes.


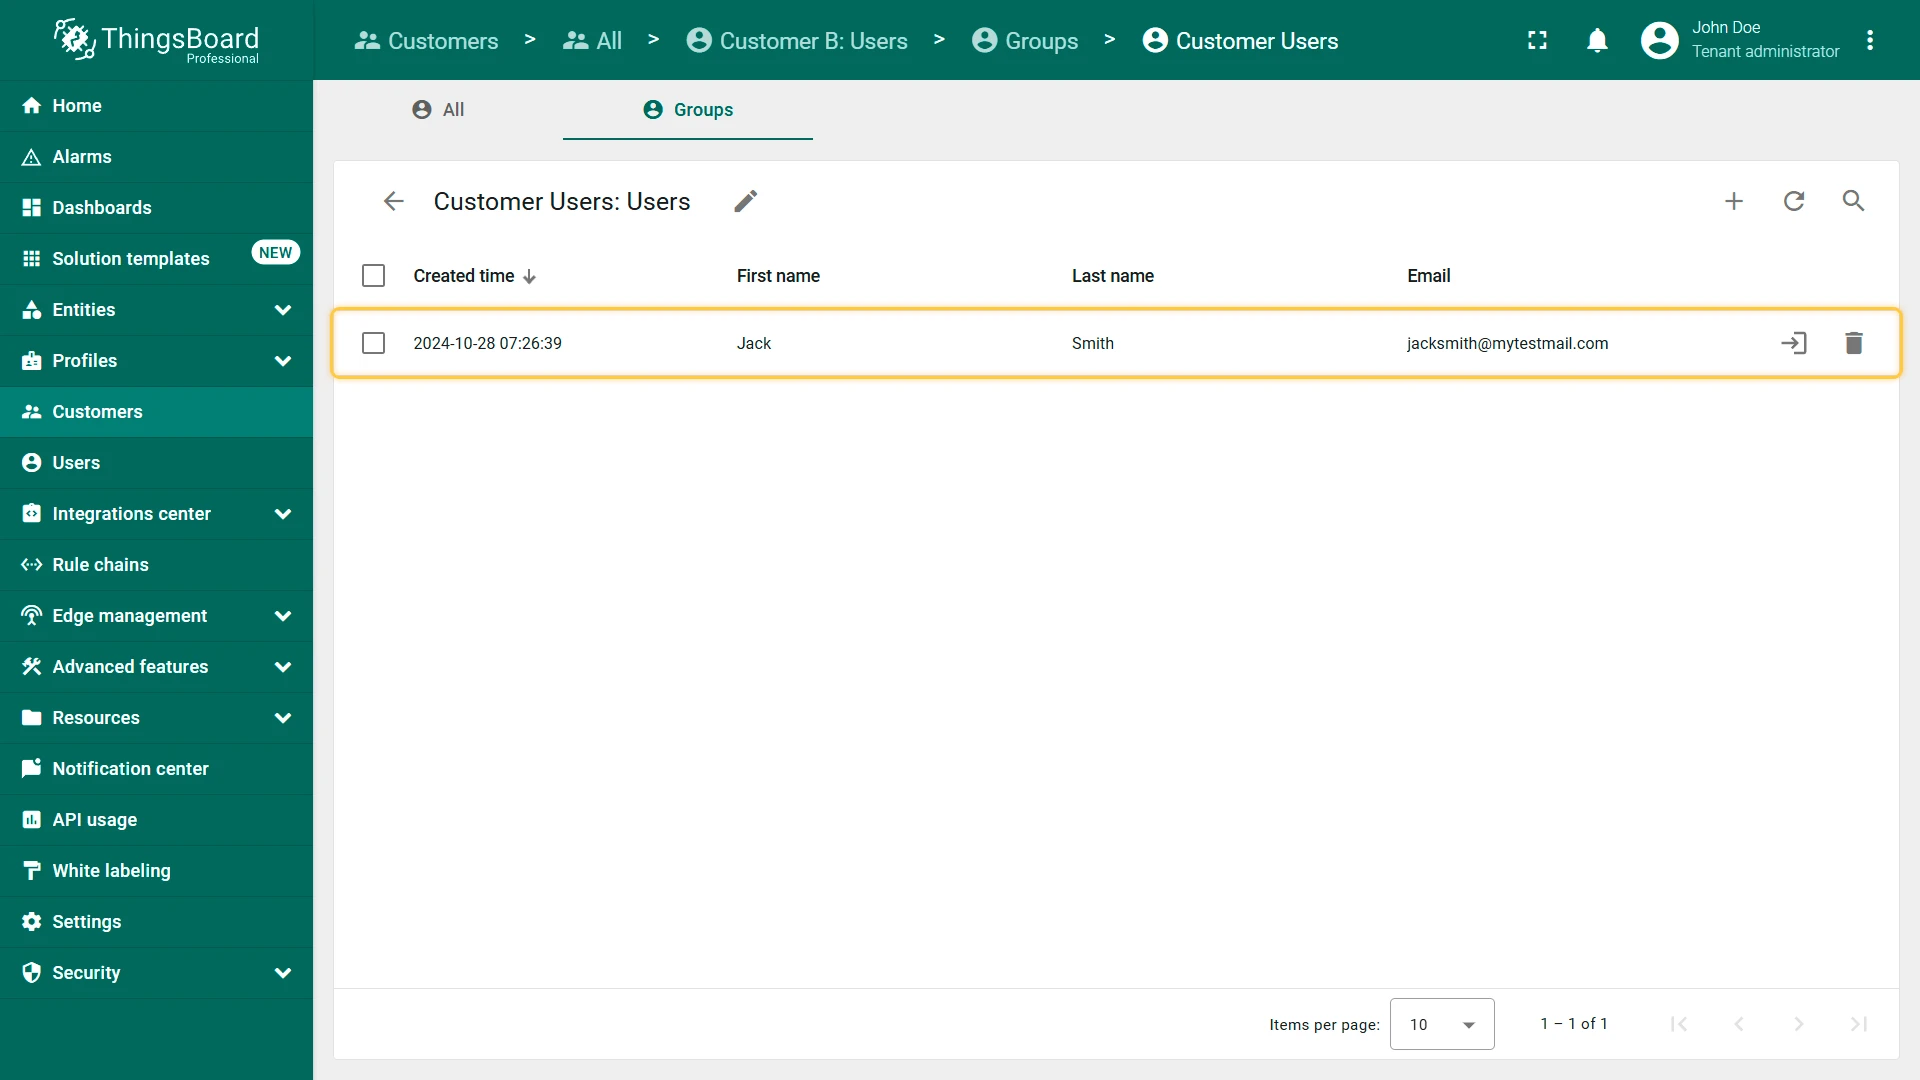
Repeat the process for Customer B. Add user Jack Smith.
Step 5.6. Verify Customer Access
Section titled “Step 5.6. Verify Customer Access”Validate that each customer has correct and restricted access to their assigned resources, ensuring proper permissions and data visibility.
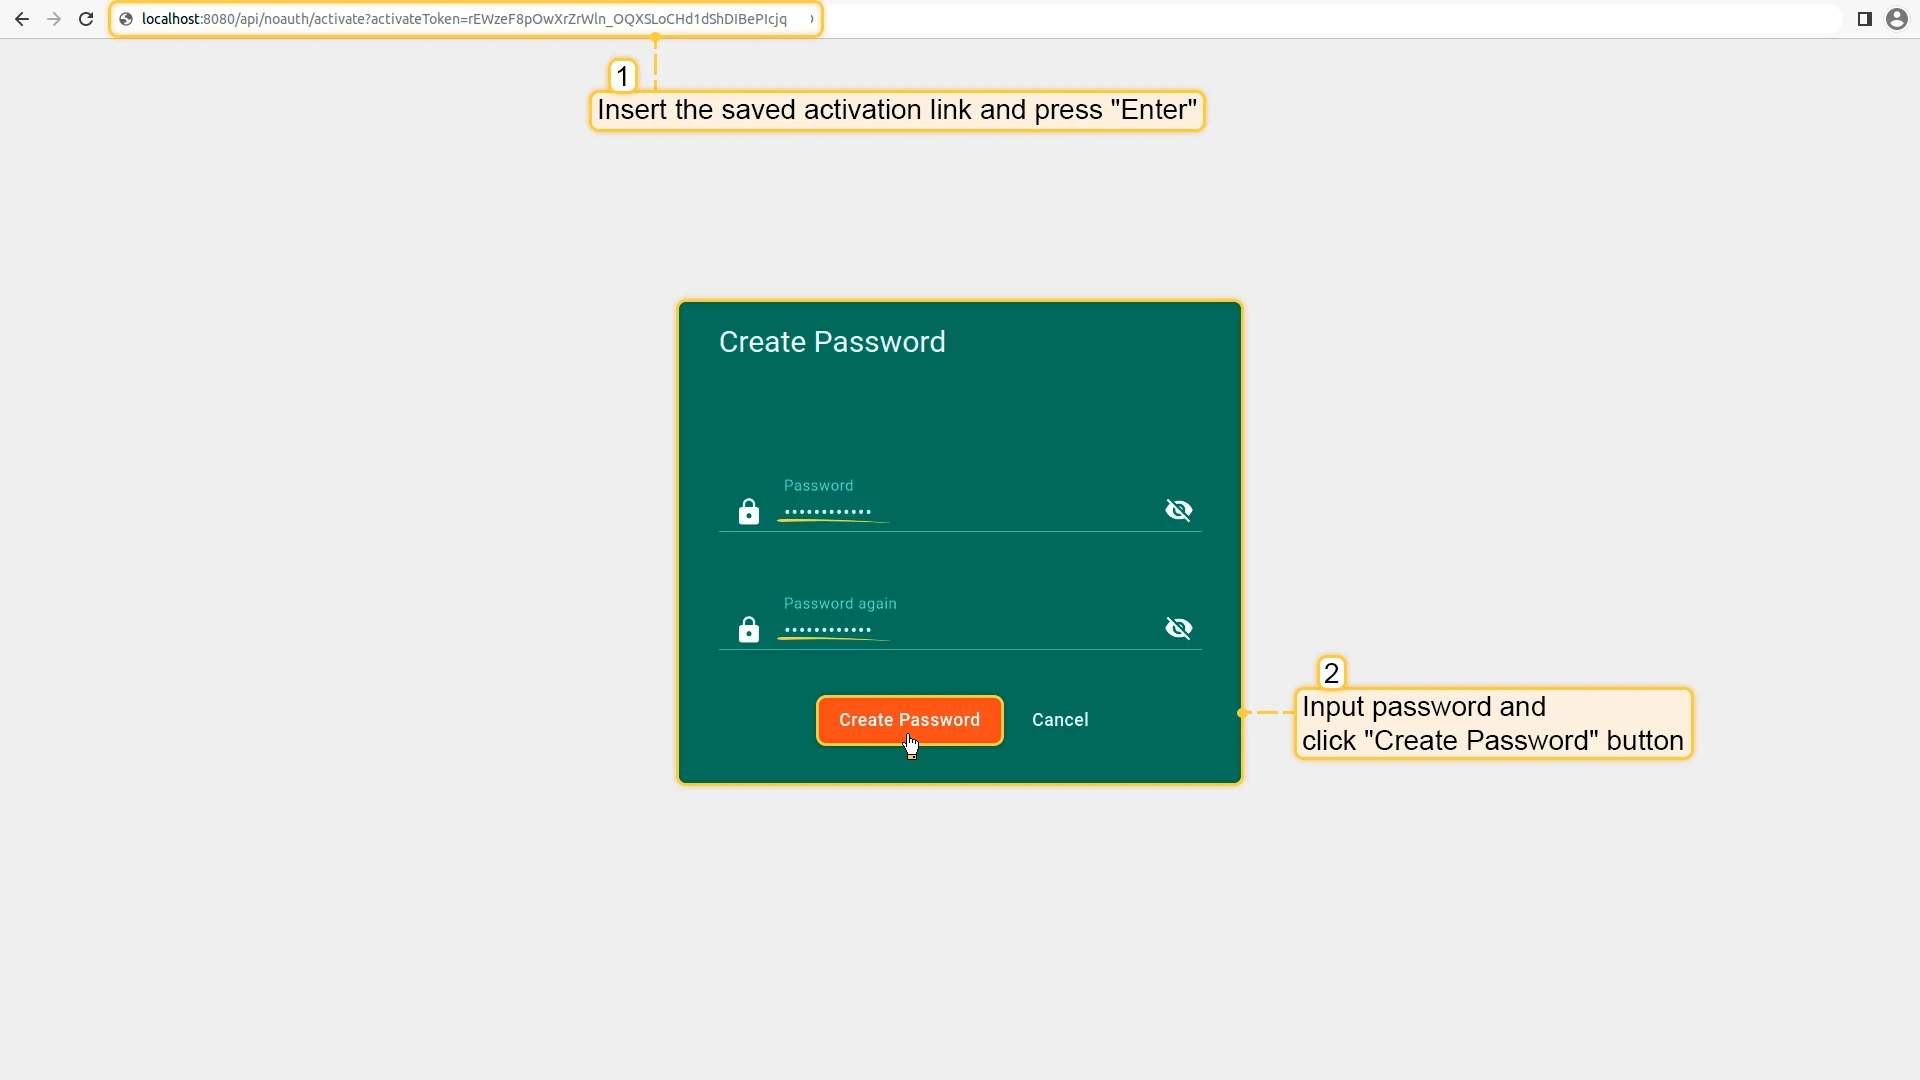
- Paste the previously copied user activation link into your browser’s address bar and press Enter.
- Set a password and click Create Password.
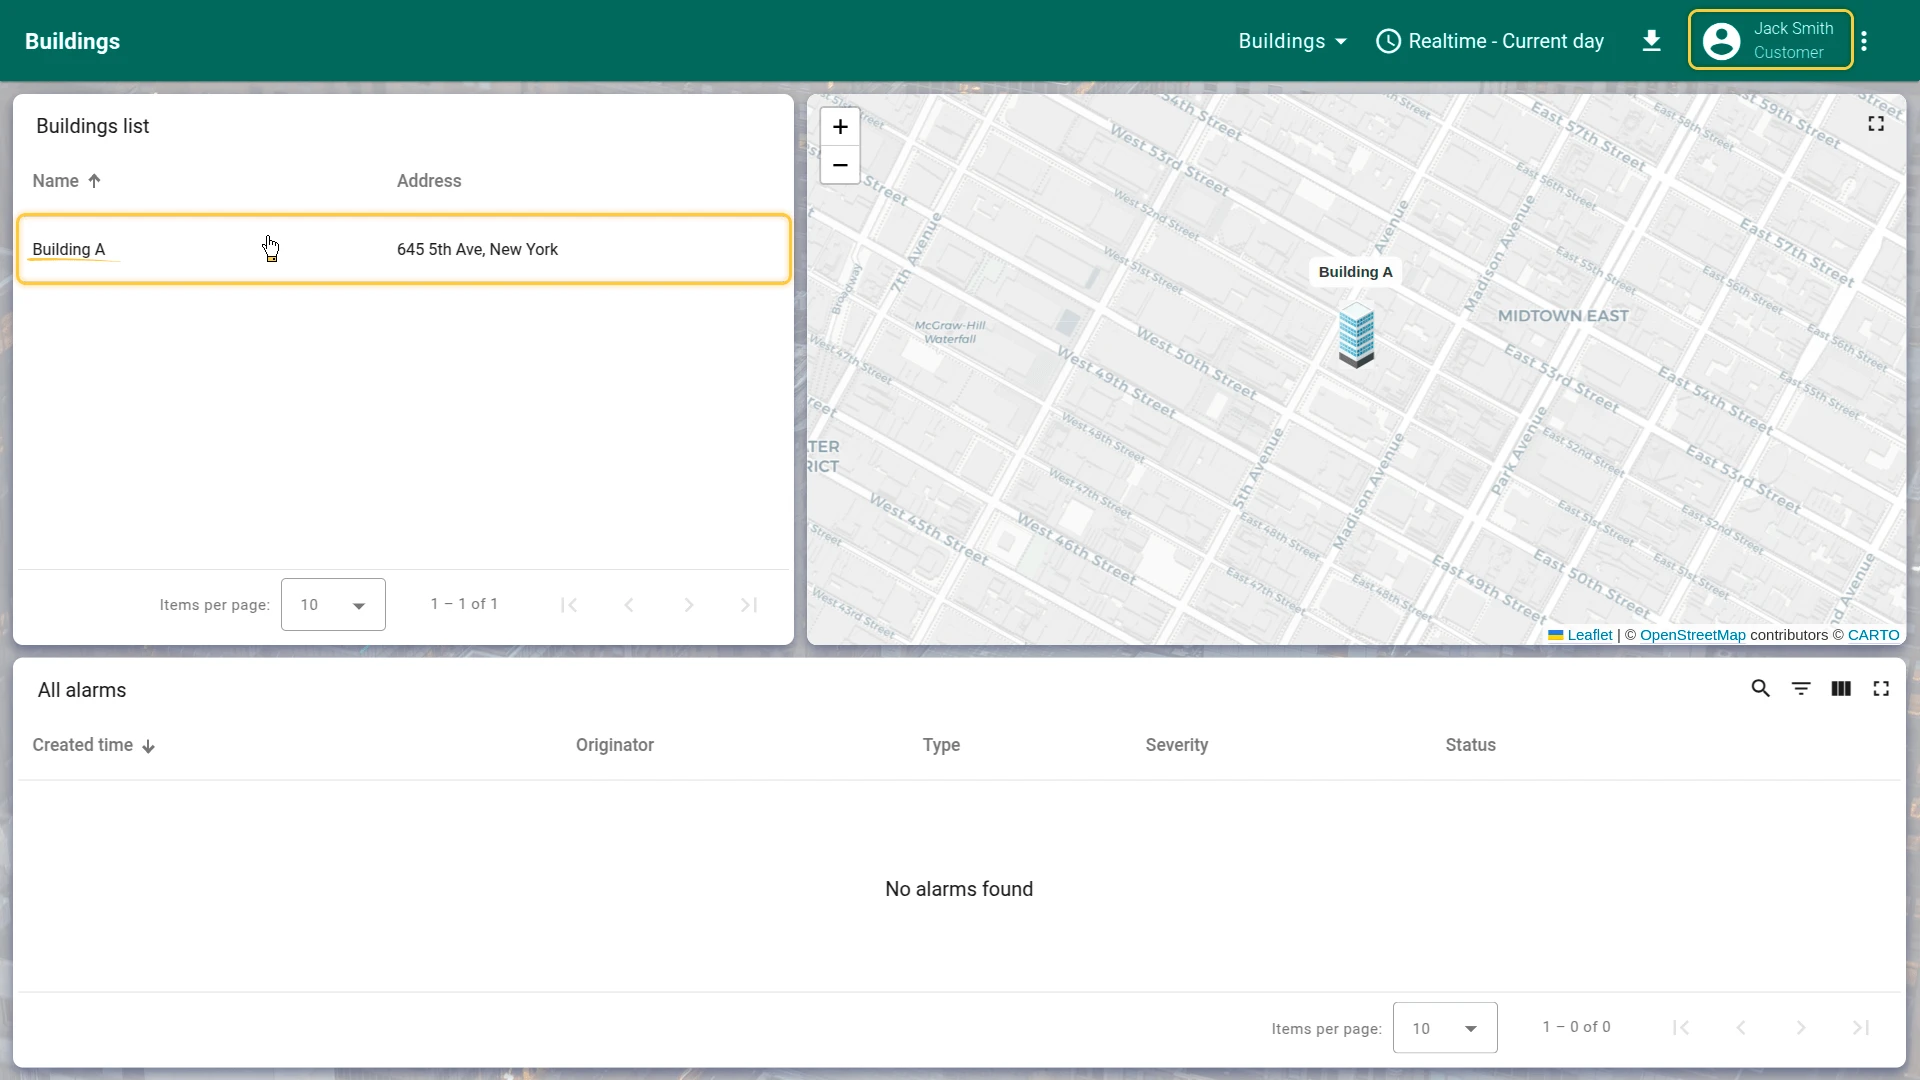
After this, your account will be activated and you will be logged in as a customer user.
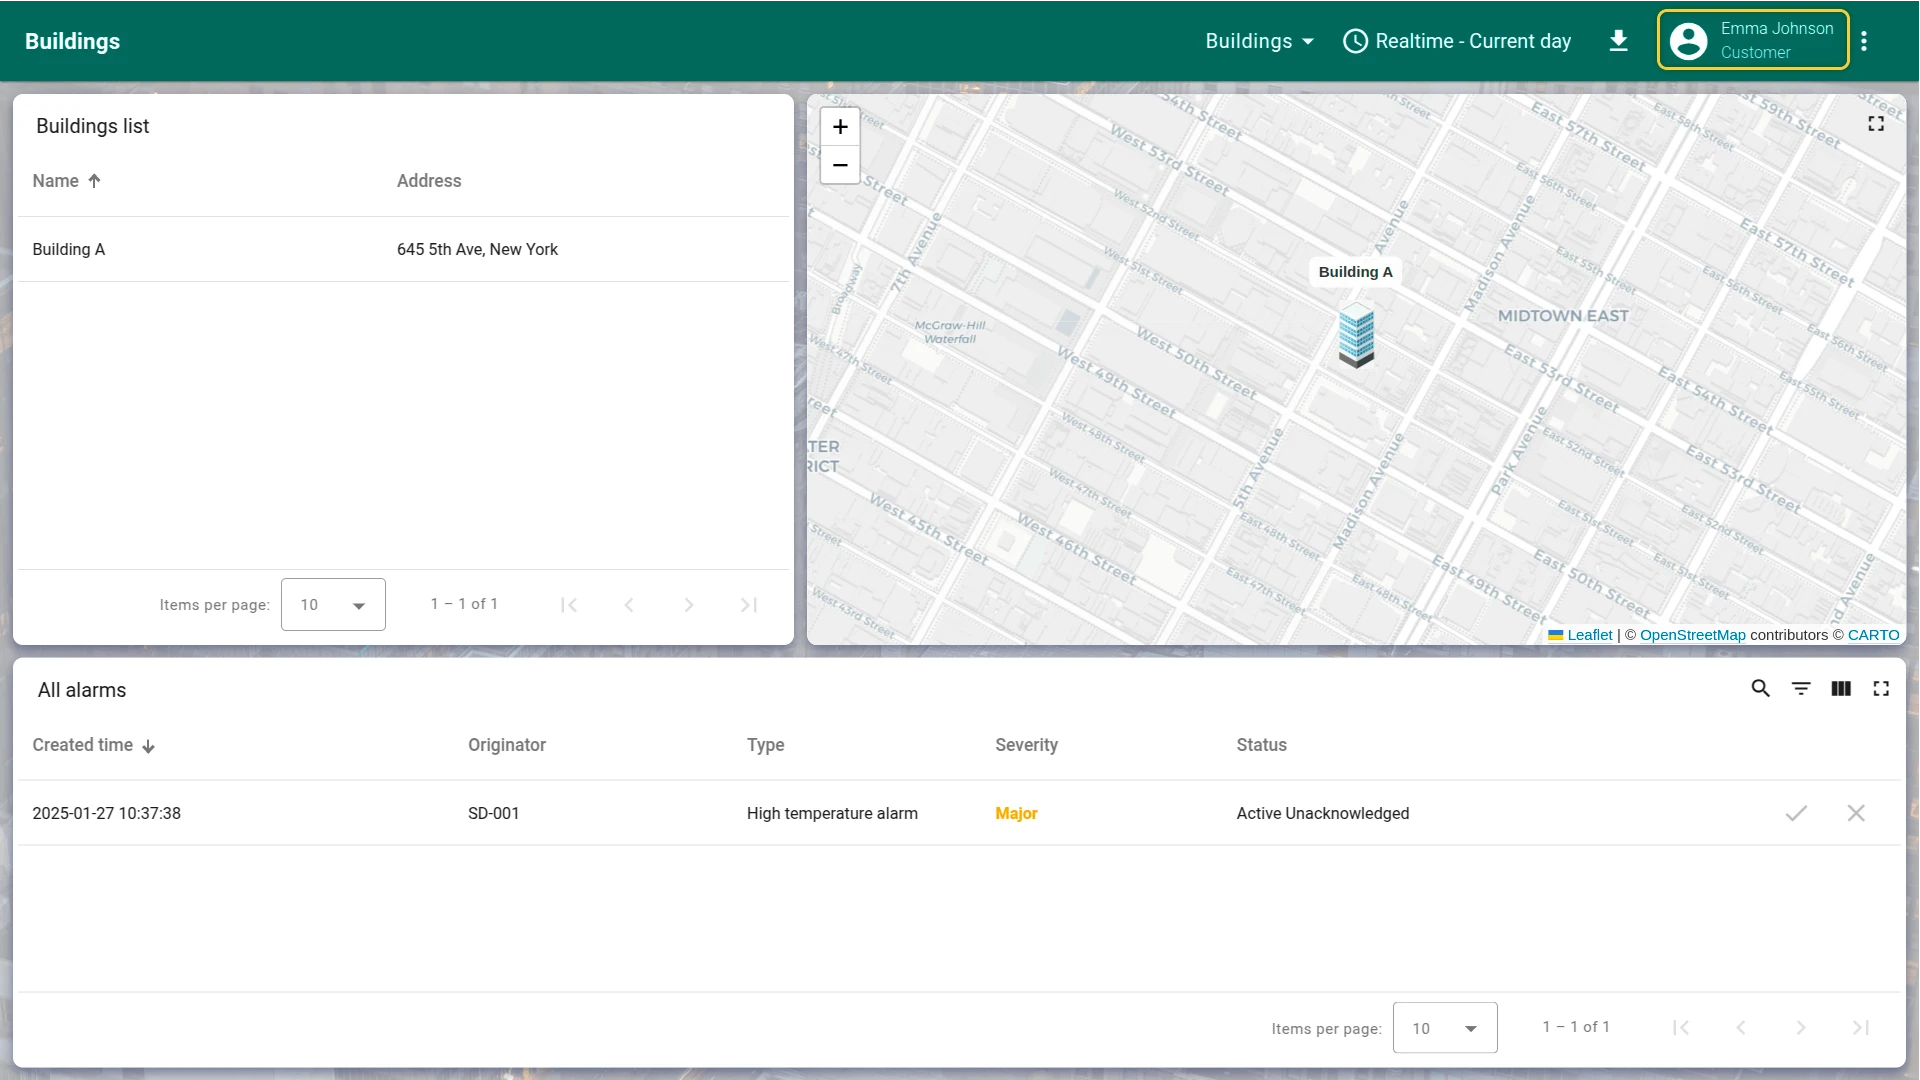
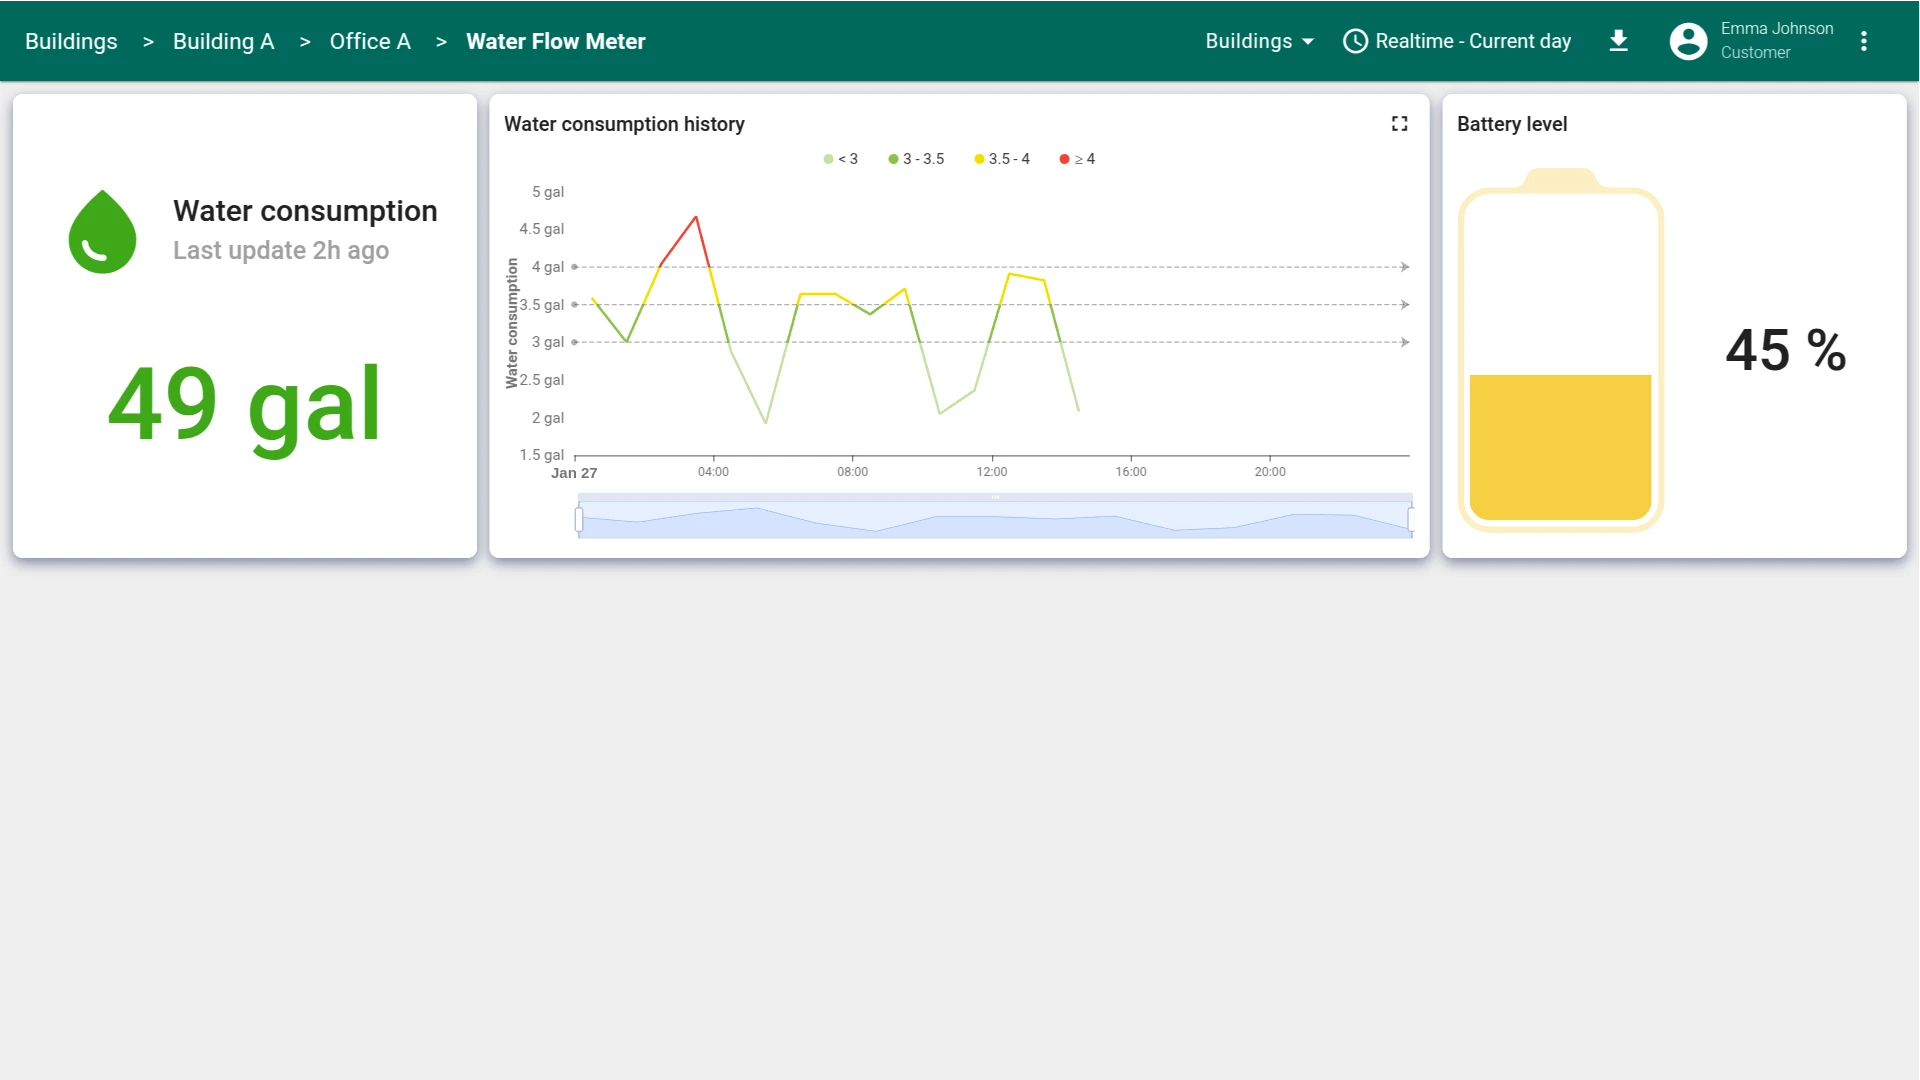
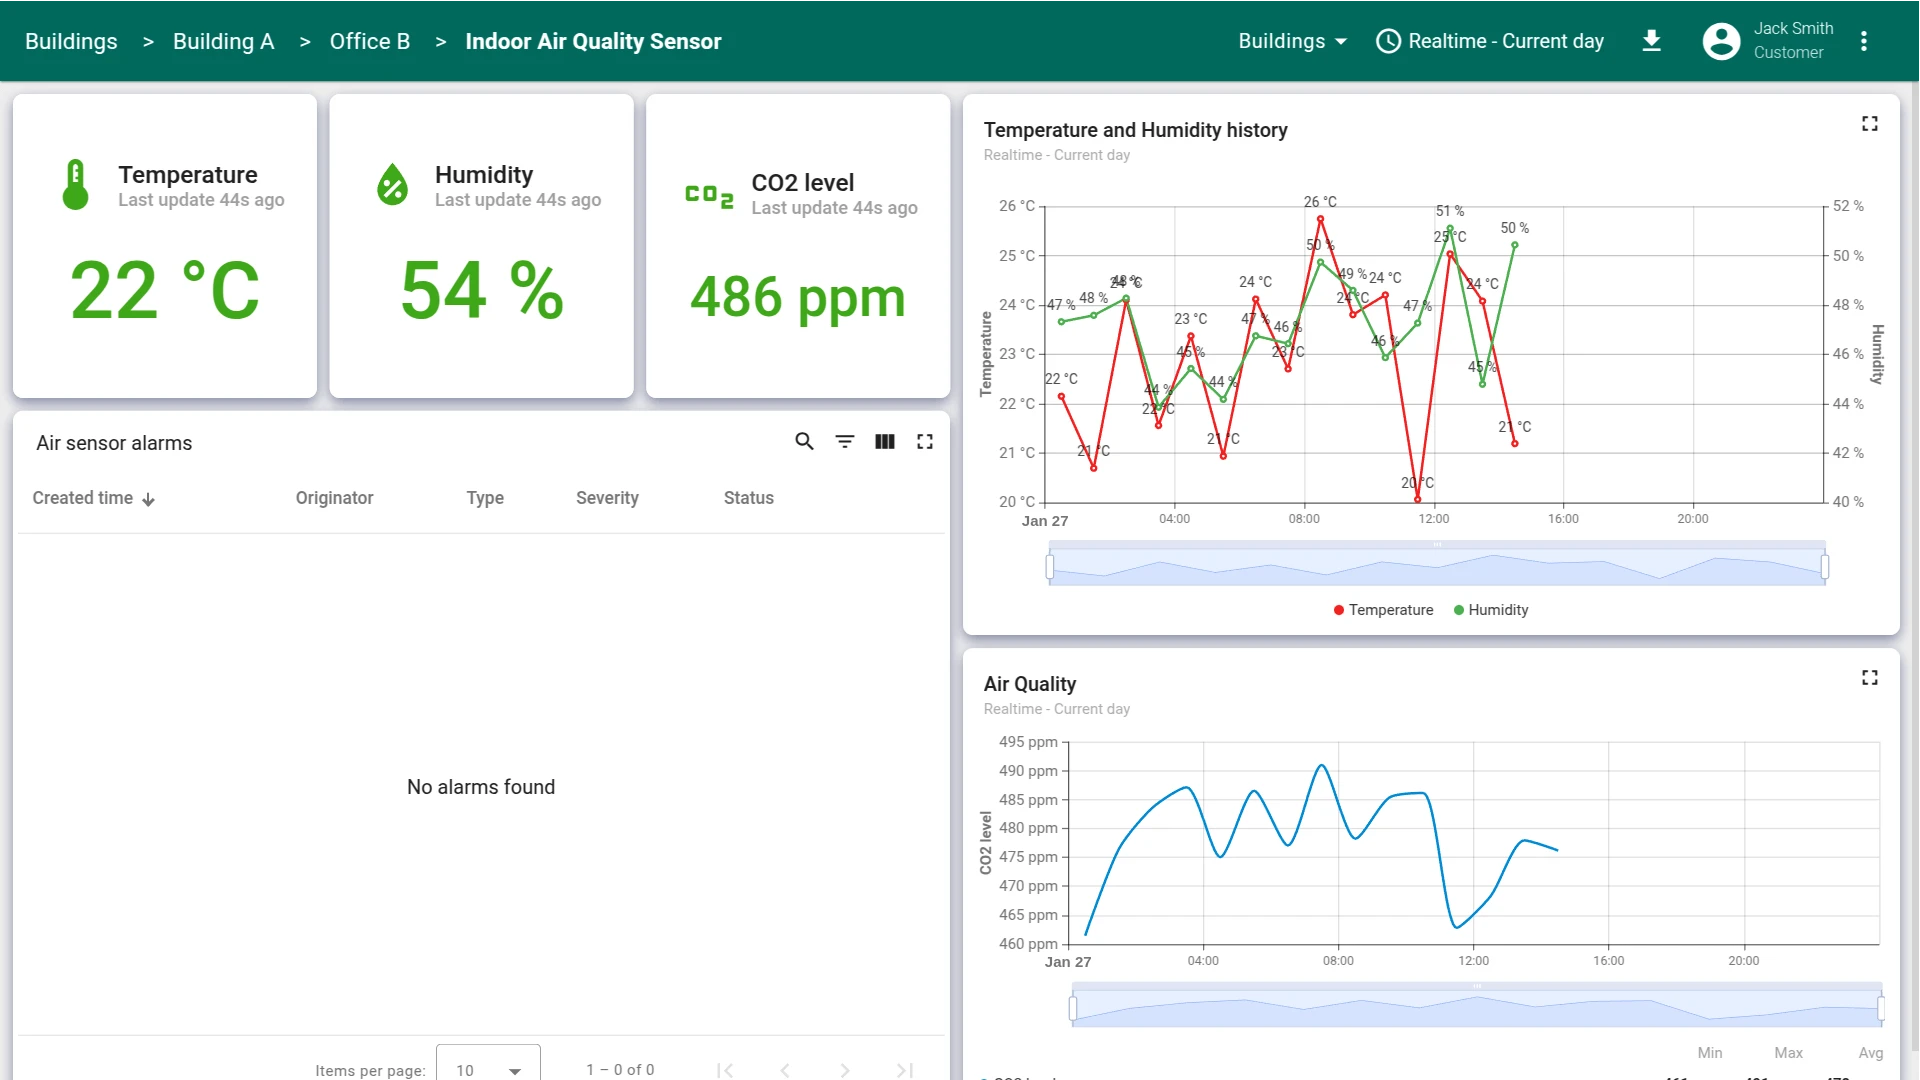
The dashboard will open, displaying only the building where your office is located — Building A. Navigate through the dashboard to ensure that your user has access only to the data you have granted them access to.

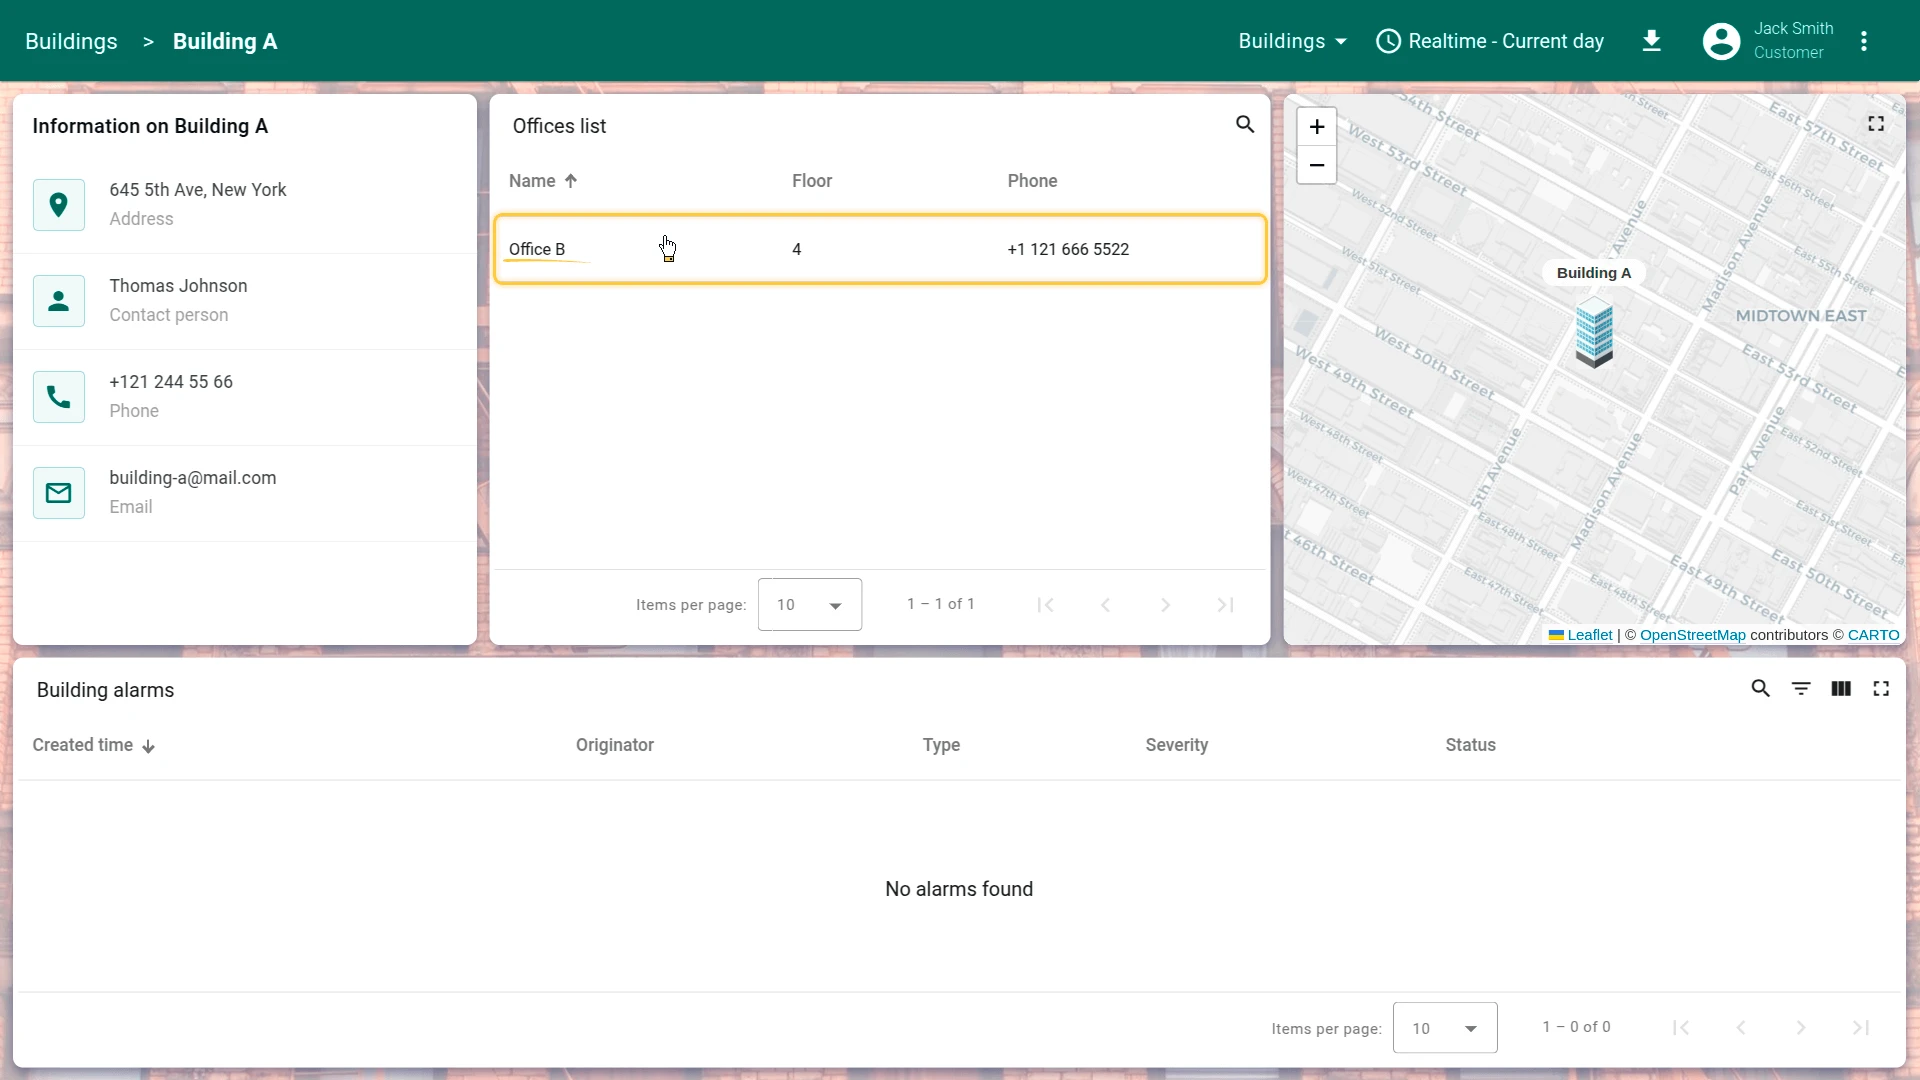
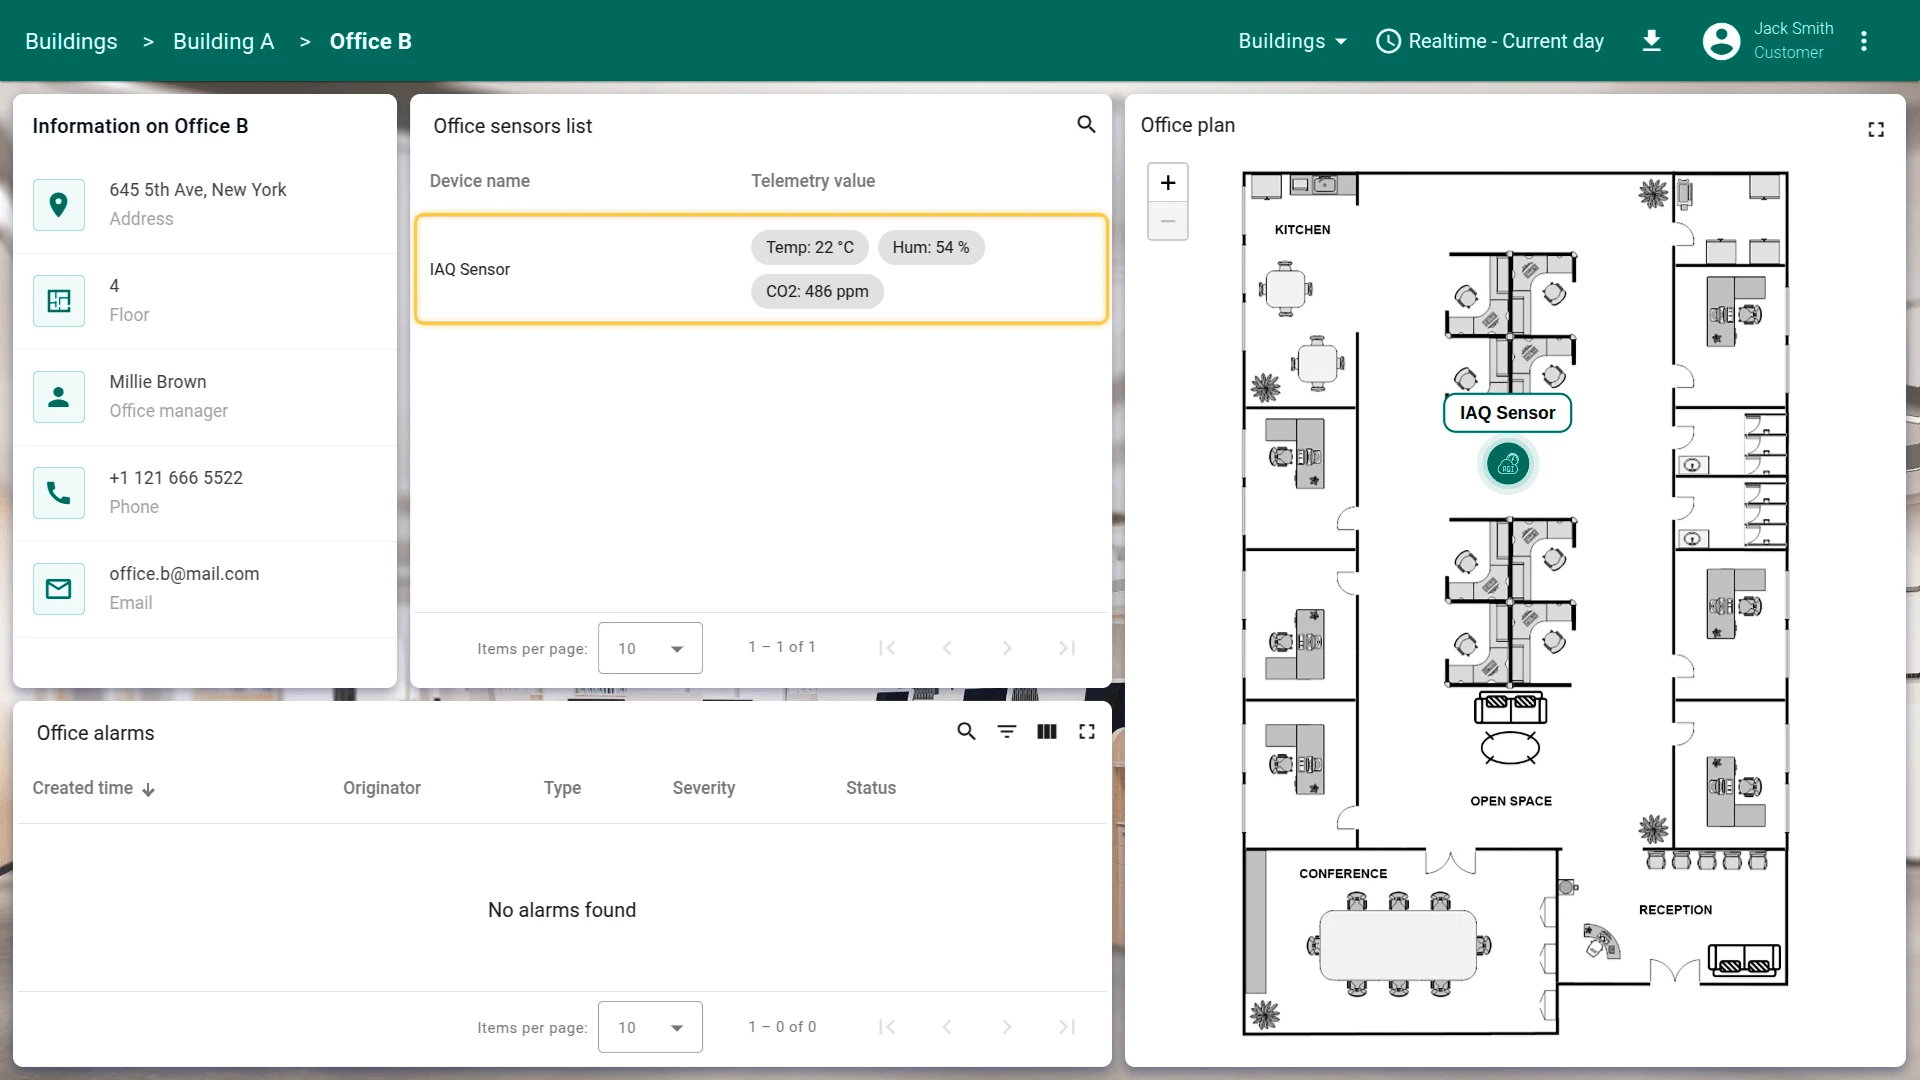
Similarly, activate the user of Customer B. They should have access to Office B in Building A and the data from the IAQ Sensor located inside the Office B.
Best Practices: Multi-Tenant Isolation
Section titled “Best Practices: Multi-Tenant Isolation”Ownership vs. Sharing
- Ownership provides exclusive access: only the owner and tenant admins can see the entity and its data. Use this for customer-specific resources (their devices, their offices).
- Sharing grants read access to a resource without transferring ownership. Use this for shared resources like a building asset that multiple customers need to see.
Ownership Hierarchy
Structure ownership to match your business model: customers own devices and their immediate assets (offices), while the tenant owns shared infrastructure (buildings). This simplifies access control and propagation patterns.
Entity Groups for Scale
Entity groups (device groups, asset groups, dashboard groups) allow you to share or manage permissions for multiple entities at once. Avoid sharing individual entities when possible — use groups to reduce configuration overhead.
Role-Based Access Control (RBAC)
Create customer user groups with consistent permission sets (e.g., “read-only dashboard access”). Assign customers to these groups rather than granting permissions per user. This simplifies onboarding and reduces misconfiguration.
Data Isolation Verification
Always test customer access by logging in as a customer user:
- Verify they see only their owned entities and shared resources
- Check that dashboard states and drill-down navigation correctly filter by ownership
- Ensure that entity aliases (e.g., “selected office”) correctly resolve to customer-owned entities only
Propagation Patterns
When setting up alarms or rule chains, ensure that relation-based propagation respects ownership boundaries. A customer’s alarm should not propagate through shared assets to reveal data outside their scope.
Conclusion
Section titled “Conclusion”You have built a complete multi-level IoT dashboard from scratch:
- Entities and hierarchical relationships — buildings, offices, and devices connected via assets.
- Multi-state dashboard with map and drill-down navigation — interactive states for each level of the hierarchy.
- Simulated telemetry and per-device visualization — generator rule chains and dedicated sensor views.
- Alarm rules with cross-hierarchy propagation — alarms surface through the asset tree to the top level.
- Scoped customer access — each customer sees only their own data through ownership and sharing.
From here, you can extend the dashboard with additional device types, custom widgets, automated email/SMS notifications via rule chains, or integrate with external systems using ThingsBoard’s REST API.
Checklist
Section titled “Checklist”Was this helpful?