AWS IoT Integration
The AWS IoT integration streams data from AWS IoT Core to ThingsBoard. AWS IoT Core acts as an MQTT broker — IoT devices publish messages to topics, and ThingsBoard subscribes to them. The connection uses mutual TLS: ThingsBoard authenticates with a client certificate and private key issued by AWS IoT, while AWS IoT validates the server identity using a Root CA certificate. Incoming messages are decoded by an uplink converter and stored as device telemetry and attributes in ThingsBoard.
AWS IoT setup
Section titled “AWS IoT setup”You need an AWS account with IoT Core enabled. The setup involves creating an IoT policy, a thing (device), and a certificate that ThingsBoard will use to authenticate with AWS IoT Core.
Create a policy
Section titled “Create a policy”A policy defines which IoT operations (connect, publish, subscribe, receive) are permitted.
- In the AWS IoT console, go to Security ⇾ Policies and click Create policy.
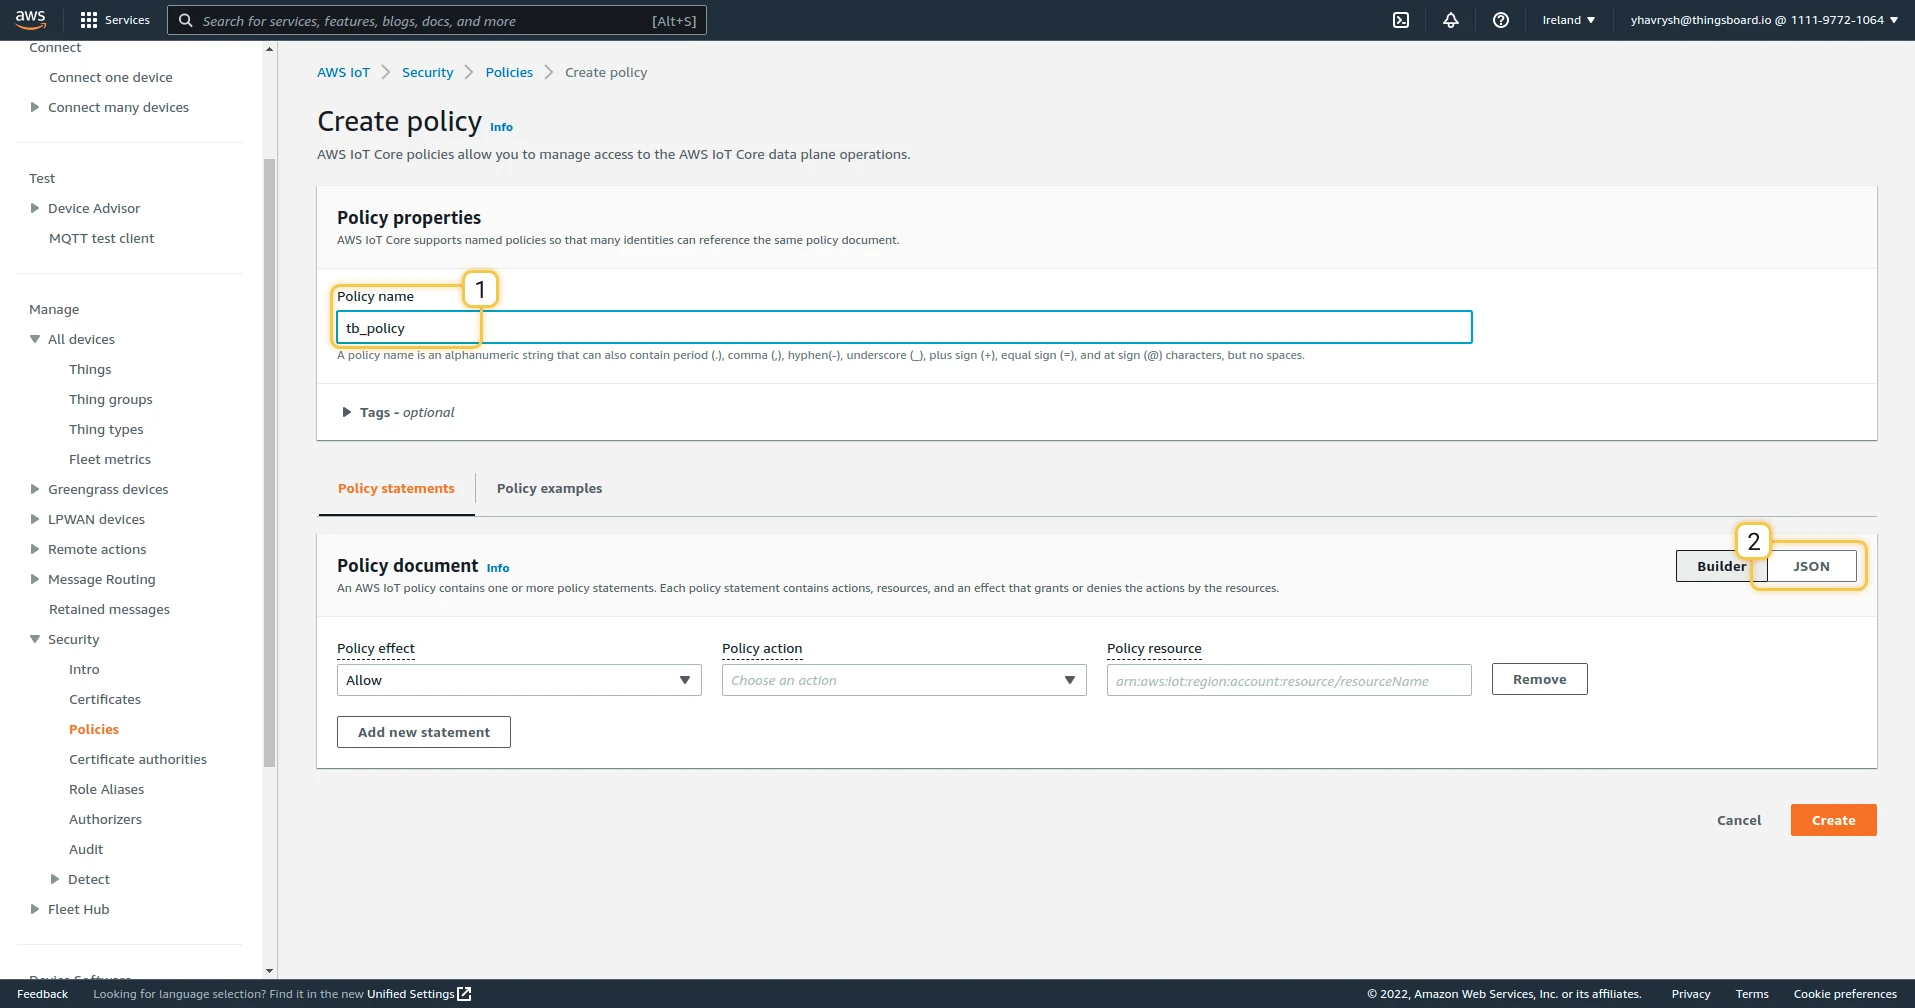
- Enter a Policy name and click JSON to switch the editor to JSON mode.
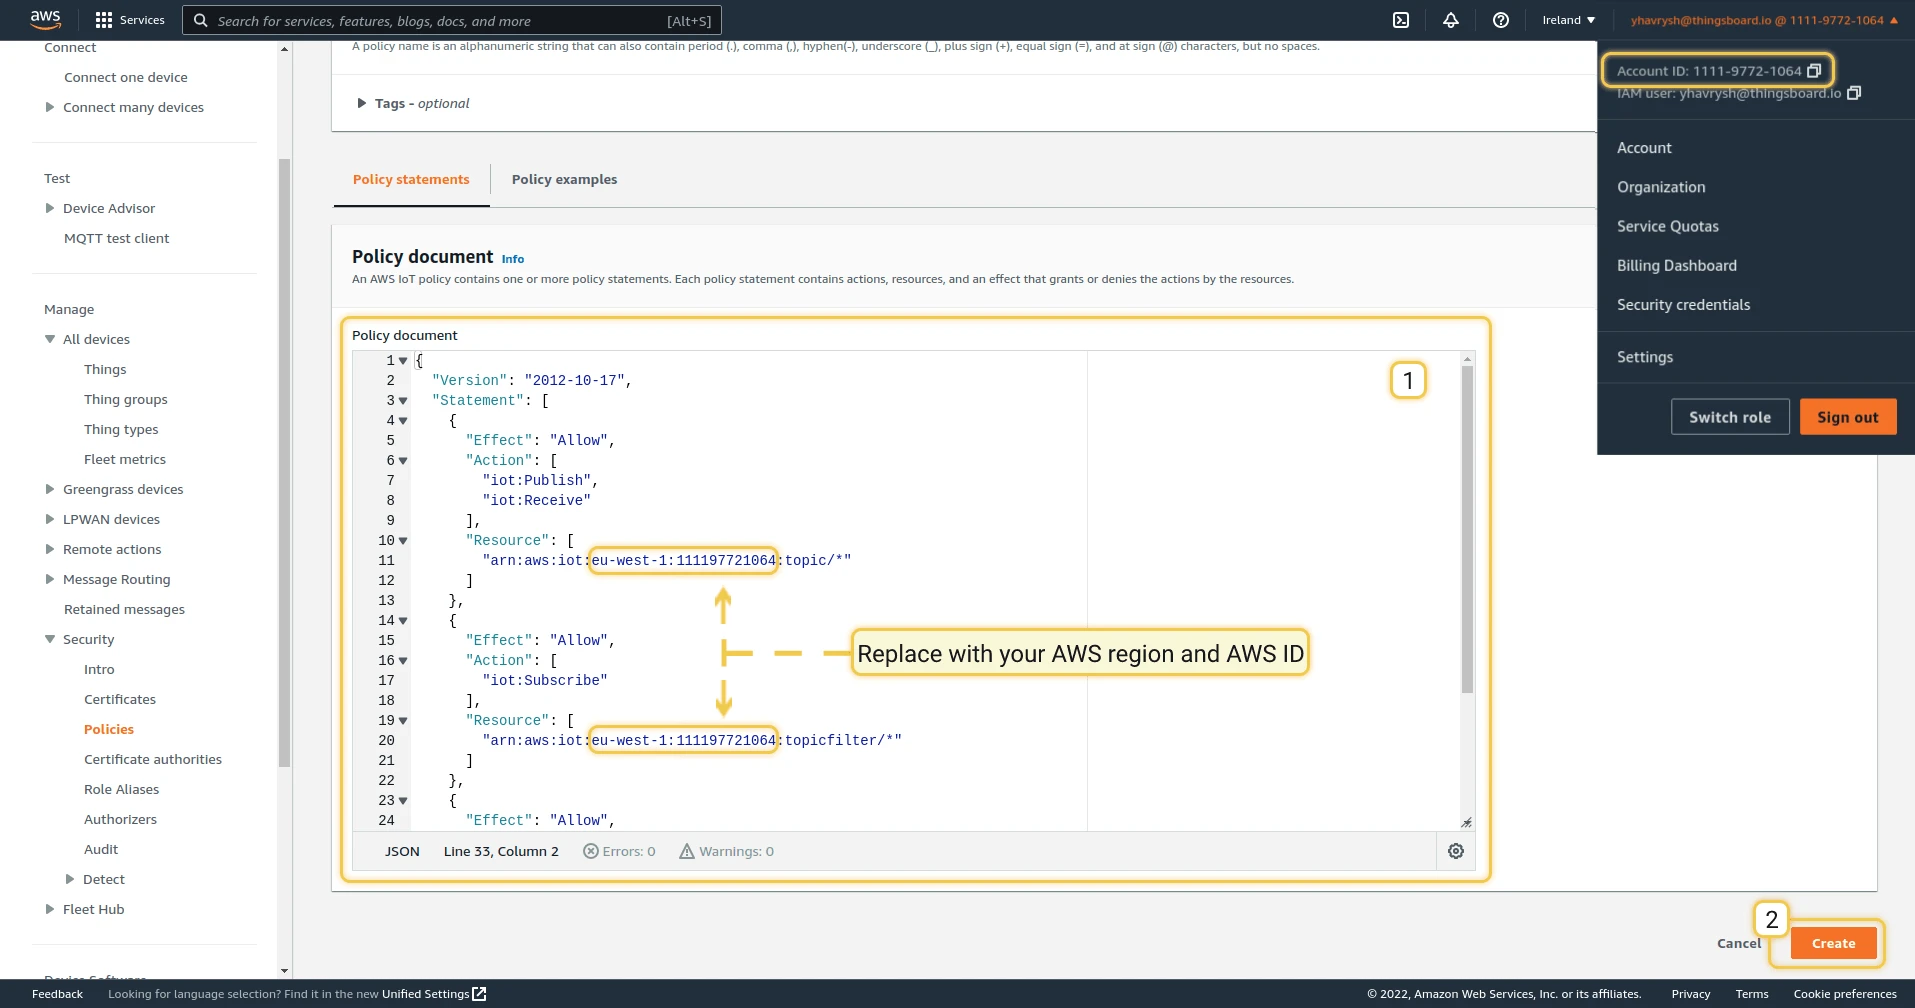
- Paste the policy document below, replacing
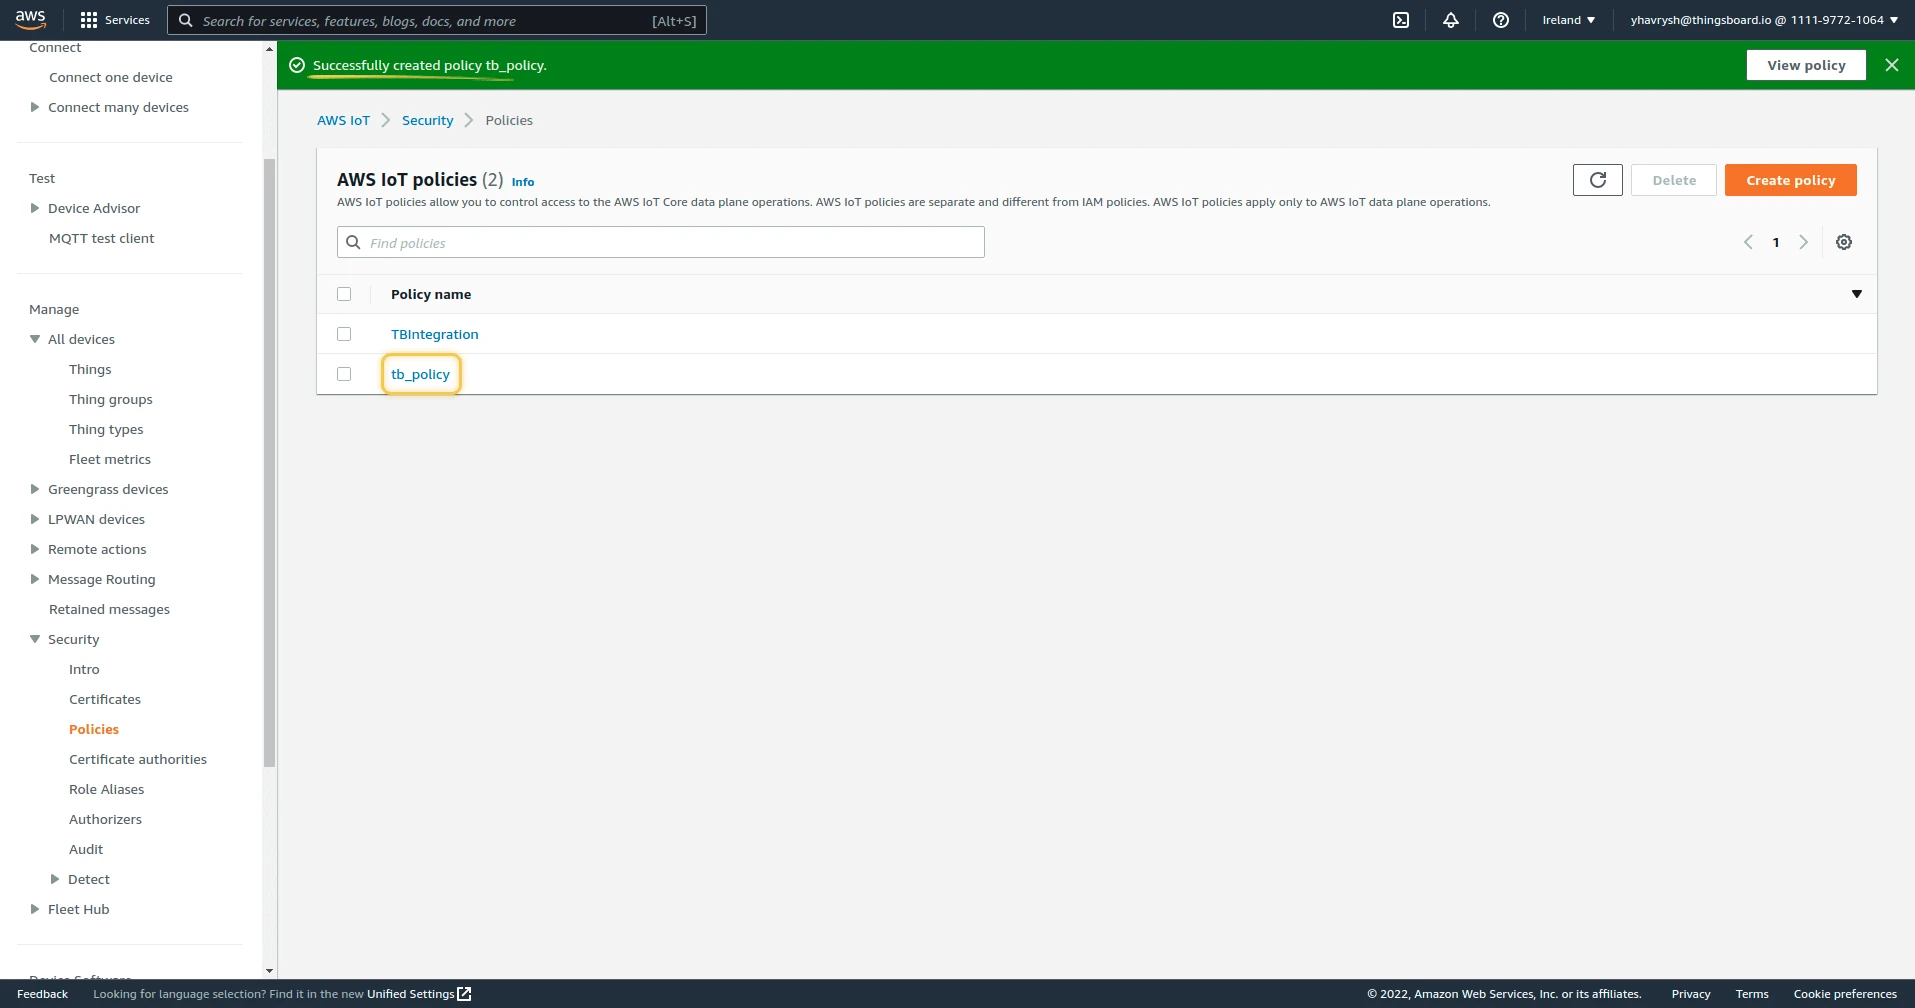
YOUR_REGIONandYOUR_AWS_IDwith your values. - Click Create.
{ "Version": "2012-10-17", "Statement": [ { "Effect": "Allow", "Action": ["iot:Publish", "iot:Receive"], "Resource": ["arn:aws:iot:YOUR_REGION:YOUR_AWS_ID:topic/*"] }, { "Effect": "Allow", "Action": ["iot:Subscribe"], "Resource": ["arn:aws:iot:YOUR_REGION:YOUR_AWS_ID:topicfilter/*"] }, { "Effect": "Allow", "Action": ["iot:Connect"], "Resource": ["arn:aws:iot:YOUR_REGION:YOUR_AWS_ID:client/*"] } ]}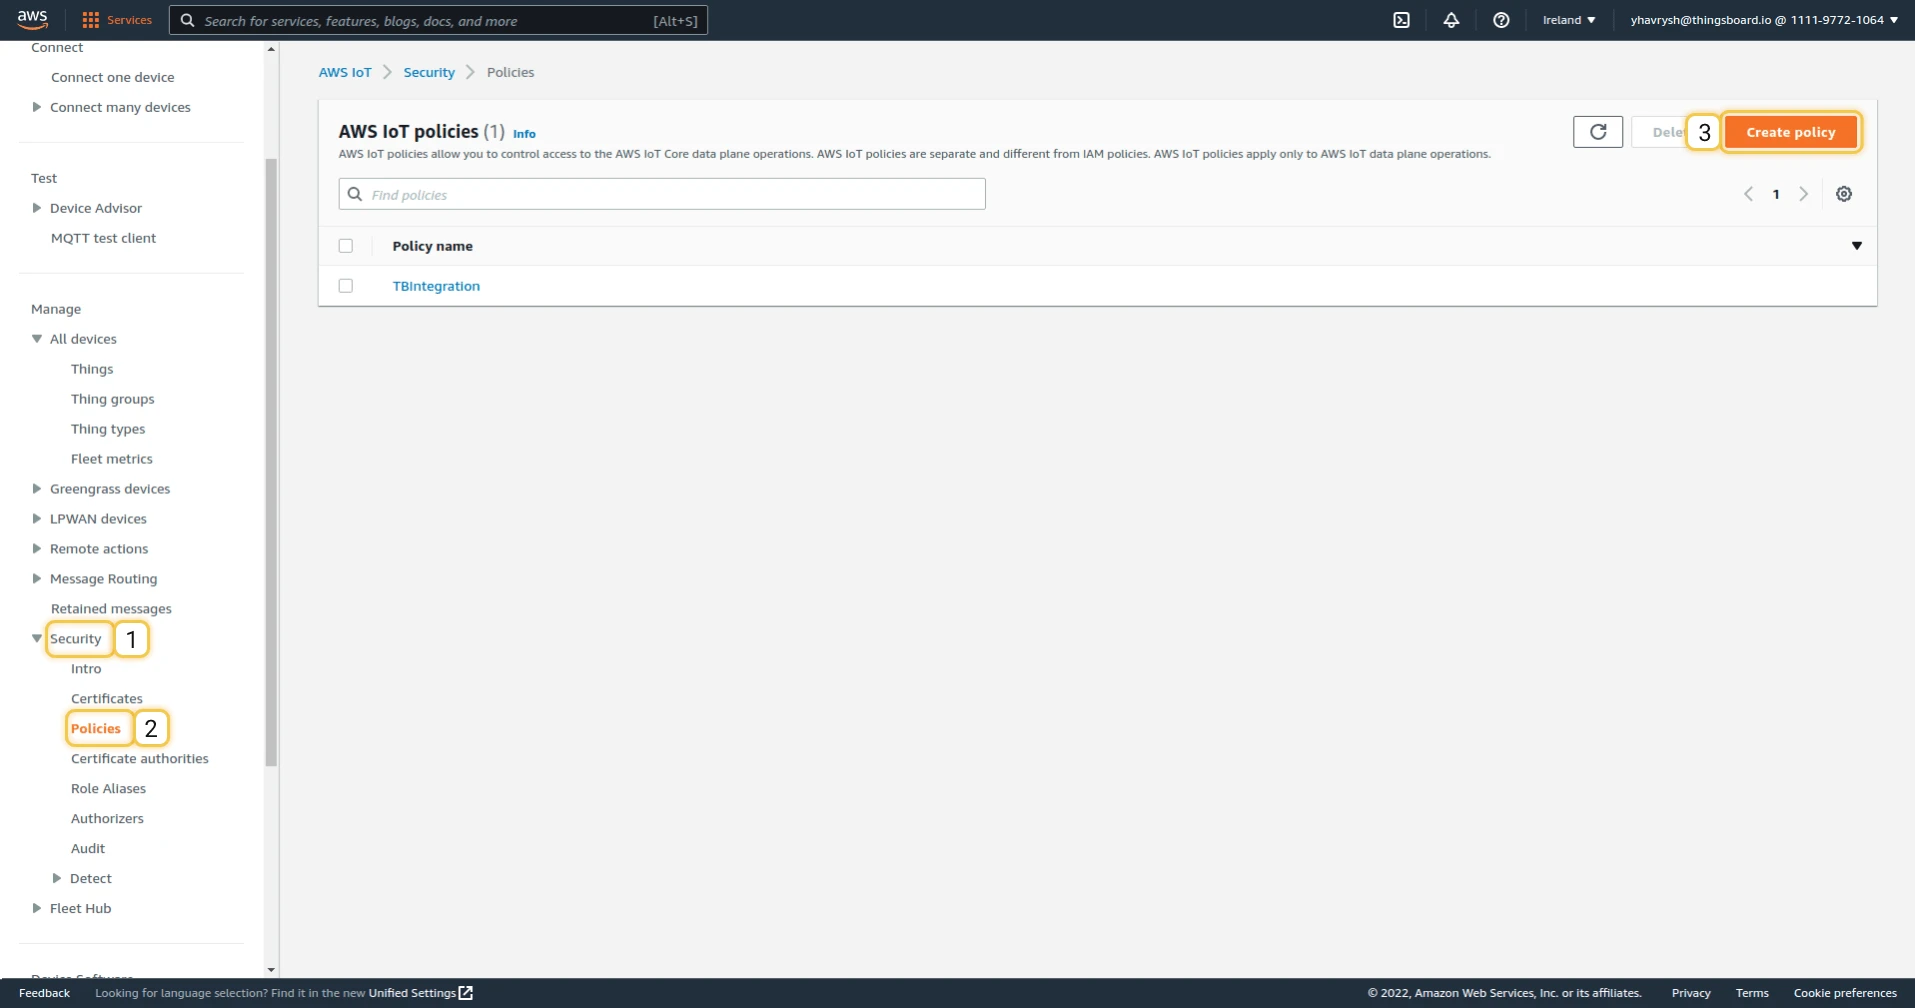
Create a thing and certificates
Section titled “Create a thing and certificates”A “thing” is the digital representation of a physical device in AWS IoT.
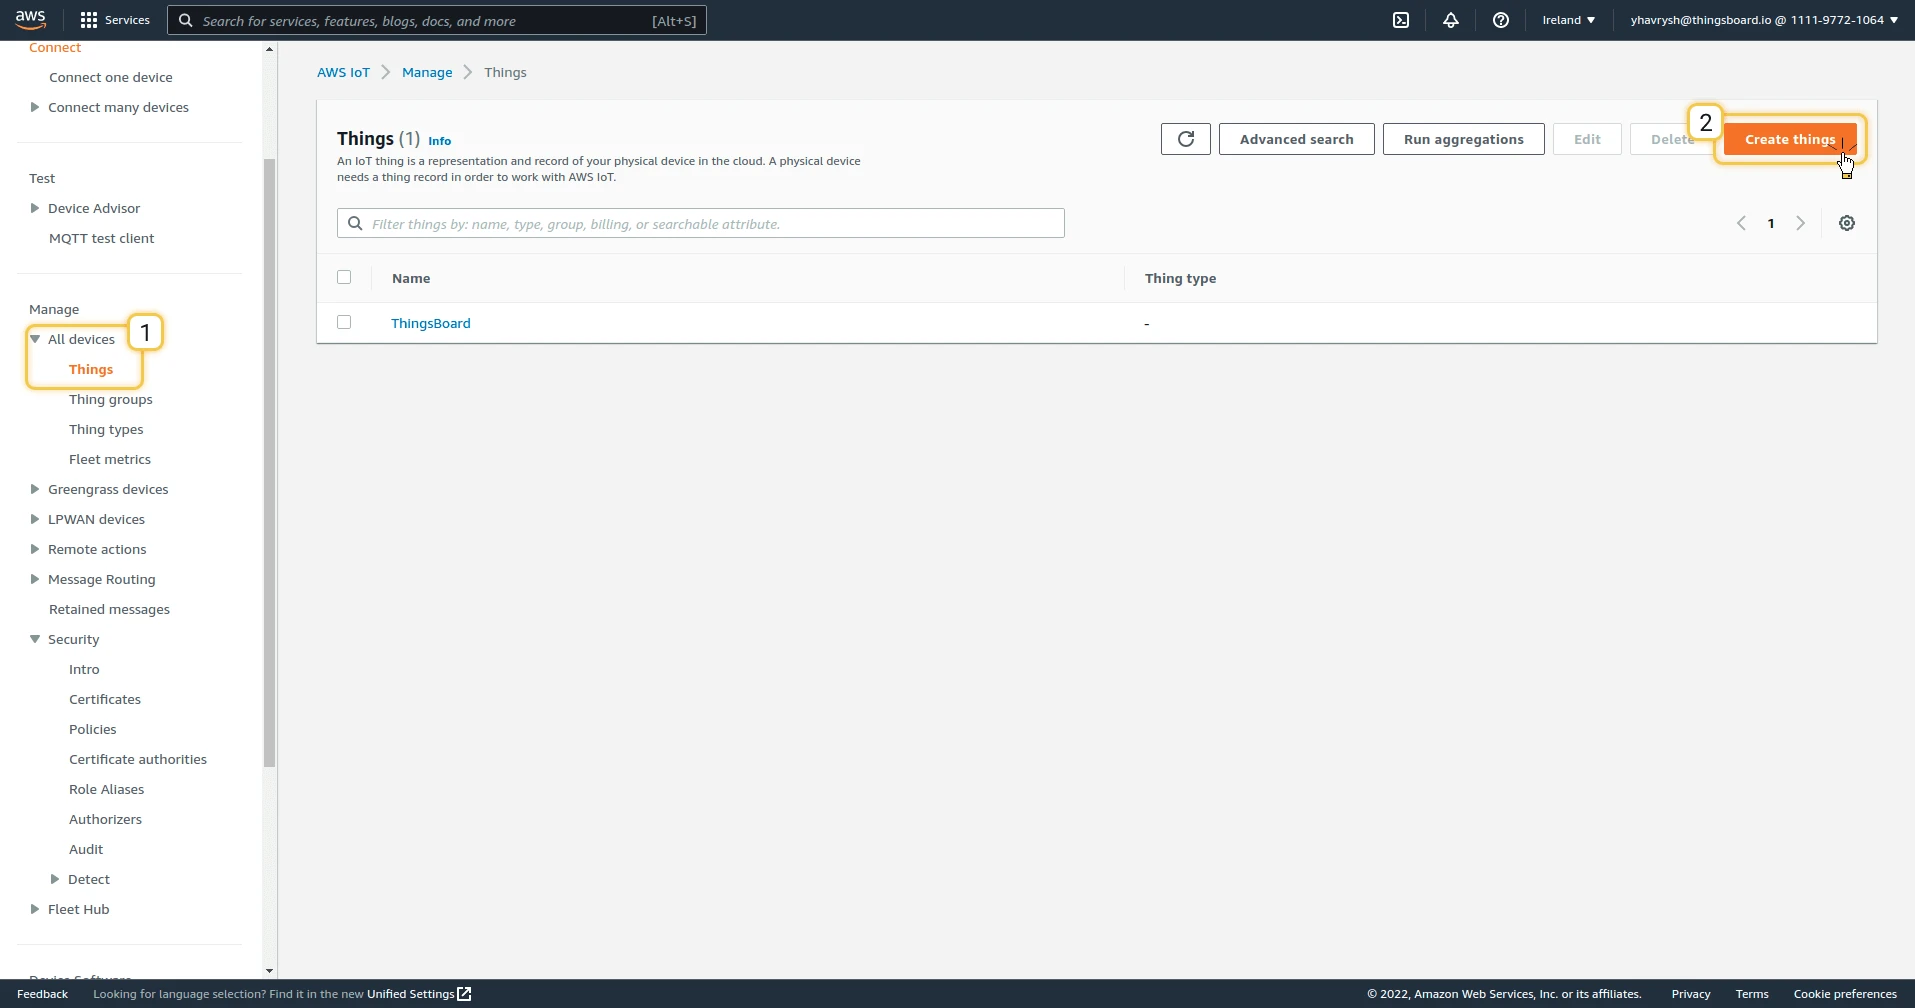
- Go to All devices ⇾ Things and click Create things.
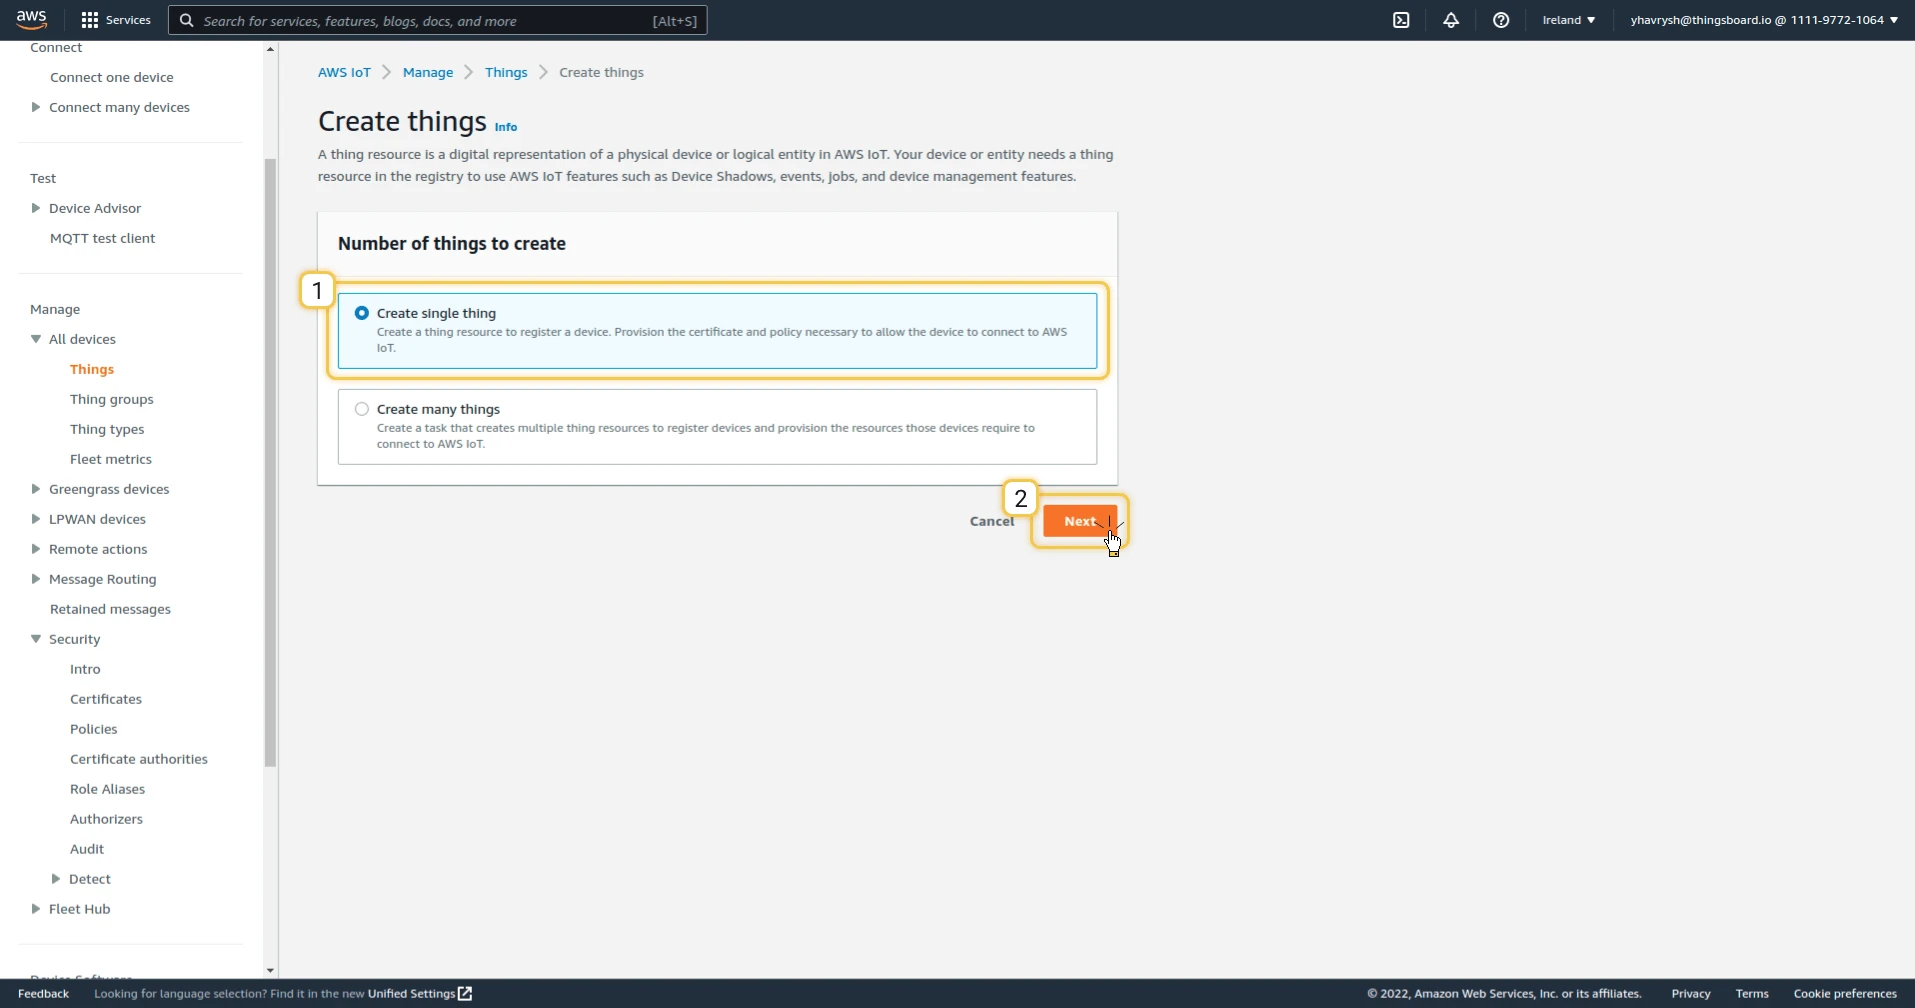
- Select Create single thing and click Next.
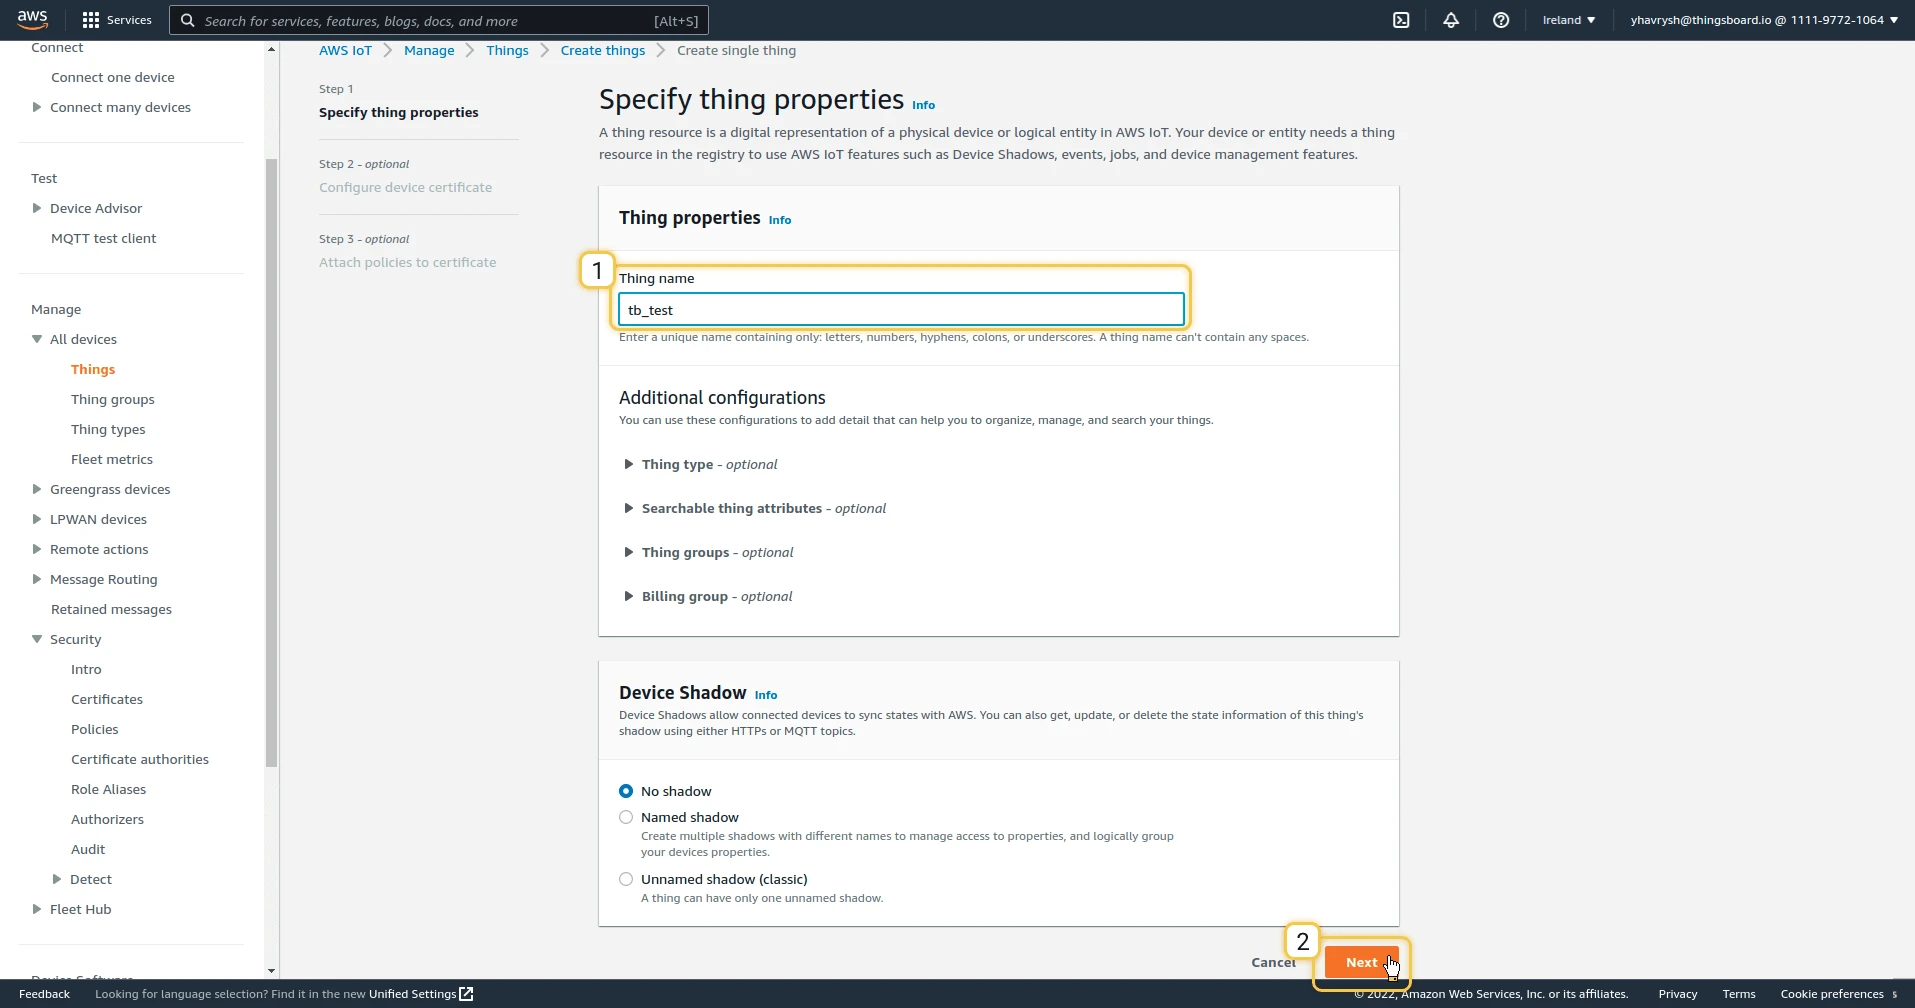
- Enter a Name for the device and click Next.
- Select Auto-generate a new certificate (recommended) and click Next.
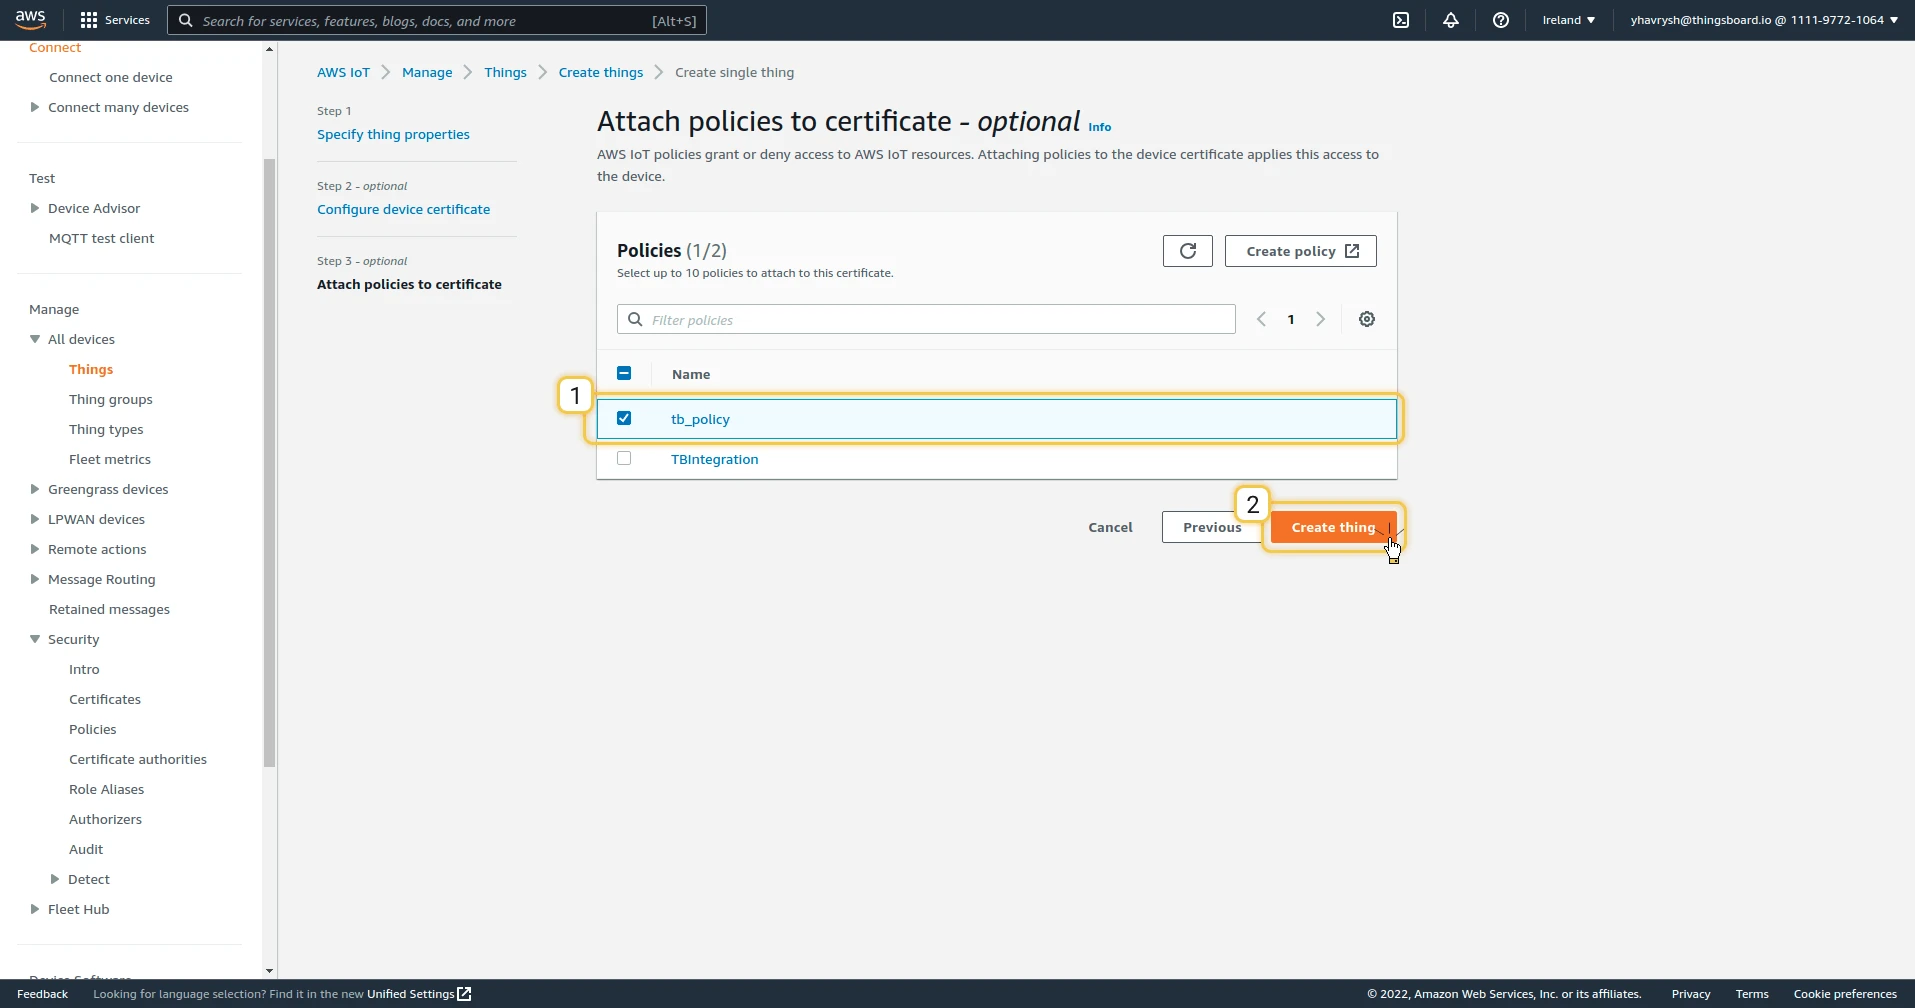
- Attach the policy you created and click Create thing.
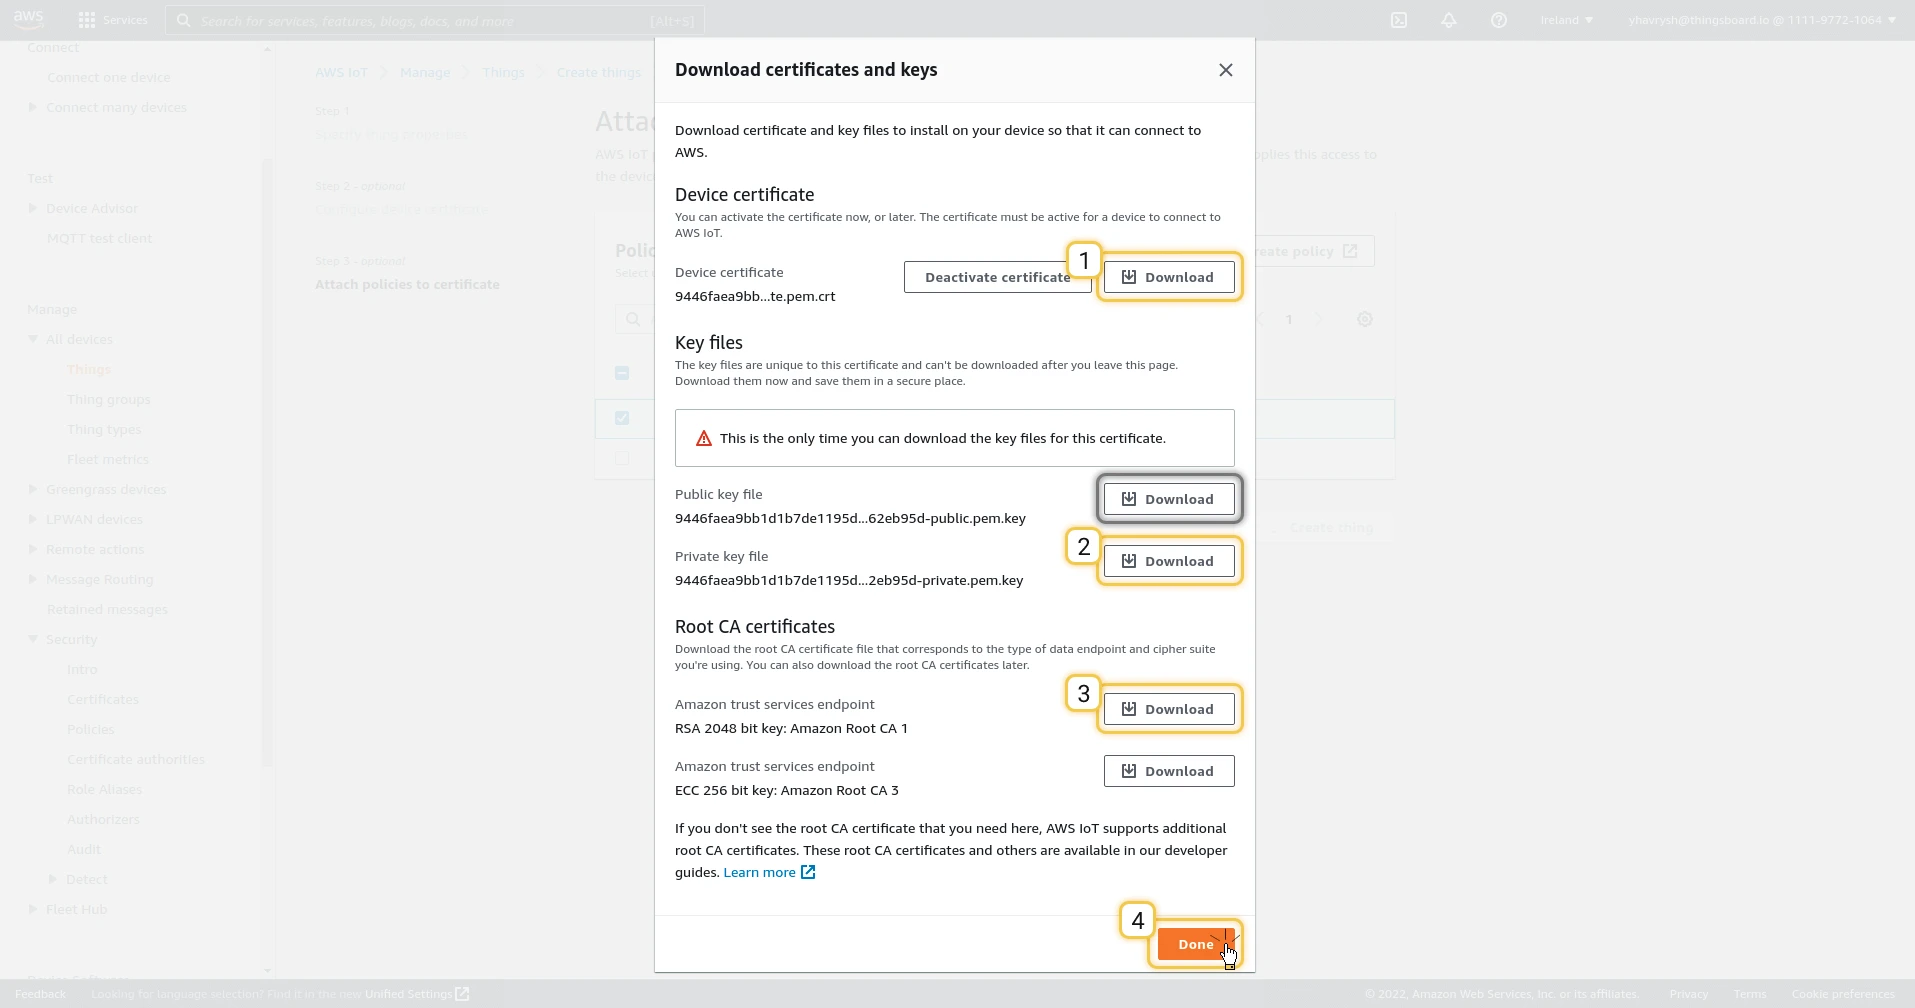
- Download the required files:
- Device certificate (
*.pem.crt) - Private key (
*-private.pem.key) — shown only once, save it immediately - Root CA certificate — download Amazon Root CA 1 (
AmazonRootCA1.pem)
- Device certificate (
- Click Done.

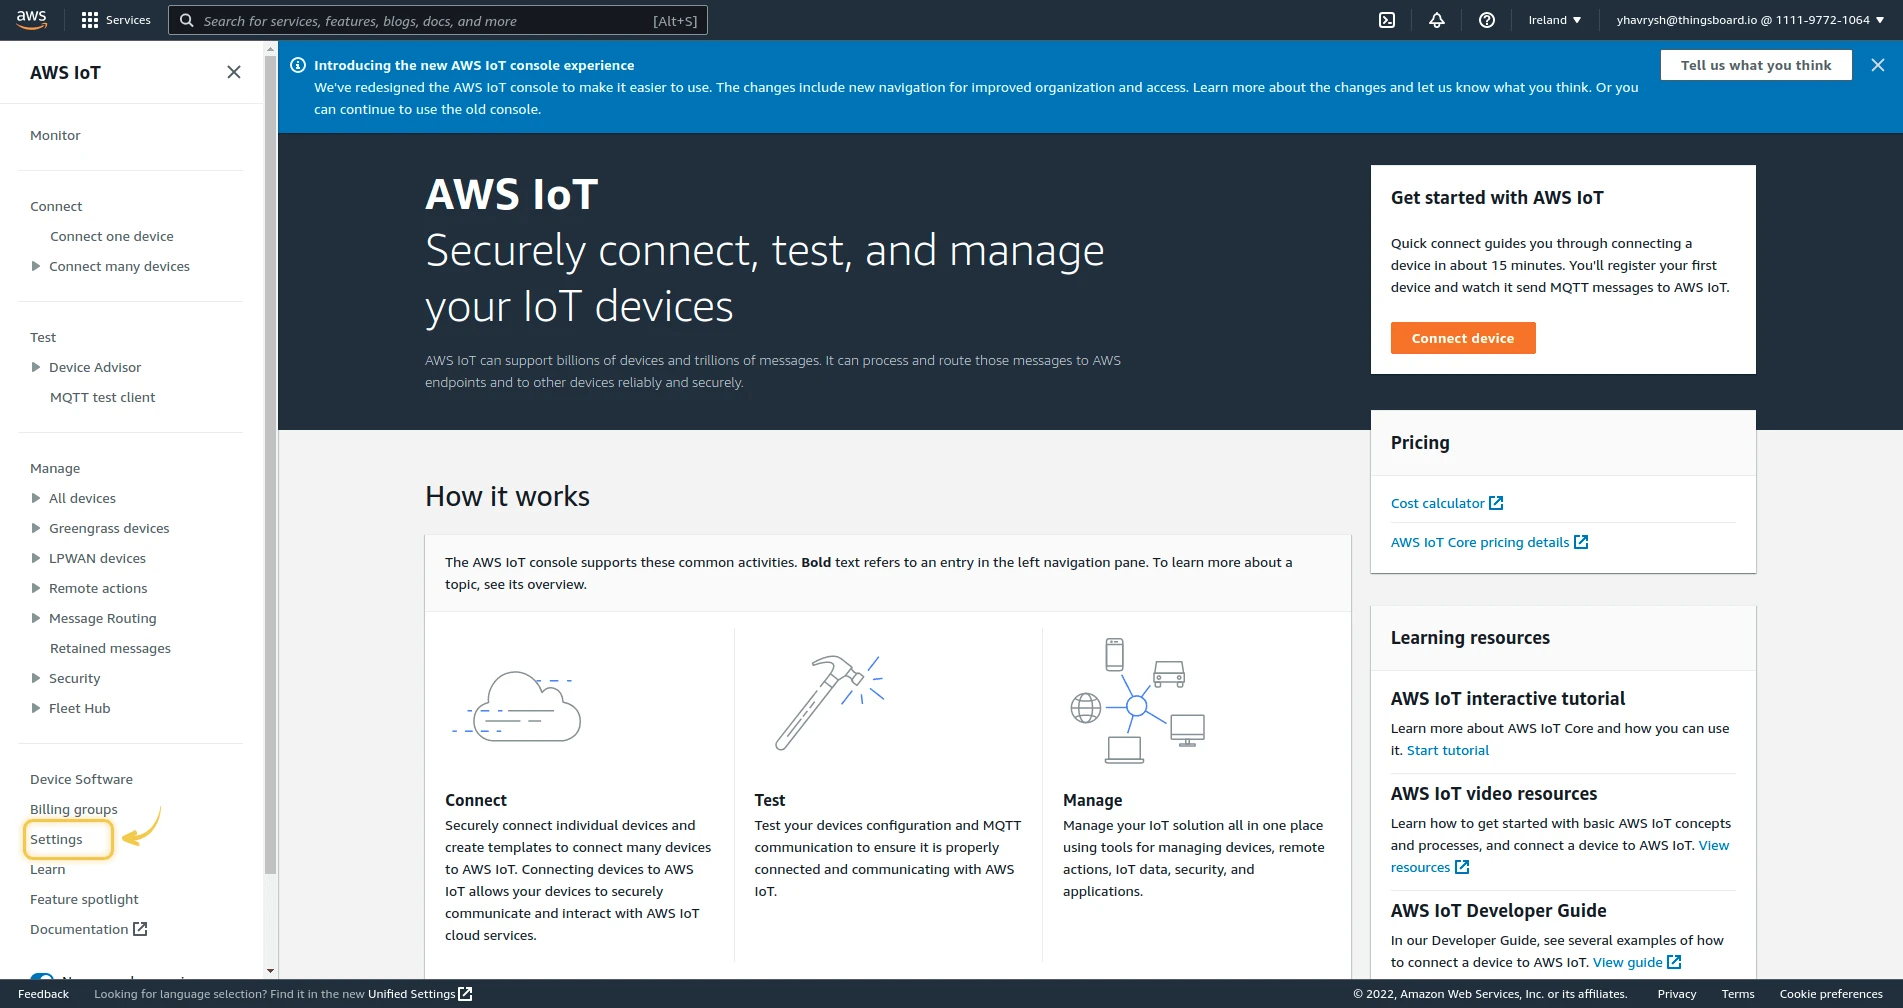
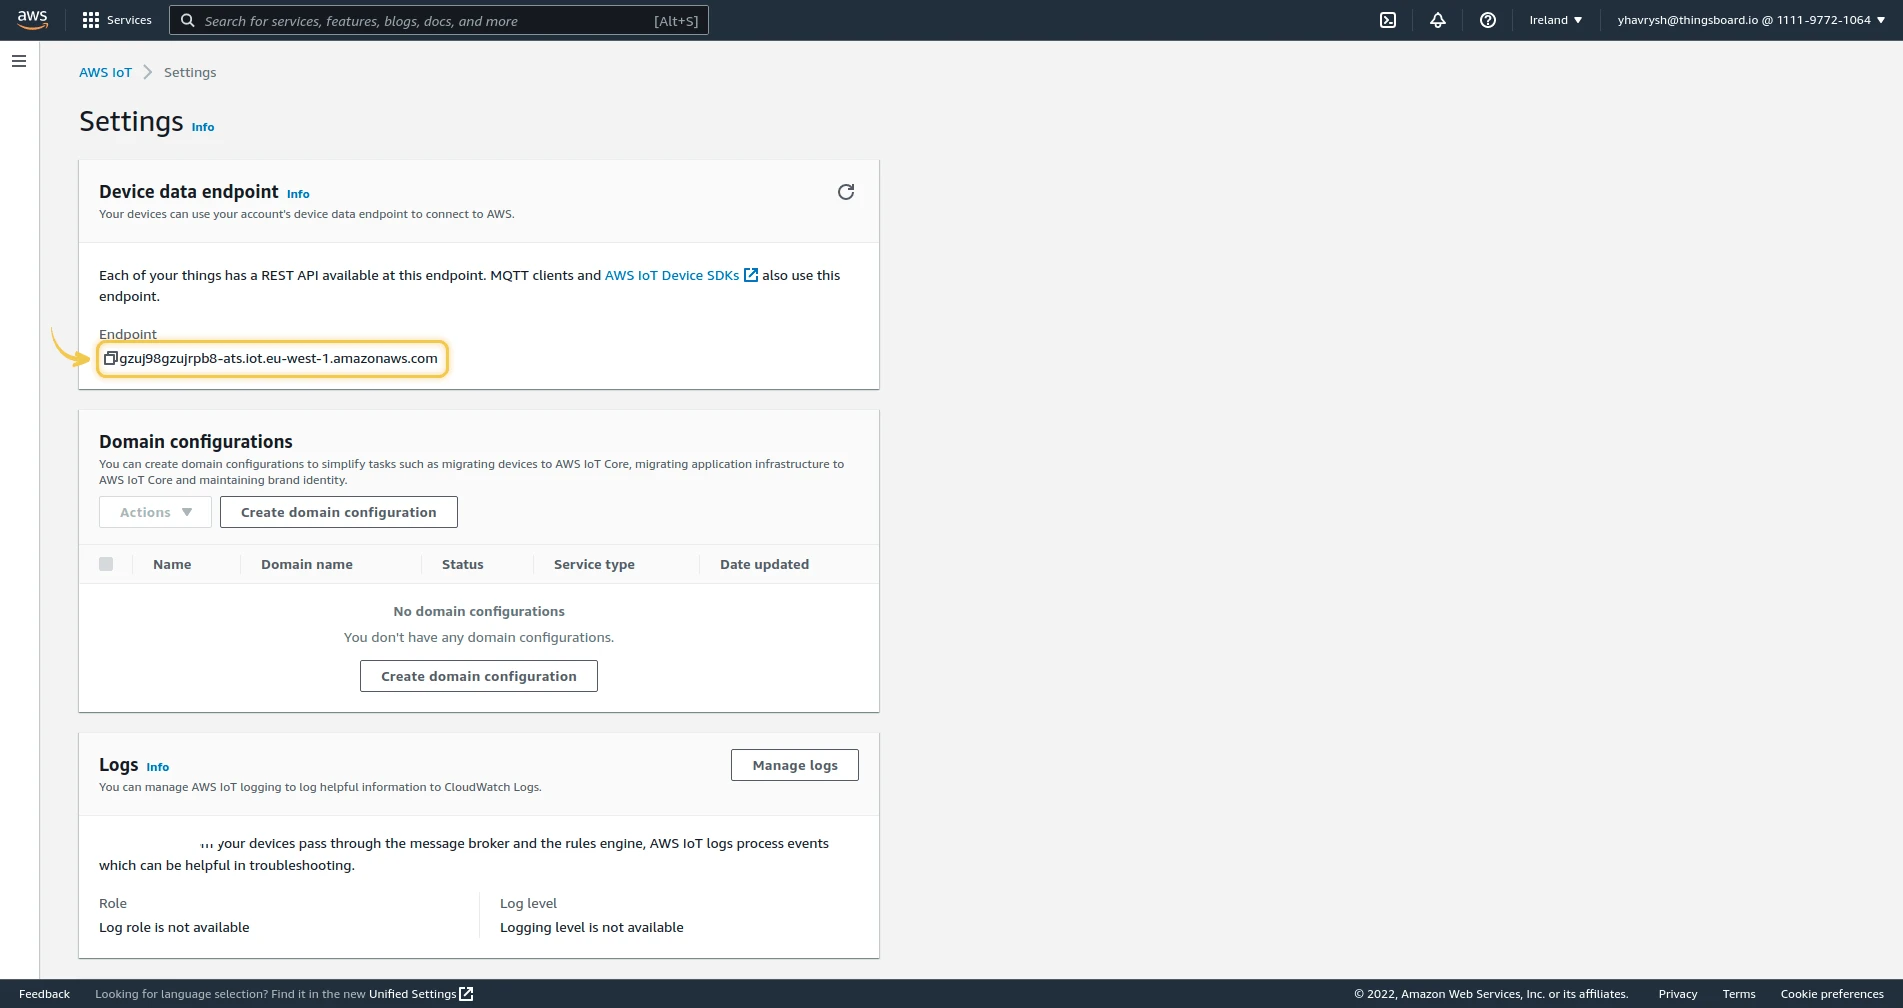
AWS IoT endpoint
Section titled “AWS IoT endpoint”Each AWS account has a unique device data endpoint — the MQTT broker hostname that ThingsBoard will connect to. Copy it from the console under Settings ⇾ Device data endpoint; you will paste it into the ThingsBoard integration connection settings.
ThingsBoard integration setup
Section titled “ThingsBoard integration setup”Create an uplink converter
Section titled “Create an uplink converter”The AWS IoT integration uses a generic uplink converter. The decoder function receives payload (JSON object decoded from the MQTT message) and metadata (includes topic and integrationName), and must return an object with deviceName, deviceType, and optionally attributes and telemetry.
- Go to Integrations center ⇾ Data converters.
- Click + Add data converter ⇾ Create new converter.
- Set the type to Uplink and enter a name.
- Paste the decoder script and click Add.
The example decoder below uses the topic tb/aws/iot/sensors/freezer-432 — it extracts deviceType from segment 4 (sensors) and deviceName from segment 5 (freezer-432), and maps the four payload fields to one attribute and three telemetry keys:
var data = decodeToJson(payload);var topicParts = metadata.topic.split("/");var deviceType = topicParts[3];var deviceName = topicParts[4];
var result = {    deviceName: deviceName,    deviceType: deviceType,    attributes: {        state: data.val0,    },    telemetry: {        temperature: data.val1,        fan_ins: data.val2,        fan_out: data.val3,    }};
return result;
var payloadStr = decodeToString(payload);var data = JSON.parse(payloadStr);var topicParts = metadata.topic.split("/");var deviceType = topicParts[3];var deviceName = topicParts[4];
var result = { deviceName: deviceName, deviceType: deviceType, attributes: { state: data.val0, }, telemetry: { temperature: data.val1, fan_ins: data.val2, fan_out: data.val3, }};
function decodeToString(payload) { return String.fromCharCode.apply(String, payload);}
return result;Adapting the decoder to your device:
- Different topic structure — change the segment indices in
metadata.topic.split("/")to match the position of the device type and name in your topic path. - Device name from payload — replace
topicParts[4]with a payload field (e.g.data.deviceId) if the device name is in the message body rather than the topic. - Different telemetry fields — add or rename keys in the
telemetryobject to match your payload structure. - Update only keys — in Advanced decoding parameters, add attribute keys that should only be written when their value changes.
Create the integration
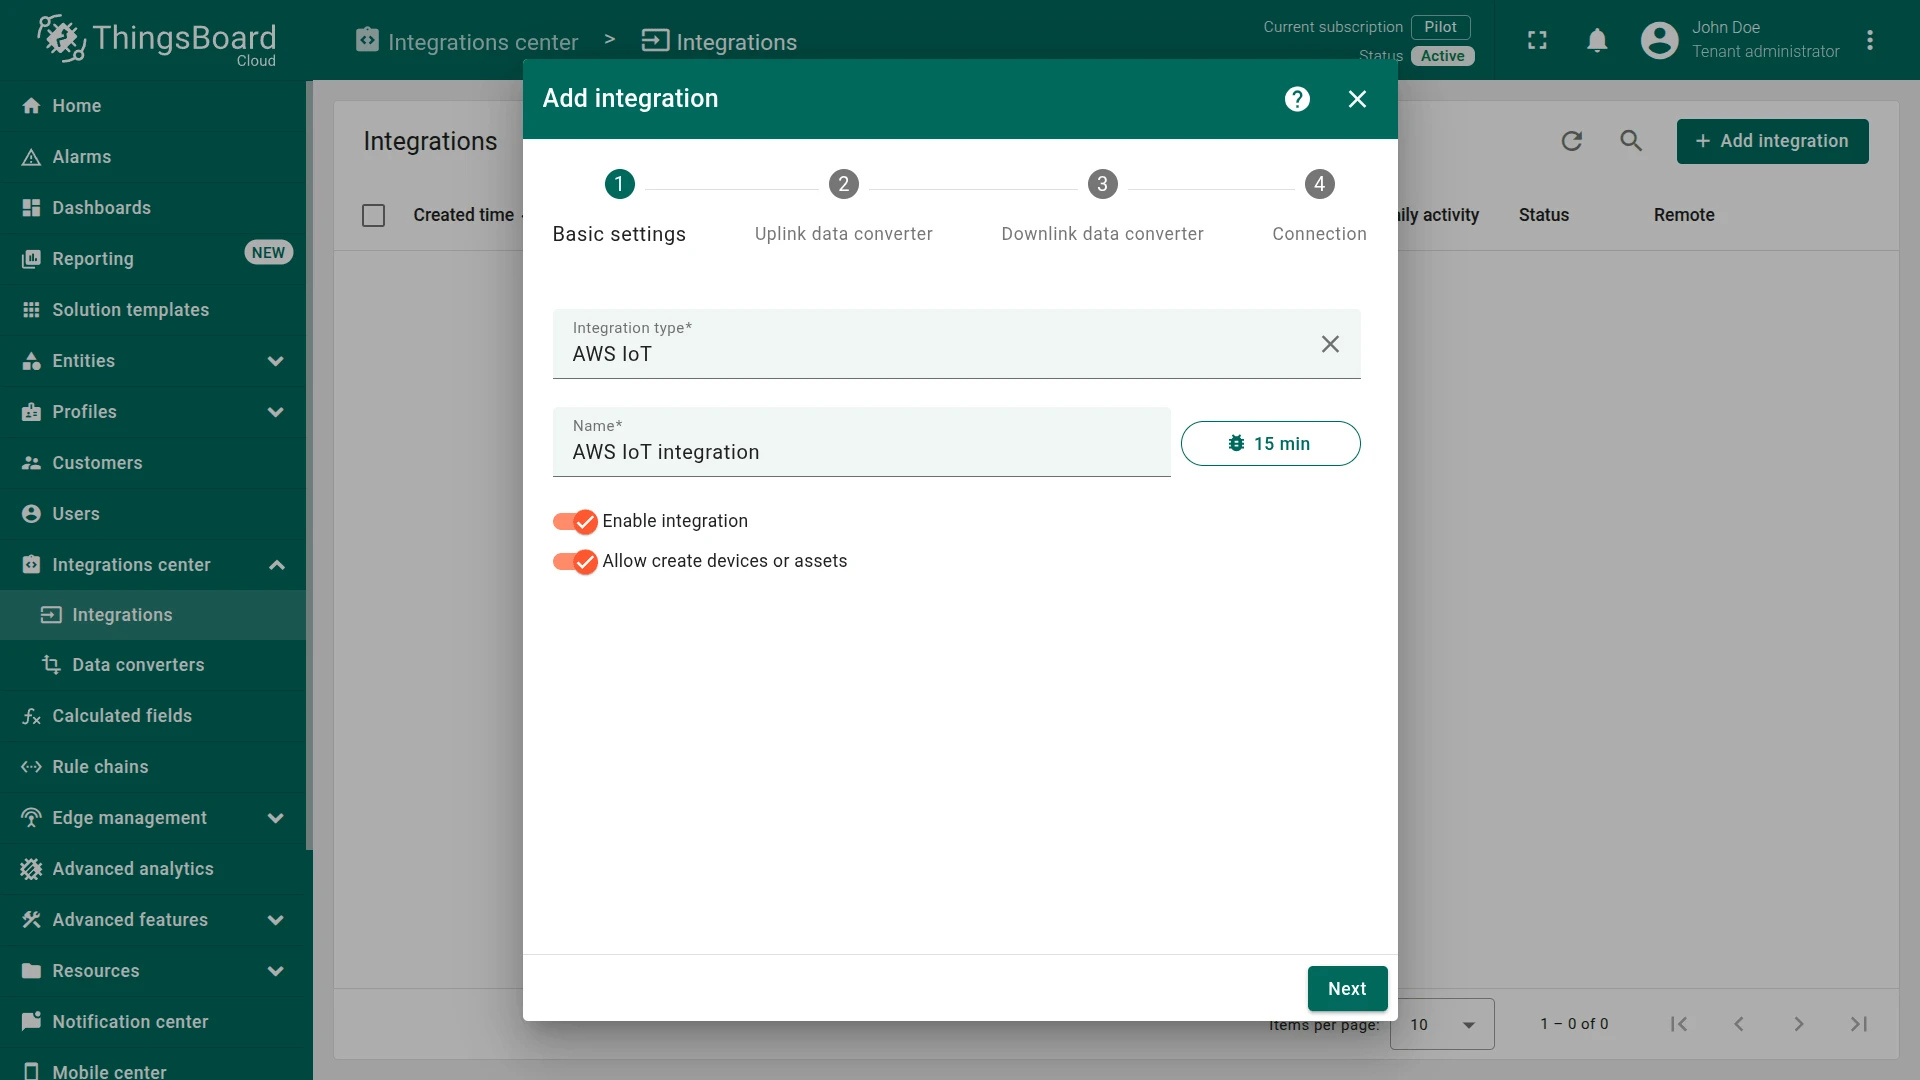
Section titled “Create the integration”- Go to Integrations center ⇾ Integrations and click +.
- Set Integration type to AWS IoT.
- Enable integration and Allow create devices or assets are on by default.
- Click Next.
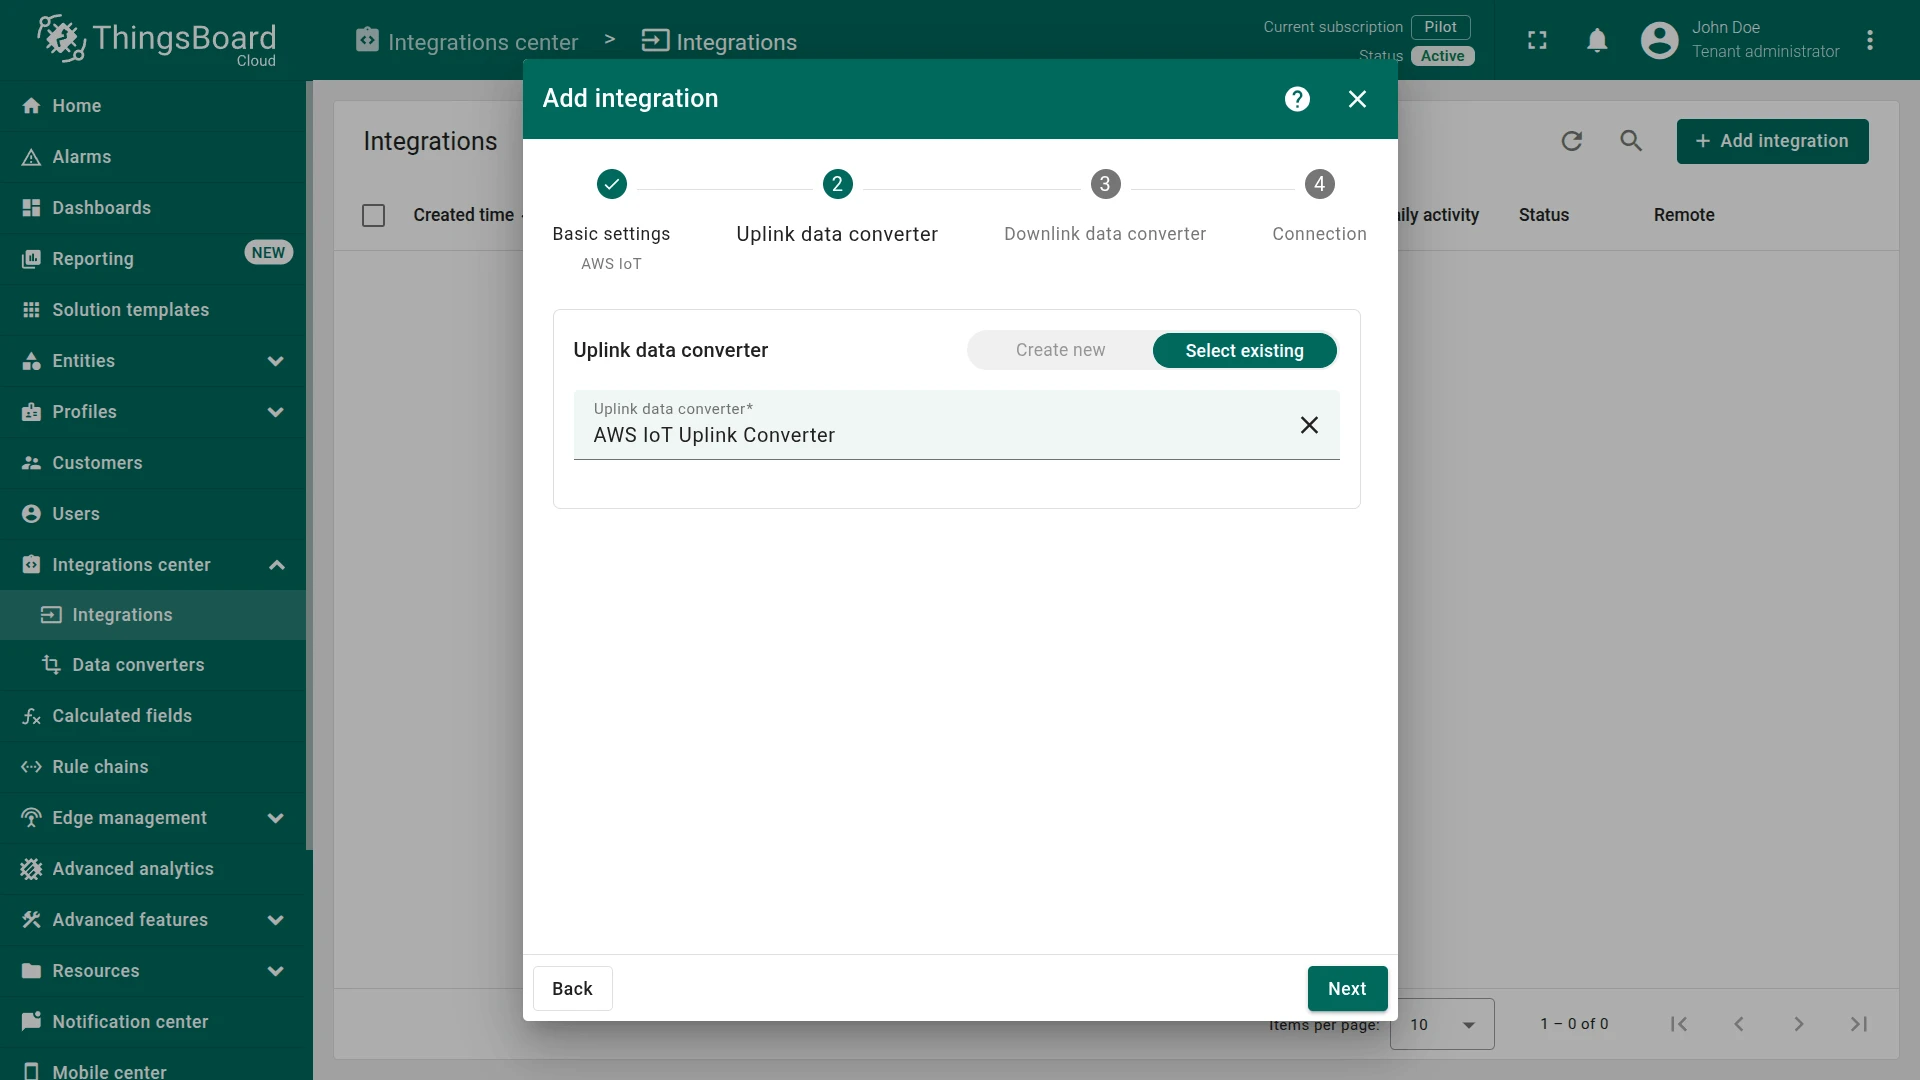
- Uplink data converter:
- Select existing — choose the previously created AWS IoT Uplink Converter from the list.
- Click Next.
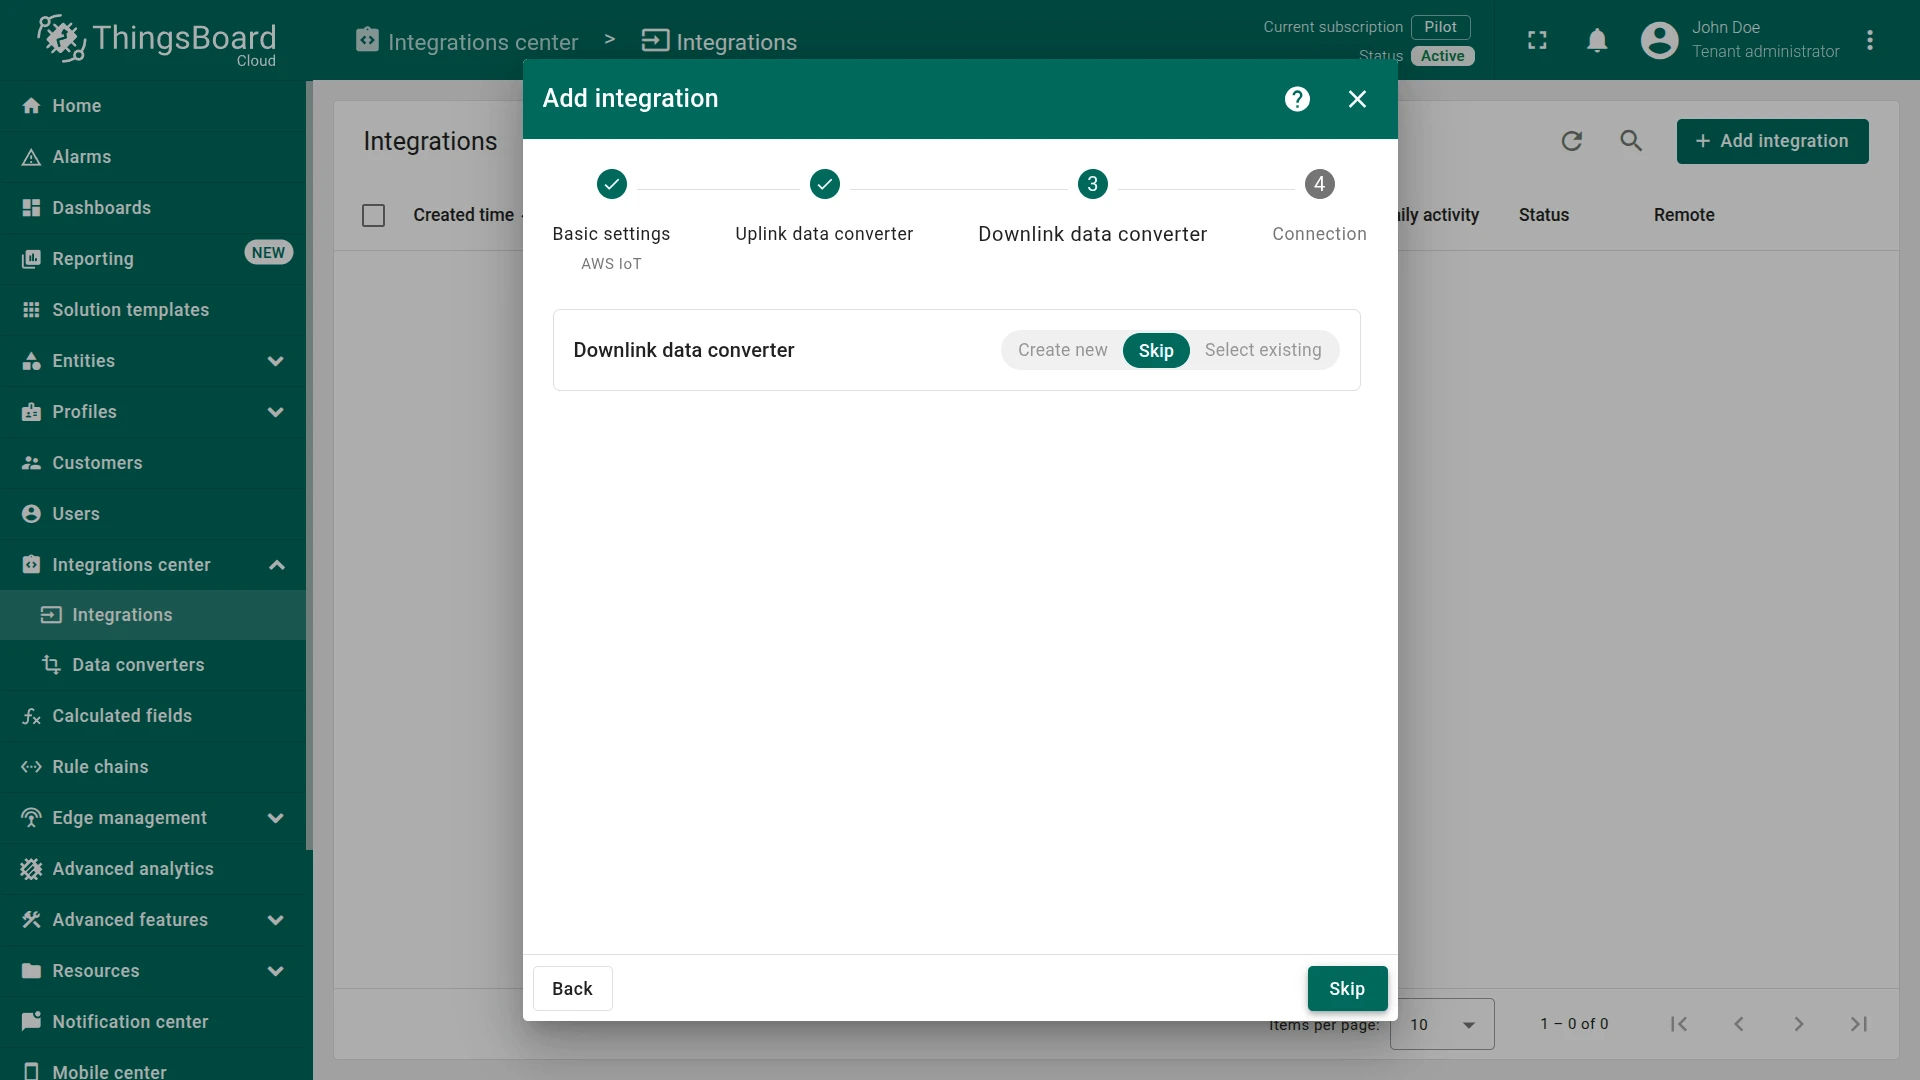
- Downlink data converter:
- Click Skip — the downlink converter is only needed for sending commands to devices and can be added later.
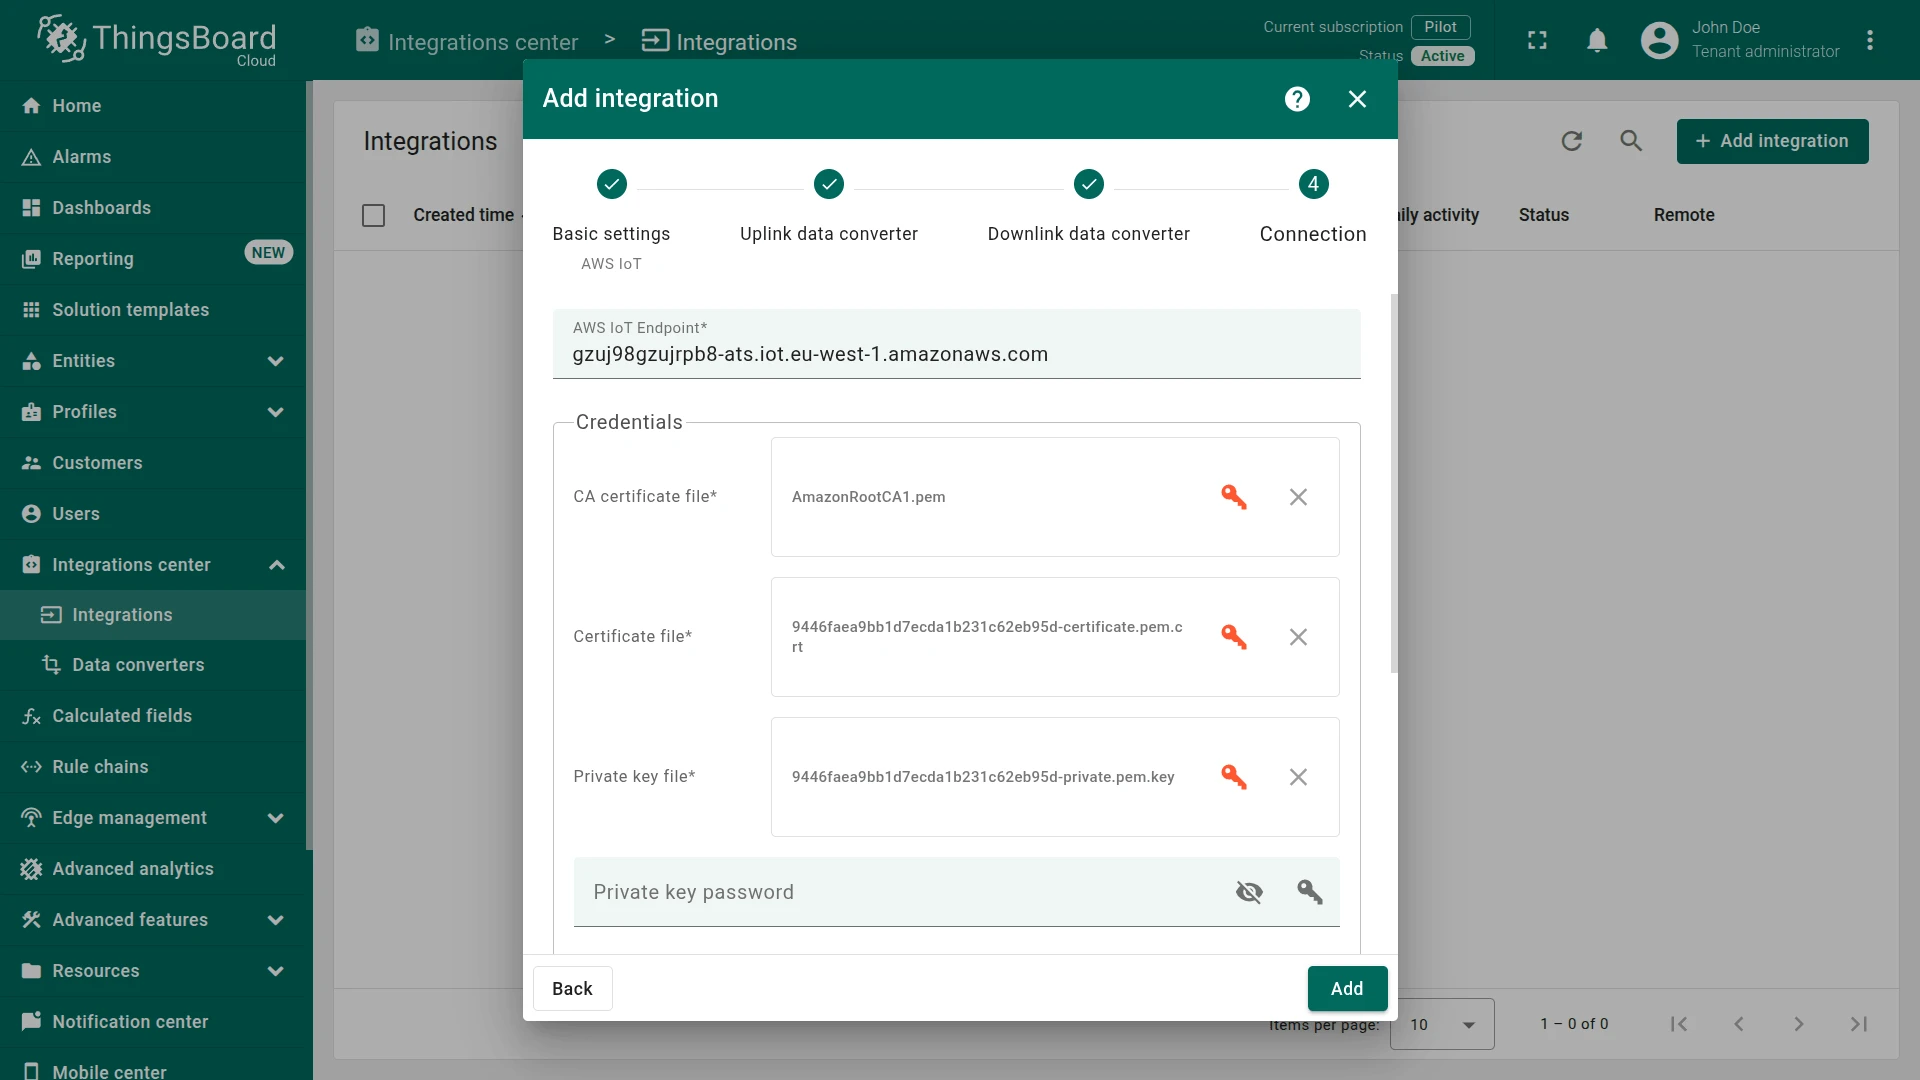
- Connection:
- Enter the AWS IoT endpoint.
- Upload the CA certificate (
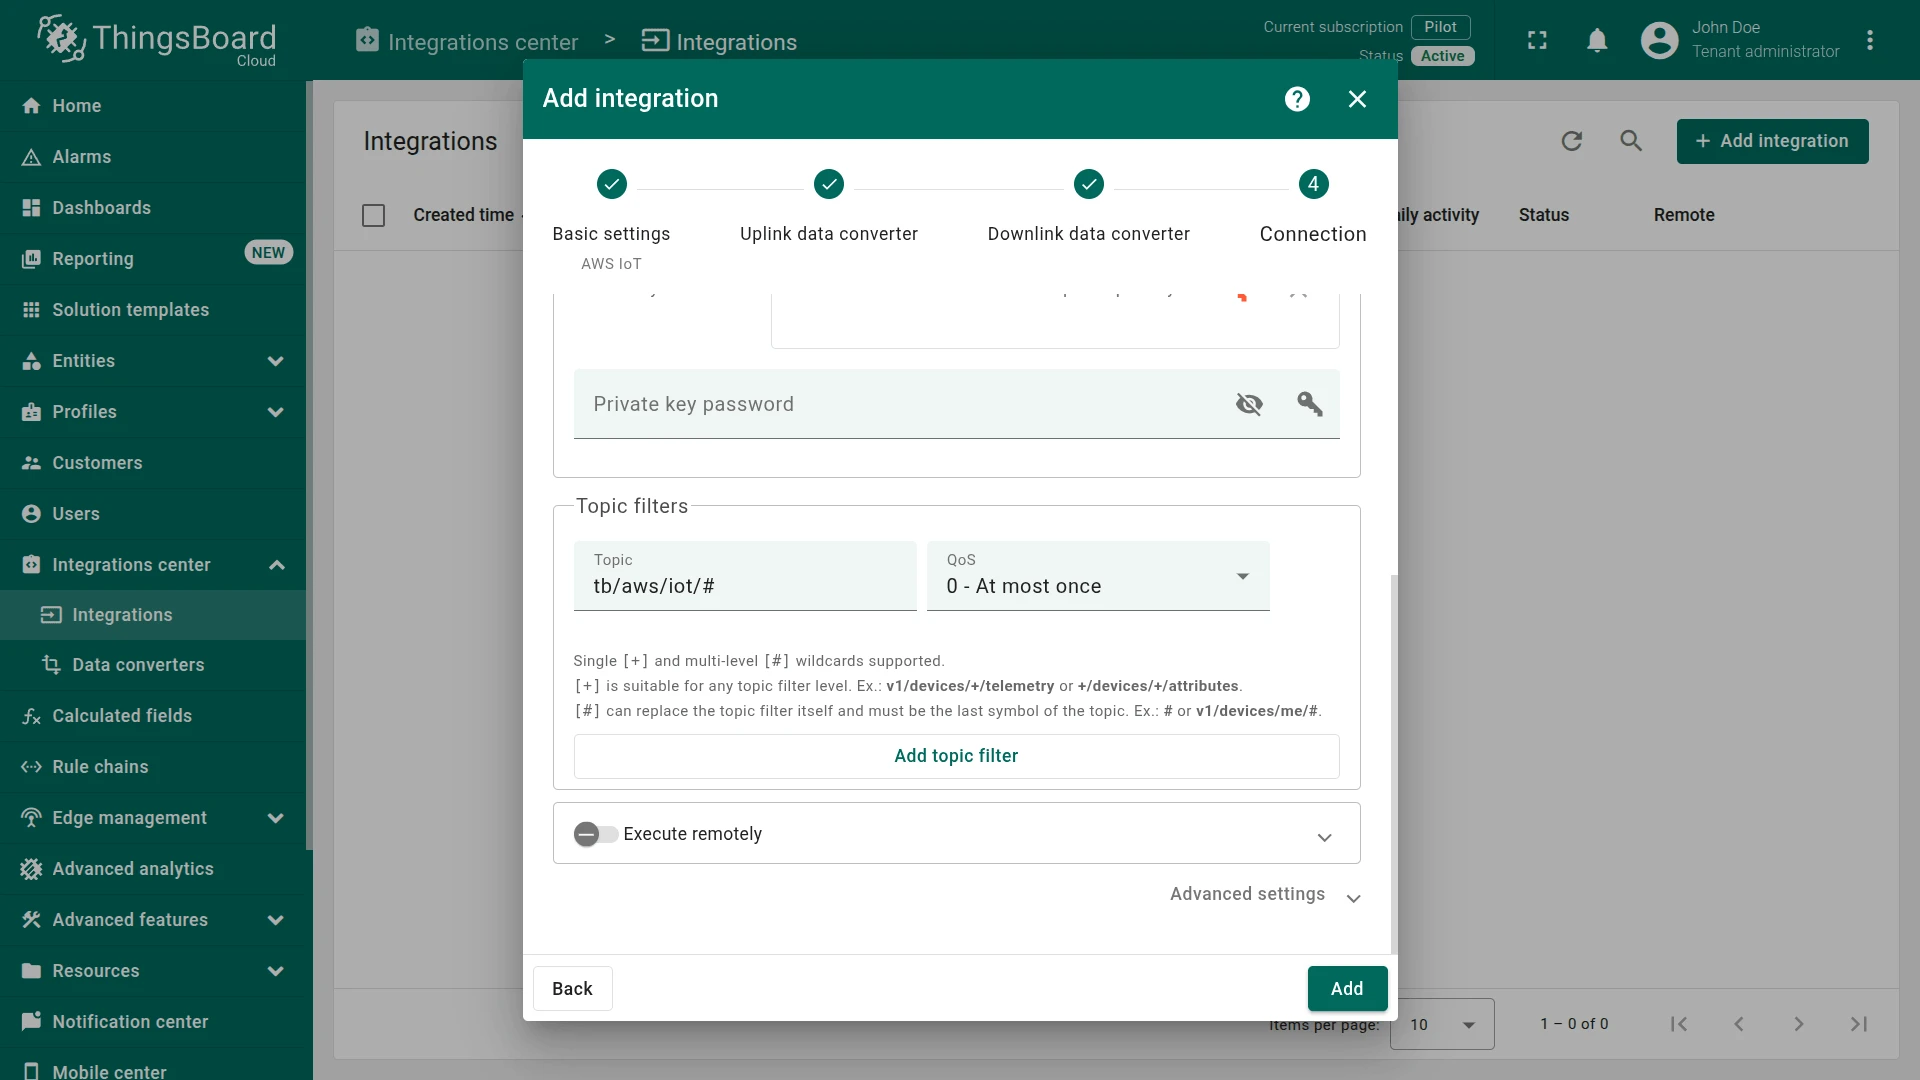
AmazonRootCA1.pem), Device certificate (*.pem.crt), and Private key (*-private.pem.key). Leave Private key password blank unless the key is encrypted. - Add a Topic filter (e.g.
tb/aws/iot/#) — the#wildcard matches all sub-topics. Select QoS level (default: At most once).
- Click Add to create the integration.
Test uplink
Section titled “Test uplink”Use the AWS IoT MQTT test client to send a test message:
- Go to MQTT test client ⇾ Publish to a topic.
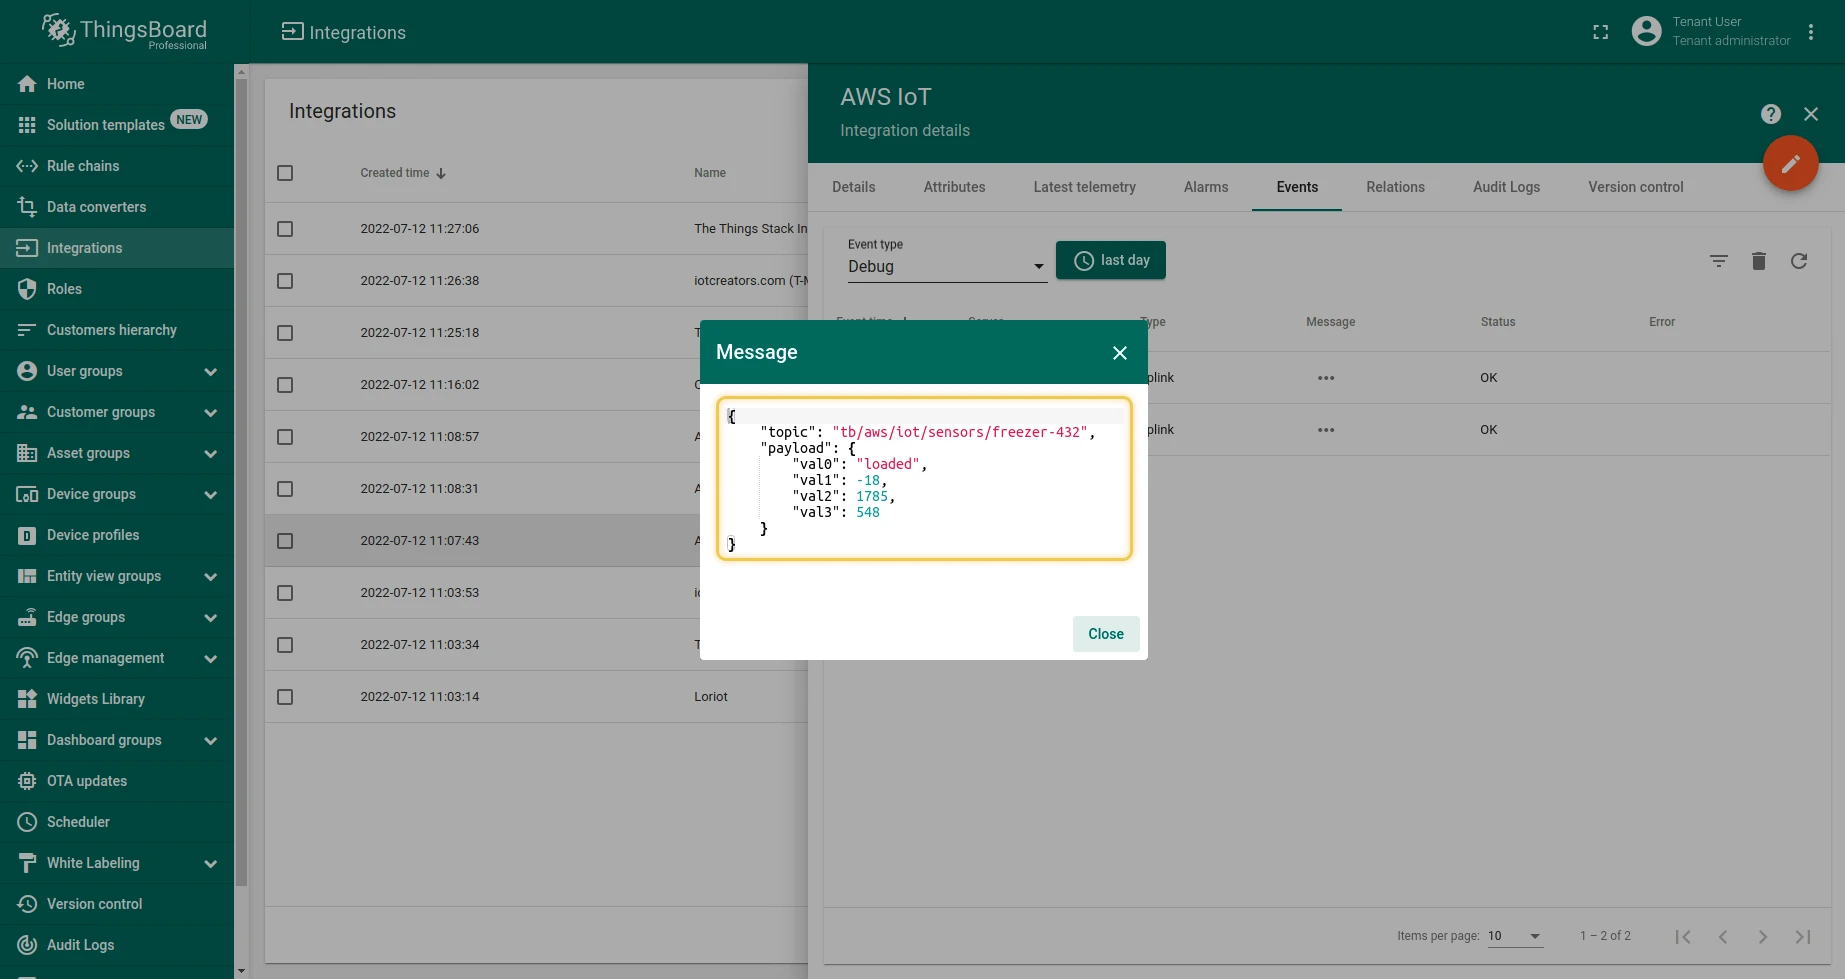
- Enter the topic
tb/aws/iot/sensors/freezer-432and paste the payload below. - Click Publish.
{ "val0": "loaded", "val1": -18, "val2": 1785, "val3": 548}
After publishing, go to Entities ⇾ Devices — a new device named freezer-432 of type sensors is automatically created. Open it and check the Latest telemetry tab to see the decoded temperature, fan_ins, and fan_out values, and the Attributes tab for the state attribute.
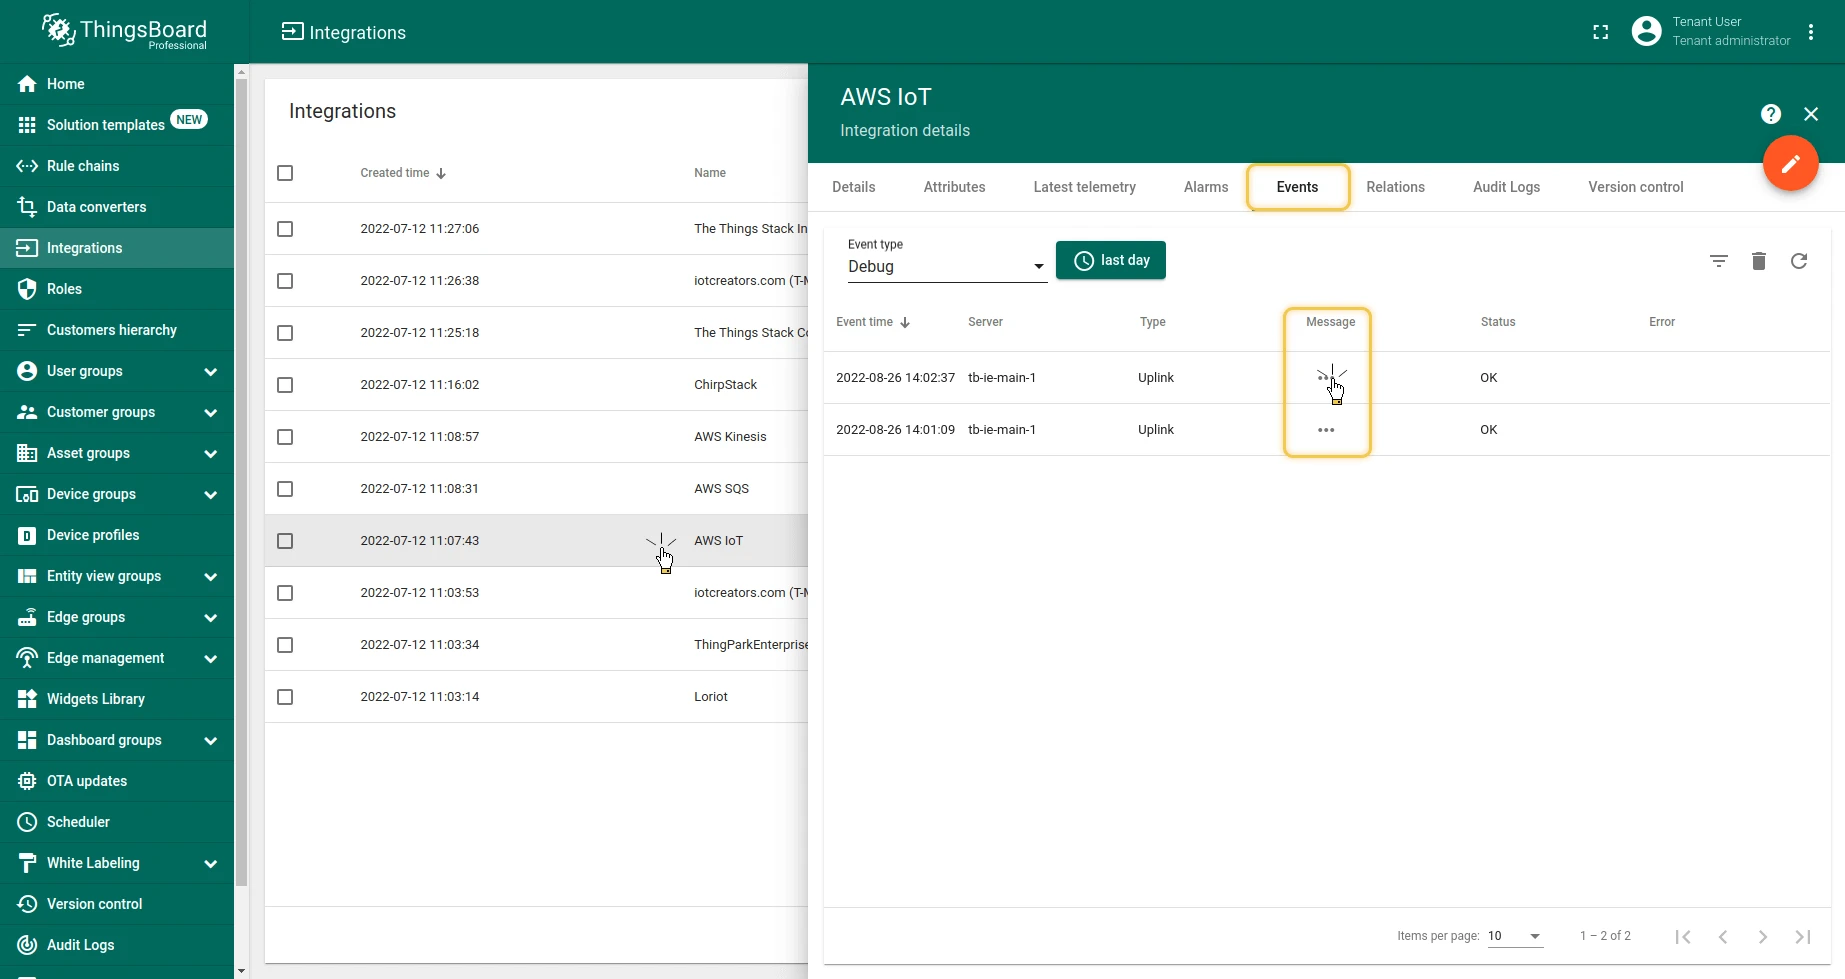
Go to Integrations center ⇾ Integrations, open the AWS IoT integration, and check the Events tab to verify the message was received:
Configure and test downlink
Section titled “Configure and test downlink”To send messages from ThingsBoard to devices via AWS IoT, create a downlink converter and configure a rule chain.
Add a downlink converter
Section titled “Add a downlink converter”- Go to Integrations center ⇾ Integrations and open the AWS IoT integration.
- Click Toggle edit mode.
- In the Downlink data converter field, click Create new.
- Enter a name, paste the encoder script, and click Add.
- In Advanced settings, set the Downlink topic pattern to
down/test. - Click Apply changes.
// Encode downlink data from incoming Rule Engine message
// msg - JSON message payload downlink message json// msgType - type of message, for ex. 'ATTRIBUTES_UPDATED', 'POST_TELEMETRY_REQUEST', etc.// metadata - list of key-value pairs with additional data about the message// integrationMetadata - list of key-value pairs with additional data defined in Integration executing this converter
/** Encoder **/var data = {};
// Process data from incoming message and metadatadata.v0 = msg.state;data.m0 = "att_upd_success";data.devSerialNumber = metadata['ss_serialNumber'];
// Result object with encoded downlink payloadvar result = {  // downlink data content type: JSON, TEXT or BINARY (base64 format)  contentType: "JSON",  // downlink data  data: JSON.stringify(data),  // Optional metadata object presented in key/value format  metadata: {  type: "sensors/device/upload"  }};return result;
// Encode downlink data from incoming Rule Engine message
// msg - JSON message payload downlink message json// msgType - type of message, for ex. 'ATTRIBUTES_UPDATED', 'POST_TELEMETRY_REQUEST', etc.// metadata - list of key-value pairs with additional data about the message// integrationMetadata - list of key-value pairs with additional data defined in Integration executing this converter
/** Encoder **/var data = {};
// Process data from incoming message and metadatadata.v0 = msg.state;data.m0 = "att_upd_success";data.devSerialNumber = metadata['ss_serialNumber'];
// Result object with encoded downlink payloadvar result = { // downlink data content type: JSON, TEXT or BINARY (base64 format) contentType: "JSON", // downlink data data: JSON.stringify(data), // Optional metadata object presented in key/value format metadata: { type: "sensors/device/upload" }};return result;Configure the Root Rule Chain
Section titled “Configure the Root Rule Chain”To send downlinks through the integration, modify the Root Rule Chain:
- Go to Rule chains and open the Root Rule Chain.
- Find the integration downlink node in the node library panel on the left. Drag it onto the canvas.
- In the node configuration dialog, enter a name (e.g.
Downlink to AWS IoT integration) and select your AWS IoT integration. Click Add. - Connect the message type switch node to the newly created integration downlink node using the Post attributes and Attributes Updated relation types to trigger downlinks whenever shared attributes are created or updated.
- Apply the changes.
Test the downlink
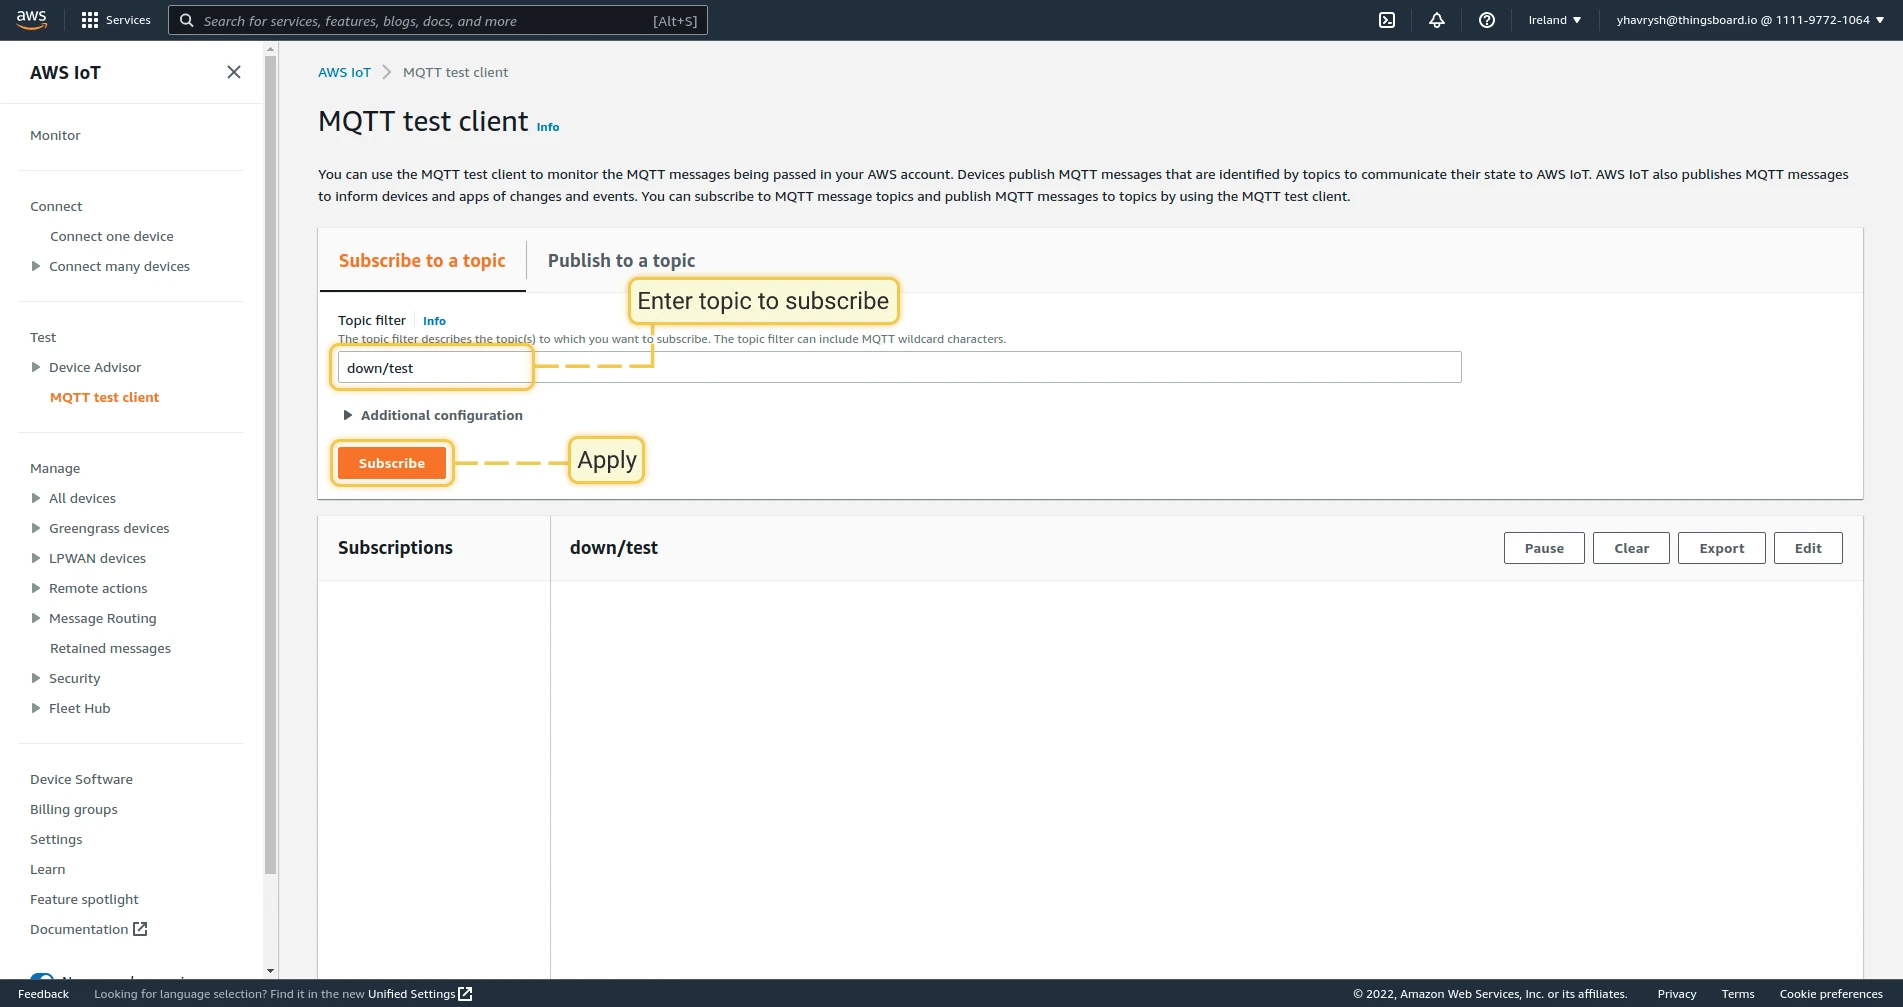
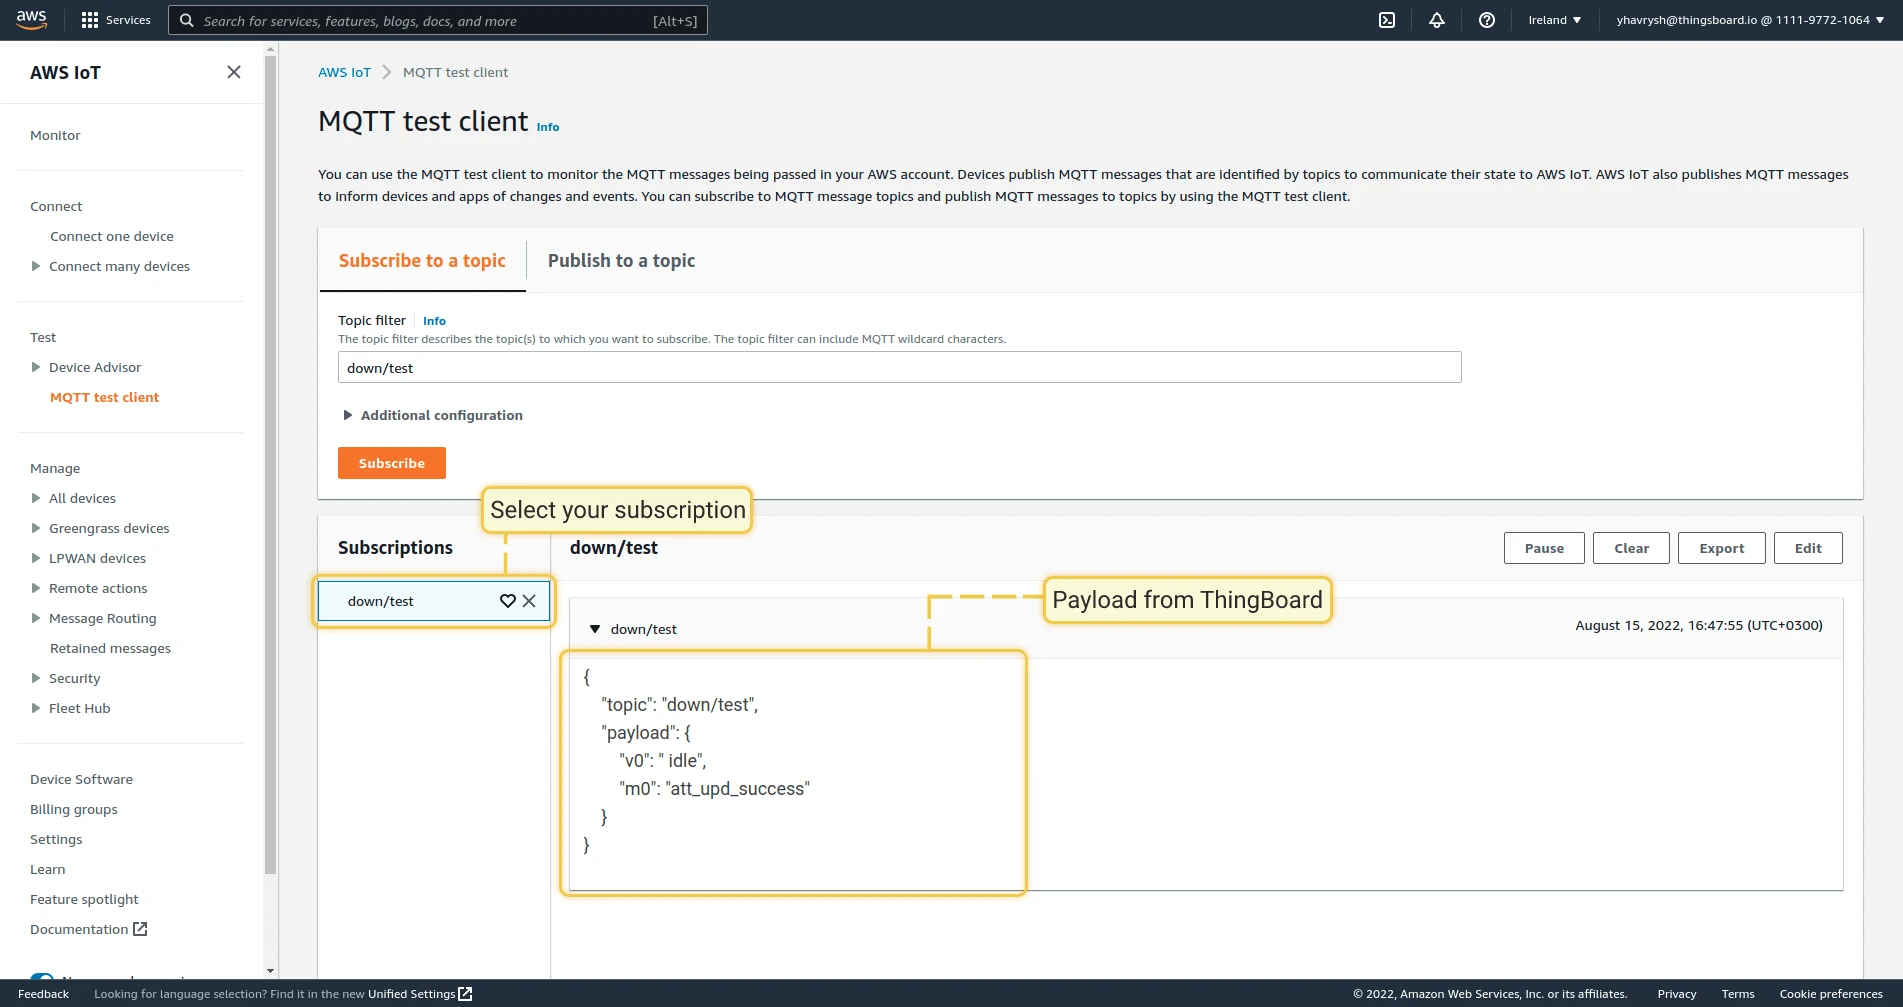
Section titled “Test the downlink”- In the AWS IoT MQTT test client, go to Subscribe to a topic, enter
down/test, and click Subscribe. - In ThingsBoard, go to Entities ⇾ Devices, open device
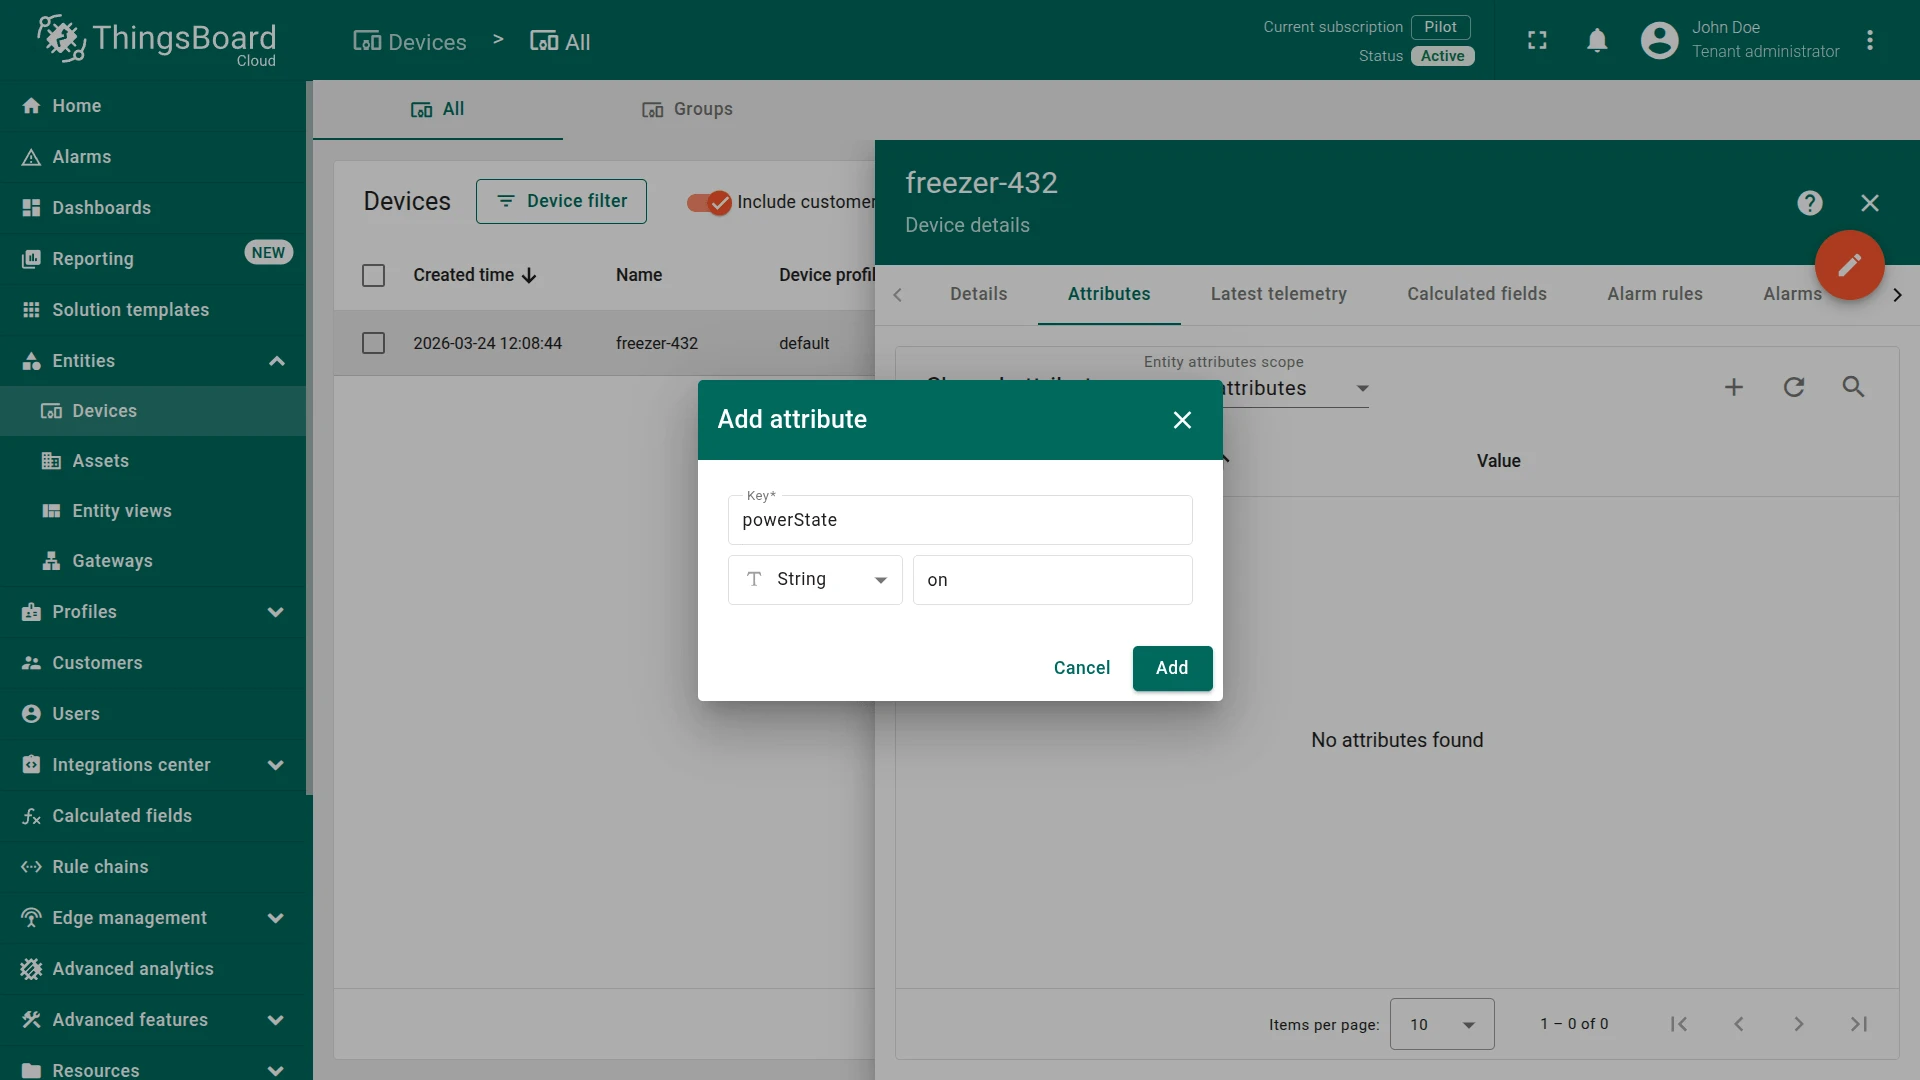
freezer-432, switch to the Attributes tab, and select scope Shared attributes. - Enter the key
powerStateand valueon, then click Add to trigger the downlink.
Check the subscribed topic in the AWS MQTT test client — the downlink payload should appear:
See also
Section titled “See also”Was this helpful?