MQTT Integration
MQTT Integration connects ThingsBoard to any MQTT broker — cloud or on-premises — and subscribes to one or more topic filters. The platform:
- subscribes to configured topics on the external broker,
- passes each received message through the Uplink Converter (JavaScript or TBEL),
- decodes the payload and maps it to ThingsBoard telemetry and attributes,
- auto-creates devices on the first uplink.
When to use MQTT Integration:
- Devices already publish to an existing MQTT broker (HiveMQ, Mosquitto, AWS IoT Core, etc.) and you want to ingest that data into ThingsBoard without re-flashing firmware.
- You need to bridge two MQTT brokers — one for devices, one for ThingsBoard.
- You want to send commands back to devices via MQTT downlink topics.
- You need topic-based device routing: device name or type is encoded in the topic path rather than the payload.

Prerequisites
Section titled “Prerequisites”Before creating the integration, ensure:
- You have access to ThingsBoard PE or ThingsBoard Cloud with integration functionality enabled for your tenant.
- You have permissions to create integrations and data converters.
- You know the MQTT broker host, port, and any credentials required to connect.
- You know the topic structure your devices publish to and the structure of their payloads.
Create MQTT Uplink Data Converter
Section titled “Create MQTT Uplink Data Converter”The uplink converter decodes each MQTT message payload — received as an array of bytes — and maps it to ThingsBoard’s data model: it resolves the target device and extracts fields into telemetry and attributes.
For the full decoder function reference — all input parameters and output fields — see Uplink data converter.
- Go to Integrations center ⇾ Data converters.
- Click + Add data converter ⇾ Create new converter.
In the Add data converter dialog:
- Converter type — leave Uplink (selected by default).
- Integration type — in the search field, enter
MQTTand select MQTT from the list. - Name — enter a converter name, for example
MQTT Uplink Converter. Main decoding configuration — a code editor with the function signature
function decoder(payload, metadata) {.
By default it opens in TBEL; use the TBEL / JS toggle (upper right) to switch languages.The default template handles both patterns: device name and type from the JSON payload (if present), or extracted from the MQTT topic as a fallback. Adapt field names to match your device.
// Decode an uplink message from a buffer// payload - array of bytes// metadata - key/value object/** Decoder **/// decode payload to JSONvar data = decodeToJson(payload);// --- Device name and type ---// Extract from MQTT topic (e.g. "my/topic/deviceType/deviceName")var topicParts = metadata['topic'] != null ? metadata['topic'].split('/') : null;var deviceName = data.deviceName != null ? data.deviceName :(topicParts != null && topicParts.length > 0 ? topicParts[topicParts.length - 1] : 'Unknown Device');var deviceType = data.deviceType != null ? data.deviceType :(topicParts != null && topicParts.length > 1 ? topicParts[topicParts.length - 2] : 'default');// var customerName = 'Customer C';// var groupName = 'thermostat devices';// use assetName and assetType instead of deviceName and deviceType// to automatically create assets instead of devices.// var assetName = 'Asset A';// var assetType = 'building';// --- Timestamp parsing ---var timestamp = -1;if (data.ts != null) {timestamp = data.ts;} else if (data.timestamp != null) {timestamp = new Date(data.timestamp).getTime();}if (timestamp == -1) {timestamp = Date.now();}// --- Telemetry and attributes ---var telemetry = {};var attributes = {model: 'Model A',serialNumber: 'SN111',integrationName: metadata['integrationName'],};// Keys to exclude from telemetry (already used or non-telemetry fields)var excludeFromTelemetryList = ["deviceName", "deviceType", "ts", "timestamp"];// Parse all remaining JSON fields as telemetrytelemetry.putAll(toFlatMap(data, excludeFromTelemetryList, true));// Result object with device attributes/telemetry datavar result = {deviceName: deviceName,deviceType: deviceType,// customerName: customerName,// groupName: groupName,// assetName: assetName,// assetType: assetType,attributes: attributes,telemetry: {ts: timestamp,values: telemetry}};/** Helper functions 'decodeToString', 'decodeToJson' and 'toFlatMap' are already built-in **/return result;// Decode an uplink message from a buffer// payload - array of bytes// metadata - key/value object/** Decoder **/// decode payload to JSONvar data = decodeToJson(payload);// --- Device name and type ---// Extract from MQTT topic (e.g. "my/topic/deviceType/deviceName")var topicParts = metadata['topic'] != null ? metadata['topic'].split('/') : null;var deviceName = data.deviceName != null ? data.deviceName :(topicParts != null && topicParts.length > 0 ? topicParts[topicParts.length - 1] : 'Unknown Device');var deviceType = data.deviceType != null ? data.deviceType :(topicParts != null && topicParts.length > 1 ? topicParts[topicParts.length - 2] : 'default');// var customerName = 'Customer C';// var groupName = 'thermostat devices';// use assetName and assetType instead of deviceName and deviceType// to automatically create assets instead of devices.// var assetName = 'Asset A';// var assetType = 'building';// --- Timestamp parsing ---var timestamp = -1;if (data.ts != null) {timestamp = data.ts;} else if (data.timestamp != null) {timestamp = new Date(data.timestamp).getTime();}if (timestamp == -1) {timestamp = Date.now();}// --- Telemetry and attributes ---var telemetry = {};var attributes = {model: 'Model A',serialNumber: 'SN111',integrationName: metadata['integrationName'],};// Keys to exclude from telemetry (already used or non-telemetry fields)var excludeFromTelemetryList = ["deviceName", "deviceType", "ts", "timestamp"];// Parse all remaining JSON fields as telemetrytoFlatMap(data, telemetry, excludeFromTelemetryList);// Result object with device attributes/telemetry datavar result = {deviceName: deviceName,deviceType: deviceType,// customerName: customerName,// groupName: groupName,// assetName: assetName,// assetType: assetType,attributes: attributes,telemetry: {ts: timestamp,values: telemetry}};/** Helper functions **/function decodeToString(payload) {return String.fromCharCode.apply(String, payload);}function decodeToJson(payload) {var str = decodeToString(payload);return JSON.parse(str);}function toFlatMap(obj, result, excludeList, prefix) {prefix = prefix || '';for (var key in obj) {if (excludeList.indexOf(key) !== -1) continue;var value = obj[key];var fullKey = prefix ? prefix + '.' + key : key;if (typeof value === 'object' && value !== null && !Array.isArray(value)) {toFlatMap(value, result, excludeList, fullKey);} else {result[fullKey] = value;}}}return result;- Click Add.
Converter input variables
ThingsBoard passes two variables to the decoder. Function signature: function decoder(payload, metadata): object | object[]
| Variable | Type | Description |
|---|---|---|
payload | byte array | The MQTT message body. Use the built-in helper functions to decode it to a string or JSON object. |
metadata | {[key: string]: string} | Key/value map with integration-specific fields. For MQTT, the most important field is topic — the full MQTT topic of the incoming message (e.g. tb/sensors/thermostat/SN-001). Additional fields can be configured in the integration details. |
Metadata keys available in the MQTT converter:
| Key | Example value | Description |
|---|---|---|
topic | tb/sensors/thermostat/SN-001 | The full MQTT topic the message was received on |
integrationName | MQTT integration | Name of the integration as configured in ThingsBoard |
To work with the payload, use the built-in helper functions:
| Function | Result |
|---|---|
decodeToJson(payload) | Parse bytes as JSON → return a JS object |
decodeToString(payload) | Convert bytes to a string (UTF-8) |
toFlatMap(obj, excludeKeys, flatNested) | Flatten nested JSON into a flat key/value map |
For common scripting patterns — renaming fields, extracting nested values, normalizing data, and handling non-JSON payloads — see Uplink data converter: Common scripting patterns.
Testing the converter in the editor
Click the Test decoder function button below the editor — the Test decoder function (TBEL) dialog opens with four panels.
Fill in the fields:
Payload content type: Json
Payload content:
{ "deviceName": "SN-001", "deviceType": "thermostat", "humidity": 60, "temperature": 22.5}Metadata — two rows (key / value):
| Key | Value |
|---|---|
topic | tb/sensors/thermostat/SN-001 |
integrationName | MQTT integration |
Click Test — in the Output panel you should see:
{ "deviceName": "SN-001", "deviceType": "thermostat", "attributes": { "model": "Model A", "serialNumber": "SN111", "integrationName": "MQTT integration" }, "telemetry": { "ts": 1780055515934, "values": { "humidity": 60, "temperature": 22.5 } }}Make sure deviceName is not empty and telemetry.values contains the expected keys. If Output is empty or shows an error, check the converter code in the Decoder panel.
After a successful test, click Add to save the converter.
Create MQTT Integration
Section titled “Create MQTT Integration”- Go to Integrations center ⇾ Integrations and click + Add integration.
- Basic settings:
- Select MQTT as the integration type.
- Enter a Name for the integration, or keep the default
MQTT integration. - Enable integration and Allow create devices or assets are enabled by default.
- Click Next.
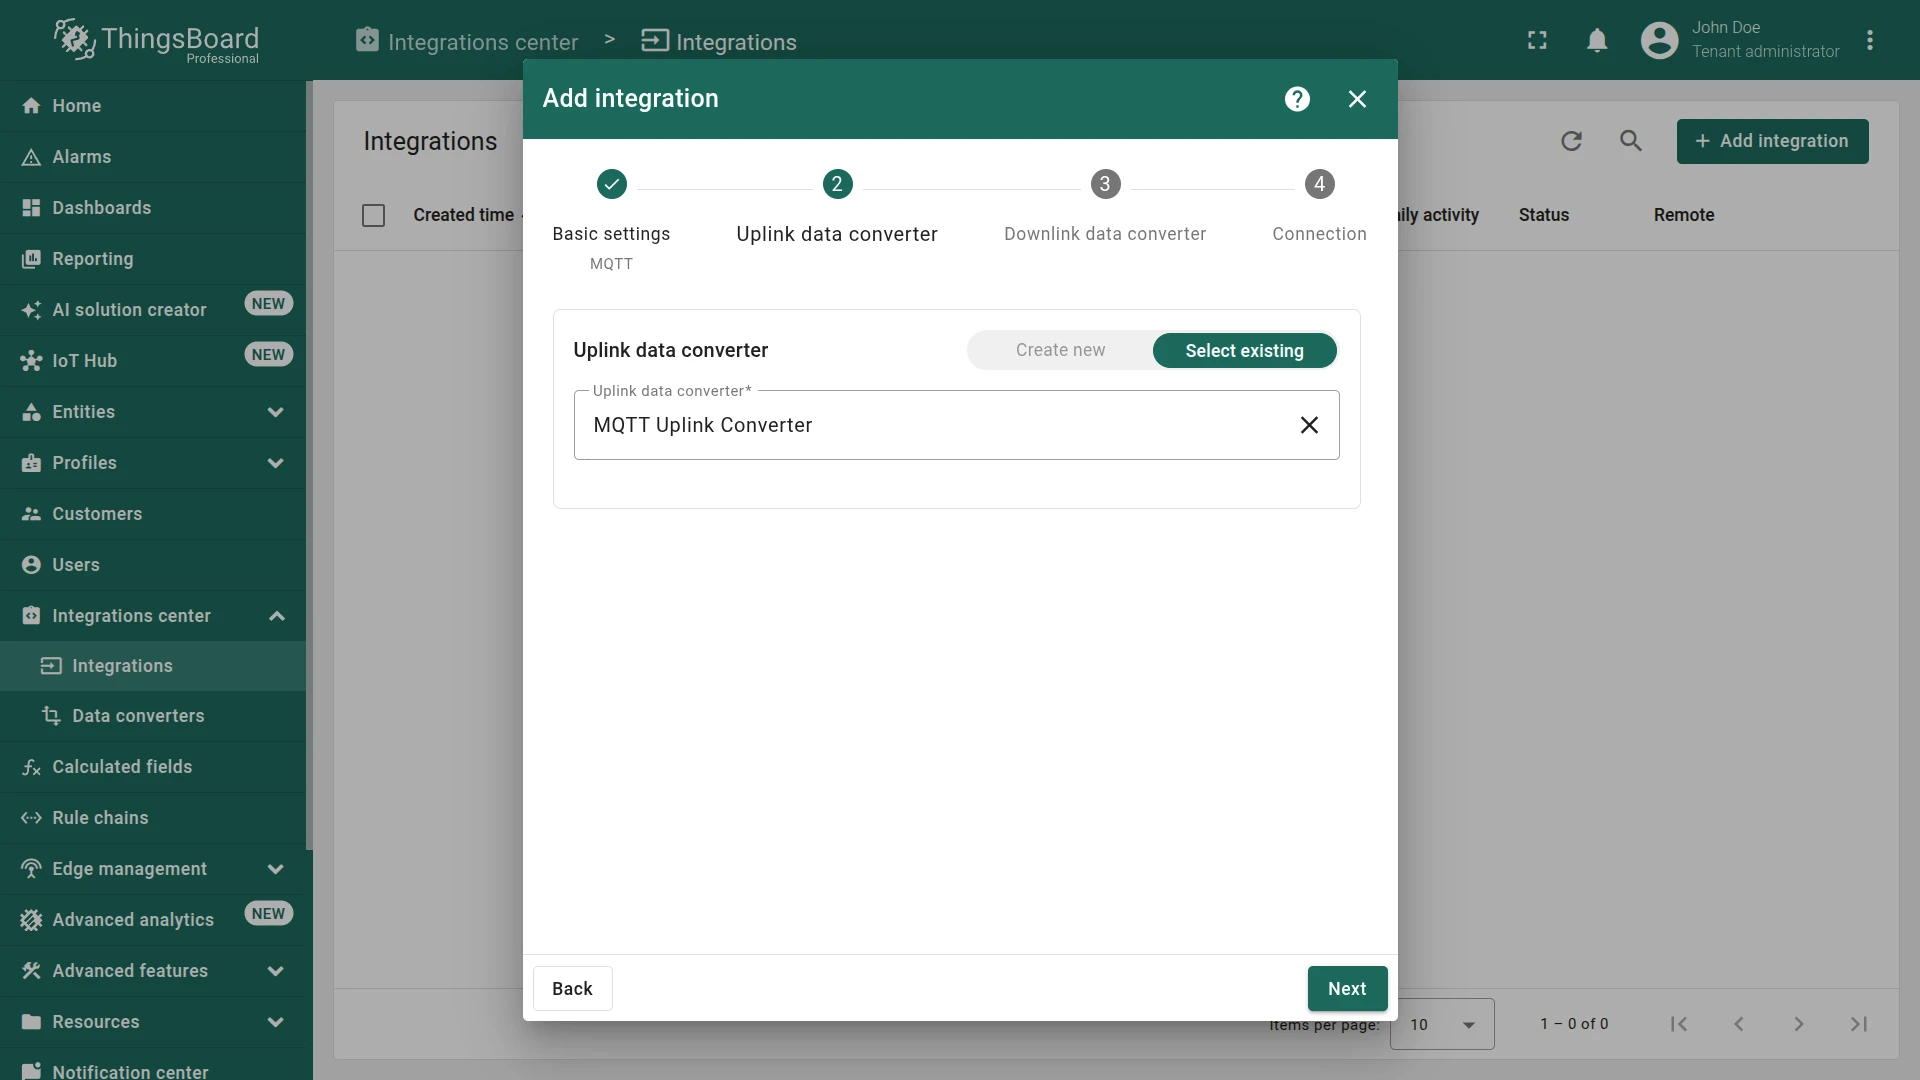
- Uplink data converter:
- Click Select existing and choose the MQTT Uplink Converter created in the previous step, or click Create new to define the decoder inline.
- Click Next.
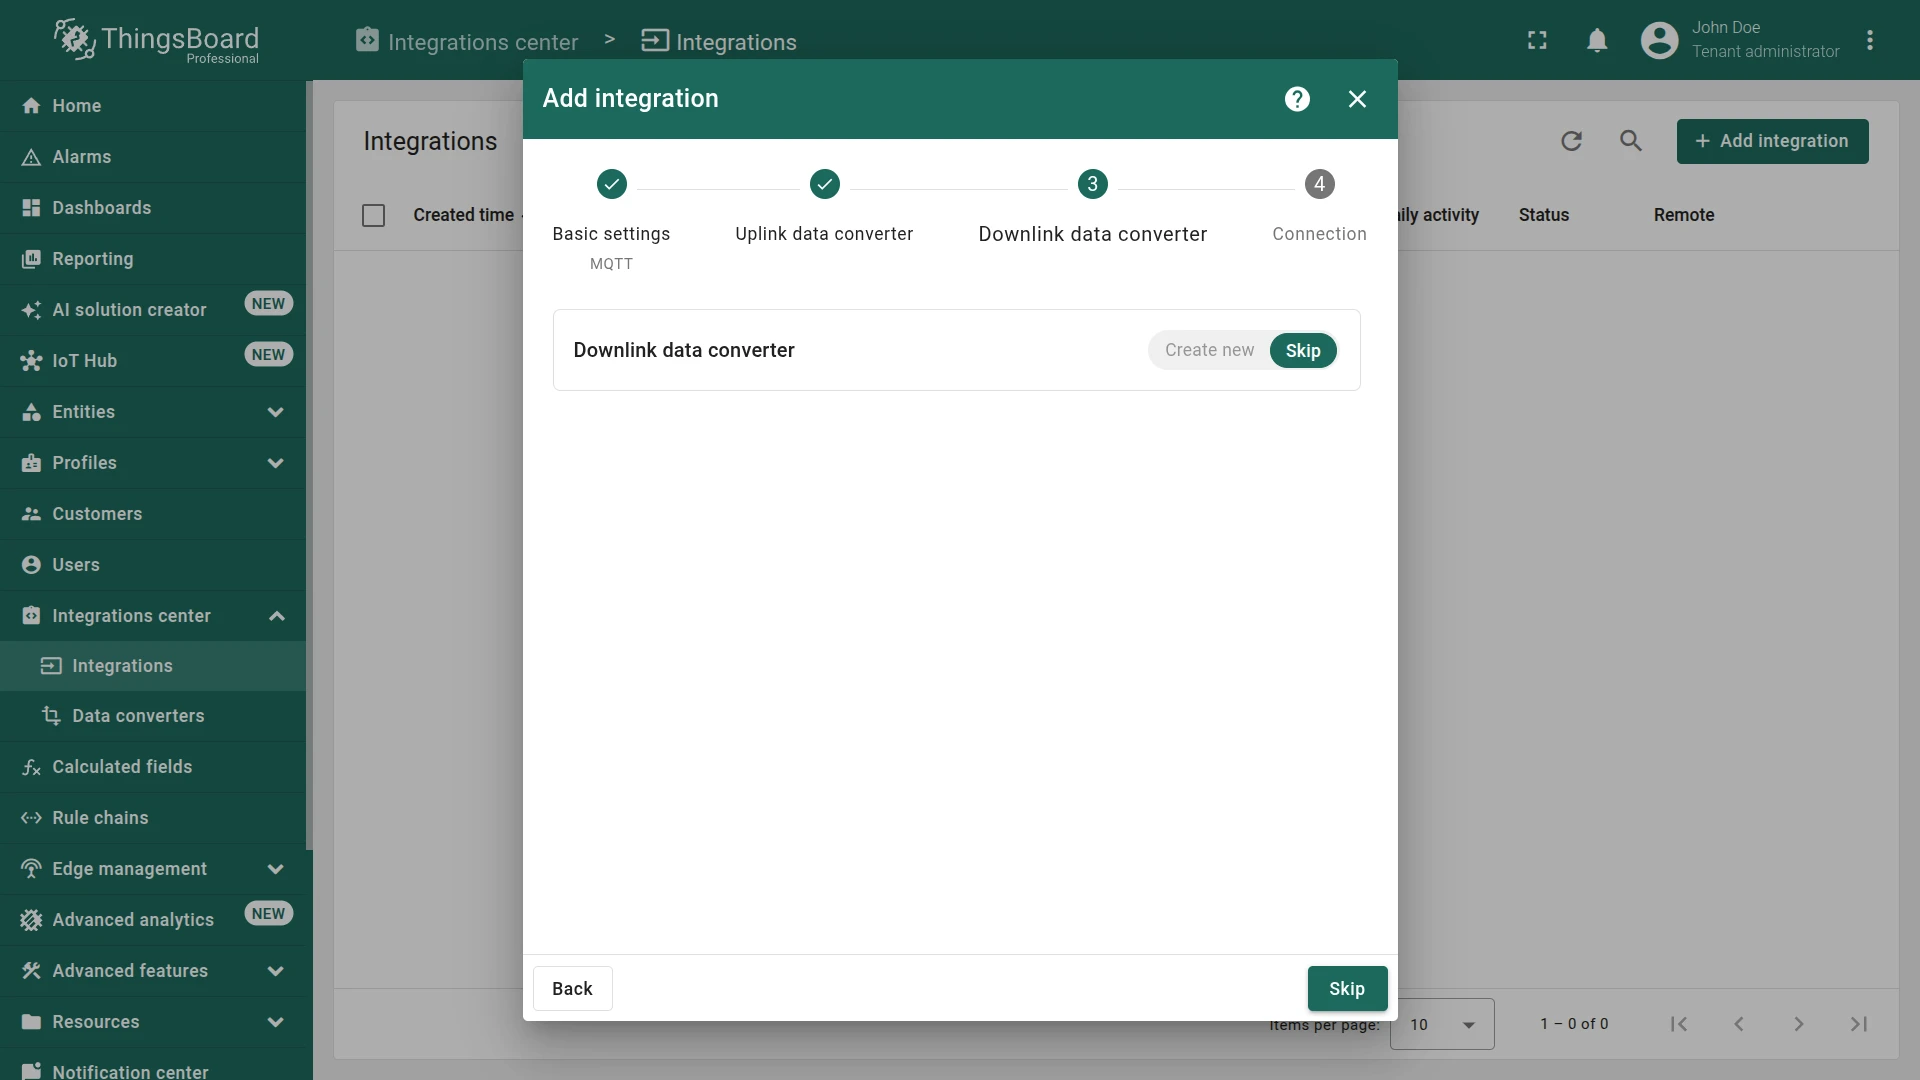
- Downlink data converter:
- Click Skip — a downlink converter is only needed when ThingsBoard must send commands back to the device over MQTT. It can be configured later.
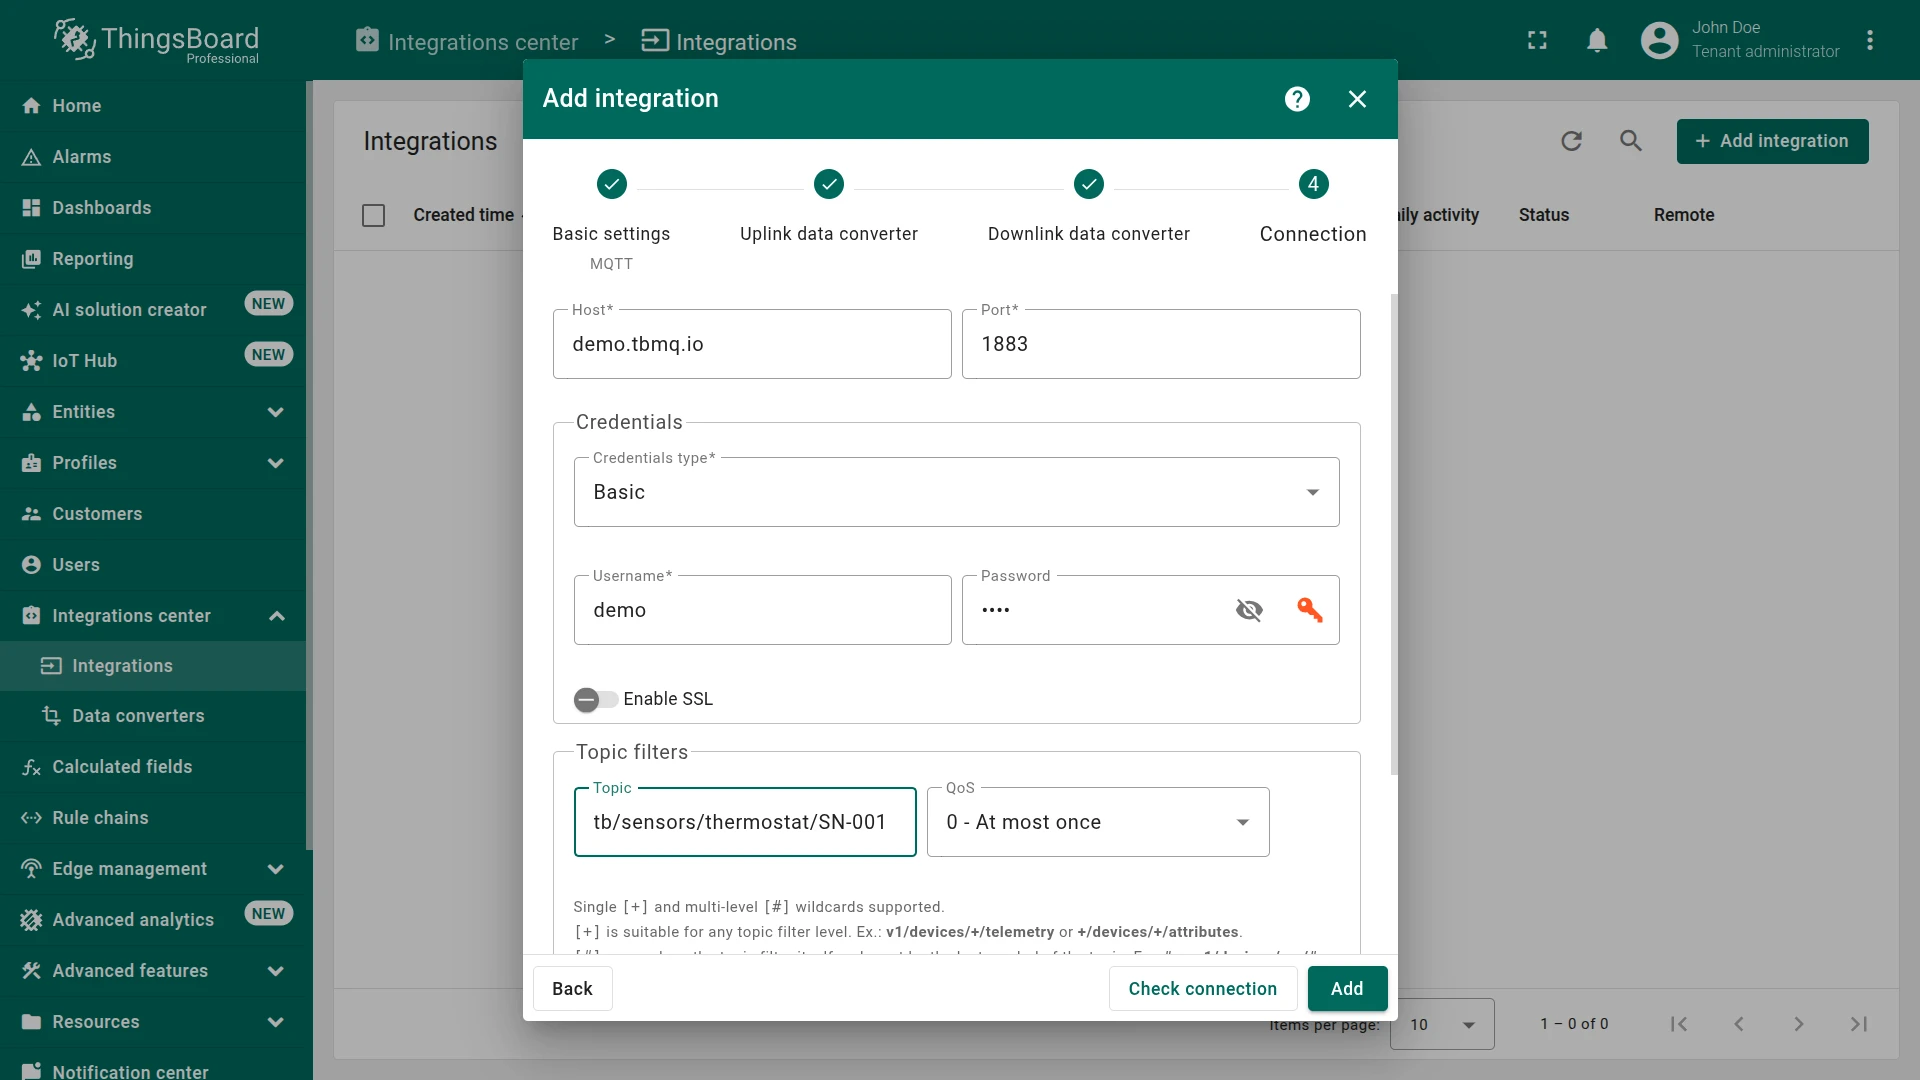
- Connection:
- Enter the MQTT broker Host and Port (e.g. host:
demo.tbmq.io, port:1883). - Select the appropriate Credentials type (e.g. Basic) and fill in the required fields (e.g. username:
demo, password:demo). - Configure the Topic filters — at least one topic filter is required (e.g.
tb/sensors/thermostat/SN-001, QoS0 — At most once). - Optionally, expand Advanced settings to configure protocol version, client ID, and other parameters.
- Enter the MQTT broker Host and Port (e.g. host:
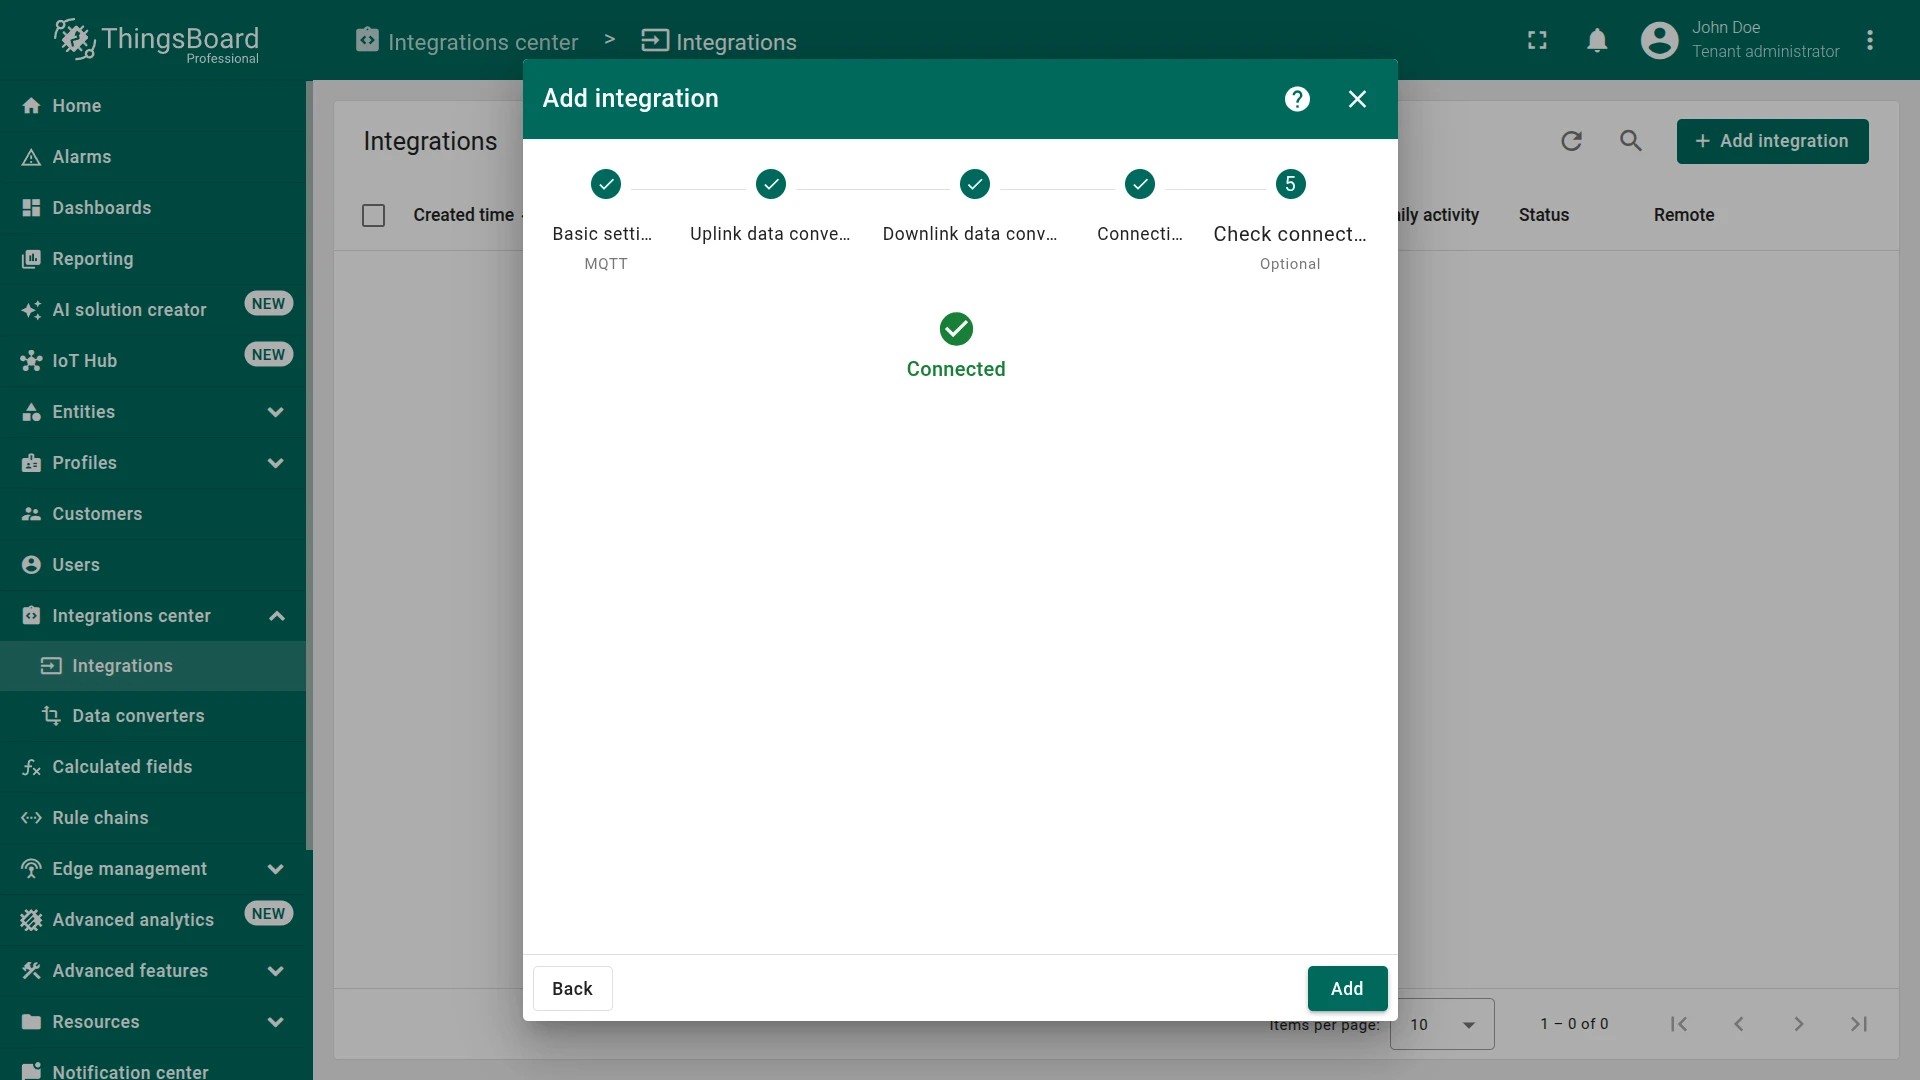
- Click Check connection to verify the broker is reachable, then click Add to complete the integration setup.


Connection Settings
Section titled “Connection Settings”Host
Hostname or IP address of the MQTT broker ThingsBoard should connect to.
Example: demo.tbmq.io
Port
TCP port of the MQTT broker. Common values:
| Port | Usage |
|---|---|
1883 | Unencrypted MQTT |
8883 | MQTT over TLS/SSL |
Credentials
ThingsBoard supports three credential types for authenticating with the broker.
Anonymous — no credentials sent. Use only with brokers that allow unauthenticated connections.
Basic — username and password authentication.
| Field | Description |
|---|---|
| Username | MQTT username |
| Password | MQTT password |
PEM — certificate-based mutual TLS authentication. Required when the broker enforces client certificate verification.
| Field | Description |
|---|---|
| CA certificate file | The CA certificate that signed the broker’s server certificate. ThingsBoard uses it to verify the broker’s identity on connect. |
| Certificate file | The client certificate presented to the broker when mutual TLS is required. |
| Private key file | The private key corresponding to the client certificate. |
| Private key password | Password for the private key, if encrypted. |
Each file can be uploaded directly (Browse file) or retrieved from ThingsBoard’s secret storage (Use Secret storage).
To generate a client certificate and private key signed by your CA:
openssl req -newkey rsa:2048 -keyout client_key.pem -out client.csr \  -nodes -subj "/CN=thingsboard-integration"
openssl x509 -req -in client.csr -CA ca.pem -CAkey ca_key.pem \  -CAcreateserial -out client.pem -days 3650
Upload ca.pem as CA certificate file, client.pem as Certificate file, and client_key.pem as Private key file.
Enable SSL
When enabled, ThingsBoard establishes a TLS-encrypted connection to the broker. Enable this when using port 8883 or any broker that requires encrypted transport. For PEM credentials, SSL is implicitly required.
Topic Filters
One or more MQTT topic subscriptions. ThingsBoard subscribes to all configured topics simultaneously on connection.
| Field | Description |
|---|---|
| Topic | MQTT topic filter string |
| QoS | Quality of Service level for the subscription |
Wildcard support:
| Wildcard | Scope | Example | Matches |
|---|---|---|---|
+ | Single level | v1/devices/+/telemetry | v1/devices/SN-001/telemetry, v1/devices/SN-002/telemetry |
# | Multi-level (must be last) | v1/devices/me/# | v1/devices/me/telemetry, v1/devices/me/attributes/request/1 |
QoS levels:
| Level | Name | Delivery guarantee |
|---|---|---|
0 | At most once | Fire-and-forget. Message may be lost. |
1 | At least once | Acknowledged delivery. Message may be duplicated. |
2 | Exactly once | Guaranteed single delivery. Highest overhead. |
Click Add topic filter to subscribe to additional topics.
Execute Remotely
When enabled, ThingsBoard generates an Integration key and Integration secret. These credentials allow the integration to run as a separate process outside the ThingsBoard cluster — useful when the integration must reach a broker not accessible from the ThingsBoard server (e.g., in a private network or on-premises environment).
See Remote Integration for setup details.
Advanced Settings
| Parameter | Default | Description |
|---|---|---|
| Protocol version | MQTT 3.1.1 | MQTT protocol version used for the connection. Options: MQTT 3.1, MQTT 3.1.1, MQTT 5.0. Match this to the version your broker supports. |
| Clean session | on | When on, ThingsBoard starts with a fresh session on each connect — no queued messages from previous sessions are delivered. When off, the broker delivers messages published while the client was disconnected (requires QoS 1 or 2). |
| Retained | off | When on, downlink messages published to the broker are marked as retained. |
| Downlink QoS | 1 | Quality of Service level for all downlink PUBLISH messages. Fixed at QoS 1 (at least once) — not configurable. |
| Client ID | auto-generated | MQTT client identifier sent to the broker. Leave empty for an auto-generated ID. If set manually, ensure it is unique — most brokers reject or disconnect duplicate client IDs. |
| Max bytes in message | 32368 | Maximum size of a single MQTT message payload in bytes. Messages exceeding this limit are discarded. |
| Connection timeout (sec) | 10 | Seconds to wait for the broker to accept the connection before the attempt is considered failed. |
| Downlink topic pattern | ${topic} | Topic used when publishing downlink messages to the device. Placeholders like ${topic} are resolved from the downlink converter’s output metadata — metadata.topic sets the actual publish topic. Can be set to a fixed topic string or any metadata variable pattern. |
| Description | — | Optional free-text description of the integration. |
| Metadata | — | Optional key–value pairs attached to the integration. These values are injected into every message processed by the integration and are accessible in converter scripts via the metadata object. |
Message Retransmission
Section titled “Message Retransmission”ThingsBoard retransmits unacknowledged MQTT packets — PUBLISH (QoS 1/2), SUBSCRIBE, UNSUBSCRIBE, and PUBREL — using exponential backoff: the delay doubles with each attempt, and a jitter factor adds random variance to prevent synchronized retries.
Example: 3 attempts, 5,000 ms initial delay, jitter factor 0.15 → retries at approximately 5,000 ms, 10,000 ms, and 20,000 ms (each ±15%). If the final attempt goes unacknowledged, the message is dropped and the Rule Engine routes it via the Failure chain.
Configure retransmission parameters globally using environment variables — these settings apply to all MQTT clients on the platform. For configuration instructions, see How to change configuration. After making changes, restart the ThingsBoard service.mqtt: client: retransmission: max_attempts: "${TB_MQTT_CLIENT_RETRANSMISSION_MAX_ATTEMPTS:3}" initial_delay_millis: "${TB_MQTT_CLIENT_RETRANSMISSION_INITIAL_DELAY_MILLIS:5000}" jitter_factor: "${TB_MQTT_CLIENT_RETRANSMISSION_JITTER_FACTOR:0.15}"Test the Integration
Section titled “Test the Integration”After the integration is created, send a test uplink and confirm that ThingsBoard received the message, decoded it correctly, and provisioned the device.
Send Test Uplink
Section titled “Send Test Uplink”Test the integration by publishing a message to the configured topic using mosquitto_pub or any MQTT client.
If you followed this guide and used demo.tbmq.io:
mosquitto_pub -h demo.tbmq.io -p 1883 \ -u "demo" -P "demo" \ -t "tb/sensors/thermostat/SN-001" \ -m '{"temperature":25.1}' -q 0For a broker with Basic authentication, replace the host and credentials with your actual values:
mosquitto_pub -h YOUR_BROKER_HOST -p 1883 \ -u "YOUR_USERNAME" -P "YOUR_PASSWORD" \ -t "tb/sensors/thermostat/SN-001" \ -m '{"temperature":25.1}' -q 0For a broker that does not require authentication:
mosquitto_pub -h YOUR_BROKER_HOST -p 1883 \ -t "tb/sensors/thermostat/SN-001" \ -m '{"temperature":25.1}' -q 0Verify Integration Events
Section titled “Verify Integration Events”Go to Integrations center ⇾ Integrations, open MQTT integration, and click the Events tab. Each successfully processed uplink appears as a row with status OK.
Click ⋅⋅⋅ in the Message column to see the raw MQTT topic and payload received by the integration.
Verify Converter Events
Section titled “Verify Converter Events”To inspect converter processing, go to Integrations center ⇾ Data converters, click MQTT Uplink Converter, and open its Events tab:
- In shows the raw payload passed to the converter, including the MQTT topic in metadata
- Out shows the decoded result (
deviceName,deviceType,attributes,telemetry) - Metadata contains the MQTT topic and integration name
Verify Device Provisioning
Section titled “Verify Device Provisioning”Go to Entities ⇾ Devices — device SN-001 is provisioned automatically on the first uplink. Open it and check the Latest telemetry tab to confirm temperature = 25.1.
Converter Examples by Payload Type
Section titled “Converter Examples by Payload Type”Scenario A: Device name and type from JSON payload
Use when every MQTT message contains deviceName and deviceType fields. This is the simplest pattern — device identity is fully self-contained in the payload.
Input payload (published to any topic):
{ "deviceName": "Thermometer", "deviceType": "thermostat", "model": "SN-001", "temperature": 33}Converter:
/** Decoder **/
var data = decodeToJson(payload);
var deviceName = data.deviceName;var deviceType = data.deviceType;
var result = {   deviceName: deviceName,   deviceType: deviceType,   attributes: {       model: data.model,       integrationName: metadata['integrationName'],   },   telemetry: {       temperature: data.temperature   }};
/** Helper function 'decodeToJson' is already built-in **/
return result;
Field mapping:
| JSON field | Output field | Type | Notes |
|---|---|---|---|
deviceName | deviceName | — | Device identifier; auto-creates the device on first uplink |
deviceType | deviceType | — | Device profile name |
model | model | attribute | |
temperature | temperature | telemetry |
For the payload above the decoder produces:
{ "deviceName": "Thermometer", "deviceType": "thermostat", "attributes": { "model": "SN-001", "integrationName": "Test MQTT" }, "telemetry": { "temperature": 33 }}To adapt this converter to your device:
- Device name from a different field — replace
data.deviceNamewith the field that carries the device identifier in your payload. - Hardcoded device type — replace
data.deviceTypewith a string literal (e.g.'thermostat') if all devices share the same profile. - Rename a field — use
outputName: data.sourceFieldto store the value under a different key in ThingsBoard. - Additional telemetry fields — extend the
telemetryobject with more fields from the payload.
Scenario B: Device name and type from the MQTT topic
Use when devices publish minimal payloads — sensor readings only — and embed their identity in the topic path. This is common for constrained devices that cannot include metadata in every message.
Topic structure: tb/mqtt-integration-tutorial/sensors/{deviceName}
Example topic: tb/mqtt-integration-tutorial/sensors/SN-001
Input payload (published to the topic above):
{ "temperature": 25.1}Converter:
/** Decoder **/
// decode payload to stringvar payloadStr = decodeToString(payload);var data = JSON.parse(payloadStr);
// Topic: tb/mqtt-integration-tutorial/sensors/{deviceName}// Index:  0             1                2         3var deviceName = metadata.topic.split("/")[3];var deviceType = 'sensor'; // hardcoded device profile
// Result object with device attributes/telemetry datavar result = {  deviceName: deviceName,  deviceType: deviceType,  attributes: {    integrationName: metadata['integrationName'],  },  telemetry: {    temperature: data.temperature,  }};
/** Helper functions 'decodeToString' and 'decodeToJson' are already built-in **/
return result;
/** Decoder **/
// decode payload to stringvar payloadStr = decodeToString(payload);var data = JSON.parse(payloadStr);
// Topic: tb/mqtt-integration-tutorial/sensors/{deviceName}// Index: 0 1 2 3var deviceName = metadata.topic.split("/")[3];var deviceType = 'sensor'; // hardcoded device profile
// Result object with device attributes/telemetry datavar result = { deviceName: deviceName, deviceType: deviceType, attributes: { integrationName: metadata['integrationName'], }, telemetry: { temperature: data.temperature, }};
/** Helper functions **/
function decodeToString(payload) { return String.fromCharCode.apply(String, payload);}
function decodeToJson(payload) { // convert payload to string. var str = decodeToString(payload);
// parse string to JSON var data = JSON.parse(str); return data;}
return result;Field mapping:
| Source | Output field | Type | Notes |
|---|---|---|---|
metadata.topic.split("/")[3] | deviceName | — | 4th segment of the topic path (0-indexed) |
hardcoded 'sensor' | deviceType | — | Device profile name |
data.temperature | temperature | telemetry | From JSON payload |
metadata['integrationName'] | integrationName | attribute | Name of the integration |
For the message published to tb/mqtt-integration-tutorial/sensors/SN-001 with payload {"temperature": 25.1} the decoder produces:
{ "deviceName": "SN-001", "deviceType": "sensor", "attributes": { "integrationName": "MQTT integration" }, "telemetry": { "temperature": 25.1 }}To adapt this converter to your topic structure:
- Different topic depth — change the index in
split("/")[3]to match the position of the device identifier in your topic path (e.g.split("/")[2]for a 3-segment topic). - Device type from topic — replace the hardcoded
'sensor'with another segment, e.g.metadata.topic.split("/")[2], if your topic encodes the device type. - Device name from payload — replace
metadata.topic.split("/")[3]with a field fromdata(e.g.data.deviceId) if the device name is in the payload body. - Additional telemetry fields — extend the
telemetryobject with more fields from the payload (e.g.humidity: data.humidity). - Wildcard subscription — when using
tb/mqtt-integration-tutorial/sensors/+as the topic filter, the+segment is preserved inmetadata.topicand accessible viasplit("/").
Scenario C: Nested JSON + toFlatMap for automatic flattening
Use when the payload has a nested structure and you want to automatically map all remaining fields to telemetry without listing each one explicitly. toFlatMap traverses the object recursively and produces dot-separated keys for nested fields. Fields listed in excludeKeys are skipped.
Input payload:
{ "deviceName": "air-monitor-X", "deviceType": "air-quality", "meta": { "source": "cloud" }, "sensors": { "co2": 412, "pm25": 8.2, "voc": 0.3 }, "location": { "lat": 50.45, "lon": 30.52 }, "ts": 1700000000000}Converter:
/** Decoder **/
var data = decodeToJson(payload);
// Fields to exclude from telemetry — used as device identity, attributes, or timestampvar excludeKeys = ['deviceName', 'deviceType', 'ts', 'meta', 'location'];
// Flatten all remaining fields into telemetry (nested objects become dot-separated keys)var telemetry = {};telemetry.putAll(toFlatMap(data, excludeKeys, true));
var result = {    deviceName: data.deviceName,    deviceType: data.deviceType,    attributes: {        latitude:        data.location.lat,        longitude:       data.location.lon,        source:          data.meta.source,        integrationName: metadata['integrationName']    },    telemetry: {        ts:     data.ts != null ? data.ts : Date.now(),        values: telemetry    }};
/** Helper functions 'decodeToString', 'decodeToJson' and 'toFlatMap' are already built-in **/
return result;
Field mapping:
| JSON field | Output field | Type | Notes |
|---|---|---|---|
deviceName | deviceName | — | Excluded from telemetry via excludeKeys |
deviceType | deviceType | — | Excluded from telemetry via excludeKeys |
location.lat | latitude | attribute | Extracted manually before flattening |
location.lon | longitude | attribute | Extracted manually before flattening |
meta.source | source | attribute | Extracted manually before flattening |
sensors.co2 | sensors.co2 | telemetry | Auto-mapped by toFlatMap |
sensors.pm25 | sensors.pm25 | telemetry | Auto-mapped by toFlatMap |
sensors.voc | sensors.voc | telemetry | Auto-mapped by toFlatMap |
ts | ts | — | Timestamp in milliseconds; excluded from telemetry via excludeKeys |
For the payload above the decoder produces:
{ "deviceName": "air-monitor-X", "deviceType": "air-quality", "attributes": { "latitude": 50.45, "longitude": 30.52, "source": "cloud", "integrationName": "MQTT integration" }, "telemetry": { "ts": 1700000000000, "values": { "sensors.co2": 412, "sensors.pm25": 8.2, "sensors.voc": 0.3 } }}To adapt this converter to your device:
- Different nested structure — update
excludeKeysto include any top-level fields you do not want in telemetry. - Rename auto-mapped keys — extract the field manually before calling
toFlatMapand add it toexcludeKeysso it is not duplicated. - No timestamp in payload — replace the conditional with
ts: Date.now()directly. - Timestamp in seconds — convert before assigning:
ts: data.ts * 1000.
Scenario D: String payload (not JSON)
Use when the device sends raw text instead of JSON — for example a semicolon-delimited string. decodeToString converts the byte array to a UTF-8 string; the converter then parses it manually using split or any other string method.
Input payload (text/plain):
sensor-001;23.5;60;87Converter:
/** Decoder **/
// Decode bytes to a UTF-8 string and split by delimitervar raw   = decodeToString(payload);var parts = raw.trim().split(';');
// parts[0] = device name// parts[1] = temperature// parts[2] = humidity// parts[3] = battery
var result = {    deviceName: parts[0],    deviceType: 'csv-sensor',    attributes: {        integrationName: metadata['integrationName'],        topic: metadata['topic']    },    telemetry: {        ts: Date.now(),        values: {            temperature: parseFloat(parts[1]),            humidity:    parseFloat(parts[2]),            battery:     parseInt(parts[3])        }    }};
/** Helper function 'decodeToString' is already built-in **/
return result;
Field mapping:
| Position | Output field | Type | Notes |
|---|---|---|---|
parts[0] | deviceName | — | First segment used as the device identifier |
'csv-sensor' | deviceType | — | Hardcoded device profile |
parts[1] | temperature | telemetry | Parsed as float |
parts[2] | humidity | telemetry | Parsed as float |
parts[3] | battery | telemetry | Parsed as integer |
For the payload sensor-001;23.5;60;87 the decoder produces:
{ "deviceName": "sensor-001", "deviceType": "csv-sensor", "attributes": { "integrationName": "MQTT integration", "topic": "tb/sensors/csv/sensor-001" }, "telemetry": { "ts": 1780299924174, "values": { "temperature": 23.5, "humidity": 60.0, "battery": 87 } }}To adapt this converter to your device:
- Different delimiter — replace
';'insplit(';')with the delimiter your device uses (e.g.',','|',' '). - Device name from topic instead of payload — replace
parts[0]withmetadata['topic'].split('/').pop(). - Timestamp in the string — parse it from the appropriate position and assign to
ts; convert to milliseconds if the device sends seconds. - Fewer or more fields — add or remove entries in the
valuesobject and update the index comments.
Configure Downlink
Section titled “Configure Downlink”Downlink allows ThingsBoard to send commands back to the device over MQTT in response to a Rule Engine event — for example, when a shared attribute is updated. ThingsBoard publishes the encoded payload to the topic defined by the Downlink topic pattern in the integration’s Advanced settings (default: ${topic}, resolved from metadata.topic in the downlink converter output).
The downlink converter transforms a Rule Engine message into an MQTT payload. For the full encoder function reference, see Downlink data converter.
When downlink is needed
- You need to send configuration updates or commands to the device (e.g., set a threshold, change a polling interval).
- You want to acknowledge received data with a control response published to a device-specific topic.
Add Downlink Converter
Section titled “Add Downlink Converter”The encoder receives msg, metadata, and msgType, and must return:
contentType—JSON,TEXT, orBINARYdata— the payload string to publishmetadata.topic— when the integration’s Downlink topic pattern is${topic}, the integration publishes to this topic
For RPC commands, msg.method and msg.params are available. msg.params is always a string — use parseFloat(msg.params) or JSON.parse(msg.params) when a numeric or structured value is needed. See the Downlink data converter reference for the full encoder API.
- Go to Integrations center ⇾ Integrations and open the MQTT Integration.
- Click the pencil icon to enter edit mode.
- In the Downlink data converter field, click Create new.
- Enter a name (e.g.
MQTT Downlink Converter) and paste the encoder script. - Click Add, then click Apply changes.
The encoder function used in this tutorial:
/** Encoder **/// Publish the ThingsBoard message as JSON to the device command topic.// metadata.topic is read by the integration when Downlink topic pattern is ${topic}.
var result = {  contentType: "JSON",  data: JSON.stringify(msg),  metadata: {    topic: metadata['deviceType']+'/'+metadata['deviceName']+'/upload'  }};
return result;
/** Encoder **/// Publish the ThingsBoard message as JSON to the device command topic.// metadata.topic is read by the integration when Downlink topic pattern is ${topic}.
var result = { contentType: "JSON", data: JSON.stringify(msg), metadata: { topic: metadata['deviceType']+'/'+metadata['deviceName']+'/upload' }};
return result;Configure the Root Rule Chain
Section titled “Configure the Root Rule Chain”To ensure the downlink converter has access to device information, we enrich message metadata with the device name and device profile name. These values are later used by the MQTT integration downlink converter to dynamically build the MQTT topic (for example, thermostat/SN-001/upload) and other payload fields.
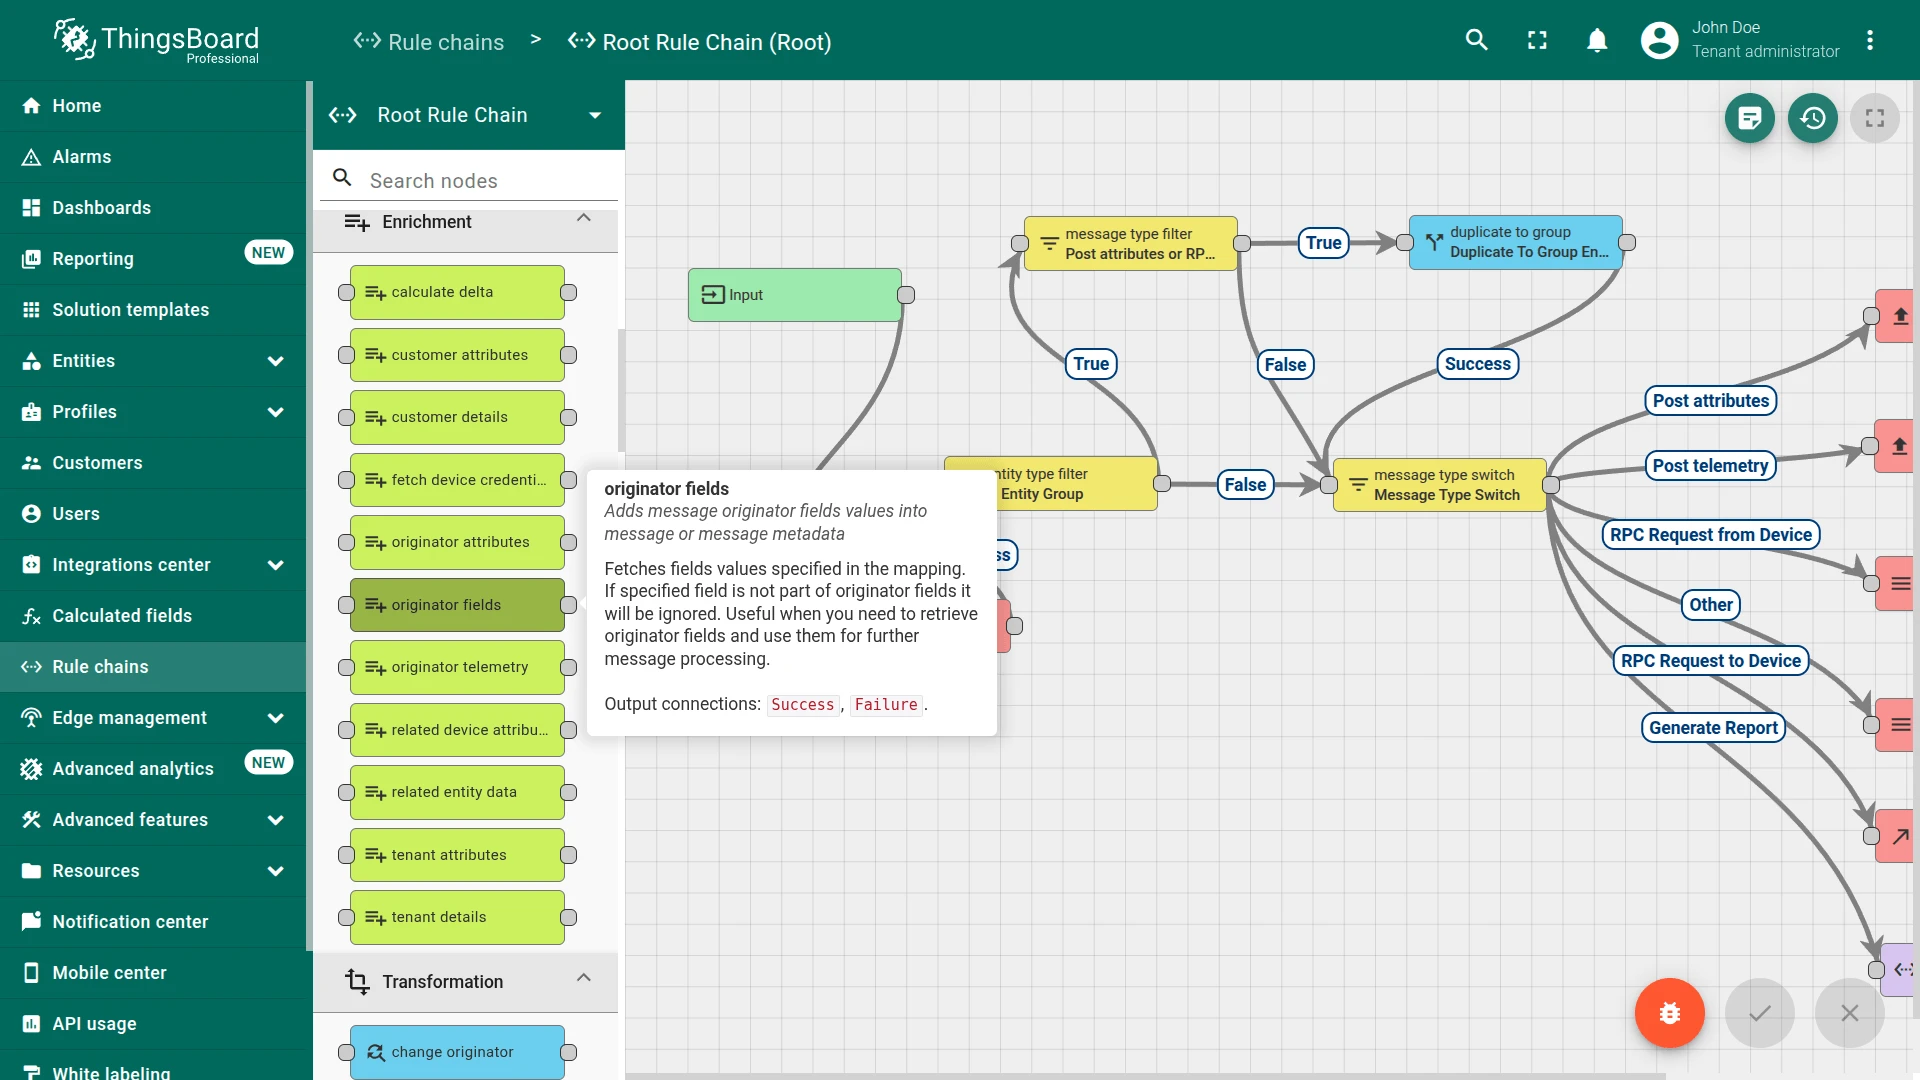
- Go to Rule chains ⇾ Root Rule Chain.
- In the Enrichment section of the node library, find the originator fields node and drag it onto the canvas.
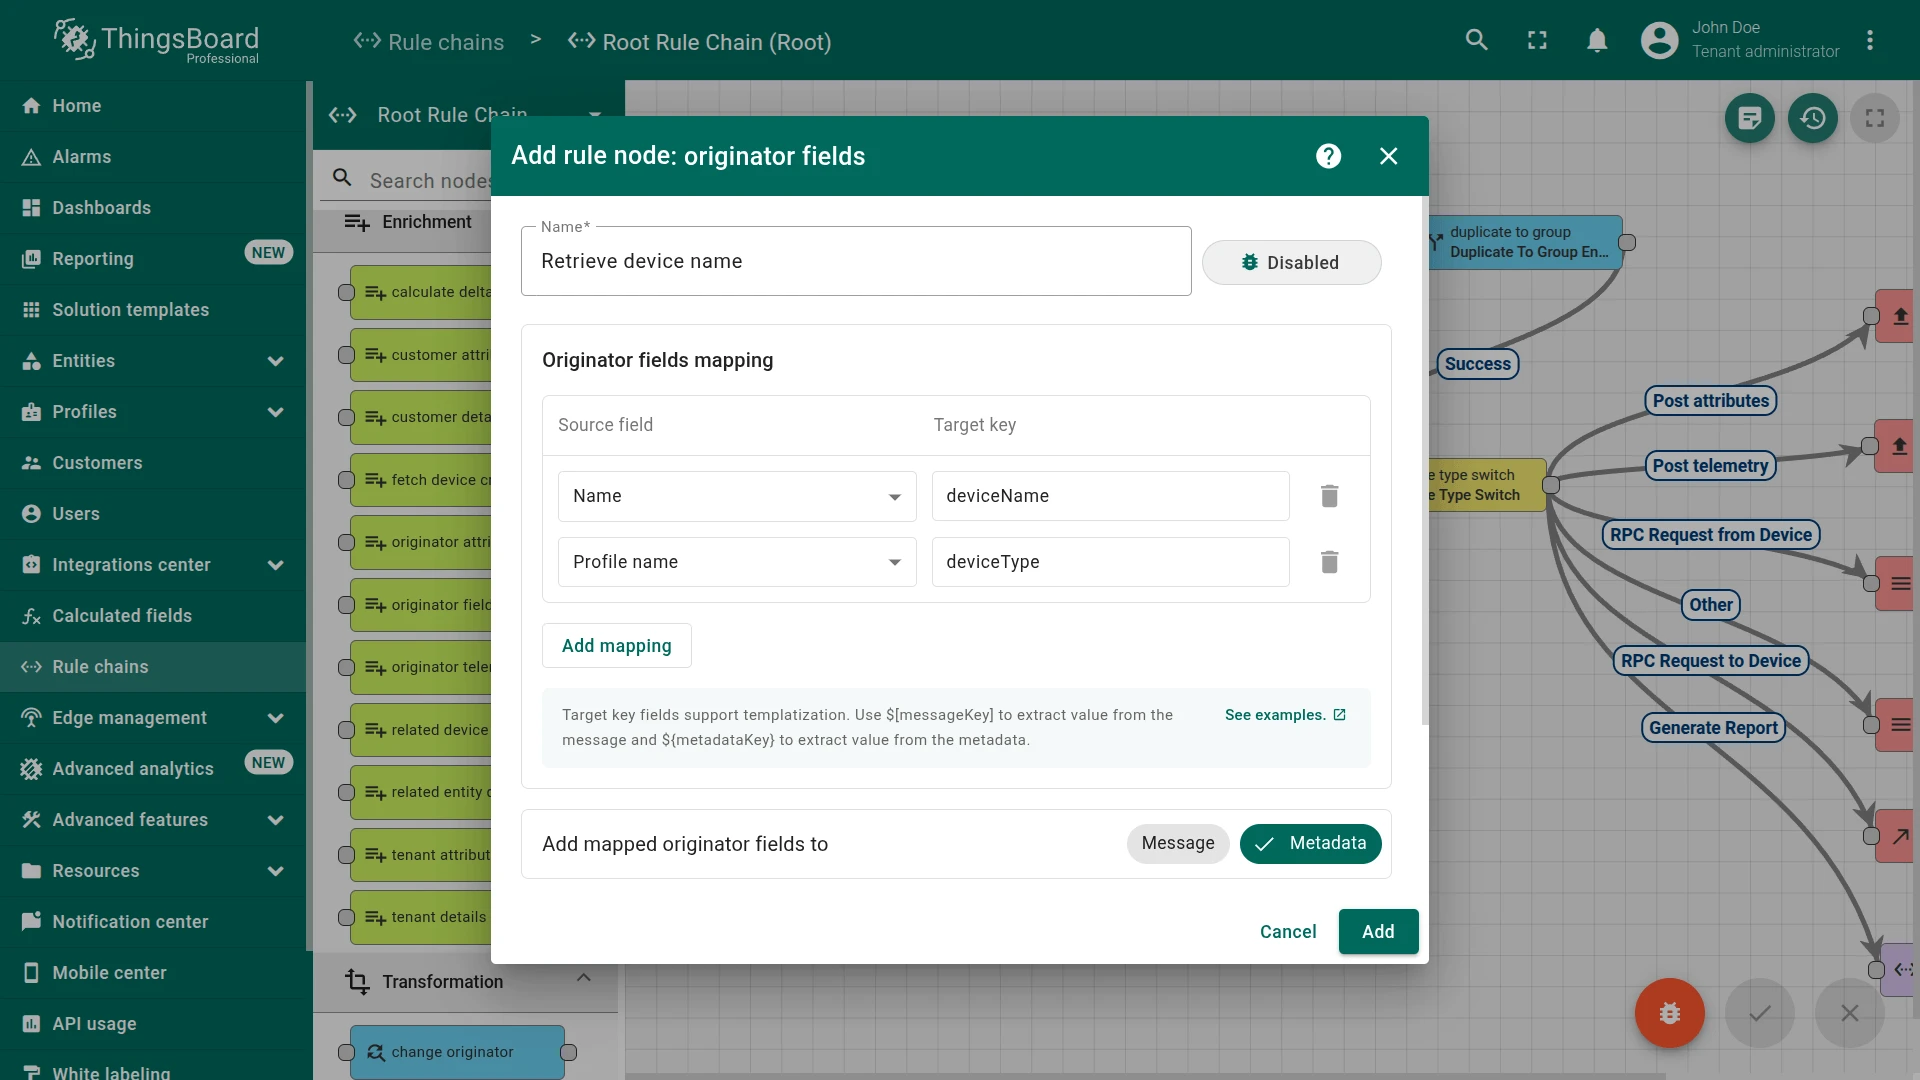
- In the originator fields node configuration, map the source fields:
- Name ⇾ deviceName
- Profile name ⇾ deviceType
- Then click Add.
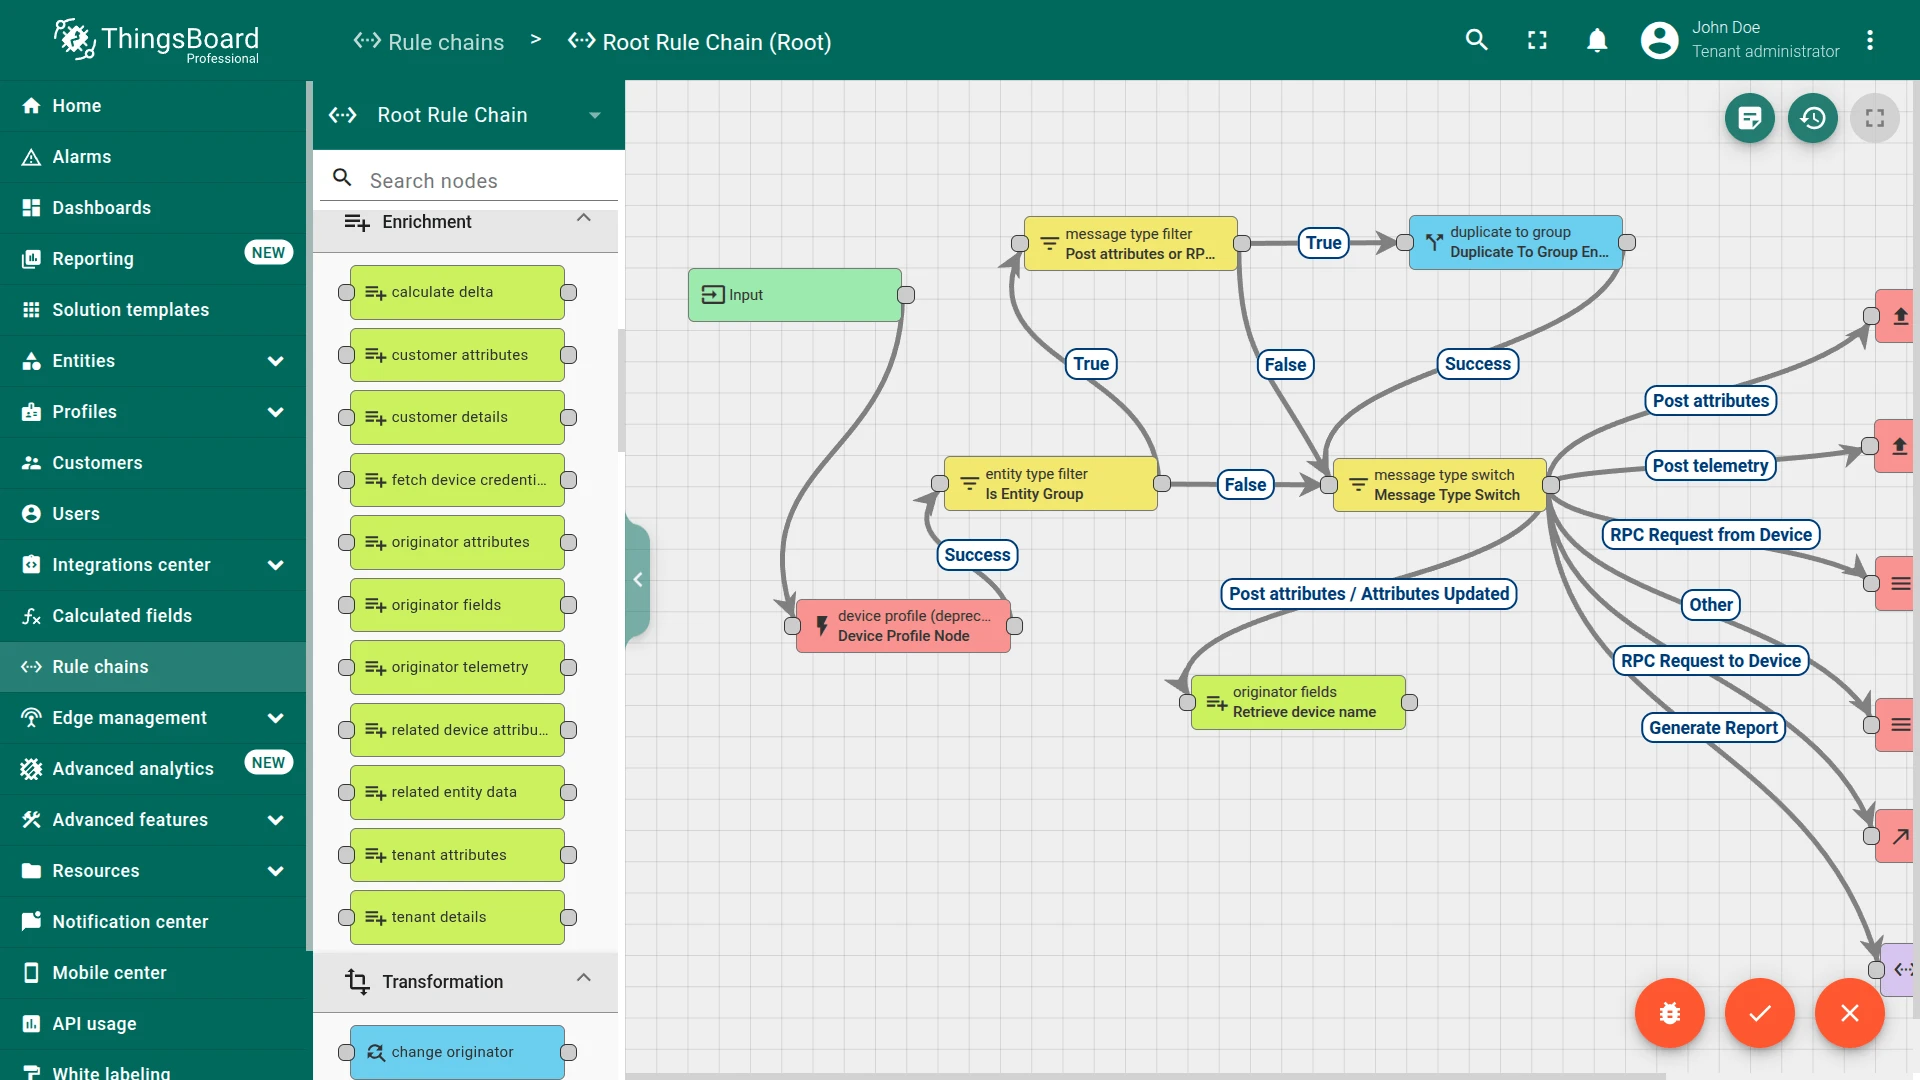
- Connect the message type switch node to the originator fields node using the Attributes Updated and Post attributes link types.
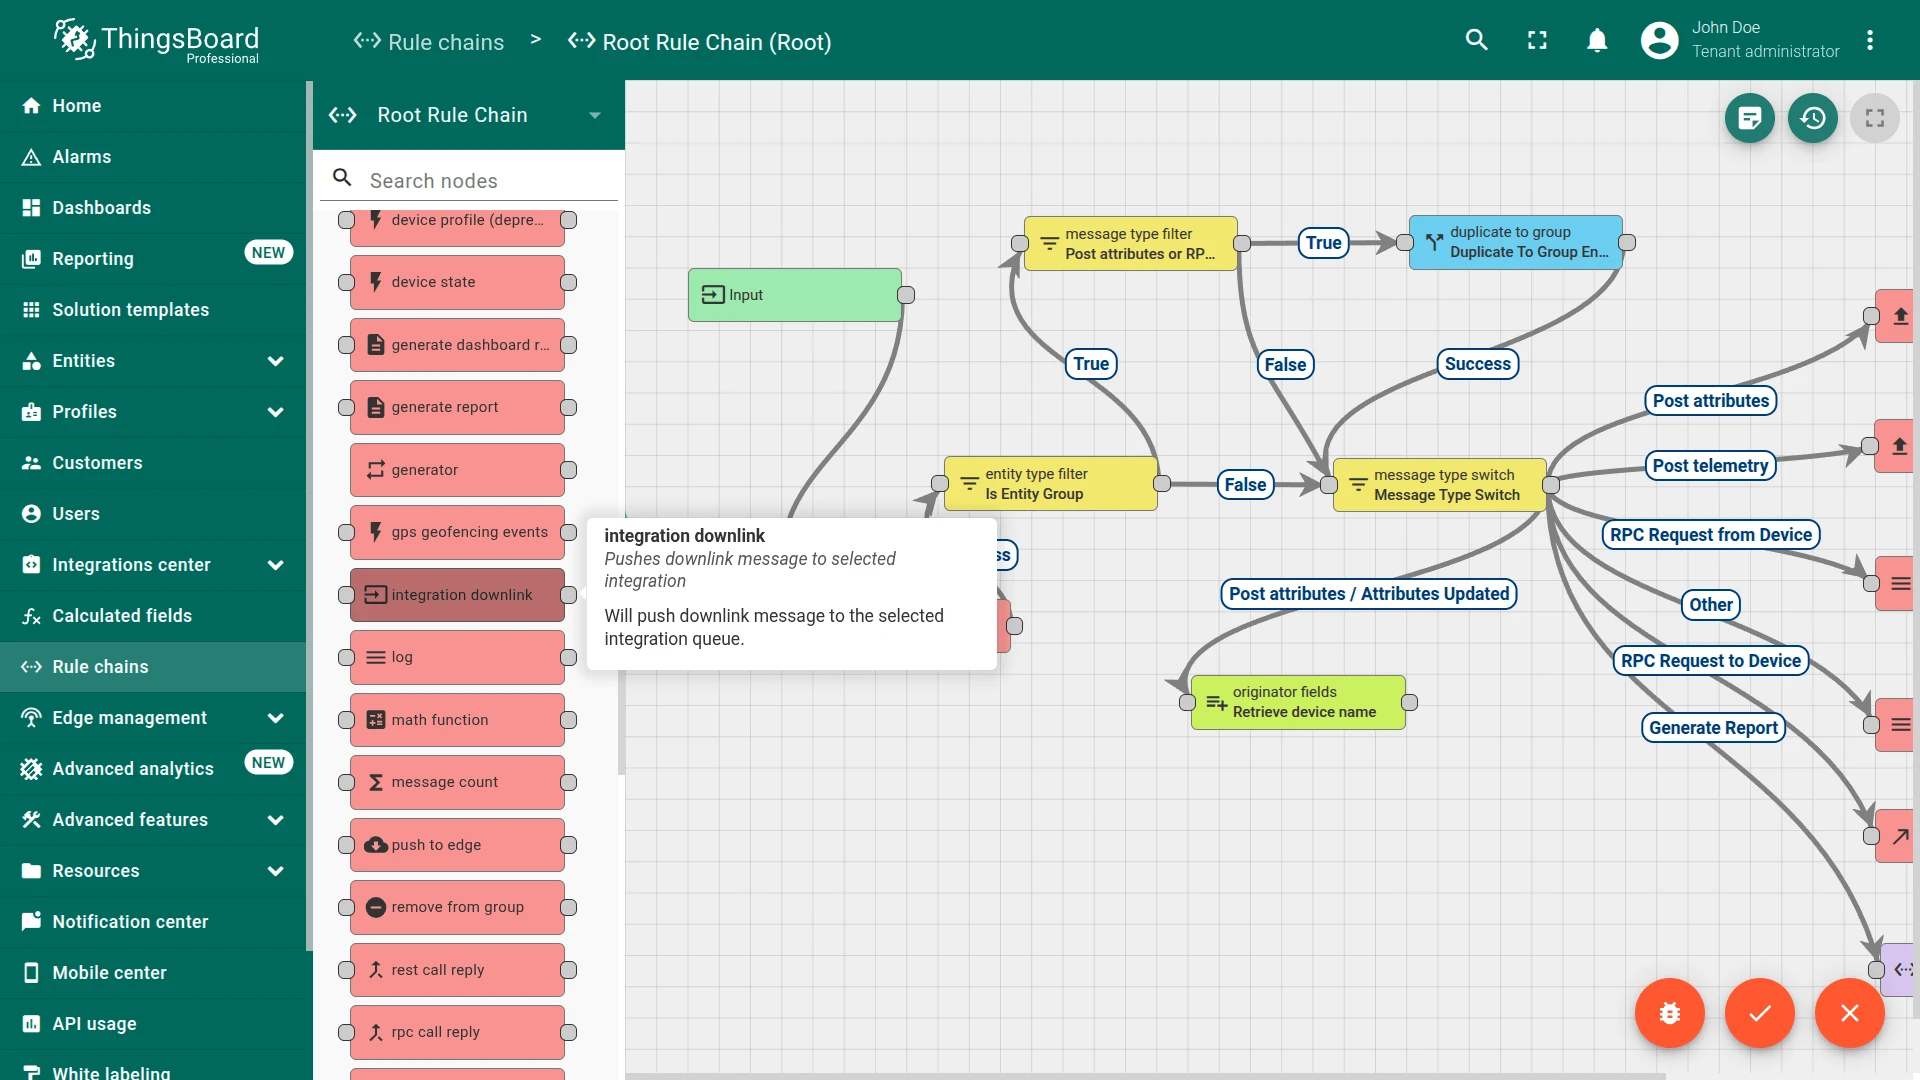
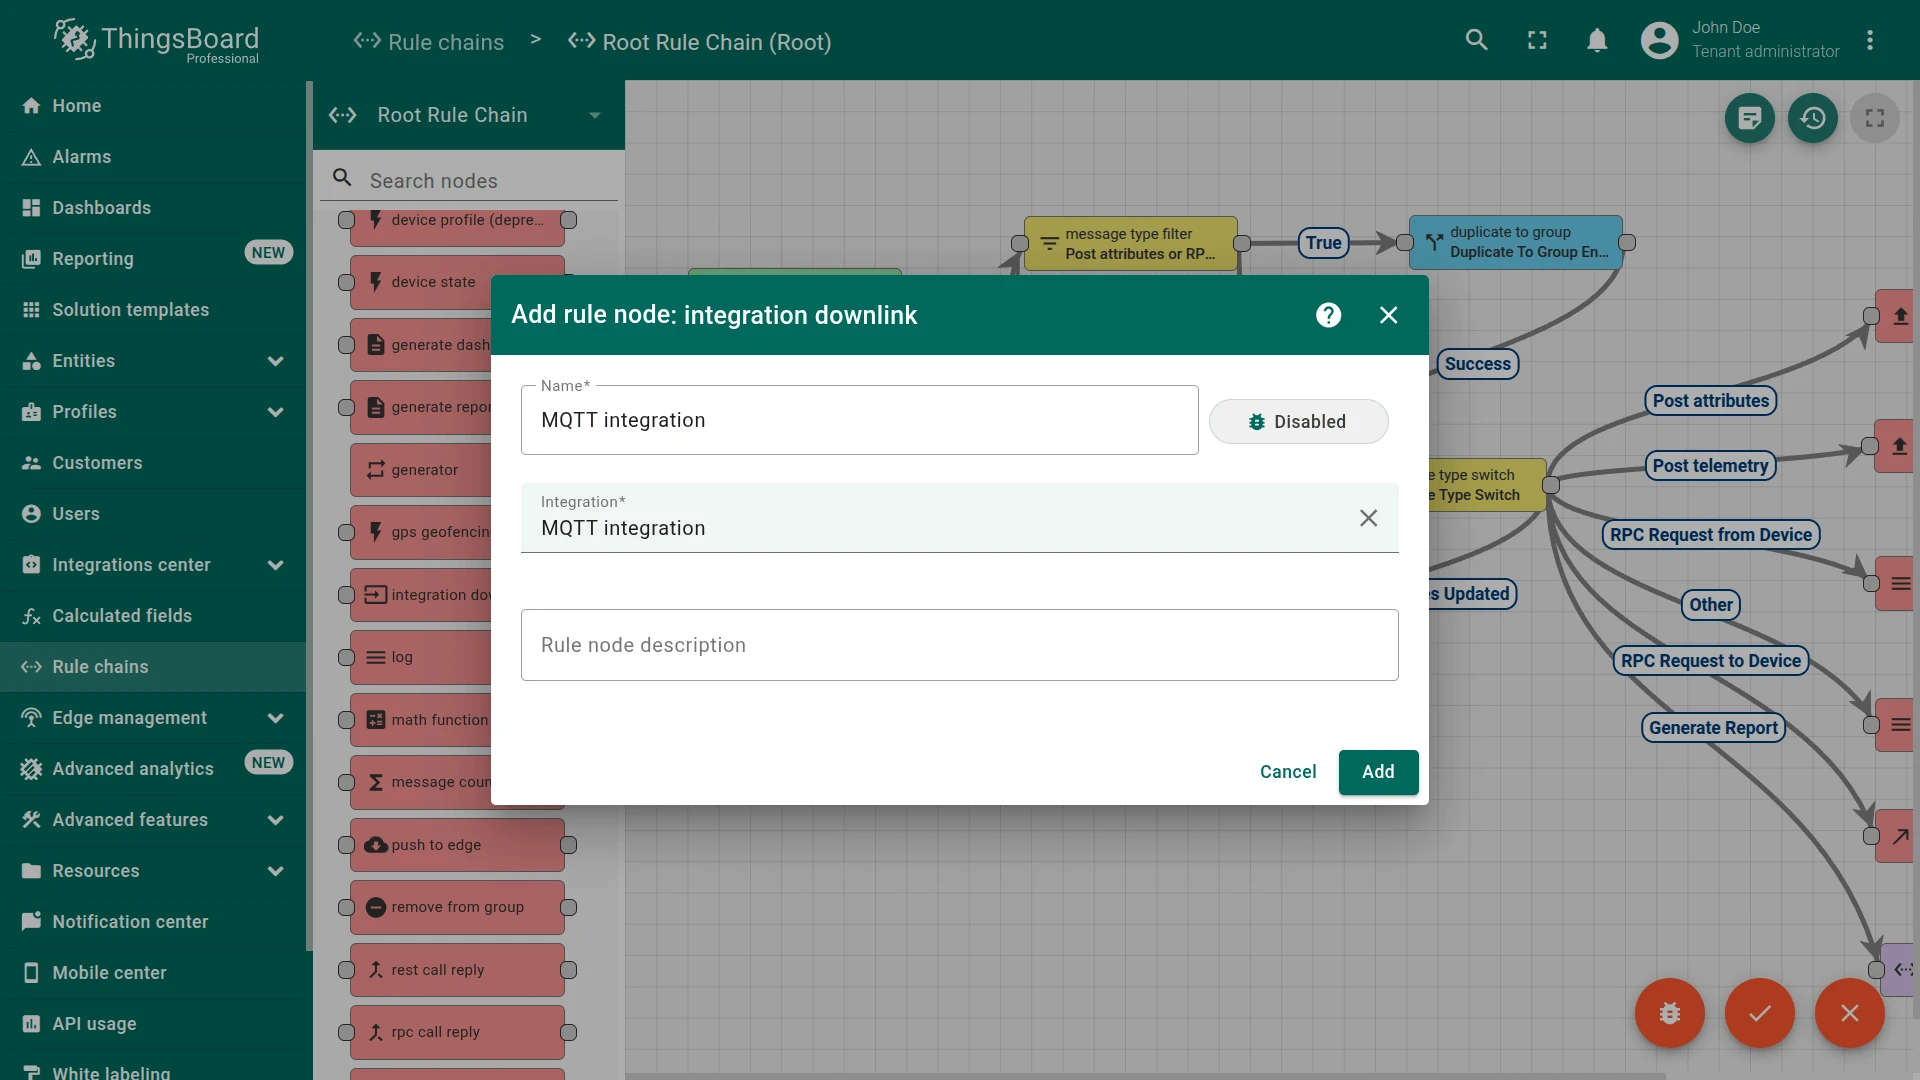
- In the node library, find the integration downlink node and drag it onto the canvas.
- In the node configuration, set a name (e.g., MQTT integration) and select your MQTT integration. Click Add.
- Connect the originator fields node to the integration downlink node using the Success relation.
- Click Apply changes.

Test Downlink
Section titled “Test Downlink”When a shared attribute is created or updated, the Rule Engine routes the event to the integration, which publishes the encoded payload to the downlink topic.
Subscribe to the downlink topic with your MQTT client to verify receipt:
mosquitto_sub -h demo.tbmq.io -p 1883 -t "thermostat/SN-001/upload" -u "demo" -P "demo"Trigger a downlink by adding a shared attribute to the device:
- Go to Entities ⇾ Devices, open SN-001, and navigate to the Attributes tab.
- Select Shared attributes, click + to add a new attribute.
- Set the key (e.g.
powerState) and value (e.g.on). - Click Add.
The Rule Engine routes the attribute update to the integration downlink node, which passes it to the encoder. The terminal subscribed to SN-001/commands will print the downlink payload:
{"powerState":"on"}Verify Downlink Converter Events
Section titled “Verify Downlink Converter Events”Go to Integrations center ⇾ Data converters, open MQTT Downlink Converter, and click the Events tab — a Downlink event should appear in the list.
- In shows the Rule Engine message
- Out shows the encoded MQTT payload
- Metadata shows the topic and integration name.
Troubleshooting
Section titled “Troubleshooting”| Symptom | Cause | Fix |
|---|---|---|
| Integration status shows Disconnected (broker unreachable) | Wrong host, port, or firewall blocking the connection | Verify host, port, and firewall rules; use Check connection in the integration settings |
| Integration status shows Disconnected (authentication failure) | Wrong credentials | Check username/password or certificate files; ensure the credentials type matches the broker configuration |
| Integration status shows Disconnected (SSL mismatch) | TLS setting doesn’t match broker | Enable or disable Enable SSL to match the broker’s TLS requirement; check that port matches (1883 for plain, 8883 for TLS) |
| Messages received but device not created | deviceName is empty or undefined | Check Debug Events → Out on the converter; ensure deviceName is resolved from the payload or topic |
| Messages received but telemetry not saved | Converter returns {} or [] | Ensure telemetry.values contains at least one field |
| No messages received at all | Topic filter does not match published topic | Verify the topic filter in the integration settings; check wildcard syntax |
Error in converter | JavaScript or TBEL exception | Open Events → Error on the converter and inspect the stack trace |
| Data present but timestamp is wrong | Device sends ts in seconds | Convert before assigning: ts: data.ts * 1000 |
| Duplicate messages | QoS 1 or 2 with Clean session off after reconnect | Enable Clean session in Advanced settings to discard queued messages on reconnect |
| Multiple connections rejected by broker | Duplicate Client ID | Leave Client ID empty for auto-generated IDs, or ensure the configured ID is unique per broker |
How to read Debug Events
- Go to Integrations center ⇾ Integrations, open your integration, and click the Events tab. Filter by Uplink.
- Click on an event to inspect:
- In — what the integration received: the raw MQTT payload and metadata including the topic
- Out — what the converter returned: the decoded device name, attributes, and telemetry
- Error — error text, if any
See Also
Section titled “See Also”- Integrations Overview — how ThingsBoard connects to external platforms and how uplink/downlink flow works
- Uplink Data Converter — full decoder function reference: input parameters, output fields, and scripting patterns
- Downlink Data Converter — full encoder function reference for sending commands to devices
- Remote Integration — run the integration outside the ThingsBoard server to reach MQTT brokers in a private network
- TBEL scripting reference — built-in functions and operators for writing converter scripts
- Rule Engine — how uplink messages are processed after the converter
- MQTT one-way RPC — send a one-way RPC command from ThingsBoard to a device over MQTT with no response expected
- MQTT two-way RPC — send an RPC command from ThingsBoard to a device over MQTT and receive the response back
Was this helpful?